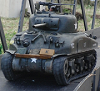
M4A1 75mm Sherman from BOB
-
MarkofZollo
- Corporal
- Posts: 328
- Joined: Mon Jul 05, 2010 6:16 pm
- Location: Honiton, East Devon
Re: M4A1 75mm Sherman from BOB
Cheers bud! Same for me I cant wait to finish it but I have a busy day tomorrow then im off to Spain on thurs morning, if I had it my way I would probably stay lol 
There is always a fifth Sherman
-
MarkofZollo
- Corporal
- Posts: 328
- Joined: Mon Jul 05, 2010 6:16 pm
- Location: Honiton, East Devon
Re: M4A1 75mm Sherman from BOB
Lame, only just got following done, then busy with friends and family 'til late this eve, catching plane tomorrow noon so no painting 'til back 
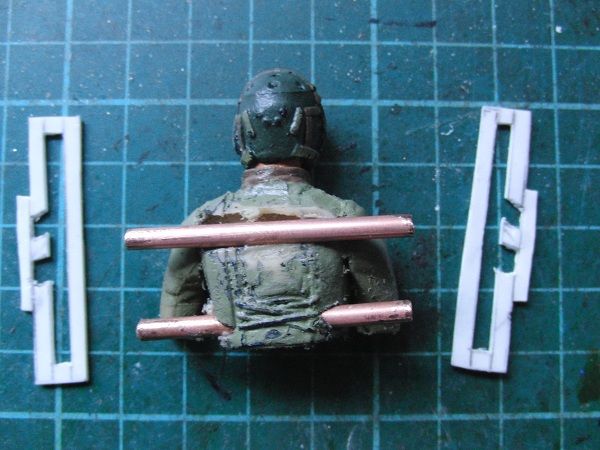
Anyway carried on with driver today, drilled holes/groves in his back and attached rods, cut some styrene as needed;
Missed taking pic of the cradle I then made but here it is attached to tank;
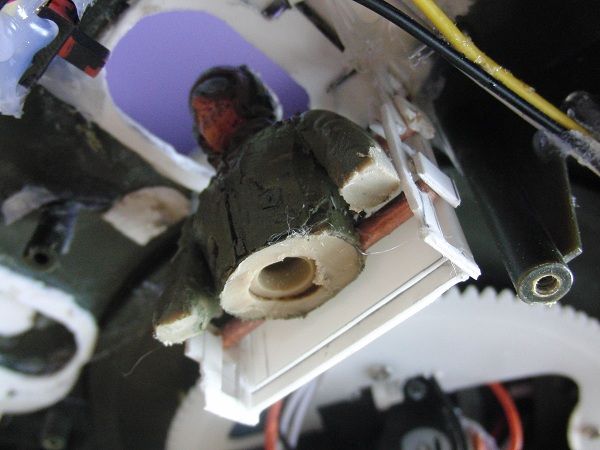
This gives me the following three positions for driver, first head under hatch for closed hatch or just protection;
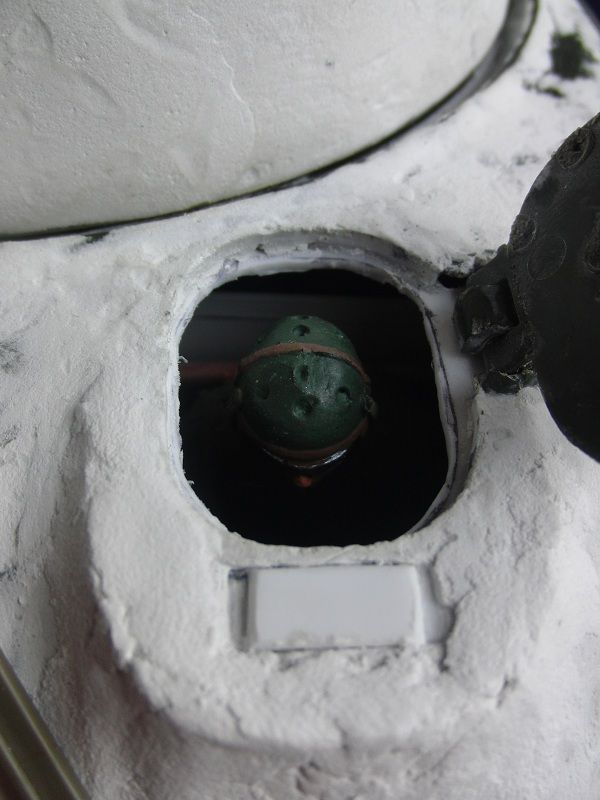
eyes at hull line so better view of what lays ahead but still some protection;
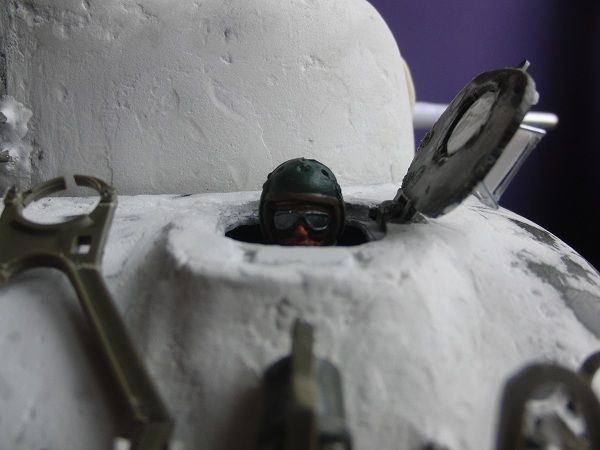
and head out and fully exposed but best view;

The rods on his back just travel up and down the 'ladder' and a nudge to tilt him forward set him in each notch to fix him there
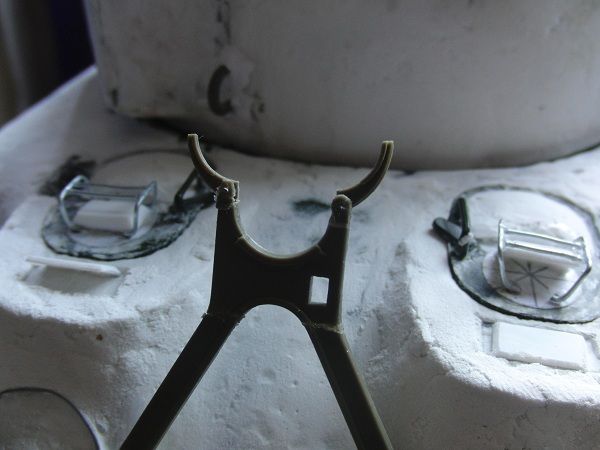
Finished gun travel hook, In previous pics you can see it closed, here it is open;
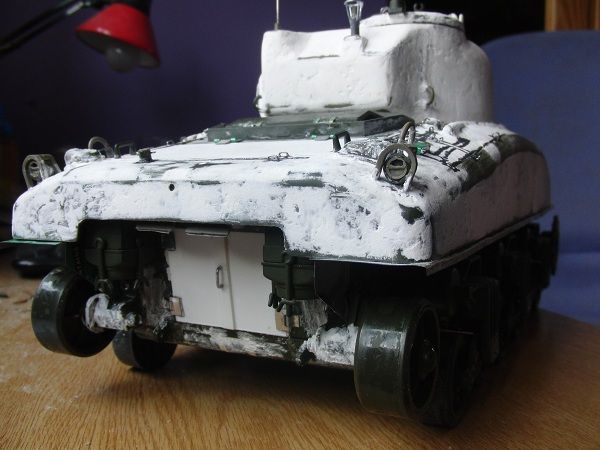
Thought also I would post 'before' pictures regarding painting, the next update will prob be in a couple weeks when I am back but should be primed at the very least.

Cheers guys for following, the nice comments etc, cant wait to get back and on with the build!!!!!
Anyway carried on with driver today, drilled holes/groves in his back and attached rods, cut some styrene as needed;

Missed taking pic of the cradle I then made but here it is attached to tank;

This gives me the following three positions for driver, first head under hatch for closed hatch or just protection;

eyes at hull line so better view of what lays ahead but still some protection;

and head out and fully exposed but best view;

The rods on his back just travel up and down the 'ladder' and a nudge to tilt him forward set him in each notch to fix him there
Finished gun travel hook, In previous pics you can see it closed, here it is open;

Thought also I would post 'before' pictures regarding painting, the next update will prob be in a couple weeks when I am back but should be primed at the very least.


Cheers guys for following, the nice comments etc, cant wait to get back and on with the build!!!!!
Last edited by MarkofZollo on Thu Jan 01, 2015 4:22 pm, edited 1 time in total.
There is always a fifth Sherman
-
MarkofZollo
- Corporal
- Posts: 328
- Joined: Mon Jul 05, 2010 6:16 pm
- Location: Honiton, East Devon
Re: M4A1 75mm Sherman from BOB
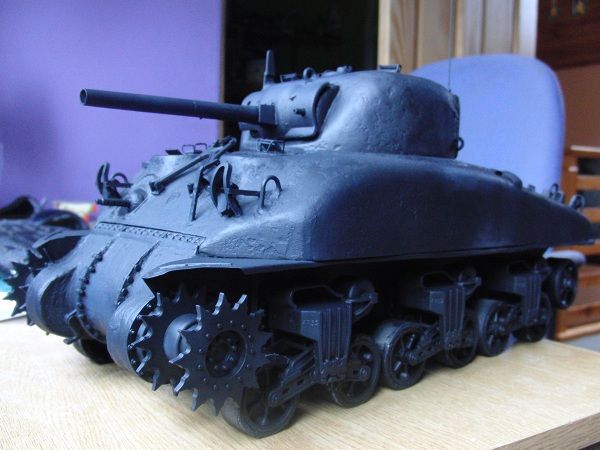
One quick update before I leave, been applying the occasional coat whilst packing;

Hope you guys enjoy, see you in a couple weeks
Dave


Hope you guys enjoy, see you in a couple weeks
Dave
Last edited by MarkofZollo on Thu Jan 01, 2015 4:23 pm, edited 1 time in total.
There is always a fifth Sherman
-
caddyshack
- Sergeant
- Posts: 501
- Joined: Wed Jun 15, 2011 8:31 pm
- Location: Uk
Re: M4A1 75mm Sherman from BOB
What a difference a coat of paint makes..that is coming togeather very nicely, keep up the good work.
Looking forward to seeing the finished tank
Looking forward to seeing the finished tank
Man will occasionally stumble over the truth, but most of the time he will pick himself up and continue on.
~~~Winston Churchill~~~
~~~Winston Churchill~~~
-
MarkofZollo
- Corporal
- Posts: 328
- Joined: Mon Jul 05, 2010 6:16 pm
- Location: Honiton, East Devon
Re: M4A1 75mm Sherman from BOB
Ah finally Im back and carrying on! thanks for comment
Spent a fair while yesterday unsticking several bits, was a bit silly to have painted it then left it for two weeks.
A couple revisions im in the process of doing, and adding a few bits I forgot in the rush
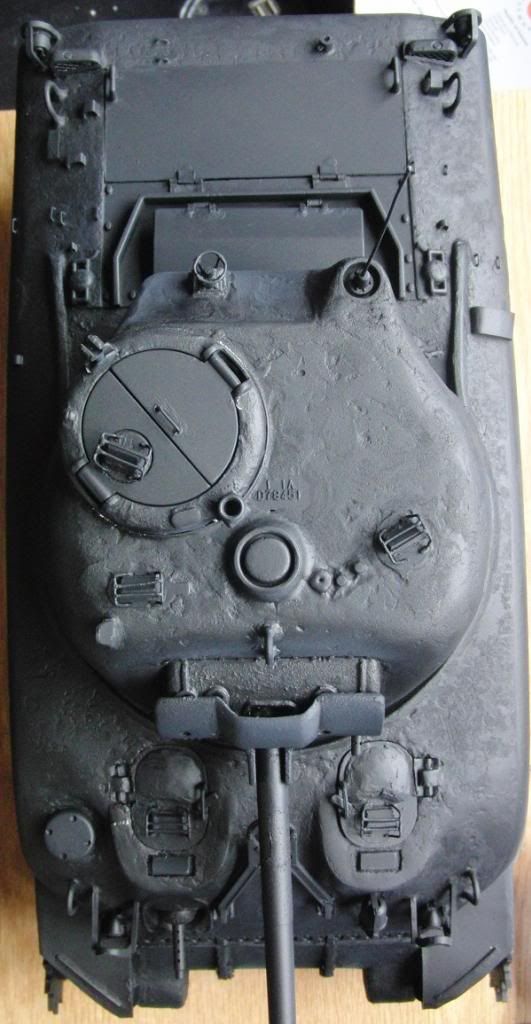
the following shows the lift hooks for the rotor shield present on all BOB Grizzlys (toward bottom right) and the Mato M2 .50 cal mount which has been narrowed to take the better HL Pershing gun and lowered to about the right height;
Im looking at movong the drive sprockets in a bit as the gap is a tad large, also applique armour.
Spent a fair while yesterday unsticking several bits, was a bit silly to have painted it then left it for two weeks.
A couple revisions im in the process of doing, and adding a few bits I forgot in the rush
the following shows the lift hooks for the rotor shield present on all BOB Grizzlys (toward bottom right) and the Mato M2 .50 cal mount which has been narrowed to take the better HL Pershing gun and lowered to about the right height;

Im looking at movong the drive sprockets in a bit as the gap is a tad large, also applique armour.
Last edited by MarkofZollo on Thu Jan 01, 2015 4:23 pm, edited 1 time in total.
There is always a fifth Sherman
-
maintcoder

- Private
- Posts: 54
- Joined: Sun Jan 23, 2011 8:02 pm
- Location: Kent, WA
Re: M4A1 75mm Sherman from BOB
Wow, another great Sherman build!
-
MarkofZollo
- Corporal
- Posts: 328
- Joined: Mon Jul 05, 2010 6:16 pm
- Location: Honiton, East Devon
Re: M4A1 75mm Sherman from BOB
Ta mate. Todays update was supposed to be mondays.....damn turret rotation took hours to fix, was a bit sloppy so I took up the slack (2mm+ using 2x.75mm styrene) then turret refused to turn. When it did get turning it would stick at set points and not budge.......not fun 
 .
.
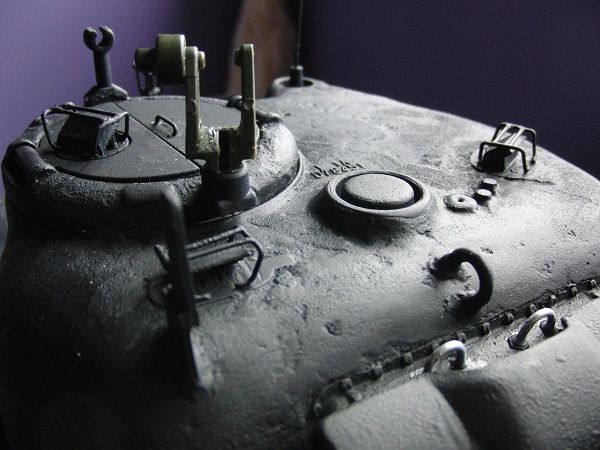
Anyway a few trials and I ended up using following method for the front hatch spring things;
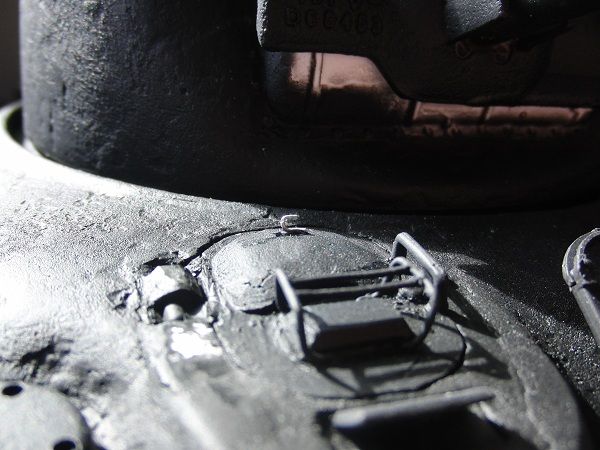
I started by making a little 'c' from a staple and sticking it, then got a peice of this wire;
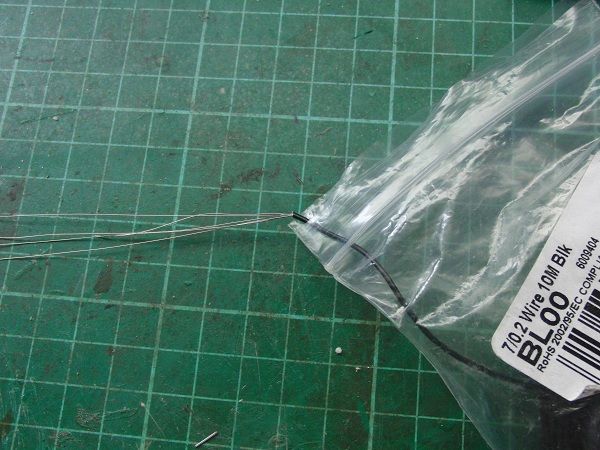
and wound round a 2mm drill bit;
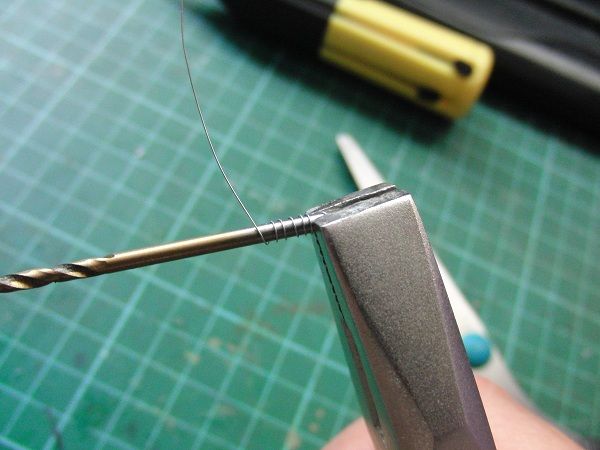
creating this;
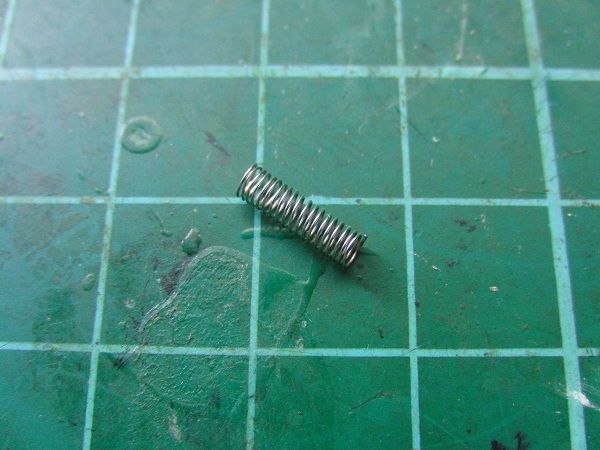
Then turned down a bit at either end, made a 'u' from a staple again and glued on to hull with spring in place;
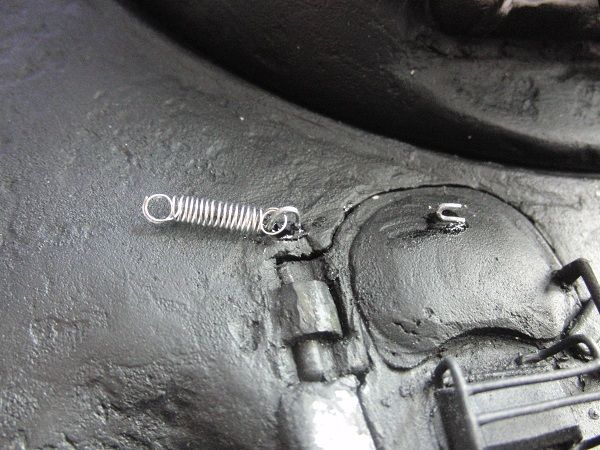
Now the tricky bit for me (impatient ), you HAVE to wait for the glue to set before trying to hook other end of spring on the 'c'
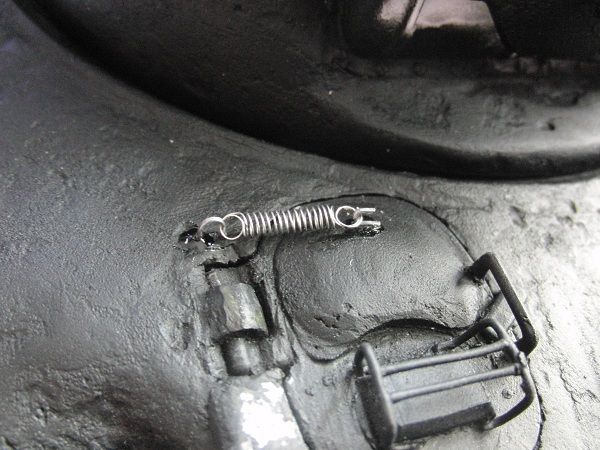
Simples eh. Spent a while deciding whether to put on applique armour, probably most Sherms in Normandy would have had it but I kinda didnt want to cover up half the cast texture I spent so long doing. In the end decided;
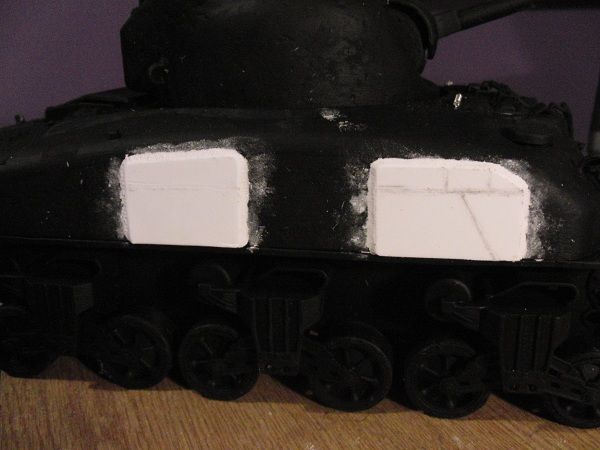
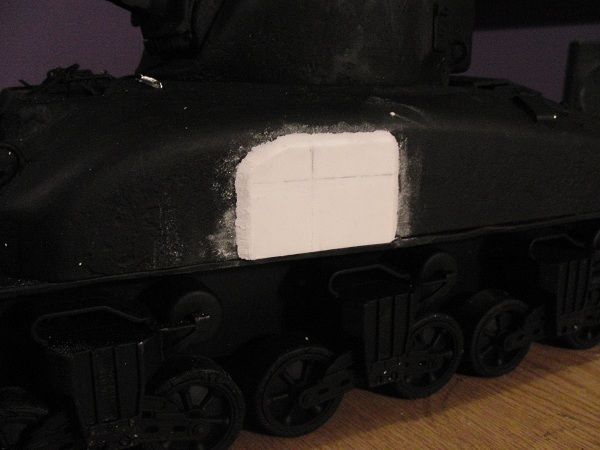
Weld effect on applique was best I could do but may be redone later. Up to 3 ish I was grinding down the drive shafts, they leave too big a gap (5mm) but now down to about 2.5-3mm, looks better . Currently waiting for first coat of OD to dry bout time!
Cheers
Anyway a few trials and I ended up using following method for the front hatch spring things;

I started by making a little 'c' from a staple and sticking it, then got a peice of this wire;

and wound round a 2mm drill bit;

creating this;

Then turned down a bit at either end, made a 'u' from a staple again and glued on to hull with spring in place;

Now the tricky bit for me (impatient

Simples eh. Spent a while deciding whether to put on applique armour, probably most Sherms in Normandy would have had it but I kinda didnt want to cover up half the cast texture I spent so long doing. In the end decided;


Weld effect on applique was best I could do but may be redone later. Up to 3 ish I was grinding down the drive shafts, they leave too big a gap (5mm) but now down to about 2.5-3mm, looks better
Cheers
Last edited by MarkofZollo on Thu Jan 01, 2015 4:26 pm, edited 1 time in total.
There is always a fifth Sherman
-
MarkofZollo
- Corporal
- Posts: 328
- Joined: Mon Jul 05, 2010 6:16 pm
- Location: Honiton, East Devon
Re: M4A1 75mm Sherman from BOB
Lol cheers mate. Painting is taking two days longer than expected (whilst doing other stuff too), started on Wed and still not there  . First time airbrushing a model, its seems the thinned OD green is way lighter than neat, and thats lighter still than hand brushing it. So after three coats of thinned (about half and half) looking crap, I applied about three neat coats and am close to correct shade (another one or two coats), that seems like a lot to me.....
Anyhow this is how it appears now;
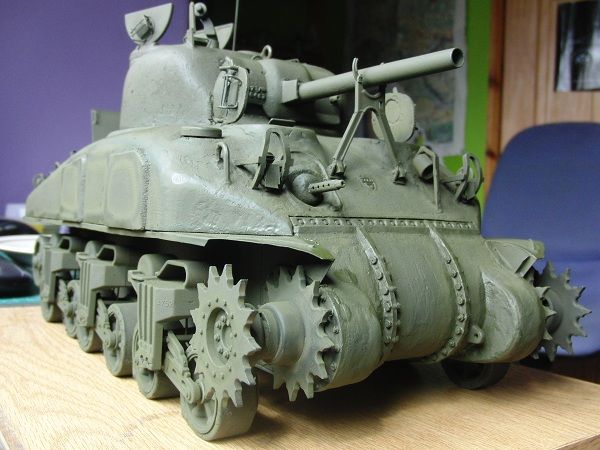
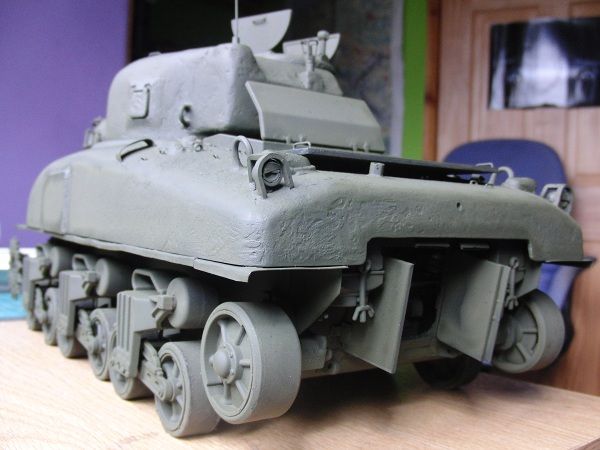
the lighting here is odd so neither picture looks how I see it, but at least an idea.
Got some weathering to do when I get to a shade I like, any tips welcome though
Spent some time between coats doing the .50 cal, filling gaps, adding wooden bits, drilling out the vent holes and end and then painting. Accidentaly left some water from cleaning the airbrush and it came out all wet (was suposed to be matt black, I decided to leave it and it turned out like this;

Cheers
Anyhow this is how it appears now;


the lighting here is odd so neither picture looks how I see it, but at least an idea.
Got some weathering to do when I get to a shade I like, any tips welcome though
Spent some time between coats doing the .50 cal, filling gaps, adding wooden bits, drilling out the vent holes and end and then painting. Accidentaly left some water from cleaning the airbrush and it came out all wet (was suposed to be matt black, I decided to leave it and it turned out like this;

Last edited by MarkofZollo on Thu Jan 01, 2015 4:27 pm, edited 1 time in total.
There is always a fifth Sherman
-
MarkofZollo
- Corporal
- Posts: 328
- Joined: Mon Jul 05, 2010 6:16 pm
- Location: Honiton, East Devon
Re: M4A1 75mm Sherman from BOB
Right sorry I have been off here for a couple days, been painting and having trouble with compressor. Quite close to finish so thought Id post a couple pics ;
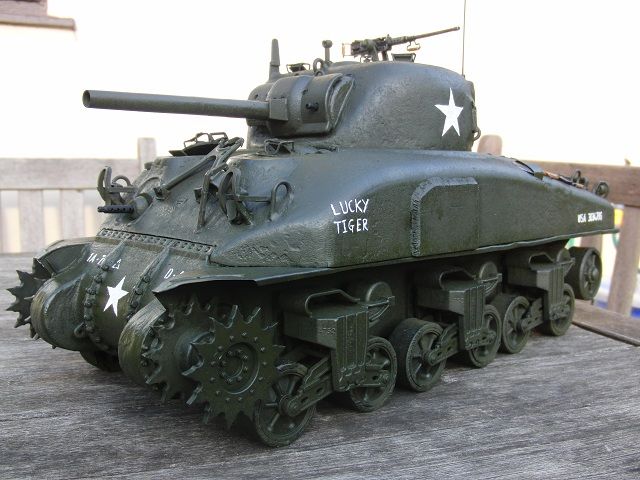
'Lucky Tiger' is from the game Forgotten Hope 2, a Battlefield 2 mod, thought It would be fitting
So had a few coats of Tamiyas OD green, most recent being two parts OD (XF-62) to one part Dark Green (XF-61) as seen on another forum.
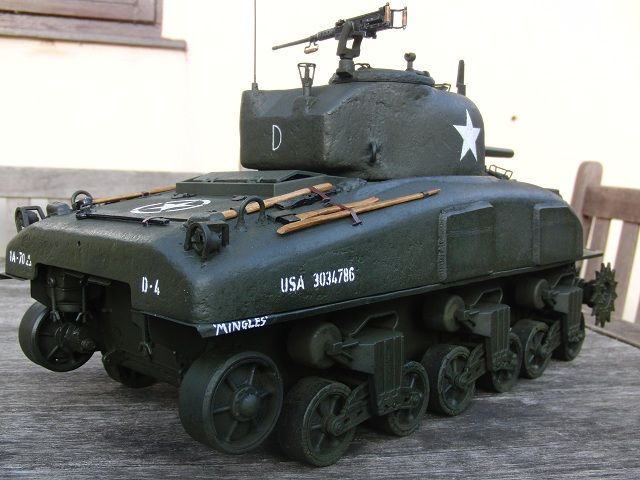
Stencils of the unit numbers etc lovingly cut out by my girlfriend Ruby , turret and front stars were Tamiya ones but started coming off today so I hand painted the outline made putting them on 
Rear star was from the Mato sheet, cut out the white bits which left the impression on the hull, so I hand painted in the outline
Put tools on and added straps using some leather colour electric tape. Have just sprayed varnish over, supposed to be matt but looks shinier than before
May do another layer of varnish tonight, then will dark wash and oil stain etc, waiting for Archer stencils to add before dust and dirt layers.
Cheers guys

'Lucky Tiger' is from the game Forgotten Hope 2, a Battlefield 2 mod, thought It would be fitting
So had a few coats of Tamiyas OD green, most recent being two parts OD (XF-62) to one part Dark Green (XF-61) as seen on another forum.

Stencils of the unit numbers etc lovingly cut out by my girlfriend Ruby
Rear star was from the Mato sheet, cut out the white bits which left the impression on the hull, so I hand painted in the outline
Put tools on and added straps using some leather colour electric tape. Have just sprayed varnish over, supposed to be matt but looks shinier than before
May do another layer of varnish tonight, then will dark wash and oil stain etc, waiting for Archer stencils to add before dust and dirt layers.
Cheers guys
Last edited by MarkofZollo on Thu Jan 01, 2015 4:27 pm, edited 1 time in total.
There is always a fifth Sherman
-
caddyshack
- Sergeant
- Posts: 501
- Joined: Wed Jun 15, 2011 8:31 pm
- Location: Uk
Re: M4A1 75mm Sherman from BOB
'Lucky Tiger' sure is looking good , all that hard work you have put in is paying off.
Looking forward to seeing it after "Lucky" gets weathered.
Keep up the good work, your on the home run
Looking forward to seeing it after "Lucky" gets weathered.
Keep up the good work, your on the home run
Man will occasionally stumble over the truth, but most of the time he will pick himself up and continue on.
~~~Winston Churchill~~~
~~~Winston Churchill~~~
