1/10th Brummbar

Re: 1/10th Brummbar
Very cool. Love the side to side clanking noise. Recoil is spot on!
"Don't believe everything you see on the internet" - George S. Patton
Eric
Eric
-
Herr Dr. Professor

- Major
- Posts: 6126
- Joined: Mon Apr 22, 2019 10:48 pm
- Location: Southern Wisconsin USA
Re: 1/10th Brummbar
I was ecstatic about getting a Mato M10 to work, and here you come, Baldrick, with sheer genius, skill, and 3D printing, creating this BIG beastie! I am impressed!
-
baldrick131
- Lance Corporal
- Posts: 140
- Joined: Fri Oct 04, 2019 8:46 pm
- Location: March cambridgeshire
- Contact:
Re: 1/10th Brummbar
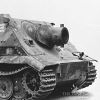
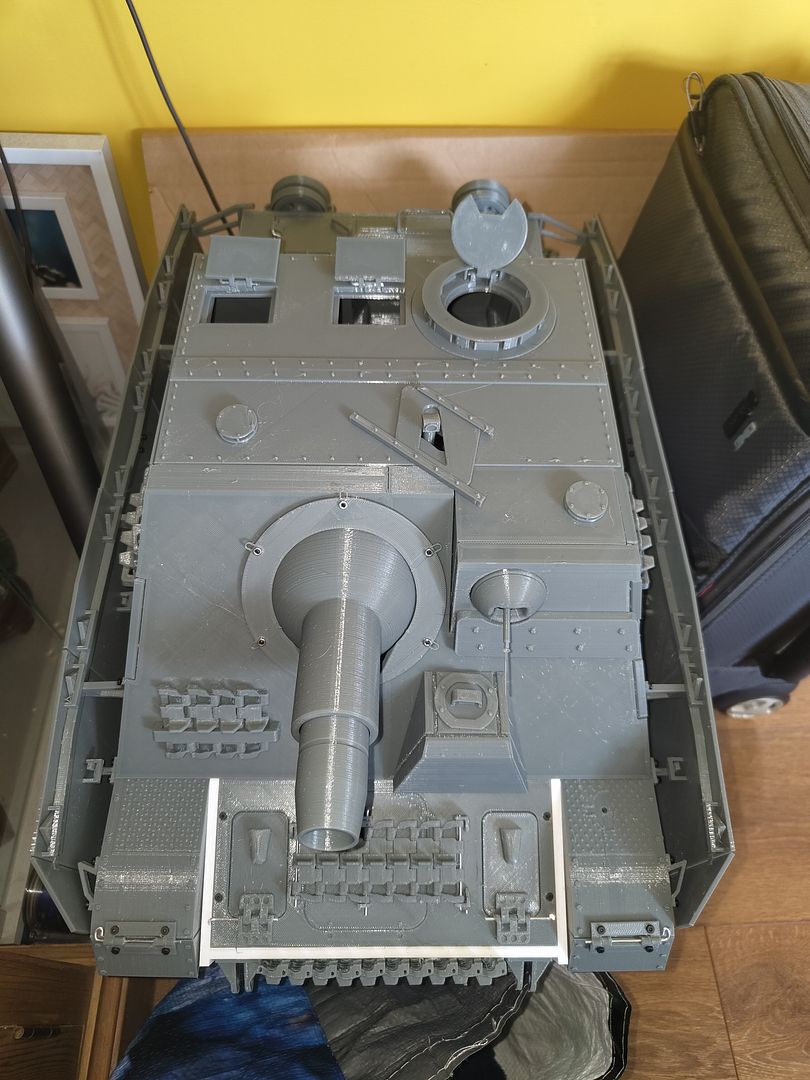
I have made a change to the machine gun station by adding a small motor and gearbox to it and hooking it up so when the machine gun fires it moves side to side a bit of a gimmick but it was worth doing.
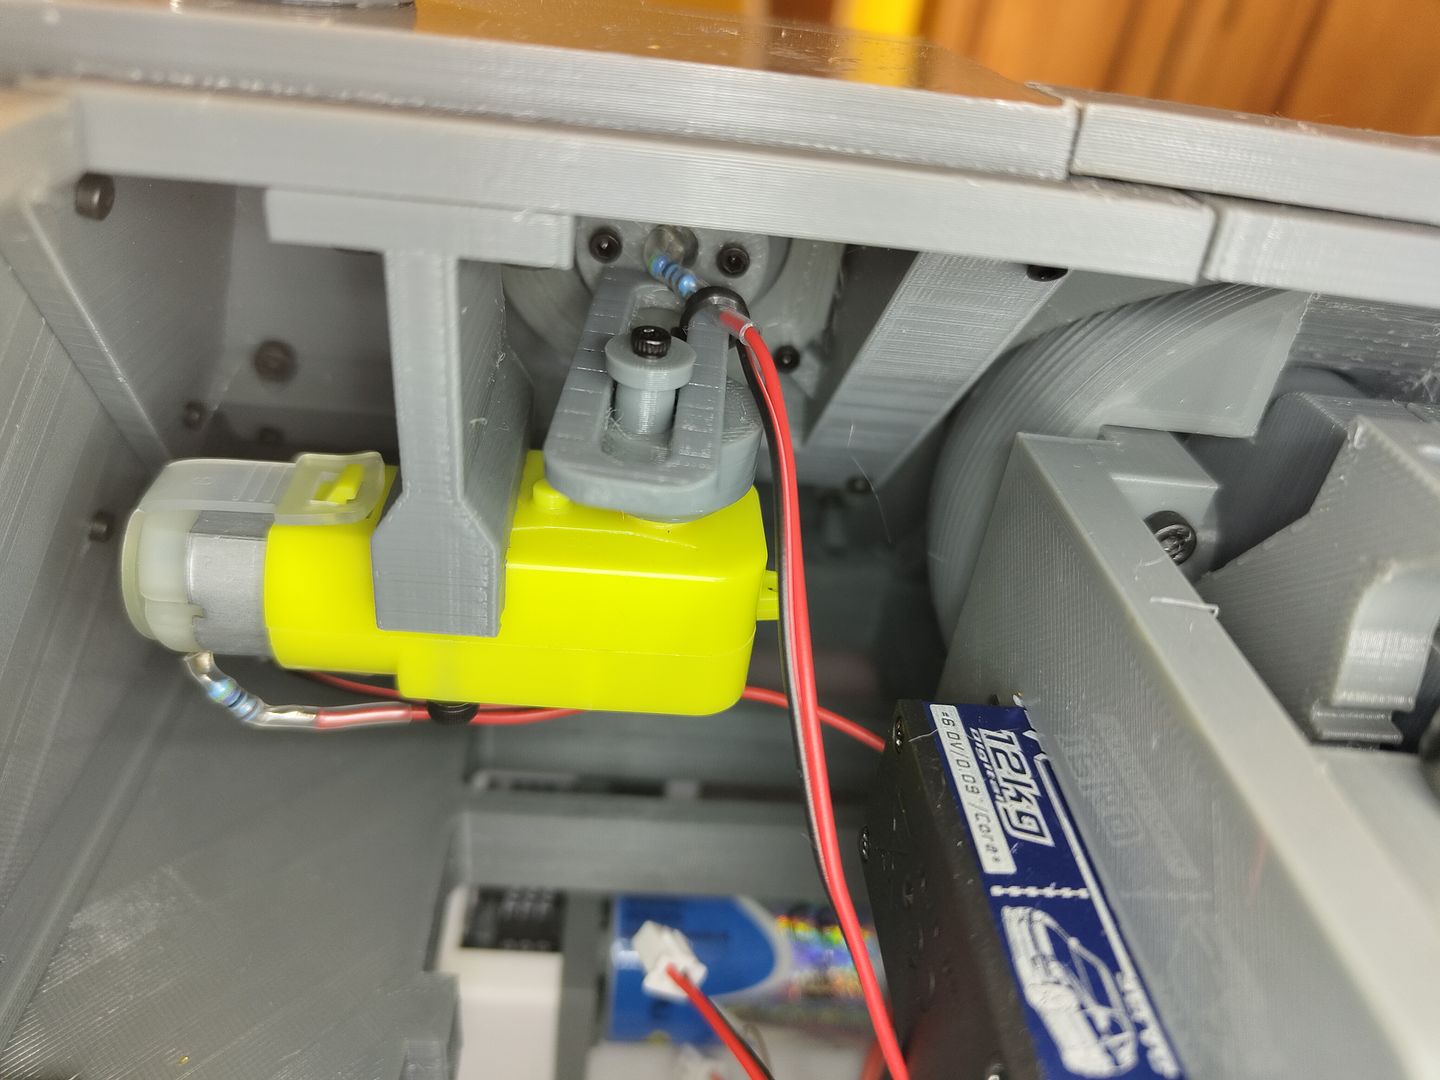
I had to put a resistor inline to slow it down to make it look more realistic.
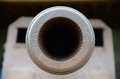
I also changed my mind about how I was going to do the machine gun originally I was going to make the barrel out of a piece of 3mm acrylic rod but I tried to print it in one piece with the ball and it turned out looking good and it even has a 1mm hole along it to put in a bit of 1mm acrylic rod for the muzzle flash.(it will get cut down when it's painted)
I will post a video of it when I have got all the muzzle flash and smoke set up properly on the main gun.
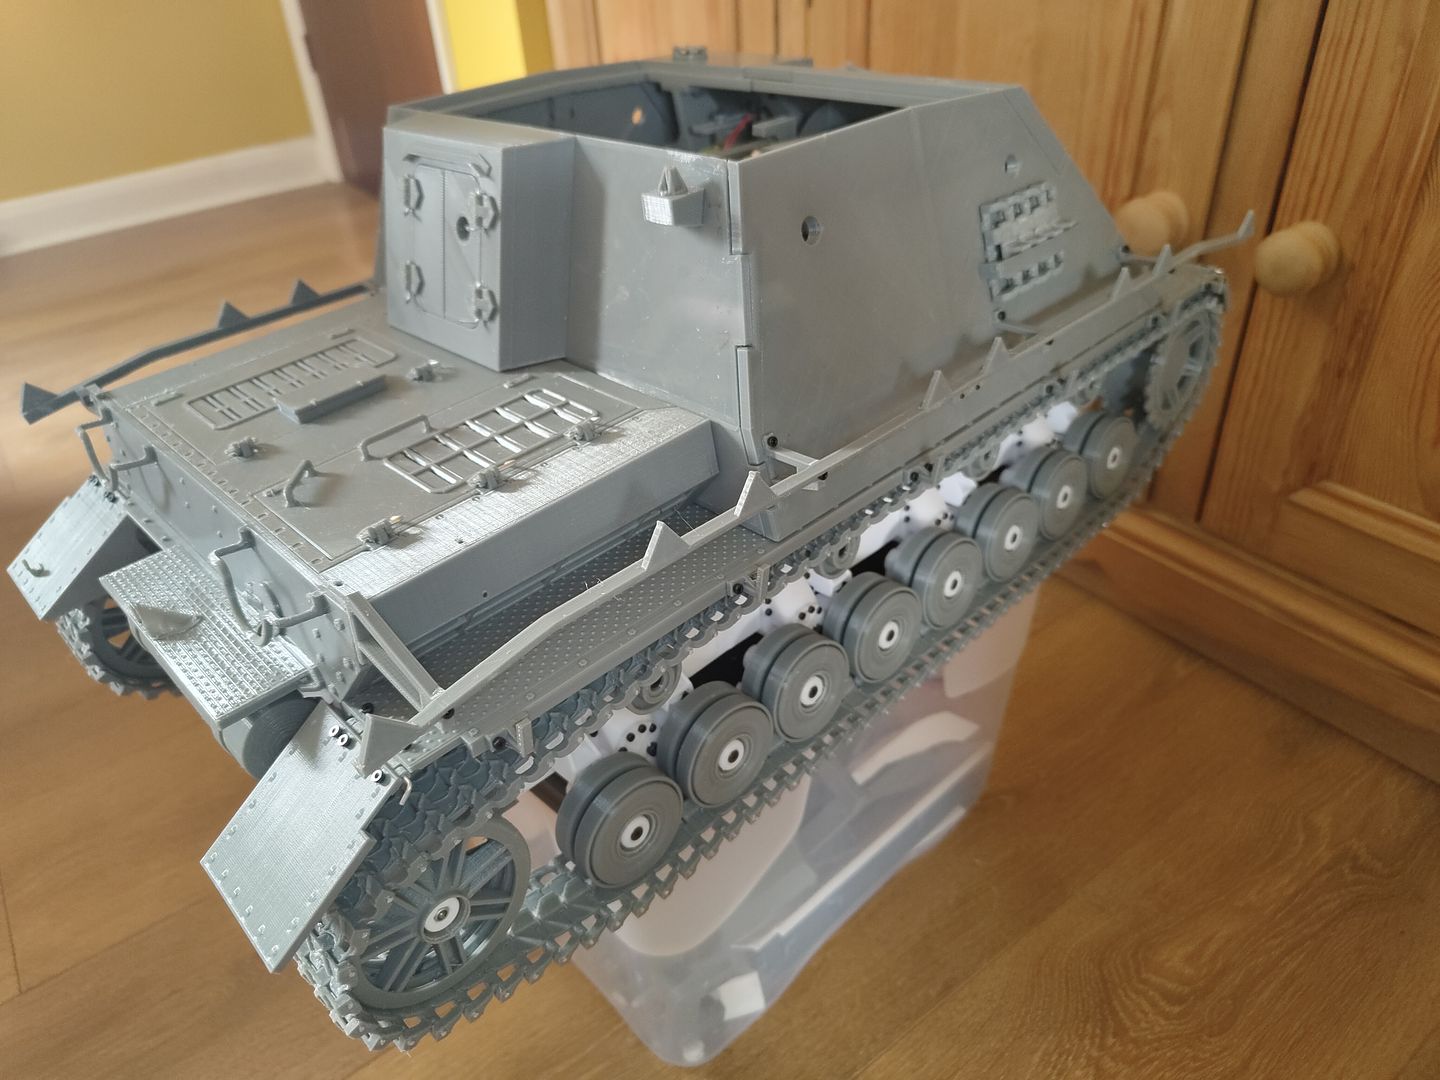
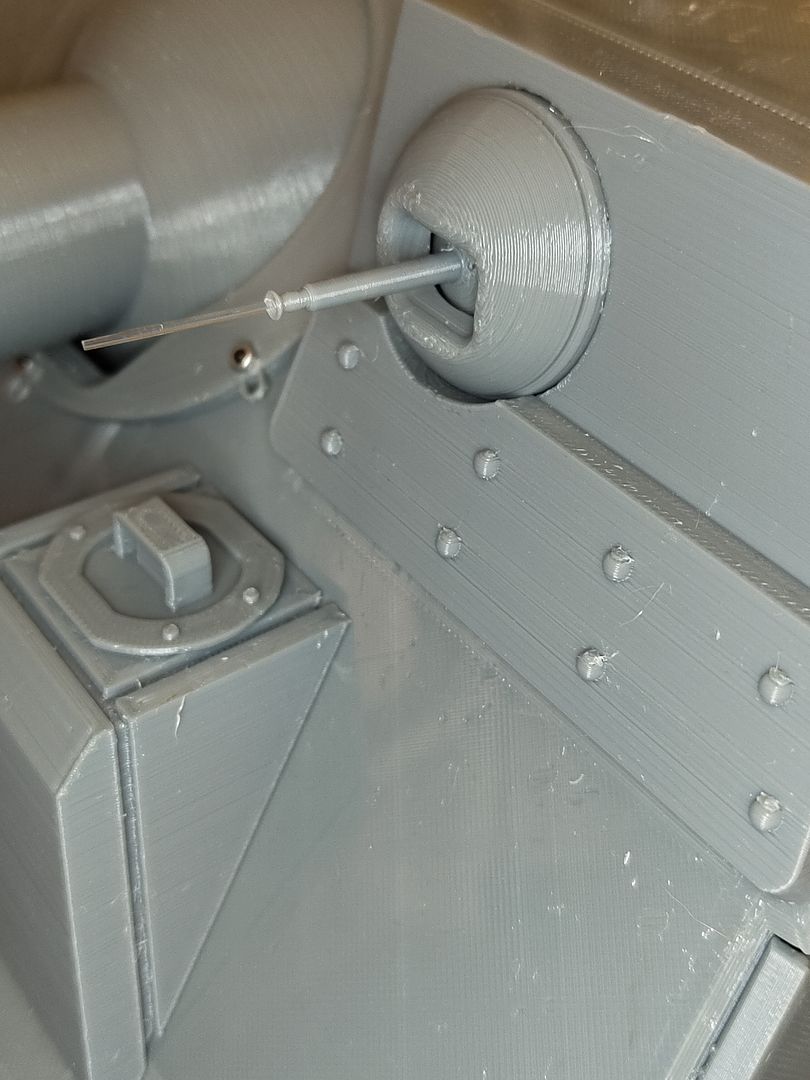
I had to split the sides into half's so that they would fit on the printer.
I redesigned the side rails and brackets of the original kit to fit the Brummbar and it highlights the lower brackets are in the wrong places to line up with the armour plates so I will be moving them to suit I will alter the cad model but will probably just drill new holes in this one and will get a cheap 3d printing pen just to use like a hot glue gun to fill the existing holes for a permanent fix.
I have thought it would also make the perfect tool to recreate weld seams that actually weld the plastic together I will have to experiment with it.
The rear wall was also split but it's hidden behind the rear hatch frame that helps join it together.
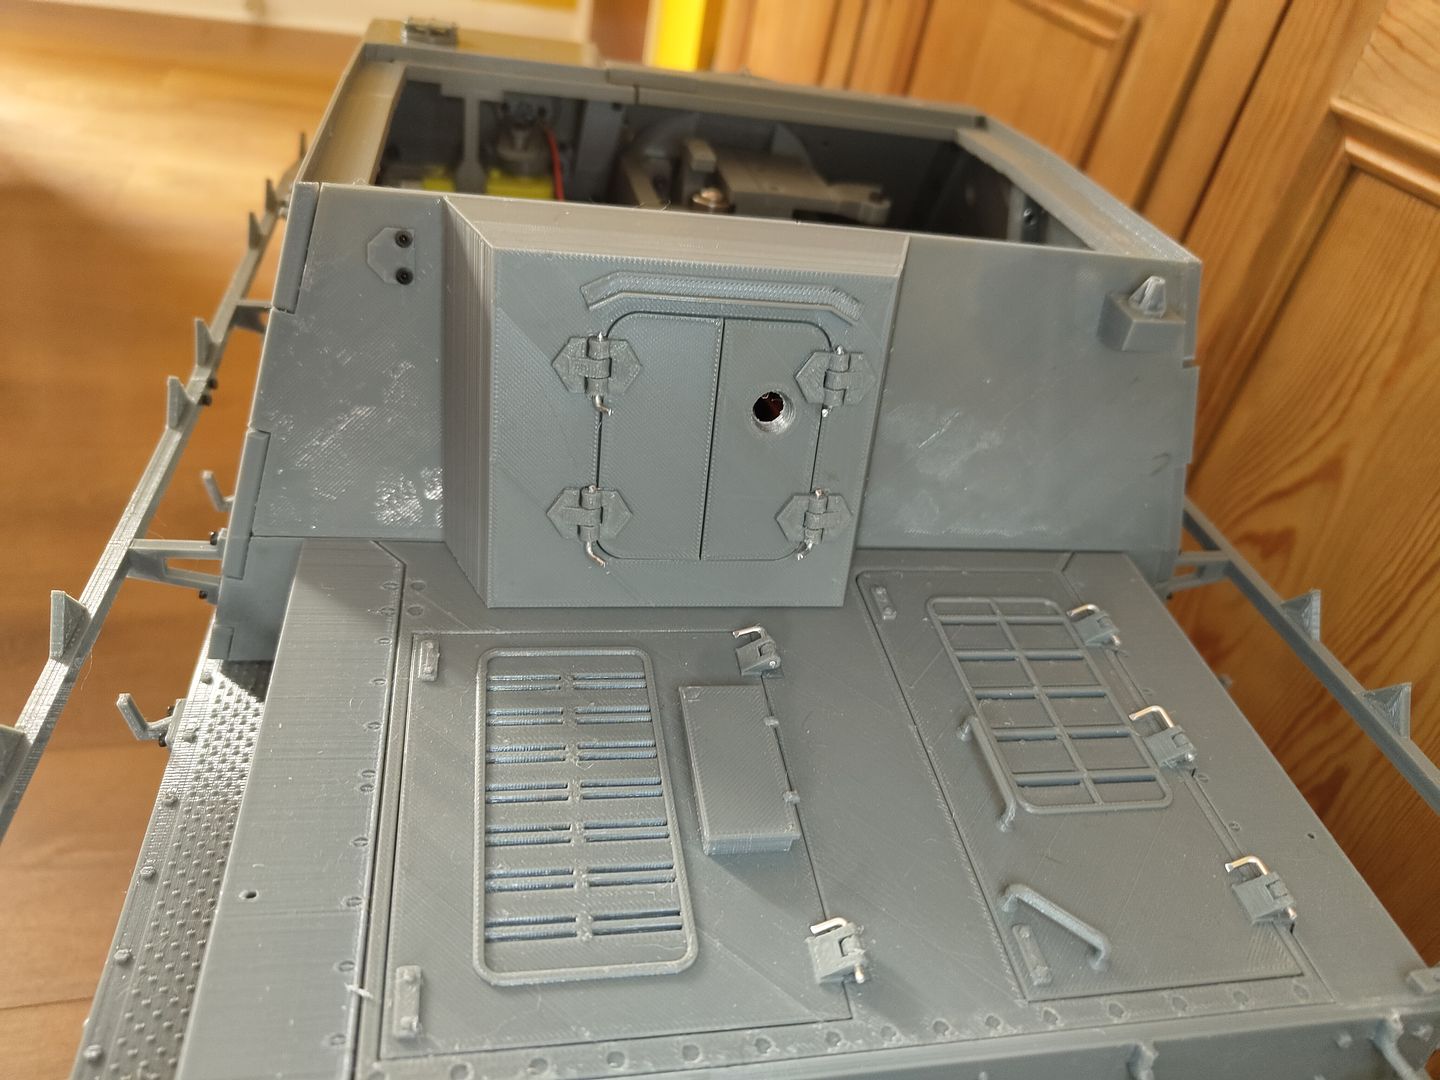
The hatches are openable I will find a couple of 2mm bolts to replace the Allen bolts on the small plate to look correct and I am planning to get a small length of 2mm carbon rod to make an antenna to fit on the mount will just have to sand it to a taper somehow.
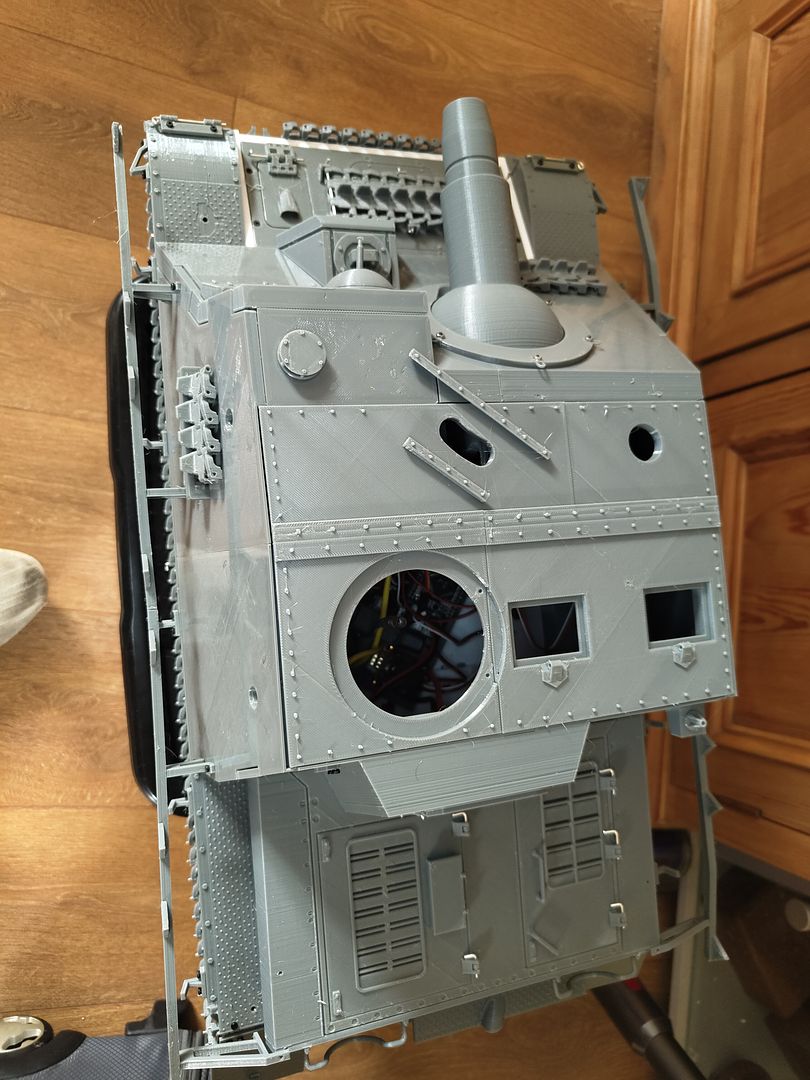
But the crowning glory is the roof has made an appearance this is my proof of concept as it had to be split to fit my printer (only 5mm too big )
)
But I can use it to get the hatches designed and it will get printed again with any mods.
So next job is give my 3d printer an overhaul and fit a new slightly bigger hot bed (going from 220x220 up to 235x235 ) not much but it will fit with little effort mechanically just some jiggery pokery with the marlin firmware.
That will enable me to print the roof in one piece with a v cut out so it can be bent into shape at the joiner bar.
I had to put a resistor inline to slow it down to make it look more realistic.
I also changed my mind about how I was going to do the machine gun originally I was going to make the barrel out of a piece of 3mm acrylic rod but I tried to print it in one piece with the ball and it turned out looking good and it even has a 1mm hole along it to put in a bit of 1mm acrylic rod for the muzzle flash.(it will get cut down when it's painted)
I will post a video of it when I have got all the muzzle flash and smoke set up properly on the main gun.
I had to split the sides into half's so that they would fit on the printer.
I redesigned the side rails and brackets of the original kit to fit the Brummbar and it highlights the lower brackets are in the wrong places to line up with the armour plates so I will be moving them to suit I will alter the cad model but will probably just drill new holes in this one and will get a cheap 3d printing pen just to use like a hot glue gun to fill the existing holes for a permanent fix.
I have thought it would also make the perfect tool to recreate weld seams that actually weld the plastic together I will have to experiment with it.
The rear wall was also split but it's hidden behind the rear hatch frame that helps join it together.
The hatches are openable I will find a couple of 2mm bolts to replace the Allen bolts on the small plate to look correct and I am planning to get a small length of 2mm carbon rod to make an antenna to fit on the mount will just have to sand it to a taper somehow.
But the crowning glory is the roof has made an appearance this is my proof of concept as it had to be split to fit my printer (only 5mm too big
But I can use it to get the hatches designed and it will get printed again with any mods.
So next job is give my 3d printer an overhaul and fit a new slightly bigger hot bed (going from 220x220 up to 235x235 ) not much but it will fit with little effort mechanically just some jiggery pokery with the marlin firmware.
That will enable me to print the roof in one piece with a v cut out so it can be bent into shape at the joiner bar.
Re: 1/10th Brummbar
That is really coming out great! And yes, I can understand the gimmick thing.
"Don't believe everything you see on the internet" - George S. Patton
Eric
Eric
-
baldrick131
- Lance Corporal
- Posts: 140
- Joined: Fri Oct 04, 2019 8:46 pm
- Location: March cambridgeshire
- Contact:
Re: 1/10th Brummbar
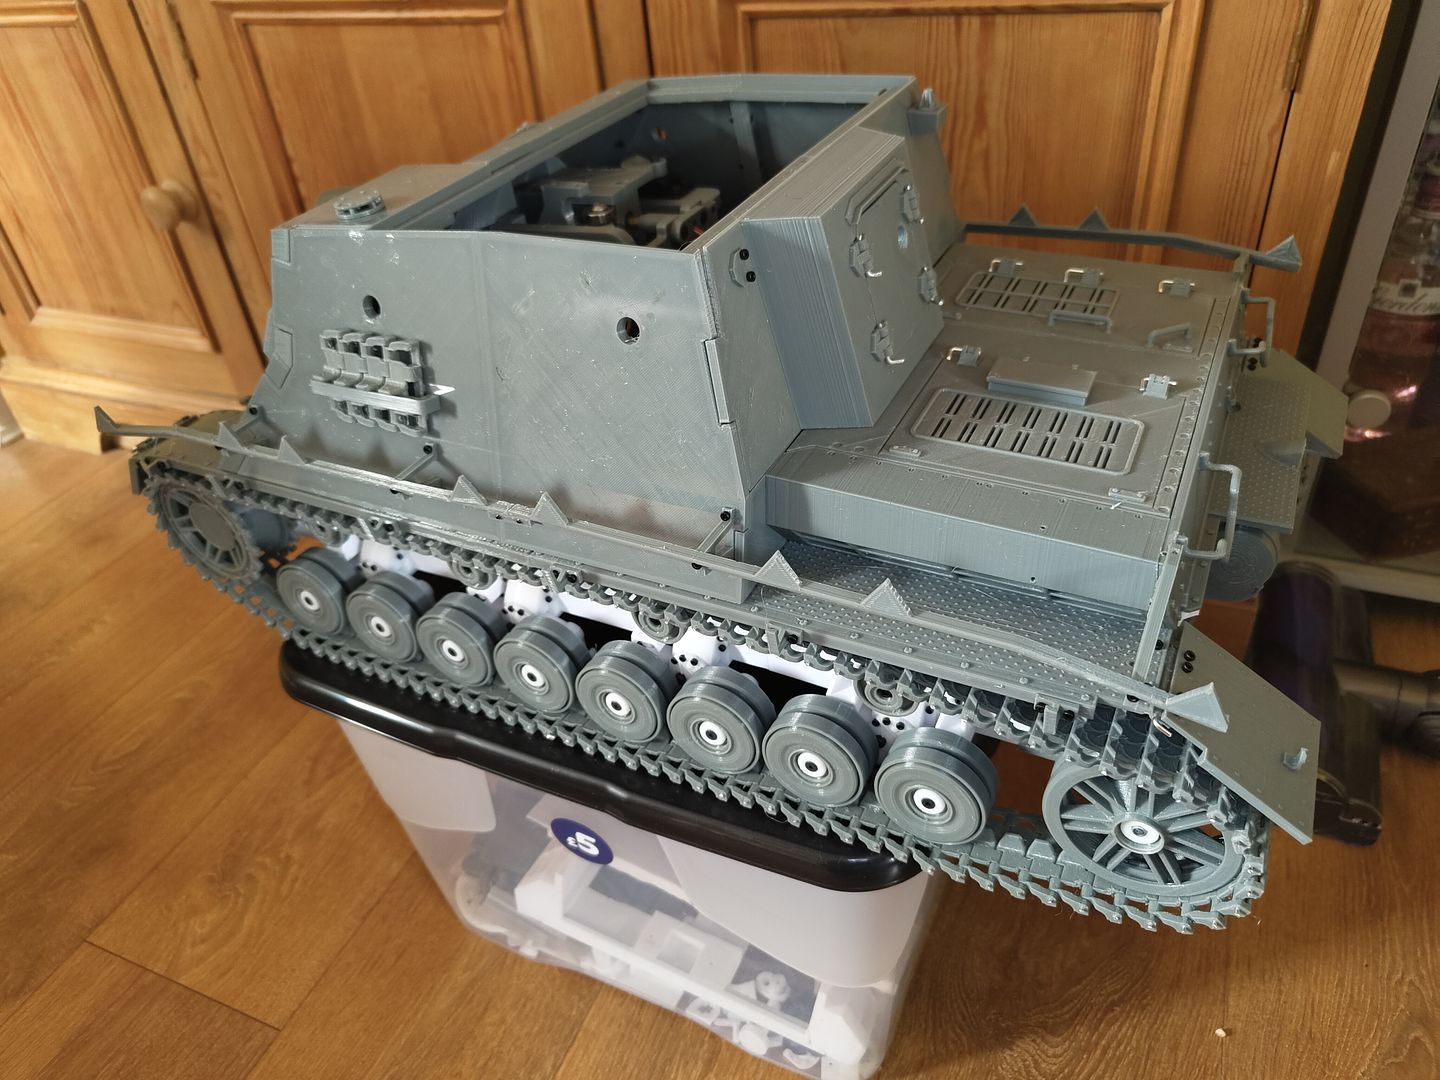
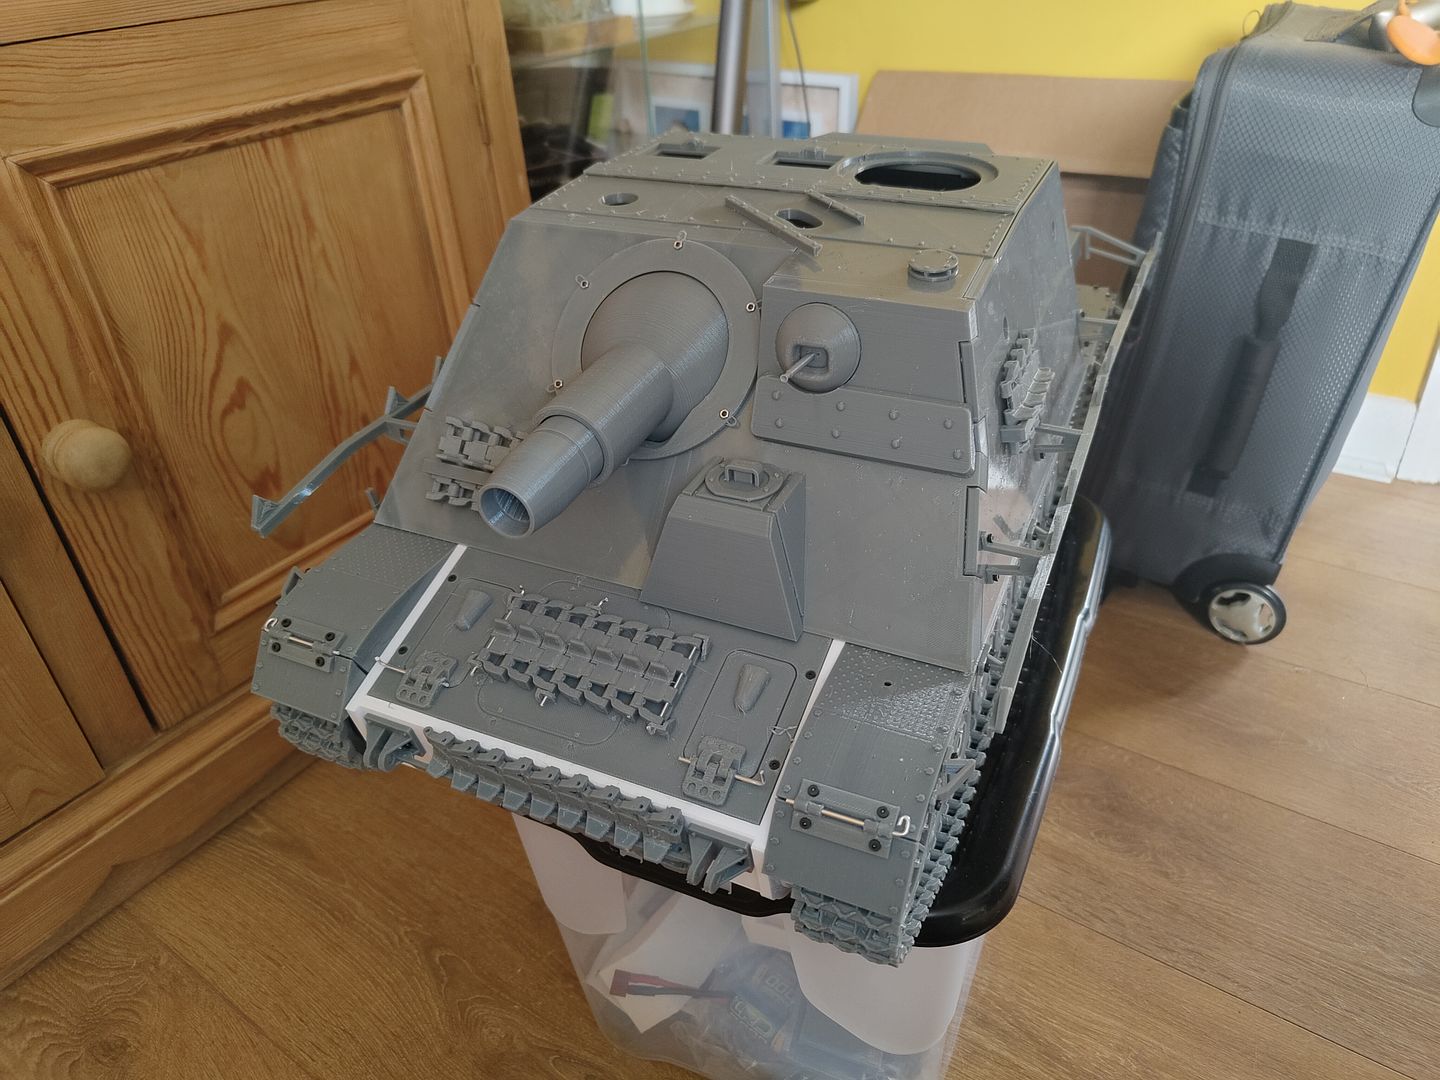
I have modified my 3d printer and finally got it working.
(I did do quite a bit of swearing trying to get the firmware updated) Should have been an easy job just change a few numbers but nothing is that easy apparently.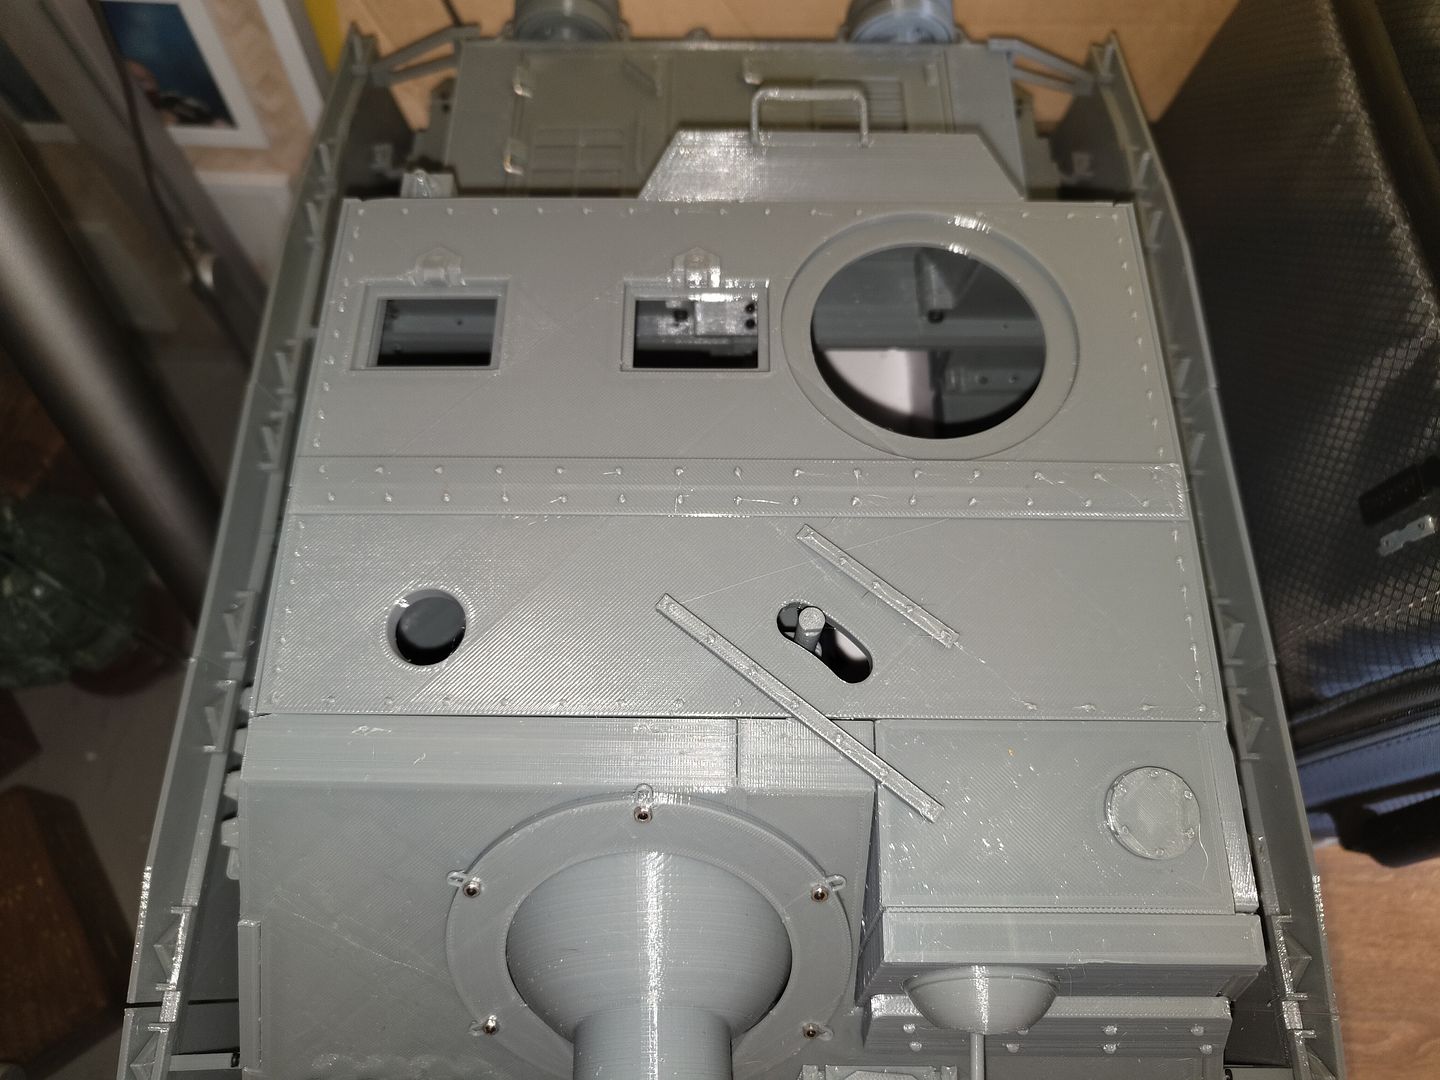
This is the new one piece roof.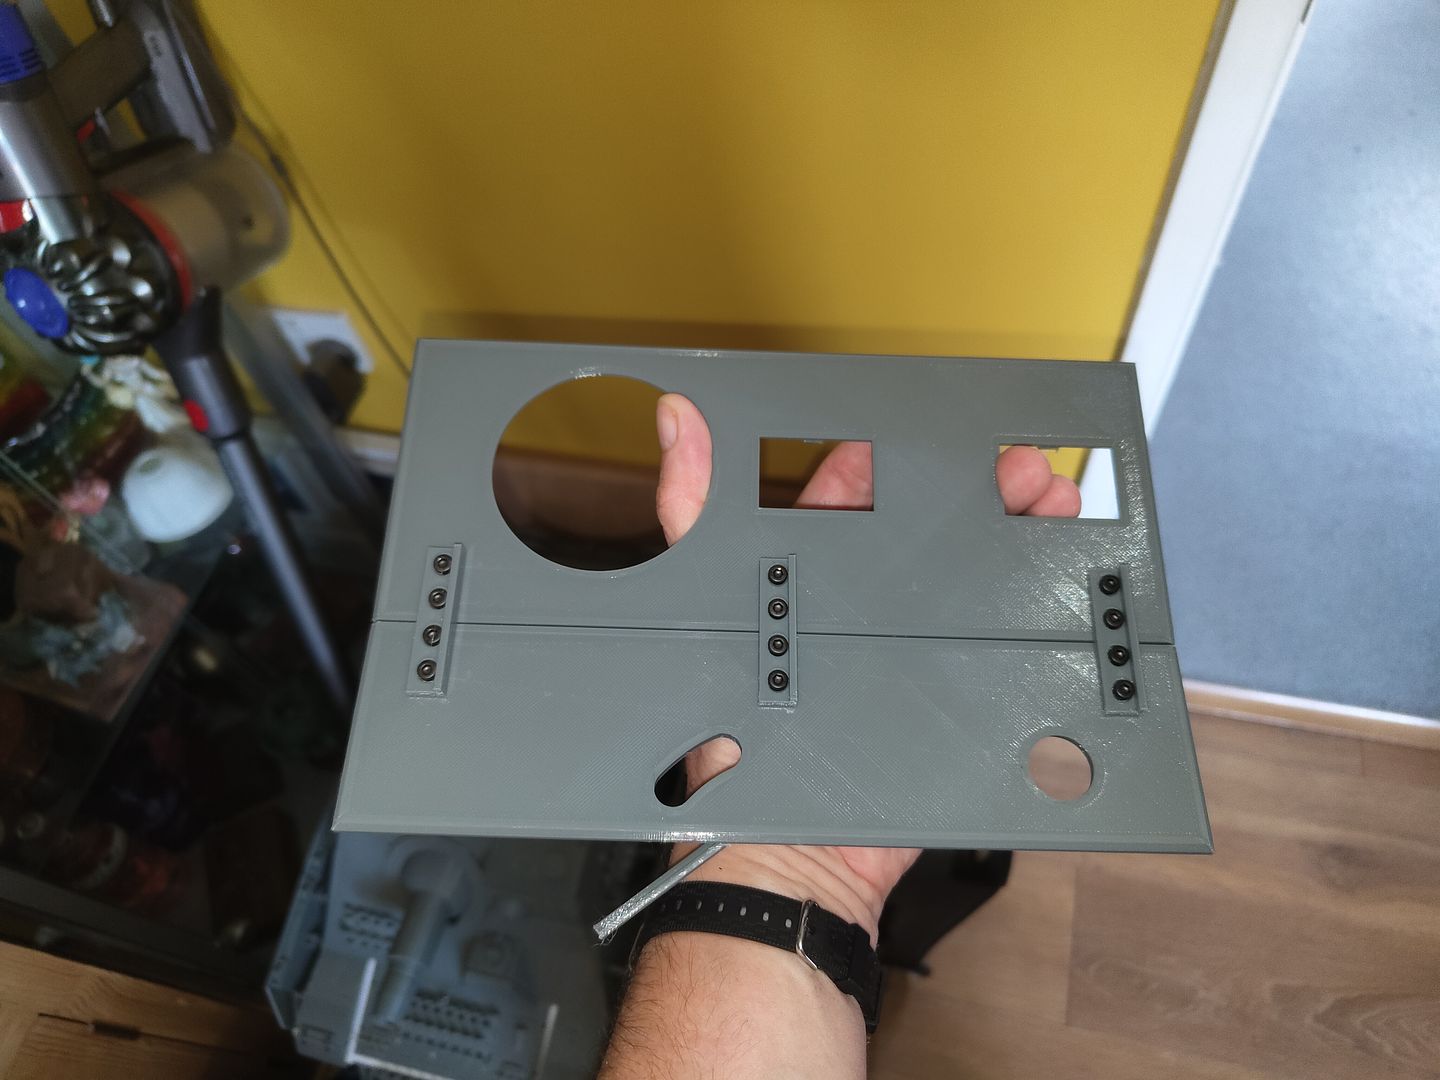
It's got a cutout at the point where the angle changes so it can be bent and held with some struts.
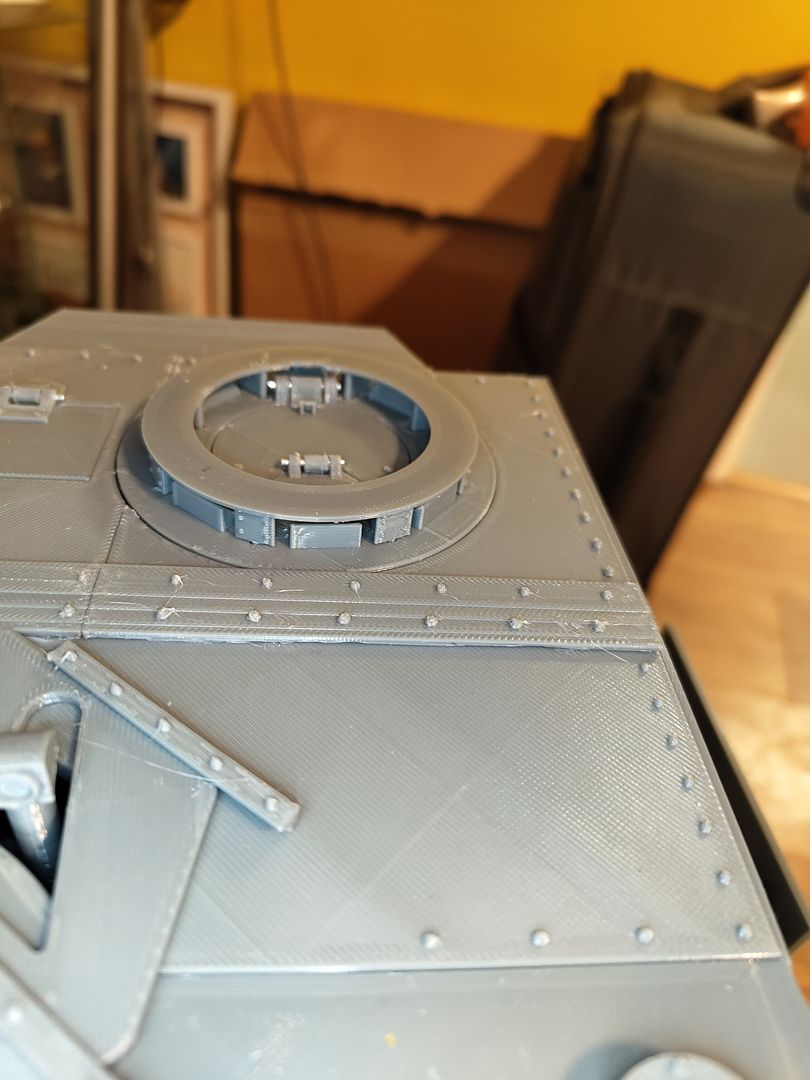
I knocked up a commanders hatch that can revolve.
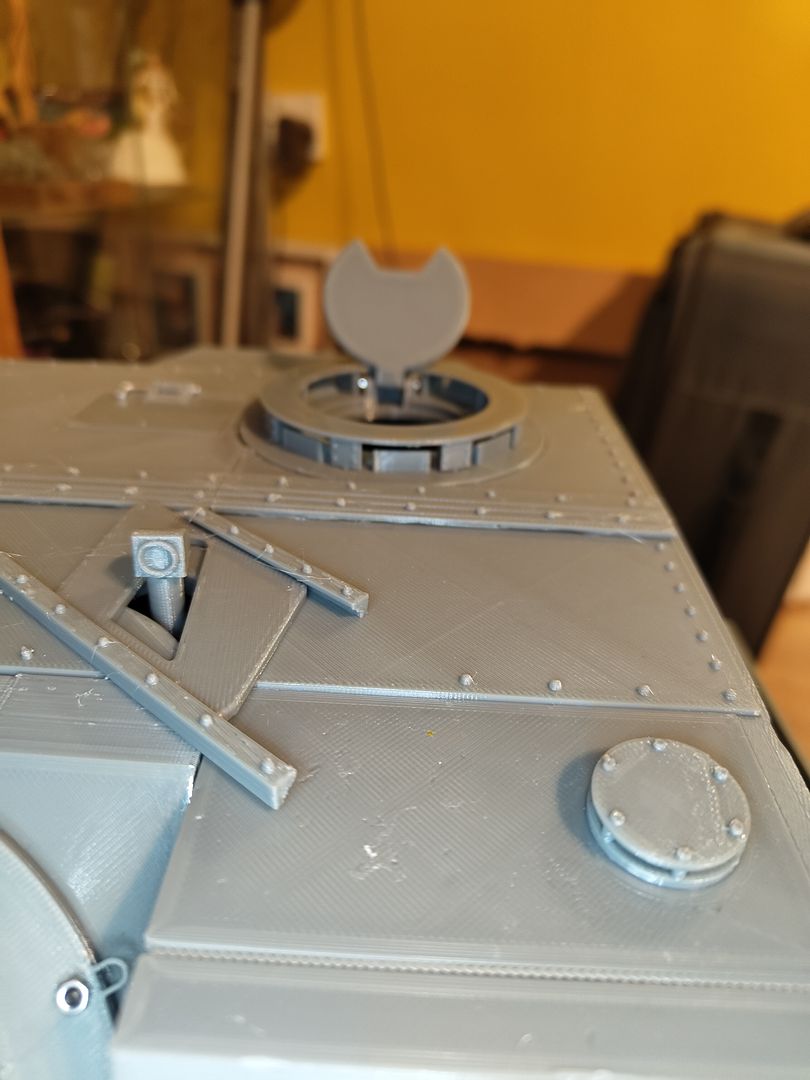
It also opens.
The gun site was also fitted
This is the roof finished with all its hatches fitted.
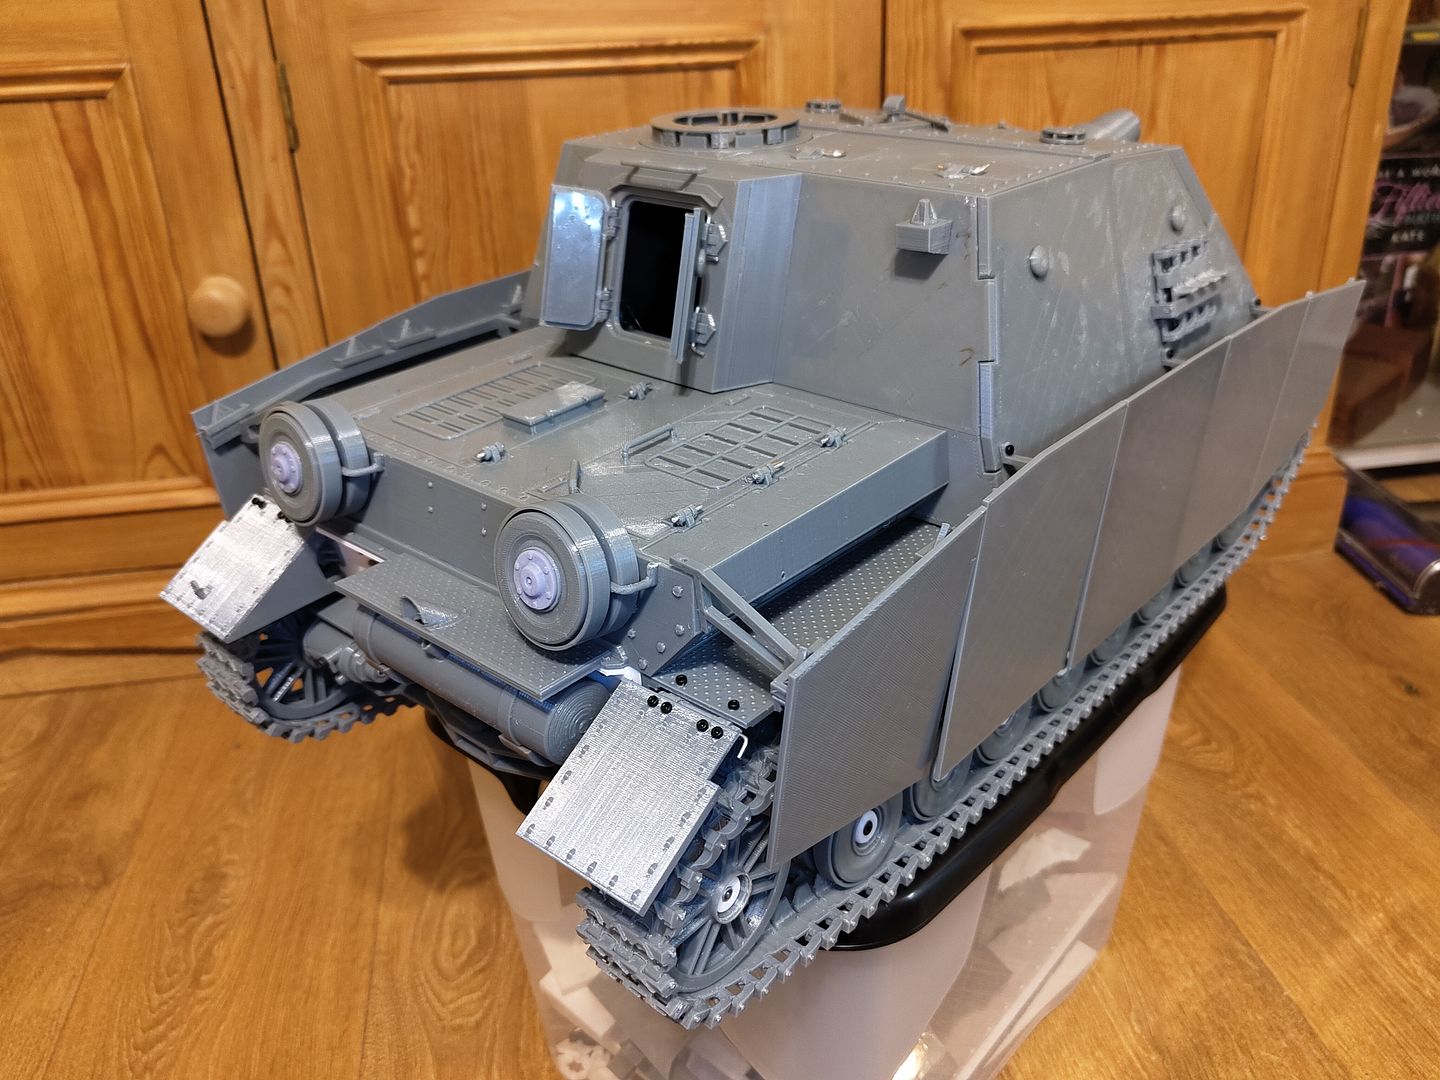
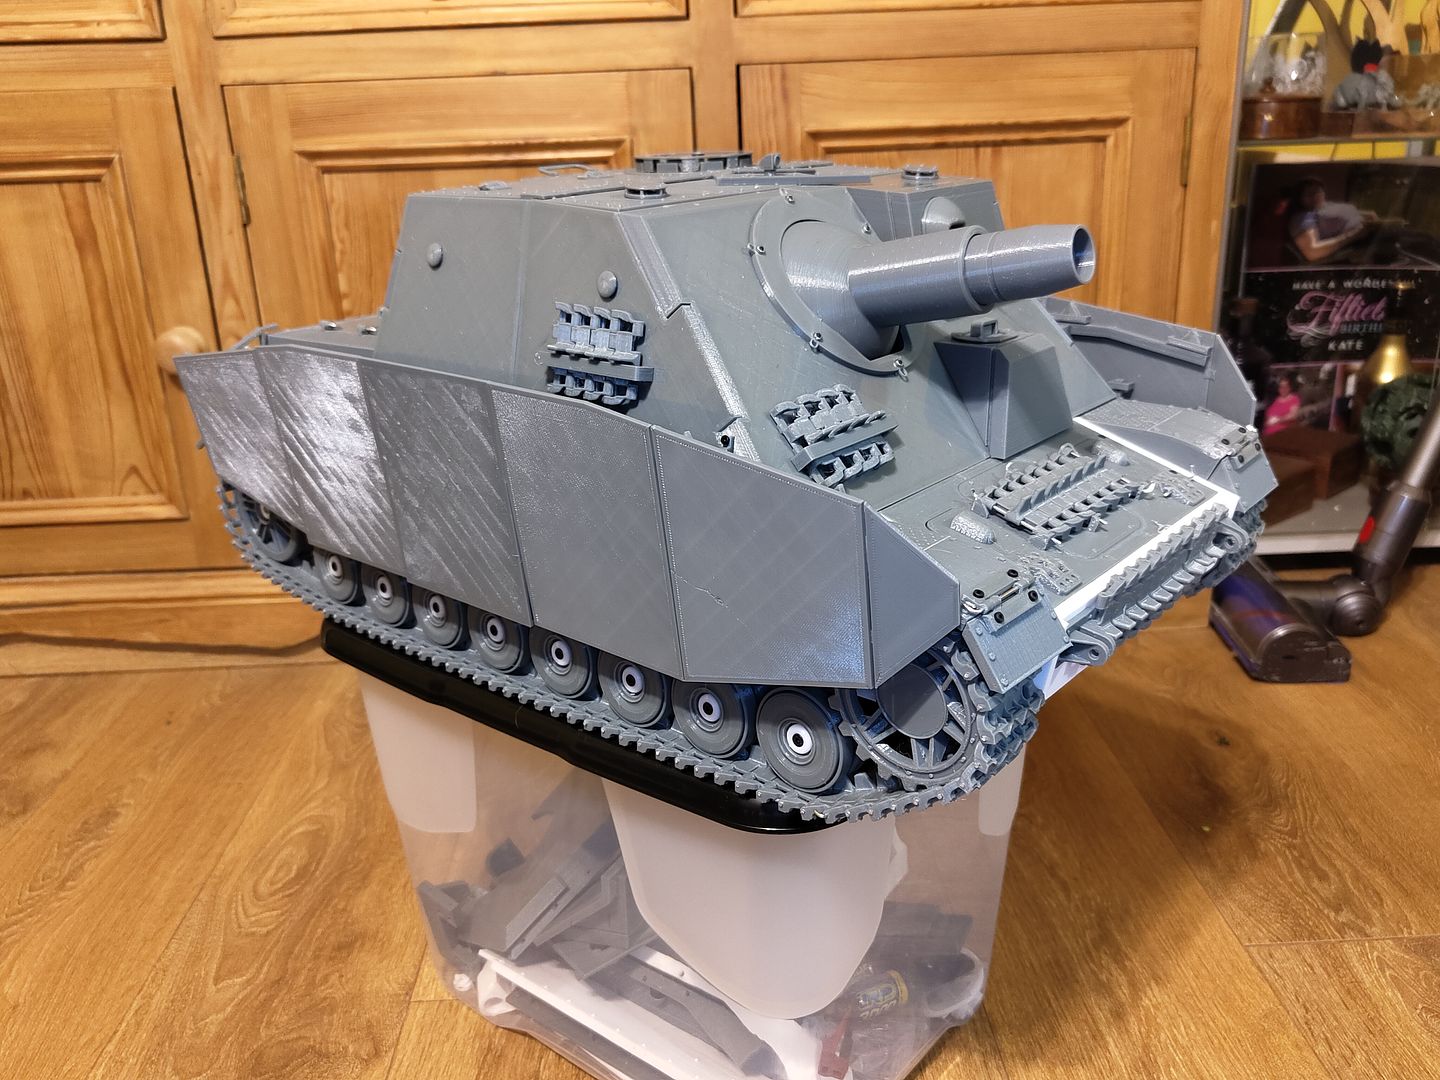
The side armour plates were also made and fitted and this is the tank nearly finished just details to make and add but I will do the electronics and get them sorted and fitted properly before I do those.
(I did do quite a bit of swearing trying to get the firmware updated) Should have been an easy job just change a few numbers but nothing is that easy apparently.
This is the new one piece roof.
It's got a cutout at the point where the angle changes so it can be bent and held with some struts.
I knocked up a commanders hatch that can revolve.
It also opens.
The gun site was also fitted
This is the roof finished with all its hatches fitted.
The side armour plates were also made and fitted and this is the tank nearly finished just details to make and add but I will do the electronics and get them sorted and fitted properly before I do those.
Re: 1/10th Brummbar
A very impressive build. I have no experience of 3d printed parts in fact I can’t recall ever even handling any.
What do you expect the all up weight to be ?
Paul
What do you expect the all up weight to be ?
Paul
Tiger 1
Mowag Piranha 3C
Stridsvagen 103C
Mowag Piranha 3C
Stridsvagen 103C
-
baldrick131
- Lance Corporal
- Posts: 140
- Joined: Fri Oct 04, 2019 8:46 pm
- Location: March cambridgeshire
- Contact:
Re: 1/10th Brummbar
Thanks for the compliment Paul.
I just weighed it on some bathroom scales and as is without the batteries and electronics it came in at 6.4Kg
And for anyone who is wondering about what it takes to build something like this it has 6 and a half reels of filament to build it this far not including maybe as many used on the development prints to get parts just right and at around £22 a reel I have spent with all the filament and electronics,motors,belts for the gearboxes,bearings and screws I have spent around £350 to get it this far so it's working out cheaper than buying a good quality 1/16th scale tank this would be cheaper if I had just built the panzer 4 kit as download.
-
jee
- Warrant Officer 2nd Class
- Posts: 1028
- Joined: Thu Apr 22, 2021 4:16 am
- Location: Siberia
- Contact:
Re: 1/10th Brummbar
this is absolutely next level modellingbaldrick131 wrote: ↑Thu Sep 28, 2023 11:40 am I have made a change to the machine gun station by adding a small motor and gearbox to it and hooking it up so when the machine gun fires it moves side to side a bit of a gimmick but it was worth doing.
I had to put a resistor inline to slow it down to make it look more realistic.
I also changed my mind about how I was going to do the machine gun originally I was going to make the barrel out of a piece of 3mm acrylic rod but I tried to print it in one piece with the ball and it turned out looking good and it even has a 1mm hole along it to put in a bit of 1mm acrylic rod for the muzzle flash.(it will get cut down when it's painted)
I will post a video of it when I have got all the muzzle flash and smoke set up properly on the main gun.
Regards,
Jaap
Jaap
-
baldrick131
- Lance Corporal
- Posts: 140
- Joined: Fri Oct 04, 2019 8:46 pm
- Location: March cambridgeshire
- Contact:
Re: 1/10th Brummbar
Thanks for the compliment Paul.
I just weighed it on some bathroom scales and as is without the batteries and electronics it came in at 6.4Kg
And for anyone who is wondering about what it takes to build something like this it has 6 and a half reels of filament to build it this far not including maybe as many used on the development prints to get parts just right and at around £22 a reel I have spent with all the filament and electronics,motors,belts for the gearboxes,bearings and screws I have spent around £350 to get it this far so it's working out cheaper than buying a good quality 1/16th scale tank this would be cheaper if I had just built the panzer 4 kit as download.
-
Herr Dr. Professor
- Major
- Posts: 6126
- Joined: Mon Apr 22, 2019 10:48 pm
- Location: Southern Wisconsin USA
Re: 1/10th Brummbar
Oh, yeah! A flashing and moving machine gun. What a hoot! Way to go, Jaap! 
