Israeli Centurion - Sho’t Kal C (Gimel) - IDF 1980s - Build
-
c.rainford73

- Major
- Posts: 6104
- Joined: Thu Aug 25, 2016 7:34 pm
- Location: Connecticut USA
Re: Israeli Centurion - Shot Kal Gimel - IDF 1980s - Build
Louis exceptional work, this may be my favorite one yet!  The hardware and details are very well designed and look excellent
Tanks alot.... 
-
Panzerjaeger66
- Corporal
- Posts: 396
- Joined: Sat Jun 11, 2016 9:20 pm
- Location: West of Austria
Re: Israeli Centurion - Shot Kal Gimel - IDF 1980s - Build
wow, you detailing is fantastic!!
I wouldn't have the time and skill....
I wouldn't have the time and skill....

Re: Israeli Centurion - Shot Kal Gimel - IDF 1980s - Build
Amazing work as usual Louis 

Re: Israeli Centurion - Shot Kal Gimel - IDF 1980s - Build
Thank you all for your encouragements.
Regards, Louis
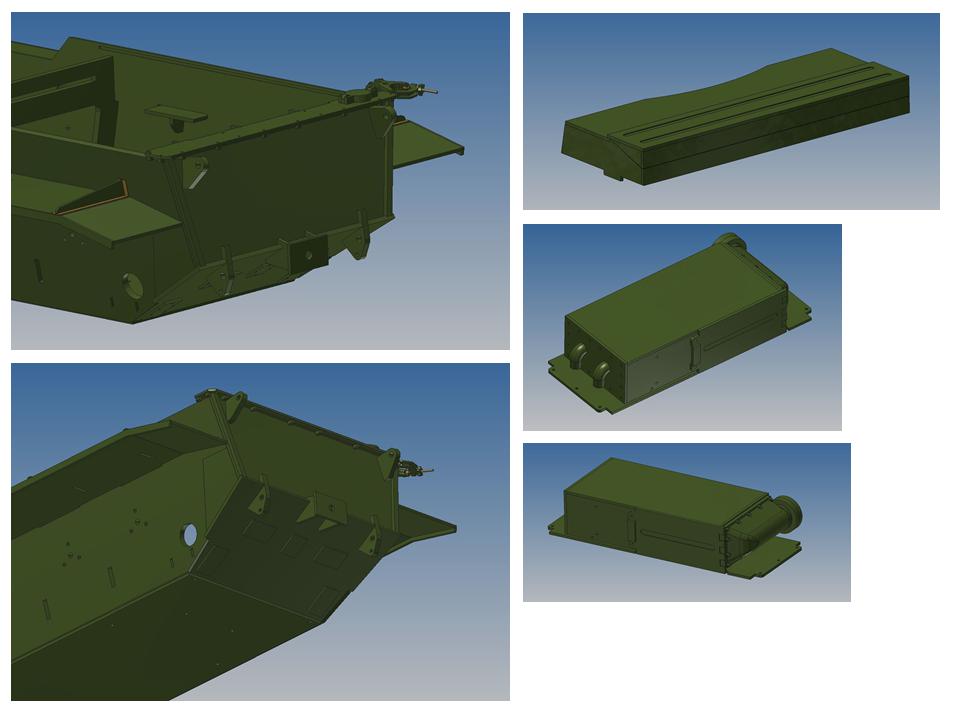
Good base model. I wish I could have used or reused the hull bins you designed for the kit but these are the Mark II and early Mark III with top opening doors. Late Mark III and up have variations of the side opening doors in either 2 or 3 sections, the Israeli ones have the two sections plus a small bin at the rear right. Looking forward for the kit suspension to be started soon.Panzerjaeger66 wrote:wow, you detailing is fantastic!!I wouldn't have the time and skill...
- Ludwigs Centurion hull bins
-
Panzerjaeger66
- Corporal
- Posts: 396
- Joined: Sat Jun 11, 2016 9:20 pm
- Location: West of Austria
Re: Israeli Centurion - Shot Kal Gimel - IDF 1980s - Build
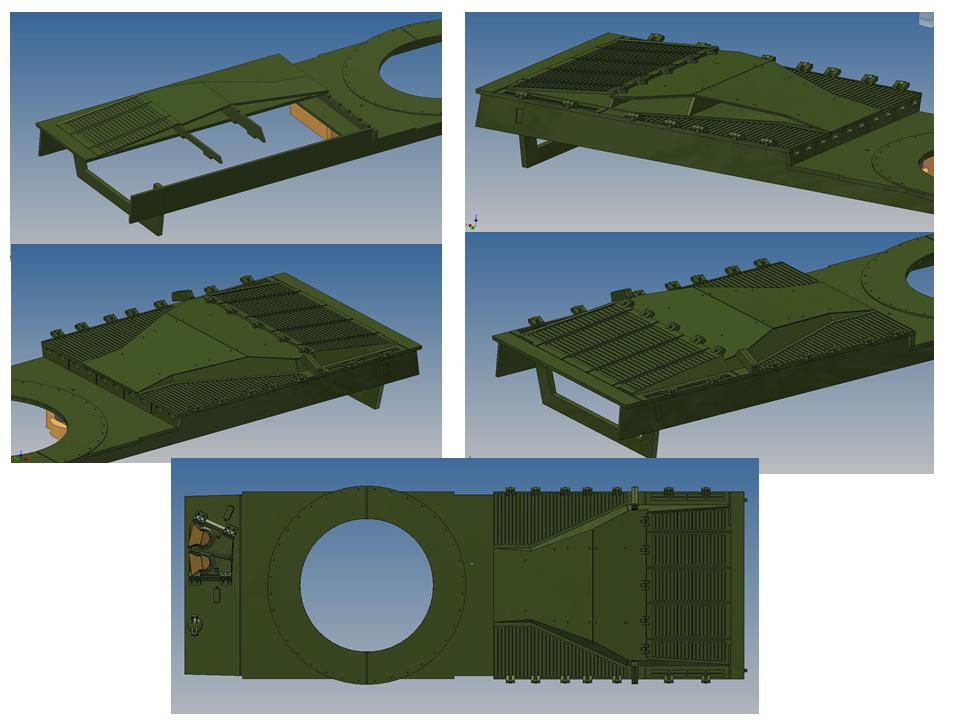
Chris got the data to manufacture all necessary parts for the Sho´t conversion (motor deck, hull backside, stowage bins, filters,...) but after all I´ve seen, you did a much better job than me 
-
Son of a gun-ner
- Lieutenant-Colonel
- Posts: 7638
- Joined: Sun May 07, 2017 8:49 pm
- Location: Lancashire UK
Re: Israeli Centurion - Shot Kal Gimel - IDF 1980s - Build
Gosh, this is a work of art Louis, bravo sir 
Mick - The grit in the underpants of life!
Always happy to spare the bytes
Apparently my mind works in mysterious ways
TOTM needs YOU support YOUR TOTM competition, I'm doing my part, are YOU?
Always happy to spare the bytes
Apparently my mind works in mysterious ways
TOTM needs YOU
Re: Israeli Centurion - Shot Kal Gimel - IDF 1980s - Build
Hi,
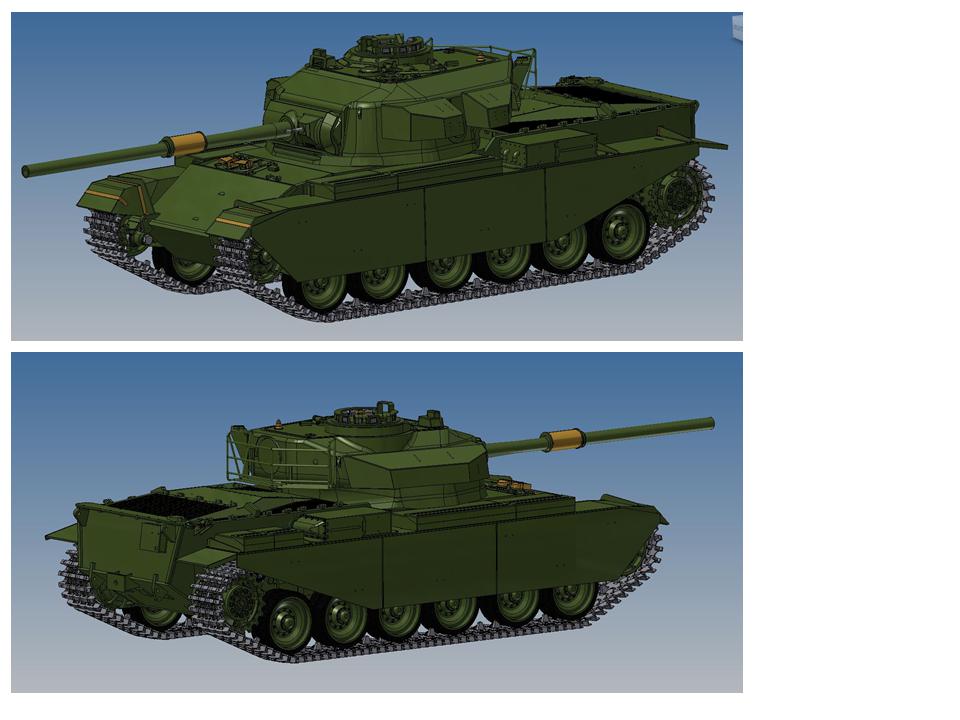
Presenting the 1/16 Centurion suspension and road wheels, a modelling task you probably only want to do once in your life.
As seen in the book "Centurion tanks of the IDF Vol 1", the Centurion has 3 Horstman double bogie suspension modules on each side.
The central unit does not have shock absorbers on either side.
Details of the shock absorbers oil container. I have seen two variants of the cap for the oil, the modeller needs to select one for his tank.
Schematics were very useful to understand the working and main components of the suspension units, making the build a lot more interesting and needed for avoiding mistakes. Plus you should be adding scratch build details to it.
Parts are assembled for the first unit. I was happy to see that Panzerjaeger66 reproduced the main components quite accurately. This is important to me because my style is to build RC tanks but also accurate models that can also sustain close up analysis and pictures, and be a good looking model when on the shelve. I have been waiting for a long time to have a 1/16 Centurion so I won't cut corners.
My parts had a defect. The critical plate that covers the front of the suspension were not created equal, a manufacturing issue. Some were as they should be, while others we're thick and devoid of much detail. There were a few spares provided so I was able to make 6 that look ok through scratching, sanding and polishing.
This is the suspension cover part as it should be before rounding the tip as per instructions. Proper preparation and handling of these parts might decide the fate of your build, specially for the first one because you do not have experienced it yet. If this part is too thick, it will not bend easily, will likely crack and will not fit the slot it needs to go into. Do this while you have superglue all over your fingers and things will become ugly real fast. Make it too thin and it will bulge, might also crack because it is too weak, won't look good and won't be solid.
The part is put into hot water in order to smoothen the plastic so that it does not break while bending it.
Slowly apply gentle pressures in steps and with increasing force to bend the part around a round object to make it soft.
Continuing on following post.
Presenting the 1/16 Centurion suspension and road wheels, a modelling task you probably only want to do once in your life.
As seen in the book "Centurion tanks of the IDF Vol 1", the Centurion has 3 Horstman double bogie suspension modules on each side.
- 1/16 RC Centurion Shot Kar Gimel tank
- 1/16 RC Centurion Shot Kar Gimel tank
- 1/16 RC Centurion Shot Kar Gimel tank
- 1/16 RC Centurion Shot Kar Gimel tank
- 1/16 RC Centurion Shot Kar Gimel tank
- 1/16 RC Centurion Shot Kar Gimel tank
- 1/16 RC Centurion Shot Kar Gimel tank
- 1/16 RC Centurion Shot Kar Gimel tank
- 1/16 RC Centurion Shot Kar Gimel tank
- Capture9.JPG (94.99 KiB) Viewed 3041 times
- 1/16 RC Centurion Shot Kar Gimel tank
Re: Israeli Centurion - Shot Kal Gimel - IDF 1980s - Build
Sub modules are ready for the main operation of assembling the suspension unit core. This is likely the most technical operation of the build. Superglue is used.
The tip will need to be folded by about 50% to fit the slot of the side parts. Dry fitting is essential for success. Failure is not an option. the tip was slowly bended and one side was inserted at a time, left, right, back.
After success with the first module, an assembly chain is created.
The main body of the 6 suspension modules are done. It is a load off.
Next task is to build the suspension arms.
It is not entirely clear how the 2 metal components of each arm need to be assembled together. I was lucky to have M2.5 brass bolts on hand, they fit perfectly.
Another chain is created for the suspension arms assembly, as per instructions. This takes hours.
Assembly of the arms into the core module.
They work quite well and require few adjustments.
Continuing on following post.
- 1/16 RC Centurion Tank Shot Kal Gimel IDF build
- 1/16 RC Centurion Tank Shot Kal Gimel IDF build
- 1/16 RC Centurion Tank Shot Kal Gimel IDF build
- 1/16 RC Centurion Tank Shot Kal Gimel IDF build
- 1/16 RC Centurion Tank Shot Kal Gimel IDF build
- 1/16 RC Centurion Tank Shot Kal Gimel IDF build
- 1/16 RC Centurion Tank Shot Kal Gimel IDF build
- 1/16 RC Centurion Tank Shot Kal Gimel IDF build
- 1/16 RC Centurion Tank Shot Kal Gimel IDF build
- 1/16 RC Centurion Tank Shot Kal Gimel IDF build
Re: Israeli Centurion - Shot Kal Gimel - IDF 1980s - Build
The 6 modules after step 2. Gone outside to enjoy the nice spring weather while continuing the build.
The shock absorbers were installed on the modules. They move freely and are solid, I have no worries they will break.
Added details as per reference picture, such a Meng nuts and the oil fill caps.
Last step is to install the road wheels. These are the parts that I required, in sequence.
The main bolt needed to be cut so that another bolt can be screwed from the other side to hold the shaft on the suspension arm. This is not very difficult, it just takes time and a lot of part preparations.
Continuing on following post
- 1/16 RC Centurion Tank Shot Kal Gimel IDF build
- 1/16 RC Centurion Tank Shot Kal Gimel IDF build
- 1/16 RC Centurion Tank Shot Kal Gimel IDF build
- Capture22.JPG (99.95 KiB) Viewed 3198 times
- 1/16 RC Centurion Tank Shot Kal Gimel IDF build
- 1/16 RC Centurion Tank Shot Kal Gimel IDF build
- 1/16 RC Centurion Tank Shot Kal Gimel IDF build
- 1/16 RC Centurion Tank Shot Kal Gimel IDF build
- 1/16 RC Centurion Tank Shot Kal Gimel IDF build
- 1/16 RC Centurion Tank Shot Kal Gimel IDF build
- Capture28.JPG (98.18 KiB) Viewed 3198 times
- 1/16 RC Centurion Tank Shot Kal Gimel IDF build
Last edited by lmcq11 on Mon May 06, 2019 12:38 am, edited 2 times in total.
Re: Israeli Centurion - Shot Kal Gimel - IDF 1980s - Build
Road wheel shafts are installed.
View of the completed suspension units, ready for mounting on the chassis. The rubber rims will be added only after painting.
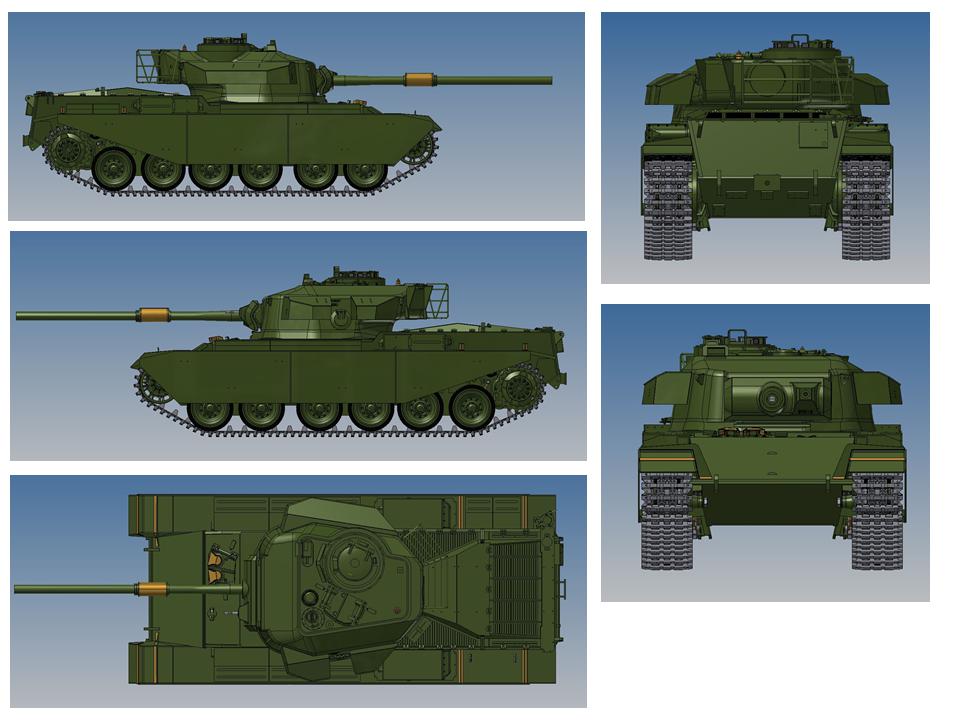
Presenting the Shot Kal Gimel Centurion tank with its main suspension. I am very happy with the results.
Time to rest... My cat Platon next to me.
- 1/16 RC Centurion Tank Shot Kal Gimel IDF build
- 1/16 RC Centurion Tank Shot Kal Gimel IDF build
- 1/16 RC Centurion Tank Shot Kal Gimel IDF build
- 1/16 RC Centurion Tank Shot Kal Gimel IDF build
- 1/16 RC Centurion Tank Shot Kal Gimel IDF build
- 1/16 RC Centurion Tank Shot Kal Gimel IDF build
- 1/16 RC Centurion Tank Shot Kal Gimel IDF build
- 1/16 RC Centurion Tank Shot Kal Gimel IDF build
