Page 4 of 29
Re: Cromwell Mk 4 1:16 scratch build Ludwig kit
Posted: Wed Mar 08, 2017 9:52 pm
by 43rdRecceReg
Many thanks, Alwyn, Painless, Adam and Wibb. The thing about this (semi) scratch building malarkey is that it is relentless. Tarting up a Taigen is one thing; as the Tank's already in a complete state. Building one of these, and YOU end up in a complete state


There are lots of unexpected puzzles to solve, and blank spaces to fill in. Unfortunately, I'm now
dreaming scratch build issues

. So this is definitely a pursuit for insomniacs; and if you're not one already, be prepared for undisturbed pillows!
Re: Cromwell Mk 4 1:16 scratch build Ludwig kit
Posted: Wed Mar 08, 2017 9:55 pm
by wibblywobbly
I know only too well from the Comet build what all of this malarkey entails. It has taken over my life, late nights, constantly solving problems, and trying to think ahead for potential problems. The Cromwell is a great model though, and at least you have the basics there all nice and accurate.

Re: Cromwell Mk 4 1:16 scratch build Ludwig kit
Posted: Wed Mar 08, 2017 11:07 pm
by 43rdRecceReg
wibblywobbly wrote:I know only too well from the Comet build what all of this malarkey entails. It has taken over my life, late nights, constantly solving problems, and trying to think ahead for potential problems. The Cromwell is a great model though, and at least you have the basics there all nice and accurate.

I can empathise completely. I'm sure you'd like a break from in now and then; even a trial separation! Won't work, though..before you know it you're back with a new 'solution' to that knotty problem..it's like marriage counselling!
The motors I have..well.. could be of a better quality, let's say. Getting them to fit is another problem, since the spindle and drive gear are in the same space as the pins/bolts supporting the suspension springs. I can't really replace the bolts, or relocate them, and I can't shave anything off the motor spindle/drive gear assembly. Currently, I'm thinking of raising the back of the gear units up so they'll be on an incline (supported be sturdy triangular fillets) and thus avoid the obstruction. Or, I could get some mid position gears that wouldn't contact the bolts, but might be slightly too tall...it goes on

You get the drift. Unfortunately, I don't have any spare gears around to test that theory unless I strip of of my expanding fleet of tanks

The Cromwell's quite narrow inside. My Panzer IV is about 5mm wider, and even then it is a tight fit for some gears.

If nothing else.. it certainly keeps the brain ticking over..and the cash register too!

Re: Cromwell Mk 4 1:16 scratch build Ludwig kit
Posted: Wed Mar 08, 2017 11:48 pm
by tomhugill
I use the 5:1 taigen low profile gears for mine, fits perfectly without alterations.
Re: Cromwell Mk 4 1:16 scratch build Ludwig kit
Posted: Thu Mar 09, 2017 12:48 pm
by Jake79
I have a spare set taigen 5-1 gears if you need them, one needs a new motor..£25 posted.
Re: Cromwell Mk 4 1:16 scratch build Ludwig kit
Posted: Fri Mar 10, 2017 5:53 pm
by 43rdRecceReg
tomhugill wrote:I use the 5:1 taigen low profile gears for mine, fits perfectly without alterations.
Good to know, but does your Cromwell have the same metal arms and springs mine has? If not, then the bolts/pins securing the Springs are probably in a different location to mine...and hence unobstructed.

But I'll certainly check out the Taigen specs...
Re: Cromwell Mk 4 1:16 scratch build Ludwig kit
Posted: Fri Mar 10, 2017 5:54 pm
by 43rdRecceReg
Jake79 wrote:I have a spare set taigen 5-1 gears if you need them, one needs a new motor..£25 posted.
Thanks for the offer, Jake..and it might take you up on it.

But, given how the cost of this is going up like 'mission creep', for the present, I'm going to see what I can do with the ones I was supplied.

Re: Cromwell Mk 4 1:16 scratch build Ludwig kit
Posted: Fri Mar 10, 2017 5:55 pm
by tomhugill
43rdRecceReg wrote:tomhugill wrote:I use the 5:1 taigen low profile gears for mine, fits perfectly without alterations.
Good to know, but does your Cromwell have the same metal arms and springs mine has? If not, then the bolts/pins securing the Springs are probably in a different location to mine...and hence unobstructed.

But I'll certainly check out the Taigen specs...
I would think so
Re: Cromwell Mk 4 1:16 scratch build Ludwig kit
Posted: Fri Mar 10, 2017 6:12 pm
by 43rdRecceReg
Re: Cromwell Mk 4 1:16 scratch build Ludwig kit
Posted: Fri Mar 10, 2017 9:25 pm
by 43rdRecceReg
and a little bit further with the Mudguards...The front units are built using the same method us the rear ones. Firstly, a layered (3 layers) spine, or former is bonded together. After that, the main panel is glued to the spine.
Because the mudguards are quite thin, and because styrene is not as tough as ABS, I've begun adding reinforcement here and there. The unwanted portions of the sprue sheets are ideal for this.
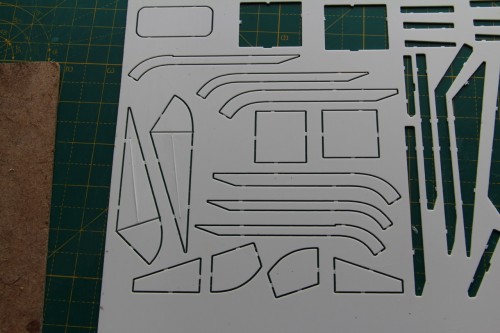
- Extracting the right parts
then bond the three backbone bits together:
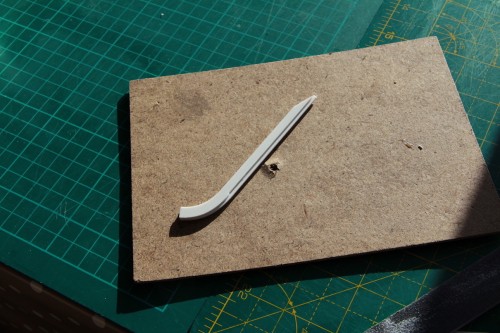
- Three struts bonded together

- Mudguard support brackets
While they're drying, I fit the rear Mudguards..and add some 'L' shaped reinforcement made out of waste sprue.
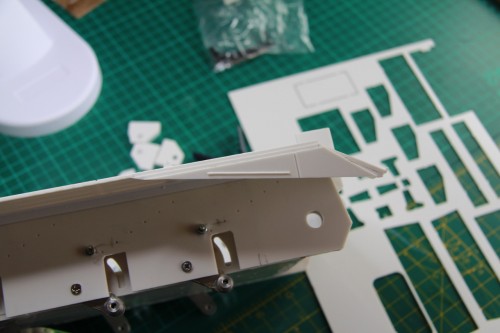
- Mudguard in place
Reinforcement underneath the joint, and along the main guard to hull panel:
The Ludwig kit doesn't make reference to bolstering the joint lines; but it seems to be a wise precaution to me.

I don't want the tank splitting up under the stress of going into action


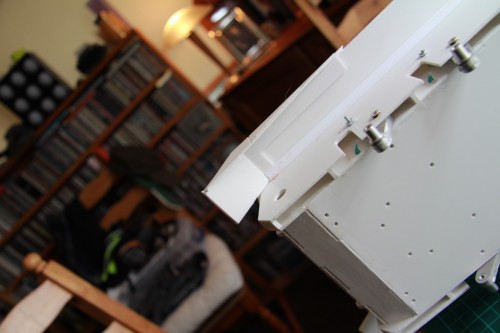
- A little extra strength..
Finally I have the rear of the lower chassis pretty complete; apart from sanding, and more judicious filling (Mr Surfacer etc.) and sanding.
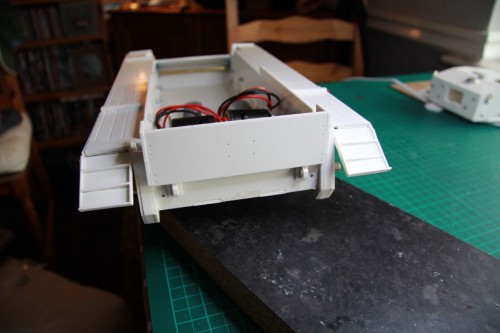
- A recognisable rear booty..
That's all for now, folks.

 There are lots of unexpected puzzles to solve, and blank spaces to fill in. Unfortunately, I'm now dreaming scratch build issues
  . So this is definitely a pursuit for insomniacs; and if you're not one already, be prepared for undisturbed pillows!