Page 4 of 9
Re: Panzer III
Posted: Sun Feb 12, 2017 11:35 am
by silversurfer1947
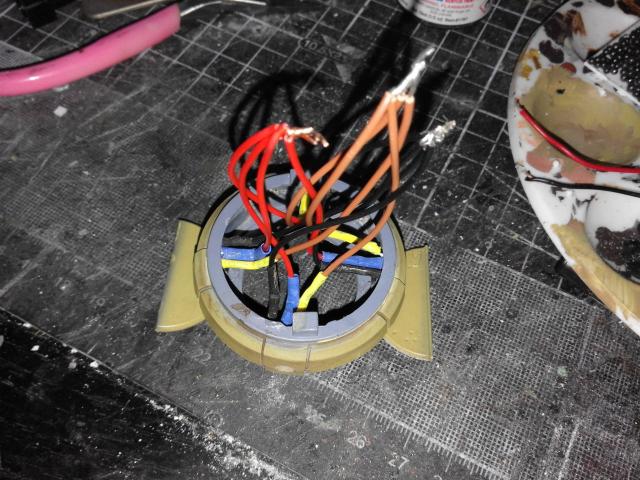
Having put the recoil assembly to one side whilst I regain my sanity, I have had a go at fitting the hidden IR system. I've been trying to follow wibblywobbly's excellent thread. It's fitted, but i think you can safely say, it is not the neatest pieces of work - certainly not up to Mr W's standard. My excuse is that this is my first attempt and I'm sticking to it. Quite what excuse I shall use when I do the next one, I am not sure.

- 20170209_154940.jpg (55.98 KiB) Viewed 4799 times
- 20170209_155428.jpg (68.02 KiB) Viewed 4799 times
Re: Panzer III
Posted: Sun Feb 12, 2017 12:38 pm
by puramo
Nice tank, lovely bookshelves too. My equivalent of the dollar store sells 'banana juice' which does losen up some of the HL glue. Sometimes judicious use of an old soldering iron can coax parts apart too. There are some good threads with inner parts stripped and magnets to hold the top and bottom hull together. As another poster suggested 'scratch' is an excellent way of holding all the parts in place with minimal space loss
How do you like the Transmiter, I was thinking of one of those myself.
Re: Panzer III
Posted: Sun Feb 12, 2017 12:49 pm
by silversurfer1947
I am very happy with the Flysky i6, thought the only draw back is the non self-centering throttle on the left stick. A lot of the functions are individually programmable, which means I can stop my tanks taking off like an F1 car. I have got some small neodymium magnets, which I am intending to use to hold the tank body together. I find it's a real pain with all the Heng Long screws every time you need access.
Re: Panzer III
Posted: Mon Feb 13, 2017 3:49 pm
by silversurfer1947
Re: Panzer III
Posted: Mon Feb 13, 2017 4:07 pm
by silversurfer1947
I would just say that appearance can e deceptive. There are no electrics in the hull save the two motors. That is the next job. I think I will have to shorten a lot of the turret to hull wiring, but need to be careful not to get too carried away.
Re: Panzer III
Posted: Tue Feb 14, 2017 3:01 pm
by silversurfer1947
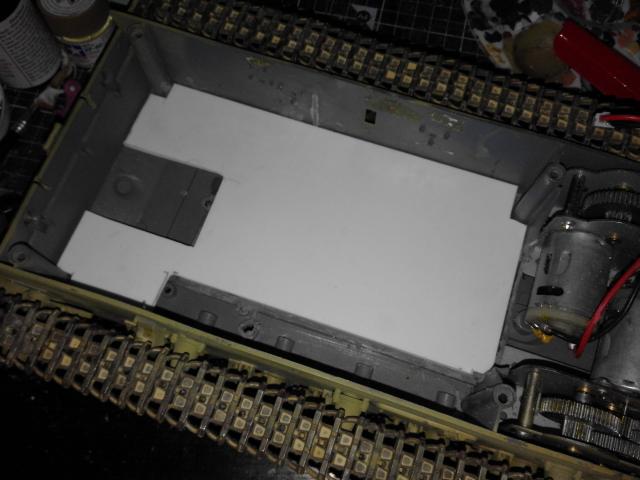
I have now finished butchering the lower hull. It looked absolutely terrible, so to cover it up I fitted a styrene floor.
- 20170214_143543.jpg (37.48 KiB) Viewed 4747 times
The large cutout is to accommodate the Tarr smoker, which otherwise sat too high. A dry fit of the various components indicated that the battery would also be too high, so that was cut away as well. Just placing the items gives an inside something like this.

- 20170214_144059.jpg (71.49 KiB) Viewed 4747 times
Once everything is secured, I will then attempt to sort out all the wiring, and, hopefully, I will have a fully functioning tank.
Re: Panzer III
Posted: Tue Feb 14, 2017 10:33 pm
by wibblywobbly
It looks really good in that colour, well done. It may be the camera angle but the wires in the turret look a bit thick, there is hardly any current going through the sensors, so you can use the finest gauge that you can find, it makes it easier to bend around things and hold down with cable clamps and ties.

Re: Panzer III
Posted: Tue Feb 14, 2017 11:52 pm
by silversurfer1947
You are right about the wire - it is quite thick. I bought a job lot of multiple colours plus some red and black I had already. Not being sure of currents, I took a cautious approach. For future efforts I will invest in some thinner gauge. The basic colour I take no credit for - this was Spartans work.
Re: Panzer III
Posted: Wed Feb 15, 2017 2:31 pm
by silversurfer1947
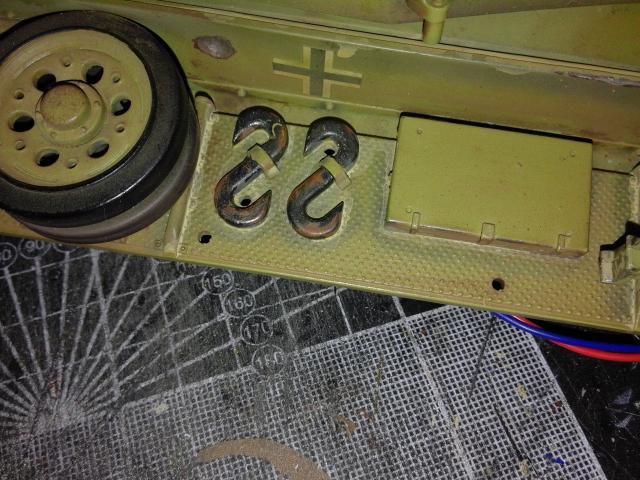
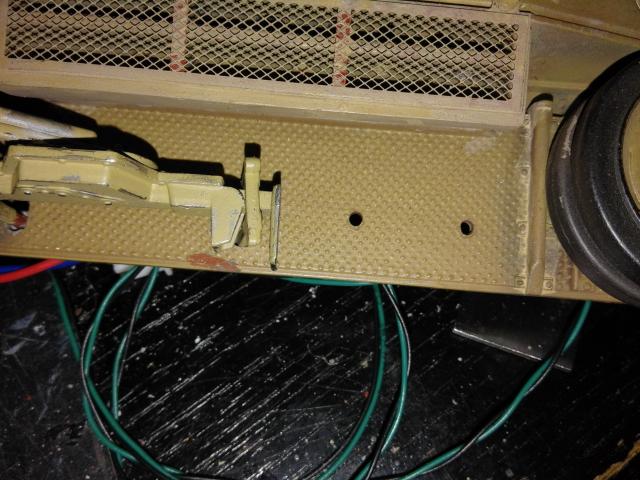
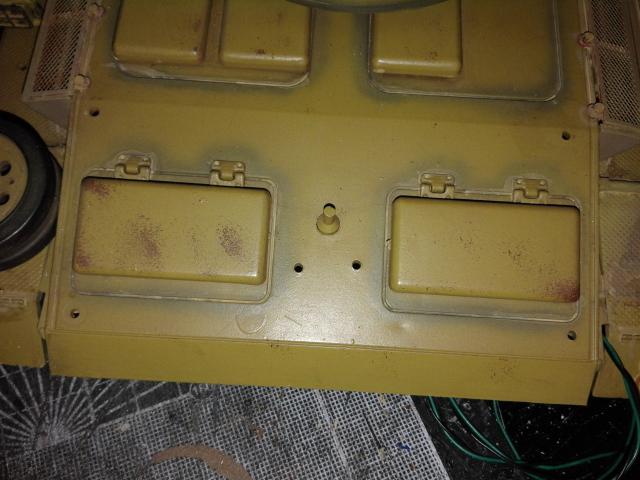
Once again, I find myself in need of assistance. I am trying to finish the detailing and purchased a set of Mato parts, which I have fitted. However, I still have a number of hole in the upper hull, which are crying out to have something fitted in them.
- 20170215_123318.jpg (64.99 KiB) Viewed 4727 times
There are 2 holes in between the S hooks and 2 along the edge of the left hand side.
- 20170215_123325.jpg (60.04 KiB) Viewed 4727 times
The 2 holes are to the rear of the jack.
- 20170215_123341.jpg (42.18 KiB) Viewed 4727 times
The last few holes are those at the rear, which are for securing the tow cables. I have the cables, but I bought real cable. What I need is the fixing brackets. If anyone can tell me what should go in the various spaces and, importantly, where I can get them from, I shall be very grateful.
When I fitted the Mato parts, I have one left over, so if someone can tell me where it fits, the above also applies.
- 20170215_123249.jpg (39.14 KiB) Viewed 4727 times
Thanks in anticipation.
Re: Panzer III
Posted: Wed Feb 15, 2017 2:47 pm
by wibblywobbly
I have some metal tow cable securing clamps here that I won't be using, I'll bring some Sunday and if they are of any use you are welcome to them.
The other holes are for the jack and further tools, I have some that may or may not fit, I will see what I can find.