Well whether it's the New Year or something else, I really feel that I have a new impetus on this build (cue cynical laughter all round).
Today I did a test with my turret back on the hull and the hull back on the rest and turned it all on - and it worked! The turret revolved, the gun recoiled, the guns flashed, the engine roared and the Tiger stalked its prey... Oh mercy this is what it's all about!
I even took a short video clip, but I'll spare you that for now. I can't work out how to upload it anyway (and if you want to give me advice please feel free but let's not turn this blog into a 'how to post video clips' section...) and besides the muzzle brake fell off when I fired the gun (it's not glued on yet).
But it proved to me that this build still has a purpose - and possible an end...
However, before I can really progress I have to get the upper hull finished so that I can paint it an then attach the turret for good. So I am working in all directions.
For now my attention has alighted on the front hatches.
Return to the front hatches
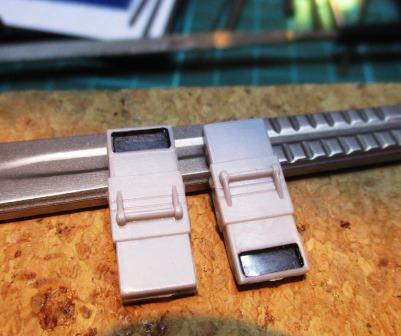
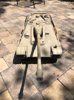
- The assembled hatch periscopes from the Build Your Own Tiger set.jpg (36.7 KiB) Viewed 15478 times
The hatches I have used on my Tiger are all-metal and, if I recall, made by Taigen. I have already discussed the options, but these are nicely made, strong and include the internal locking mechanism. But there are 'issues'. Chief among these are the fact that they don't quite fit so as to allow the hatch to swing open and past the vertical just like the real thing. First I tried a complicated fix and then found a simpler one - please look above. The result is that one (on the radio operator's side) is fixed for all eternity whilst the other (on the driver's side) is not. This made working on the first one a little tricky...
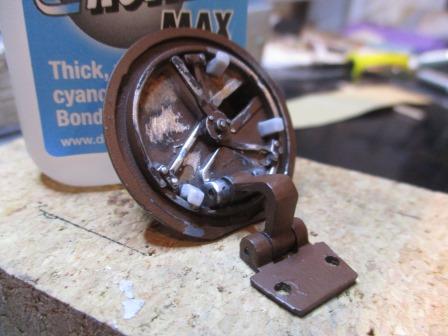
Another problem is the presence of unsightly ejector-pin circles on the inner face. I am used to these on plastic mouldings but have to say that they surprised me on a metal part. I had already tried to fill these once but once I added a primer coat it was obvious that they still showed. So I filled them again with Milliput and then sanded them down a second time. Because they are sometimes hard to reach behind the hatch locking mechanism I used an old-fashioned technique - steel wool.
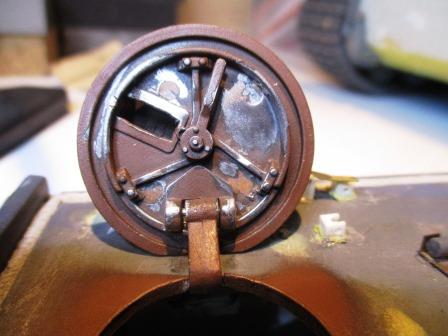
- The radio operator's metal hatch after my first attempt at filling the ejector pin holes.jpg (37.08 KiB) Viewed 15478 times
- Here is the driver's hatch after a second attempt to fill the holes with terracotta Milliput.jpg (38.87 KiB) Viewed 15478 times
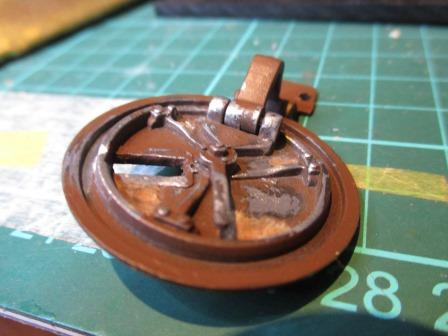
- It's not pretty - but the tell-tale circles seem to have finally disappeared!.jpg (35.65 KiB) Viewed 15478 times
The results were acceptable and since I have added a another primer coat I am going to leave them as they are (more photos will follow of the final primed hatches I promise).
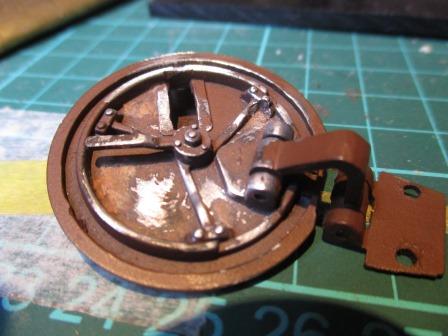
Something else I had missed where the three hatch stops on the inner face. These came courtesy of the Build Your Own Tiger set (of which more below). Note that these should be equally placed around the circumference and the one at the top of the inner hatch (when it is open - i.e. the edge facing the centre when closed) should be on the other side (the left) of the locking bar but the way the Taigen part is made doesn't allow for this - so I used artistic licence. I apologise to David Byrden in advance...
- Here I have added the three hatch stops from the Build Your Own Tiger set.jpg (38.02 KiB) Viewed 15478 times
With the hatch inner finished you may wonder what there is left. In fact you may wonder what is the point of any of this? Well eventually I want a crew in my Tiger and if the hatches are to be open then they need to look 'right'. Call it OCD if you will, but whenever I see surviving or restored tanks there is always something that bugs me if it's not there. Let's call it the eyes of the tank crew. That's right - periscopes!
This bit is going to take more than one post, but for now (as in early 2016) let's just say that the options for the front hatches of a Tiger 1 are rather limited. These were actually rather complicated on the real thing, consisting of a hinged mechanism which clamped the Bakerlite clad periscope into the inside of the hatch. There are metal and resin parts available, but for me they don't cut the mustard. The wonderful Voyager PE set doesn't include them and for the state of the art you then have to look to Aber - which is expensive and - er - complicated.
However, here the Build Your Own Tiger magazine comes to rescue! More to come...