Carl!
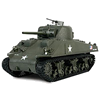
That's still a mean looking machine, even in museum storage. It's got the Indochina type roof on it so it saw service up through those years at the very least. Thank you very much, my Friend. I'm working on a few detail items for the M36B1 and will have some photos up a little later on.
regards,
Painless
1944 M36 B1 Tank Destroyer
Forum rules
If your question is electronics related please post it in one of the relevant boards here: viewforum.php?f=31
If your question is electronics related please post it in one of the relevant boards here: viewforum.php?f=31
-
PainlessWolf

- Colonel
- Posts: 7877
- Joined: Sun Feb 26, 2012 9:09 pm
- Location: Southern Colorado Rocky Mountains
Re: 1944 M36 B1 Tank Destroyer
...Money!? What's that!?...
-
c.rainford73

- Major
- Posts: 6104
- Joined: Thu Aug 25, 2016 7:34 pm
- Location: Connecticut USA
 looking forward to seeing them!
-
PainlessWolf
- Colonel
- Posts: 7877
- Joined: Sun Feb 26, 2012 9:09 pm
- Location: Southern Colorado Rocky Mountains
Re: 1944 M36 B1 Tank Destroyer
Carl!
For the hours spent this evening, there are not a lot of pics. It was basically, cutting bamboo skewers to length, painting them flat white then adding red caps and using a fine marker to add gradiant lines. I saw pics of two per side ( very small diameter stakes ) or one per side. I went with the larger diameter type since lines and colors will show up better. Oh, I did take the opportunity to upgrade the stowage rack cleaning rods by adding metal caps to both ends. After painting, they looked much better. Pics:
For the hours spent this evening, there are not a lot of pics. It was basically, cutting bamboo skewers to length, painting them flat white then adding red caps and using a fine marker to add gradiant lines. I saw pics of two per side ( very small diameter stakes ) or one per side. I went with the larger diameter type since lines and colors will show up better. Oh, I did take the opportunity to upgrade the stowage rack cleaning rods by adding metal caps to both ends. After painting, they looked much better. Pics:
- Attachments
-
- The Artillery Stakes add a touch of color to the turret.
-
- Work complete with OD tie down.
-
- WIP artillery stake.
-
- Olive Drab applied with the hairy stick finishes the job.
-
- Brass caps added to the cleaning rods.
...Money!? What's that!?...

Re: 1944 M36 B1 Tank Destroyer
Soooo nice. What did you use for the metal caps on the cleaning rods?
And how would those Artillery stakes be used?
And how would those Artillery stakes be used?
Re: 1944 M36 B1 Tank Destroyer
Artillery aiming post are black and white these days.
Not sure if they used to be red.
Not sure if they used to be red.
Torro Sherman
Torro King Tiger
Torro King Tiger
-
c.rainford73
- Major
- Posts: 6104
- Joined: Thu Aug 25, 2016 7:34 pm
- Location: Connecticut USA
Re: 1944 M36 B1 Tank Destroyer
Extremely cool looking details as usual. I will be borrowing some ideas  for my Jackson....
for my Jackson....Tanks alot.... 
-
PainlessWolf
- Colonel
- Posts: 7877
- Joined: Sun Feb 26, 2012 9:09 pm
- Location: Southern Colorado Rocky Mountains
Re: 1944 M36 B1 Tank Destroyer
Good morning, Gentlemen!
Soeren, thank you, sir, I used annealed brass strips and folded them over and glued them in place.
The stakes were used when the vehicle was tasked to be used as an artillery piece and were for elevation aiming adjustment (I believe)
Artyfist, I got the cap color from the 'Walk Around' book. The tapered tip looked darker in the photo. I can paint the tip black as I was wondering about doing that.
Carl, thanks, Doc! I am _really_ looking forward to seeing you tackle one of these. You will have loads of fun!
Regards,
Painless
...Money!? What's that!?...
-
PainlessWolf
- Colonel
- Posts: 7877
- Joined: Sun Feb 26, 2012 9:09 pm
- Location: Southern Colorado Rocky Mountains
Re: 1944 M36 B1 Tank Destroyer
Today in Pueblo, I took time to pick up some Model Masters Flat Laquer coat and some gloss black. Tonight, I revisited the 'Walk Around' book and hemmed and hawed a bit then painted the tips of the Artillery Stakes black. After that, I finished detail painting the crew packs and got them de-lustered. After they dry overnight, I'll get them mounted on the vehicle. The last thing I have done is experiment with a better camera ( the one on my phone which is unearthly good ) than the workaday Canon I have been using for years for tank pics. Here we go:
- Attachments
-
- Progress with photos as well...
-
- Model Masters Flats have worked their magic taking the shine away
-
- Nice shiny black buckles
-
- ...now it looks a lot more like the 'Walk Around' picture
-
- Starting out with...
...Money!? What's that!?...
-
HERMAN BIX

- Major-General
- Posts: 11902
- Joined: Sun Jan 12, 2014 12:15 am
- Location: Gold Coast,Australia
Re: 1944 M36 B1 Tank Destroyer
I too am glad I got a pointer to use a phone camera over the digital I had been using.
Those wooden cleaning poles are the business Mr Painless
Those wooden cleaning poles are the business Mr Painless
HL JAGDPANTHER,HL TIGER 1,HL PzIII MUNITIONSCHLEPPER, HL KT OCTOPUS,HL PANTHER ZU-FUSS,HL STuG III,HL T34/85 BEDSPRING,
HL PZIV MALTA,MATORRO JAGDTIGER,HL F05 TIGER,TAMIYA KT,HL PANTHERDOZER,HL EARLY PANTHER G,TAIGEN/RAMINATOR T34/76,
HL AN-BRI-RAM SU-85
HL PZIV MALTA,MATORRO JAGDTIGER,HL F05 TIGER,TAMIYA KT,HL PANTHERDOZER,HL EARLY PANTHER G,TAIGEN/RAMINATOR T34/76,
HL AN-BRI-RAM SU-85
-
c.rainford73
- Major
- Posts: 6104
- Joined: Thu Aug 25, 2016 7:34 pm
- Location: Connecticut USA
Re: 1944 M36 B1 Tank Destroyer
Mr Painless with the washes applied everything looks brilliant
Tanks alot....
