Page 22 of 37
Re: Building a Mid-Production Normandy Tiger 1
Posted: Tue Jan 13, 2015 12:20 am
by PainlessWolf
Good Afternoon,
Now that the December Pershing repair is complete, I can finally unbox my Taigen Tiger 1 kit and get started. Your work is inspiring and I know I will be visiting these pages along with other folks. Following along, ;o)
regards,
Painless
Re: Building a Mid-Production Normandy Tiger 1
Posted: Tue Jan 13, 2015 8:07 pm
by tanks_for_the_memory
Re: Building a Mid-Production Normandy Tiger 1
Posted: Tue Jan 13, 2015 11:13 pm
by tanks_for_the_memory
The next stage:
- This was my first attempt before I realized that I needed to sand back the plastic strip along the turret roof.jpg (32.25 KiB) Viewed 4325 times
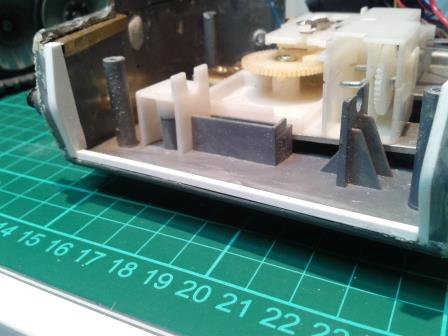
- Here a piece of square section plastic rod has been glued beneath the turret roof - in the later mod I did the same but moved it back in line with the new turret roof profile.jpg (31.06 KiB) Viewed 4325 times
After sanding back the front of the turret roof I then glued the square rod back in place but left it slightly protruding to give the impression of the thin metal strip.
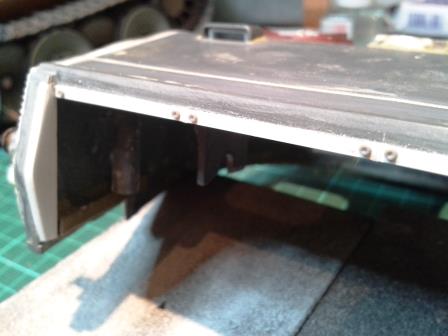
- The square section plastic rod was fixed beneath the roof so that it stuck forward very slightly to give the illusion of the metal strips.jpg (25.64 KiB) Viewed 4325 times
On the real tank this was split into three equal parts with each piece secured by two bolts. To measure the splits correctly I used a ruler: each turned out to be exactly 3cms long:
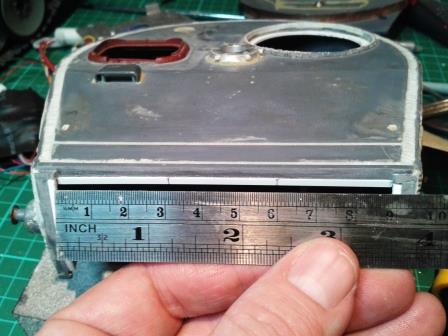
- The strip was marked into thirds each 3cms across and the two joins etched in with a file.jpg (33.53 KiB) Viewed 4325 times
The joins between the three sections of strip were etched in with the edge of a triangular needle file - this might have been a little easier had I done it before gluing the square rod in place!
The bolts securing this strip in place were quite distinctive - round on the outside with recessed hex-head bolts in the middle. Luckily I found the perfect solution in a Meng Nuts & Bolts set.
These Meng sets are excellent value - £4.60 each and identical on each side they provide literally hundreds of different sized bolts in varying sizes moulded in good quality styrene (so almost a lifetime's supply!). You simply have to slice them off using a sharp blade and glue them in place.
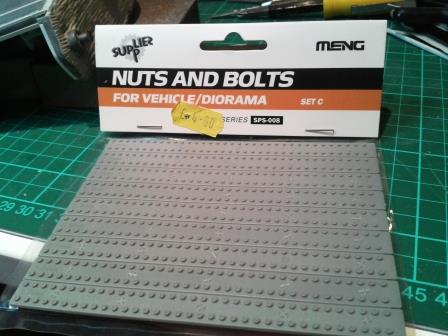
- The Meng Nuts & Bolts Set C is the ideal source for the correct pattern fixings.jpg (35.81 KiB) Viewed 4325 times
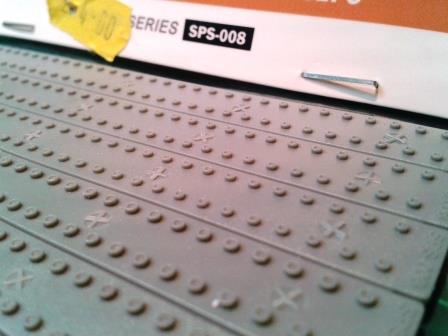
- These can simply be shaved off with a sharp knife and glued in place.jpg (28.16 KiB) Viewed 4325 times
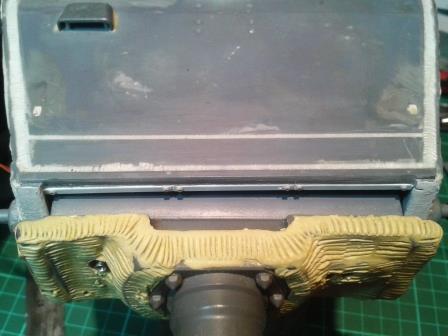
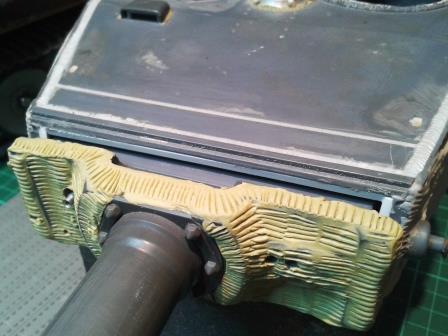
- Here you can see the new front profile of the turret roof front and the fixing strips with bolt detail in place.jpg (28.65 KiB) Viewed 4325 times

- An overhead view shows how the front of the turret roof has been set back and the front of the turret sides are now thicker and more prominent.jpg (31.14 KiB) Viewed 4325 times

- A close up with primer applied....jpg (31.96 KiB) Viewed 4325 times
Well I hope that's not too hard to follow. The good news is that now I have finally finished the 'mechanicals' on my turret I no longer need to keep taking it apart. Which means I can now start putting all of that lovely detail back on for good: the new cupola, the track hangers, the stowage bin - I can hardly wait!
Re: Building a Mid-Production Normandy Tiger 1
Posted: Sat Feb 07, 2015 8:26 pm
by edpanzer
Excellent build can't wait for the next installment
Re: Building a Mid-Production Normandy Tiger 1
Posted: Wed Feb 11, 2015 10:08 am
by Abe Froman
What a great thread. Hello, I am a Newby to 1/16 tanks, but have bought the Heng Long Tiger a few weeks ago after seeing some dioramas on the RPF site. Well they got the juices flowing.
I have been studying this thread over and over and just have to say thanks for 1...indicating what needs to be done and 2. showing beautiful responses to the models problems. Your Tiger is a work of Art. Will be following this thread till the end.


Hi all BTW

Re: Building a Mid-Production Normandy Tiger 1
Posted: Wed Feb 11, 2015 11:04 am
by HERMAN BIX
I agree Mr Froman, it will almost be a shame to have it completed

....................Almost Mr Tanks
Re: Building a Mid-Production Normandy Tiger 1
Posted: Wed Feb 11, 2015 1:24 pm
by Abe Froman
Tanks FTM, just a quick question. When you did the weld seams along the top deck length of the tank, it looks like you removed the two pole things (sorry awaiting reference books) which are moulded into the hull ( one either side towards the rear of the tank ). What were they and would a Tiger really have two of them?
My Tiger will be a Jan 43 model so Early.
My Tiger will also be no where near as good as yours but I can live with that
Re: Building a Mid-Production Normandy Tiger 1
Posted: Wed Feb 11, 2015 1:54 pm
by jarndice
Hi Abe, Welcome to the Forum, Those "Pole Things" are Aerial Stowage Tubes, and their inclusion on 1/16 Tiger 1s is a never ending source of annoyance,
TAMIYA were the originators of the 1/16 r/c mass produced Tank. The first Tiger 1 that they sold had two aerial stowage tubes EVEN though the real thing only had ONE on the left rear flank (looking from the front) They were very expensive kits and indeed for a kit they are still pricey which is why they had no competition for many years,
Then The Peoples Republic of China discovered the market economy and with labour costs so much less than Japan, HENG LONG produced the RTR (Ready to Run) Tiger 1, there were cries of copy from people in the trade which were denied by HENG LONG, a denial which would have been more believable if only it too didn't also have TWO AERIAL STOWAGE TUBES!!!!
It is not as easy to remove the extra tube as some people think, I have a scar on my thumb to prove it! but it is worth doing.
ABE read the builds on the HENG LONG BUILDS section of the Forum and you will soon see the same old faults being corrected again and again, TAMIYA no longer fit two tubes I believe but everyone else does and that includes a wrongly mounted Cupola and a lot of other mistakes.
shaun
Re: Building a Mid-Production Normandy Tiger 1
Posted: Wed Feb 11, 2015 3:04 pm
by DavidByrden
Abe Froman wrote:My Tiger will be a Jan 43 model so Early.
Interesting. A January '43 would require a lot of work to make it accurate.
Will it have the S-mine system or not? Because the Tiger always has an antenna tube on the rear right hull, but if it's previous to the S-mine system, the tube should have its wide end at the back and should overhang the hull rear a little.
Like this;

David
Re: Building a Mid-Production Normandy Tiger 1
Posted: Wed Feb 11, 2015 4:29 pm
by SovereignZuul
jarndice wrote:It is not as easy to remove the extra tube as some people think
You ain't just wistlin' Dixie.

The turret mods look great, TFTM!