Page 21 of 41
Re: HL Panther G customization diary
Posted: Sat Feb 16, 2013 4:26 pm
by jeff1101
Updates - cont'd - Odds and Ends
I thank Jbuckley for this mod. I didn't realize (until I read his thread) that the HL travel lock was missing the fastening bolt bracket. I always assumed the travel lock was welded on.
Here is the photo after I added it.

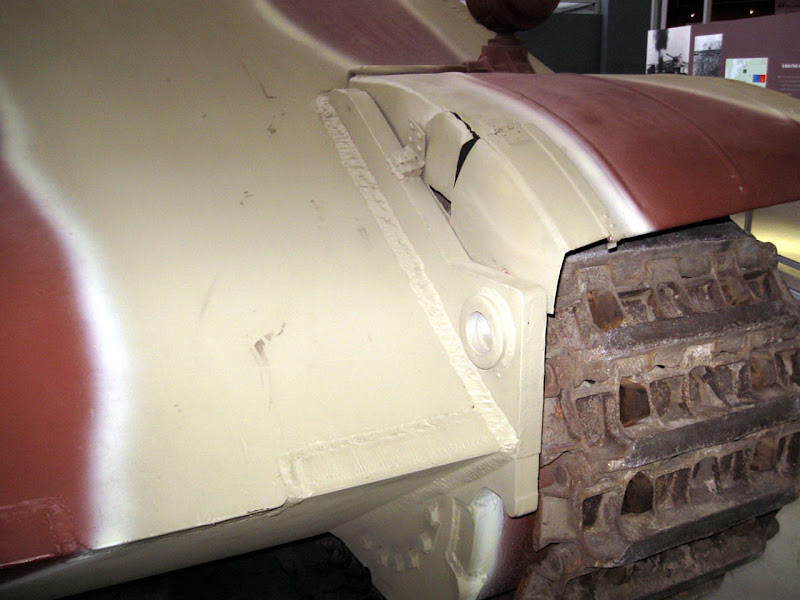
Since the main gun is offset to the right (fun fact,

the 75 mm gun is not centered in the mantlet but actually offset to the right), the gun travel lock was offset (of the armored ventilator cover) to the right as well.
To make room for the fastening bolts, the left fastening bolts are actually outboard of the travel lock while the right fastening bolts are inboard. See pic below for what I mean. (and this is what I have done on my panther as well)

I also added some brackets attached to the front wing.


And on the real panther. (from blog.net-maquettes)
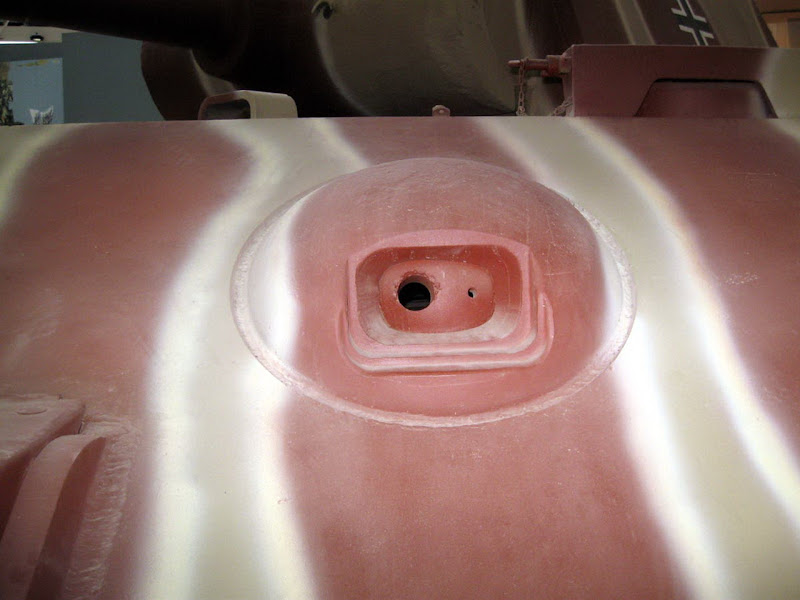
Finally I drilled a hole in the MG ball to serve as an aiming sight for the machine gunner.

Re: HL Panther G customization diary
Posted: Sat Feb 16, 2013 4:35 pm
by jeff1101
Updates cont'd. - Technique for adding countersunk bolt heads
I also added some details in the forward upper deck. I included this as some might find it helpful.
First drill .08 holes on the countersinks.

Cut pieces of .08 styrene rods.

Insert the rods to the hole making sure that it is flush with the countersink. Glue the rods on the opposite (hidden) side.

Voila! Nice countersunk bolts.

Re: HL Panther G customization diary
Posted: Sat Feb 16, 2013 7:10 pm
by maxmekker
gone mental would be word here. hehe , it's a joy to read this build log, thanks again for sharing, and I must comment on the pic's, they are top notch.
Re: HL Panther G customization diary
Posted: Thu Feb 21, 2013 3:09 pm
by jeff1101
Updates - 02/21/13 - Last tool rack finished
Again thanks for the comments and kind words guys. Your continued support give me the patience to soldier on even if at times this build drives me absolutely batty.

And with that a minor milestone. I have finally finished detailing the last tool rack. I added the clamps for the tool rack that hold the hammer and track repair tools on the side of the tank. The tools remain removable for separate painting from the rest of the tank.
The only unfinished task left to do is attaching the schurzen hangers kit from Aber. I'll show how I attached them and also do a mini review of the kit for maxmekker.

Also I finally bought my first airbrush. The owner of the model shop where I bought it from (who does his own model painting, although he is not into RC) was kind enough to offer his help and experience in the painting and weathering of the tank. His shop is very close to where I work so I promised him in return I will buy all my paint supplies from him.


On his advice I plan to decant the primer into the airbrush and spray the primer there. Although less convenient, he says it will allow me to practice using the airbrush and learn its controls.
Re: HL Panther G customization diary
Posted: Thu Feb 21, 2013 8:35 pm
by maxmekker
nice nice. What brand of AirBrush did you get, I can't make it out on the pic.
The grey primer sprays on nicely right out of the can, it can be tricky to get it into the ab cup without it blowing all over.
I prefer the grey primer over the tamiya white, it makes smoother finish and it's easy to spot flaws with the grey.
I have tried the vallejo primer to, airbrush ready( just poor and spray) I find it can be easy removed with my finger nails, where the tamiya really stick's to the surface.So overall, tamiya grey primer is preferd.
ps, looking fw to the review

Re: HL Panther G customization diary
Posted: Thu Feb 21, 2013 9:35 pm
by hotte8487
Hi Jeff1101,
I see it just like Maxmekker, the tamiya surface primer is good enough so that you can use him right out of the can. A little hint: warm up the can in warm water carefully up to 30 degrees Celsius (I believe this are 86 degree Fahrenheit), so you will have the best pressure for spraying. Also important before use is to shake the can tidy. The distance during spraying to the model should be around 20 centimeters; it's better to make previously a little sample. And, let the primer good dry (some days) before it goes on with the base color.
Much success!
Re: HL Panther G customization diary
Posted: Thu Feb 21, 2013 11:05 pm
by lister fiend
unbelievable patience you have,
a year in the making!
and a fantastic step by step guide to boot
getting close now though

good work fella!
your attension to detail is something to be looked up to
& i take my hat off to you
lister
Re: HL Panther G customization diary
Posted: Fri Feb 22, 2013 12:22 pm
by jonger
Eastern Front wrote:
Another good option is automotive primer, beleive it or not.. It is designed to show imperfections (in the case of modellers, the details) and is also designed to adhere real well.. I use the Krylon if you can get it, best paint around!
You need to make sure it is only primer though, a lot of the DIY primers in the UK are "primer fillers" designed to fill imperfections to help the amateur car repairer so detail will be lost if you use them and not the professional grade primers.
Re: HL Panther G customization diary
Posted: Fri Feb 22, 2013 2:19 pm
by jeff1101
Thanks for the advice on the primer application guys. Although I have not made up my mind yet, I am now leaning to just spraying the primer direct from the can.
nice nice. What brand of AirBrush did you get, I can't make it out on the pic.
Hi maxmeker, the brand is mikrotek. The hobby shop owner recommended it as he has spare parts for needles and valves if it needs replacing. I'll do a mini review of it too when I start using it.
Re: HL Panther G customization diary
Posted: Fri Feb 22, 2013 3:35 pm
by maxmekker
good, was it pricy ? up to now I have used the hobbyking AB. It's ok

I don't want to pay a lot for an AB that do the same job as the cheap hobbyking one , hehe