Page 3 of 6
Re: [NATO/Cold War] Portugal M5A1 "Gina"
Posted: Thu Dec 11, 2025 4:13 pm
by Stormbringer
and once pointed out its hard to ignore

Re: [NATO/Cold War] Portugal M5A1 "Gina"
Posted: Thu Dec 11, 2025 8:03 pm
by ColemanCollector
Getting down to the nitty-gritty of detailing and correcting. and found these great and unexpected sites for Stuart reference photos--vehicle auction sites! Each Stuart has a hundred plus images taken in great light, and because they're selling to a potentially remote buyer, they crawl all over, around, and under the tanks. Scroll down to the pics in each listing. A treasure trove of M5A1 goodness!
https://bringatrailer.com/listing/1952-m5a1-stuart/
https://bringatrailer.com/listing/1943- ... m5a1-tank/
https://bringatrailer.com/listing/1944- ... m5a1-tank/
https://bringatrailer.com/listing/1944-stuart-m5a1/
Mike.
Re: [NATO/Cold War] Portugal M5A1 "Gina"
Posted: Thu Dec 11, 2025 9:07 pm
by Ecam
Terrific source for pictures.
Re: [NATO/Cold War] Portugal M5A1 "Gina"
Posted: Fri Dec 12, 2025 3:45 pm
by Herr Dr. Professor
Do they come with the transmitter and receiver already installed?
Re: [NATO/Cold War] Portugal M5A1 "Gina"
Posted: Fri Dec 12, 2025 4:28 pm
by ColemanCollector
Herr Dr. Professor wrote: ↑Fri Dec 12, 2025 3:45 pm
Do they come with the transmitter and receiver already installed?
And the famous "Batteries not included" said in the fastest and lowest voice possible.
If I was some Richie Rich guy, I know what I'd be spending my $500k CAD vehicle budget on...and it wouldn't be a new Ferrari.
Mike.
Re: [NATO/Cold War] Portugal M5A1 "Gina"
Posted: Tue Dec 16, 2025 8:25 pm
by ColemanCollector
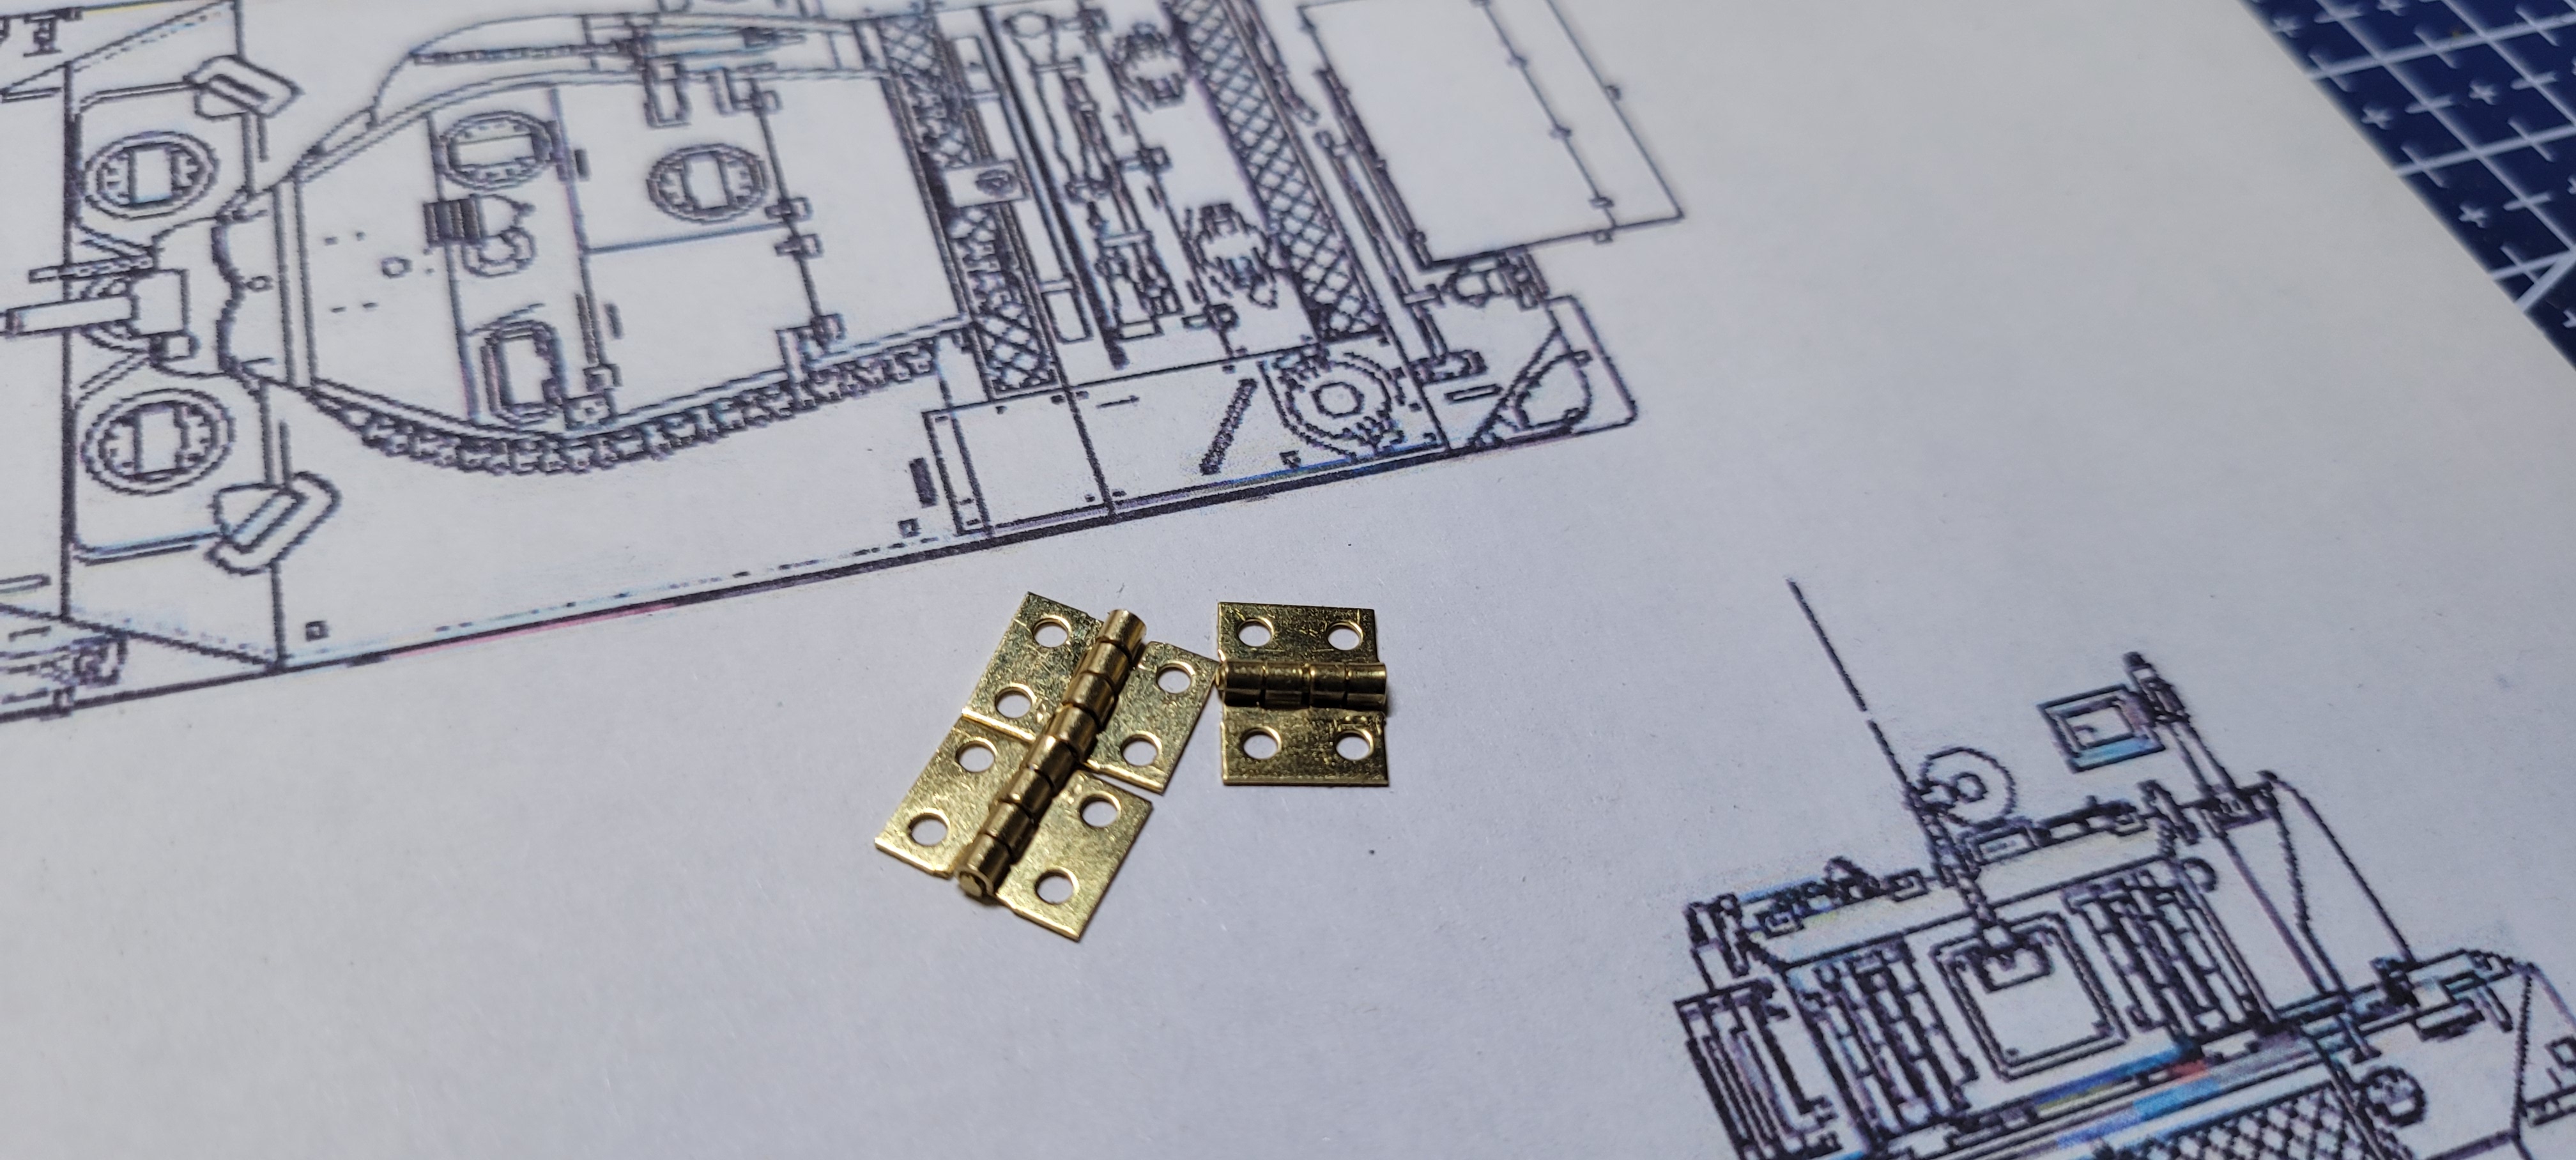
Figured before fitting new fenders, I'd get the rough stuff on the upper body completed. Off come the 36DDD hinges as flush as I could get them for final sanding with my soon to arrive--hopefully--mini detail sander.
- 20251216_133114.jpg (1.65 MiB) Viewed 1452 times
Hinges just arrived so I'll be trimming, extending, and fastening them later to look more Stuartish. They'll still be oversize, but not quite so silicon implant-like.
- 20251216_151111.jpg (1.11 MiB) Viewed 1452 times
- D86A1851-60795-scaled.jpg (203.35 KiB) Viewed 1452 times
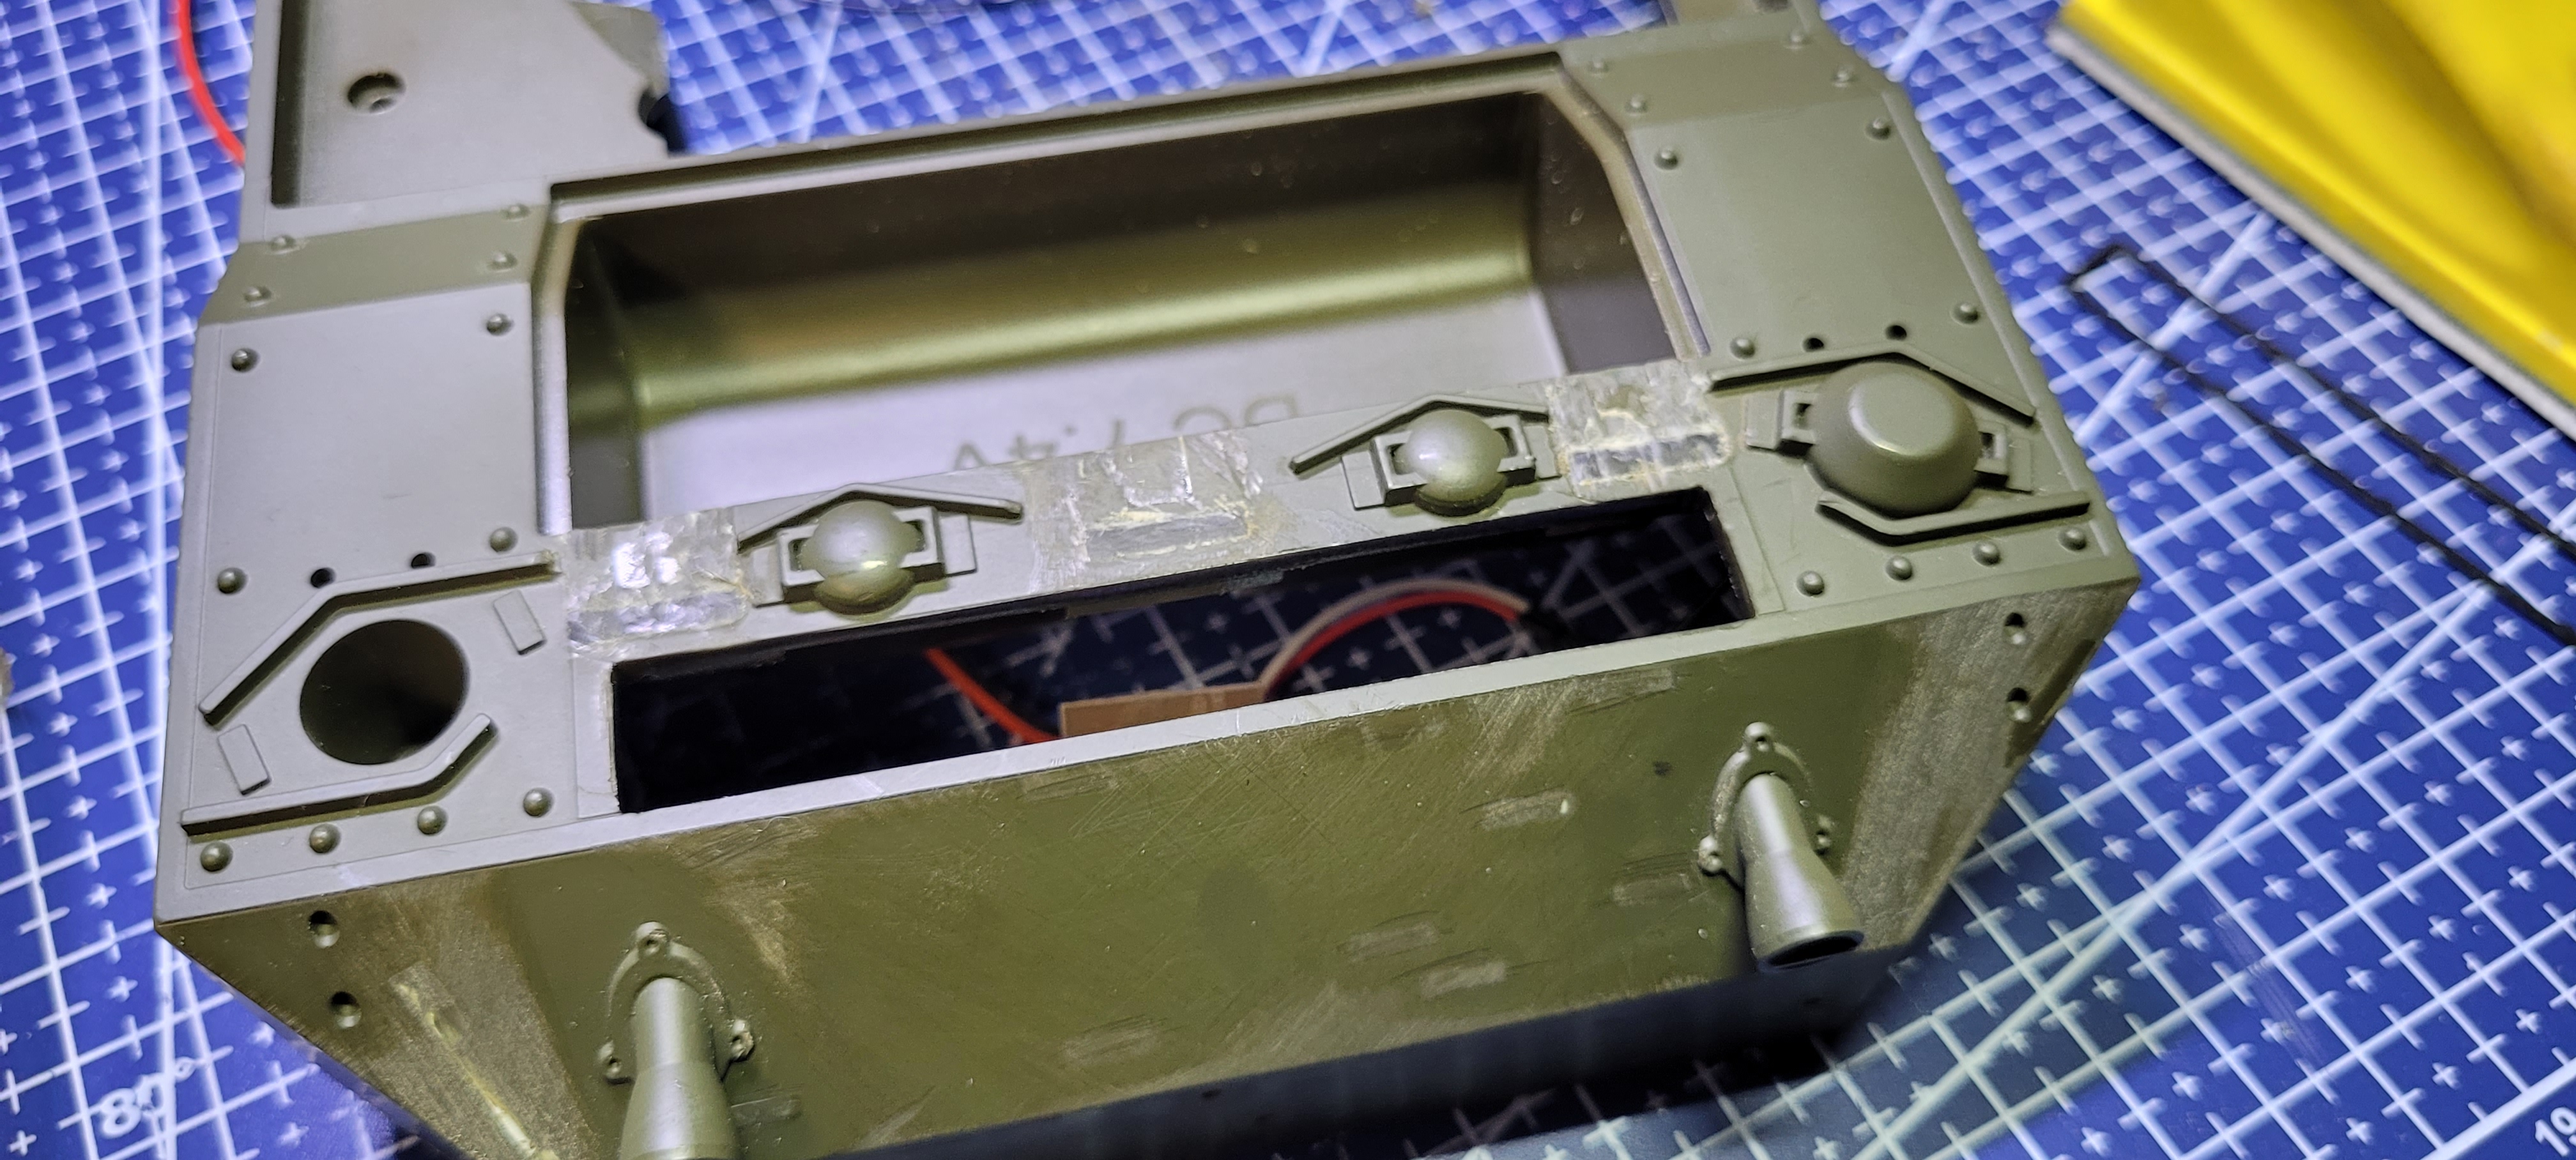
I also opened up the rear mesh ventilation rectangle on the back deck for a better look, and also to let more sound out from the anemic Coolbank sound system.

- 20251216_133114.jpg (1.65 MiB) Viewed 1452 times
And then things got crazy! As you can see in this pic, the mesh has a thin steel frame holding it down on the real deal.
- D86A1850-60785-scaled.jpg (521.67 KiB) Viewed 1452 times
Enter "Tinkercad" and my retired brain learning how to design a 3D part, and then actually printing it. Tinkercad is pretty basic, simple and free, and the website showed elementary grade students learning how to use it. Perfect, that's about my speed!
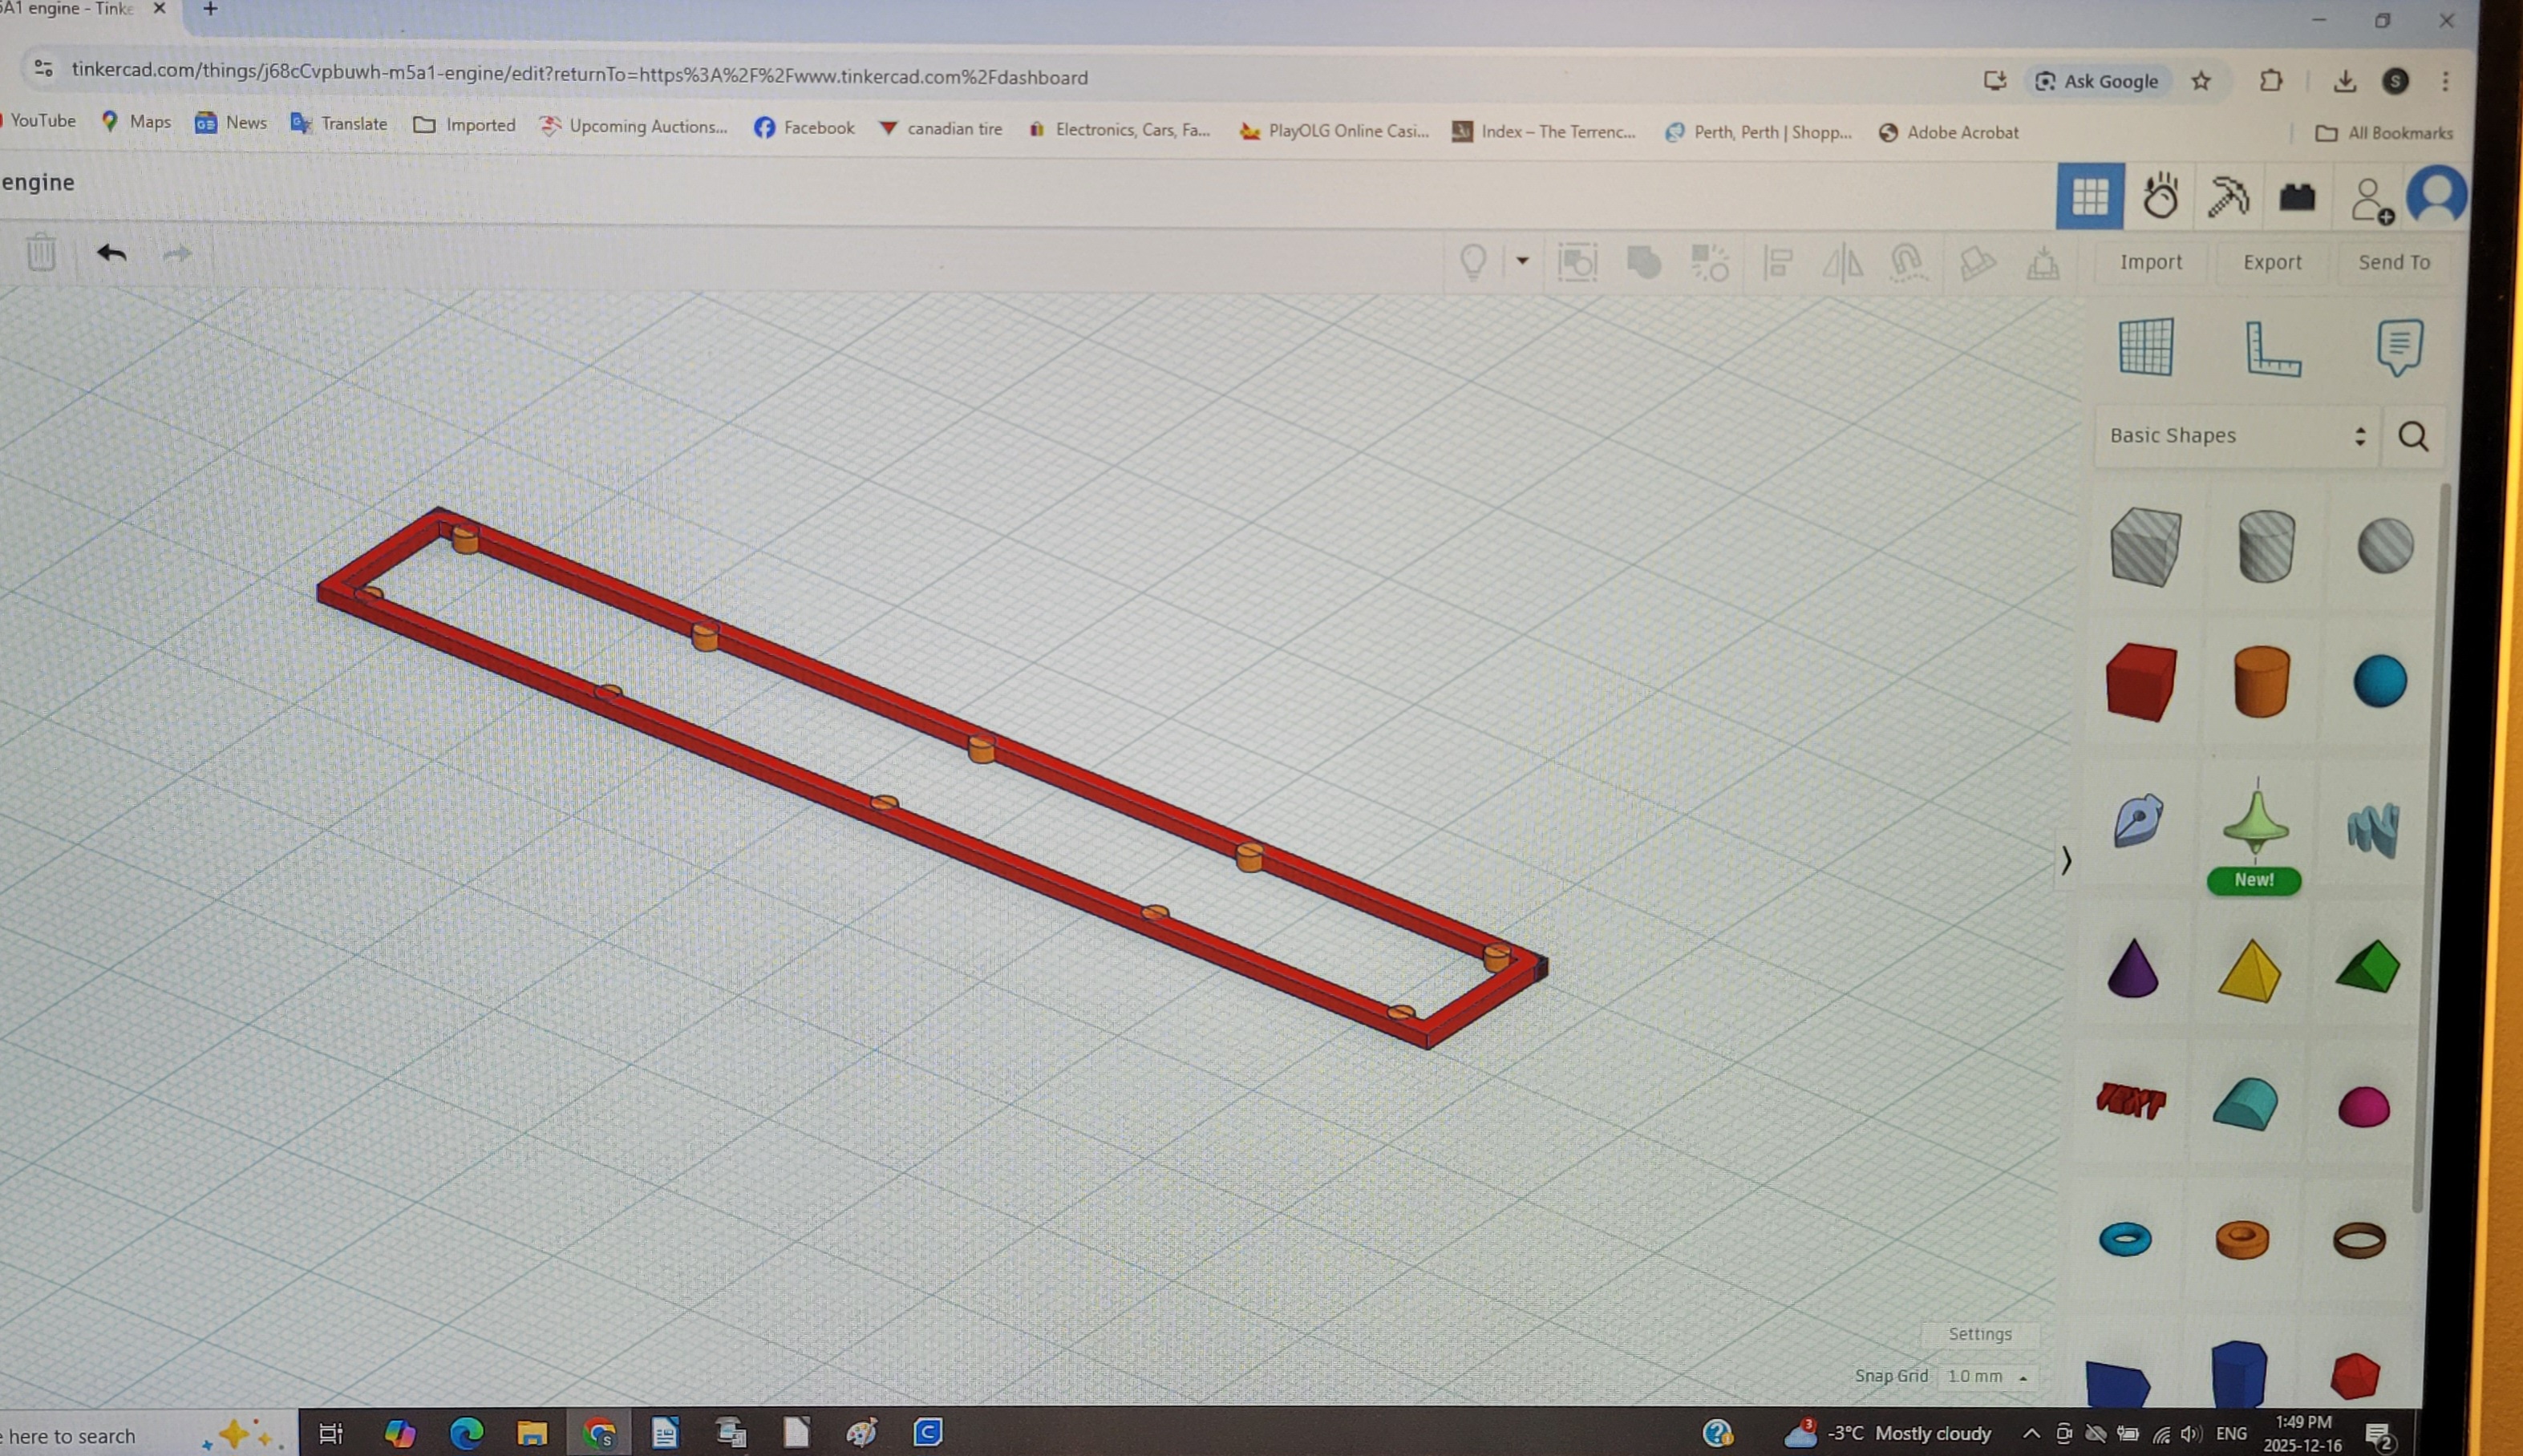
- 20251216_134936.jpg (1.44 MiB) Viewed 1452 times
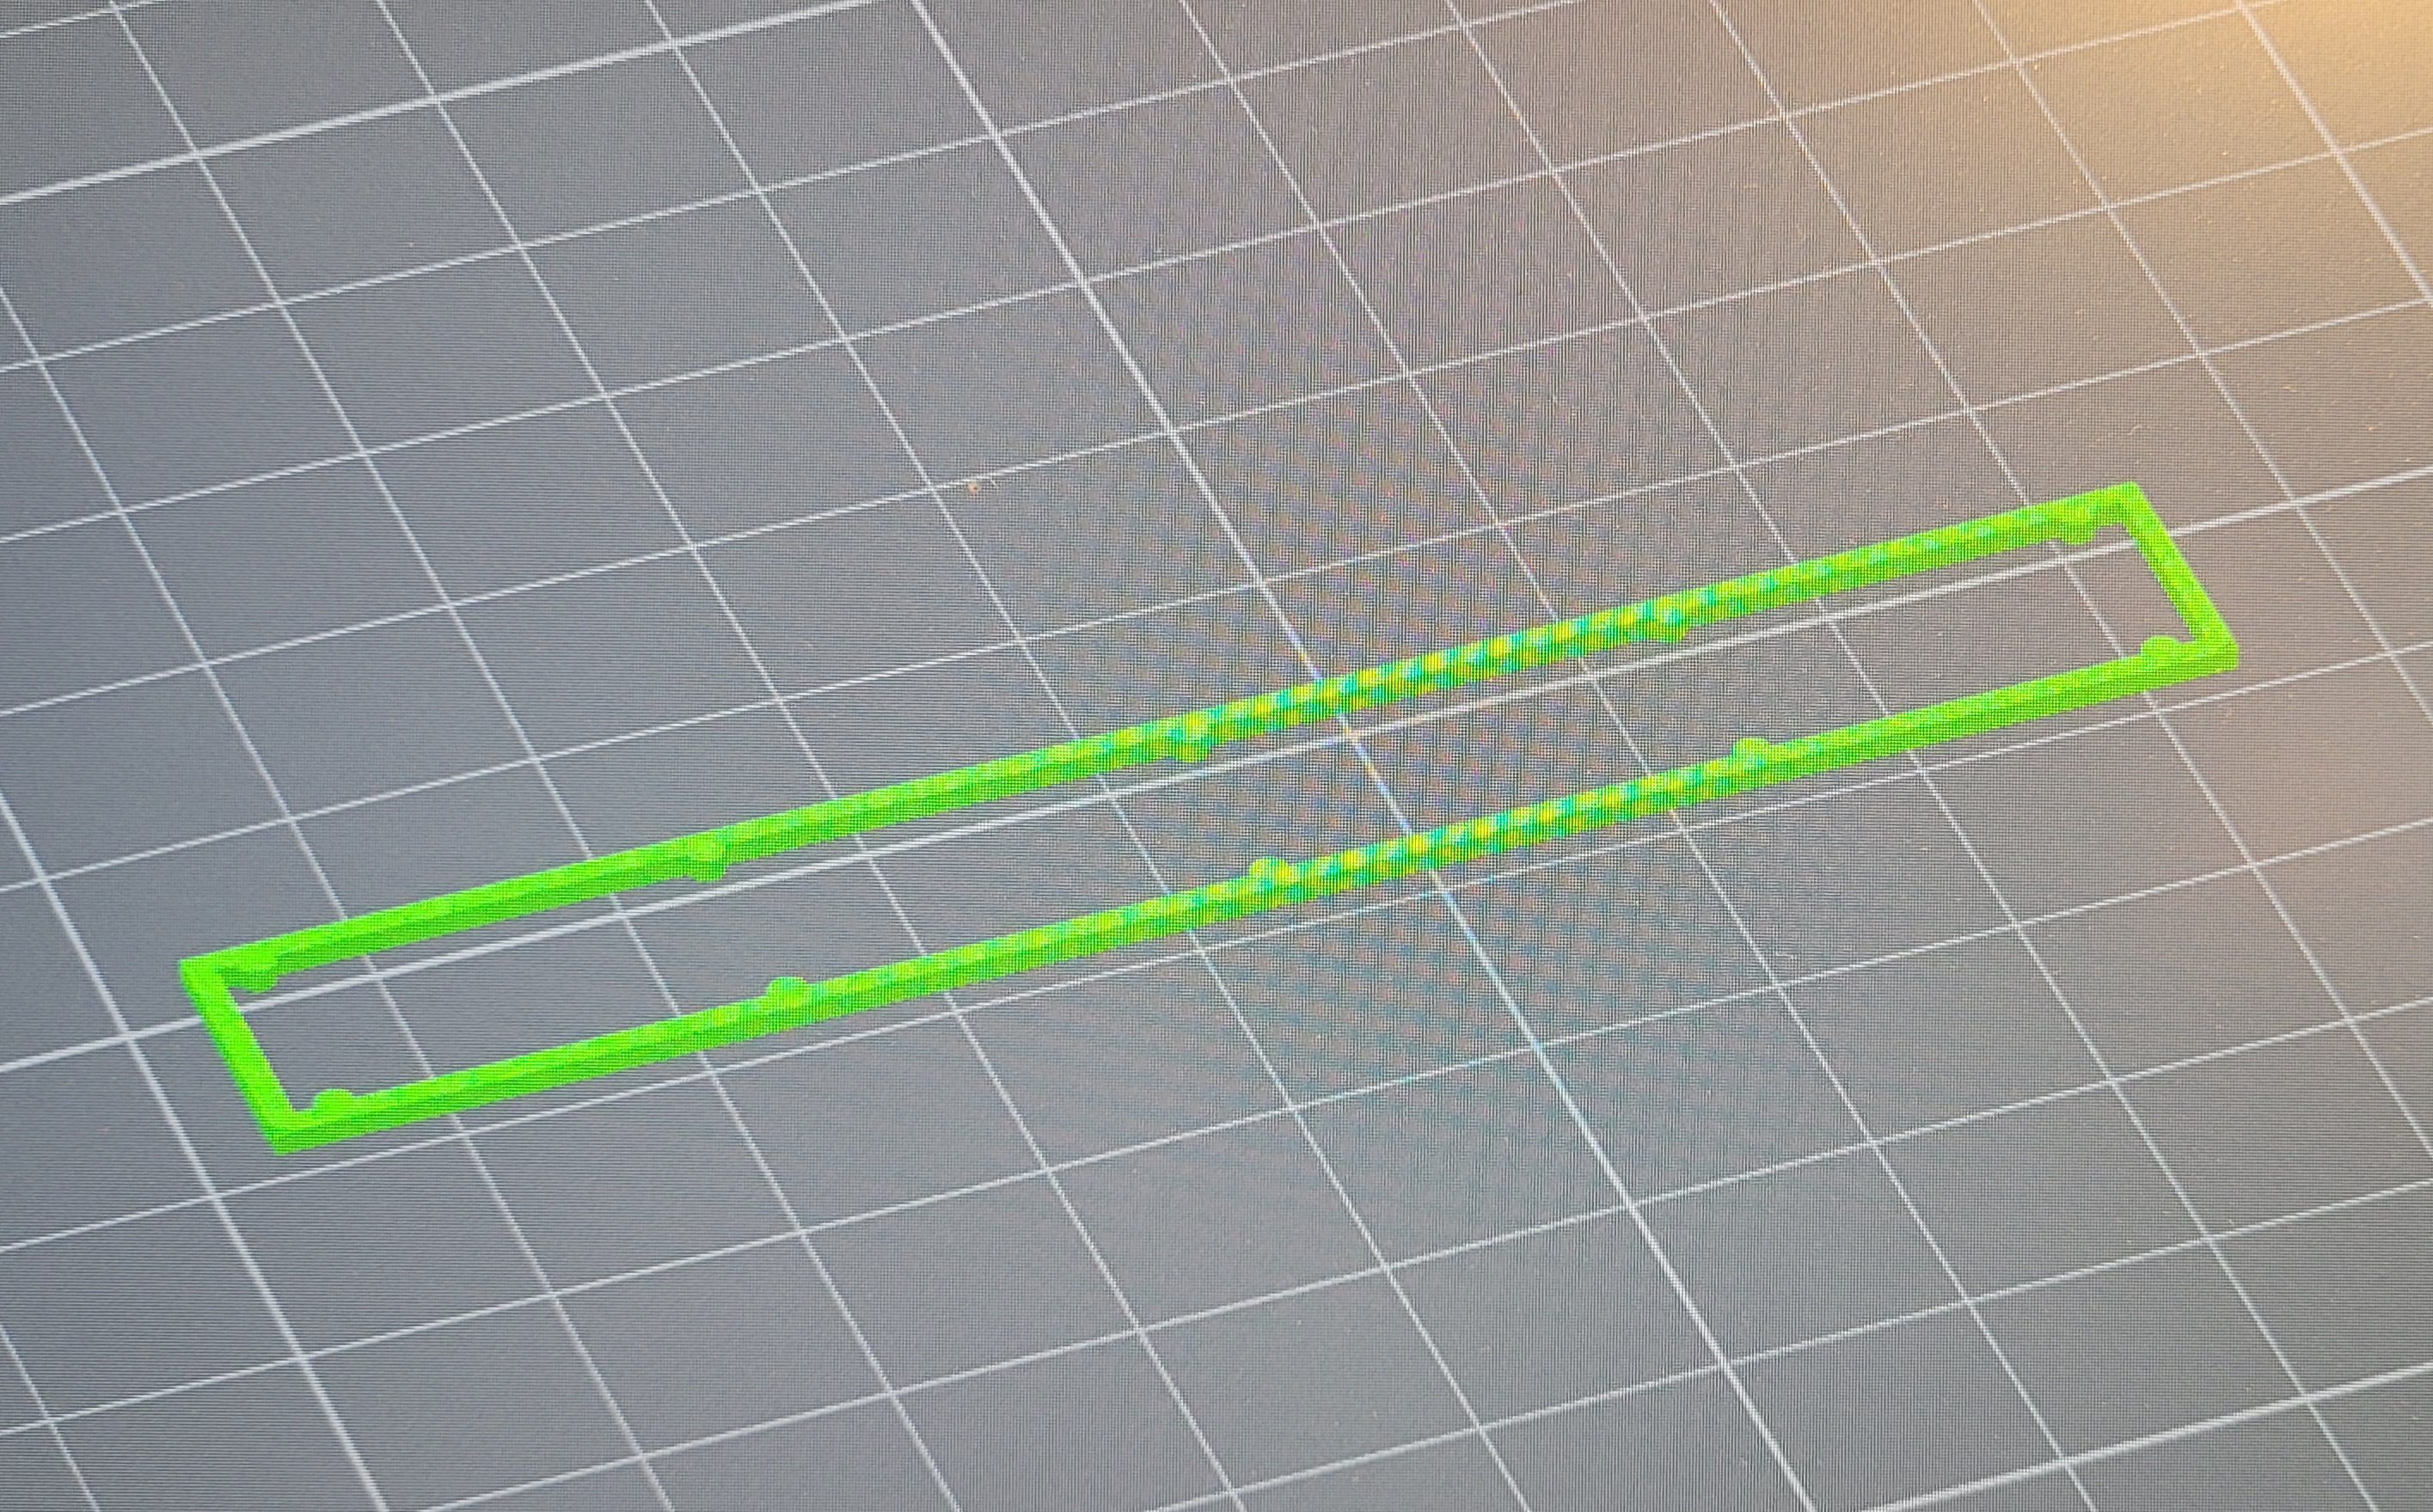
- 20251216_134840.jpg (1.86 MiB) Viewed 1452 times
Tadaaa! A frame for over the mesh! I feel like a little kid making their first clay ashtray for their Mom and Dad.
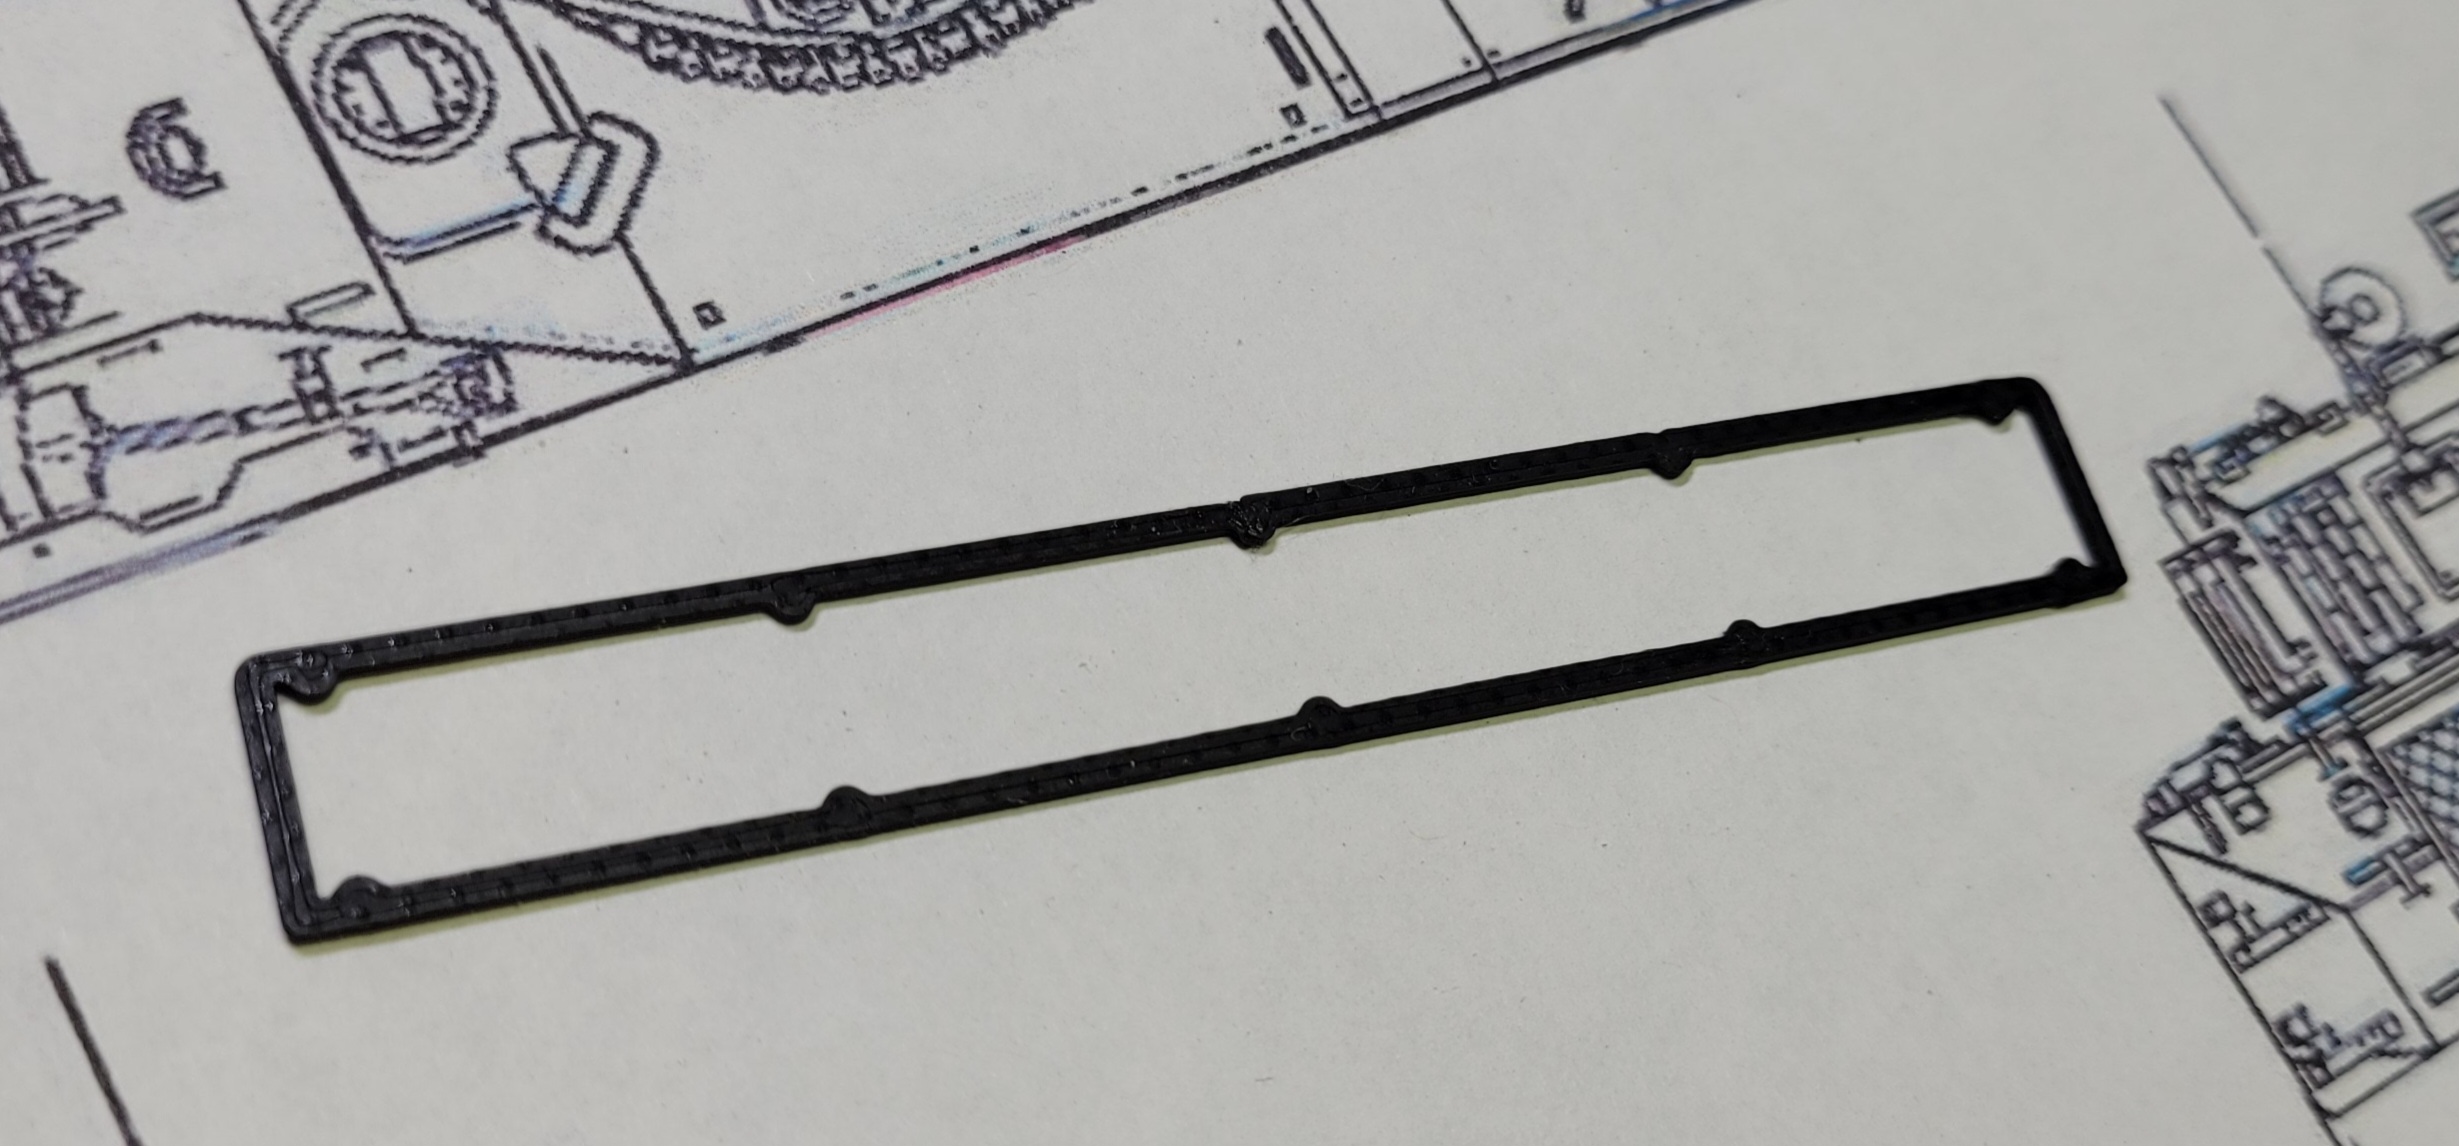
- 20251216_133216.jpg (476.86 KiB) Viewed 1452 times
Next up, hinging the battery/engine hatch, installing the mesh and its cover, and printing a cargo box.
Mike.
Re: [NATO/Cold War] Portugal M5A1 "Gina"
Posted: Thu Dec 18, 2025 6:17 pm
by ColemanCollector
A fun little job to add some very obvious detail that Coolbank left off. Those cool little screw heads on the back flanks. Some silver bling for Gina!
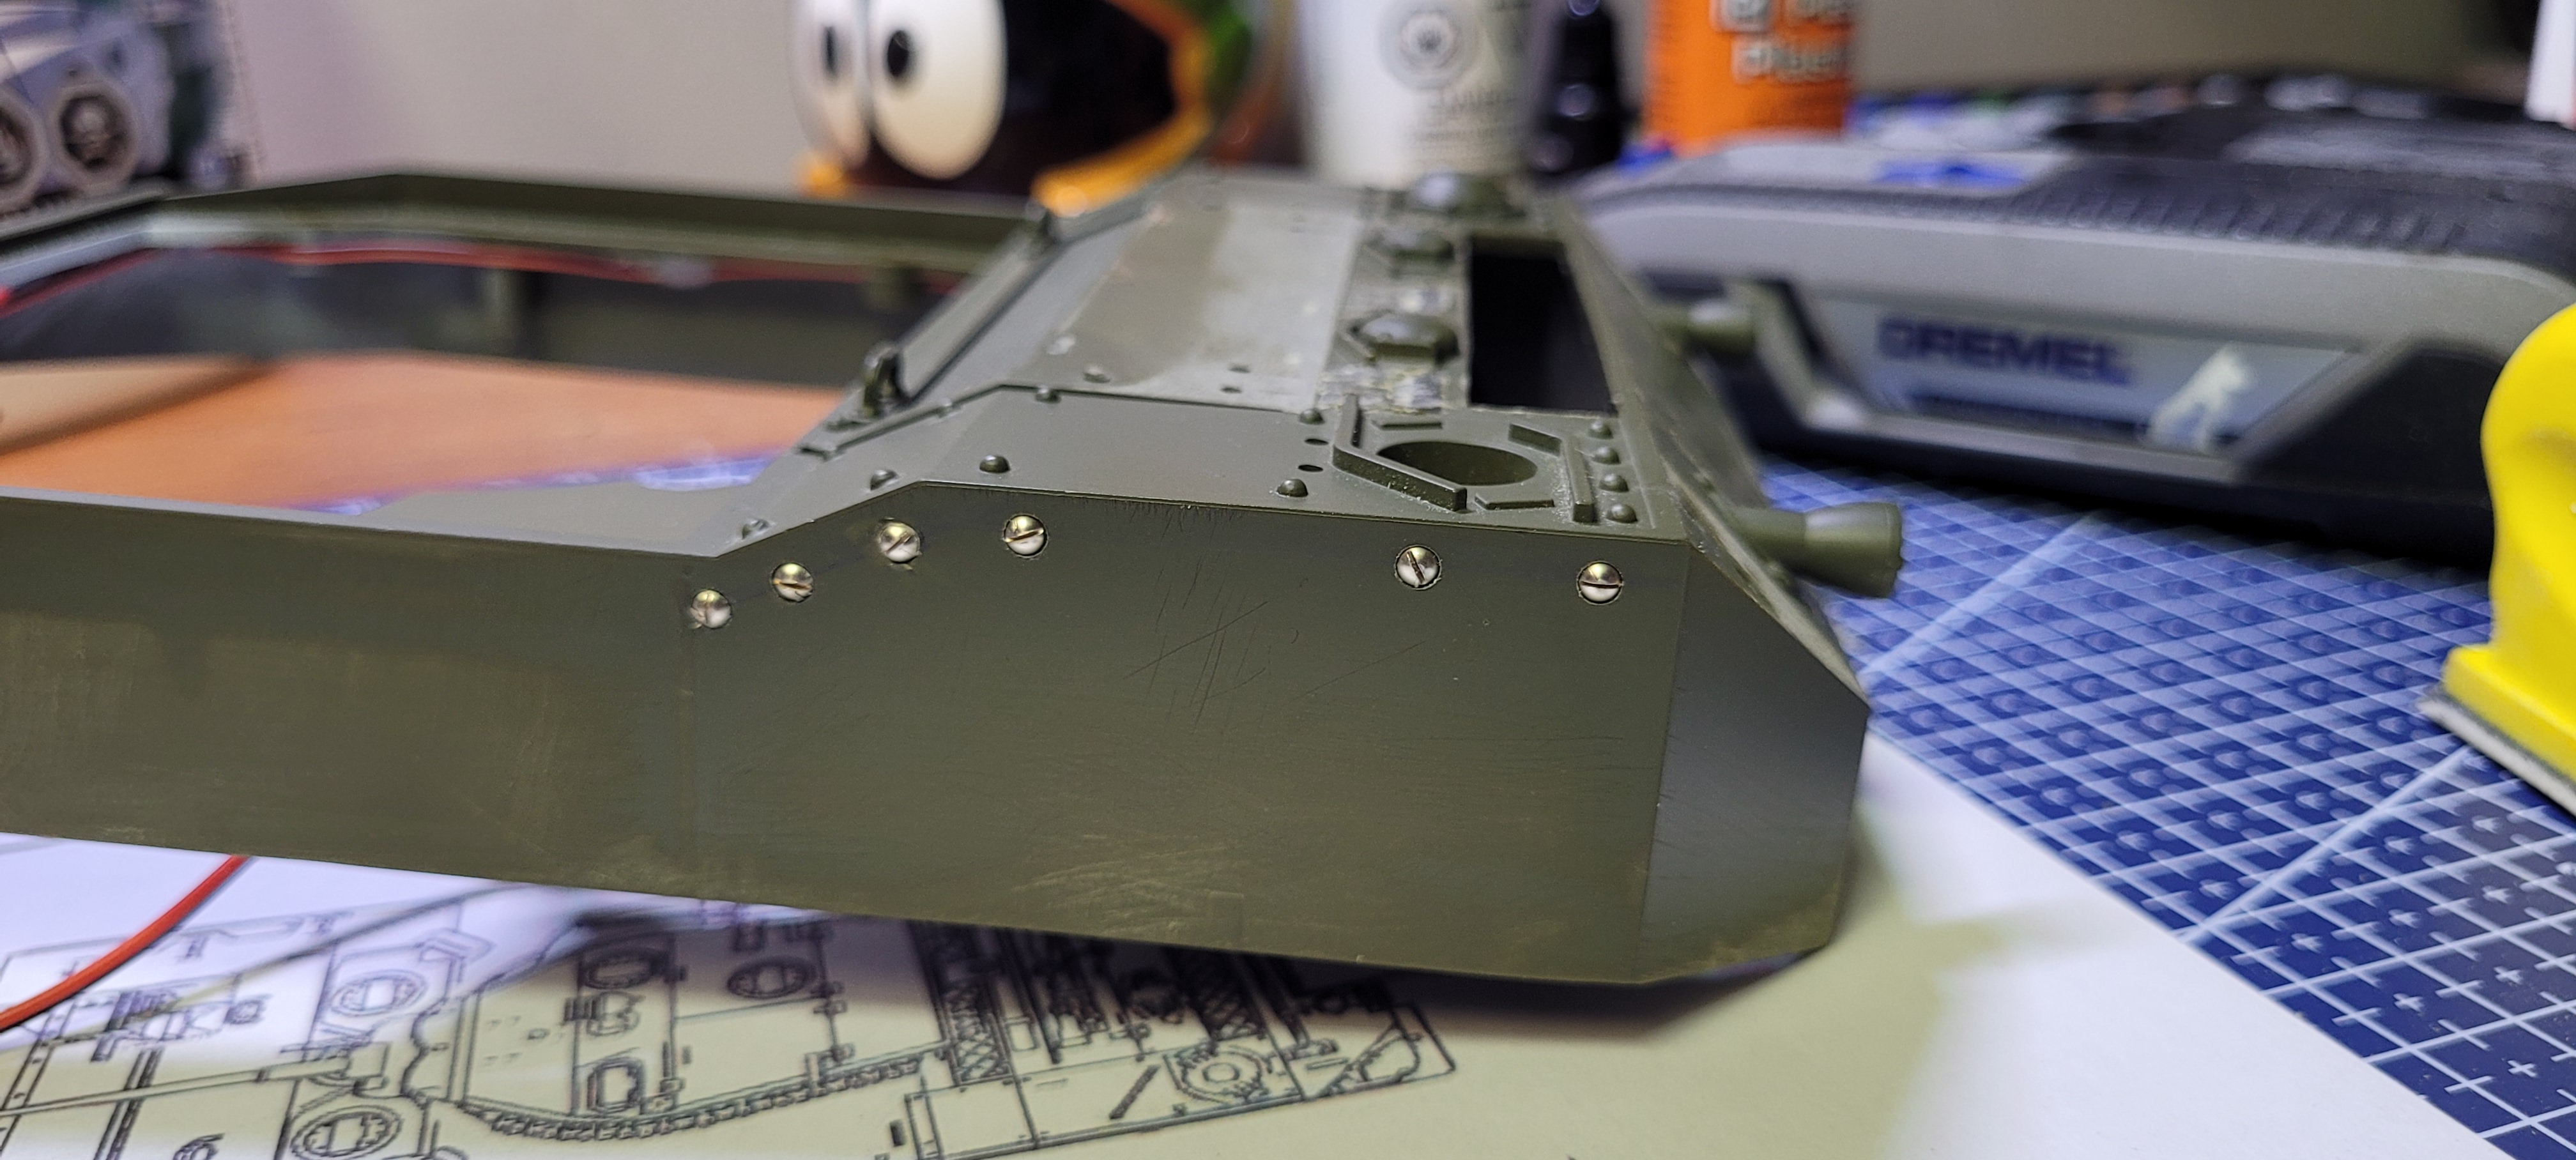
- 20251216_133340.jpg (1.59 MiB) Viewed 1387 times
Mike.
Re: [NATO/Cold War] Portugal M5A1 "Gina"
Posted: Fri Dec 19, 2025 4:26 pm
by ColemanCollector
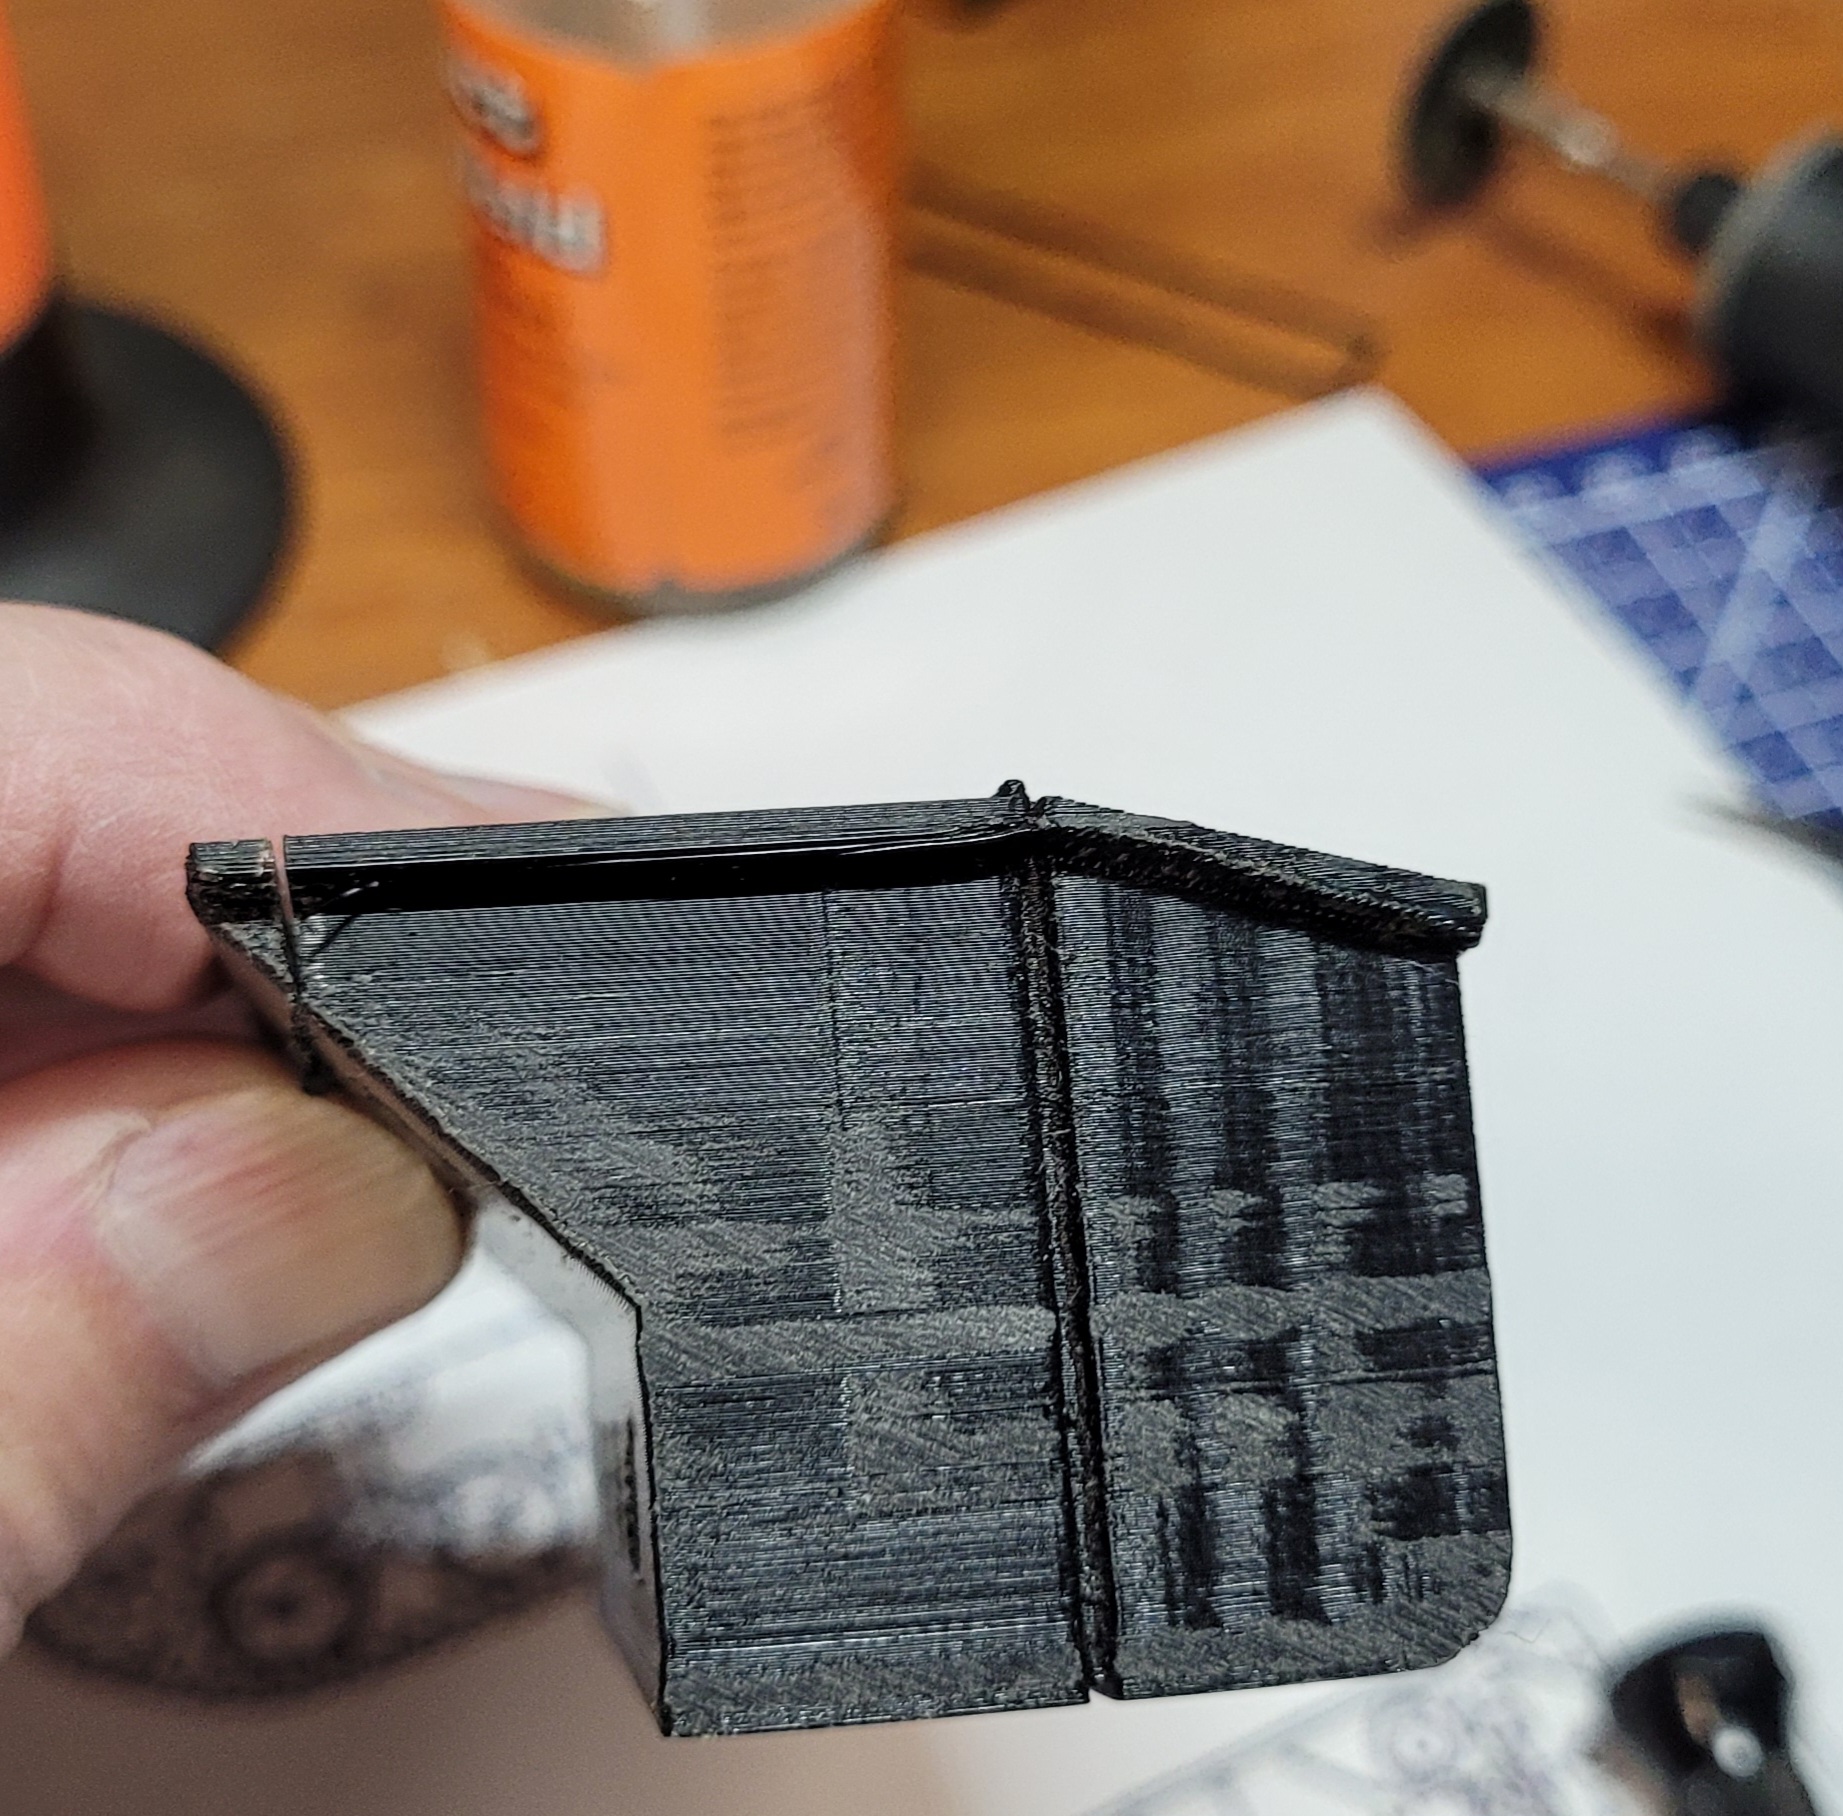
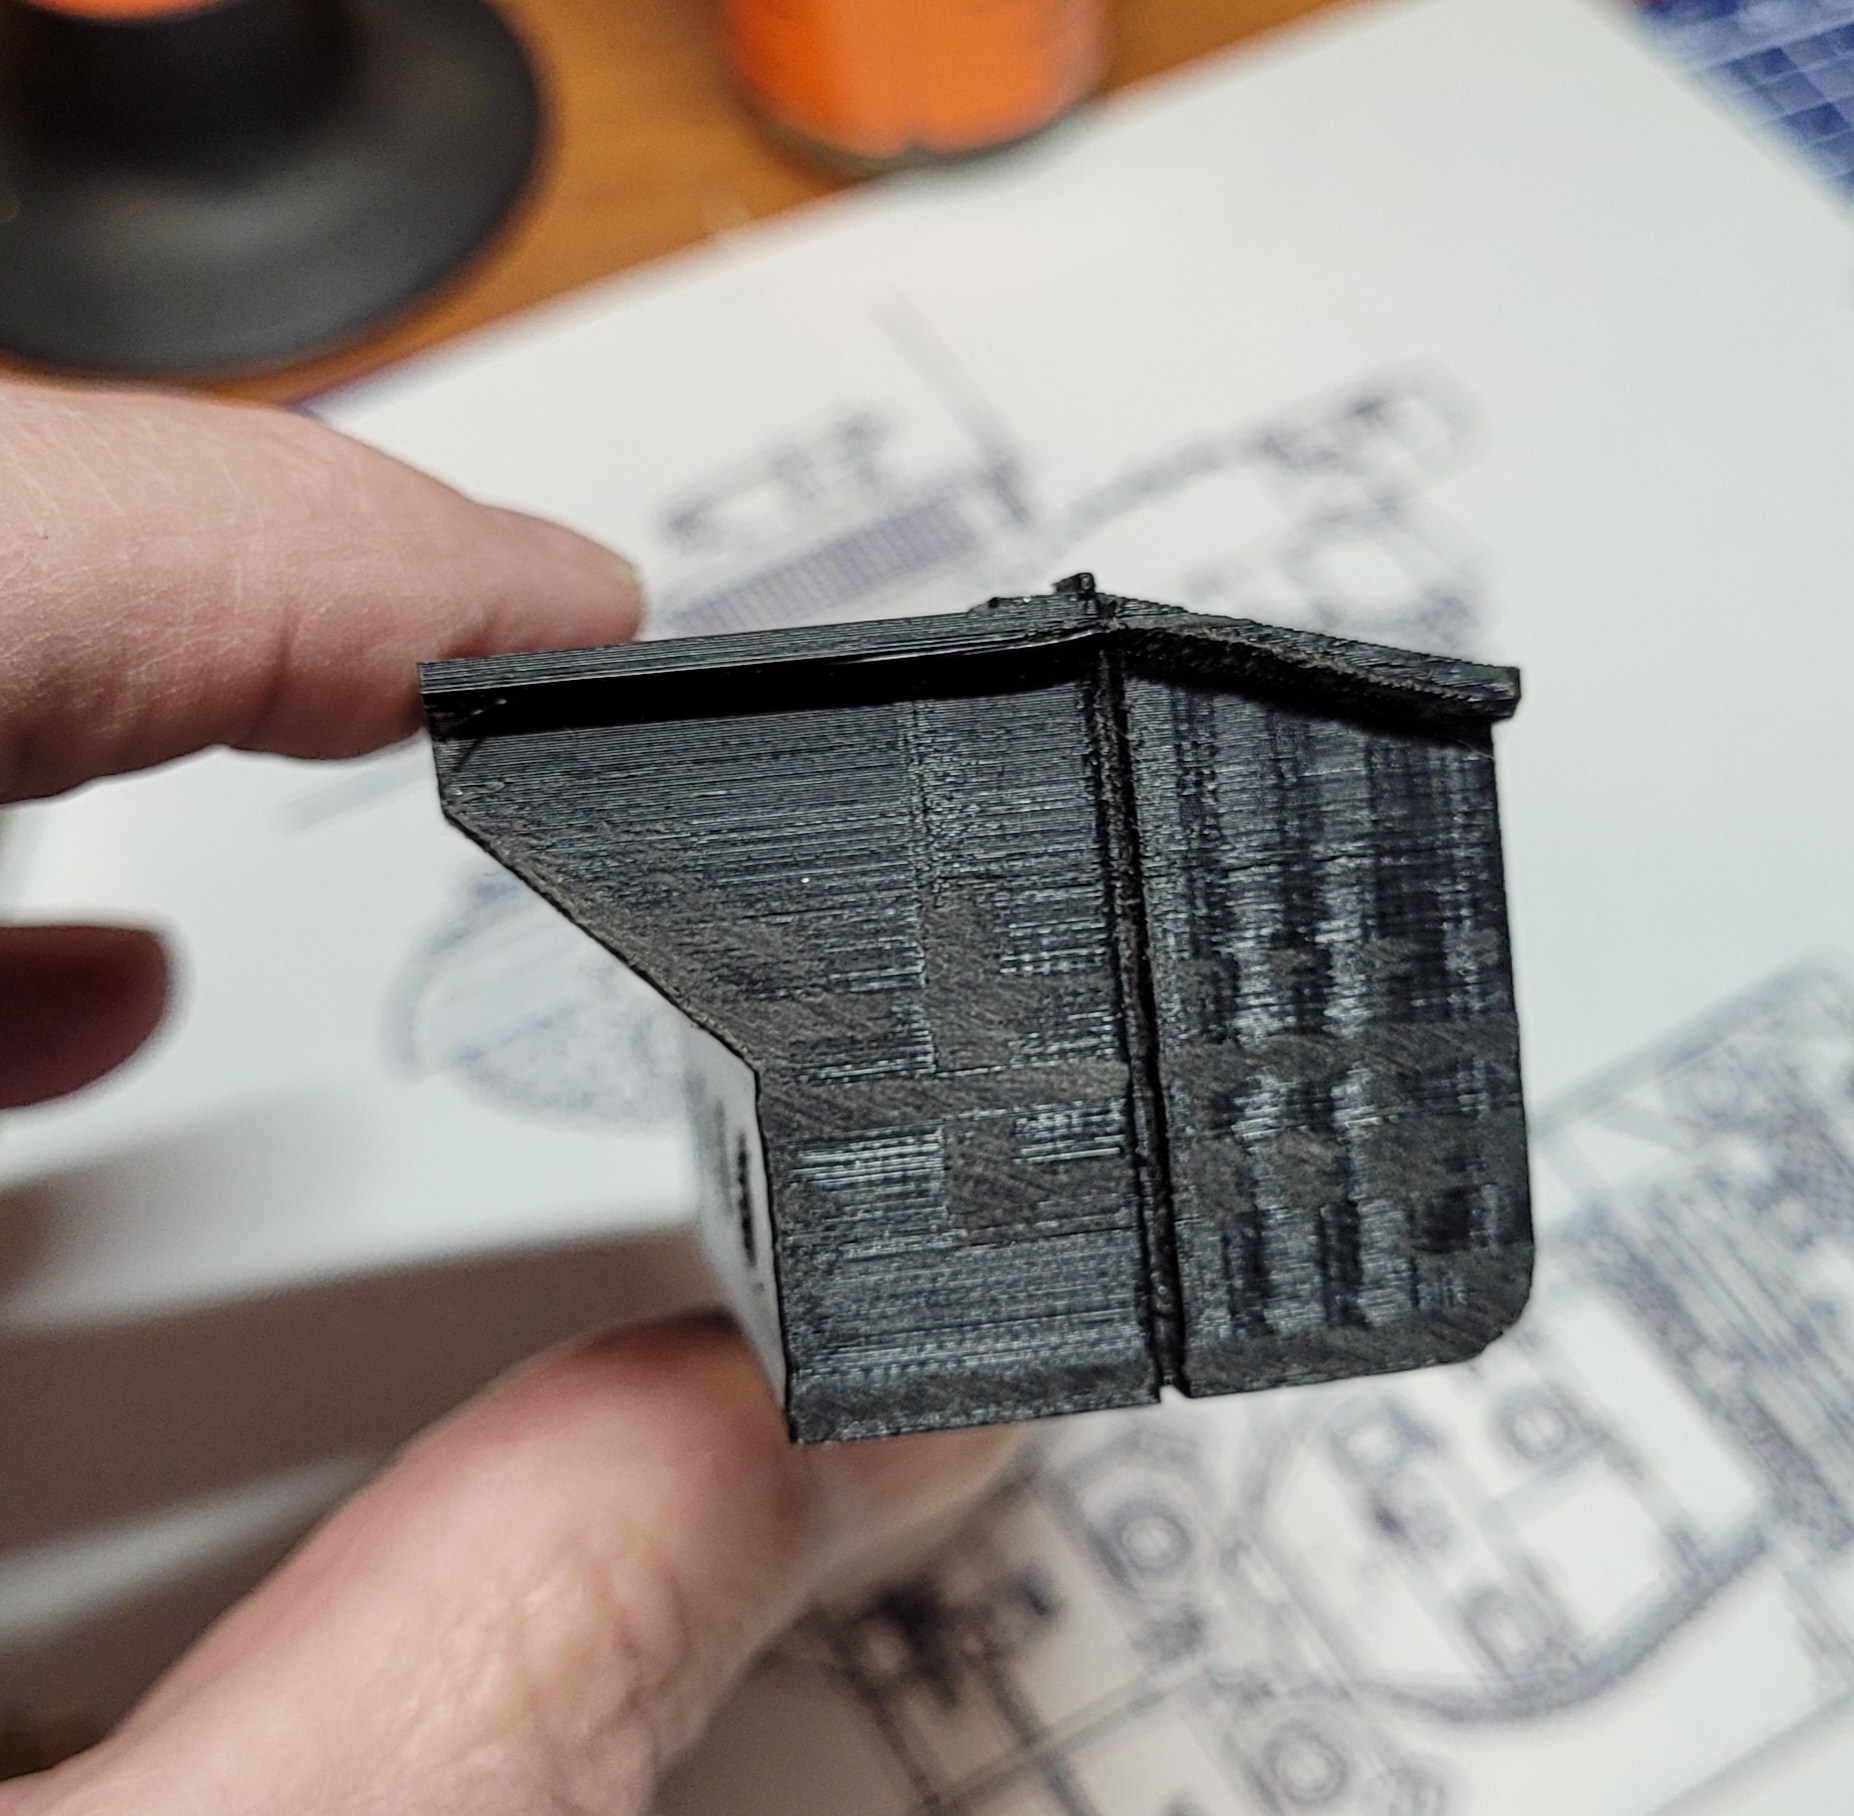
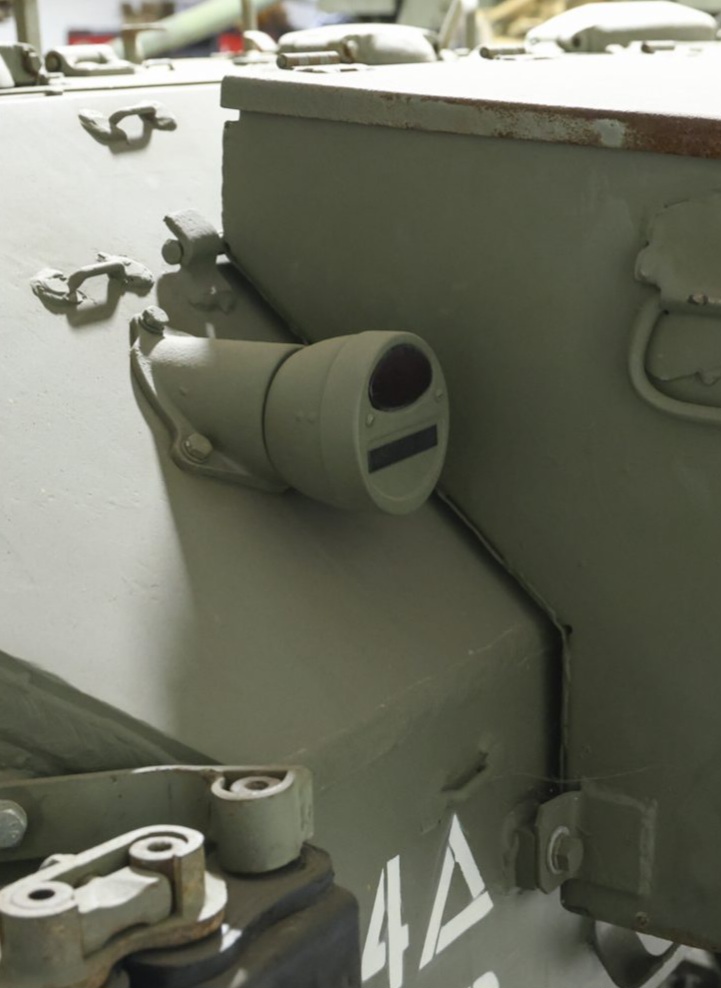
All of the Elefante Dundums were equipped with the solid rear bustle box and fortunately there was a file for one on Cults3d. I printed a rough fast test print to see how it would fit, and while the angles are correct, there's a problem at the top. It tapers off to a point and that doesn't allow the proper stowage of the axe and sledgehammer.
- 20251218_151308.jpg (846.6 KiB) Viewed 1346 times
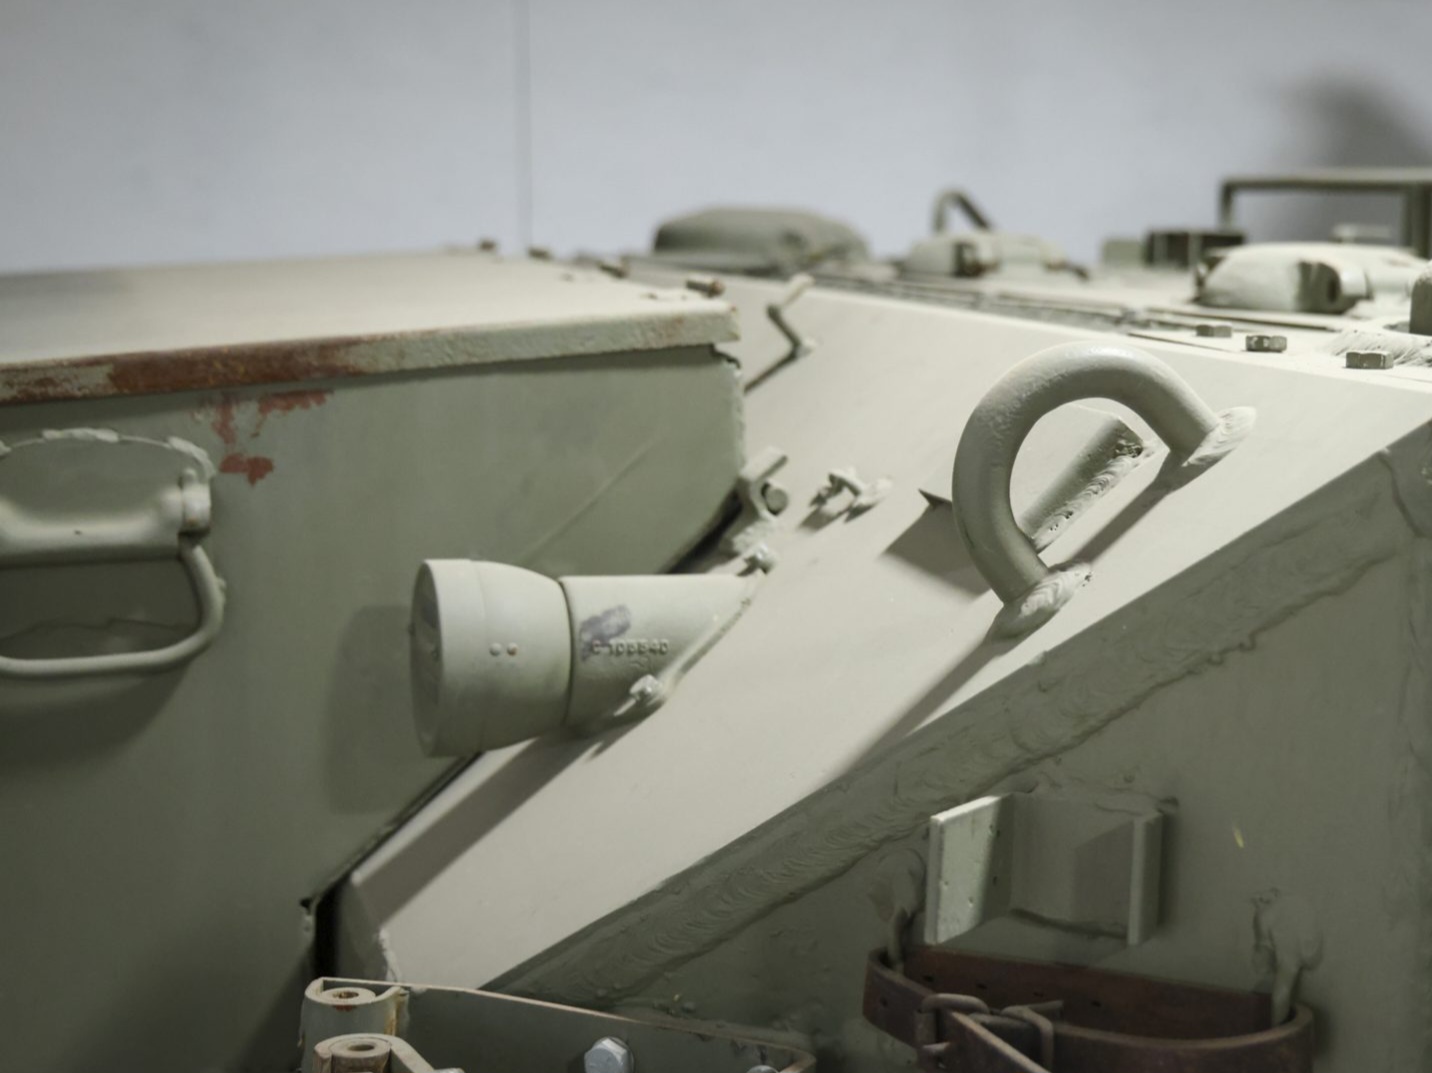
Some good reference photos show the correct profile. Nothing a razor saw can't cure!
- 436A6901-61265-scaled.jpg (181.86 KiB) Viewed 1349 times
- 20251218_151343.jpg (706.18 KiB) Viewed 1347 times
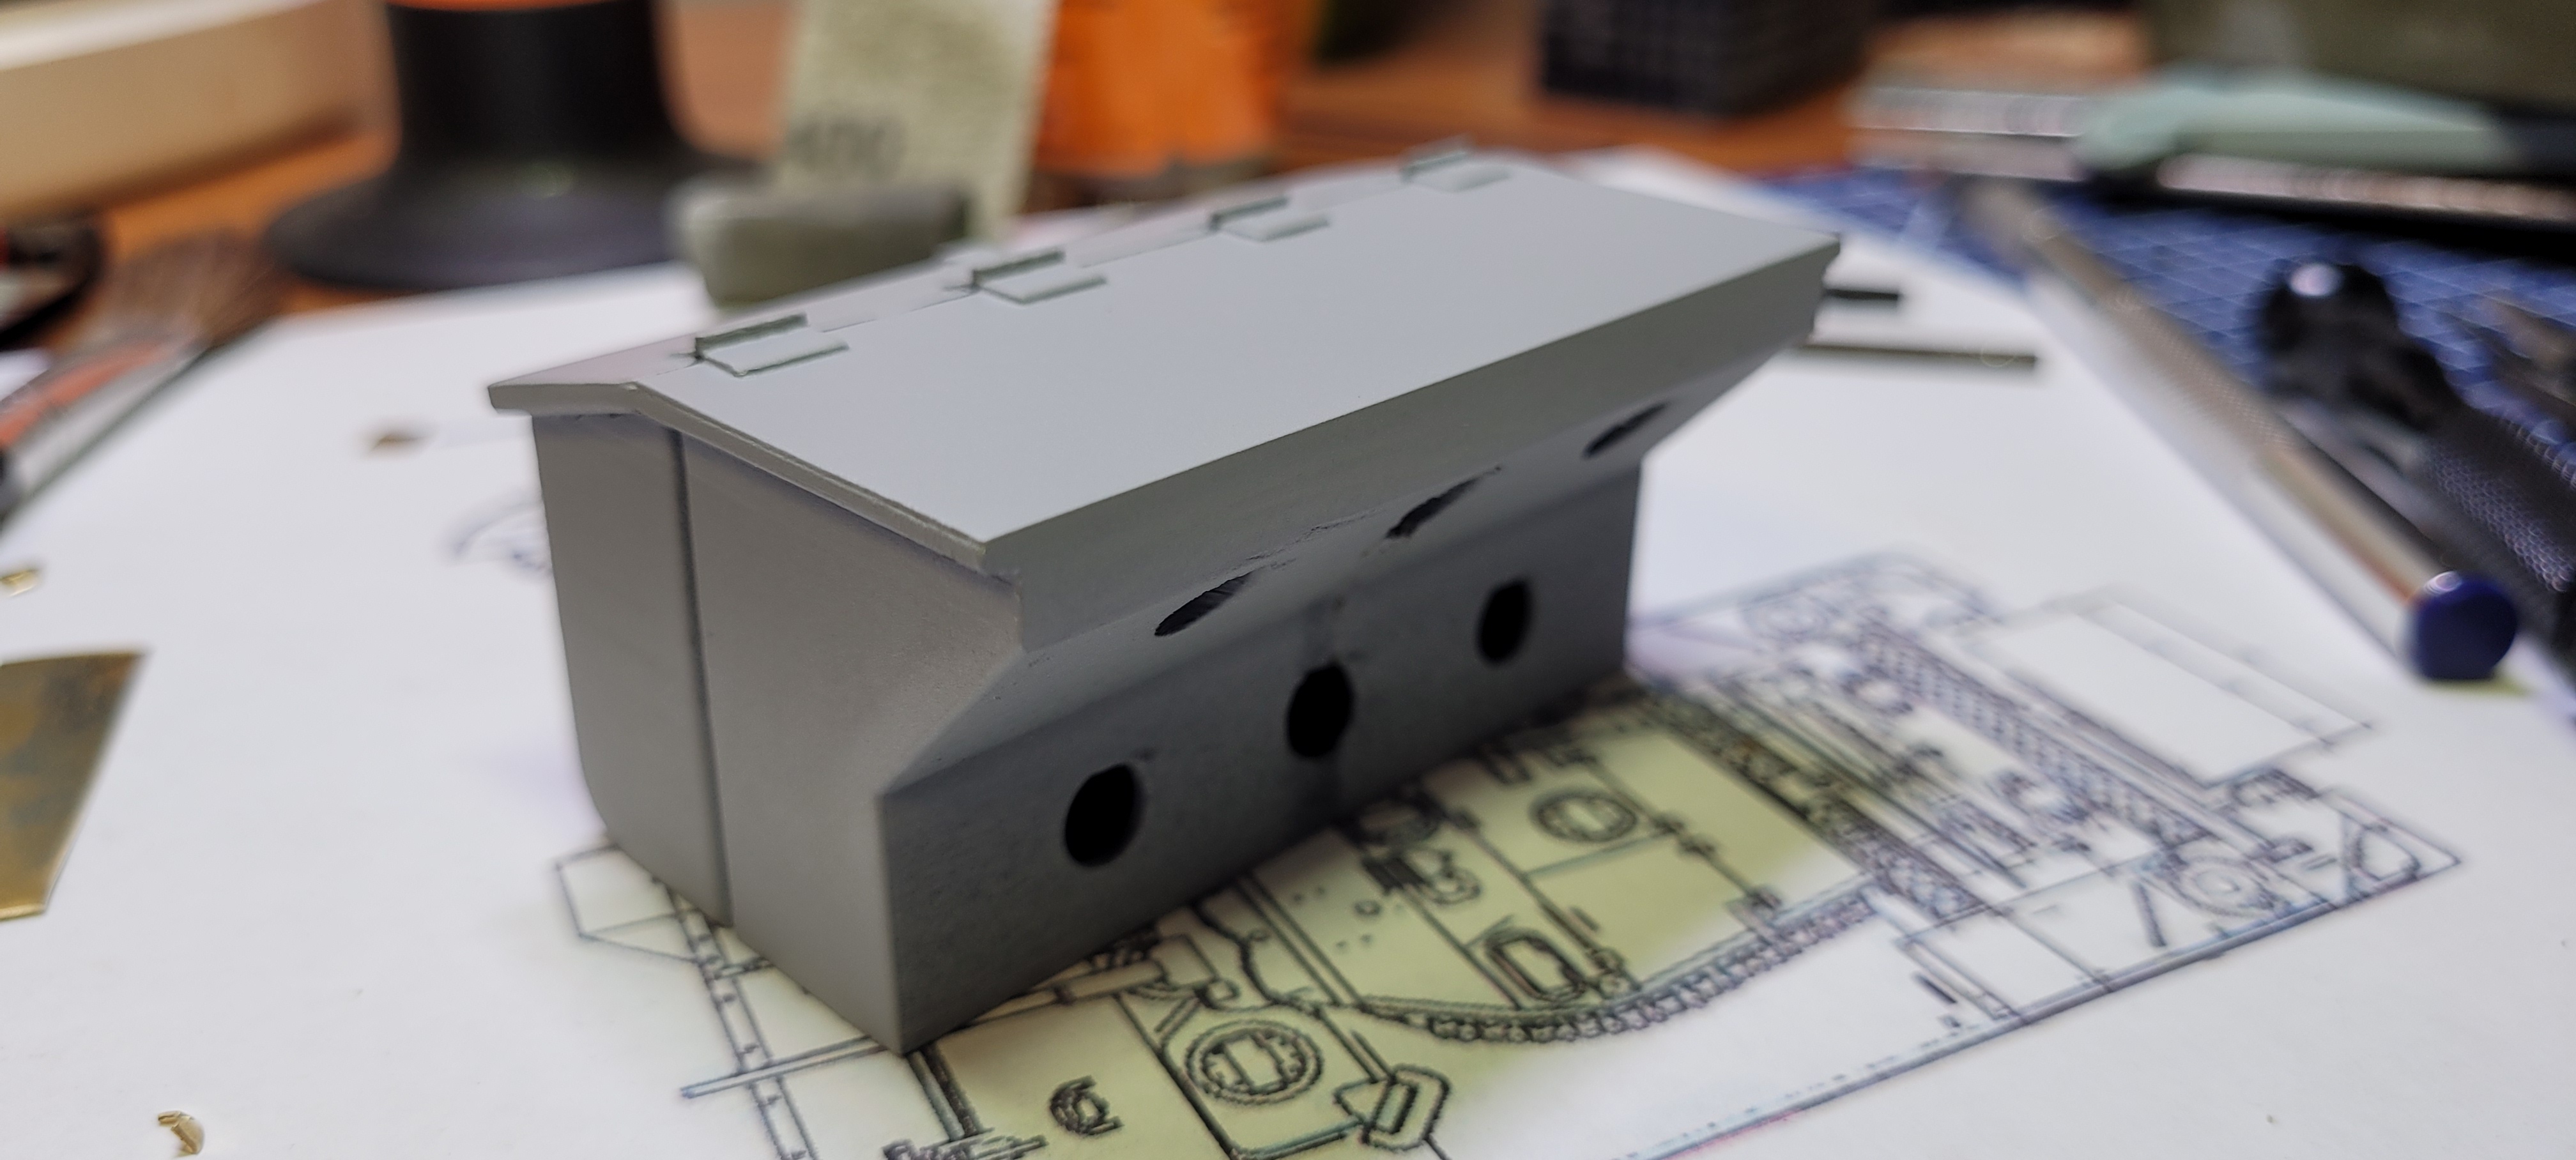
Printed a good quality box, a little razor chopping and then sanding and high fill primer. It's looking better now, just need to add the fasteners to hold it on the hull, side grab handles, side latches, some fine chain, and 4 tiny hinges where I cut the top edge.
- 20251219_105001.jpg (1.21 MiB) Viewed 1349 times
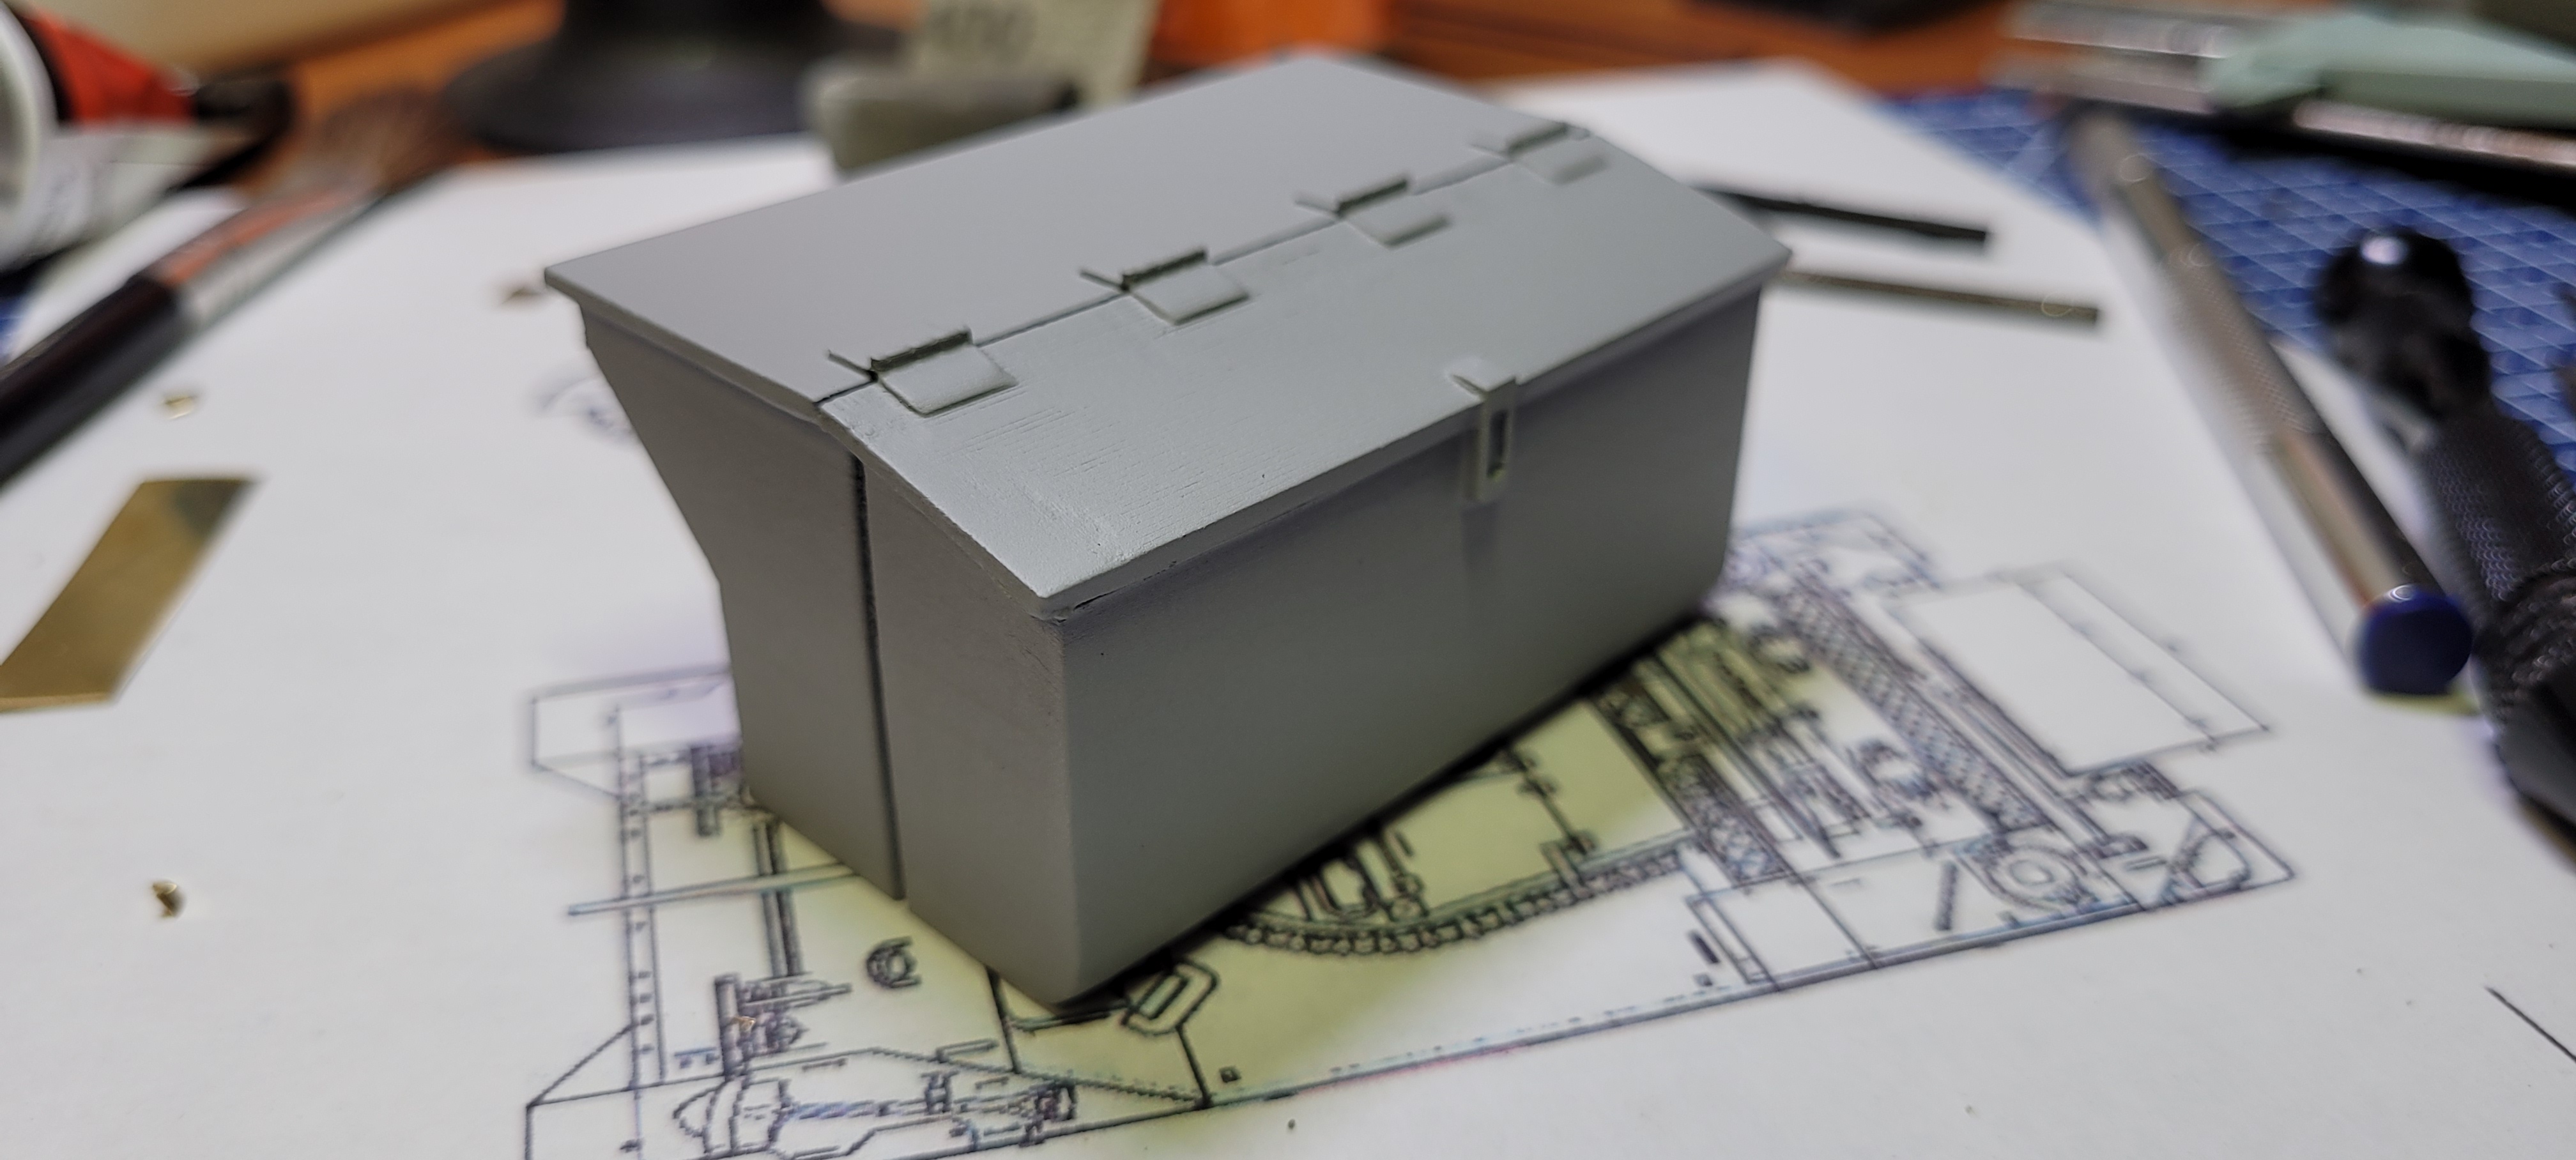
- 20251219_104948.jpg (1.17 MiB) Viewed 1349 times
- 436A6879-61113-scaled.jpg (114.15 KiB) Viewed 1349 times
Post print work on the print ridges is a drag. I have even more respect for the builders out there working on vehicles using 100% printed parts.
Mike.
Re: [NATO/Cold War] Portugal M5A1 "Gina"
Posted: Fri Dec 19, 2025 5:39 pm
by Panzermechaniker
This is definitely going to be a great little tank when finished
Re: [NATO/Cold War] Portugal M5A1 "Gina"
Posted: Tue Dec 23, 2025 9:00 am
by Estnische
Depending on what you have planned, you might find Mato Sherman fuel caps an improvement over those plastic ones. Available from Forgebear too.
https://www.forgebeartanks.com/store/p1 ... _Tank.html