Page 3 of 5
Re: 1/10th Stridsvagn 103C
Posted: Sat Nov 11, 2023 6:10 pm
by Barthez
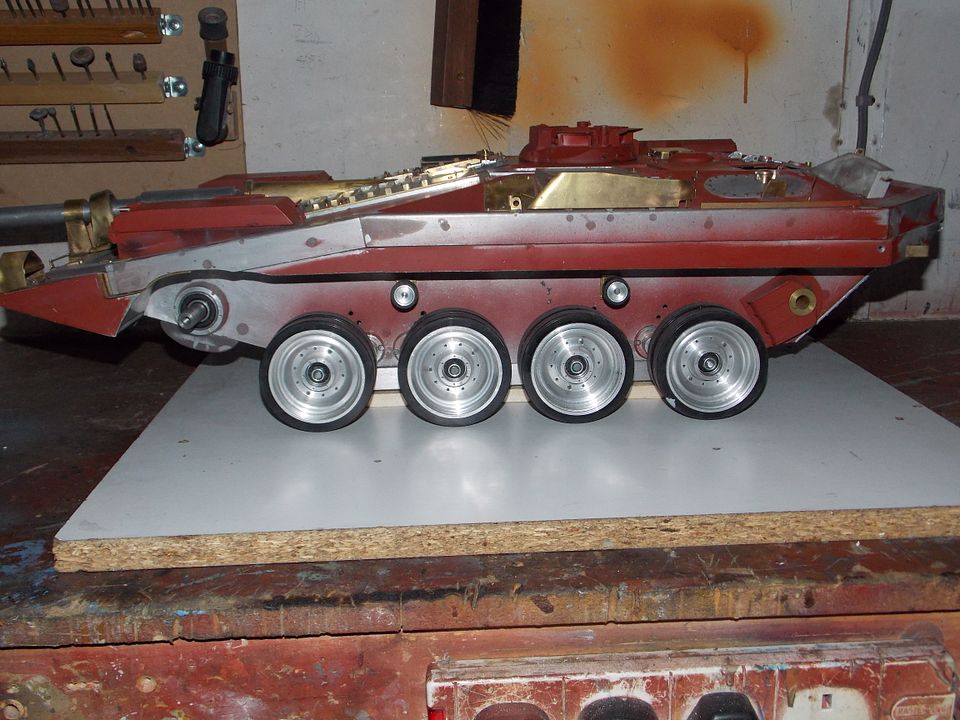
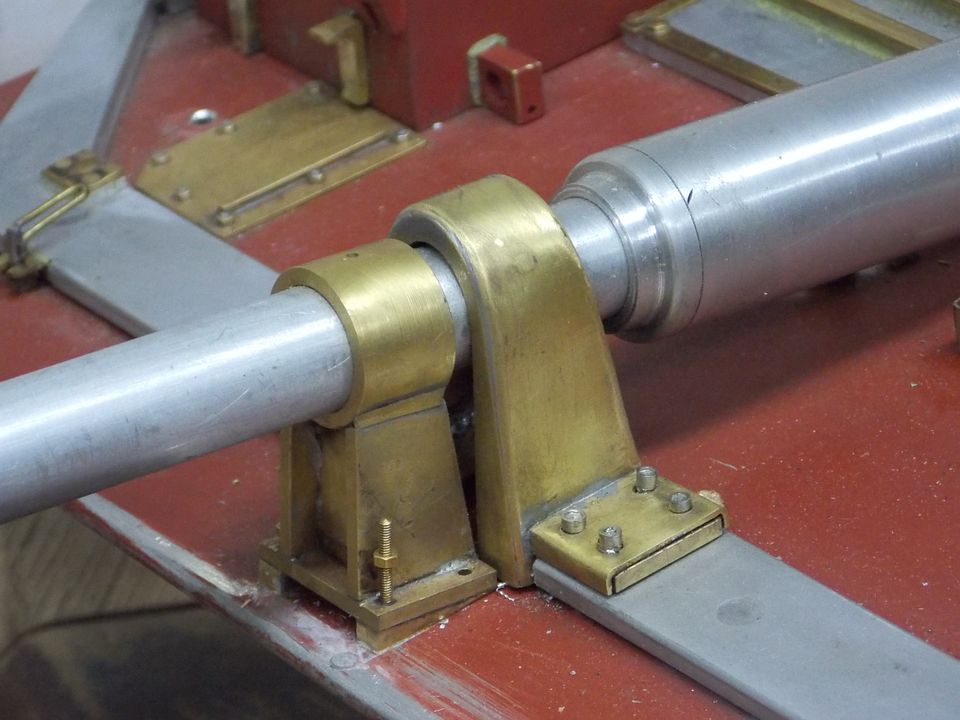
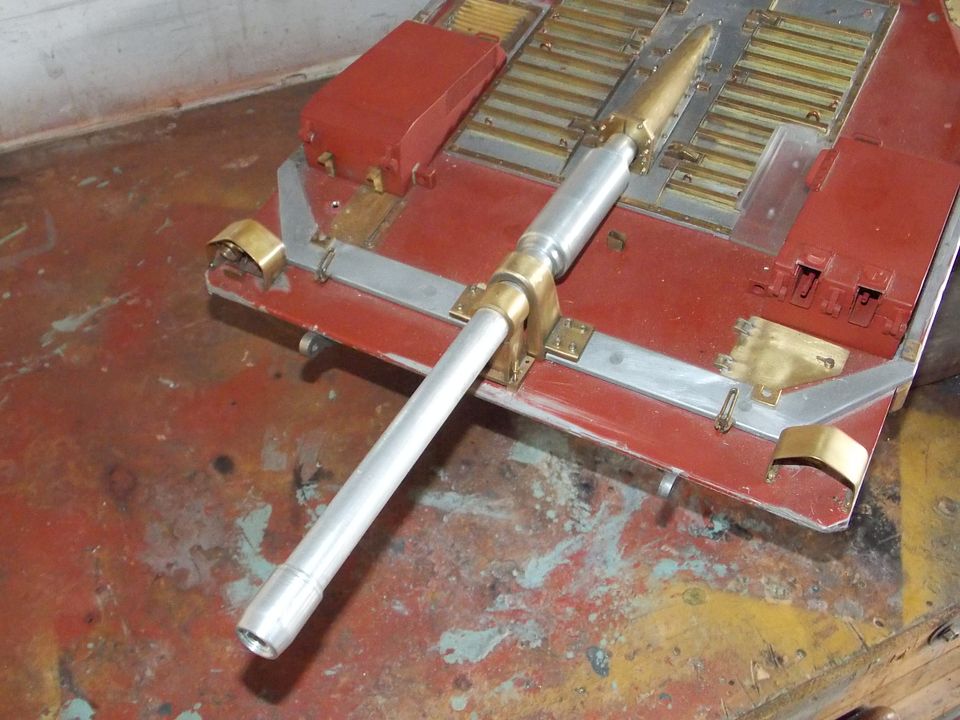
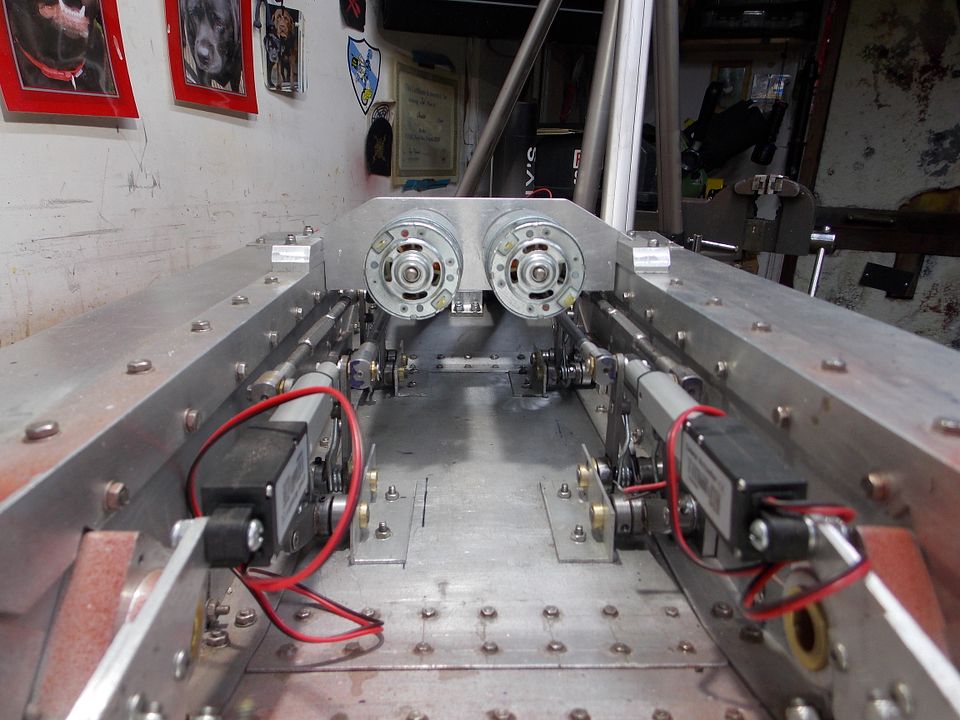
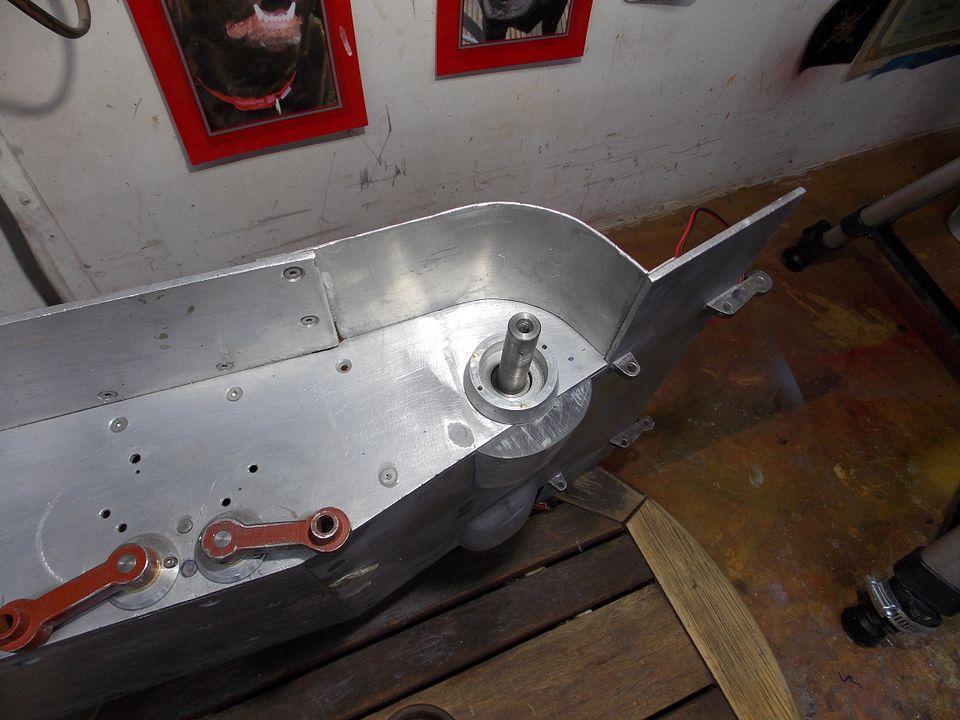
A pic with all the actuators in place , forgive the dirt in the hull, it will be cleaned and painted when I am done
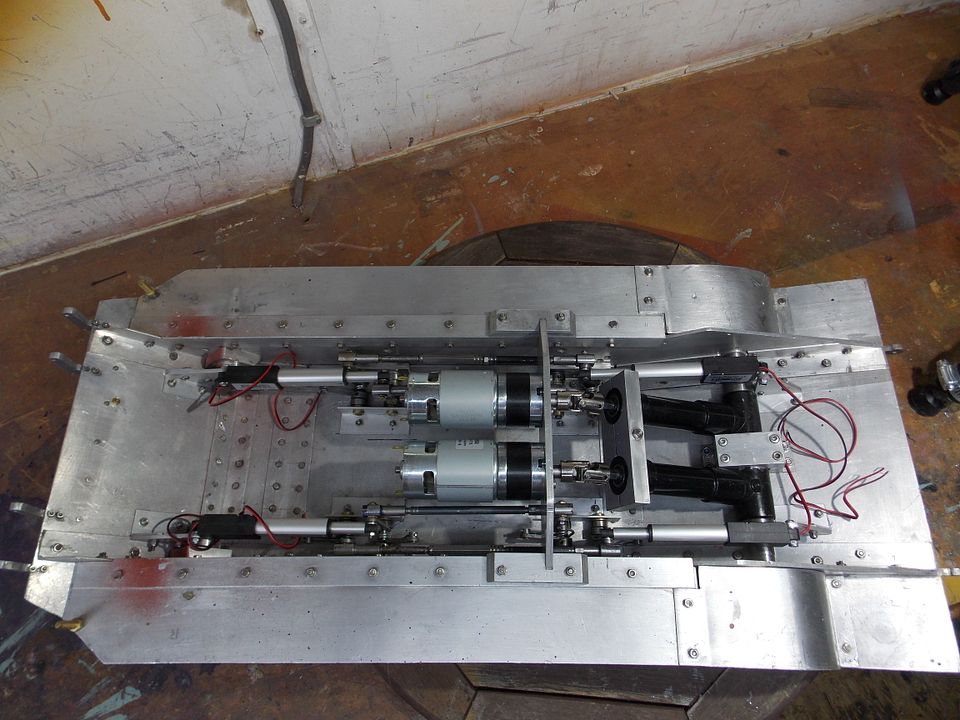
The motive power was going to be two cordless drill motors with their gearboxes. I had two of the same model but when I opened the drills up I found they had two different motors. The gearboxes seemed to have the same gear ratios albeit with slightly different designs. I was going to replace the motors so at least they were identical. One gearbox could not run without locking up. I abandoned them and found two motors with gearboxes on Aliexpress.
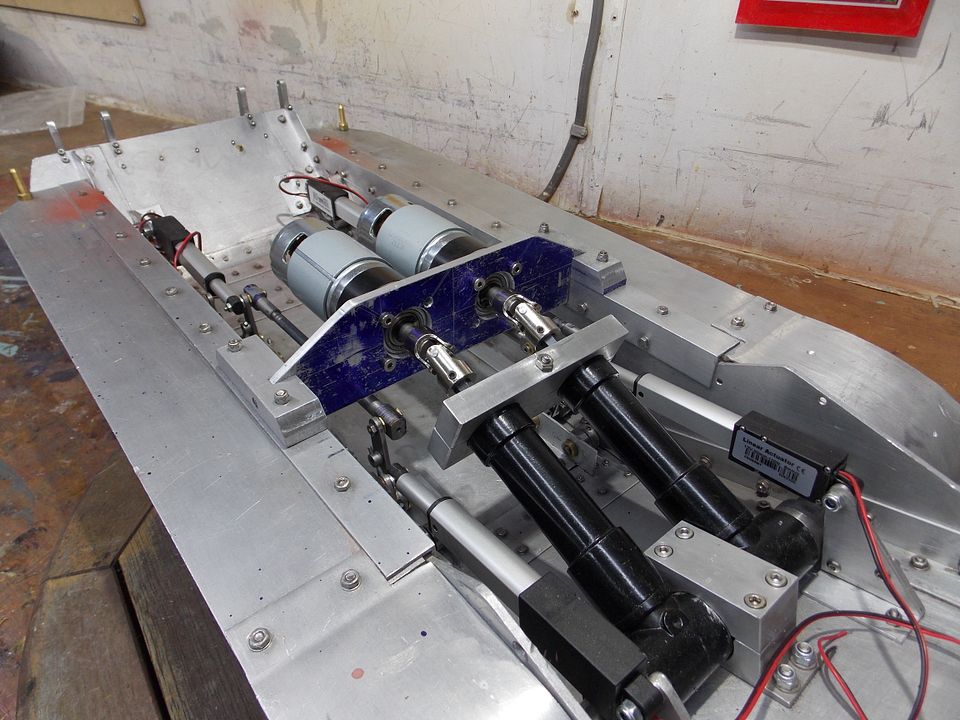
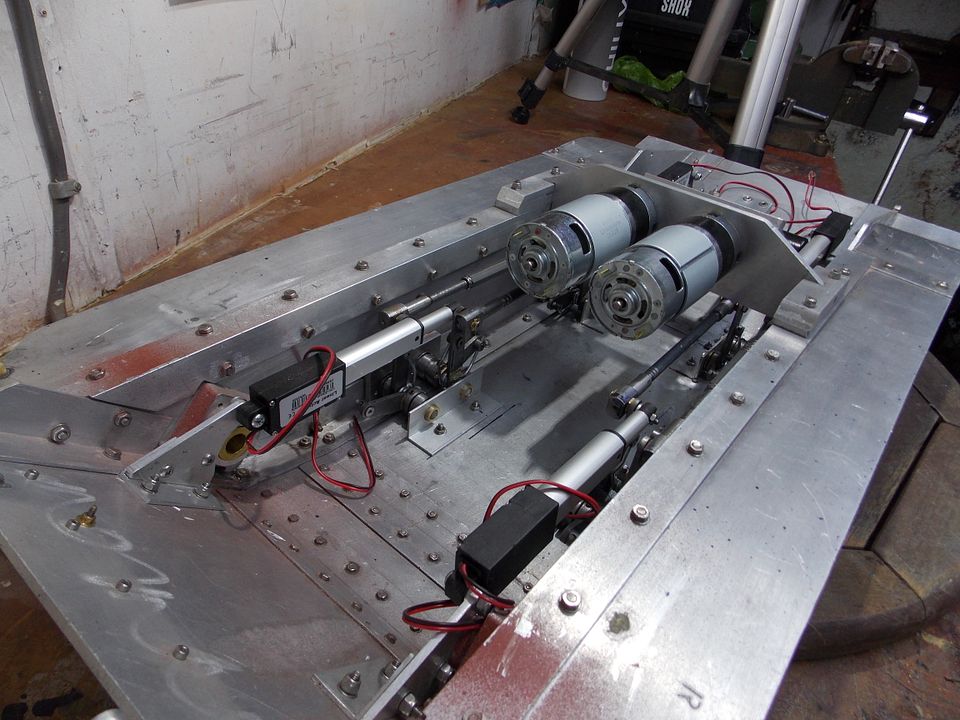
These motors and gearboxes are a little wide for the hull hence the long black tubes. These are right angled drill attachments for power tools with the drill chucks removed. I have machined two shafts that slip over the shaft in place of the chucks.
There will be plenty of space in the hull for batteries and the other gubbins .
Re: 1/10th Stridsvagn 103C
Posted: Sat Nov 11, 2023 7:59 pm
by Ecam
Now that's a creative gearbox! I'll guess the ratio in the drill head is about 3 to 1 what are the reduction units on the motors?
By the way, the pictures are just fine.
Re: 1/10th Stridsvagn 103C
Posted: Sat Nov 11, 2023 11:24 pm
by tankme
Actually like the layout. Very nice. I was thinking of using similar motors for a project.
Re: 1/10th Stridsvagn 103C
Posted: Mon Nov 13, 2023 7:42 pm
by Barthez
Ecam wrote: ↑Sat Nov 11, 2023 7:59 pm
Now that's a creative gearbox! I'll guess the ratio in the drill head is about 3 to 1 what are the reduction units on the motors?
By the way, the pictures are just fine.
The gear box out put is 1100 rpm @ 12v I have ordered a digital tachometer from eBay so I will see what the output at the drive sprocket will be.
Re: 1/10th Stridsvagn 103C
Posted: Mon Nov 13, 2023 8:10 pm
by Barthez
tankme wrote: ↑Sat Nov 11, 2023 11:24 pm
Actually like the layout. Very nice. I was thinking of using similar motors for a project.
Thank you,
I thought it might be a clumsy solution but it fits well under the upper hull. I could not find any suitable gear motors at the time . I did consider using metal gearboxes from 1/16th tanks but thought they would not be up to the job.
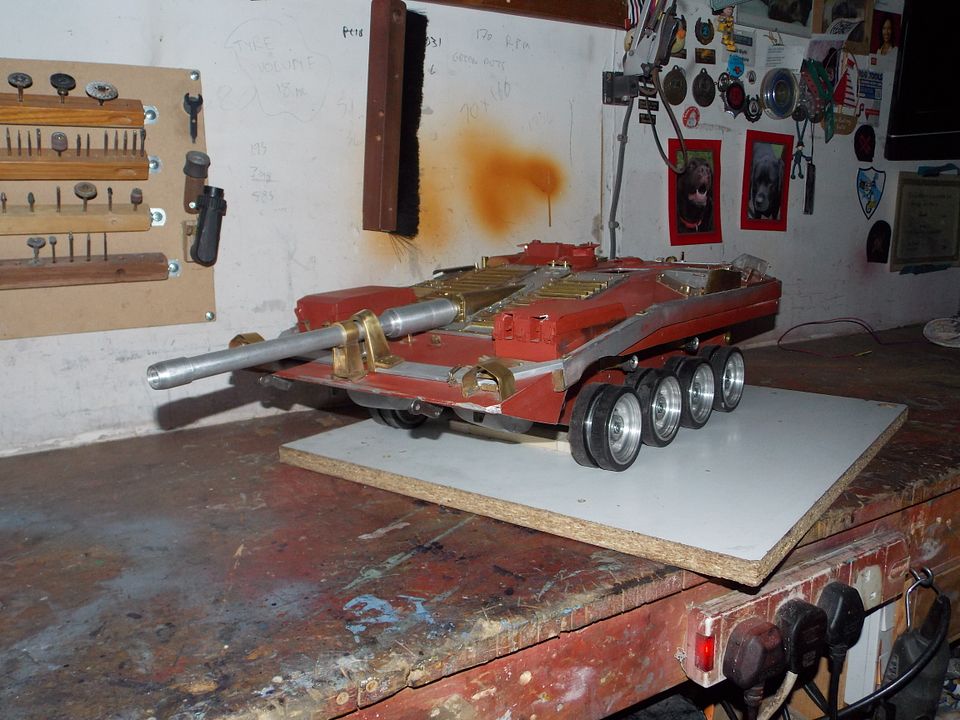
The upper and lower hull are 11kg at present with wheels and tracks yet to be added.
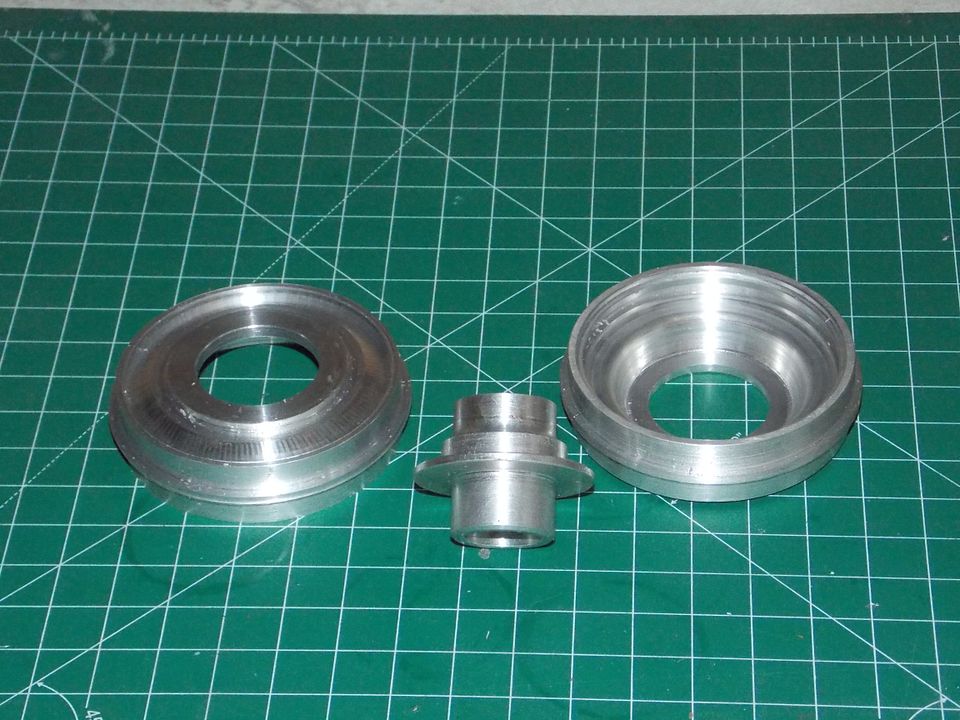
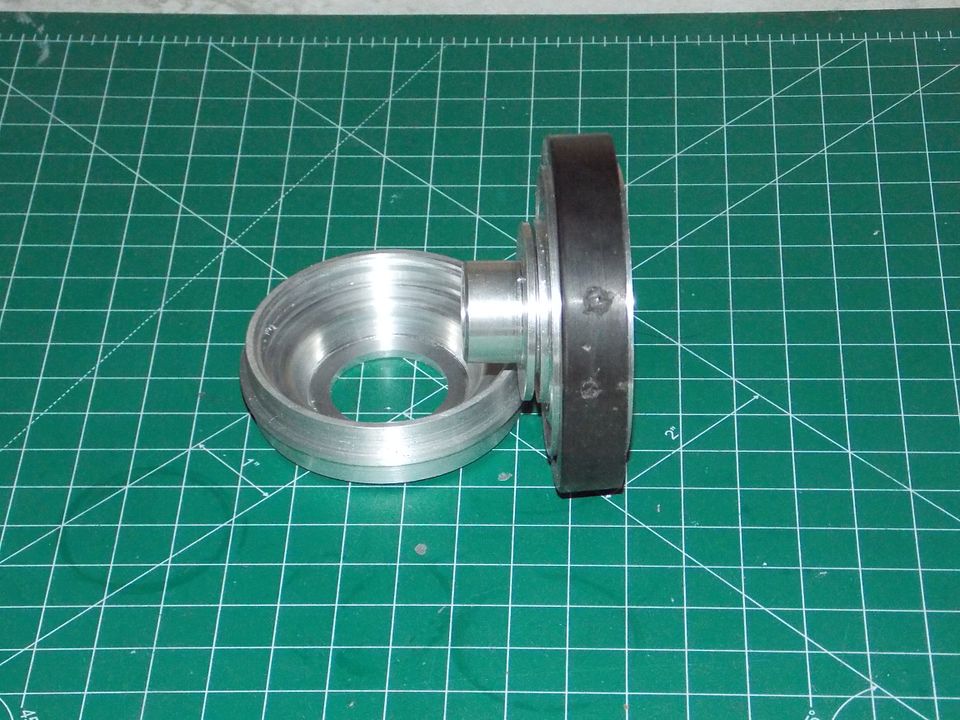
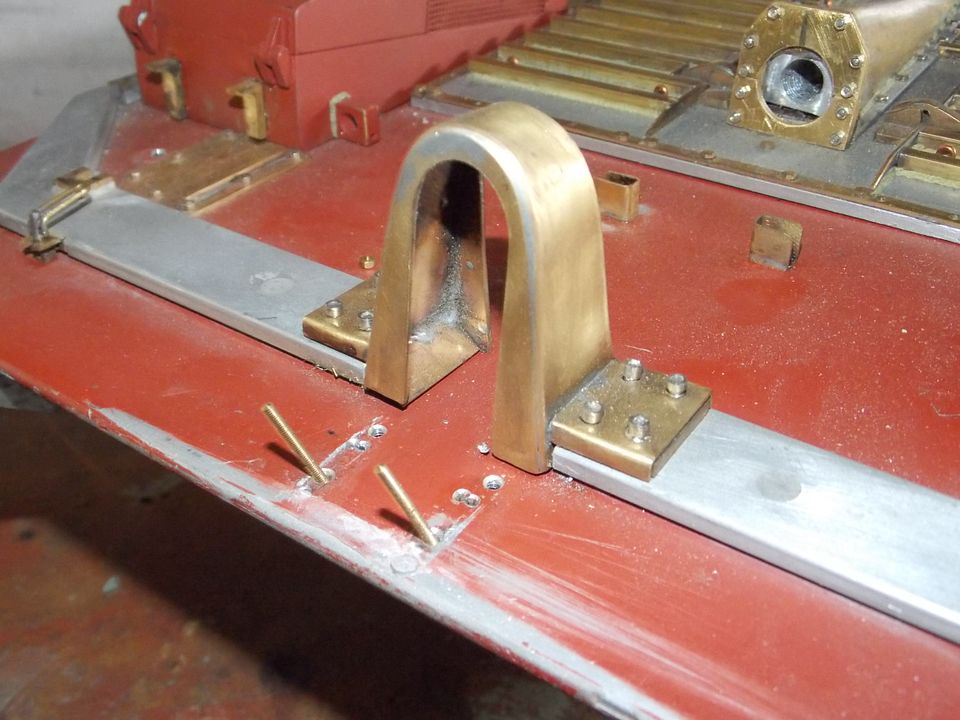
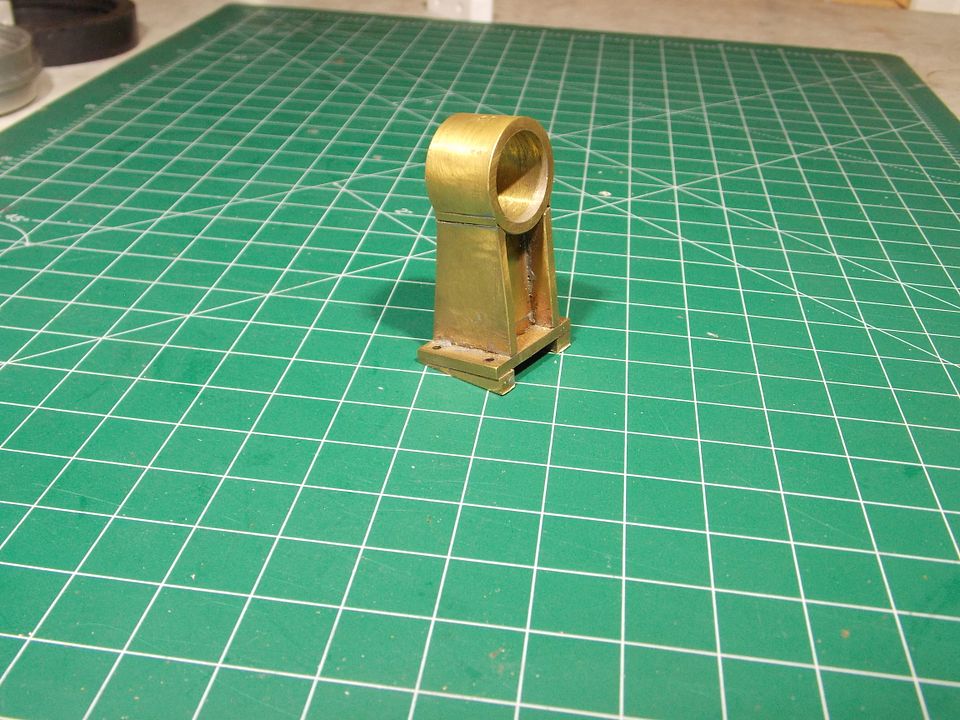
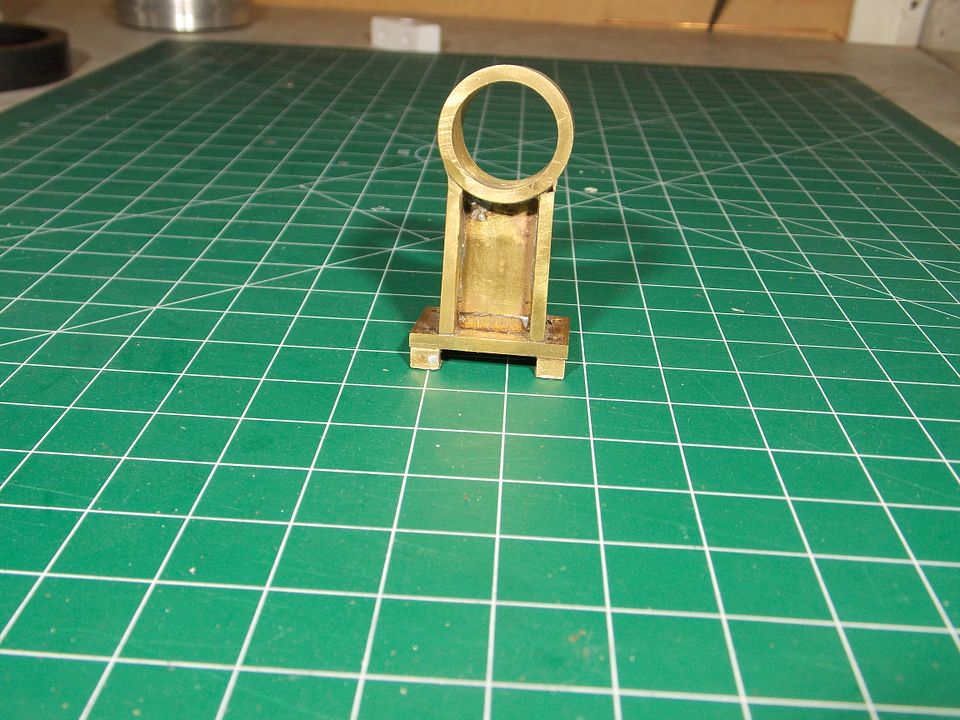
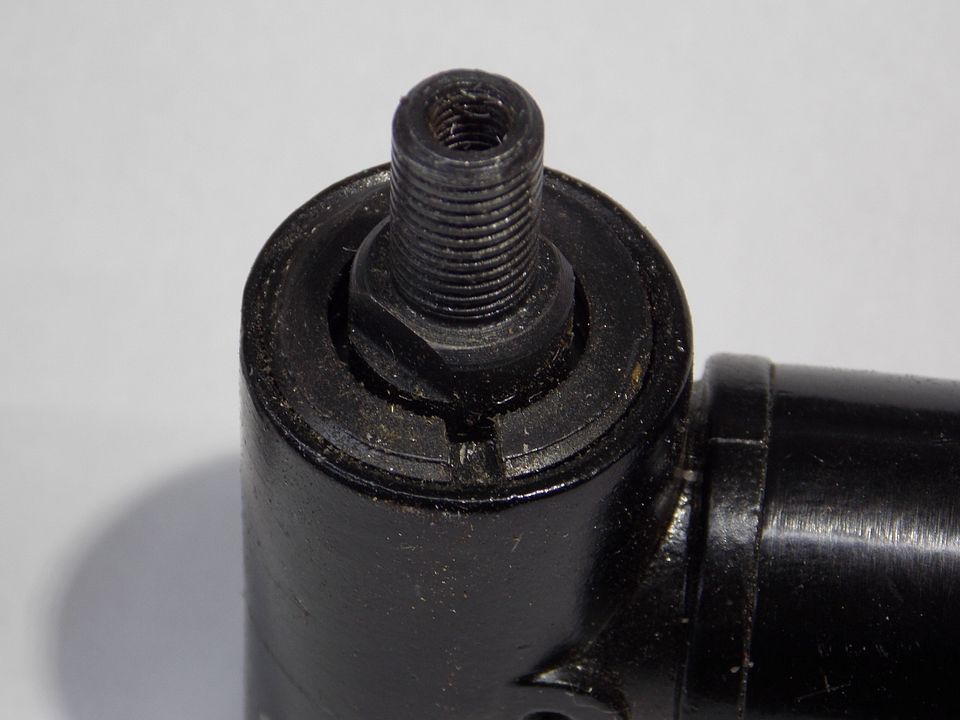
The pics below show the final drive axles that mount in place of the chuck. I could not use the thread used by the chuck, it’s a square profile. I don’t have any taps of that type. The final drive shafts will be fixed in place with a grub screw, they are a very snug fit . They cannot slide out of the hull. The whole right angled part needs to be removed and the shaft pulled internally.
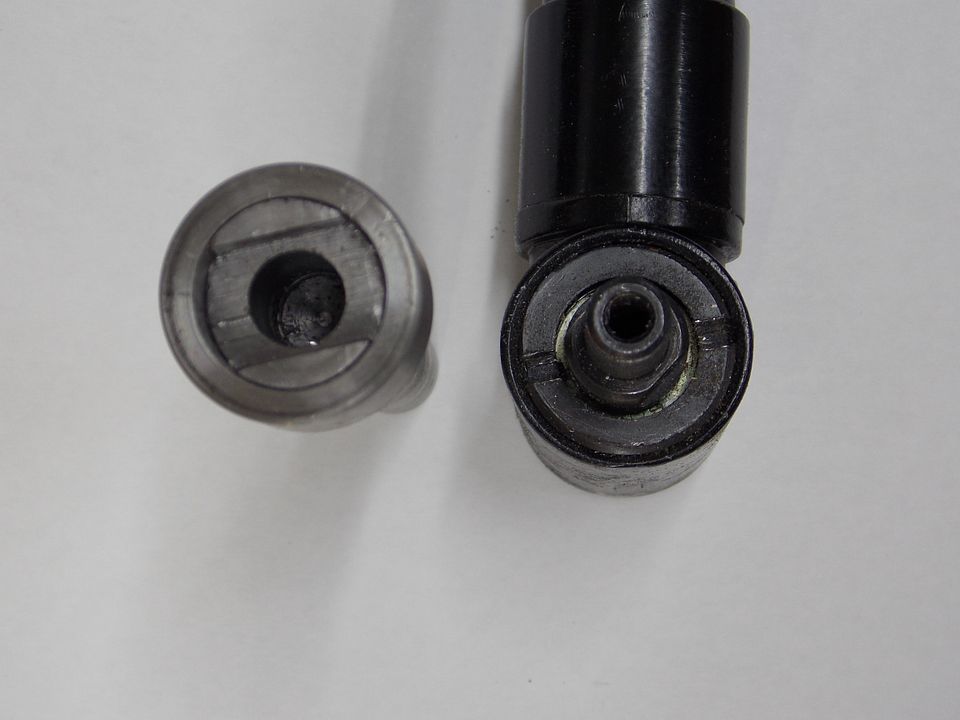

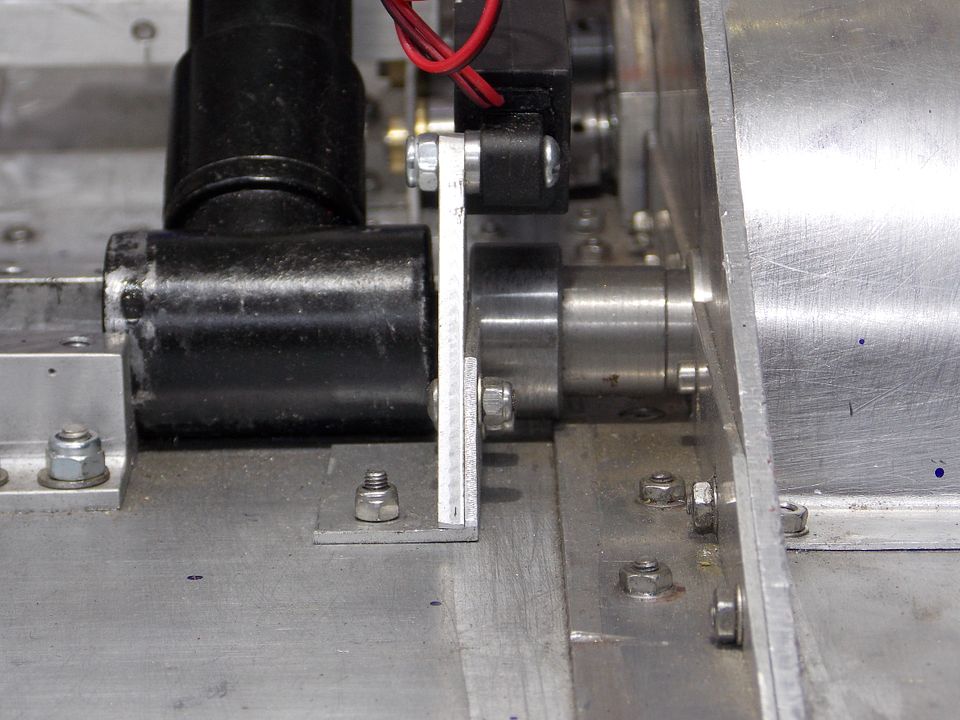
I machined a mount to take a bearing to support the drive shaft as it exits the hull. This will be hidden behind the drive sprocket.
Paul
Re: 1/10th Stridsvagn 103C
Posted: Fri Jul 05, 2024 11:09 pm
by Barthez
Re: 1/10th Stridsvagn 103C
Posted: Fri Jul 05, 2024 11:25 pm
by Ecam
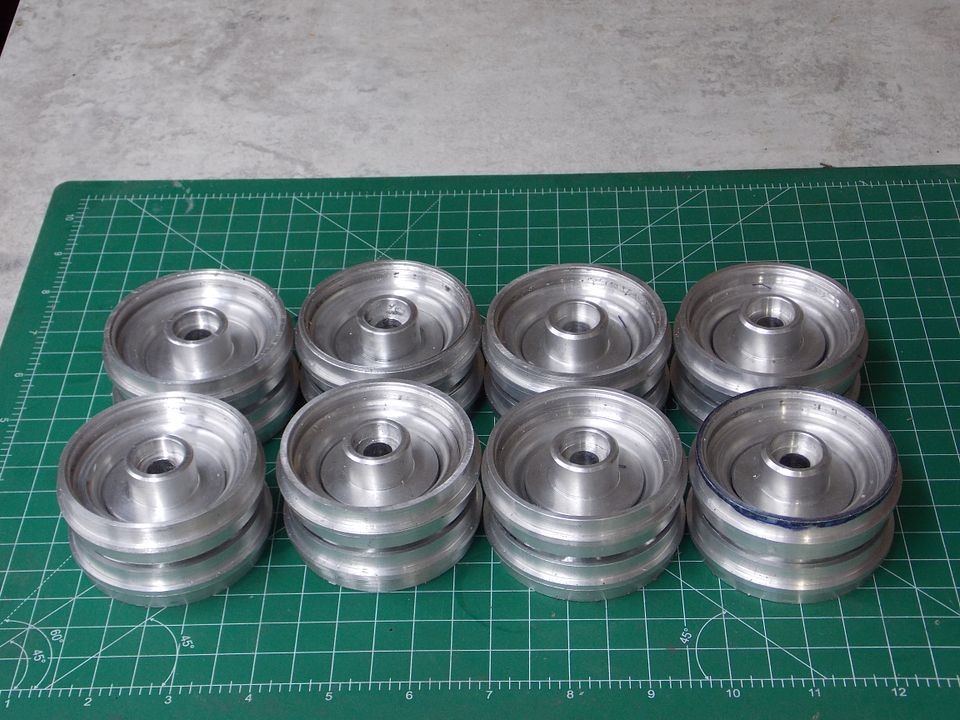
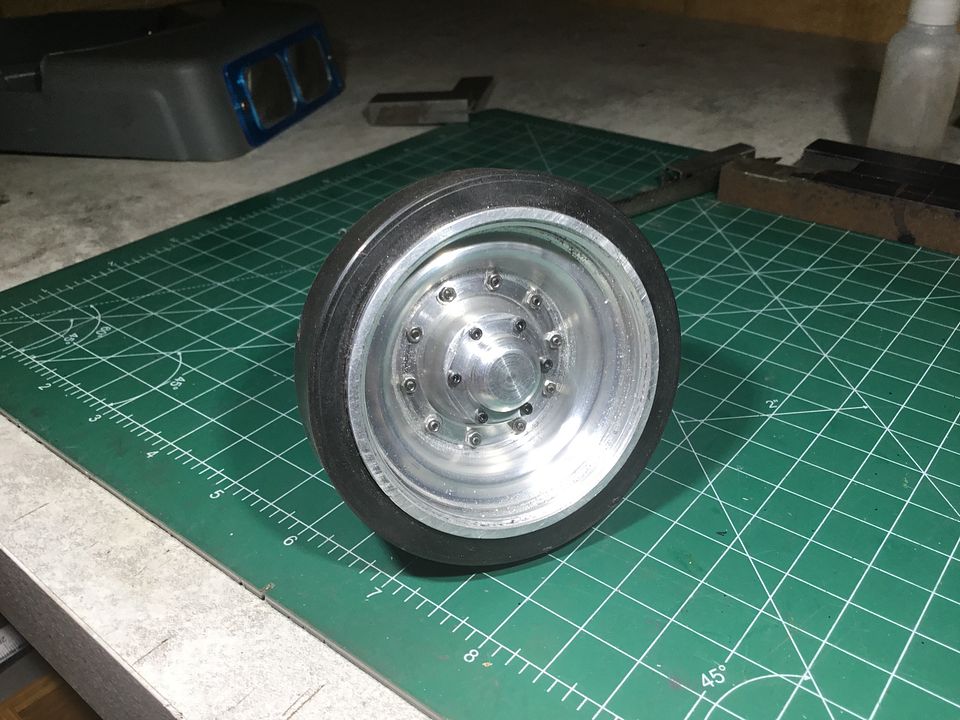
Outstanding mould (mold - USA) and metal work, those wheels are beautiful!
Re: 1/10th Stridsvagn 103C
Posted: Sat Jul 06, 2024 8:43 am
by Barthez
Thank you this website gave me the idea for the tyres
http://jrhscalecars.com/Molding%20Large ... 20Rev2.pdf
He had a tread on his tyres so used silicone rubber to make his mould.
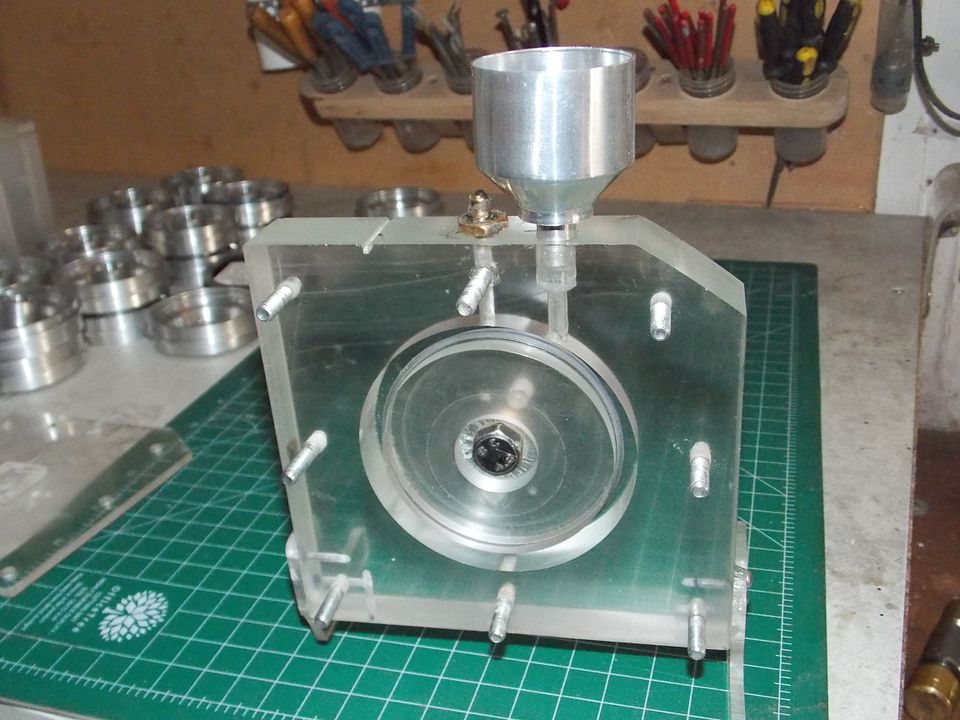
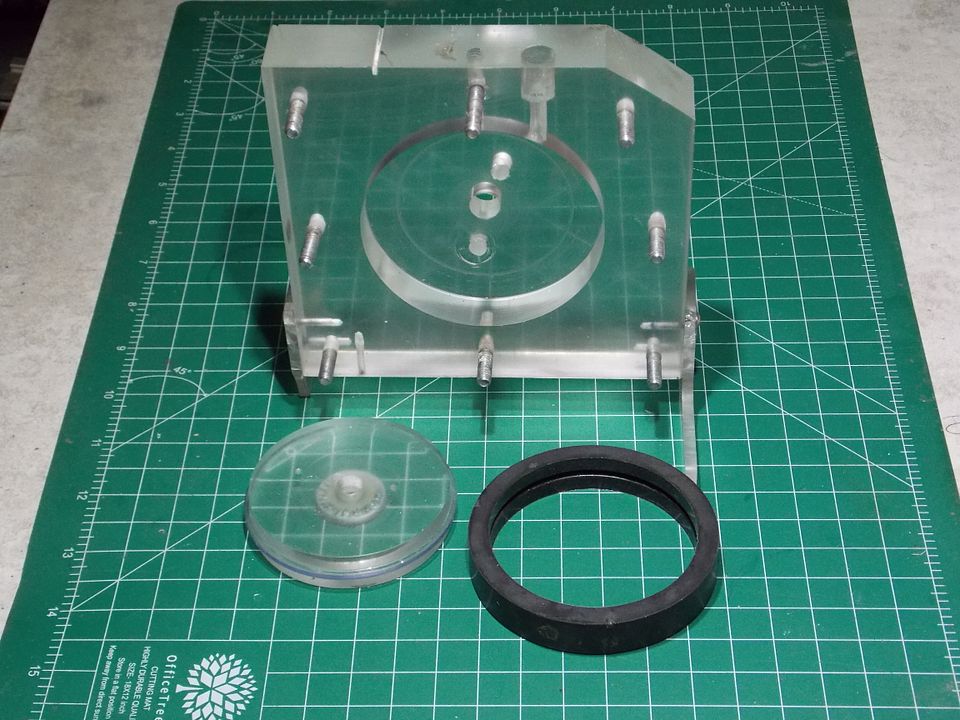
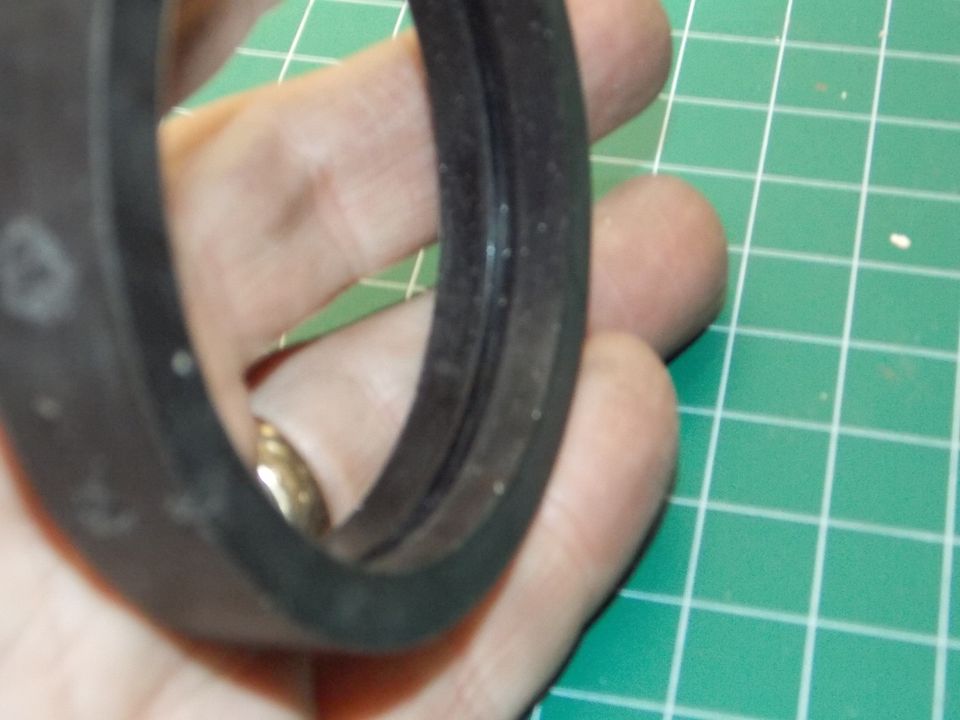
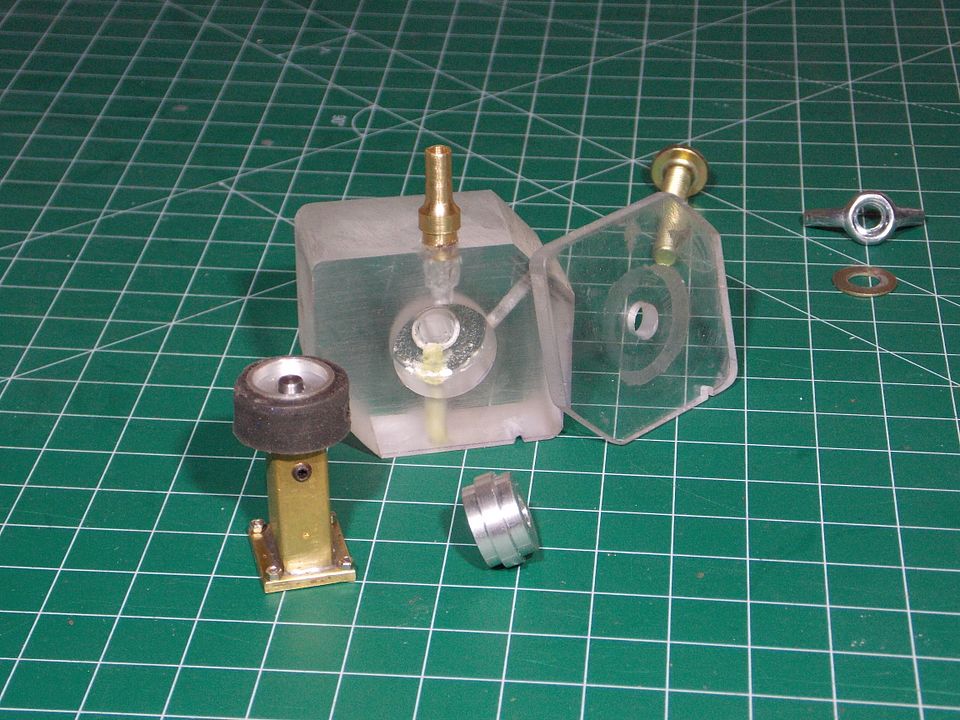
I had a slab of Perspex that I acquired on eBay many years ago for a very good price. So I decided to use it as my tyres are smooth and have no undercuts etc.
Overall I’m happy with the result. As with all things there is a technique to getting a good result. I only cast a tyre if I was in the workshop for a few hours. I found that coming back the next day when the rubber was hard made it harder to trim the rubber from the few and vent holes.
I needed 16tyres so it was a slow ish process, but then again this whole project has been on the slow side .
Regards
Bart
Re: 1/10th Stridsvagn 103C
Posted: Sat Jul 06, 2024 10:35 am
by HERMAN BIX
Astounding work Sir.
A marvel of engineering and deduction/problem solving.
Re: 1/10th Stridsvagn 103C
Posted: Sat Jul 06, 2024 11:32 am
by Ecam
Barthez wrote: ↑Fri Jul 05, 2024 11:09 pm
This was also the first time I have moulded tyres using polyurethane rubber.
The rubber has a pot life of around a minute and can be demoulded in around 45 minutes, and take several days to fully cure.
Monsieur Tox and I are starting a couple of Dragon Wagons where we are going to have to mould/mold 19 tyres/tires each for our projects. I have only used windshield installation black urethane that comes in a caulking tube like this:

Back when autocross racing the rules said we could replace the motor mount but could not add torque straps or links. The car I used was prone to tearing stock mounts on the lift side of the engine (Driver's side for most of the world). Solid mounts were too harsh for everyday use (but legal). I made my own mounts that had hoops that interlocked the top and bottom and then made a simple mold around my mount and filled it with the urethane. Worked great, was firmer than the stock rubber mount yet still had stock like give for vibrations.
Not sure if this is similar or the same urethane others are using, or how many tires could be made before the pot life of the tube is used up (without having to rely on several molds). The tubes have a terrific volume and are relatively cheap unless you get only one tire per tube.