Page 3 of 8
Re: 1/16 Taigen Metal Edition Panzer III - Build
Posted: Mon Jan 04, 2021 6:33 am
by Kaczor
Great job. I also hate those molded tools

Re: 1/16 Taigen Metal Edition Panzer III - Build
Posted: Mon Jan 04, 2021 6:57 am
by Martin2556
It would be great to get the mg sound back, how did you manage do it?
Re: 1/16 Taigen Metal Edition Panzer III - Build
Posted: Mon Jan 04, 2021 3:14 pm
by quitcherbitchen
 Viewed 2436 times")
- My Input page
Here are some shots of my screens.
 Viewed 2436 times")
- Mix page
 Viewed 2436 times")
- Momentary switch. This I added to my radio. It is a cell phone style that has a nice trigger feel. I can find the link to where I bought it later
I am able to get my smoke and all three guns to function on my radio. If I left something out please feel free to ask questions. OpenTx is a real headscratcher sometimes. Sometimes I don't even know how I got to where I was that made it work.
Re: 1/16 Taigen Metal Edition Panzer III - Build
Posted: Mon Jan 04, 2021 4:20 pm
by Martin2556
Many thanks for that, I’ll give it a go.
Re: 1/16 Taigen Metal Edition Panzer III - Build
Posted: Thu Nov 03, 2022 12:33 pm
by Martin2556
Hi To Everyone,
Time for an update on the build, it’s been a while but I’ve made some steady progress.
Upper Hull Weld Seams & Some Extra Hull Detailing:
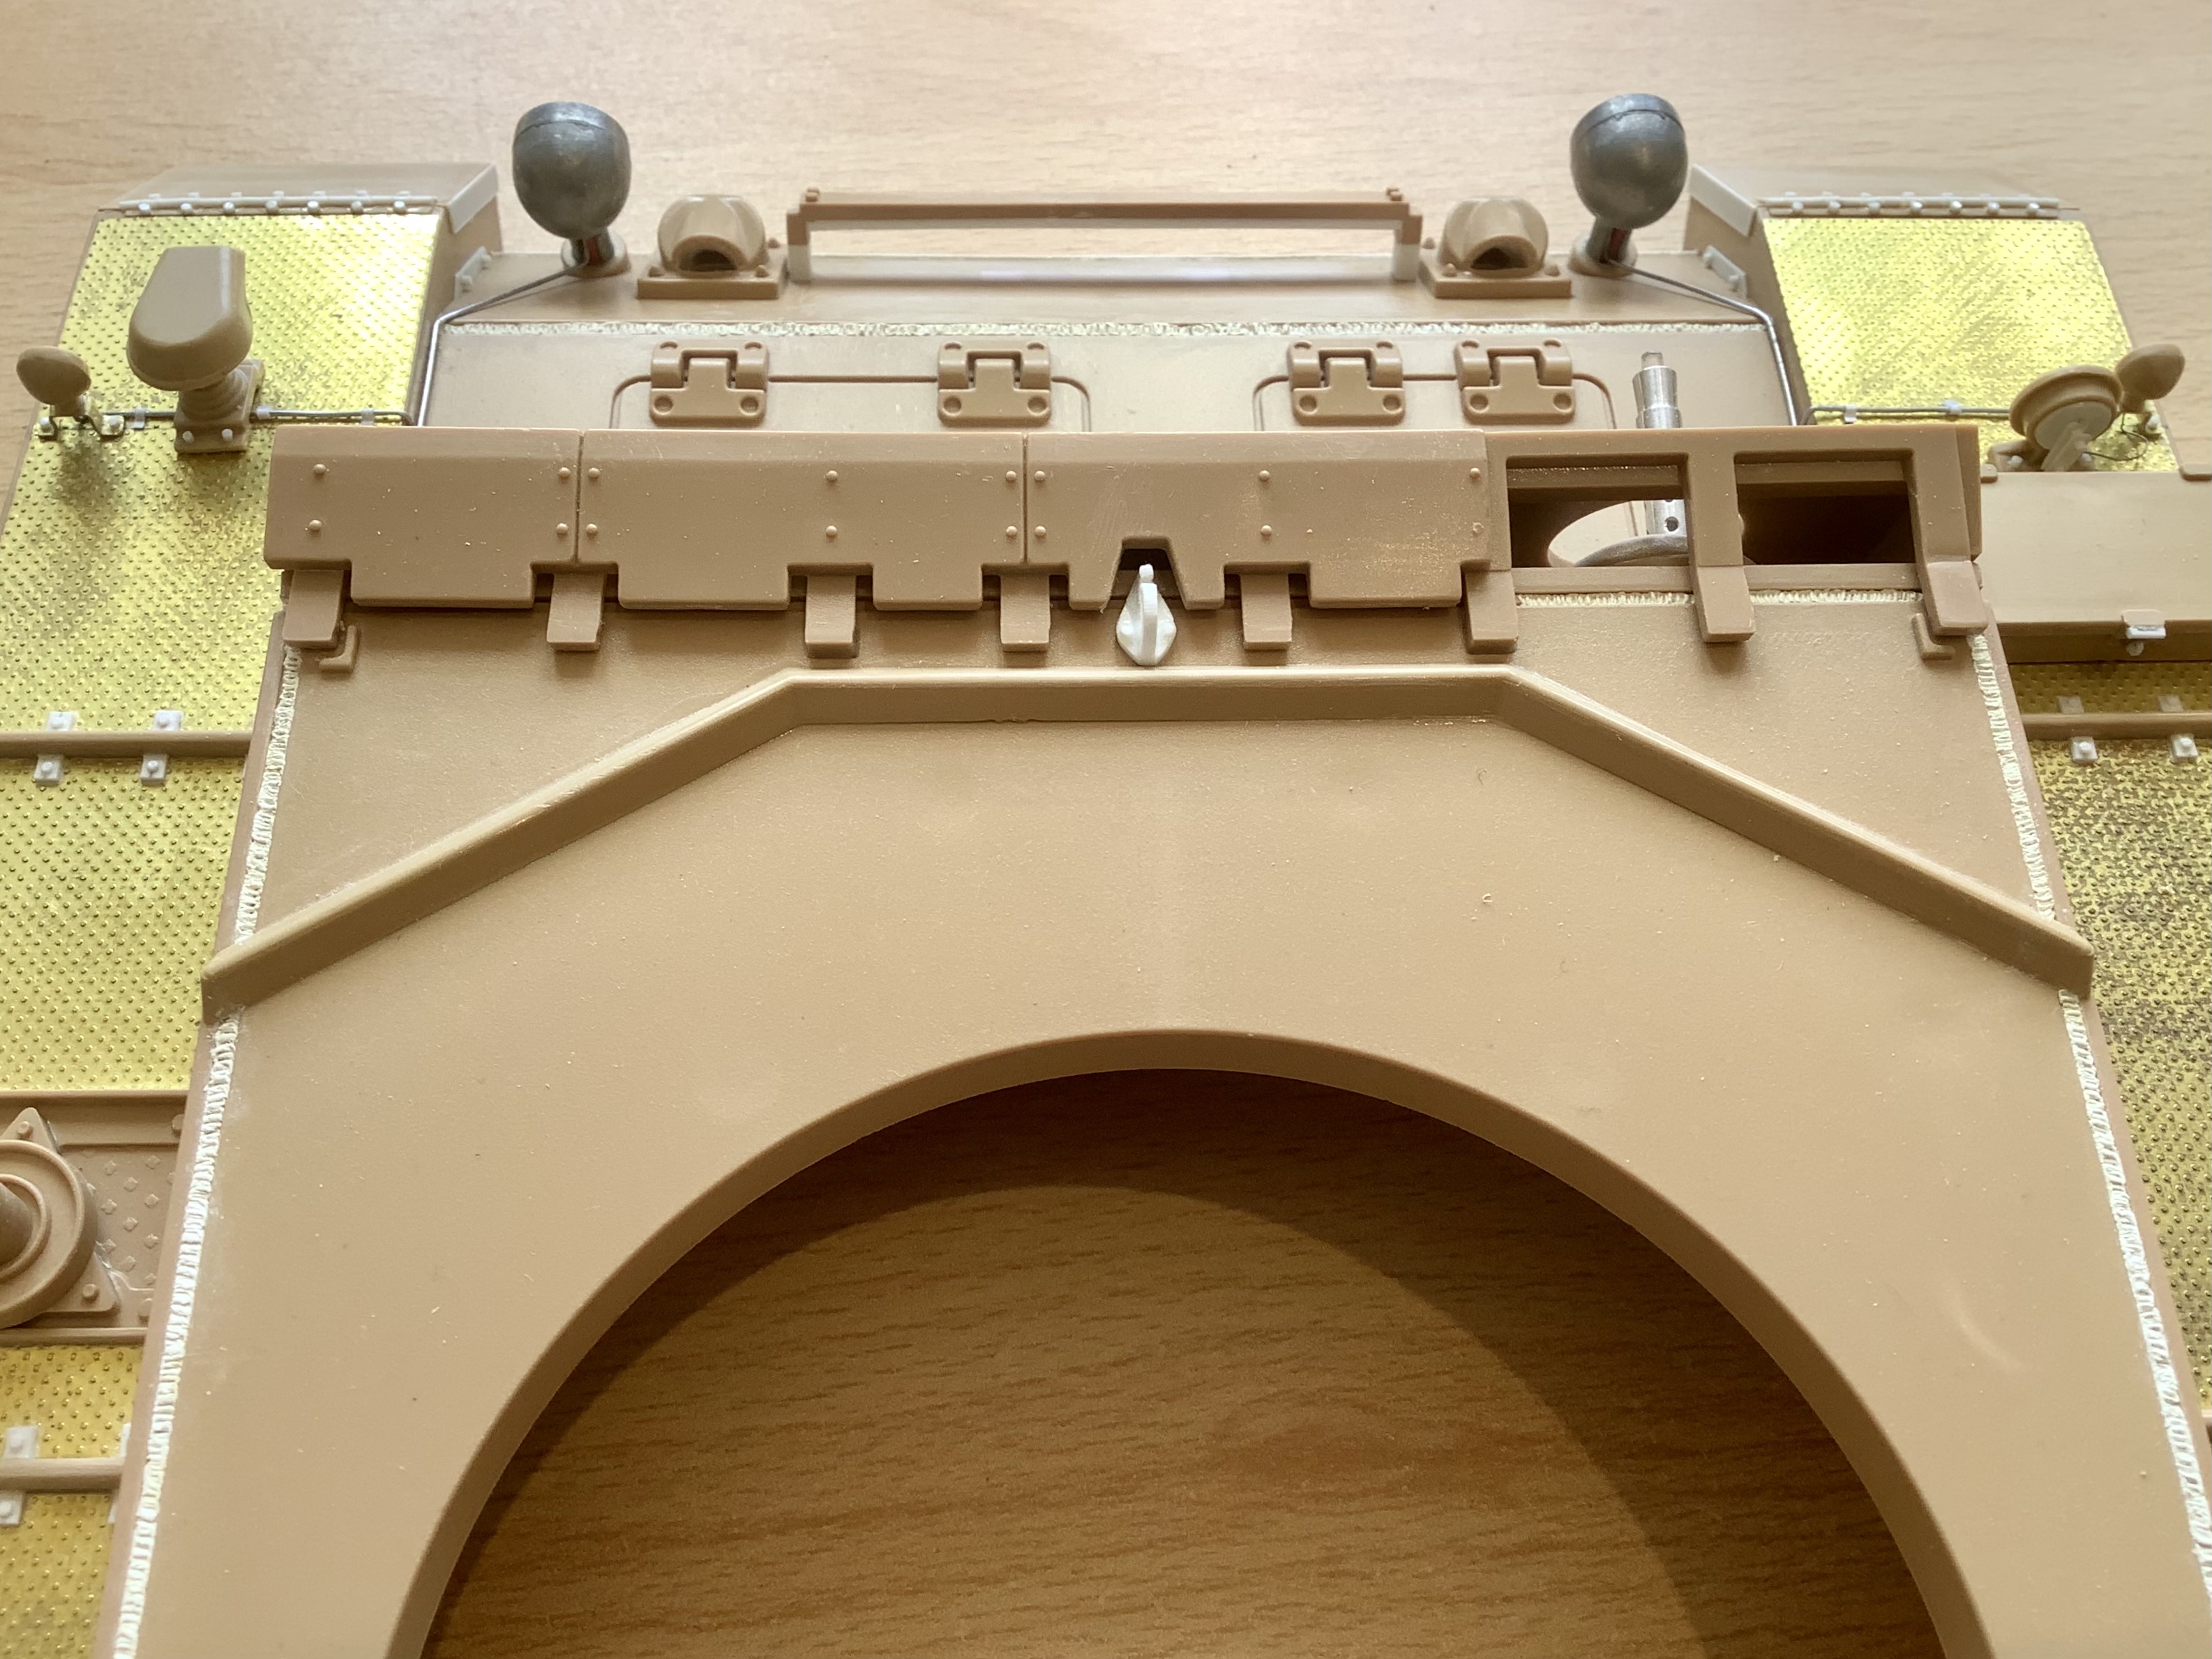
The weld seams have now been added to the upper hull, they were made using Milliput & some tools that I made from Brass tube to replicate the weld patterns.
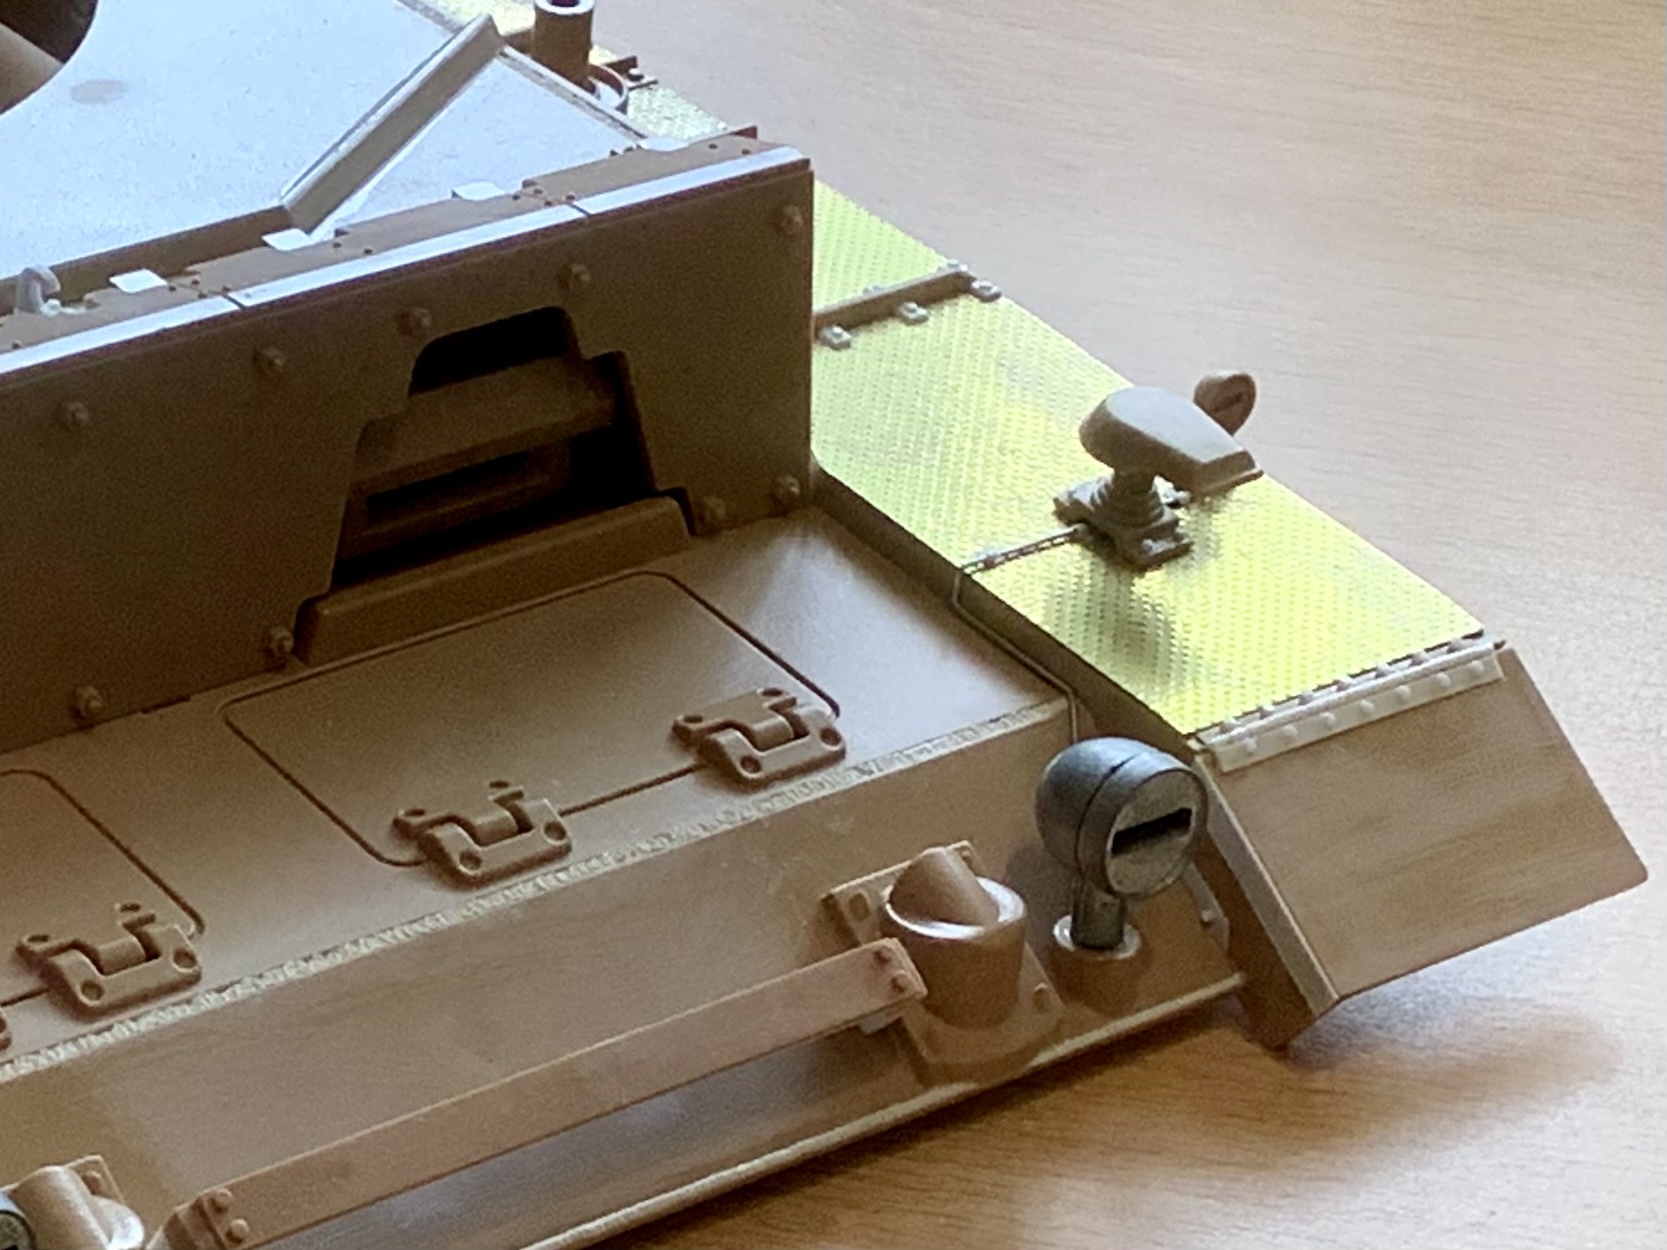
I added some missing extra details to the upper hull, lifting hooks, tow cable clamps, front & rear track guard hinges, horn/headlight wiring, tool box hinges & clasps. I also cutout & opened up the brake vents.
Please see photos below:
Note:
The additional work I’ve done & extra detailing I’ve added is more apparent when viewed before any paint has been applied.

- Upper Hull Completed-Weld Seams & Extra Details Added
- F1051BAF-D0D3-4426-9420-42324FB7A8DF.jpeg (922.87 KiB) Viewed 2152 times
Track guard hinges, headlight & horn wiring, the opened up brake vents Etc.

- Front Hull-Weld Seams-Track Guard Hinges-Open Brake Vents
- 4DFF8906-515D-433B-A278-3277A8D29D2D.jpeg (1.7 MiB) Viewed 2152 times

- Front Hull-Weld Seams-Track Guard Hinges-Open Brake Vents
- 72208A73-48F7-49AA-9DEF-3B620CECB55D.jpeg (1.67 MiB) Viewed 2152 times
The incorrect front centre lifting hook was removed & a new hook made & fitted
- Hull Front 1/2 Top
- 5210398E-F6AF-4EFD-9893-A797816BE3B6.jpeg (1.78 MiB) Viewed 2104 times

- Hull Front 1/2
- 3010A097-CAD0-4487-90E4-45BF4B133673.jpeg (1017.24 KiB) Viewed 2152 times

- Hull Front 3/4 LHS
- 24EB8E25-8180-4AB2-82E6-BD9D0A9E955C.jpeg (820.26 KiB) Viewed 2104 times
New spare track holder & track guard hinges, toolbox extra details.

- Hull Front 1/4 RHS
- 901C9A08-9CE4-40AB-B4BF-1E5E3ECA3FB5.jpeg (522.23 KiB) Viewed 2104 times

- Hull Front 3/4 RHS
- 5B46AEB2-1839-466E-8567-7336C4D9D6F0.jpeg (1.72 MiB) Viewed 2104 times
- Hull Front 1/4 LHS
- 78110FD8-1DDE-44B3-8B0E-A5C7390C2E0E.jpeg (466.96 KiB) Viewed 2104 times
The upper hull consists of two separate sections, the front upper hull & the rear engine deck, with a distinct line separating the two. This missing detail was added by cutting a groove between the two sections.

- Rear Engine Deck
- 7DA89685-7685-4EAC-9CB5-EAA6326009CB.jpeg (610.59 KiB) Viewed 1957 times
Tow cable brackets, rear track guard hinges & weld seams Etc.

- Hull Rear 1/4 RHS
- F314C382-1E14-47EB-8C03-E50415C2E8C9.jpeg (1.08 MiB) Viewed 2104 times

- Rear Engine Deck RHS
- 6338978E-0A21-42B7-B47D-5D776AF0B5AA.jpeg (2.26 MiB) Viewed 2152 times

- Hull Rear 1/4 LHS
- 72884434-AB66-4A6F-AC36-242207C7858D.jpeg (959.41 KiB) Viewed 2104 times

- Rear Engine Deck LHS
- C442CB28-242C-42C2-A040-56C58A7345EE.jpeg (973.13 KiB) Viewed 2152 times
Front upper hull & engine deck lifting hooks.

- Rear Engine Deck
- 3244F534-6C2E-4DE3-BC5D-1AE0A33AD10A.jpeg (2.24 MiB) Viewed 2152 times
Next Up - Turret Storage Bin With Some Extra Detailing
Well That’s All For Now Folks….. 
Re: 1/16 Taigen Metal Edition Panzer III - Build
Posted: Thu Nov 03, 2022 1:46 pm
by Martin2556
Hi all,
Turret Storage Bin With Some Extra Detailing:
I replaced the oversized original storage bin
(it just had to go  )
) with a correct scale sized storage bin.

- Original Oversized Storage Bin
- 4079704F-39B2-4924-879A-7F15915B77FF.jpeg (1.12 MiB) Viewed 2073 times
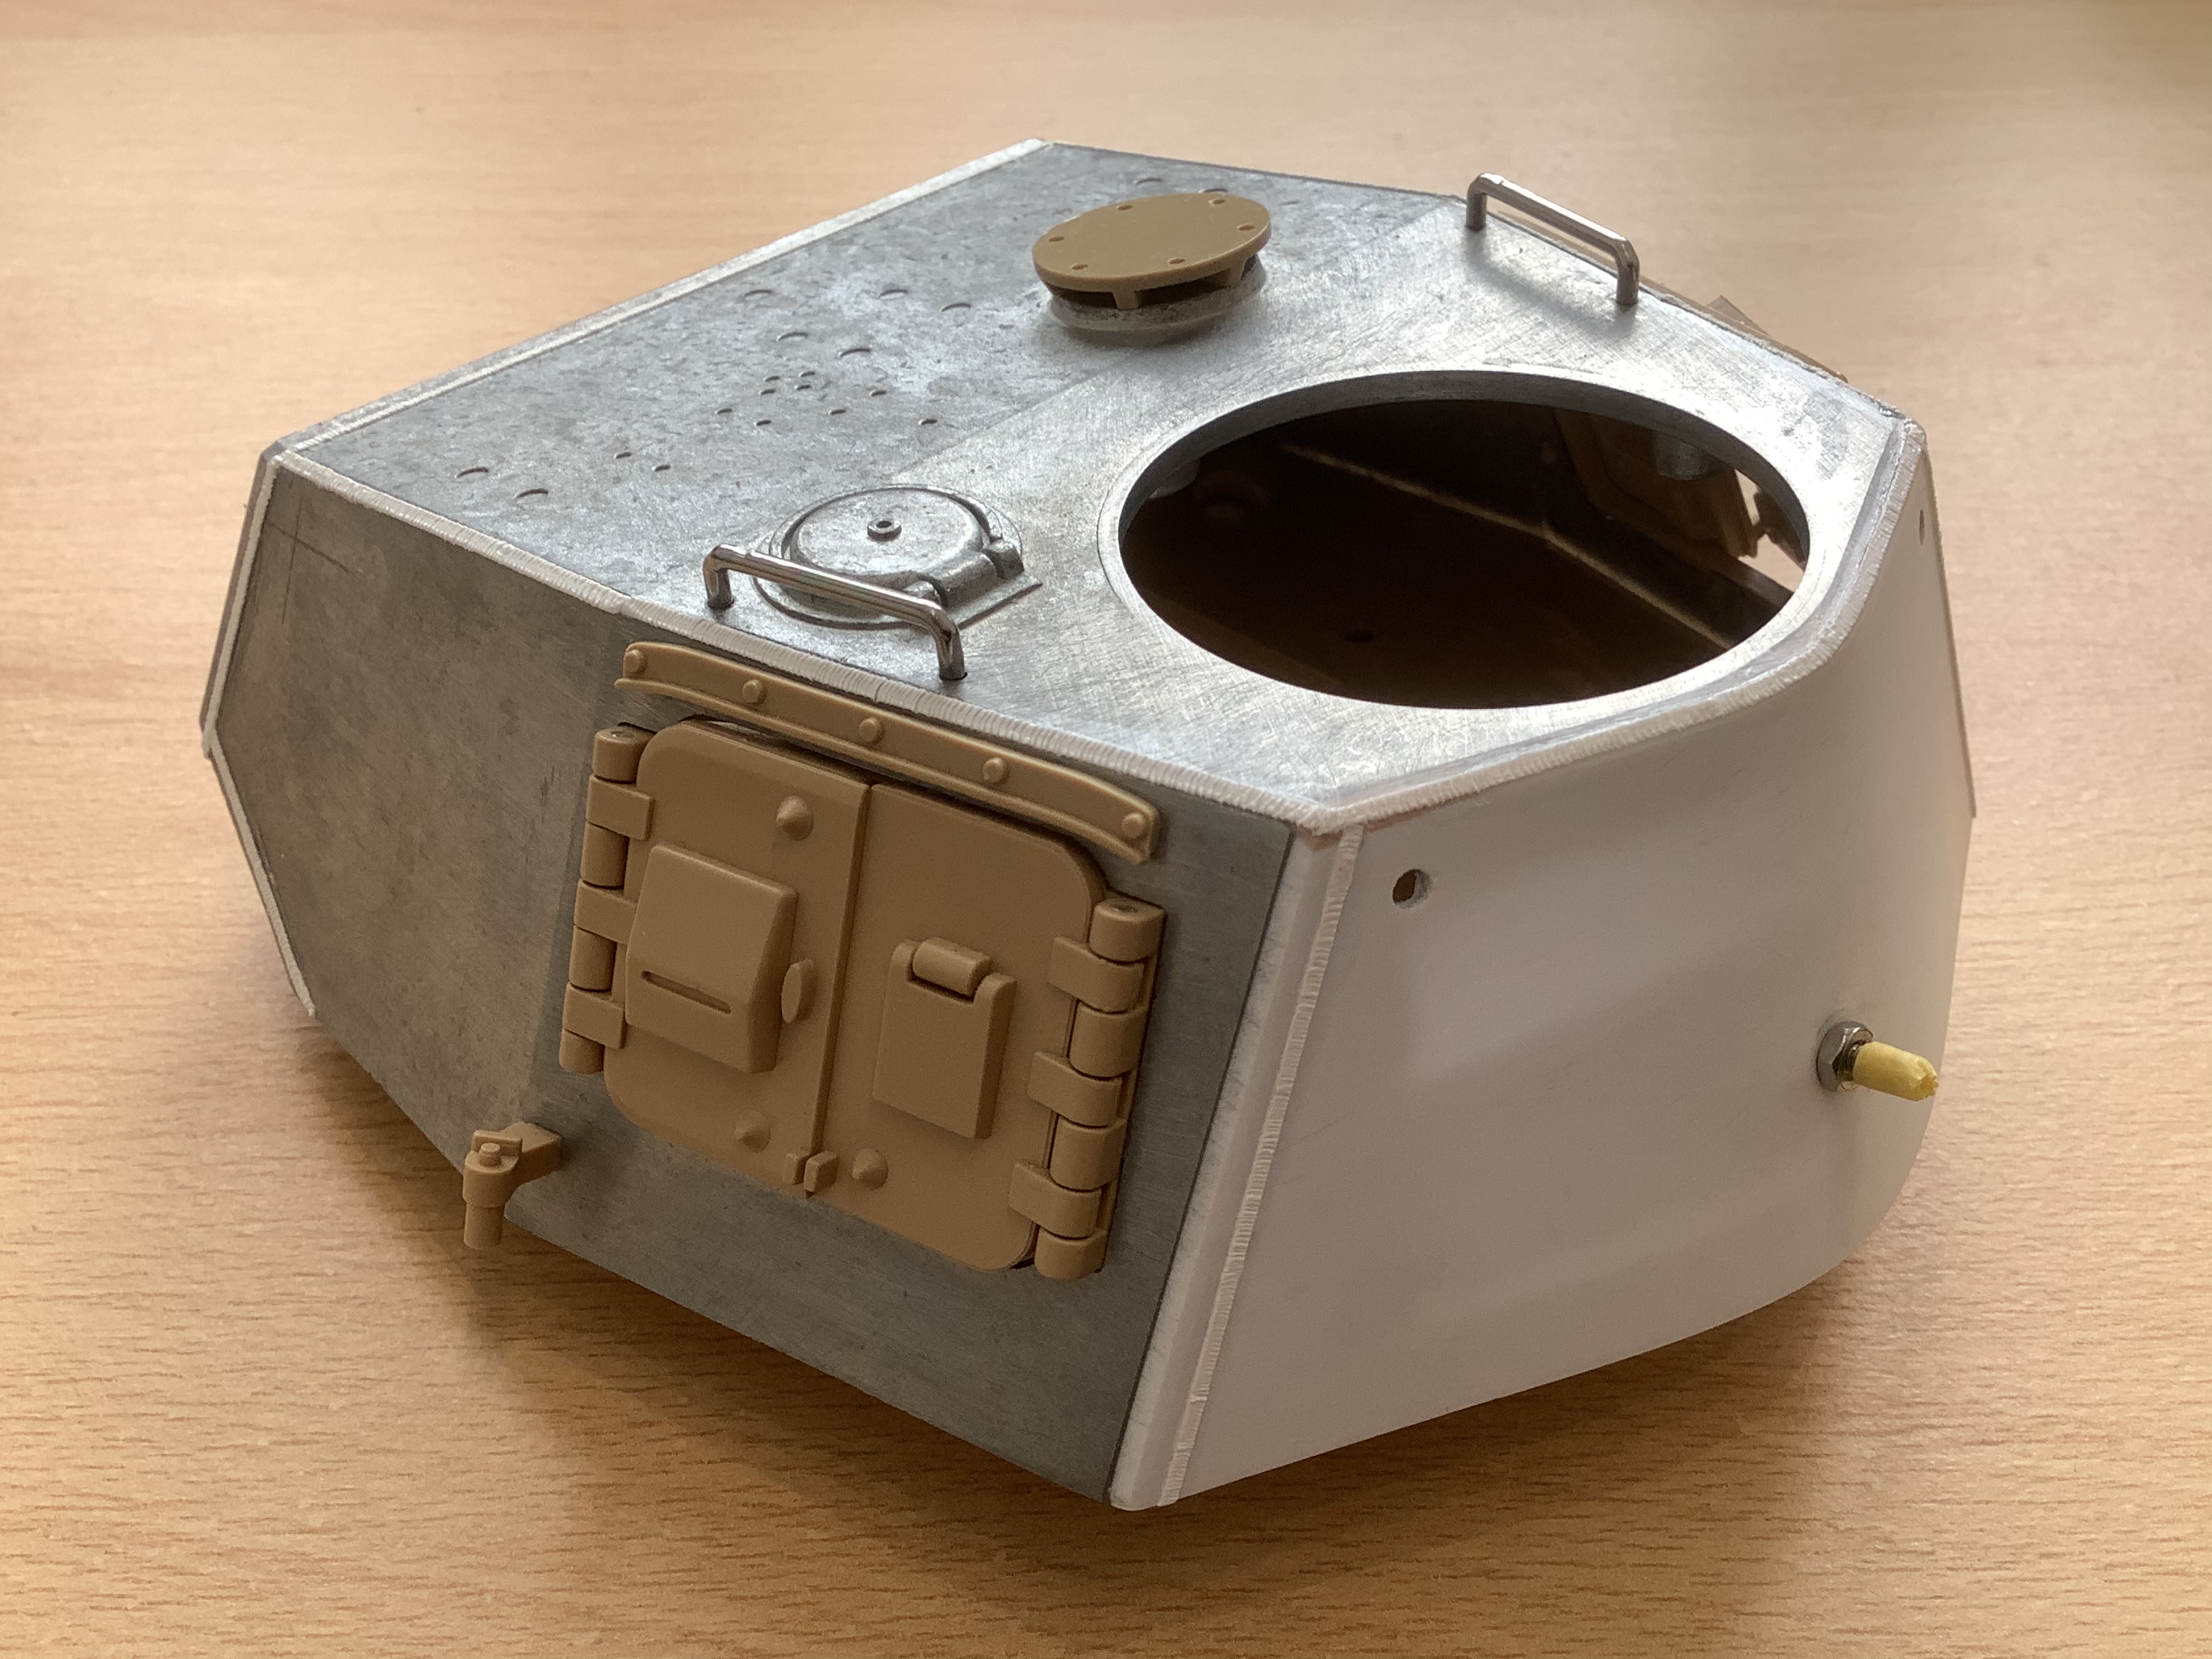
Completed turret storage bin.
- New Storage Bin
- C4807E6C-0FC8-49D6-AB9E-E3BE60D1CE17.jpeg (2.13 MiB) Viewed 2073 times
Before removing the original storage bin, I had to check that the gun recoil unit had enough room to still work correctly. The flash unit would need relocating, not a lot of spare room in the turret, but with some planning I could see that everything would fit into the turret ok.

- Turret Recoil Unit
- 05CA8D30-5D77-4374-9576-270976DC3C12.jpeg (1.06 MiB) Viewed 2073 times
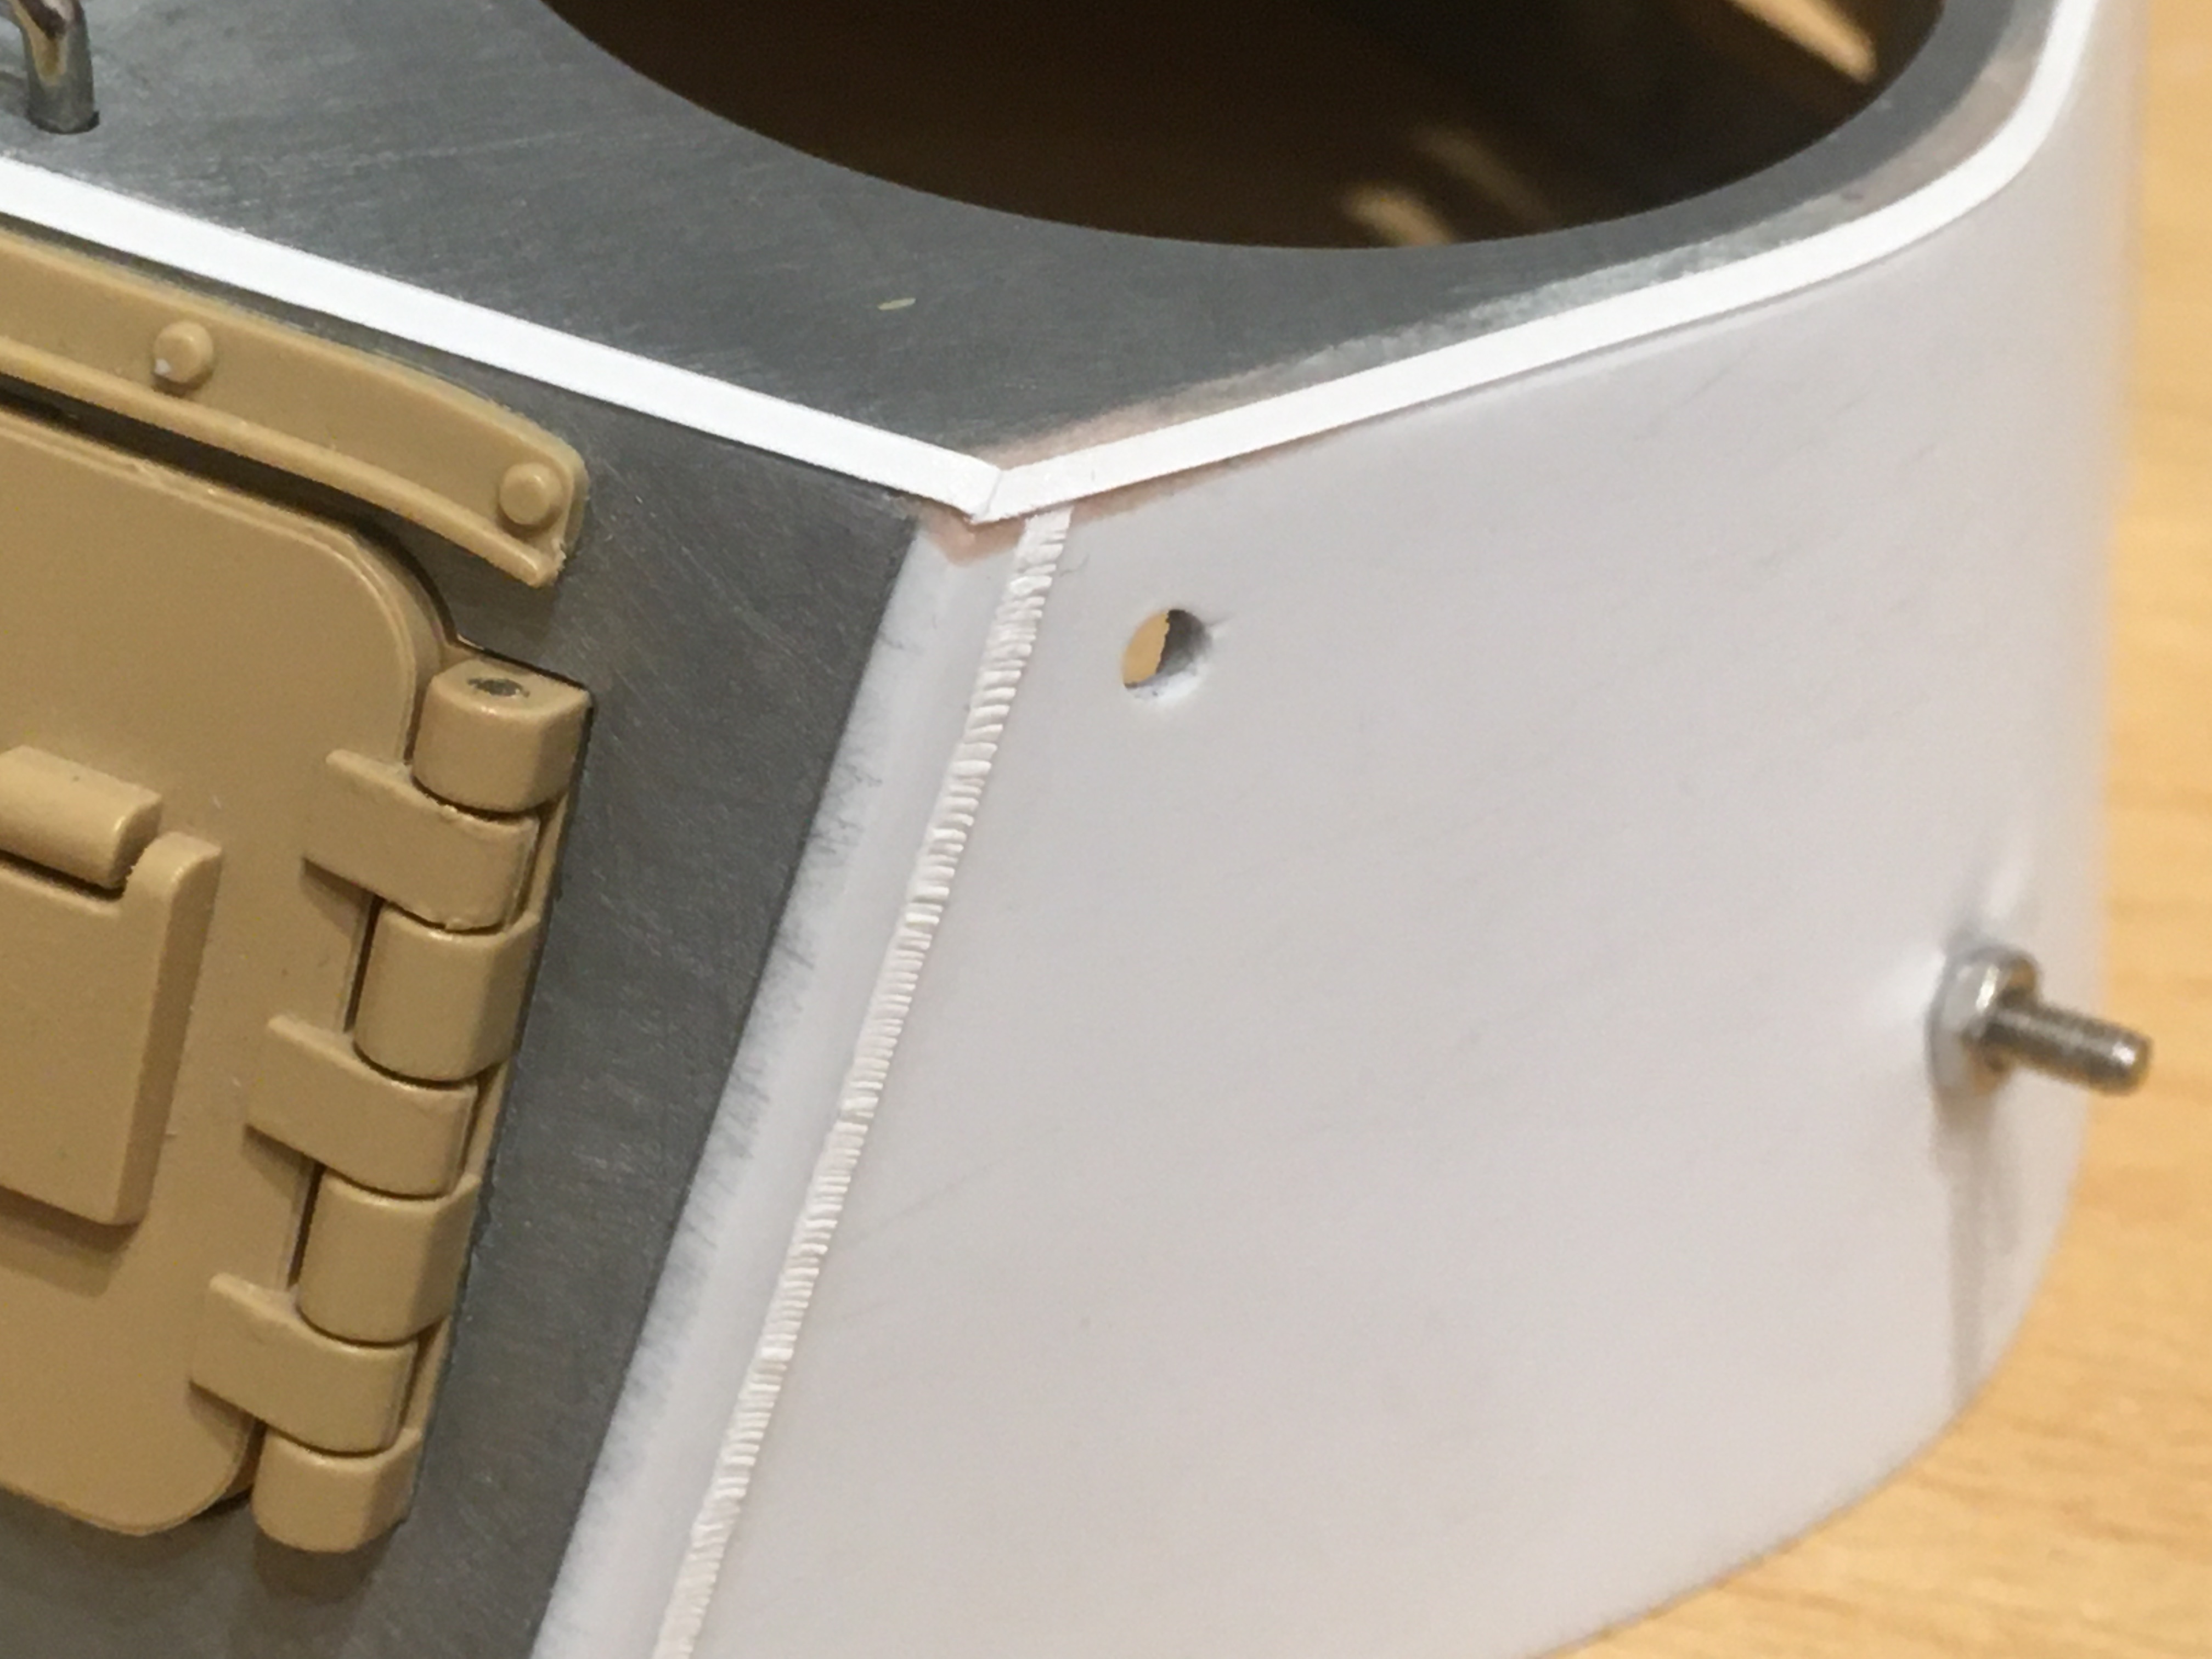
I removed the original storage bin, this left a large opening in the rear of the turret that would need some extra work.
I cleaned up & re-shaped the area where I’d removed the old storage bin & started making a new rear turret section from thick plastic card.

- Turret-Storage Bin Removed
- 275CE82E-EF2D-425B-8C05-E526EBAF10FD.jpeg (1.84 MiB) Viewed 2150 times

- Turret-Interior
- CE51637C-7E8A-4E5D-B5A2-21B20B1B6E83.jpeg (1.85 MiB) Viewed 2150 times

- Turret-After CleanUp & Shaping
- 246475D5-E735-44F7-A1C2-59DB3446D1F4.jpeg (817.22 KiB) Viewed 2075 times

- Hull+Turret
- 0D5F3687-0511-4C6C-9EE8-2A6BAFC7C11B.jpeg (2.11 MiB) Viewed 2150 times
Turret storage bin fixing points.

- Rear Turret-Storage Bin Fixing Points
- 84D83F74-C23F-49B9-9226-60F656109F4C.jpeg (872.42 KiB) Viewed 2075 times
Size comparison - original storage bin & new storage bin.

- Turret+Storage Bin’s
- 249C005C-4E66-4CA5-8D0B-82EE64E98D4D.jpeg (2.43 MiB) Viewed 2150 times

- New Storage Bin-Before Re-Working
- 4C801843-F125-4E03-89BA-FACAB96301F0.jpeg (643.54 KiB) Viewed 2075 times
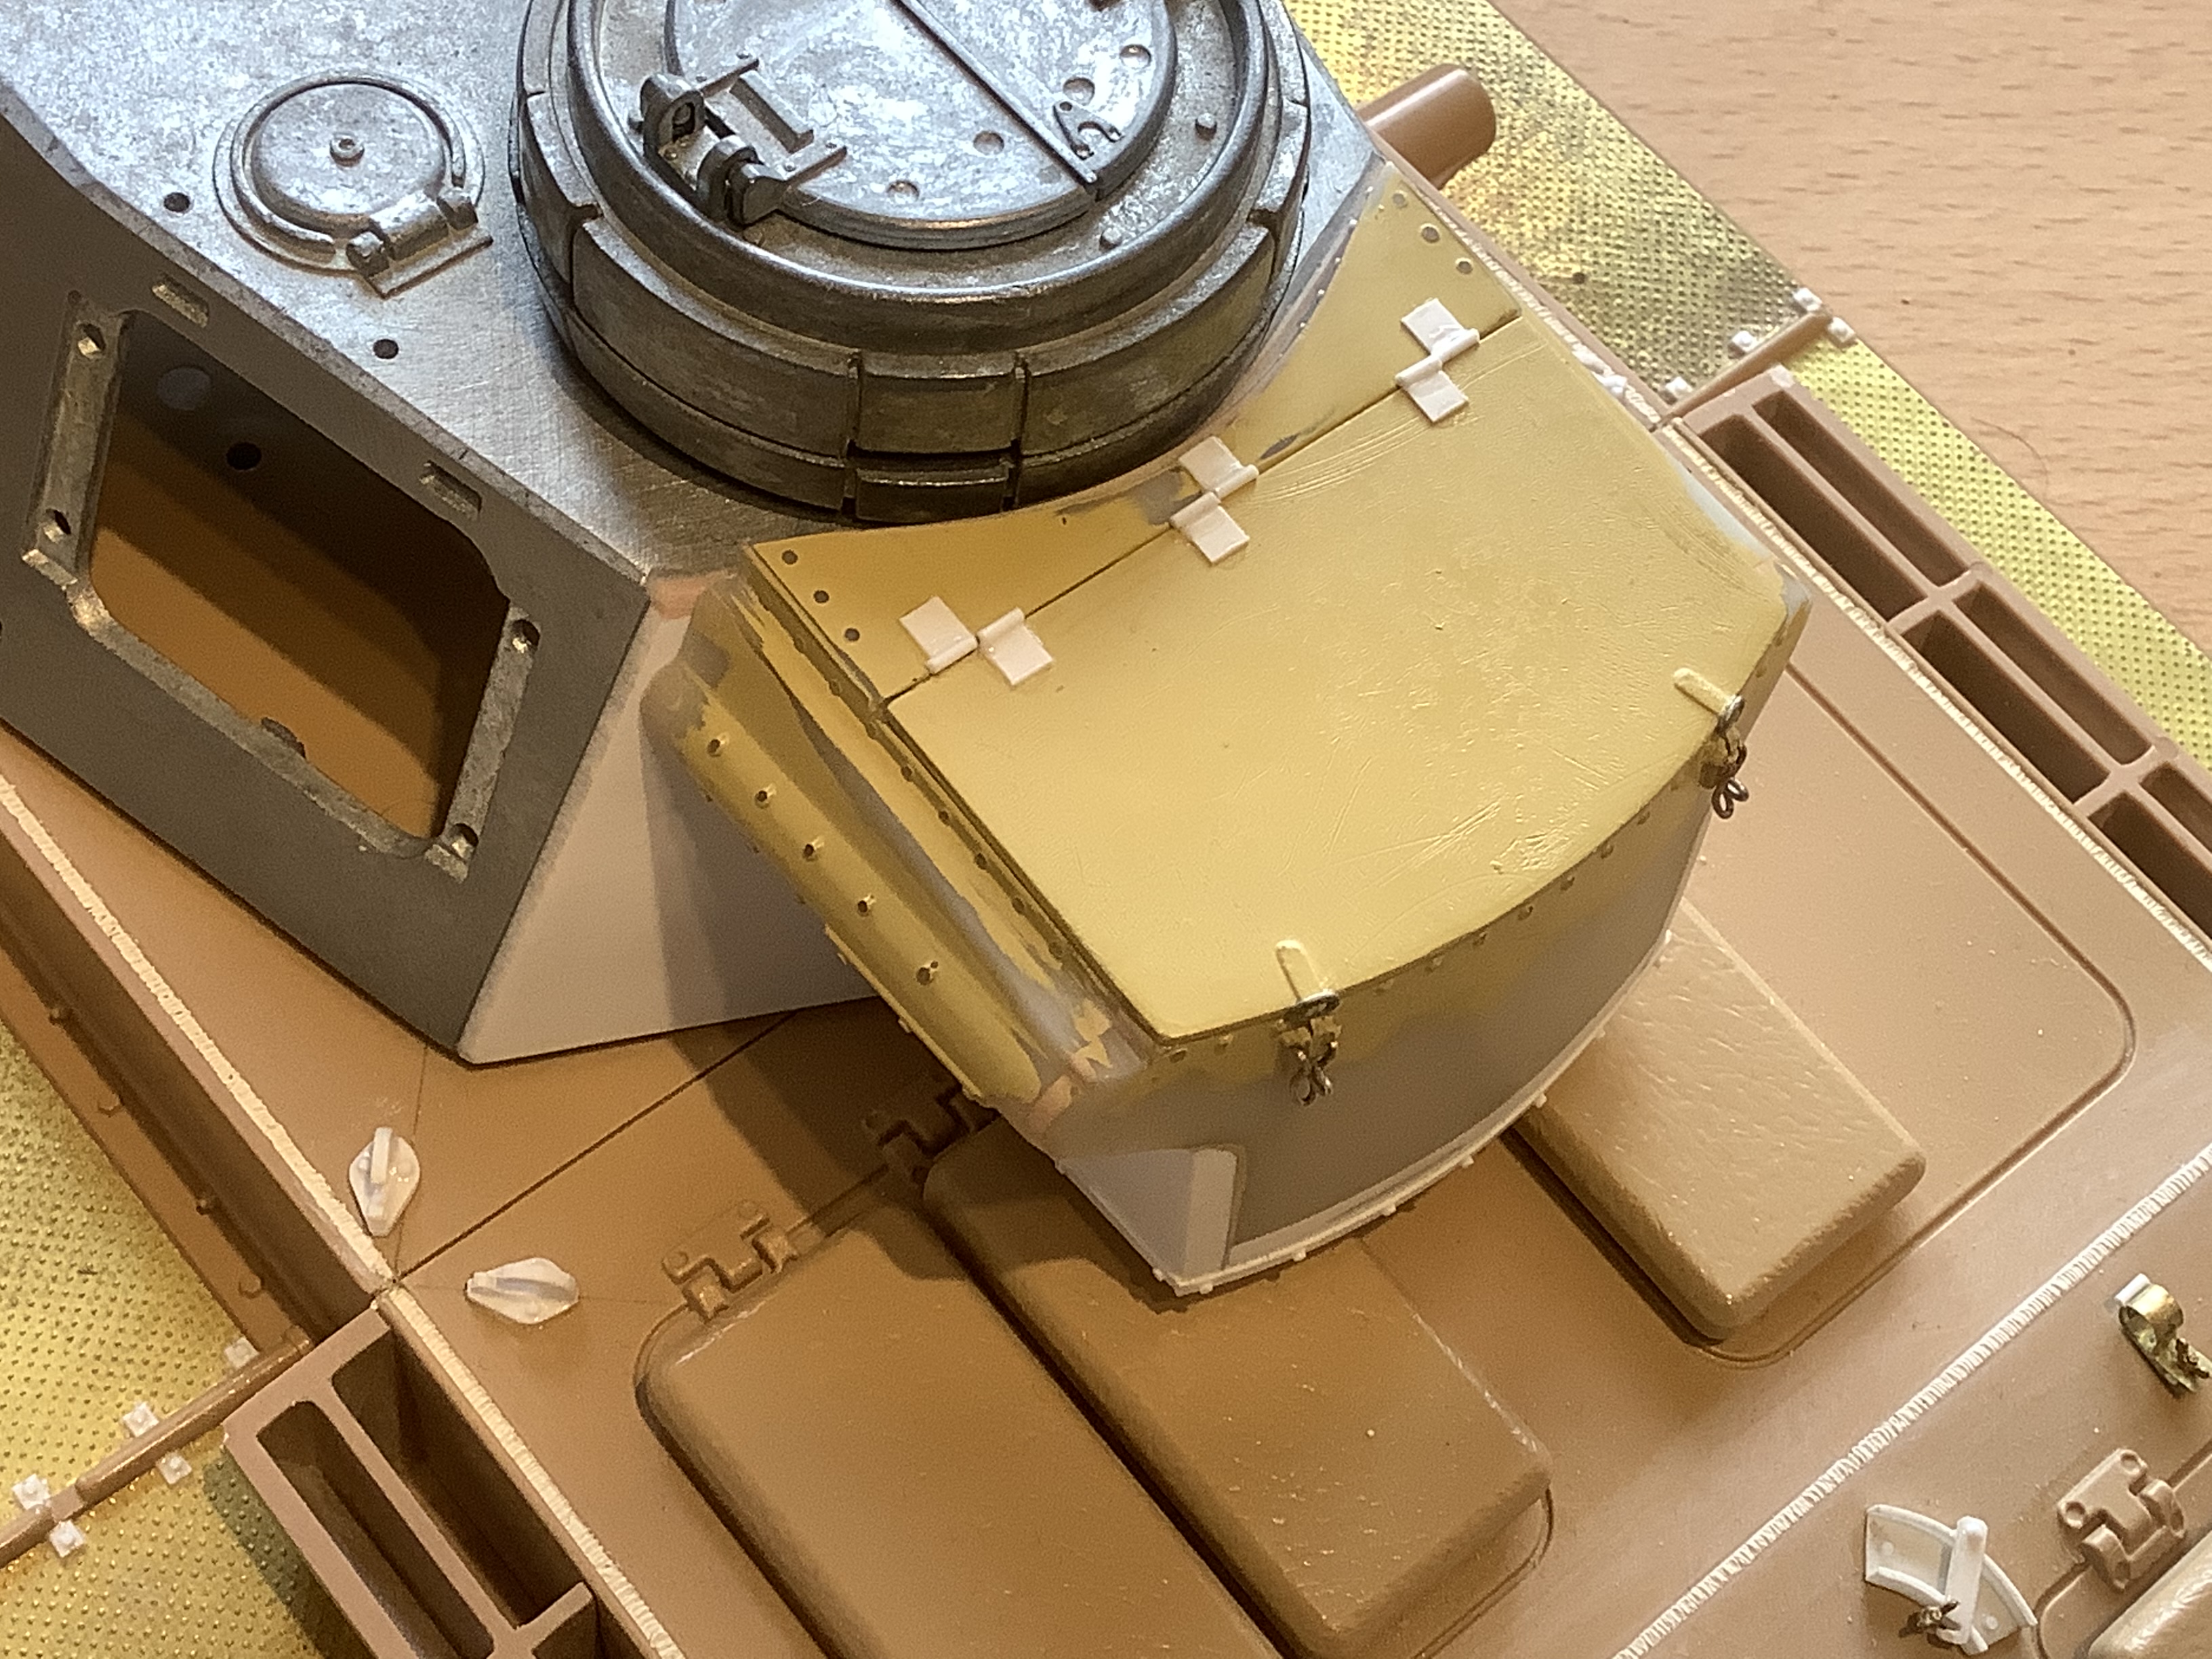
I decided to make the new storage bin removable, so I fitted it using locating pins & small nuts & bolts.
I worked out the storage bin mounting location on the rear of the turret using my reference books etc & clamped it in position ready for marking & drilling the fixing points.

- Hull+Turret+Storage Bin+Clamp
- 4DB1114D-C44B-451F-A987-BB65542924C2.jpeg (2.32 MiB) Viewed 2150 times

- Hull+Turret+Storage Bin+Clamp+Close Up
- 9B7B5630-C8C1-4DFF-892E-B7680C9CE491.jpeg (2.01 MiB) Viewed 2150 times
The new storage bin although more accurate than the original storage bin, it still needed some extra work, it took quite a lot of filling & re-shaping to ensure that it’s was as close as possible to the correct size & shape, I also added some extra details.
I retained the opening lid in order to be able to get to the fixings, also I need somewhere to keep my sandwiches.


- New Storage Bin
- 32E68B0C-963D-499D-A720-92970119064B.jpeg (1.32 MiB) Viewed 2145 times

- Storage Bin-Location Pins
- 57227986-83FC-4B6E-9872-F22E4127FD9C.jpeg (1.35 MiB) Viewed 2075 times

- Upper Hull+Turret+Storage Bin+Lid
- 04A30E7D-5711-45D0-95B9-CA4550451D28.jpeg (2.25 MiB) Viewed 2150 times
Next Up - Adding The Turret Weld Seams & Some Extra Details
Correcting The Gun Mantlet
That’s all for now everyone………
Cheers Martin
Re: 1/16 Taigen Metal Edition Panzer III - Build
Posted: Thu Nov 03, 2022 2:07 pm
by SCHWEREPANZER
Careful, exacting, precise and beautiful work. Your Pz III is fast becoming the standard by which we measure others.
Great work,
Ralph
Re: 1/16 Taigen Metal Edition Panzer III - Build
Posted: Thu Nov 03, 2022 2:50 pm
by Martin2556
Thanks Ralph

Re: 1/16 Taigen Metal Edition Panzer III - Build
Posted: Thu Nov 03, 2022 3:14 pm
by Martin2556
Hi Guy’s
Adding The Turret Weld Seams & Some Extra Details:
Correcting The Gun Mantlet:
I couldn’t use Milliput for the weld seams on some parts of the metal turret, so I had to experiment with various options. I found that using very thin strips of plastic card superglued in place worked well. After glueing in place I softened the plastic with liquid cement & then added the weld pattern with the brass tools I’d made.

- Weld Seams Turret Front RHS
- 37A96F88-C25C-43D1-82C7-D90668F68B89.jpeg (1.58 MiB) Viewed 2143 times

- Weld Seams Turret Front LHS+Top
- 8ABE39C4-5C0A-4E05-9D68-7C7D8ACACECB.jpeg (1.58 MiB) Viewed 2038 times
See top edges of turret - the thin plastic strip added for the weld seam before applying the weld pattern with the brass tool.

- Weld Seams Turret Front 1/4 RHS
- 25DD9B2A-80D7-468E-8D38-101DDF124BE2.jpeg (1.23 MiB) Viewed 2143 times
See top edges of turret - the thin plastic strip added for the weld seam & then after applying the weld pattern with the brass tool.

- Weld Seam Turret Front 1/4 LHS
- C94C5D33-5D62-4B8E-825E-BCF625E85C59.jpeg (498.68 KiB) Viewed 2037 times

- Weld Seams Turret Rear 1/4 RHS
- 6C5A3127-8211-4BAA-A489-03868D3B265F.jpeg (1.01 MiB) Viewed 2143 times
See top rear edges of turret - the thin plastic strip added for the weld seam before applying the weld pattern with the brass tool.
- Weld Seams Turret Rear 1/4 LHS
- 1CD61103-BC3A-47B5-A450-BC9DDDACDF7B.jpeg (975.31 KiB) Viewed 2143 times
See top edges of turret - the thin plastic strip added for the weld seam after applying the weld pattern with the brass tool. Turret storage bin attachment points.

- Weld Seams Turret Rear+Top+Storage Bin Attachment Points
- EC9EBE14-047C-42BD-BC76-FFD8686AF898.jpeg (1.9 MiB) Viewed 2037 times
- Weld Seams Turret Rear LHS+Top
- D855BEDA-7DE5-48D5-B91E-DB797A2509C7.jpeg (1.74 MiB) Viewed 2143 times
Turret lifting hooks (before cleaning up)

- Weld Seams Turret Lifting Hooks (Before Cleaning Up)
- 163B8E8F-7202-4758-92F4-0748F1FBA7F2.jpeg (1.31 MiB) Viewed 2143 times
Turret lifting hooks.

- Weld Seams Turret Front RHS+Top
- 982C8D84-E4A5-4170-A01A-B1E5BD800215.jpeg (2.23 MiB) Viewed 2143 times

- Weld Seams Turret Front LHS+Top
- E6FAFB2B-307B-4CF7-9600-9C393B16FAB3.jpeg (2.26 MiB) Viewed 2143 times

- Weld Seams Turret LHS+Top+Storage Bin
- 40E088FA-A204-45D8-BF8A-BB8740407258.jpeg (825.13 KiB) Viewed 2143 times
Completed turret & storage bin.

- Weld Seams Turret Rear+Top+Storage Bin
- 1248EE66-8F90-499F-A784-5282E81B6FBE.jpeg (857.34 KiB) Viewed 2143 times
Correcting the problems with the gun mantlet:.
The gun mantlet didn’t sit quite right or line up correctly, also with the top of the mantlet left open & the elevation mechanism on view the model looked unfinished. I decided to correct the alignment problem & also improve the appearance by making a cover to replicate the top of the mantlet in order to close up the opening.
It looked like a quick & easy job!!!

As it turned out correcting the alignment wasn’t to difficult, but I found it quite challenging to get the cover to fit correctly & not interfere with the elevation mechanism. The cover turned out to be quite complex, as it had to be hinged at one end & be able to slide in order to allow the gun elevation to still work correctly, after some perseverance & some trial & error I managed to get it working ok.
I can now see why Taigen left the top of the gun mantlet open.
For photos of the completed mantlet please see my later post (19 Nov 2022)
Please see photos below:

- Unfinished Open Top Gun Mantlet
- FAD9ACAB-E1AE-4FBE-BC57-89BE4C72738C.jpeg (681.75 KiB) Viewed 1905 times

- Unfinished Open Top Gun Mantlet
- D05F38CC-4078-4786-9C5B-26006E69C4D3.jpeg (356.7 KiB) Viewed 1905 times
Next Up - Time For Some Painting - Priming & Base Coat
That’s all for now……..
Cheers Martin
Re: 1/16 Taigen Metal Edition Panzer III - Build
Posted: Thu Nov 03, 2022 6:17 pm
by Martin2556
