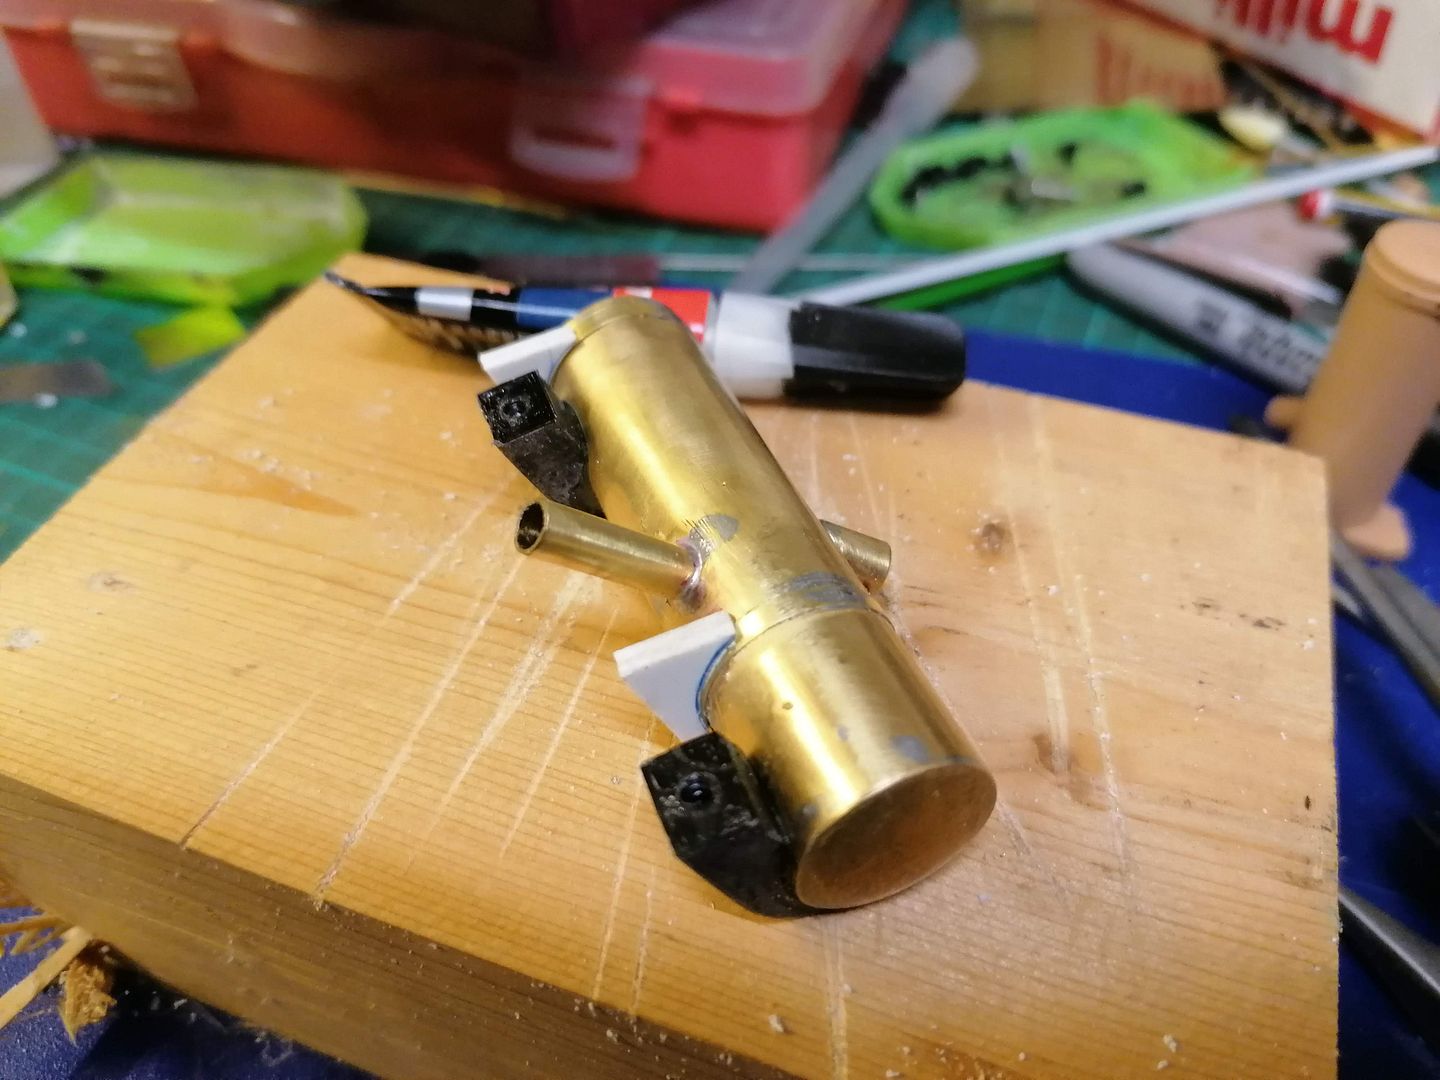
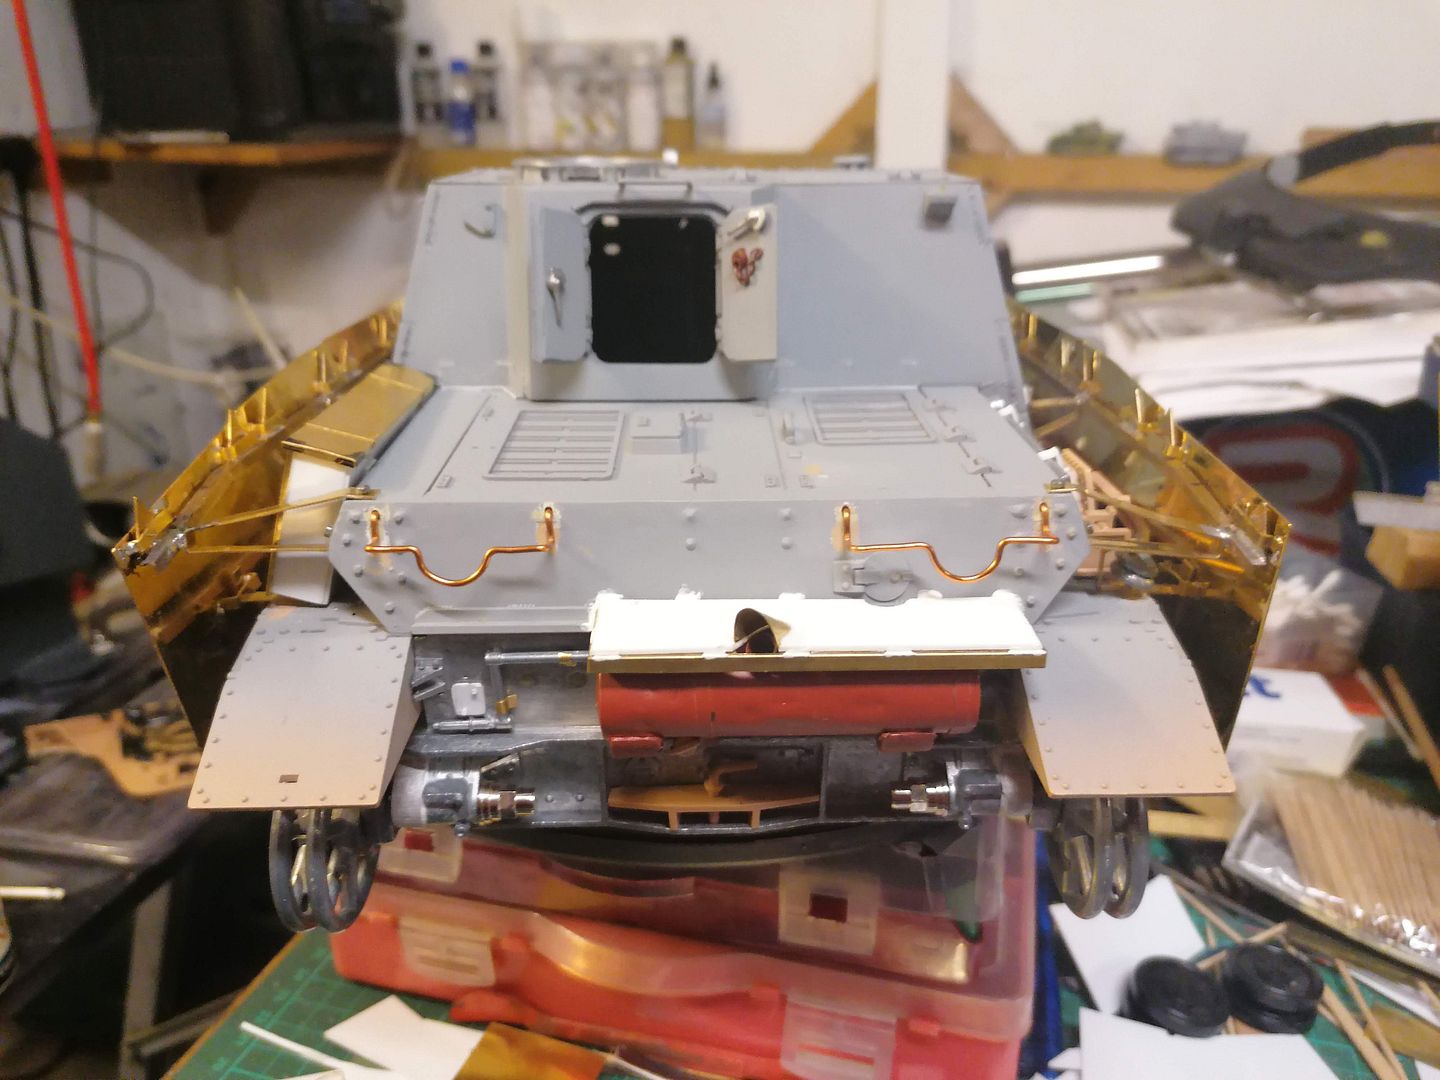
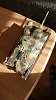
I added a bit more detail to the exhaust
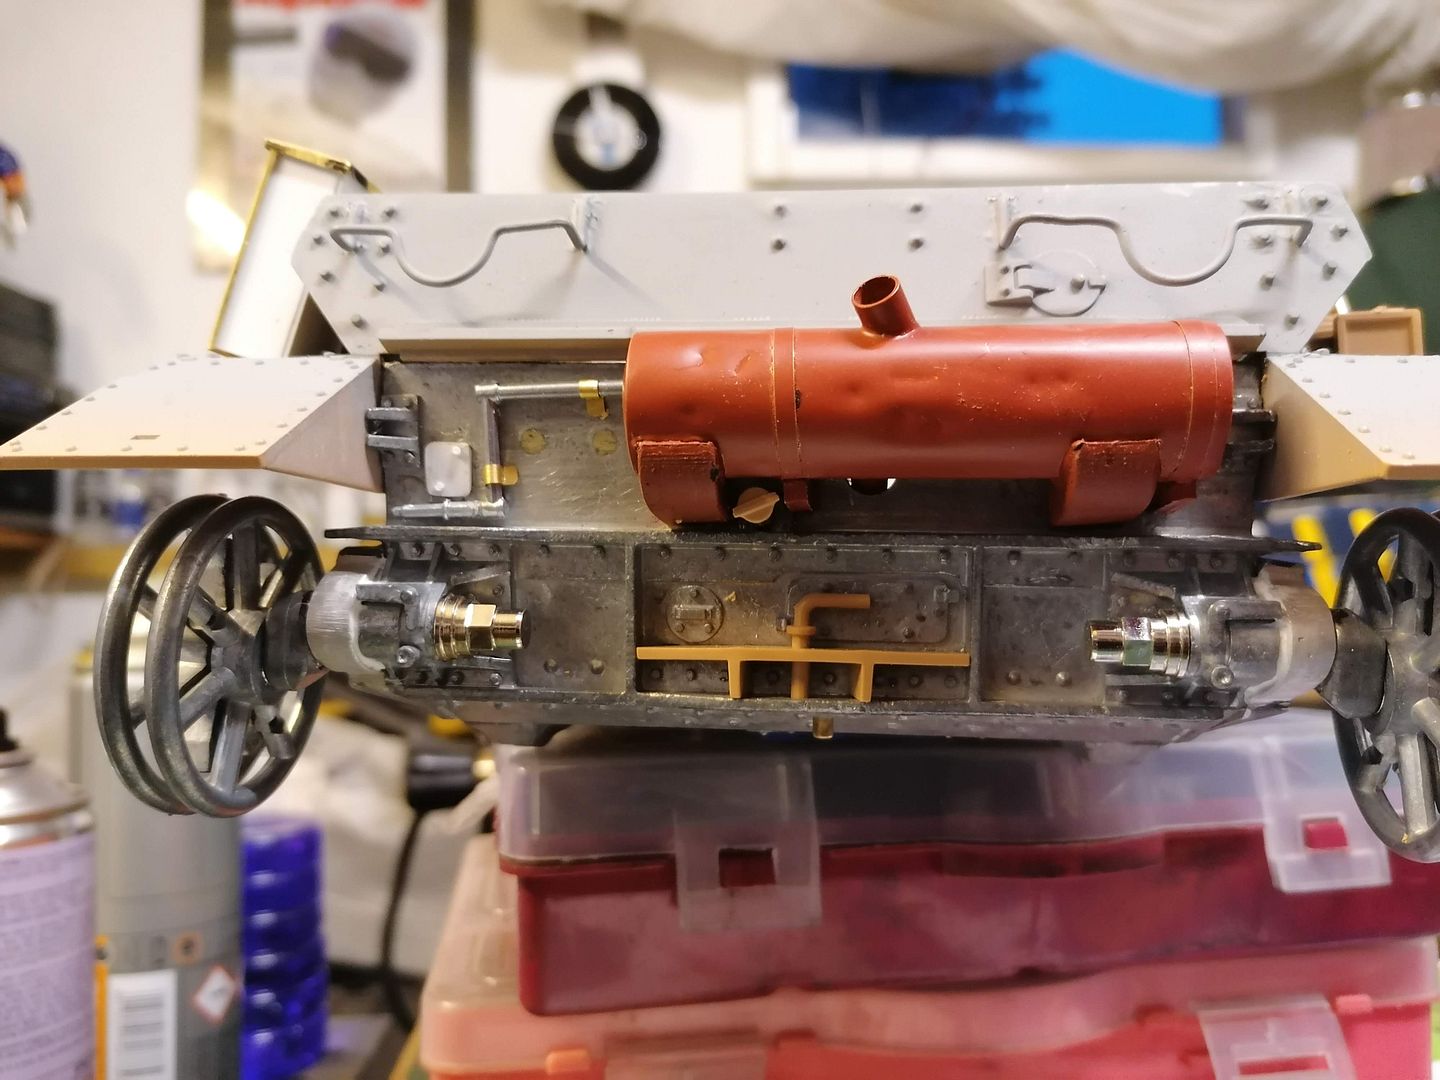
Before I refitted it I filled the holes in the rear section to tidy it up
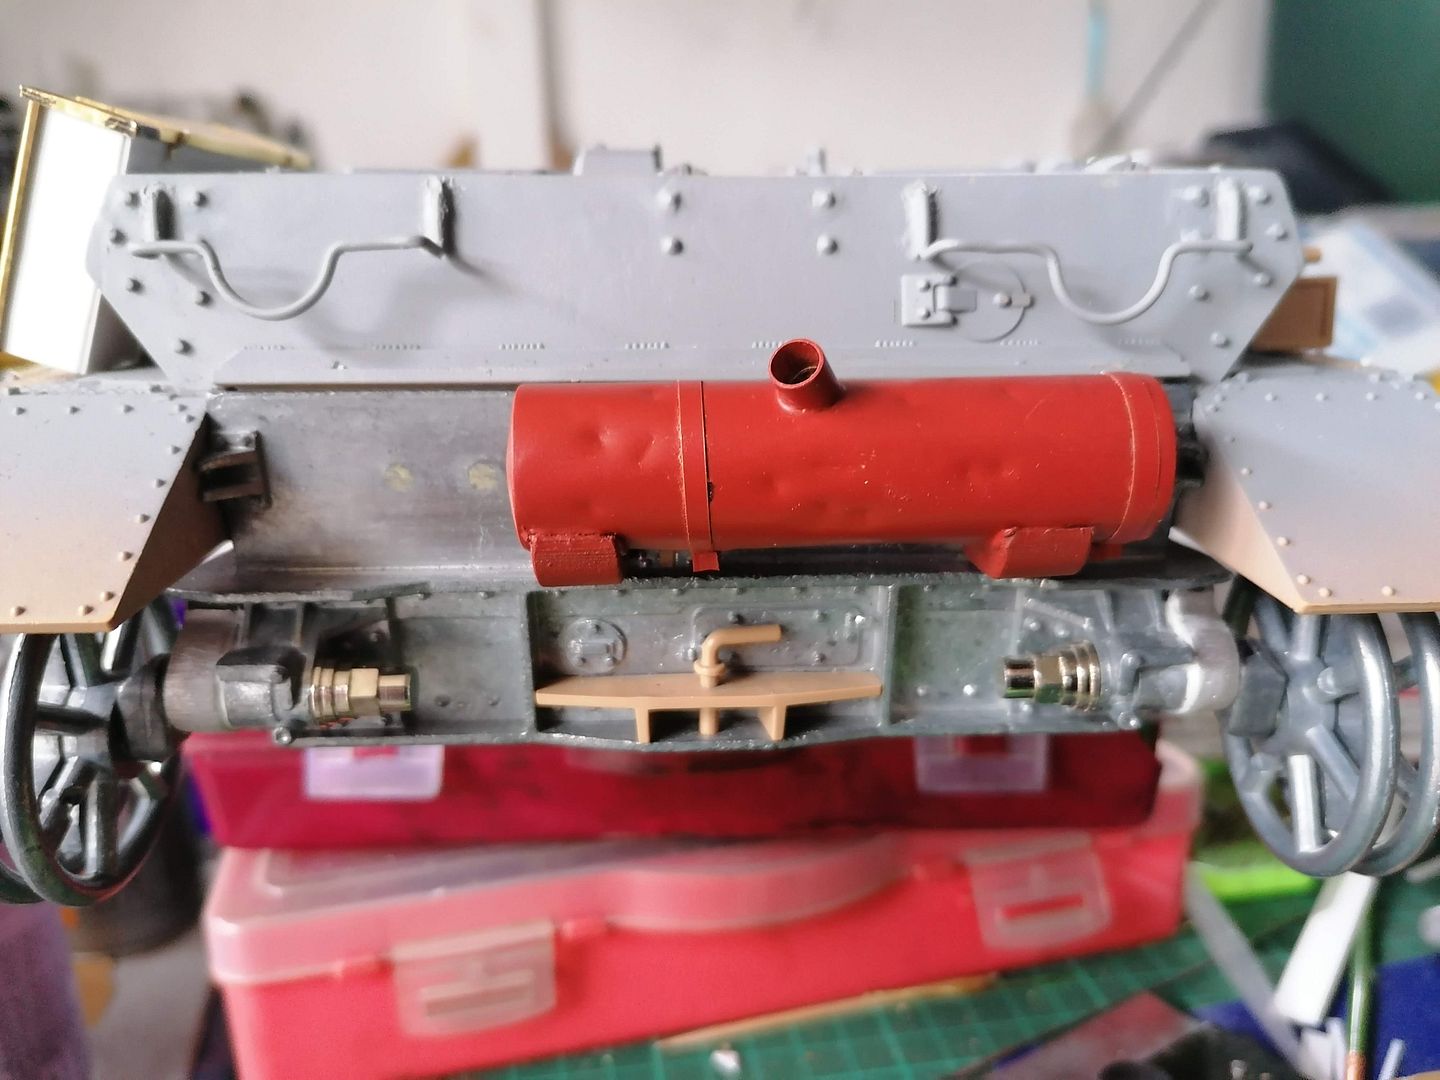
Added a bit of paint
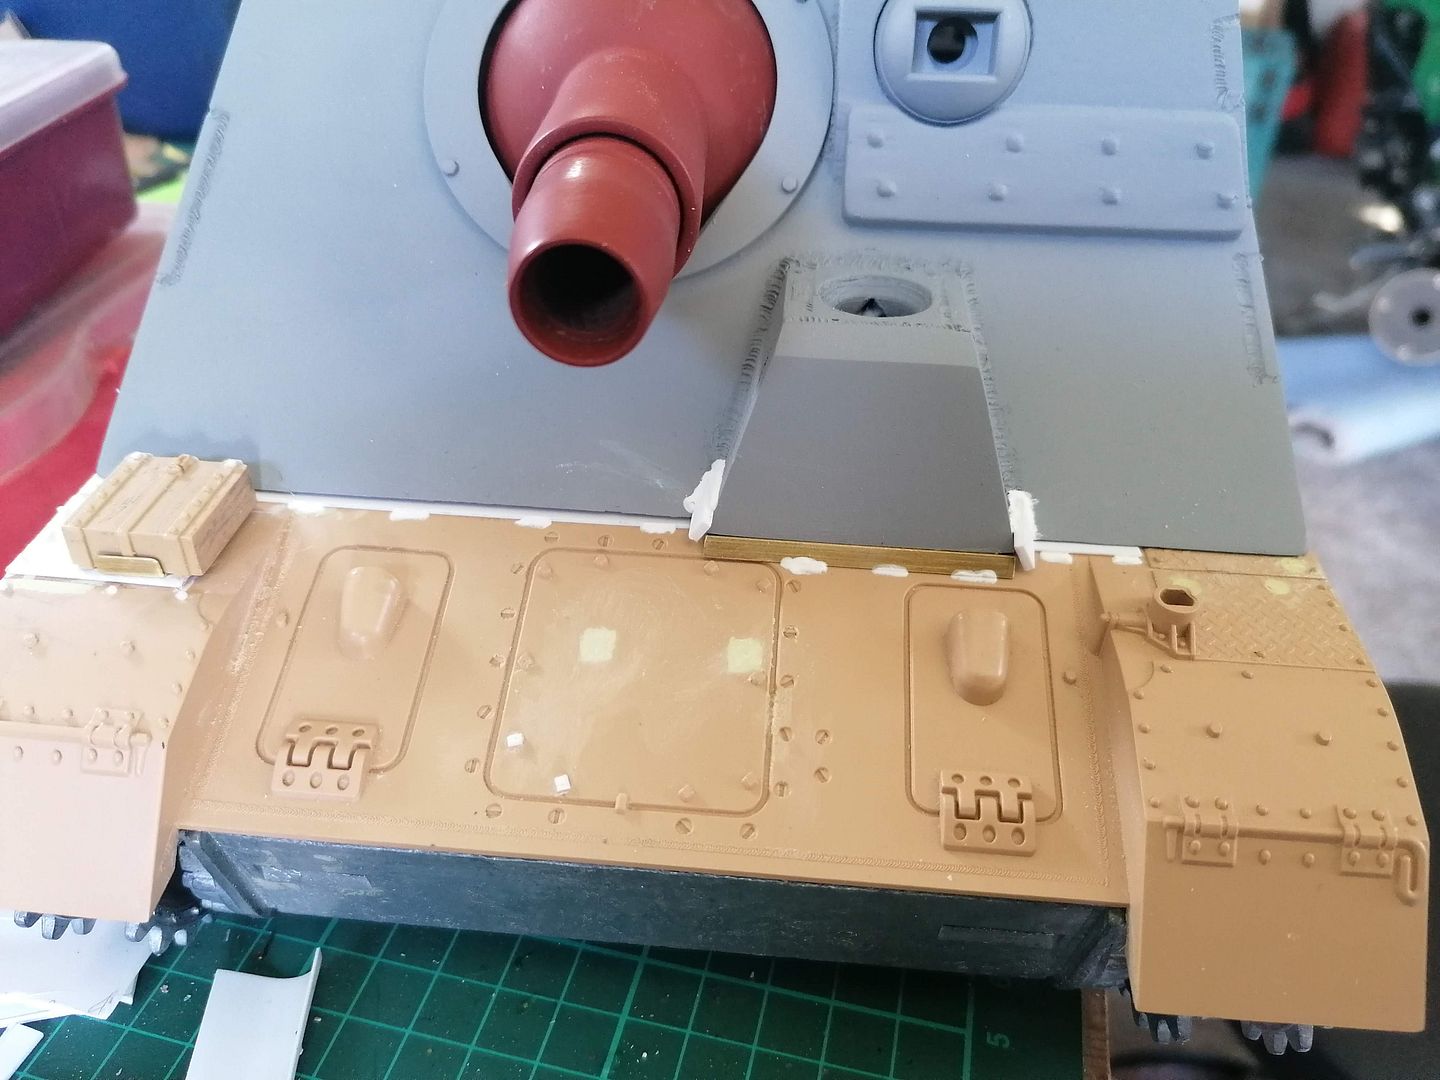
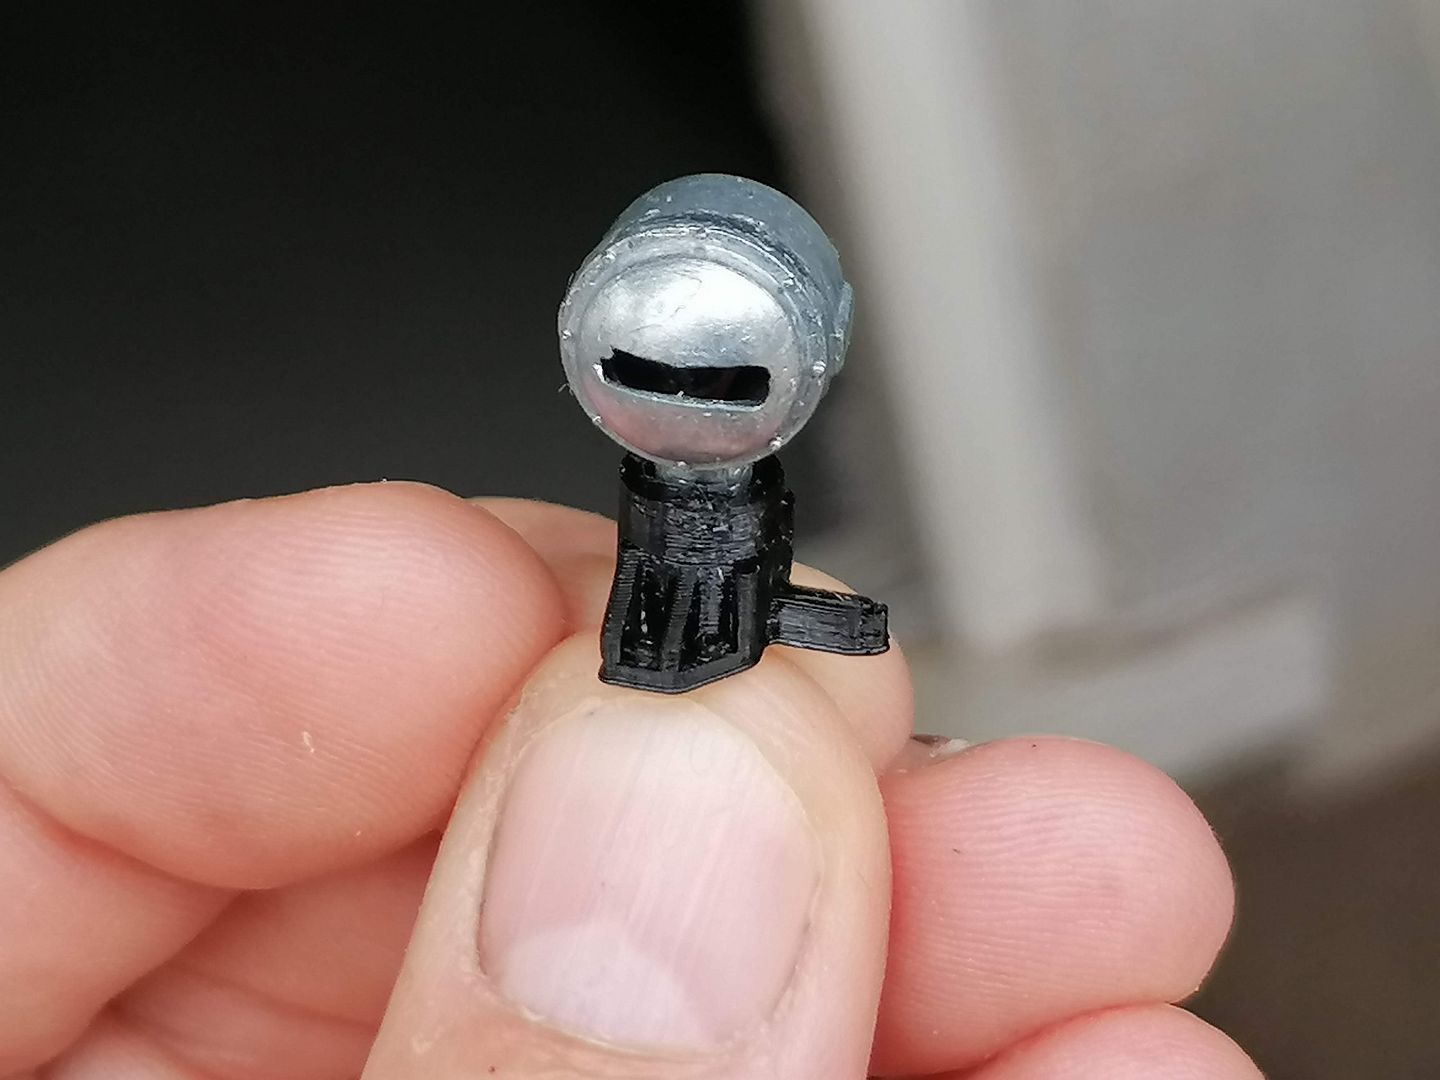
I fitted the starting handle and a cover plate for the removed auxiliary engine exhaust and drilled a hole for a small peice of brass rod then glued the filler cap from the broken plastic one to it
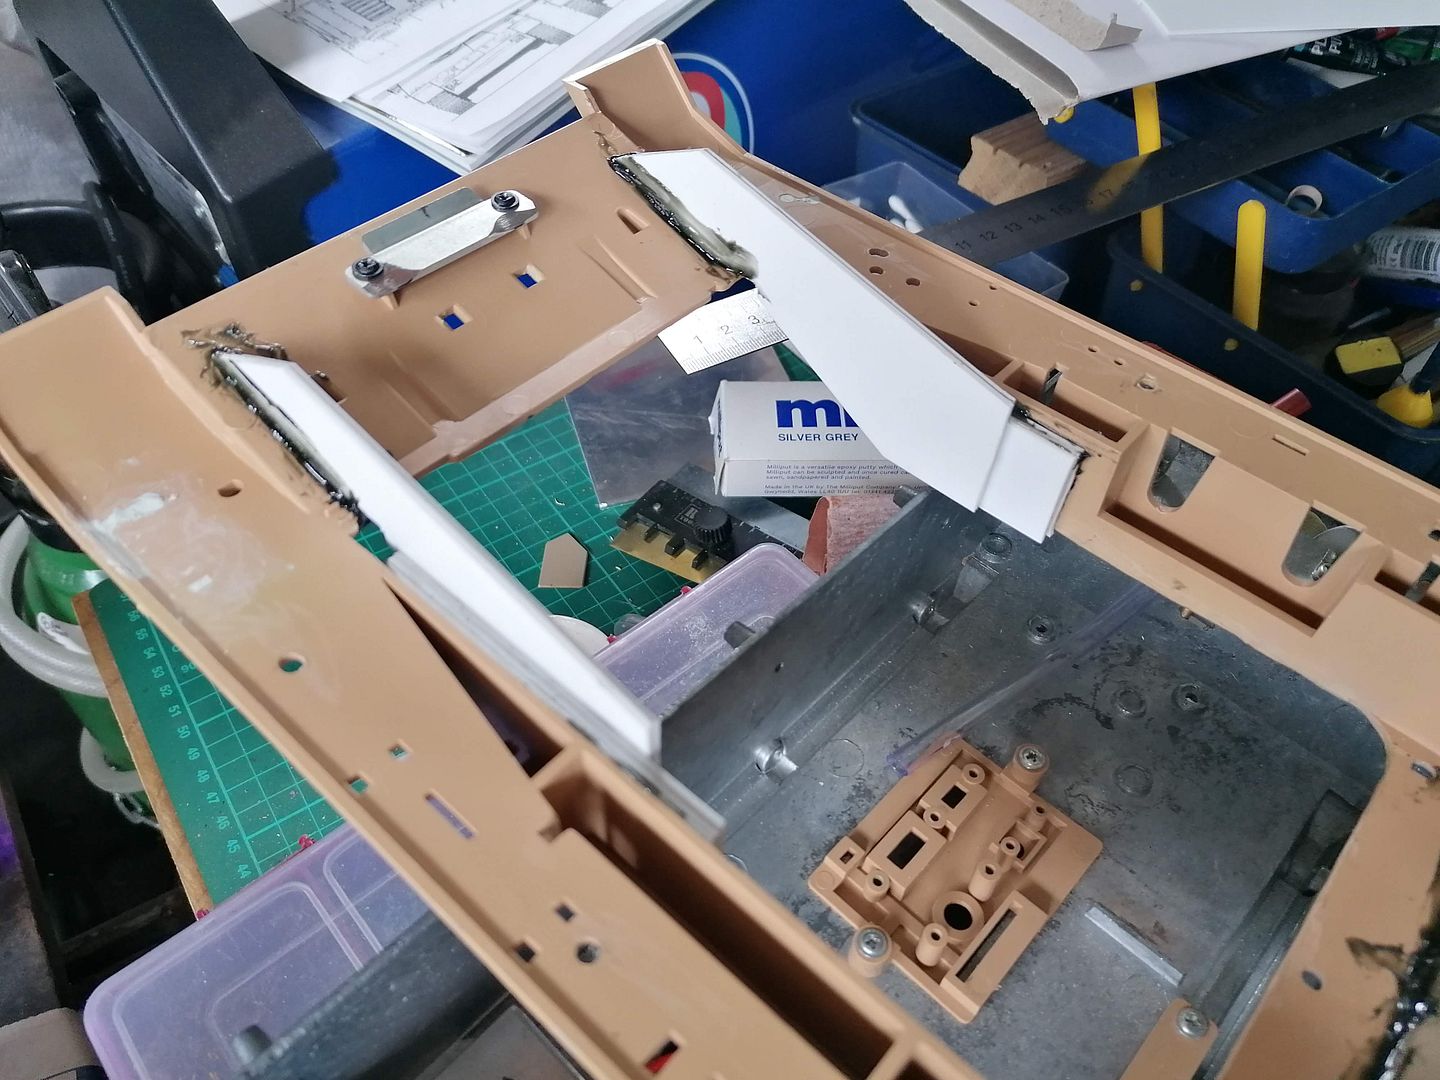
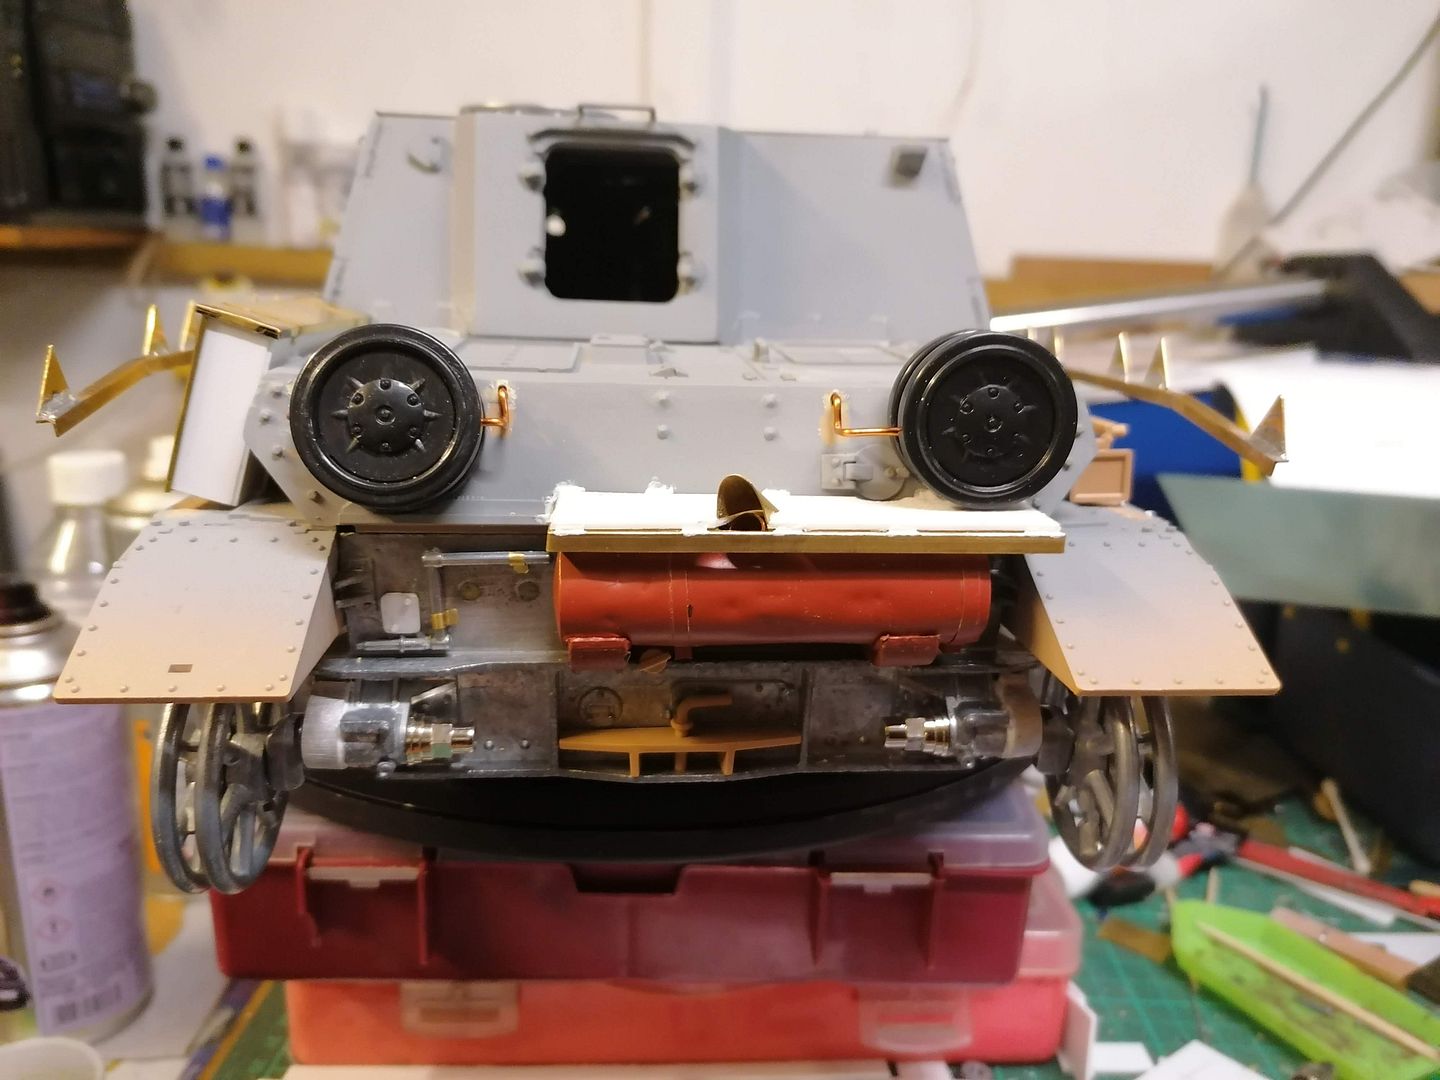
I also added stiffeners to the front of the top hull to stop the hull flexing at its weakest point and allowing the front catch to pop off
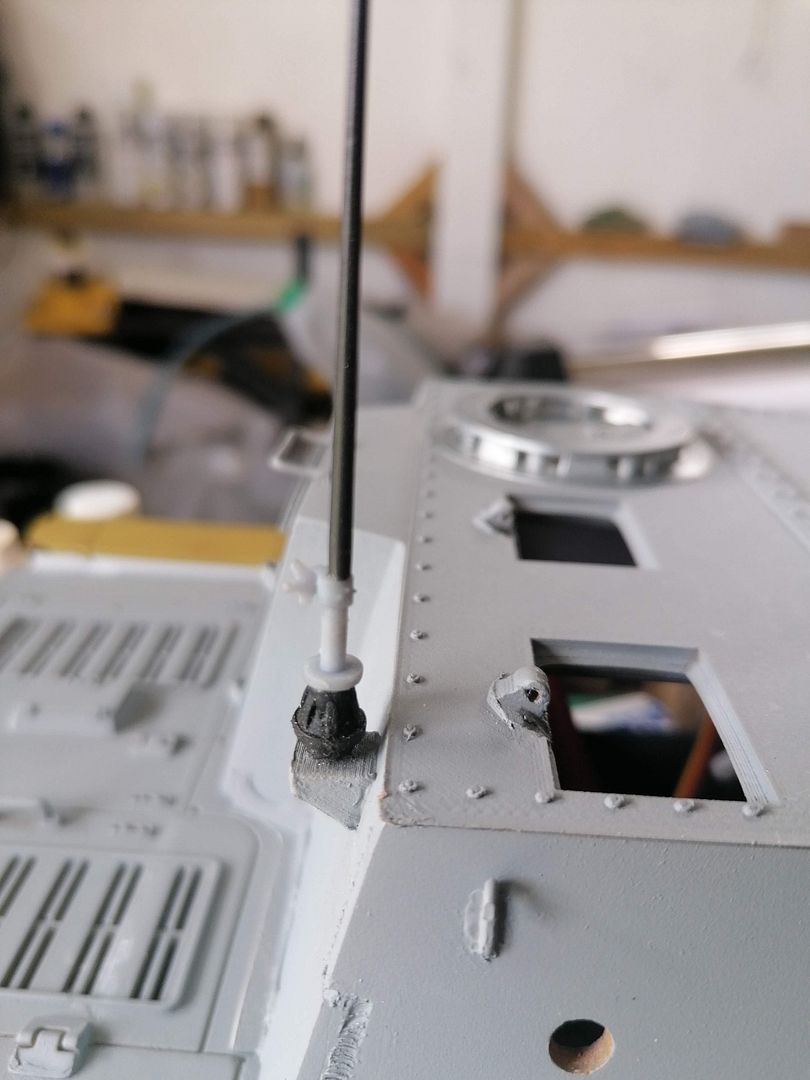
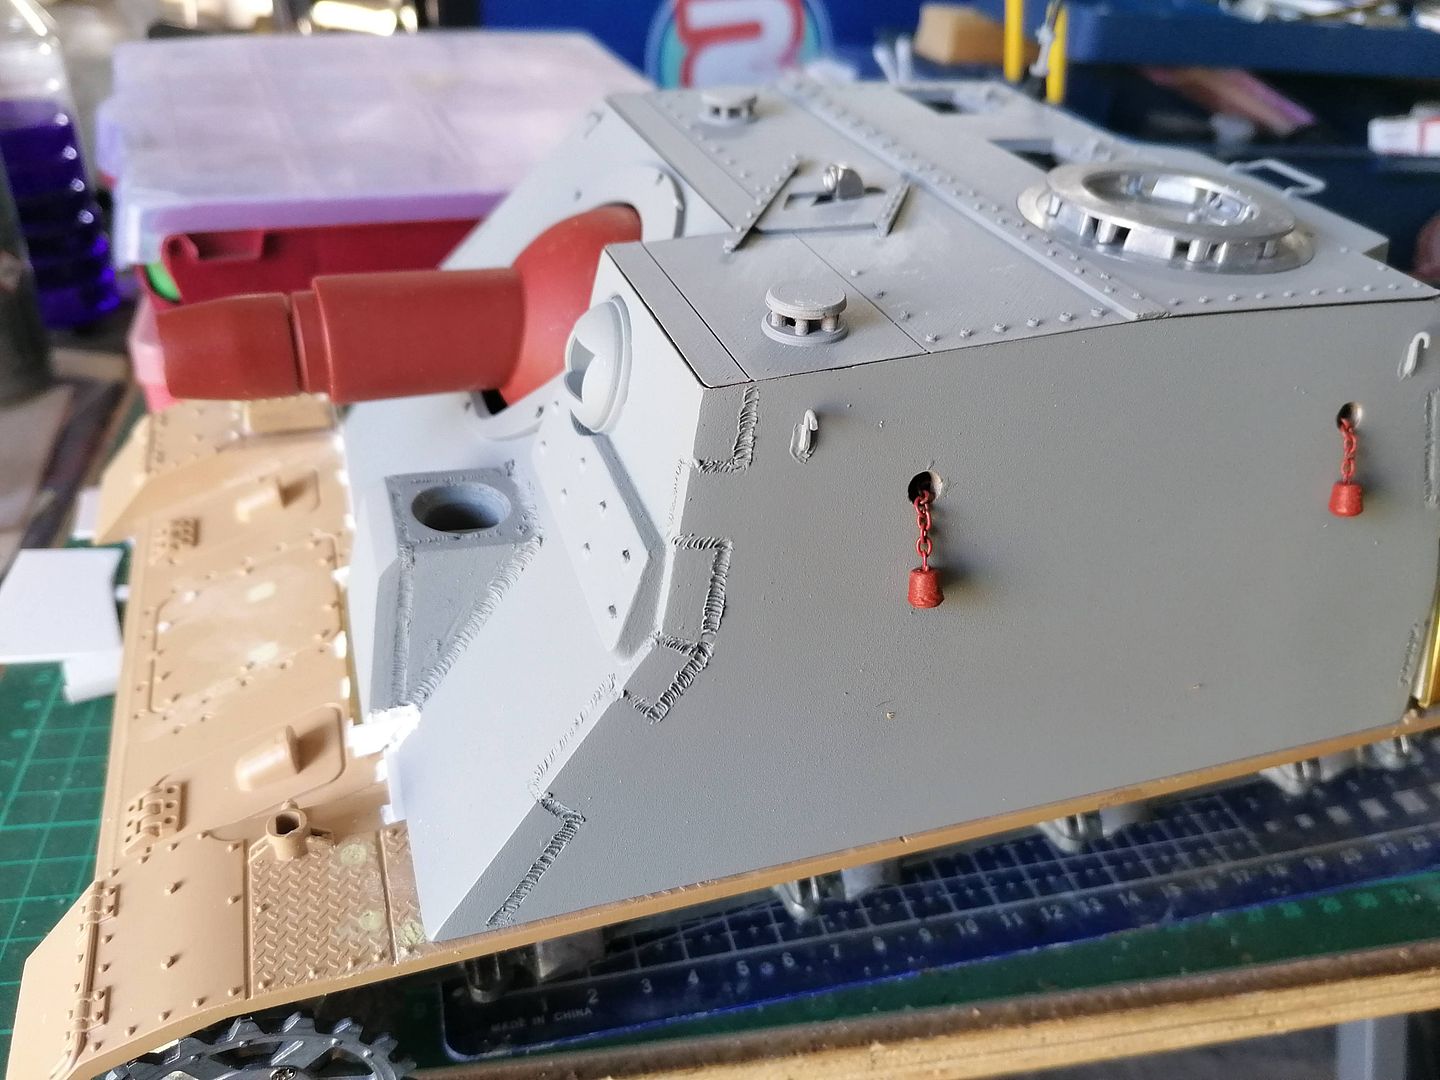
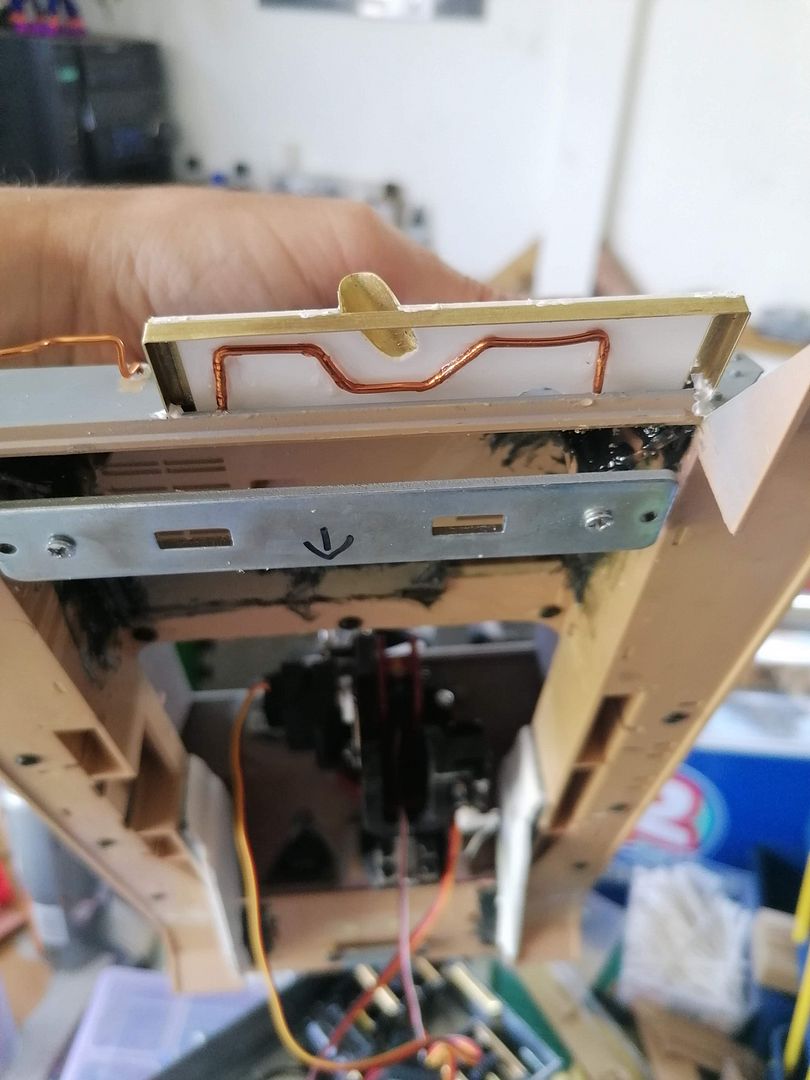
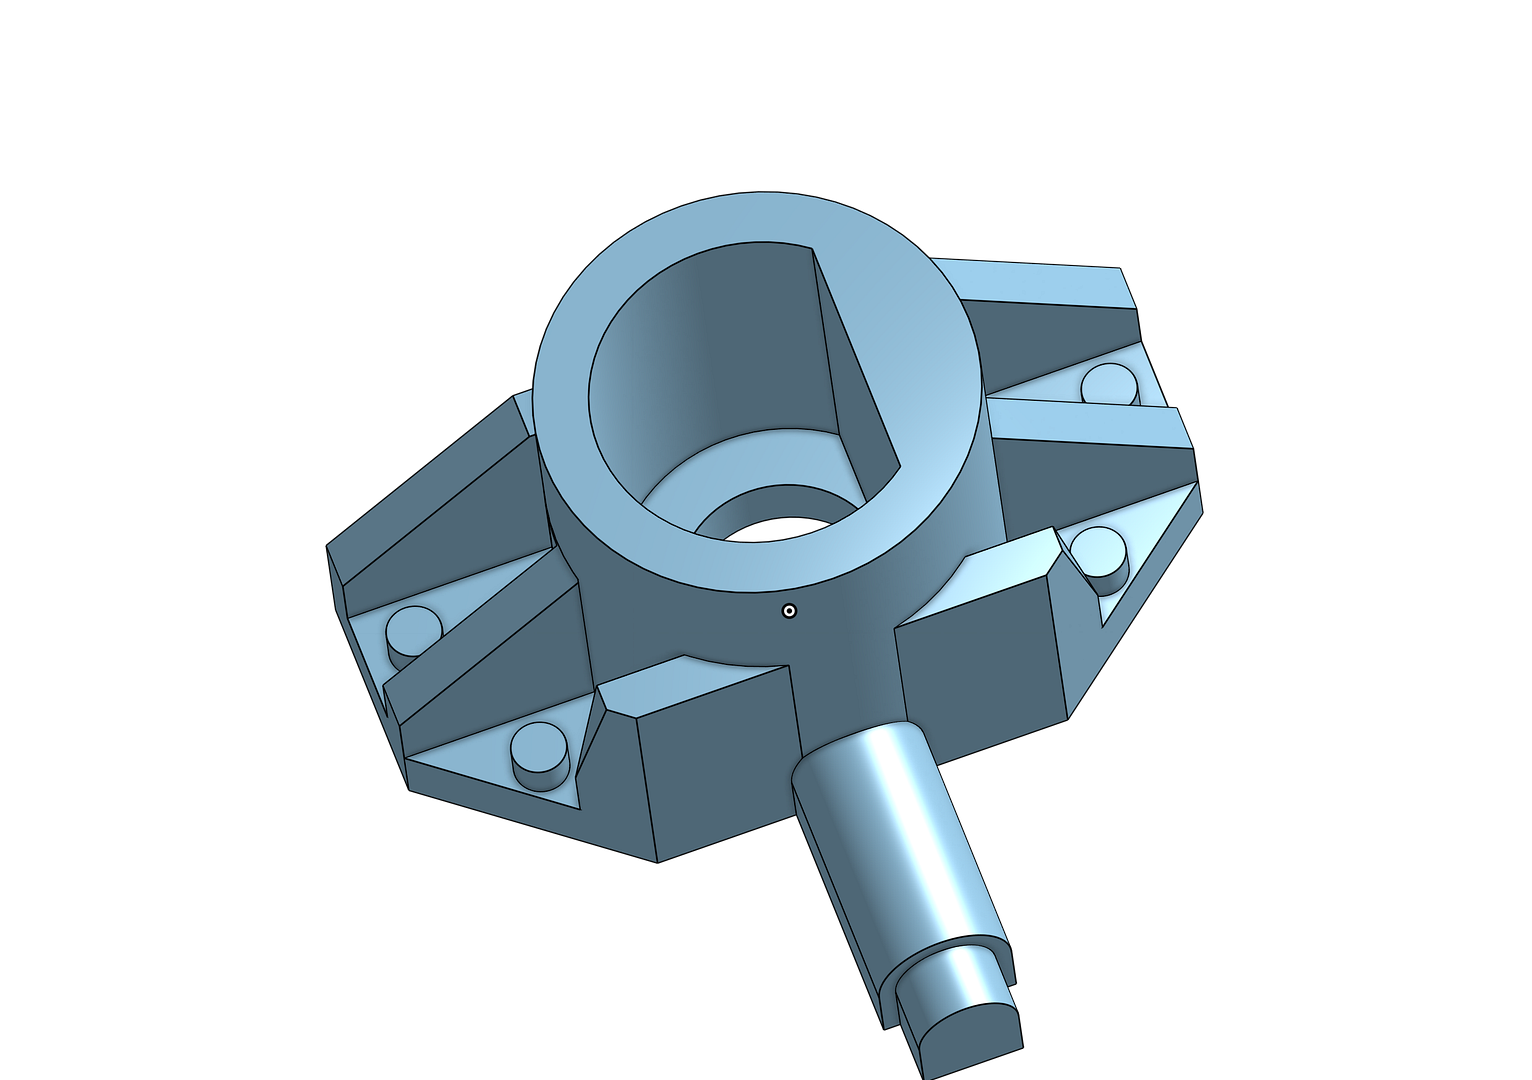
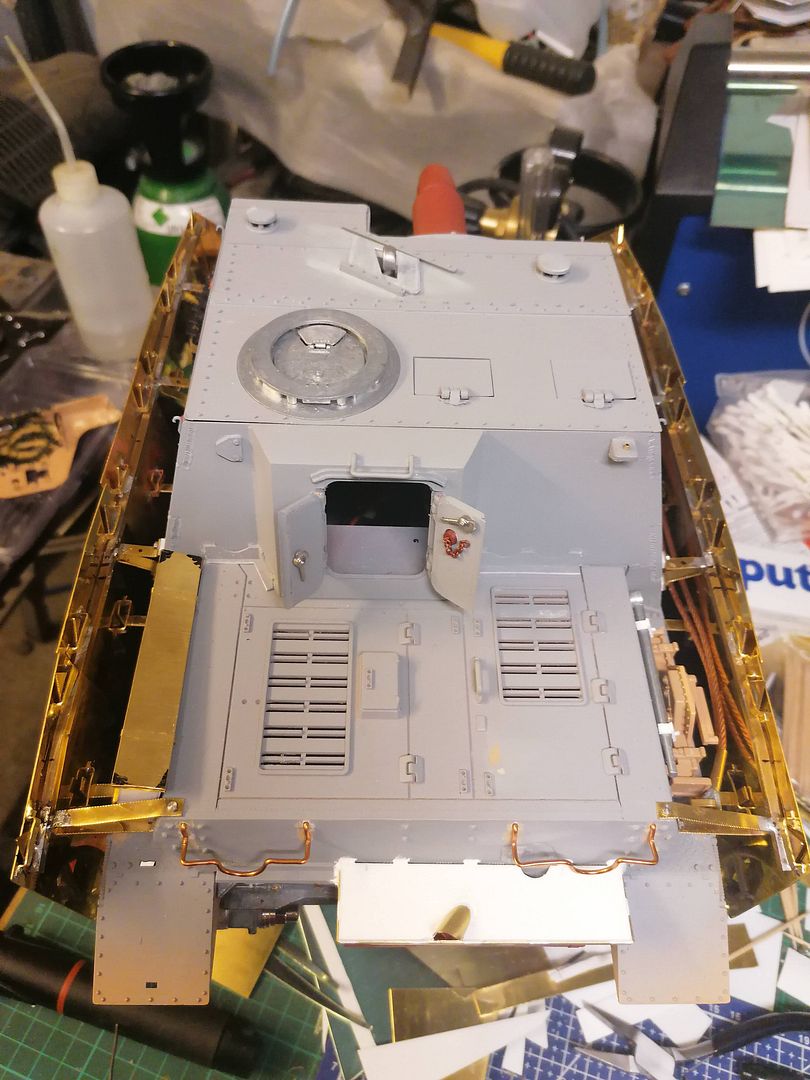
A few small jobs were done on the upper hull I put a small peice of brass tube in the antenna mount hole
To make the Aber antenna sit nice and tight but still allow for removal
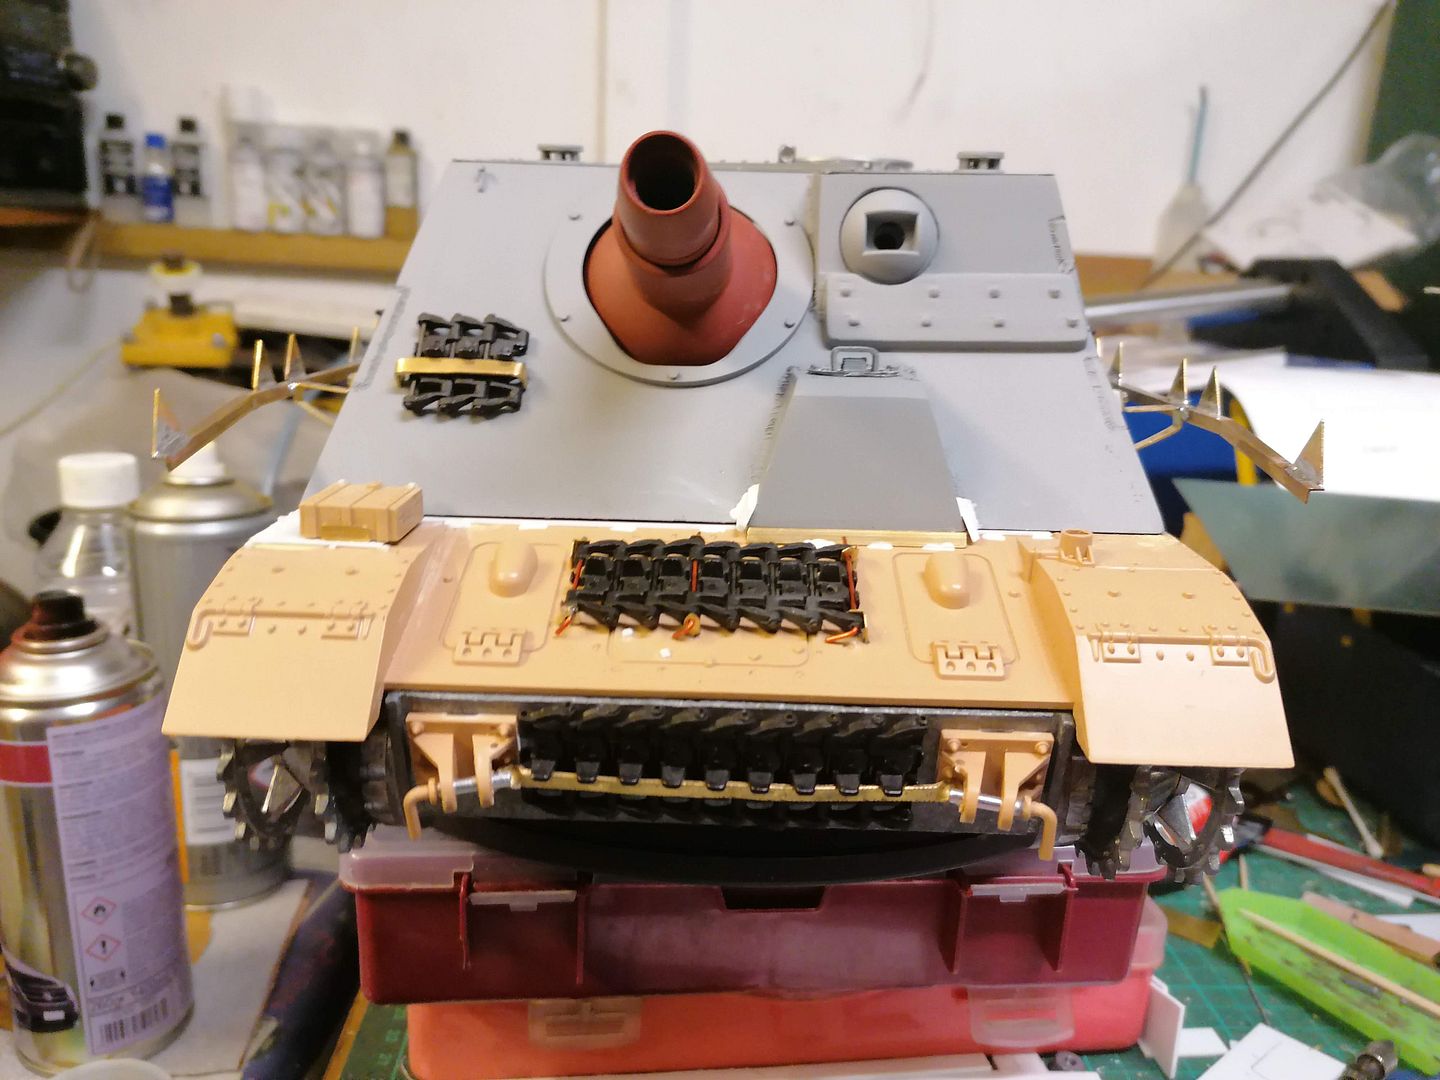
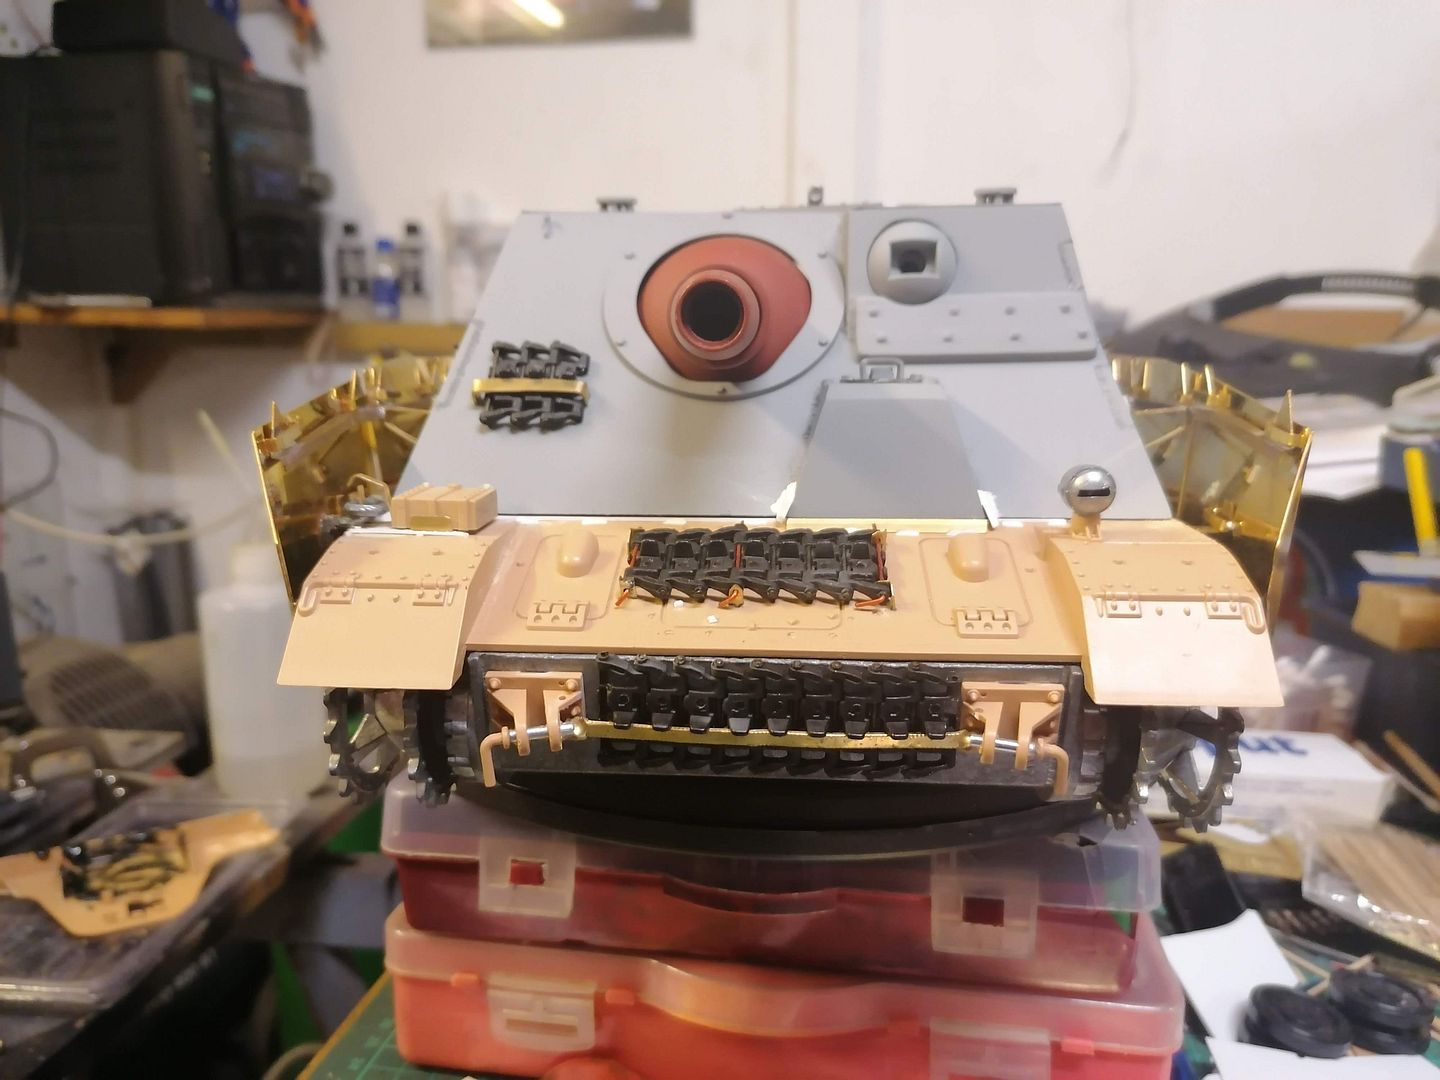
I glued some small pieces of chain into the pistol port bungs and fitted into the hull
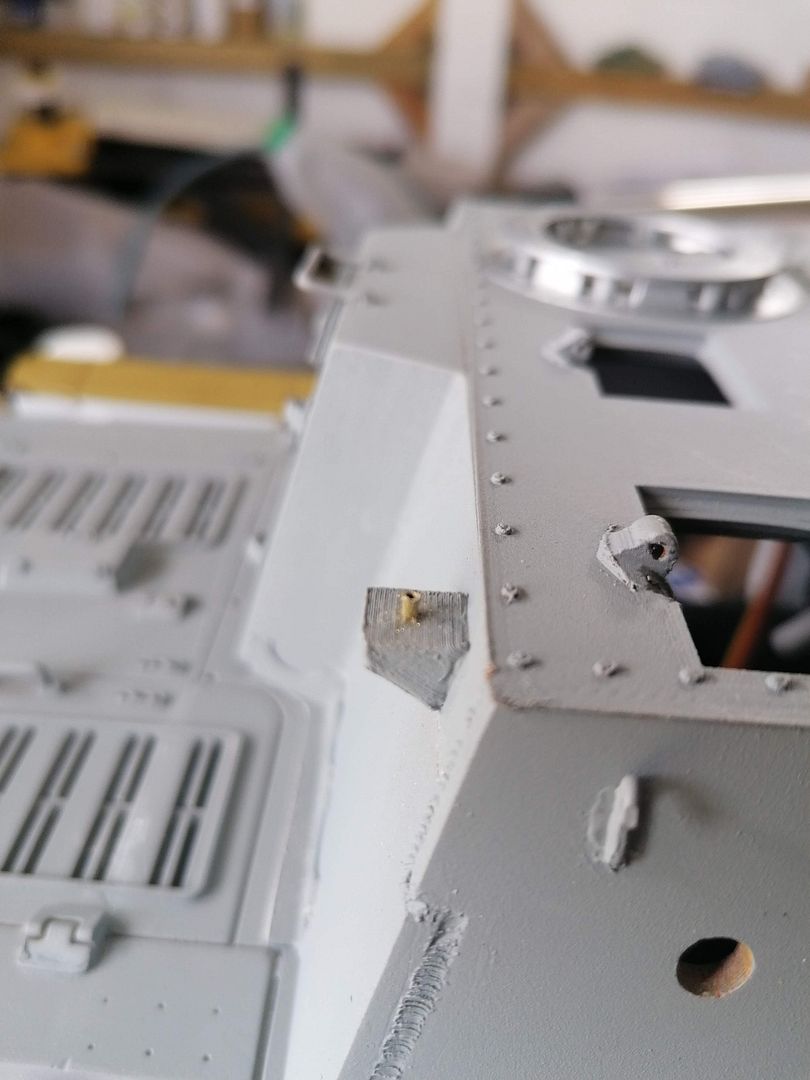
I added more detail to the front of the hull where the citadel front join is
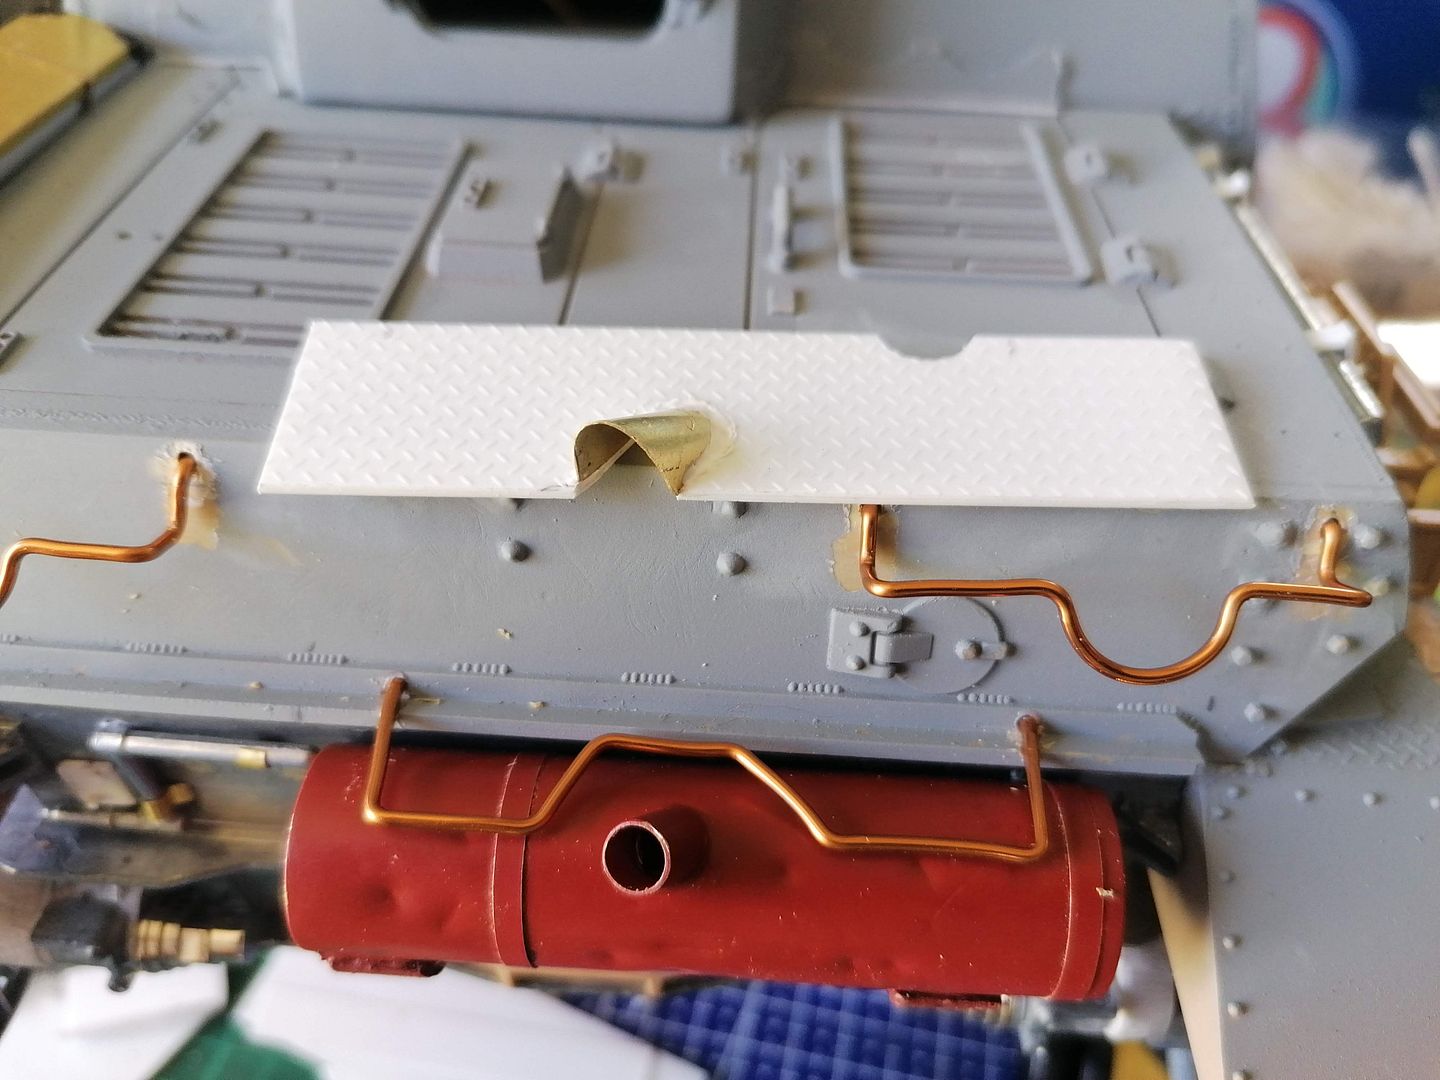
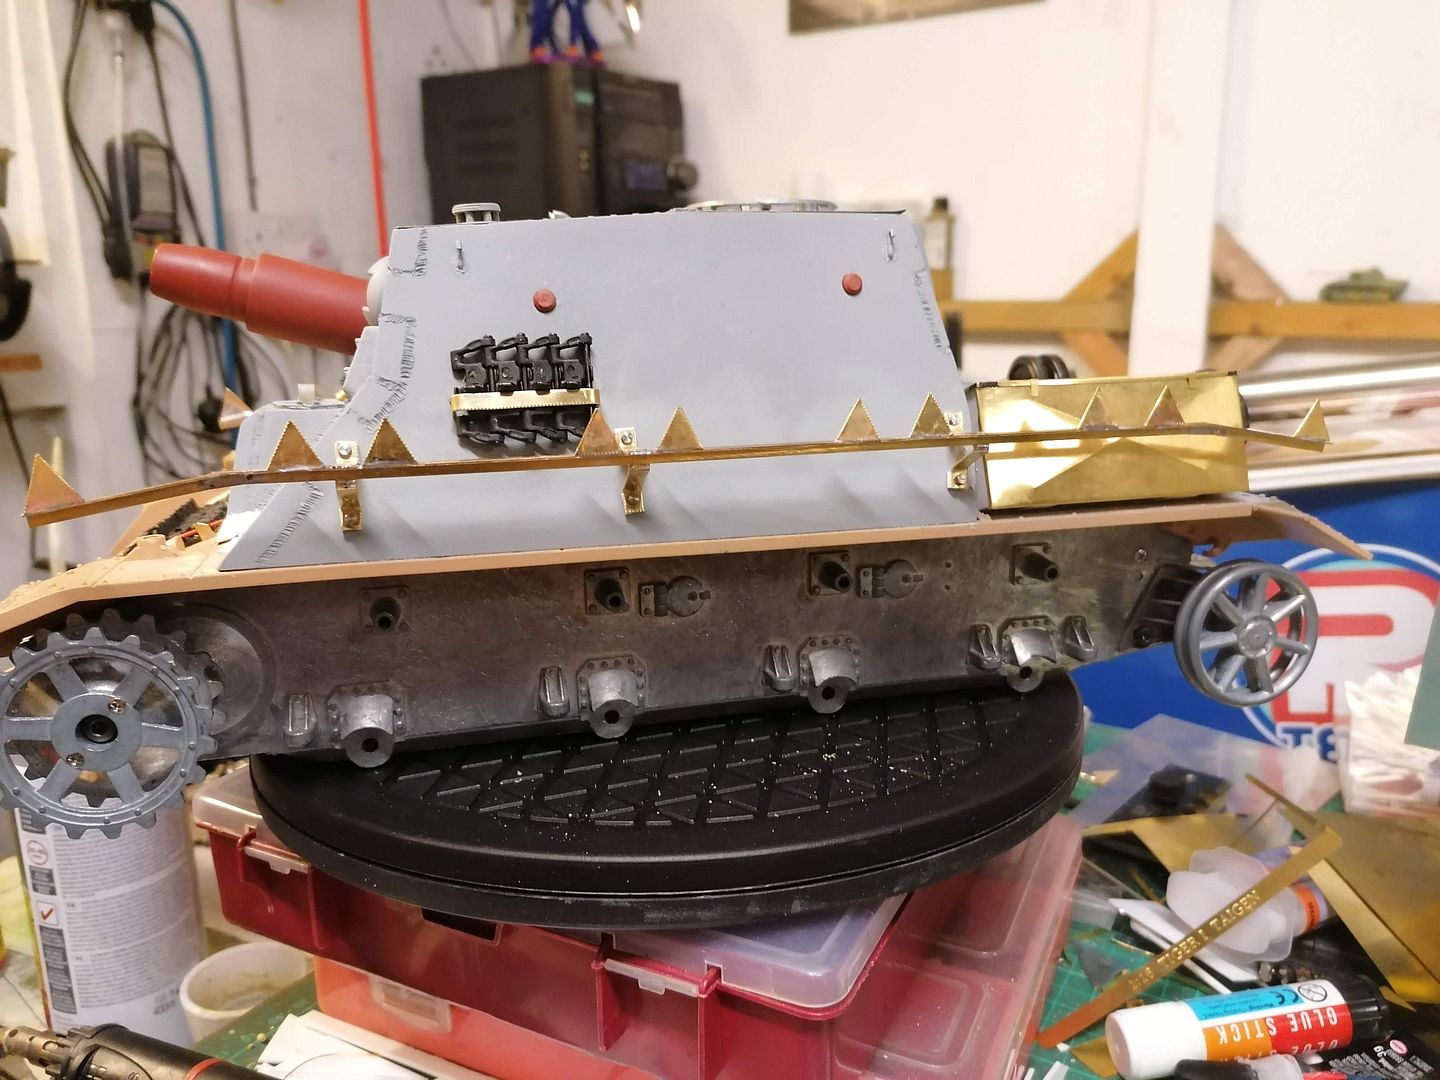
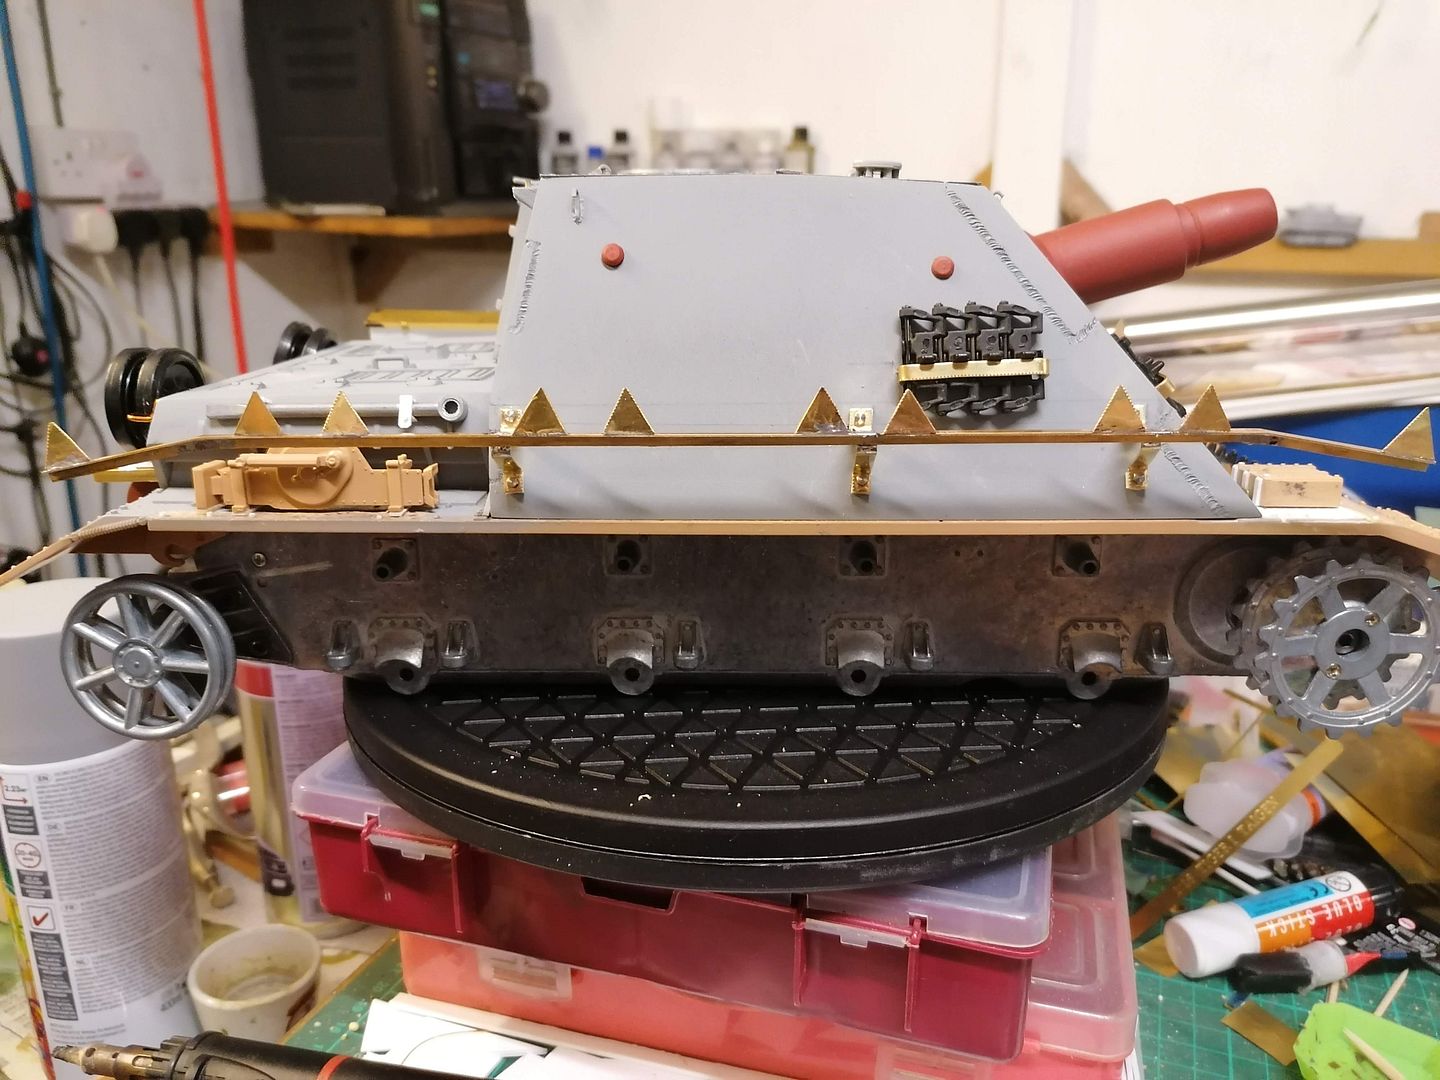
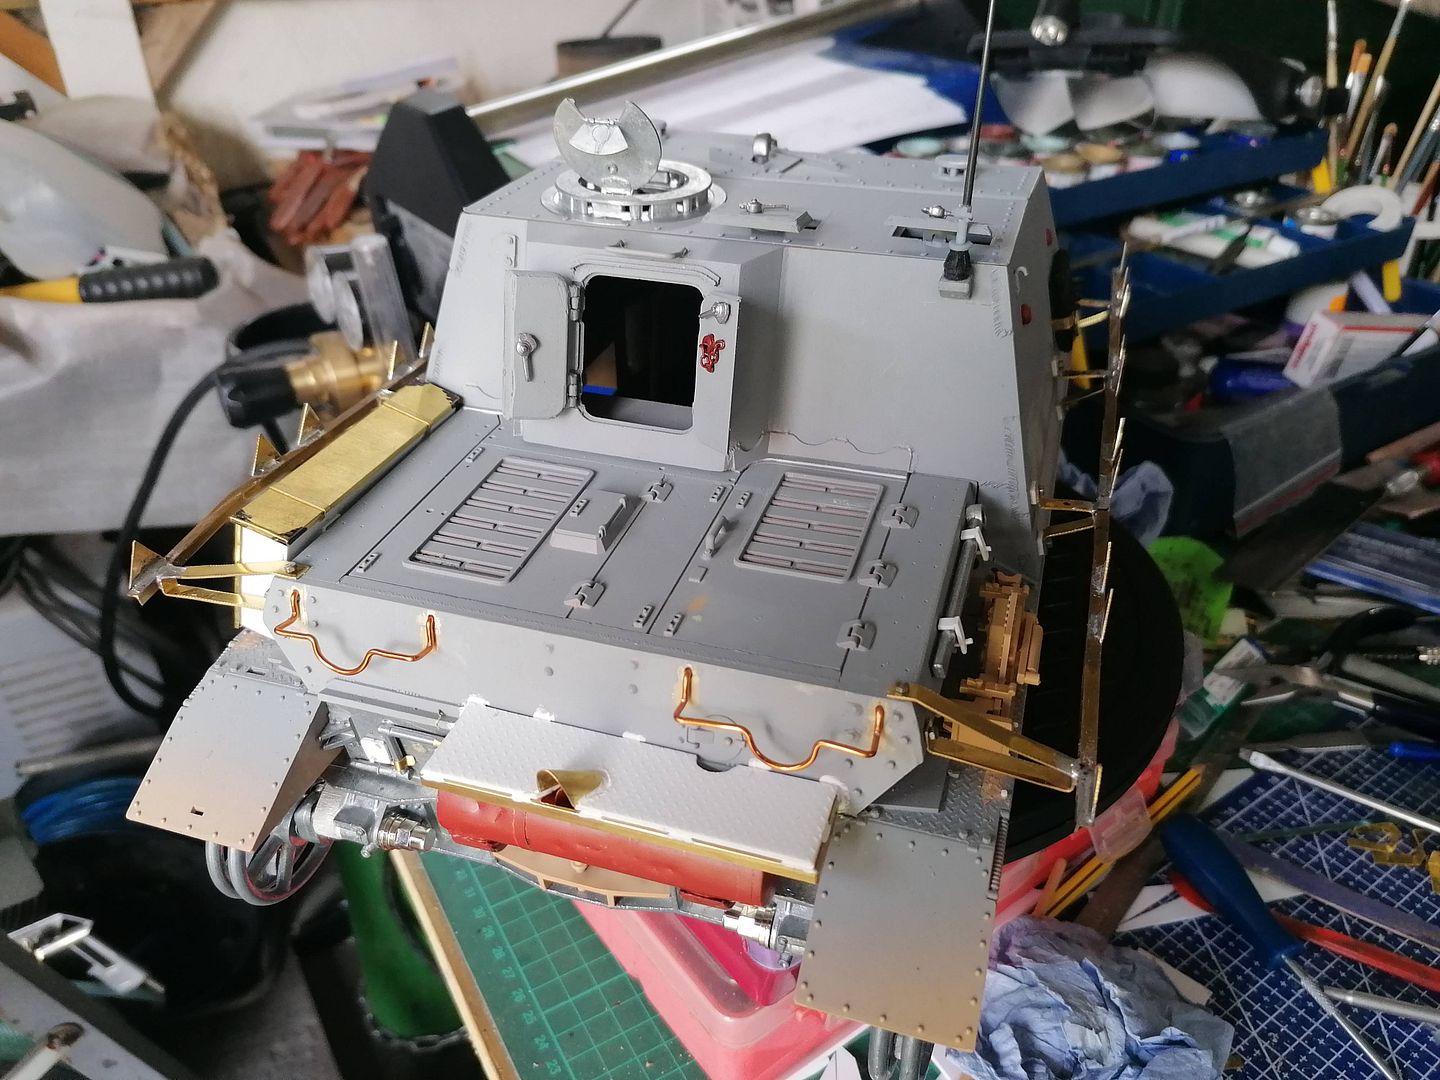
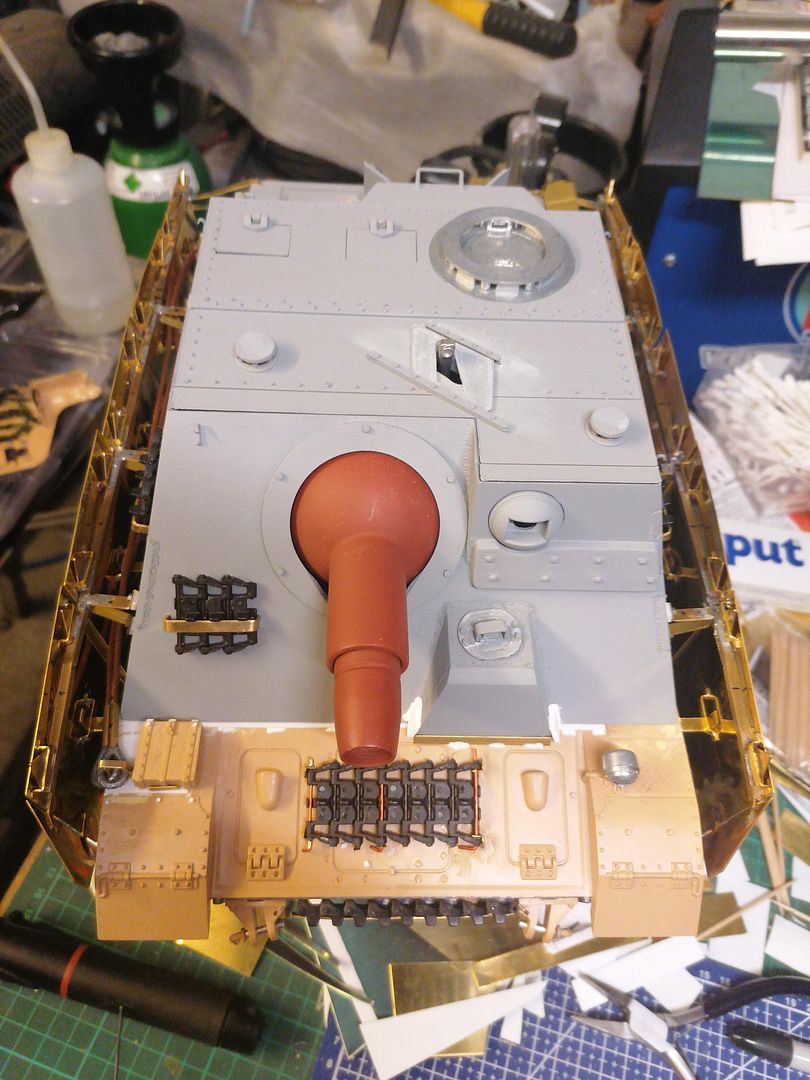
I was waiting for some supplies to turn up before I could start the next bit and I got quite busy when they turned up I started with the cover/step over the top of the exhaust first making the platform with the deflector and using some copper wire bent into a frame to glue the step on to this was glued into some holes drilled in the hull to strengthen it
then added the angle frame to the platform
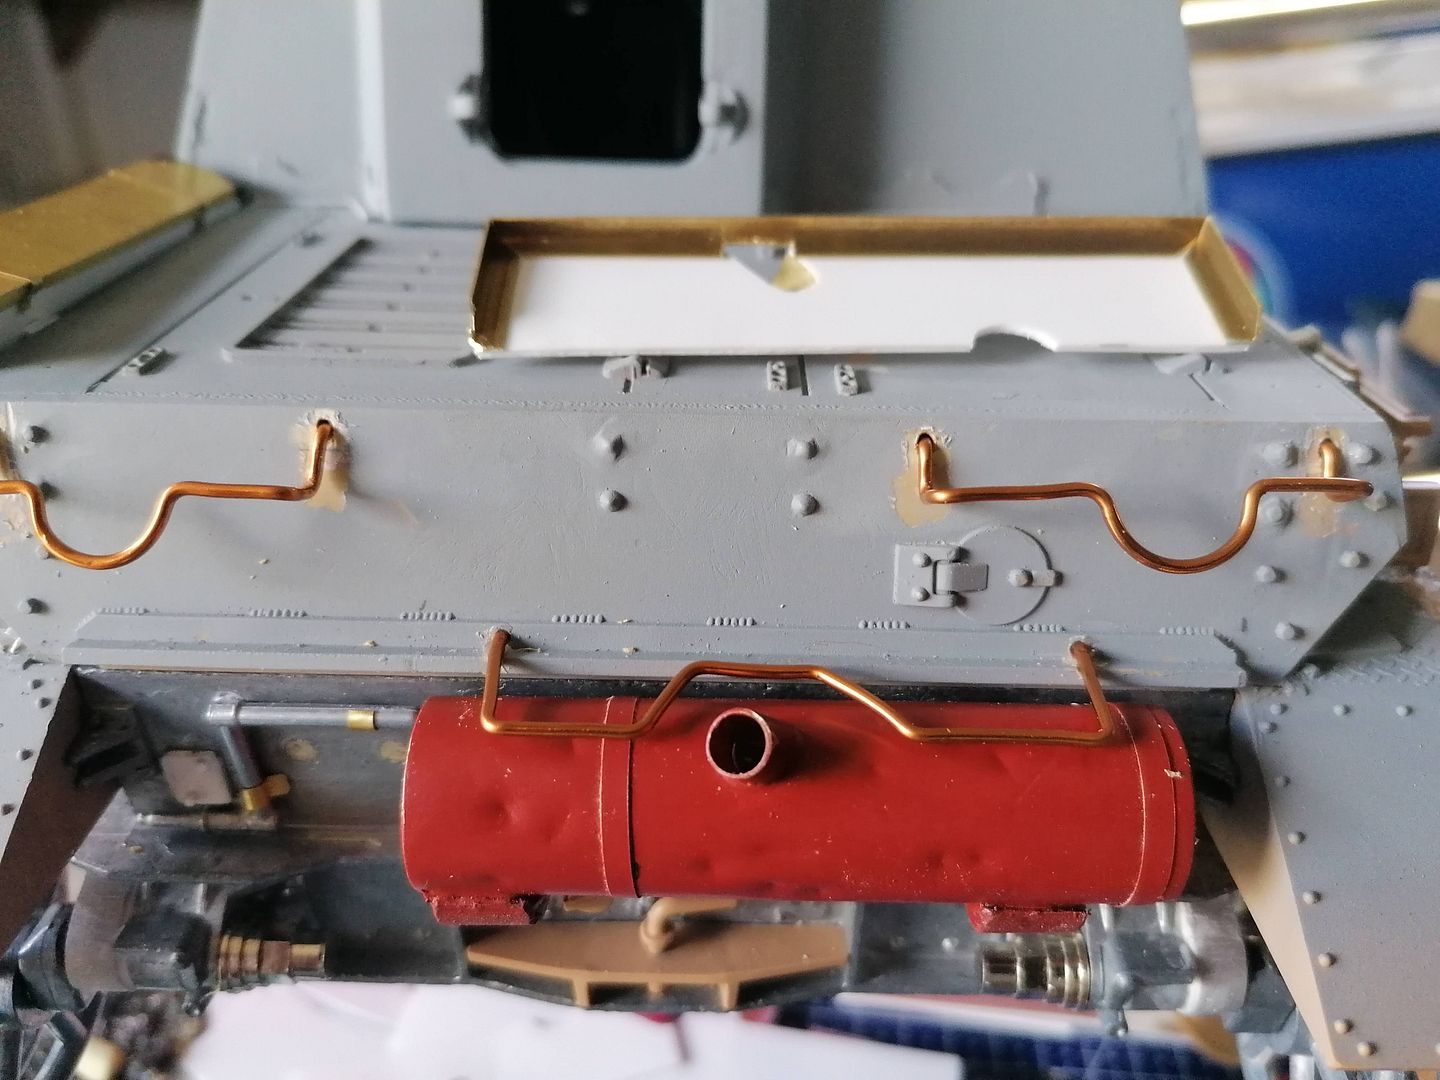
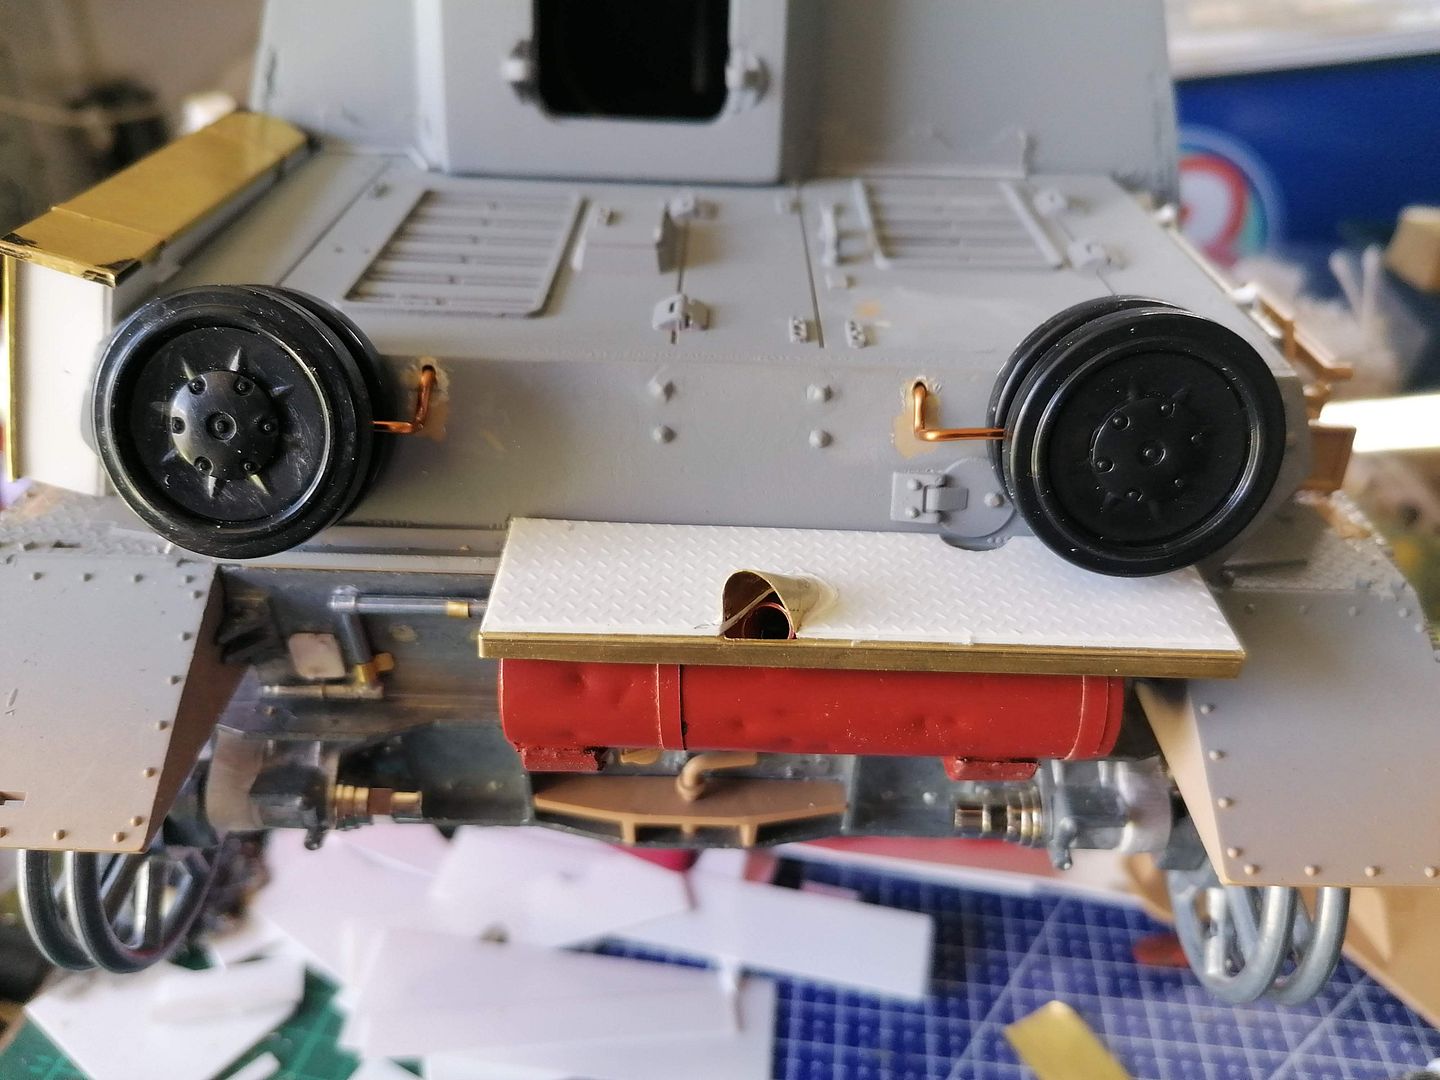
The platform all glued in place and welds added using vallejo filler in a tube that i find makes a really good weld bead and you might notice i have made new spare wheel brackets as the wheel was too low for the platform on my first ones and I am holding off gluing these down until I have got some all metal road wheels to hang on them in case they need changing again
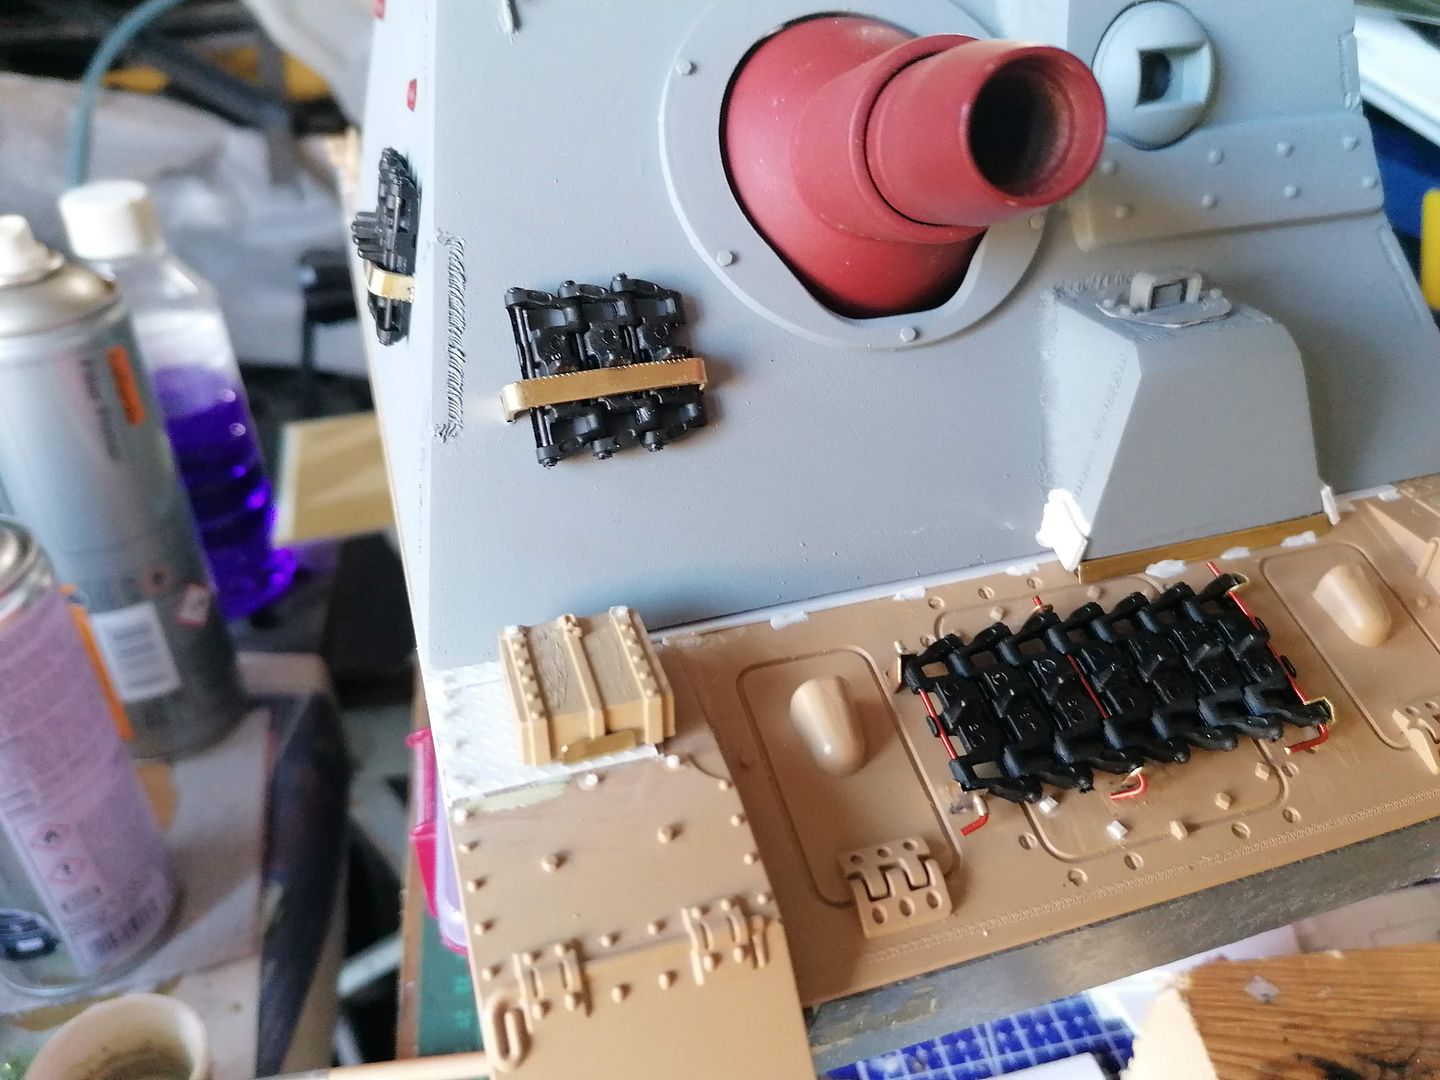
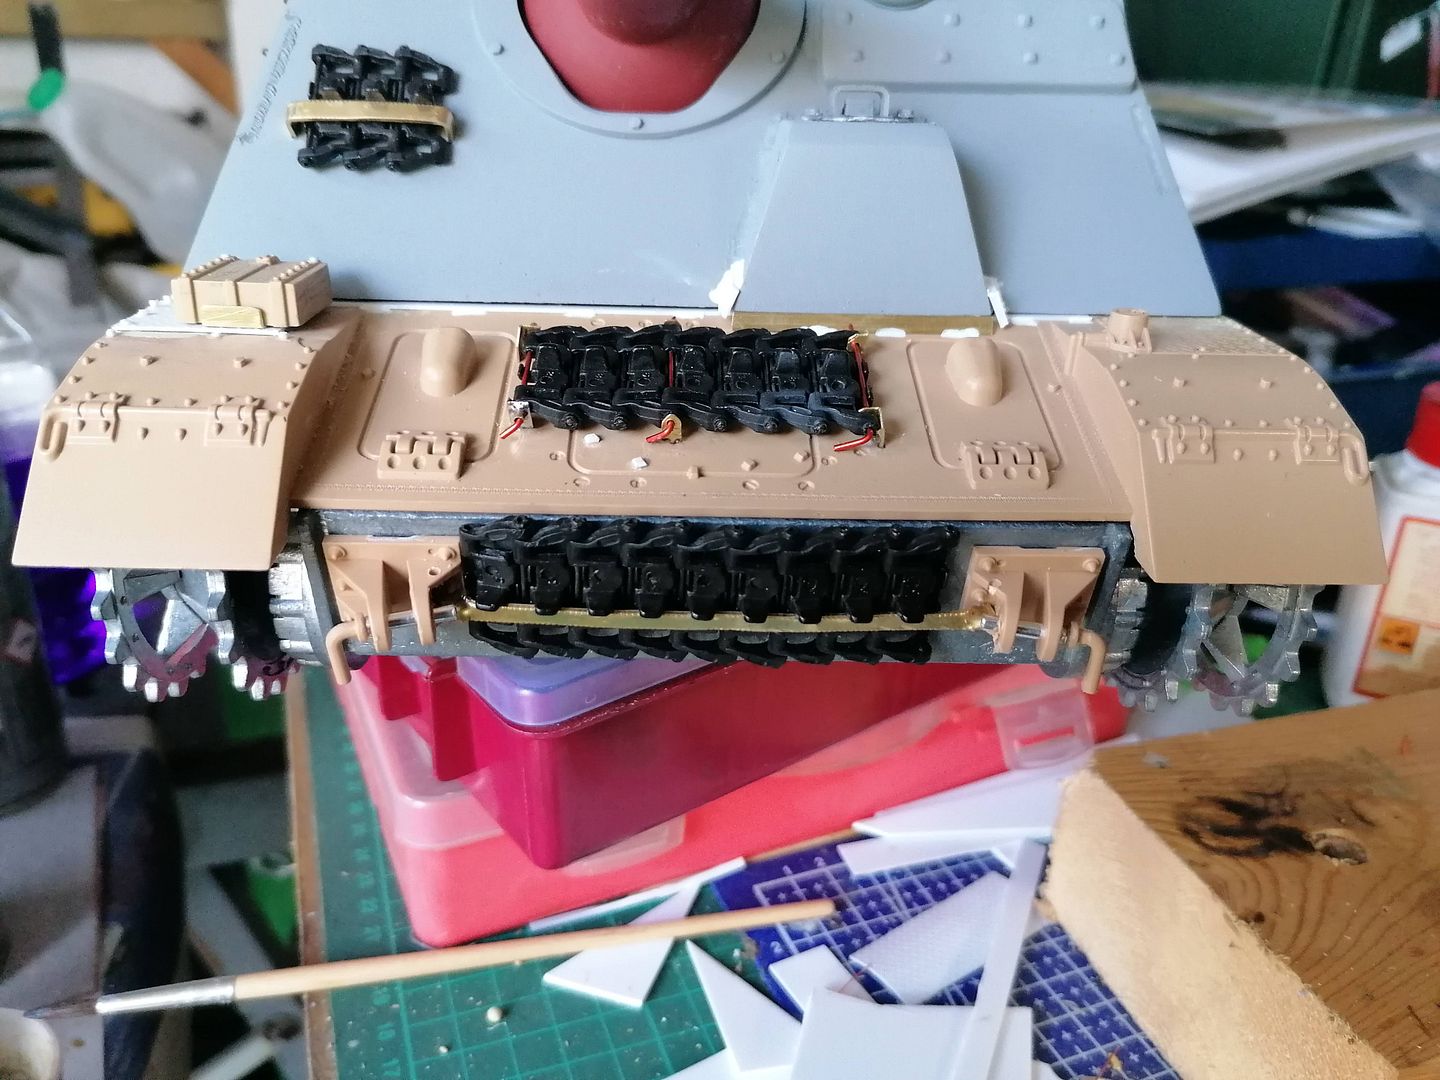
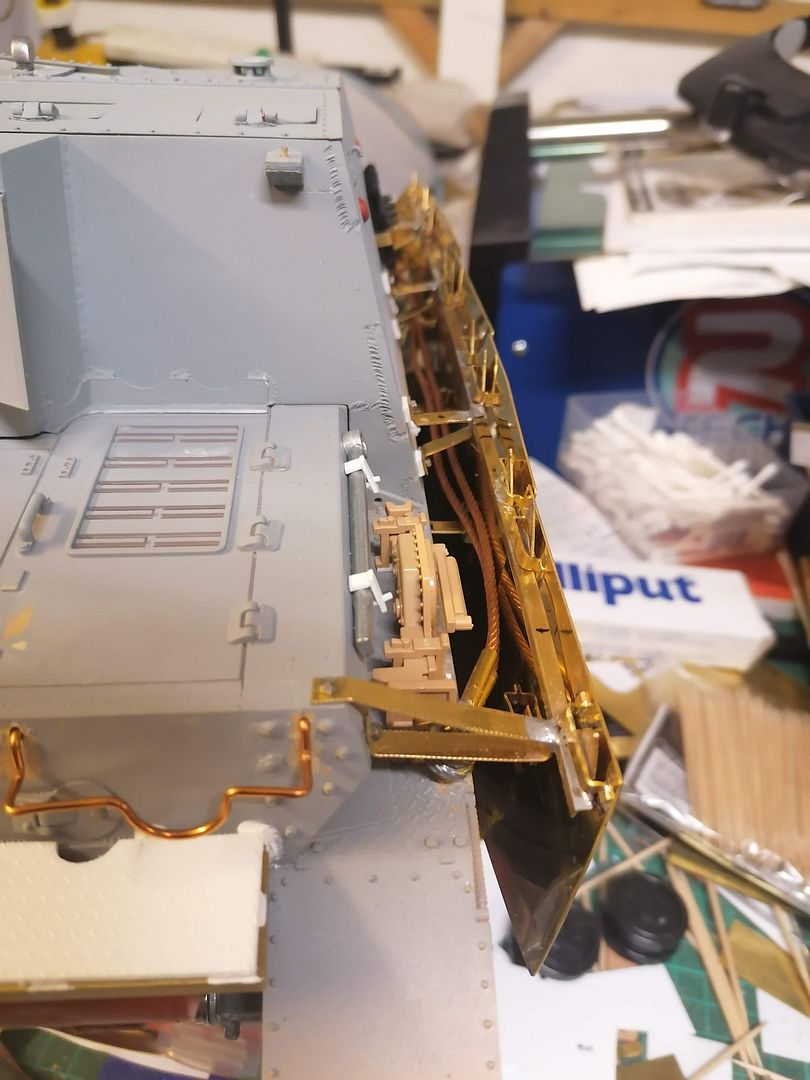
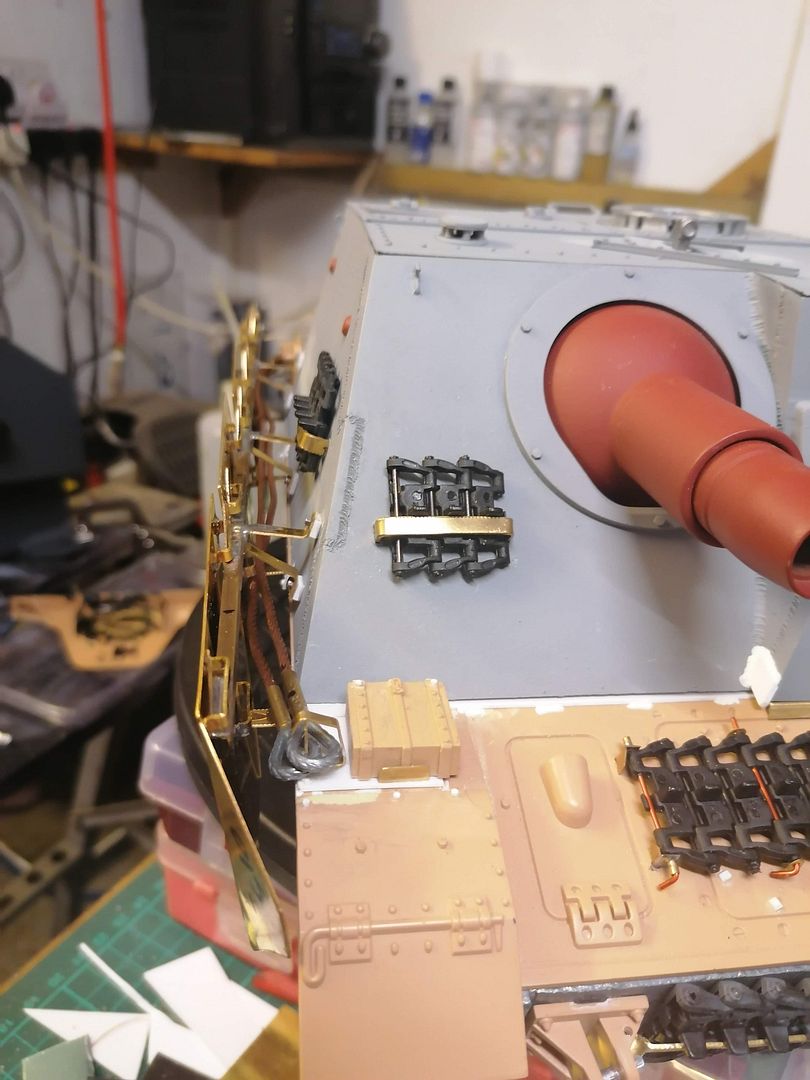
In this last week I got a set of plastic tracks to use as spare track sections so I made the brackets out of brass and the front upper section brackets were the most fiddly things I think I have ever done!
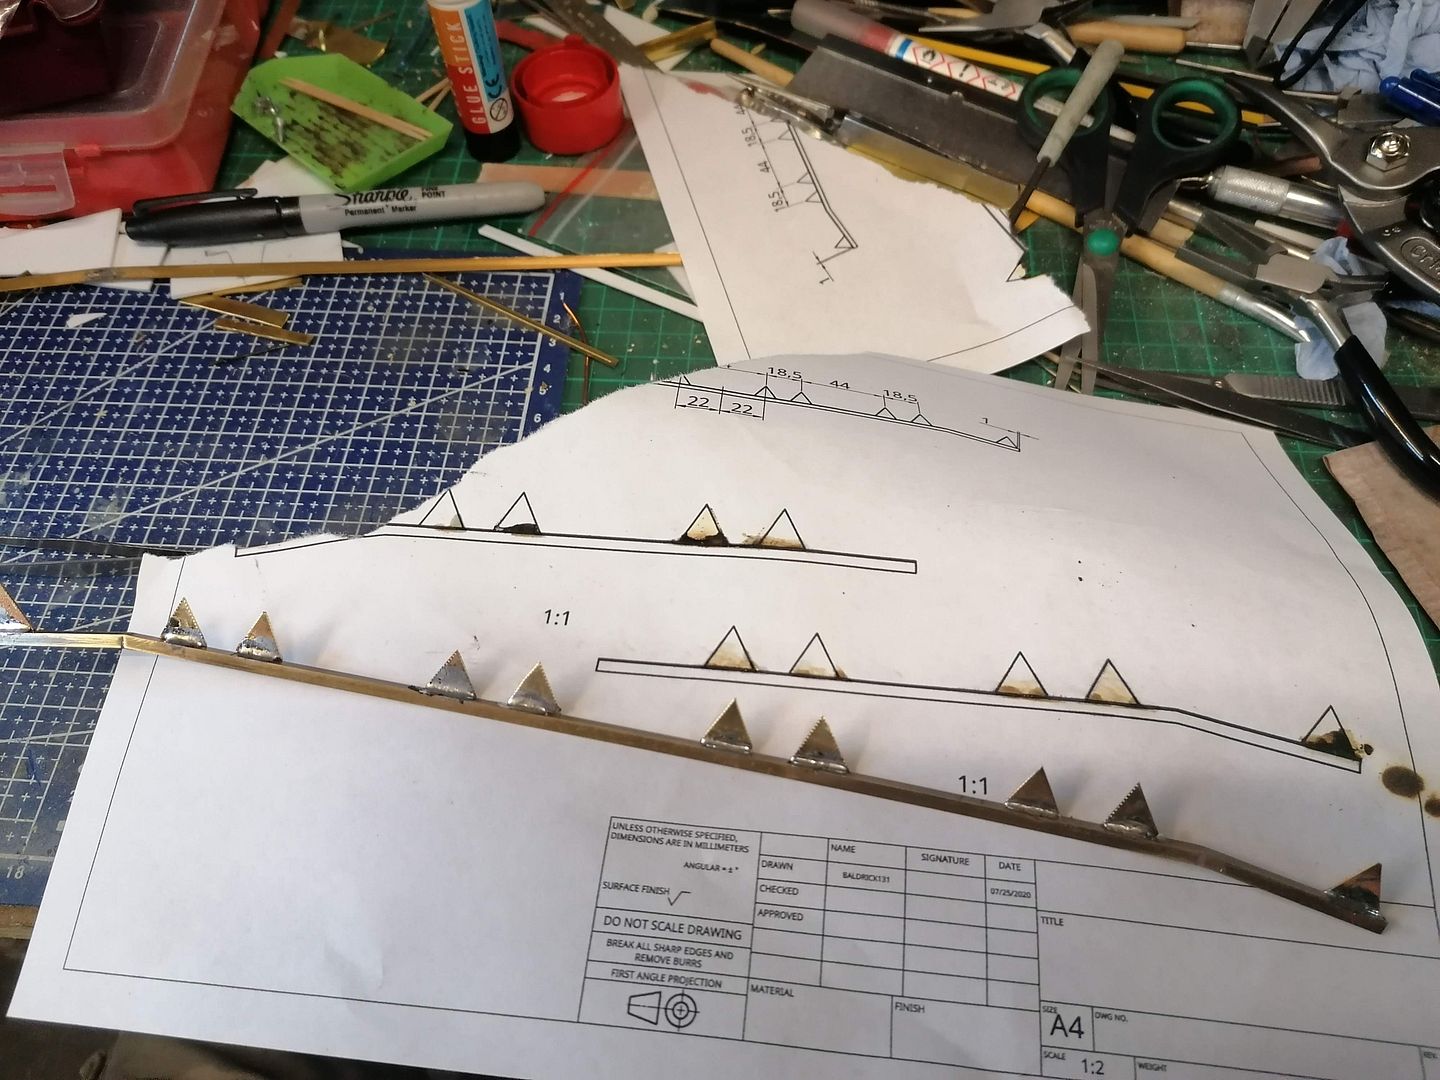
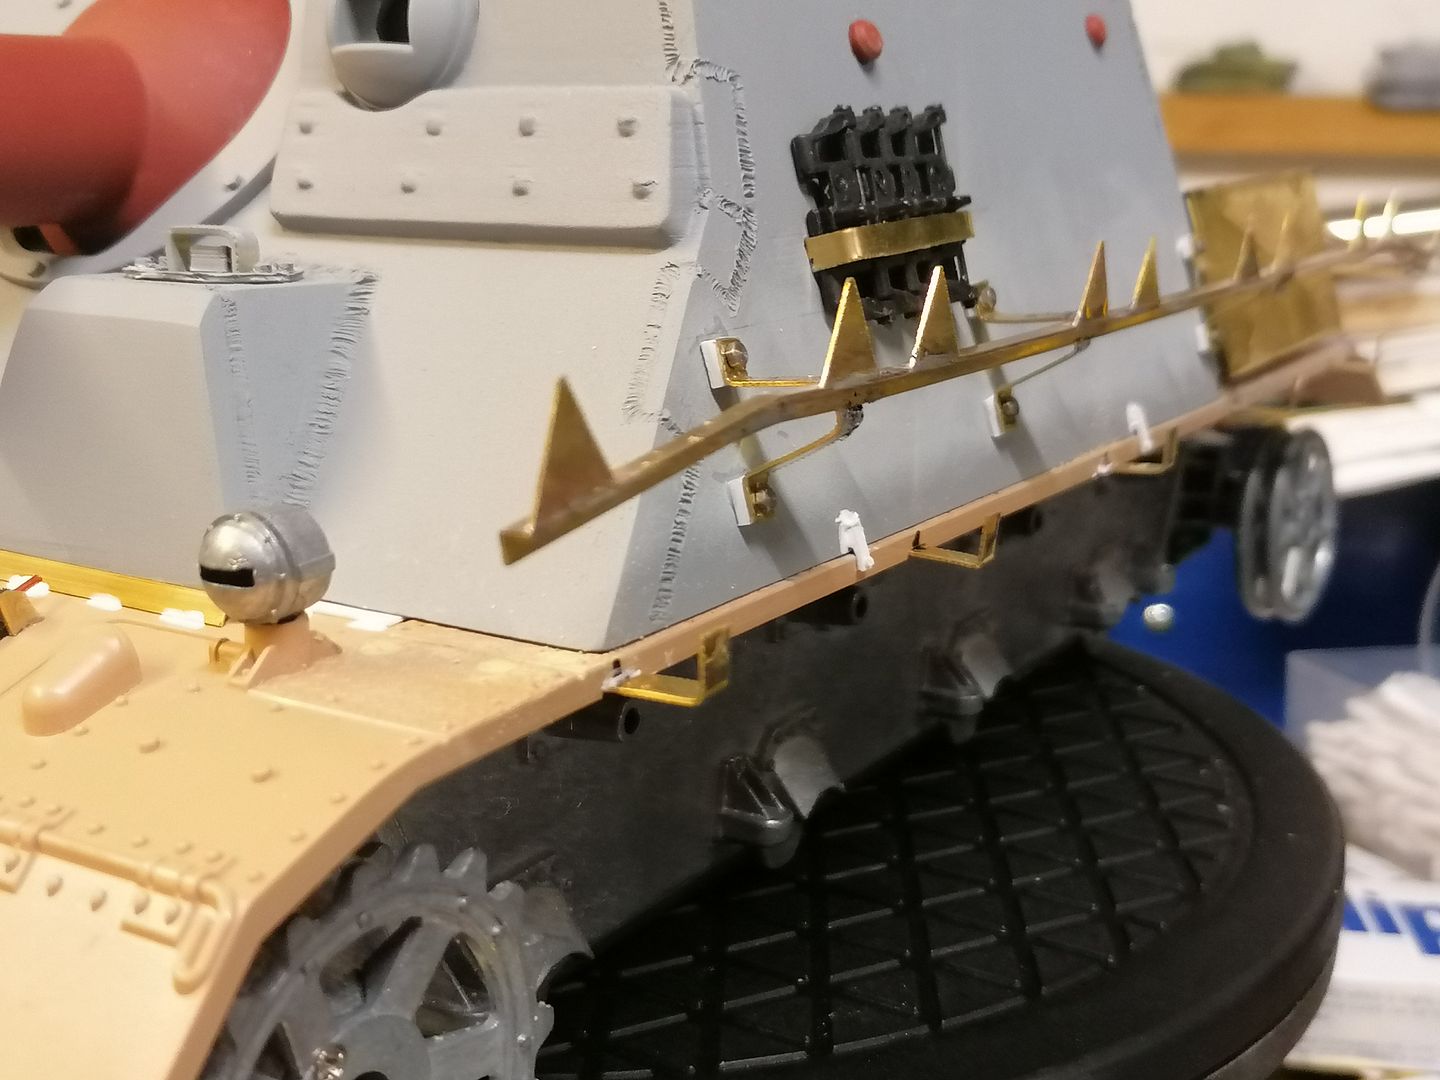
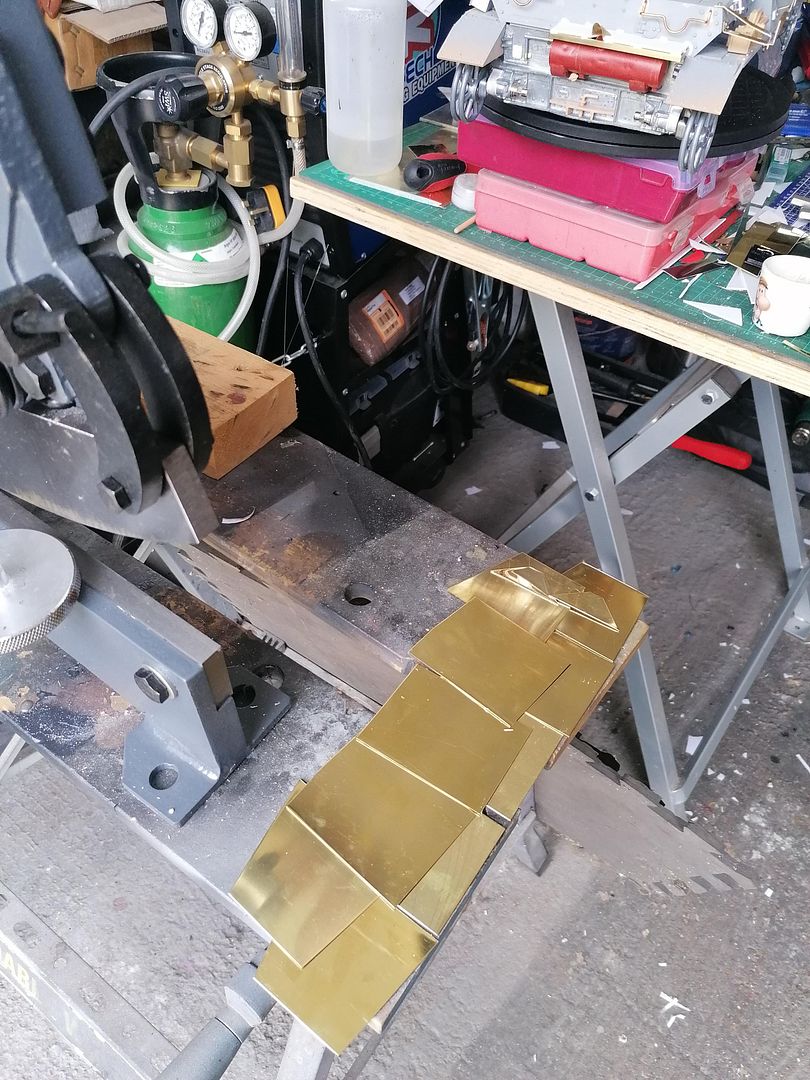
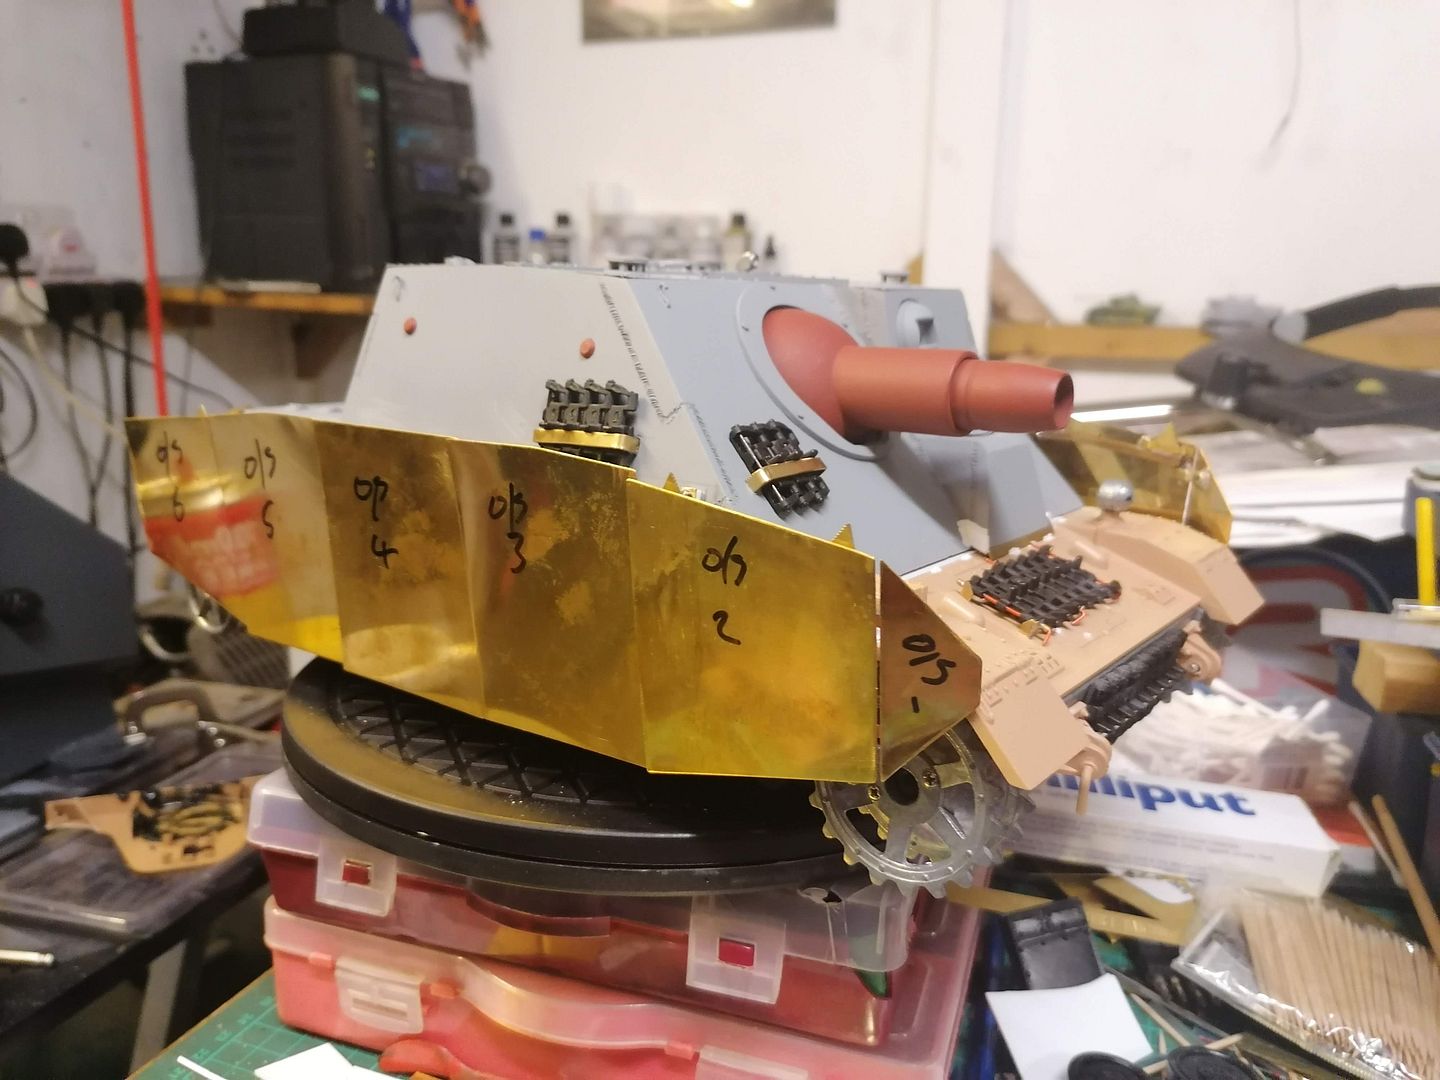
This weekend I started the frame work for the side armour plates first getting the plans out of my reference book and re scaling them by drawing the parts in CAD and making 1:1 drawings only modifying the length by 2mm to allow the use of one piece of brass L angle per side and using my normal method of cutting the shapes out of the plans gluing them to the brass sheet and cutting them out
and because the plans are 1:1 I just placed the parts on top of the plans and soldered them in place
The brackets to hold them on were just made as I went along using measurements taken from my reference book fixing these on to the hull first i glued some plastic spacers to the brackets and drilled them and the hull before just pushing them in place with some 12ba bolts then gluing the rails to them in place.
Next job is to make and fit the lower brackets and the plates then I can fit the towing cables I am waiting for and then I think the outside detail is done (apart from the wheels and tracks) then I will see how much of a struggle it will be to fit all the electrics inside
Good afternoon!
Beautiful work done everywhere on the vehicle! The brass work is some extreme eye candy. ;o) The whole thing just looks deadly already.
regards and following along,
Painless
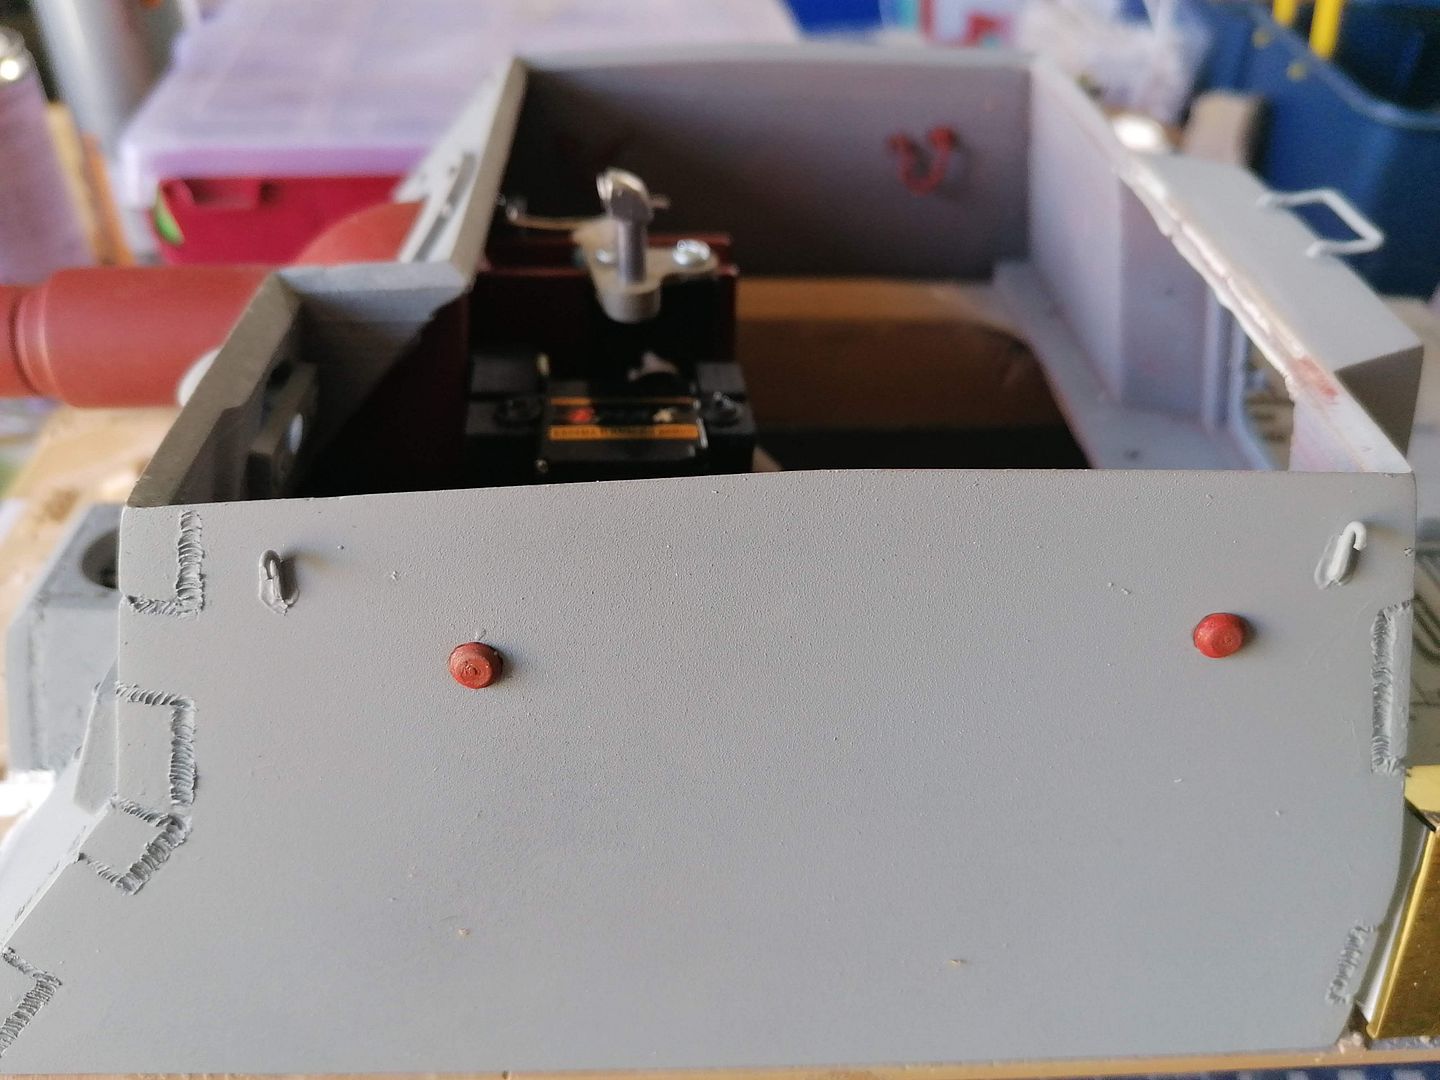
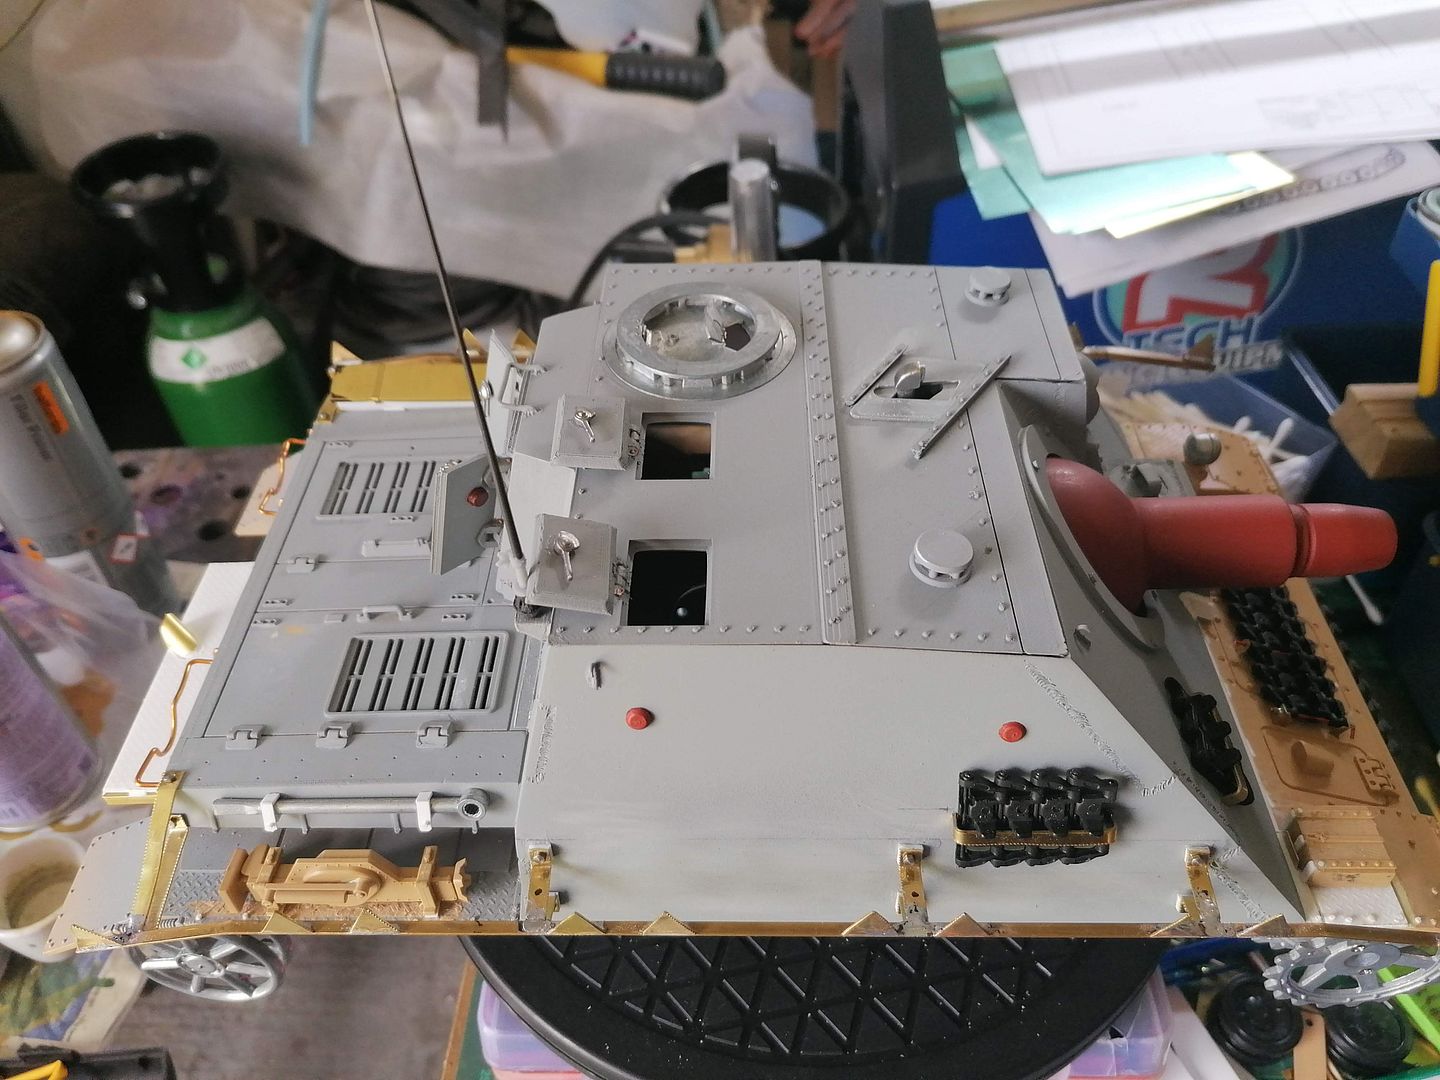
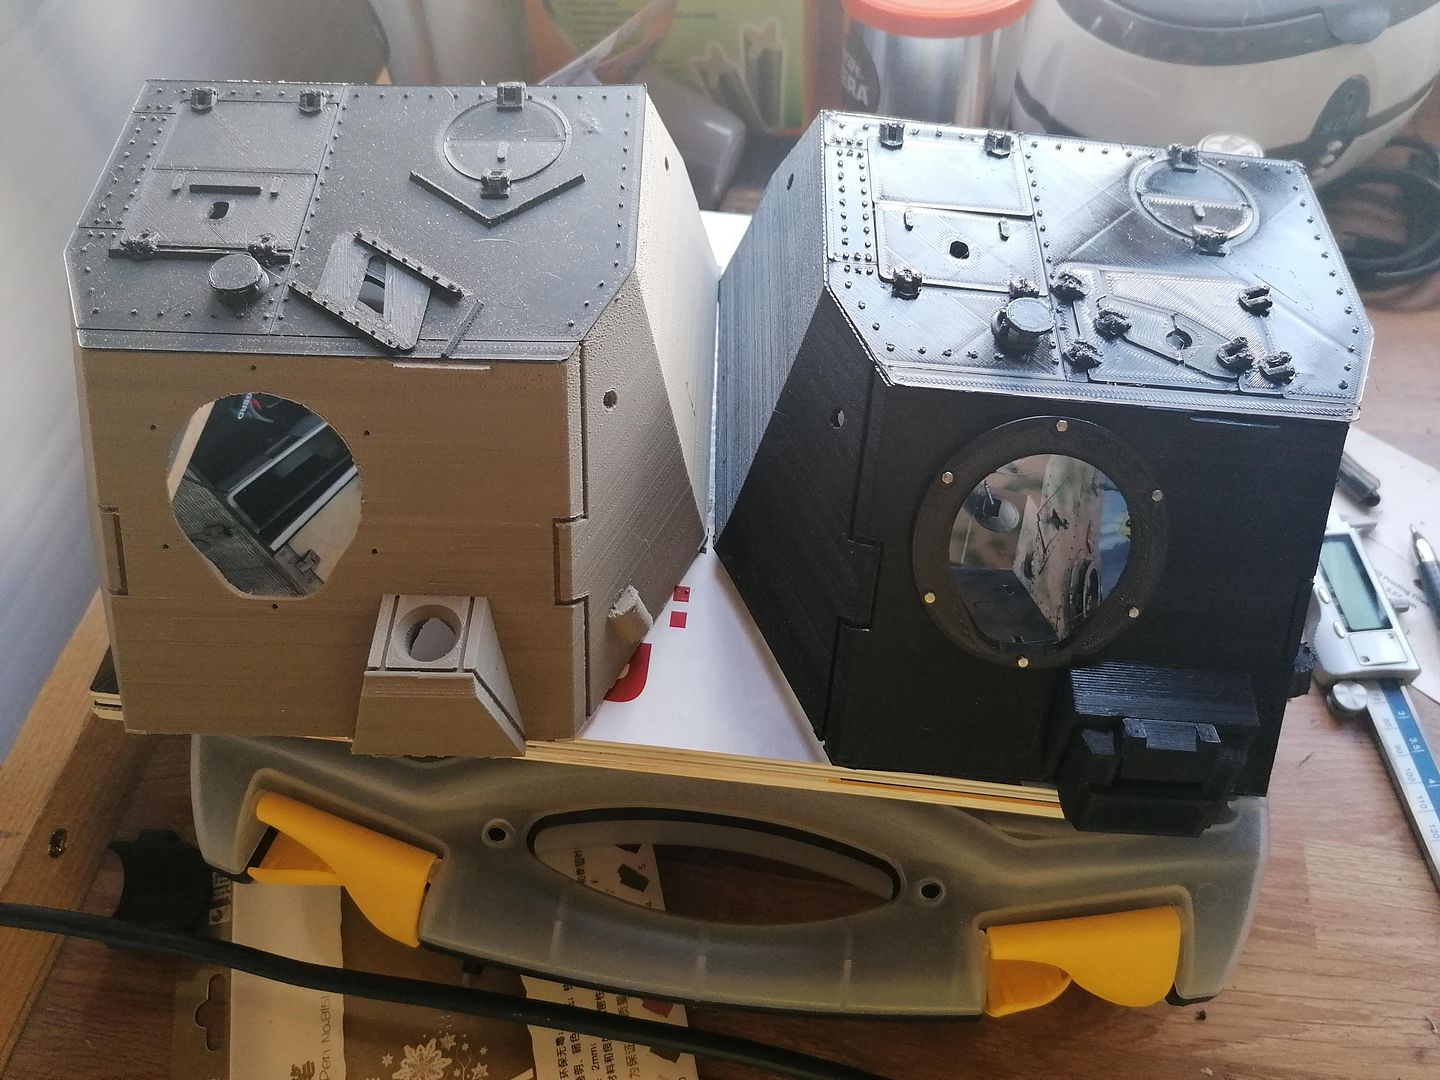
I fitted the hatches and the last pistol port bung so it wont be long before i can start doing the electrics
I also found time to finish the last hatches for the early version and I have added them to my thingiverse https://www.thingiverse.com/thing:4561513
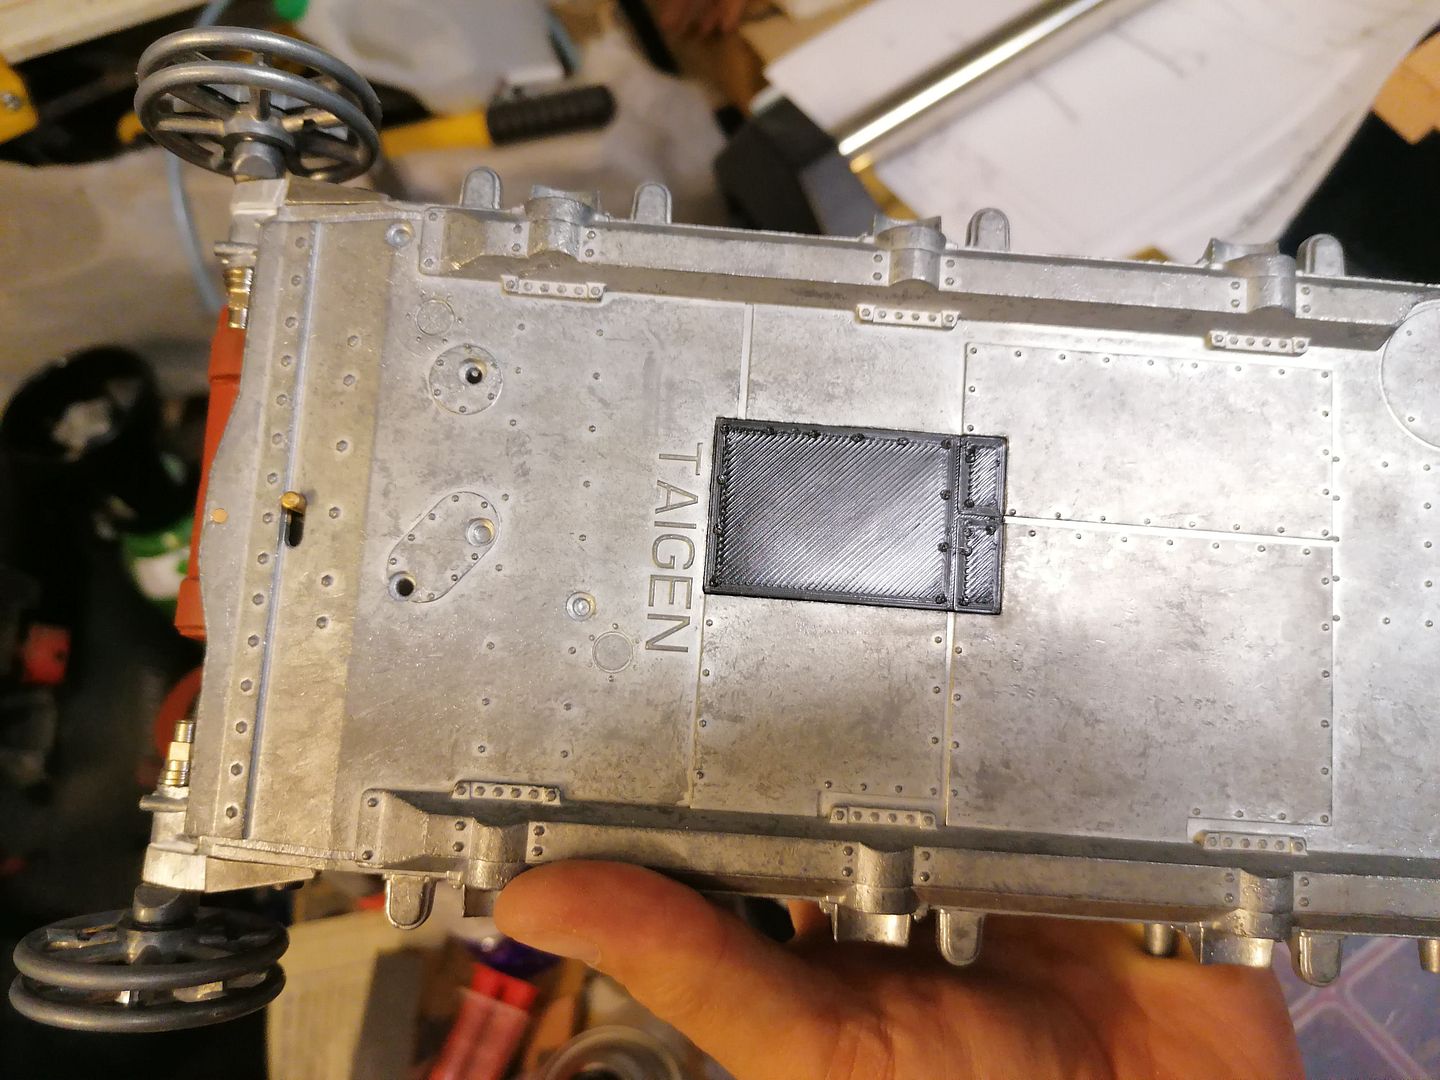
I have also added some other parts some headlight bases and an infill for the removed switch panel in the floor of the panzer 4 https://www.thingiverse.com/baldrick131/designs
A feature-rich, and exemplary project throughout.
I'm particularly glad, though, that you took the trouble put the correct angle in the engine deck (many don't). I angled the deck with my StuG 4- using Tamiya Pz IV's dimensions, but the StuG's something of a stalled project right now
Yours just keeps delivering engineering and design treats!
"Get your facts first, and then you can distort them as much as you please"- Mark Twain.
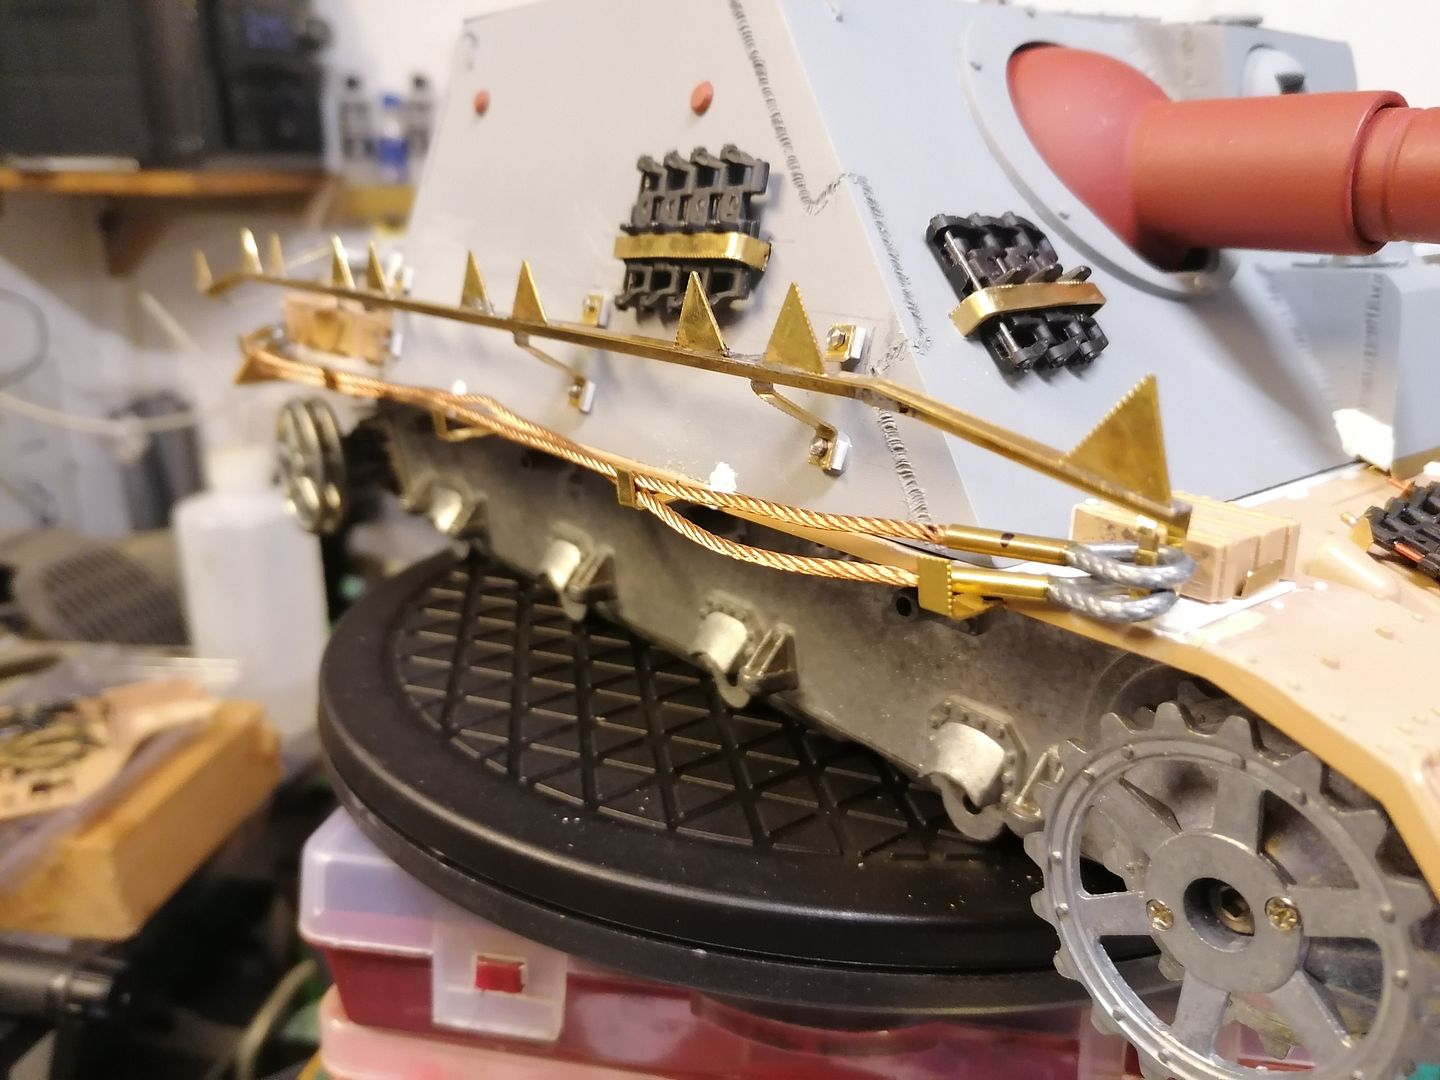
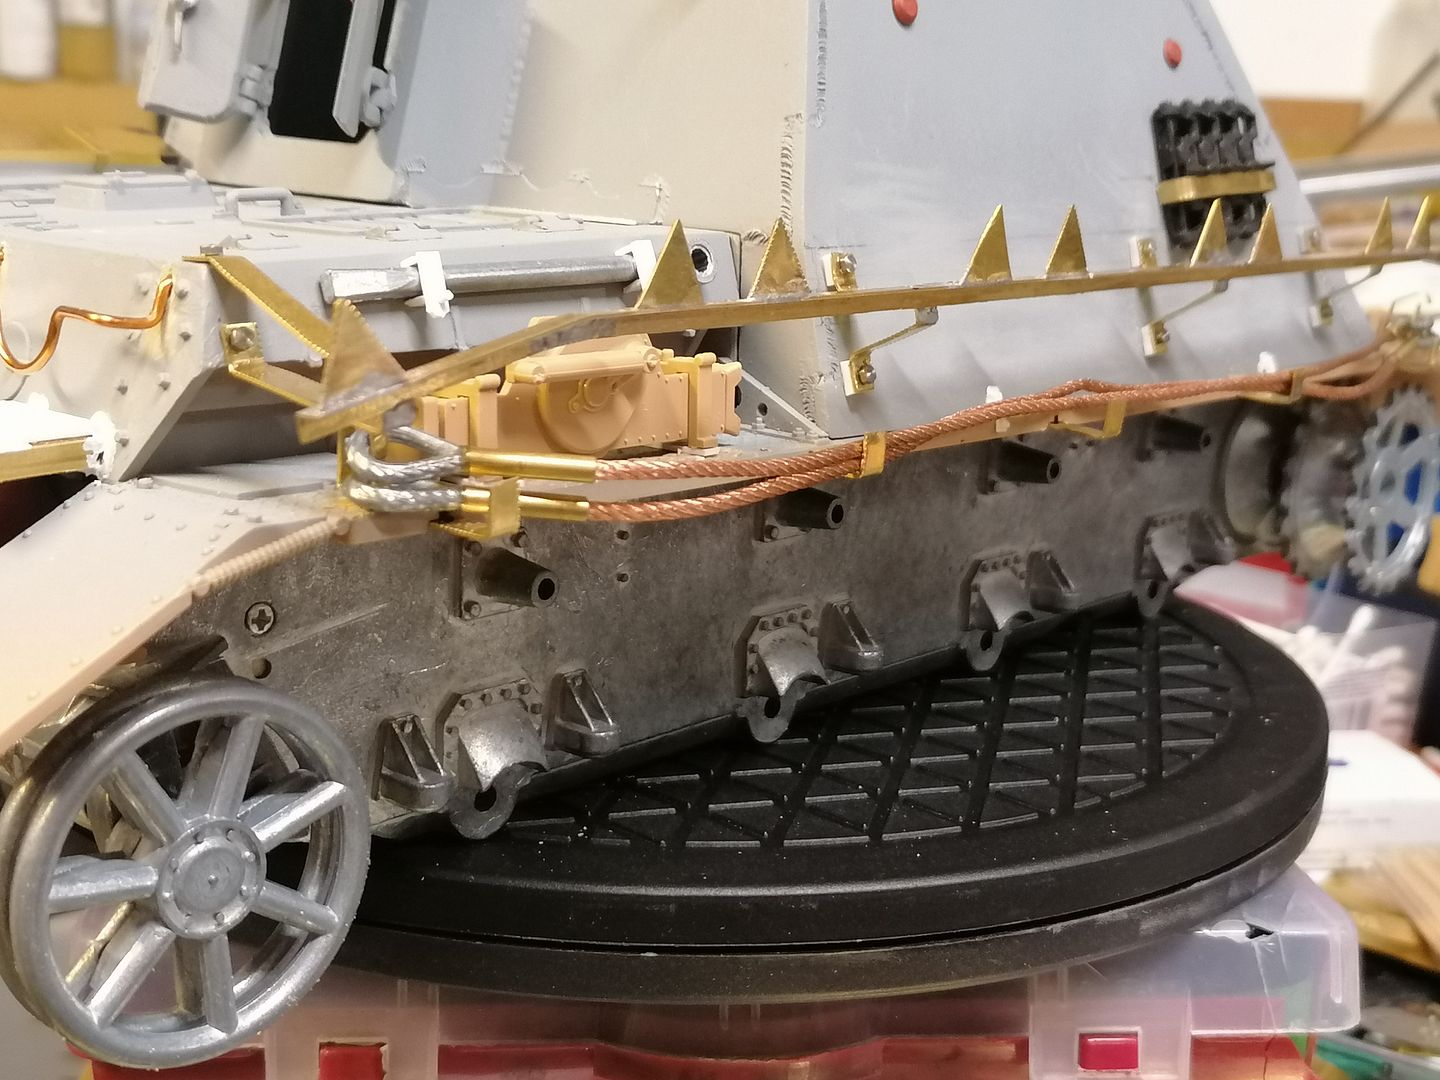
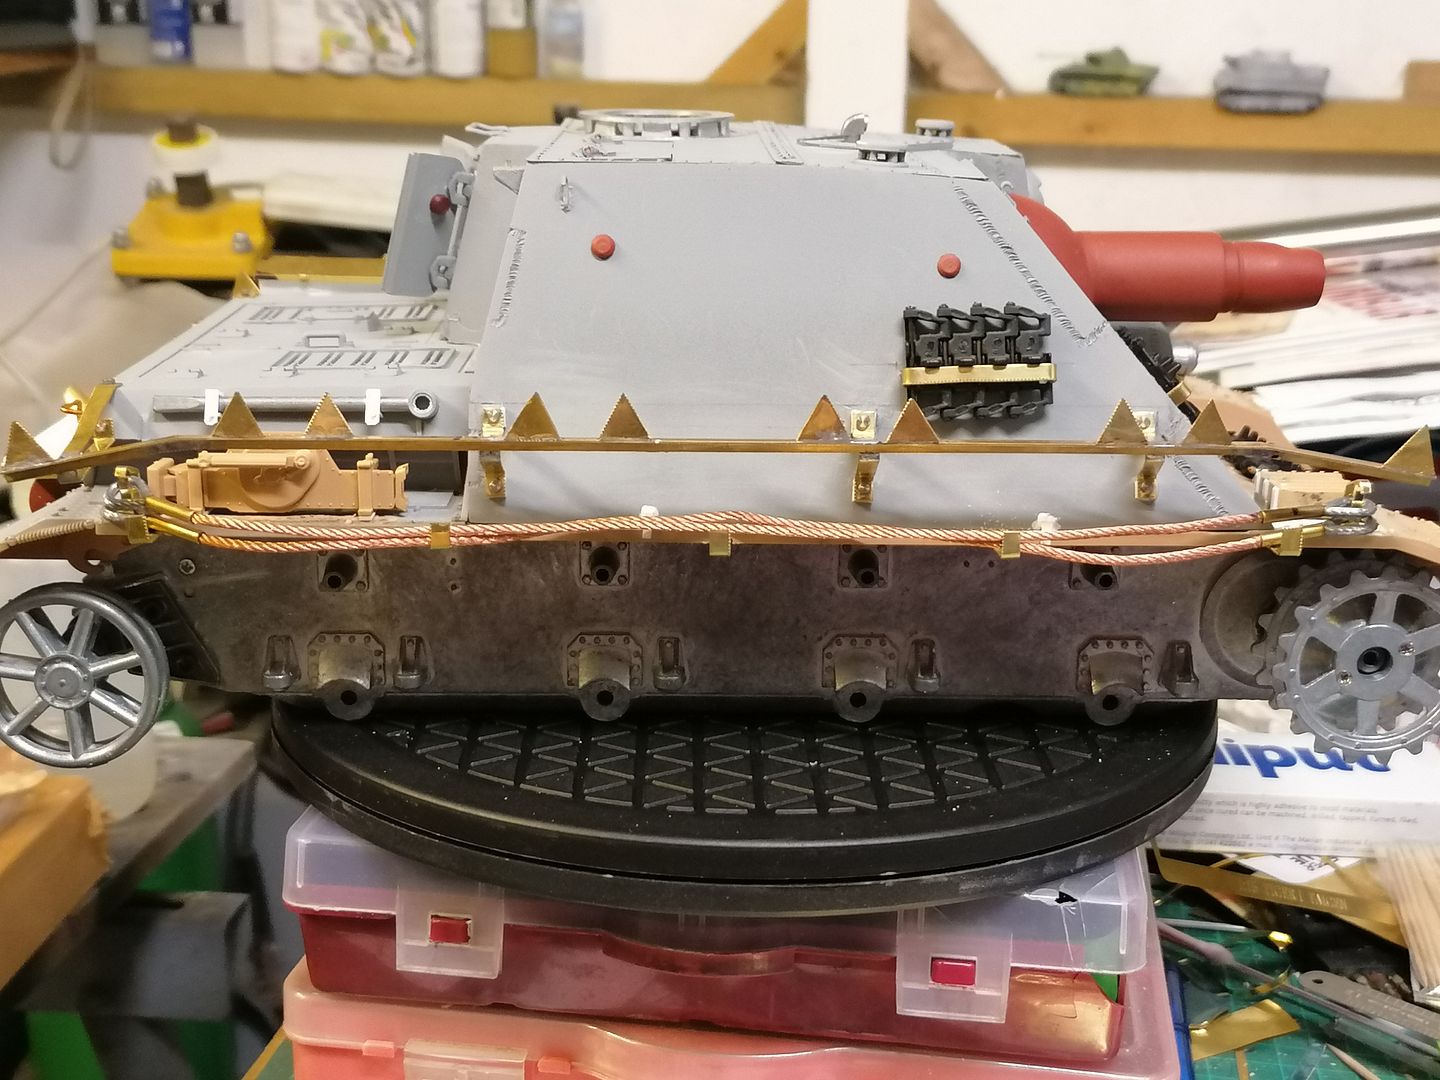
Now I have the side rails fitted it was apparent I had placed one slightly further forward so with a bit of work with the soldering iron they were both level and it was time to fit the lower mudguard mounted brackets.
After bending up some brass strips and filing the lower outer lip level with the underside of the mud guard they were glued in place.
When they were in place I shortened a couple of tow cables and made a couple of brackets to hold them at each end and they sit atop of the side L brackets.
The brass sheet turned up so I made a start on the side armour.
The PDF's for these are here. https://www.thingiverse.com/thing:4570550/files
There are no plans for the mounting brackets and clips for them as I find it easier to make those as I go along.
Here are a few close ups to see how it goes together.
I have been told by the wife im not to spend any money for a while as we are going away so it has stalled for a bit but I am printing some more parts for the next 2 I have done so when this one is finished I can start on the mid war version and have most of the conversion parts done before I get the hull but dont tell the wife