Page 3 of 29
Re: Cromwell Mk 4 1:16 scratch build Ludwig kit
Posted: Sun Mar 05, 2017 8:12 pm
by PainlessWolf
Good morning,
Using the right sprockets will add a great deal to the finished appearance. Good job on that, fiddly bits aside.
regards,
Painless
Re: Cromwell Mk 4 1:16 scratch build Ludwig kit
Posted: Sun Mar 05, 2017 8:19 pm
by 43rdRecceReg
While I'm in the mood, I'll deal with the turret until the sprockets arrive, and I can binge on suspension issues (probably a few sleepless nights over those to come..)
The crucial part of the turret build is assembling the turret ring support plates accurately. To get them plumb centre, I used a compass to draw the correct position.
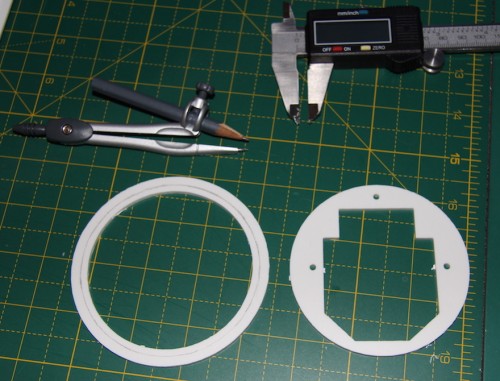
- Pencil line indicates where parts should mate..
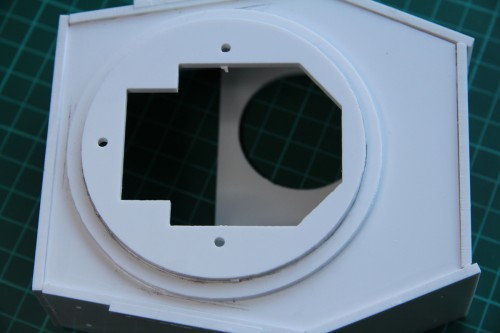
- Ring support mounted on bottom plate
Fitting the side armour plates was straightforward, but getting them truly perpendicular was critical, and hence the trusty set square:
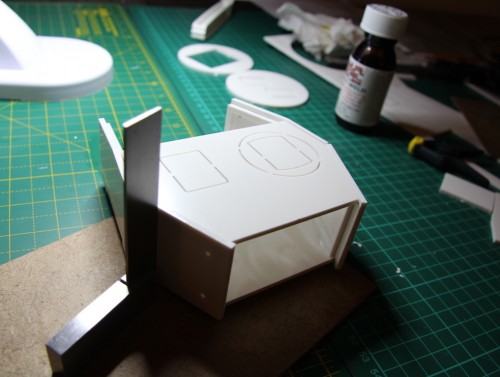
- The virtue of being upright
For the moment only the top plate, with apertures for Commander's and Loader's hatches, actually glued in place. The front portion will remain detachable for future access.
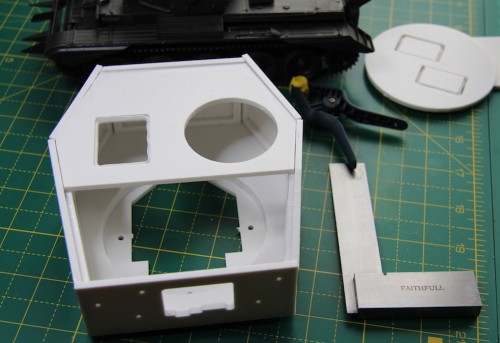
- Section of top plate glued in place
This is quite riveting..and so it's time for some...
rivets.

The feature of the Cromwell that always reminds me of a Dalek: those 'armour acne rivets.


- Fitting rivets and side hatches
Pin vice used to pave way for 2mm (across flats) wee bolts. Now to improvise the four lifting eyes found on the Cromwell turret. I found these brackets from a picture framing kit to have the right potential.

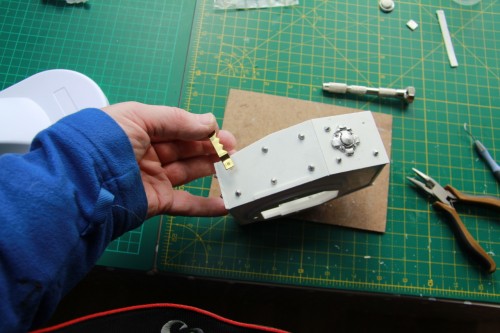
- Picture framing clip as ersatz lifting bracket
Then, roughly cut to shape and drilled:
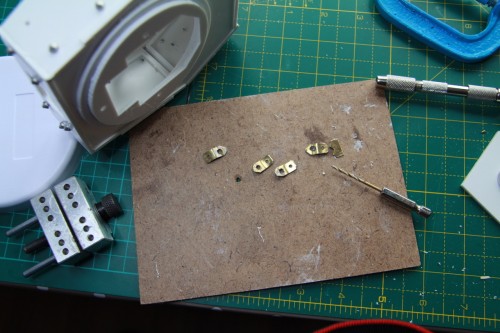
- Basic shape ok but in need of some emery paper..
That's all for now, folks. I feel a caffeine deficit in need of immediate attention. I would say a slurp deficit, but Friday night is my only amber nectar night in the week.

How's that for self-disciple?..and for a Scot to boot!

Re: Cromwell Mk 4 1:16 scratch build Ludwig kit
Posted: Sun Mar 05, 2017 8:26 pm
by 43rdRecceReg
PainlessWolf wrote:Good morning,
Using the right sprockets will add a great deal to the finished appearance. Good job on that, fiddly bits aside.
regards,
Painless
They're on order, Painless. In the meantime, I'm liberating the sprues of their captive bits. That way, all the component sections with be ready for installation. Getting the running gear to line up properly, so that there'll be no crabbing or pulling to one side on launch day, is the only aspect of the build that bothers me. Much of the shell is complete. That's the 'easy' part...well, relatively speaking.

Re: Cromwell Mk 4 1:16 scratch build Ludwig kit
Posted: Mon Mar 06, 2017 7:15 am
by Jake79
Coming along very well 43rd, enjoying following this one

Re: Cromwell Mk 4 1:16 scratch build Ludwig kit
Posted: Tue Mar 07, 2017 11:17 pm
by 43rdRecceReg
Jake79 wrote:Coming along very well 43rd, enjoying following this one

Thanks, Jake.
The pictures don't tell the whole story by any means.

The instructions for the Cromwell built are..well.. a little sparse for an 'L' plater like me, and so I've also used the more detailed Comet instructions to get a better fix on where I'm going. Overall, it's a great kit and I'd recommend anyone having a go; but I'd also have to say that projects such as can have a great thirst for cash (extra tools, mini screws, bespoke extras, etc..). The finished Tank will have cost far more than a Tamiya, and pulled out more hair; and launched a thousand unprintable expletives

but then where else are you going to get a working 1/16 WW2 icon?

Re: Cromwell Mk 4 1:16 scratch build Ludwig kit
Posted: Tue Mar 07, 2017 11:52 pm
by 43rdRecceReg
A few little updates..
I though a template for fitting the Henntec system would be included with the product, but apparently not. S o o o o..I had to make one myself.
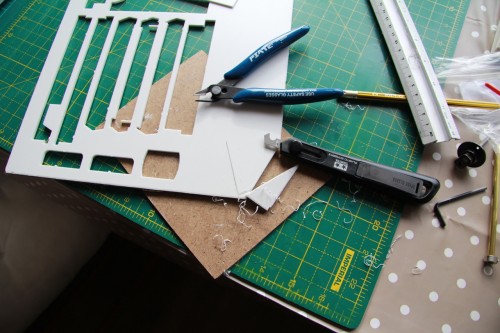
- Template for fitting Henntec track tension adjuster
The template I cut out lined the unit up with the front plate and upper/lower glacis plates. It's not as neat as the one advertised on Christian's website, but it sufficed. It was important that the positions on the left and right sides matched.
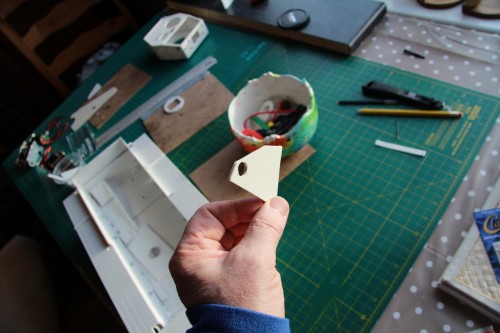
- A bit crude but it worked
and they did, and here's the result:
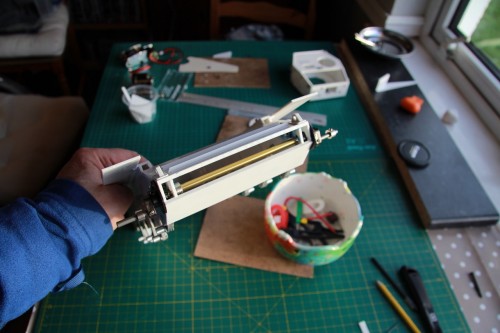
- Henntec in situ
Having got the fiddly retaining screws in place, I could now close up the front of the tank, with the front armour plate.
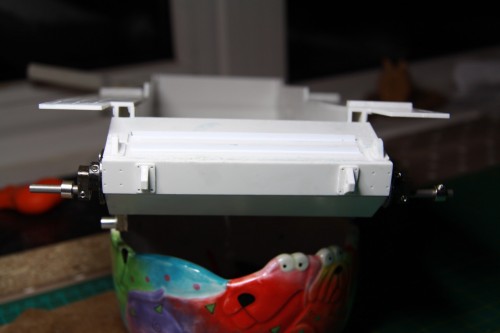
- Front plate finally fitted..now waiting for headlights
Before I go much further, I'll have to fit the Panzer 3 headlights supplied by Forgebear.
In the meantime, the Turret is looking better. I still have to make the commander's hatch, fit hinges, and then fit the gun brackets. There's also a decision to be made on the turret electronics: most likely it'll be a Taigen IR/recoil option. I'd like airsoft, but that's a pipe (or barrel) dream, I think,

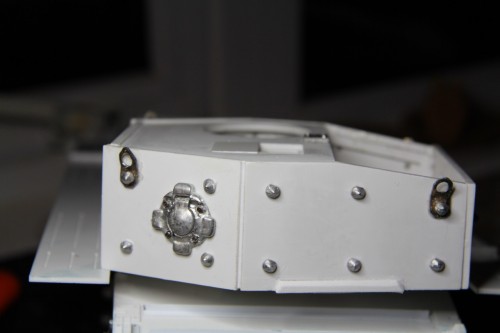
- Spot of sanding and Mr Surfacer needed for that 'lived in' look..
Re: Cromwell Mk 4 1:16 scratch build Ludwig kit
Posted: Wed Mar 08, 2017 7:49 am
by AlwynTurner
Re: Cromwell Mk 4 1:16 scratch build Ludwig kit
Posted: Wed Mar 08, 2017 4:33 pm
by PainlessWolf
Good morning,
Great job on turning those picture hangers into lifting hooks. Those things have a multitude of uses in scale tanks. I once used a set, bent into springs, to help bolster the torsion bars on a KV-2 build. Following along!
regards,
Painless
Re: Cromwell Mk 4 1:16 scratch build Ludwig kit
Posted: Wed Mar 08, 2017 4:47 pm
by Ad Lav
Cracking job.
Starting to look like a cromwell now!
Re: Cromwell Mk 4 1:16 scratch build Ludwig kit
Posted: Wed Mar 08, 2017 7:12 pm
by wibblywobbly
These are well worth the money I reckon, the detail is excellent, scratch building would be a complete pain!
