Page 3 of 6
Re: RC Universal Carrier 1/16 Scratchbuild
Posted: Mon Dec 28, 2015 11:17 am
by HERMAN BIX
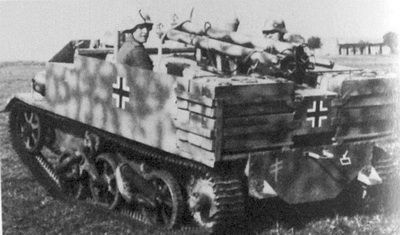
Yep, its a Bren Gun Carrier alright

I've seen pictures of captured ones the Germans mounted 3 Panzerschrek's onto !
Back in the day, I converted an Airfix carrier into one of these in 1.72nd scale, looked cool and was great in wargaming.
Will look cool alond side the Matador
Re: RC Universal Carrier 1/16 Scratchbuild
Posted: Mon Dec 28, 2015 11:40 am
by AlwynTurner
Thanks Herman, yes the germans put many captured UCs to various uses - this is the one you mean
There were many different marques and variations produced, the Canadians used them as mortar carriers, and I believe some even had gun turrets fitted. As a fast all-terrain reconaisance and support vehicle it was really good.

Alwyn
Re: RC Universal Carrier 1/16 Scratchbuild
Posted: Wed Dec 30, 2015 8:38 am
by HERMAN BIX
AlwynTurner wrote:Thanks Herman, yes the germans put many captured UCs to various uses - this is the one you mean
There were many different marques and variations produced, the Canadians used them as mortar carriers, and I believe some even had gun turrets fitted. As a fast all-terrain reconaisance and support vehicle it was really good.
Alwyn
Thats exactly the one mate, a pretty cool Sherman killer on the wargame board I can tell ya.
I have searched for combat accounts of how this conversion fared in battle, but als no luck.
Can only guess at how a salvo of those rockets would have affected an anti-tank situation mounted on a fast little platform like a BGC !
A lot of them ended up in New Zealand on farms as agricultural labourers towing ploughs and dragging logs. A hand cart I used to have an oxy-acetylene kit on at work had the big road wheels mounted to it

Re: RC Universal Carrier 1/16 Scratchbuild
Posted: Wed Dec 30, 2015 12:56 pm
by AlwynTurner
Re: RC Universal Carrier 1/16 Scratchbuild
Posted: Fri Jan 01, 2016 10:39 am
by magmer
Great to see this build, although I love German armour it is brilliant to see something British at long last. Will it be going into production as a kit? If so I would definately buy one
Re: RC Universal Carrier 1/16 Scratchbuild
Posted: Sat Jan 02, 2016 2:52 pm
by AlwynTurner
Hi Magmer, I don't think this will be a kit but most of the suspension/track parts are available from Woz. The body build is pretty straightforward using sheet styrene, and follow my build as it progresses if you want to build one.
Regards Alwyn
Re: RC Universal Carrier 1/16 Scratchbuild
Posted: Sun Jan 03, 2016 11:29 am
by AlwynTurner
More pieces have arrived and construction progresses.
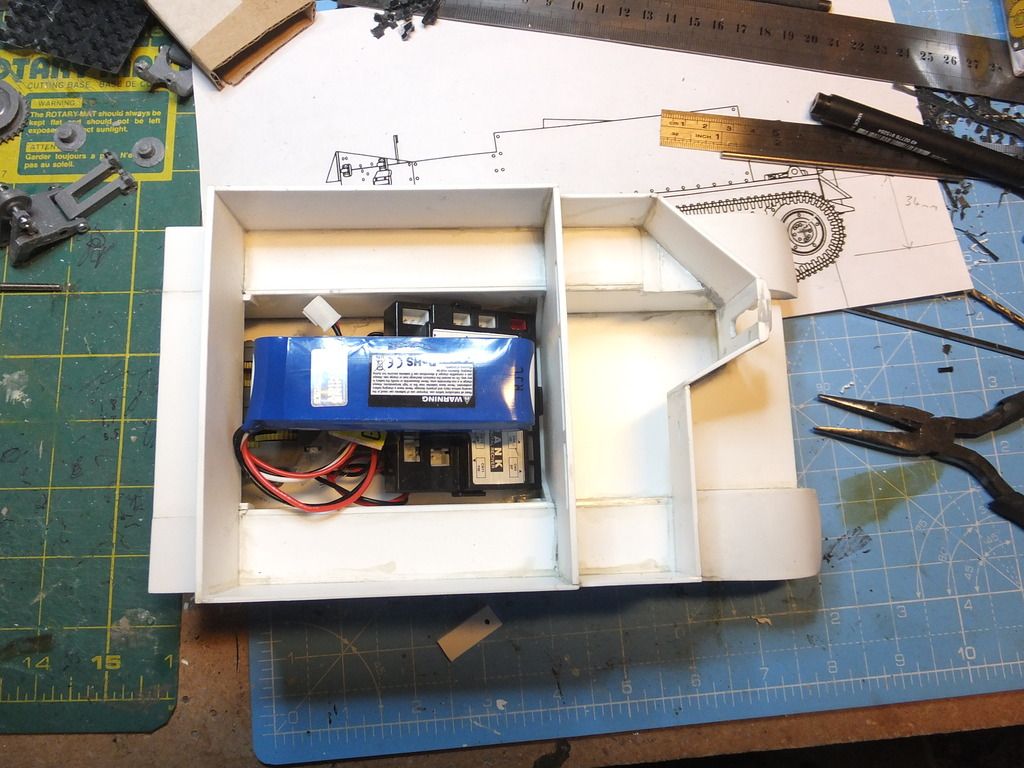
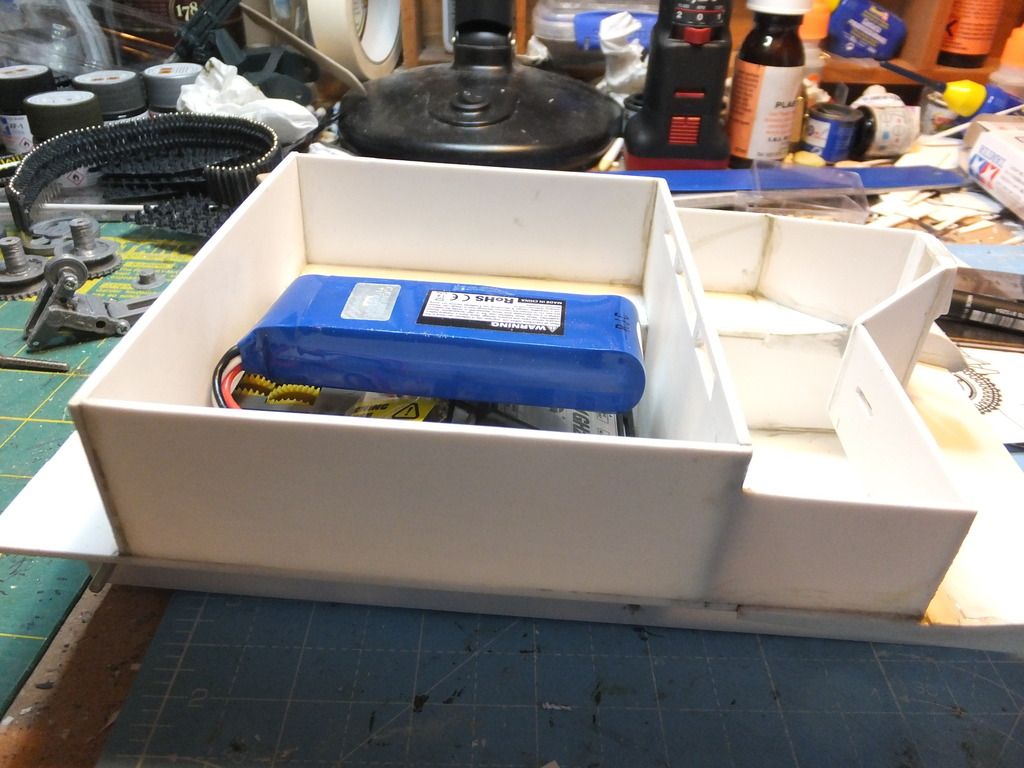
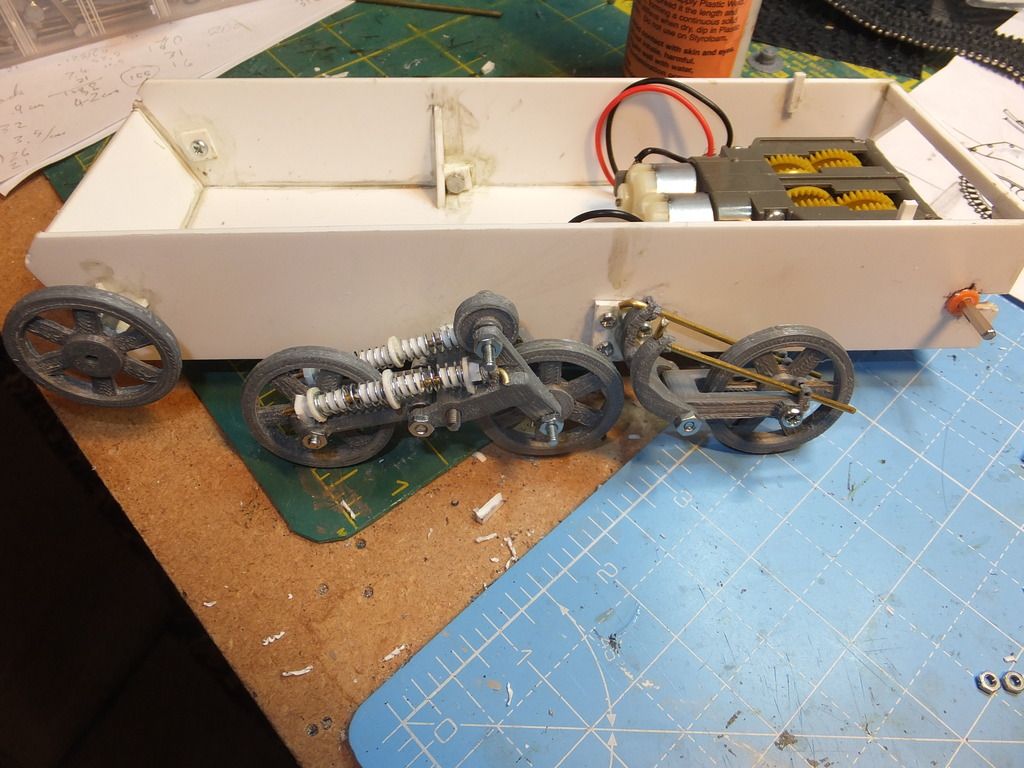
The mini LIPO battery has arrived and is a perfect fit. I'll have to change the power plug as I can't find a mini LIPO female plug anywhere except the states, so I will change to mini tamiya plugs which are readily available.
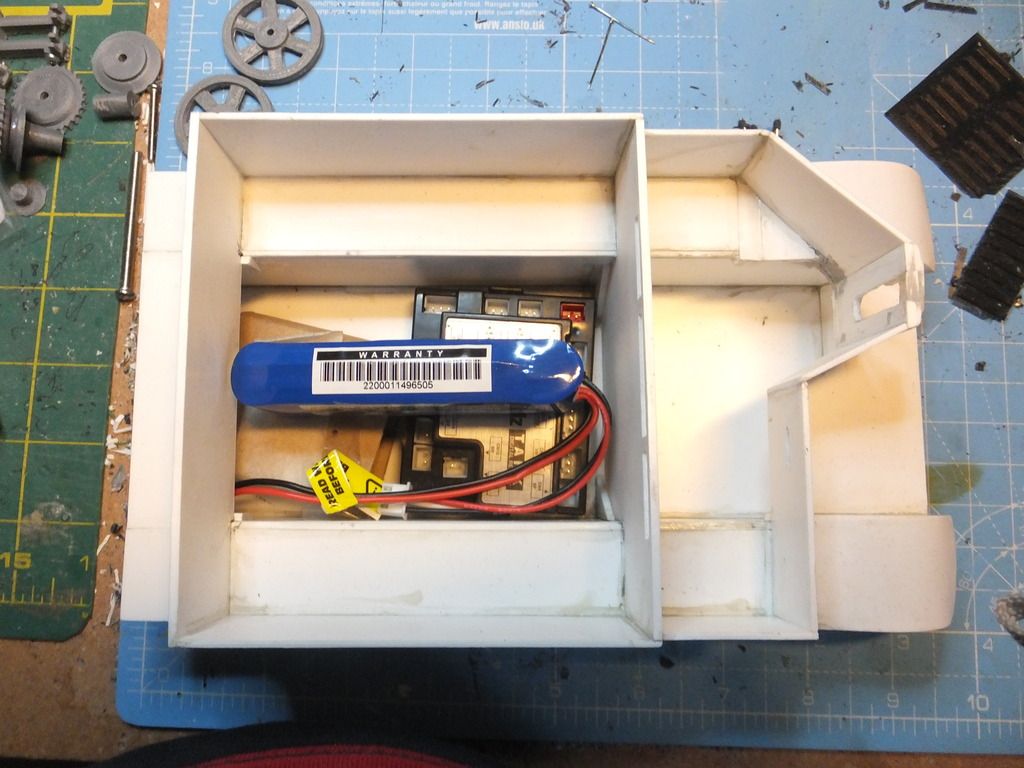
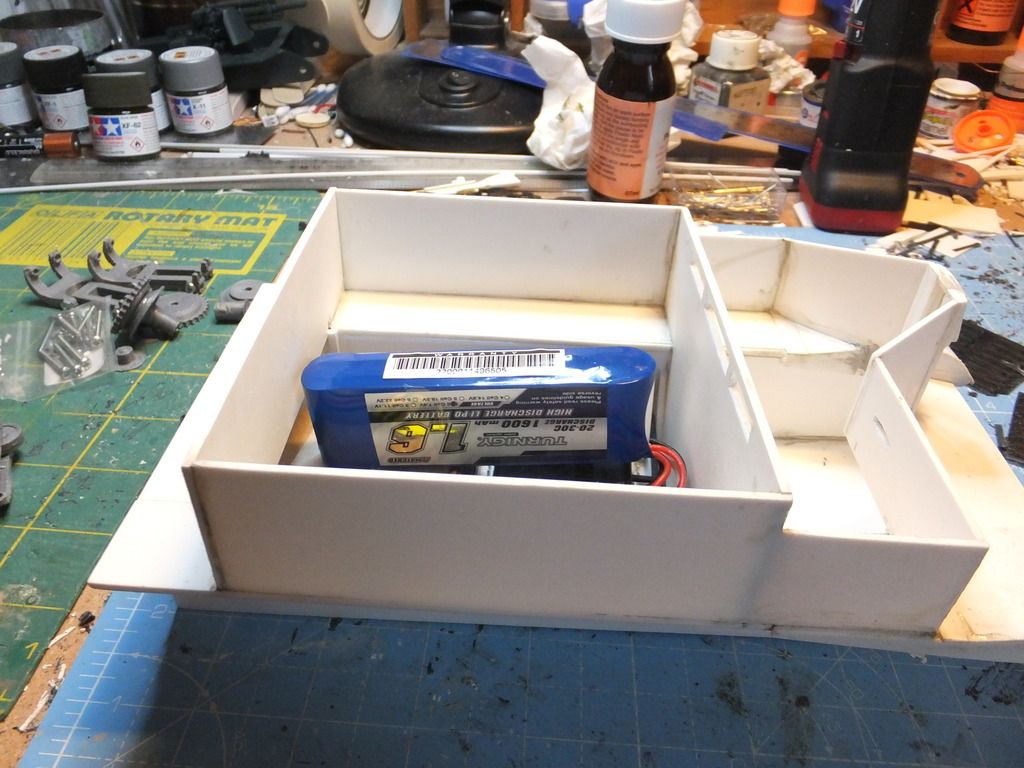
As you can see it will fit where the engine cover goes. I will just have to build a small rack to hold it clear of the MFU and Motors as the battery will probably get warm when running.
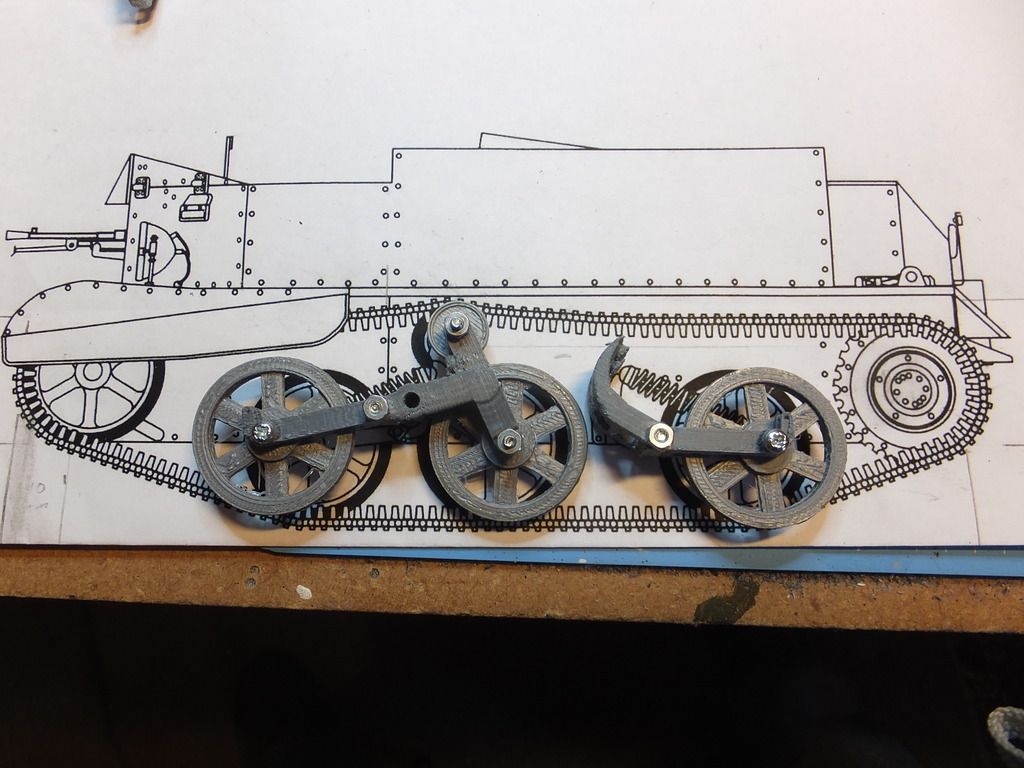
The suspension parts are coming together, I have managed to get some compression springs that should do the job and didn't cost the earth.
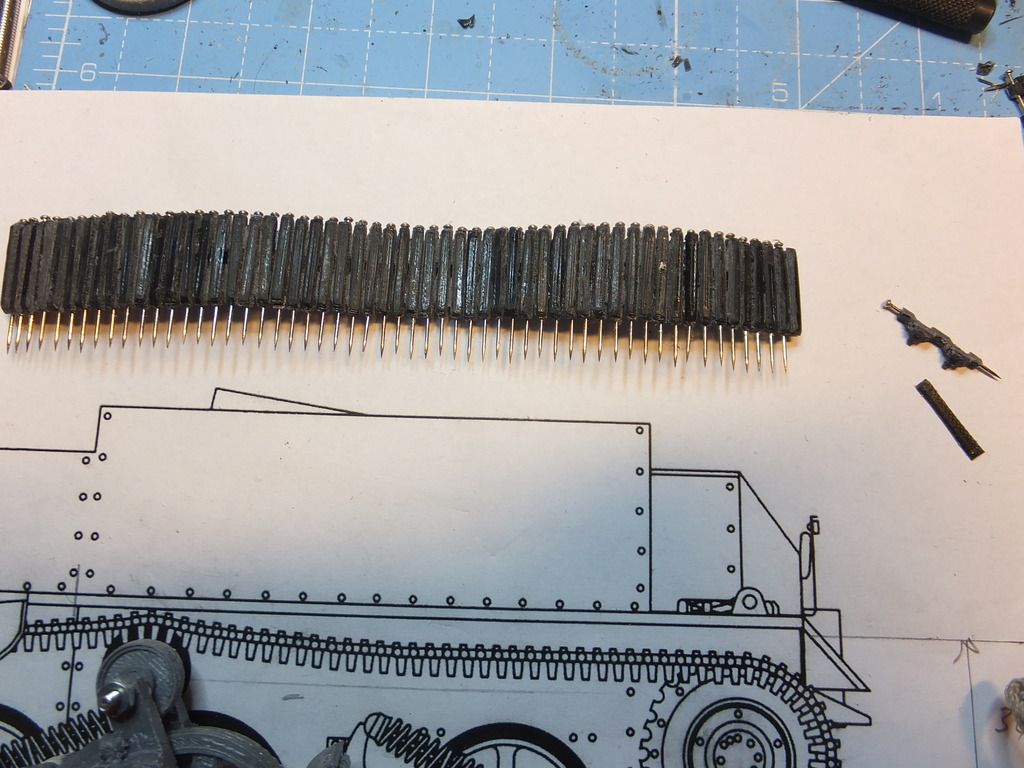
I have made/assembled 55 track links so far and at the moment this is quite a slow process and initially error prone resulting in some wastage. I will need 185 links per track so that shoiuld keep me amused for a while. You can see the link elements on the right consisting of the link and the pad which get glued together. The link contains holes for the pins but these need to be drilled out with a 1mm drill as they are slightly rough from the printing process. The pad and linked are glued together with styrene solvent, cleaned, and assembled with a bit of nip and tuck to get a smooth fit.
the raw material looks like this

And many thanks to Woz for the many excellent pieces that he has produced for me.

Much work to do on this build!!! Alwyn
Re: RC Universal Carrier 1/16 Scratchbuild
Posted: Mon Jan 04, 2016 10:25 am
by AlwynTurner
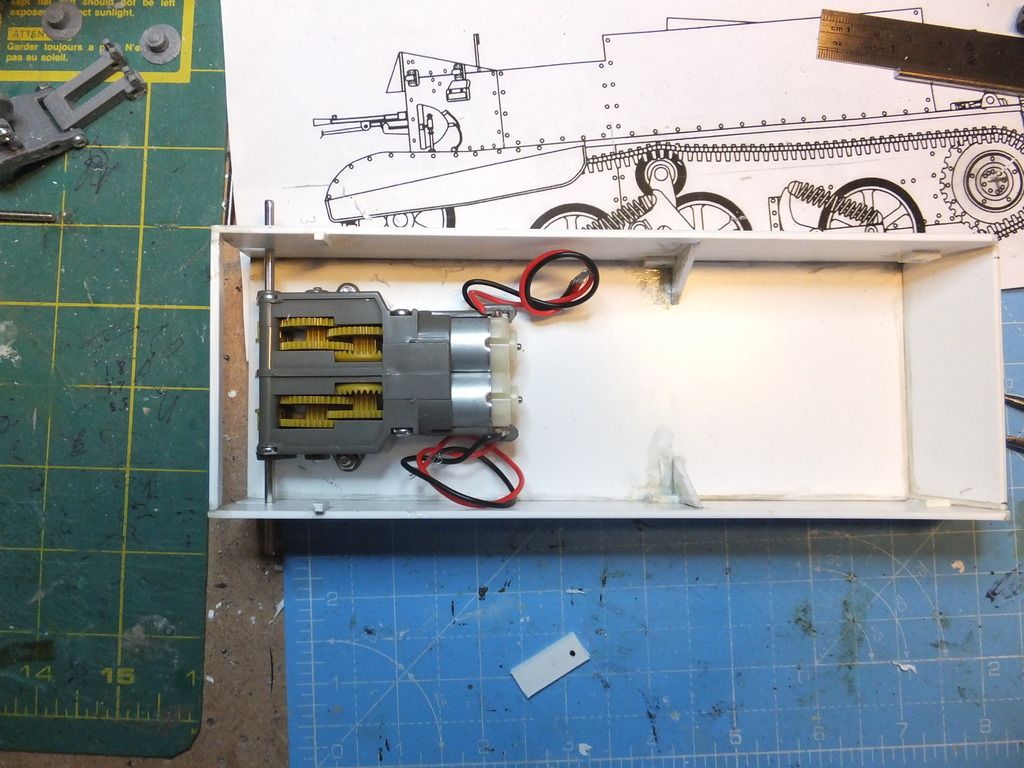
More goodies have arrived. The Tamiya twin motor/gearbox arrived from Oz (the cheapest place including postage and only took 10 days - awesome!). It's a diy kit so that is about to challenge my assembly skills and patience, judging by the tiny size of some of the components and the japanese instruction manual.
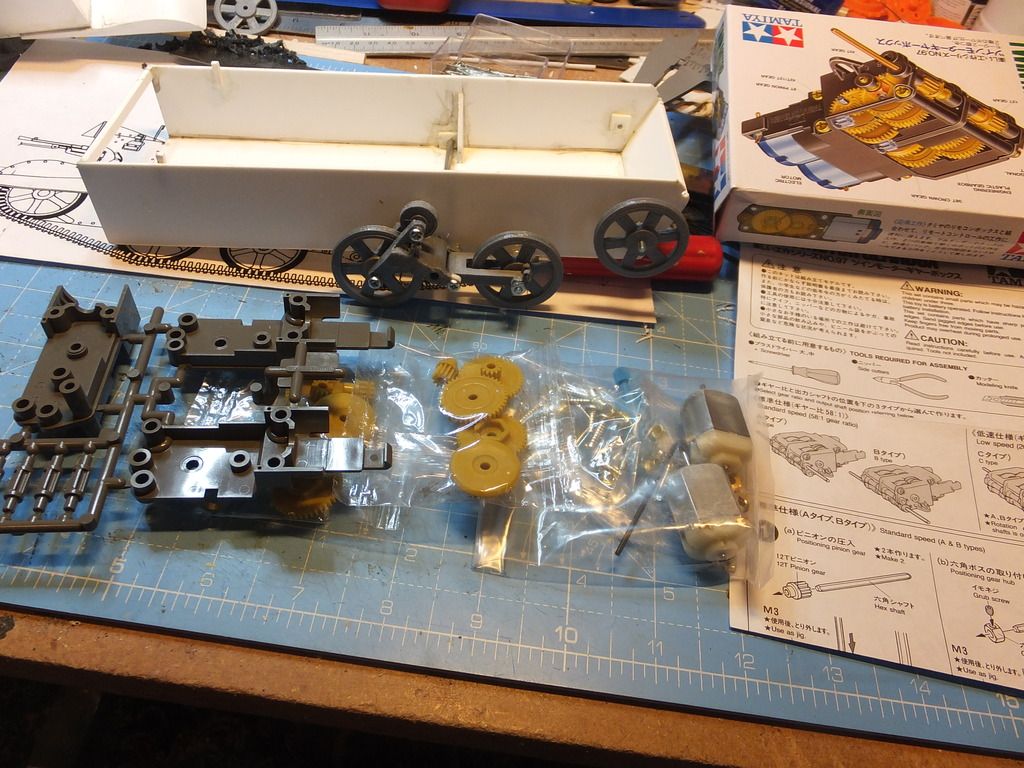
Those following the build will see that the front suspension and front wheel have been positioned and work started on the reinforcing for the mountings. All the nuts/bolts are M2.5 with the exception of the front suspension mounting bolt which will be M3 (because you can't get M2.5 in the lengths I need and also M3 will give better strength/stability).
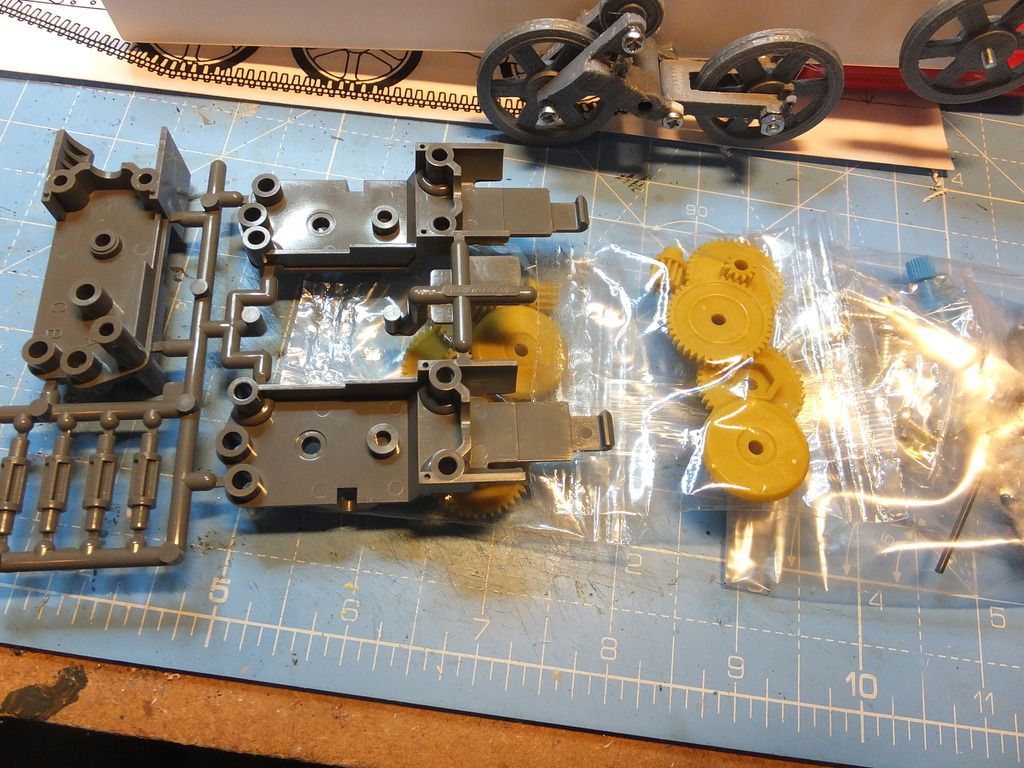
More detail on the motors/gearbox parts - you can't see the really tiny parts in the pic.
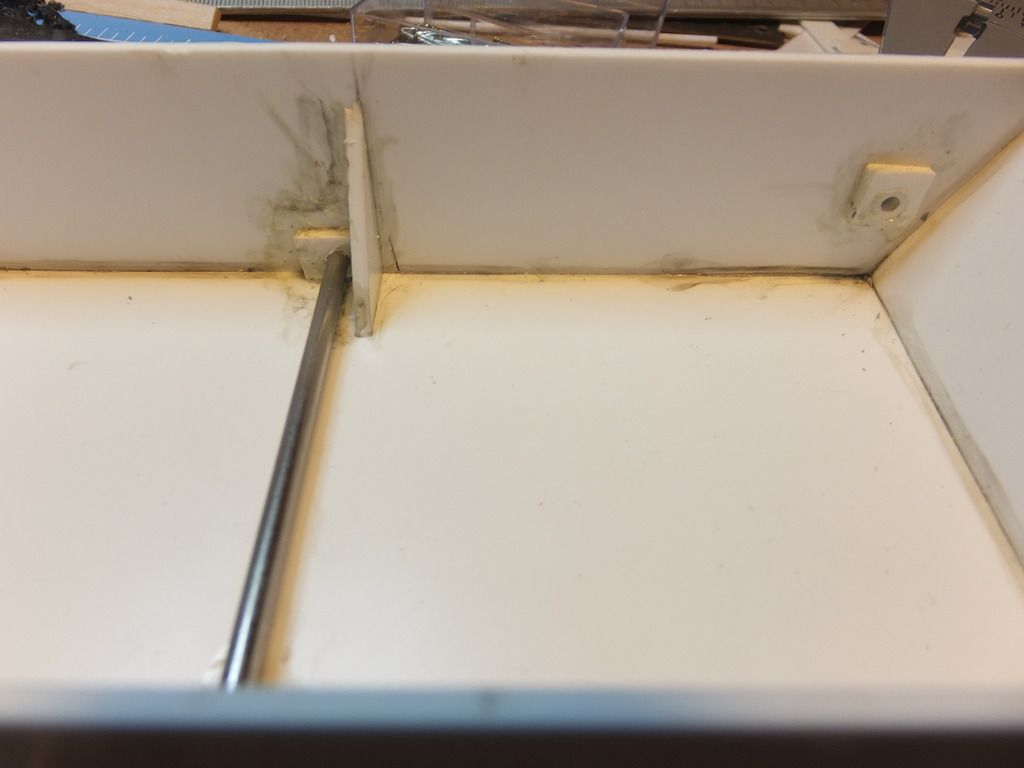
More detail on the strengthening, the bar currently in place is only being used to correctly align the reinforcing and will be replaced by M3 bolts
The gearbox/motors are slightly larger than anticipated, I maybe looked at a different version for sizing so a bit of nip and tuck will be needed fitting everything in.
More details as the build progresses.
Alwyn
Re: RC Universal Carrier 1/16 Scratchbuild
Posted: Mon Jan 04, 2016 3:49 pm
by AlwynTurner
Progress report - we have motors!
The motors were finicky to put together and the diagrams were quite obscure but I managed to sort it out eventually. The motor/gearbox unit is quite heavy so I will have to beef up the rear suspension. Everything still fits but it's going to be a squeeze.
I've now started assembling the suspension and created the first spring unit, tried it and it works quite well although I may have to fit beefier springs.
uncompressed
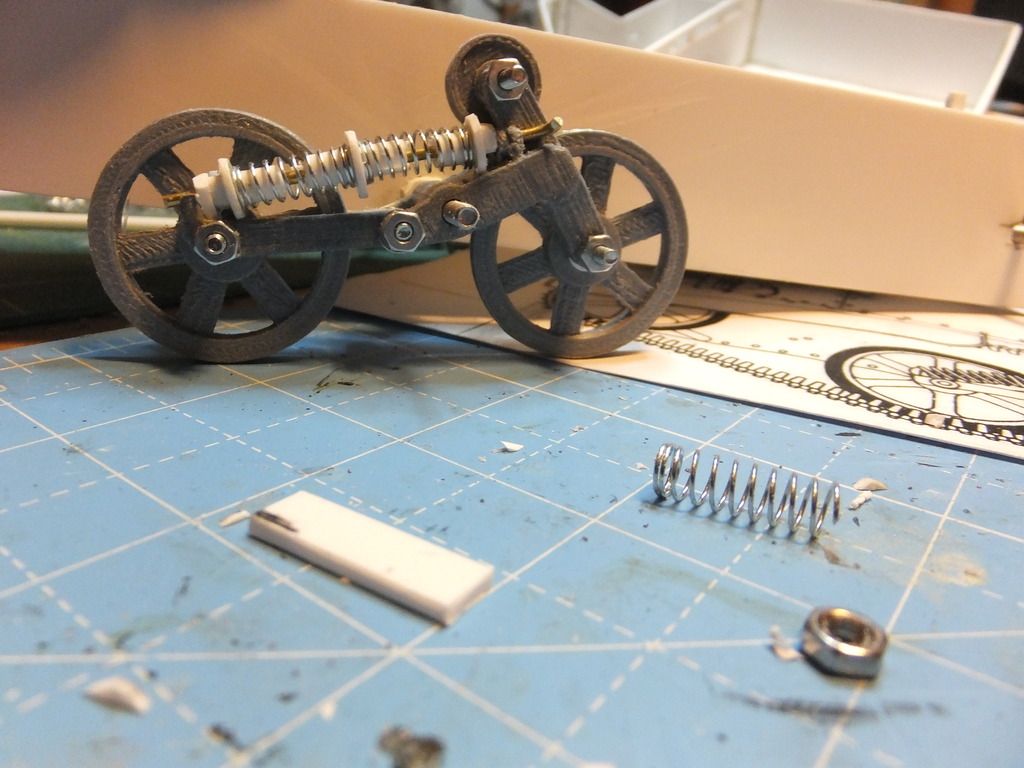
and compressed
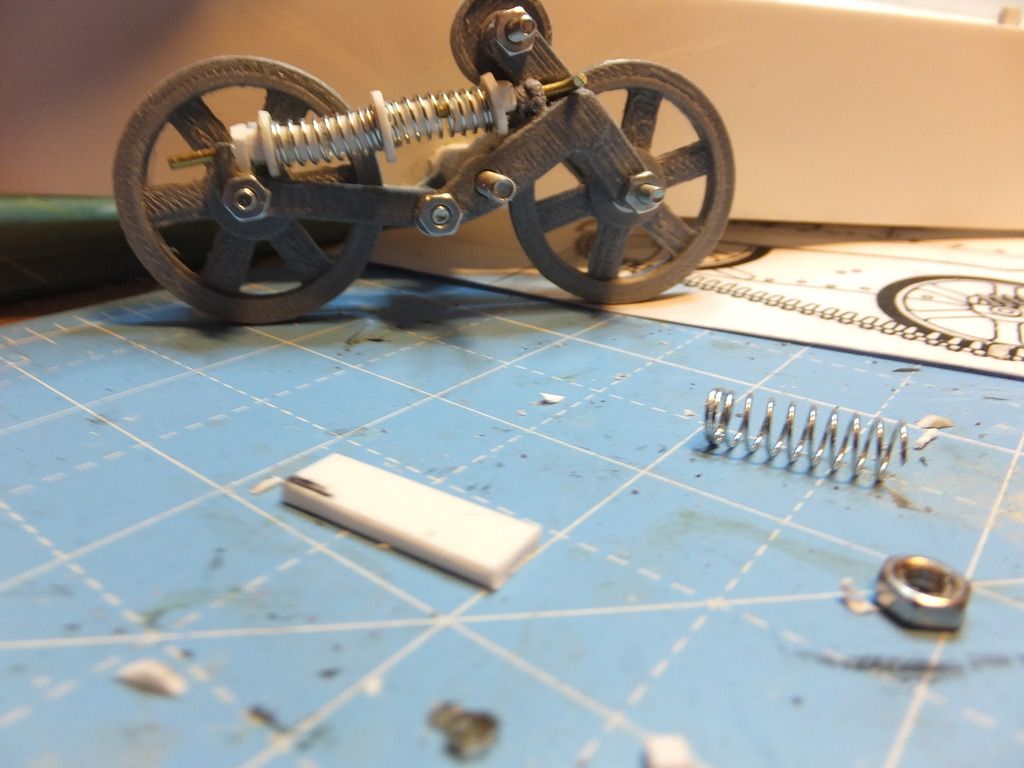
Now to manufacture more springs.
Alwyn
Re: RC Universal Carrier 1/16 Scratchbuild
Posted: Wed Jan 06, 2016 11:03 am
by AlwynTurner
Progress on the suspension, with nylon bushes fitted to the drive shafts as they aren't very sturdy. I also strengthened the rear part of the chassis.
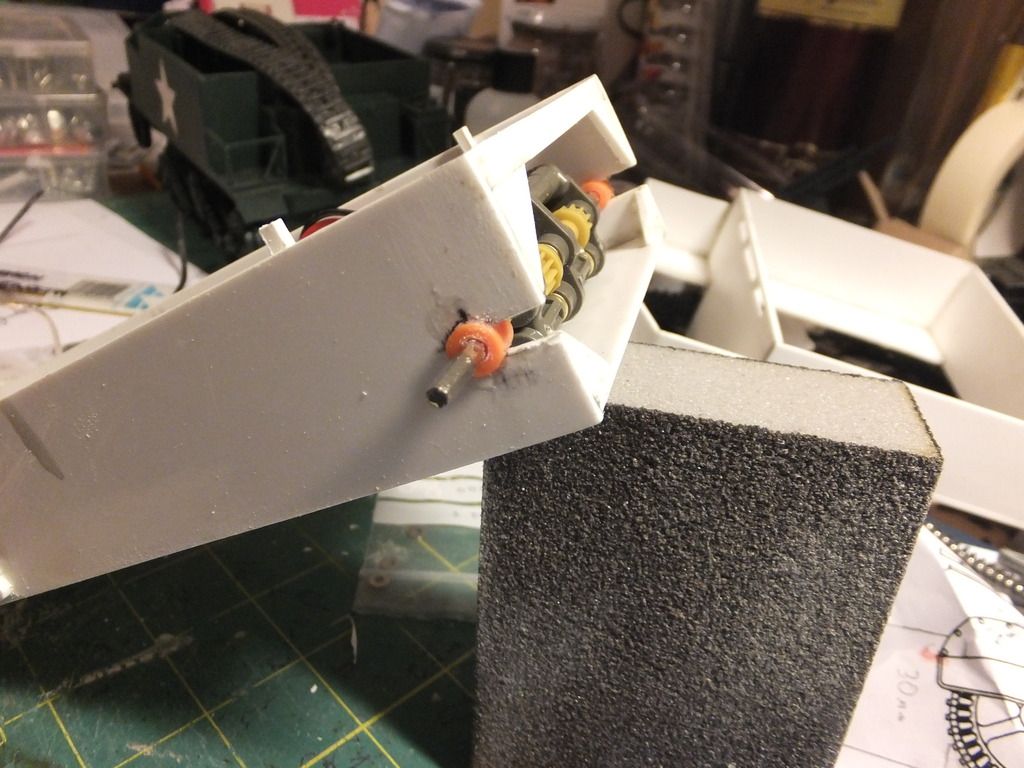
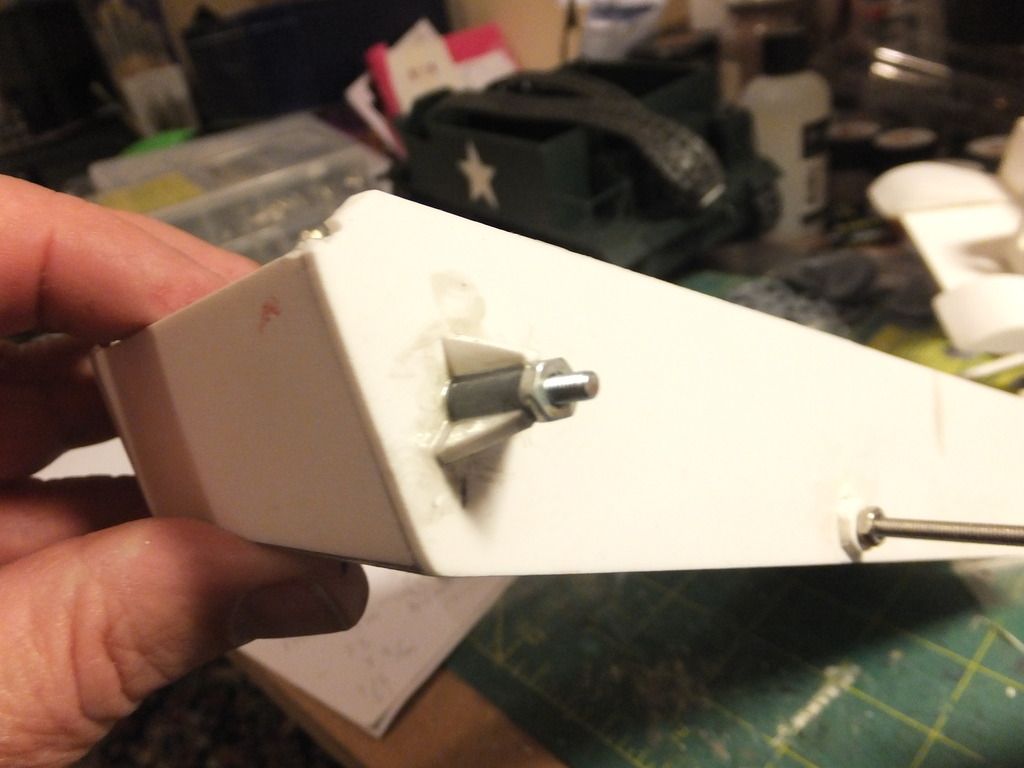
Made front wheel mounts to provide a solid mounts, these will take some stick from driving over rough terrain. I'm awaiting delivery of longer M2.5 bolts.
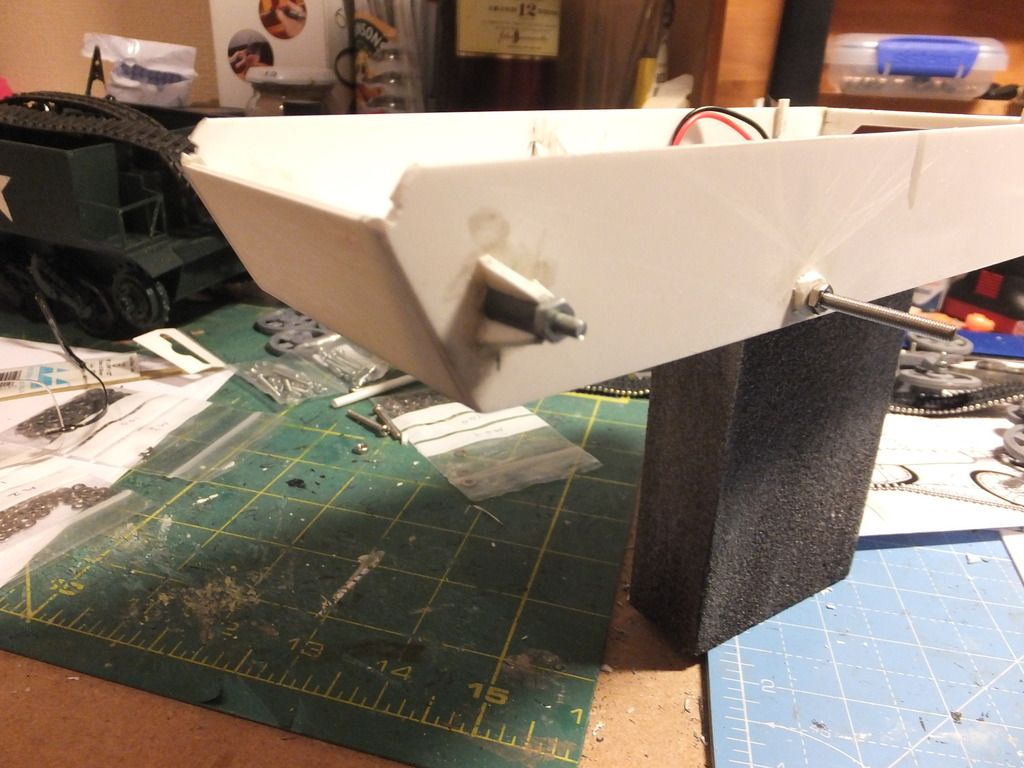
Fitted the rear suspension and made sure everything lined up
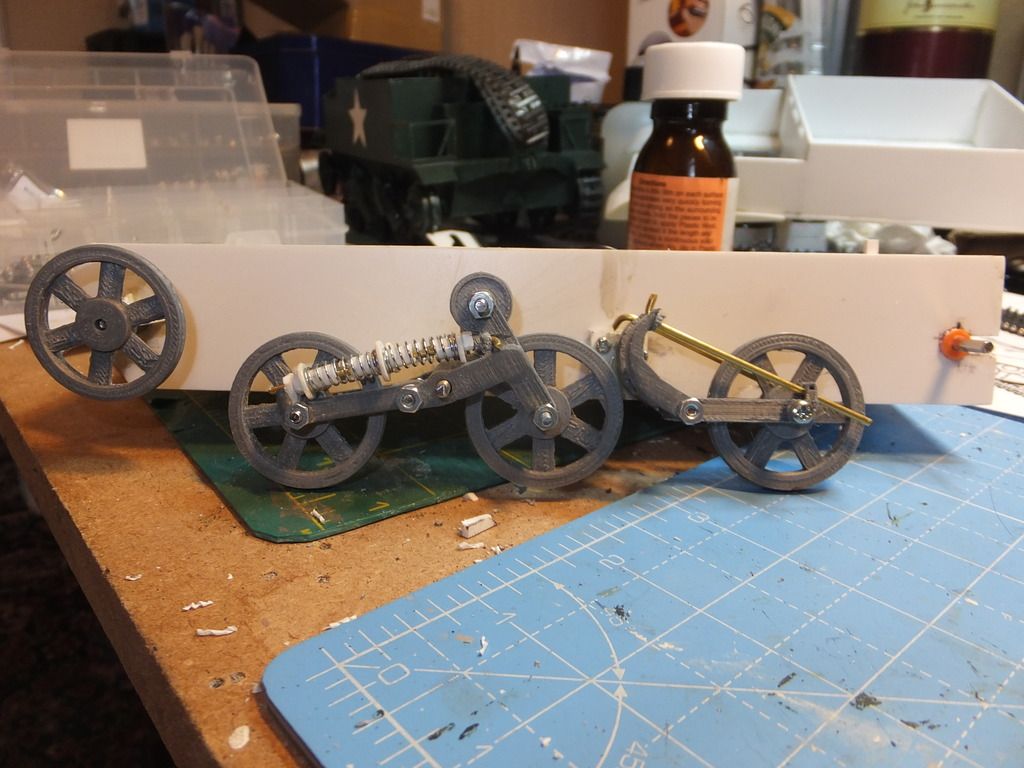
I'm bolting everything together as I don't like using screws as the threads eventually strip and I'm sure there will be a lot of adjustment and maintenance on this model. next is the drive sprocket and springs for the rear suspension.
Alwyn


