Re: Scratchbuilding C&Cs Mammoth Tank
Posted: Sun Jul 28, 2013 5:58 pm
Well, it may have been a while since the last decent update (6 months this time!) but I reckon what follows is a good step towards making up for my most recent absence! Thanks going out to my friend Aidas who convinced me to crack on with the tank again rather than start off another random project! Hopefully he'll keep me motivated long enough to get it finished sometime soon!
Anyway, as I mentioned to Blimp in my last post I'm still looking for methods of reinforcement for the main body of this build while working on some interior detail in parallel. The first batch of images are all about the stuff I've got up to in the engine bay but it's still got a long way to go. The sandy colour is currently wrong so I'll hopefully be able to tone it down to the correct hue at a later date but this is only interior anyway so it matters very little... The left and right walls will eventually have fuel tanks on them but not sure what material to use right now (nothing jumping out at me from my bitz box) The rear wall needs detailing and will most likely get some lining, riveting and a door through to the forward compartment of the vehicle. Need to paint the second engine too and fabricate a central differential to join the two gearboxes. Final detailing will be a little wiring and such but I'm realising more and more how little of this area will be visible in the final build so I'm more focussed on the exterior right now.
So enough of the text,how about some pics? Here's the blank canvas before I started with all the hardware removed.
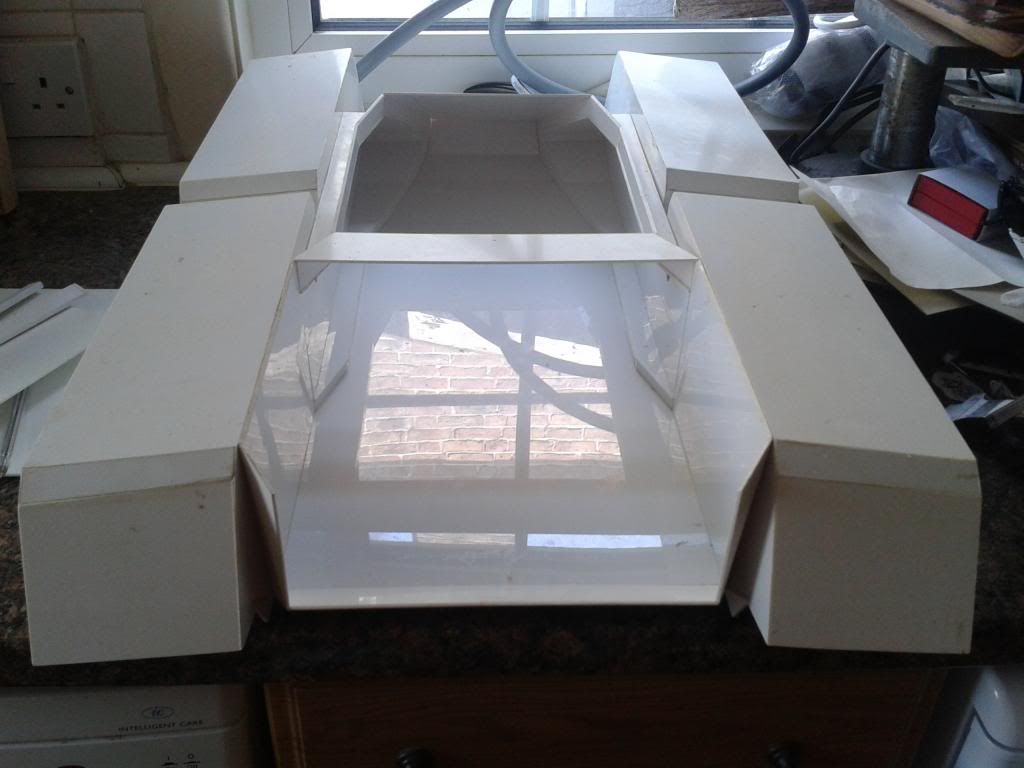
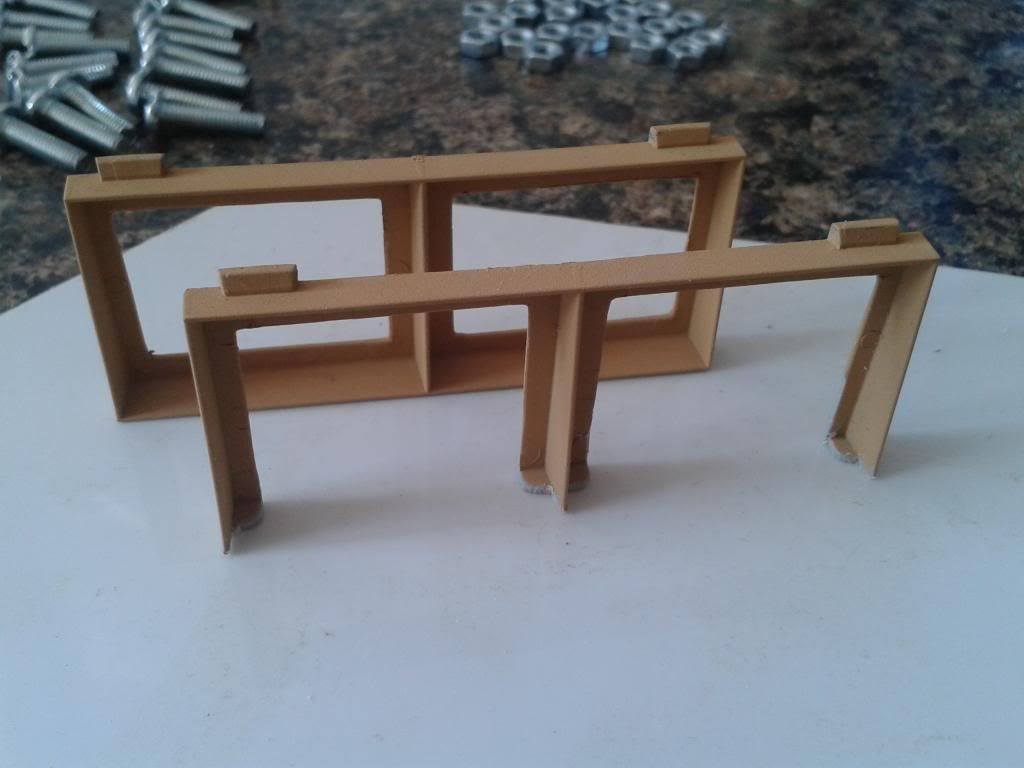
This area actually has two different floor levels but both need elevating different amounts so here are the spacers for the lower floor to which everything will actually attach. Back wall is in place too but still isn't fitted yet.
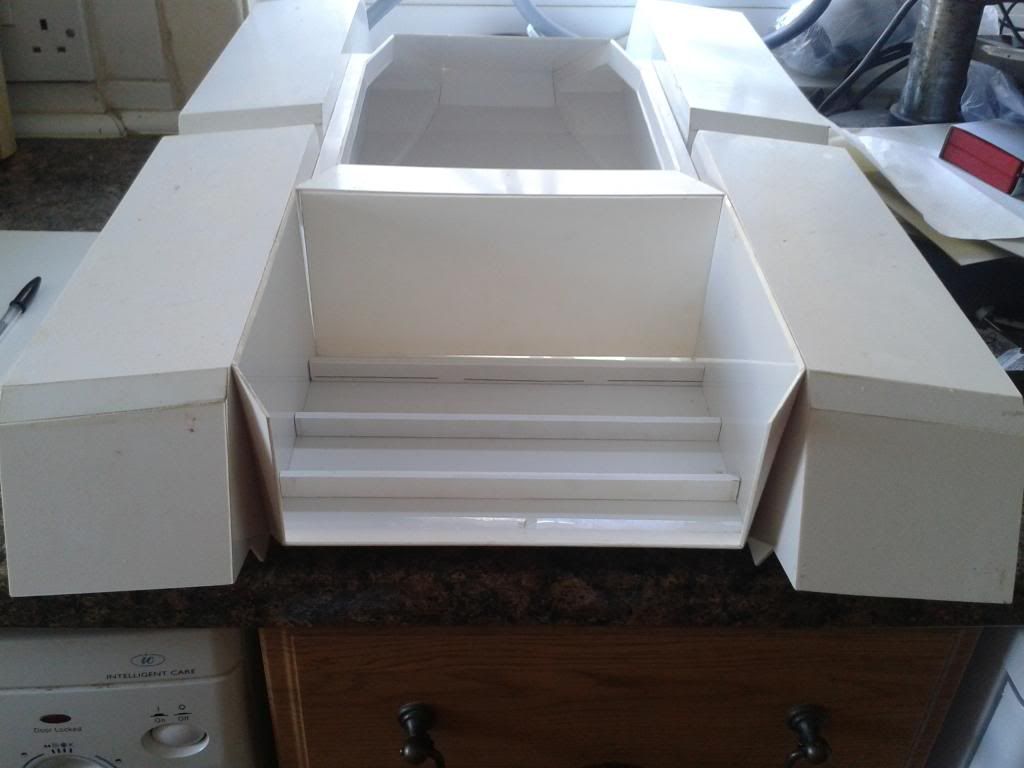
Here I've added some fairly deep lining to the floor and refitted it but it gets more attention before getting glued in.
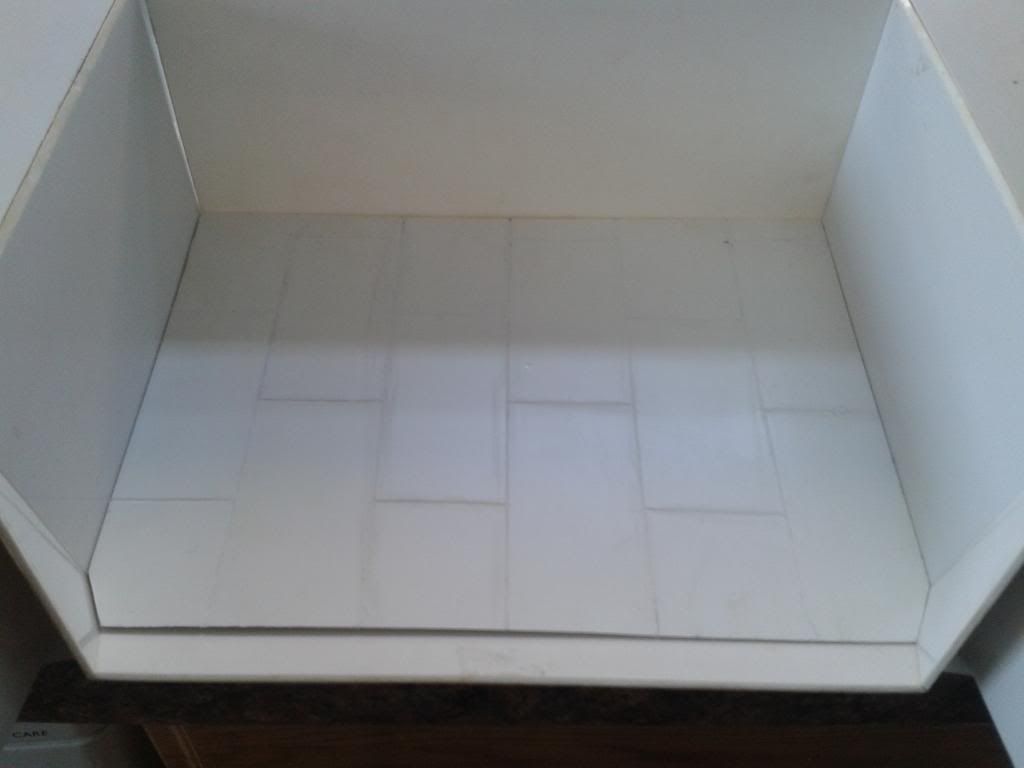
Here I used the remnants of a humbrol spraycan to paint the flat gray then a detailing pen for the lines. Dirty patches are watered down black paint, intended to show dirtier floor under the engines. It's pretty missable in the final build but at least I know it's there! Incidentally, I'm building this tank as a fairly new unit so it'll only have moderate signs of dirt, wear and use as I get into detailing...

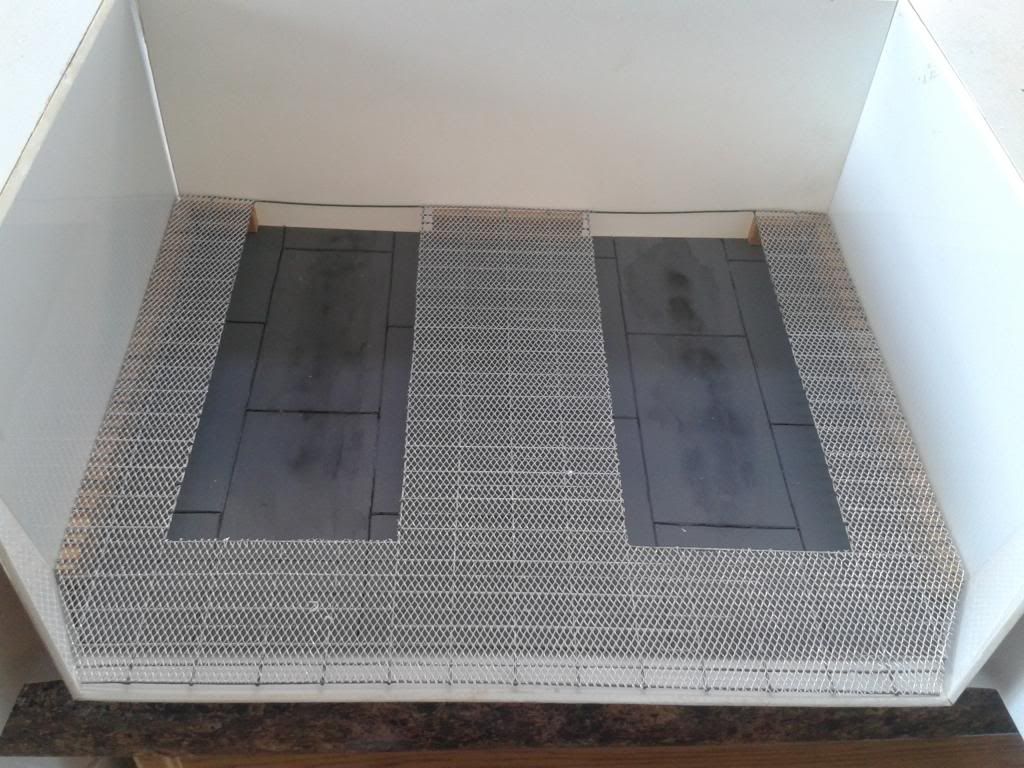
This is the floor with additional spacers fitted above it and the mesh engineering floor also fitted. It occurs to me that I think this is the first time I've shared images of this floor... It was completely hand made from rigid paper-coated florists wire which I glued together to form the thicker metal 'frame'. The fine vivarium mesh was then glued onto the frame after it got a coat of paint to turn it from green to silver! Then simply cut out the space for each engine and voila, the engineers crawlway! It honestly came out better than I could've ever hoped but now it's fitted I can't help but think it's a little too bright in contrast to the dark gray floor beneath...
Anyone who remembers this project from a few years back will remember I altered the engine mounts to give them a little more realism (as they weren't intended to be visible in the T34 kit they're from) Now I did the same again to give them a smaller footing, something I can imagine being fitted in just such an application.
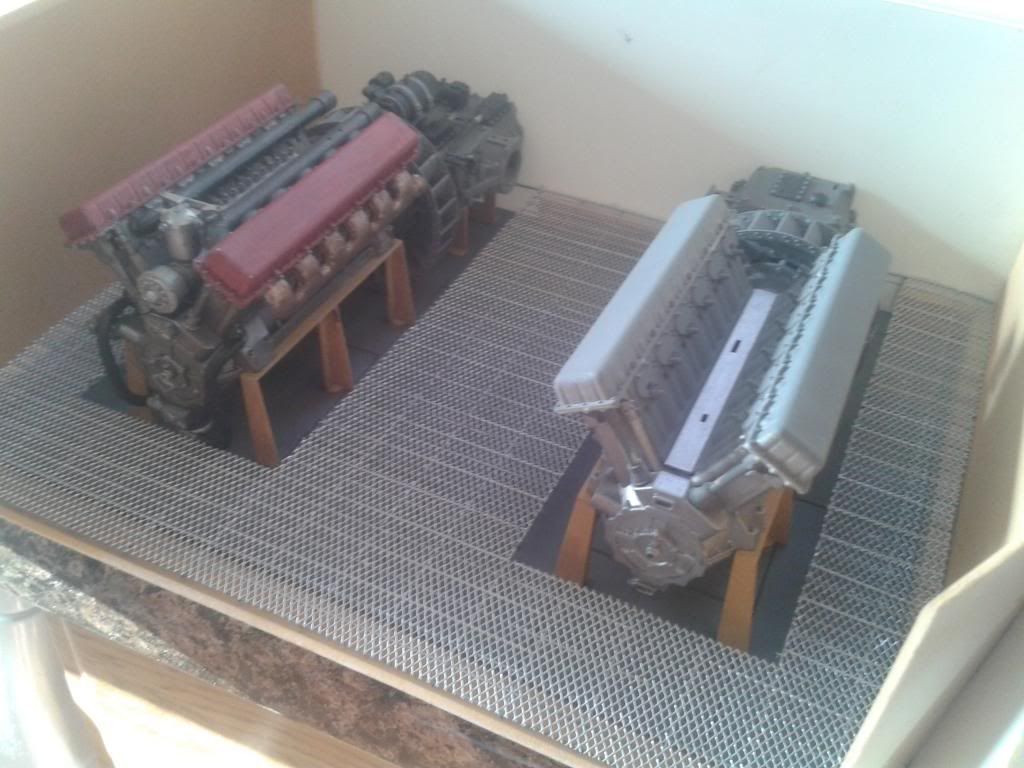
I couldn't figure out how to detail the back wall or fabricate the fuel tanks at this point so I just gave a coat of paint to the interior walls here and then permanently fitted the main floor and all engine and gearbox stands. After test fitting both powerplants and boxes you can get a pretty good idea of how this space will end up looking. Not too bad but I feel the silver floor is too bright and shiny now... Will look much better once I get in the fuel tanks and some detailing on the rear wall. Will fit some dull lighting in here and I think it'll look just right when it's done. Just wish it was more visible! I've decided to scrap the mesh for the rear grill piece. Fitting it would make all this hard work even more missable! Will probably fit removable grills to the top of the hull too which will allow me to show it off a bit. Would also allow for simple engine removal in a real world application to be fair!
That's by no means all I have to show for the last few days (not even the start of it I'm pleased to say!) but I'm going to pause now and make up another post for the next update as it's very picture heavy and is very seperate from a bit of hidden detailing! Also my children are nagging me for food or something similarly trivial... Will put them back in the cage then post the next update!
Anyway, as I mentioned to Blimp in my last post I'm still looking for methods of reinforcement for the main body of this build while working on some interior detail in parallel. The first batch of images are all about the stuff I've got up to in the engine bay but it's still got a long way to go. The sandy colour is currently wrong so I'll hopefully be able to tone it down to the correct hue at a later date but this is only interior anyway so it matters very little... The left and right walls will eventually have fuel tanks on them but not sure what material to use right now (nothing jumping out at me from my bitz box) The rear wall needs detailing and will most likely get some lining, riveting and a door through to the forward compartment of the vehicle. Need to paint the second engine too and fabricate a central differential to join the two gearboxes. Final detailing will be a little wiring and such but I'm realising more and more how little of this area will be visible in the final build so I'm more focussed on the exterior right now.
So enough of the text,how about some pics? Here's the blank canvas before I started with all the hardware removed.

This area actually has two different floor levels but both need elevating different amounts so here are the spacers for the lower floor to which everything will actually attach. Back wall is in place too but still isn't fitted yet.

Here I've added some fairly deep lining to the floor and refitted it but it gets more attention before getting glued in.

Here I used the remnants of a humbrol spraycan to paint the flat gray then a detailing pen for the lines. Dirty patches are watered down black paint, intended to show dirtier floor under the engines. It's pretty missable in the final build but at least I know it's there! Incidentally, I'm building this tank as a fairly new unit so it'll only have moderate signs of dirt, wear and use as I get into detailing...

This is the floor with additional spacers fitted above it and the mesh engineering floor also fitted. It occurs to me that I think this is the first time I've shared images of this floor... It was completely hand made from rigid paper-coated florists wire which I glued together to form the thicker metal 'frame'. The fine vivarium mesh was then glued onto the frame after it got a coat of paint to turn it from green to silver! Then simply cut out the space for each engine and voila, the engineers crawlway! It honestly came out better than I could've ever hoped but now it's fitted I can't help but think it's a little too bright in contrast to the dark gray floor beneath...

Anyone who remembers this project from a few years back will remember I altered the engine mounts to give them a little more realism (as they weren't intended to be visible in the T34 kit they're from) Now I did the same again to give them a smaller footing, something I can imagine being fitted in just such an application.

I couldn't figure out how to detail the back wall or fabricate the fuel tanks at this point so I just gave a coat of paint to the interior walls here and then permanently fitted the main floor and all engine and gearbox stands. After test fitting both powerplants and boxes you can get a pretty good idea of how this space will end up looking. Not too bad but I feel the silver floor is too bright and shiny now... Will look much better once I get in the fuel tanks and some detailing on the rear wall. Will fit some dull lighting in here and I think it'll look just right when it's done. Just wish it was more visible! I've decided to scrap the mesh for the rear grill piece. Fitting it would make all this hard work even more missable! Will probably fit removable grills to the top of the hull too which will allow me to show it off a bit. Would also allow for simple engine removal in a real world application to be fair!

That's by no means all I have to show for the last few days (not even the start of it I'm pleased to say!) but I'm going to pause now and make up another post for the next update as it's very picture heavy and is very seperate from a bit of hidden detailing! Also my children are nagging me for food or something similarly trivial... Will put them back in the cage then post the next update!


