Page 15 of 25
Re: Amateur Build. HAYA Centurion KIT
Posted: Fri Nov 08, 2024 8:15 pm
by Ludwig von wigbearer
I bought some a few years back with the metal wire connectors and crimping pliers I think they are XH JST but I would see if anyone else replies as I am not 100% sure

Regards John

Amateur Build. HAYA Centurion KIT. Motor Wires.
Posted: Fri Nov 08, 2024 9:16 pm
by zooma
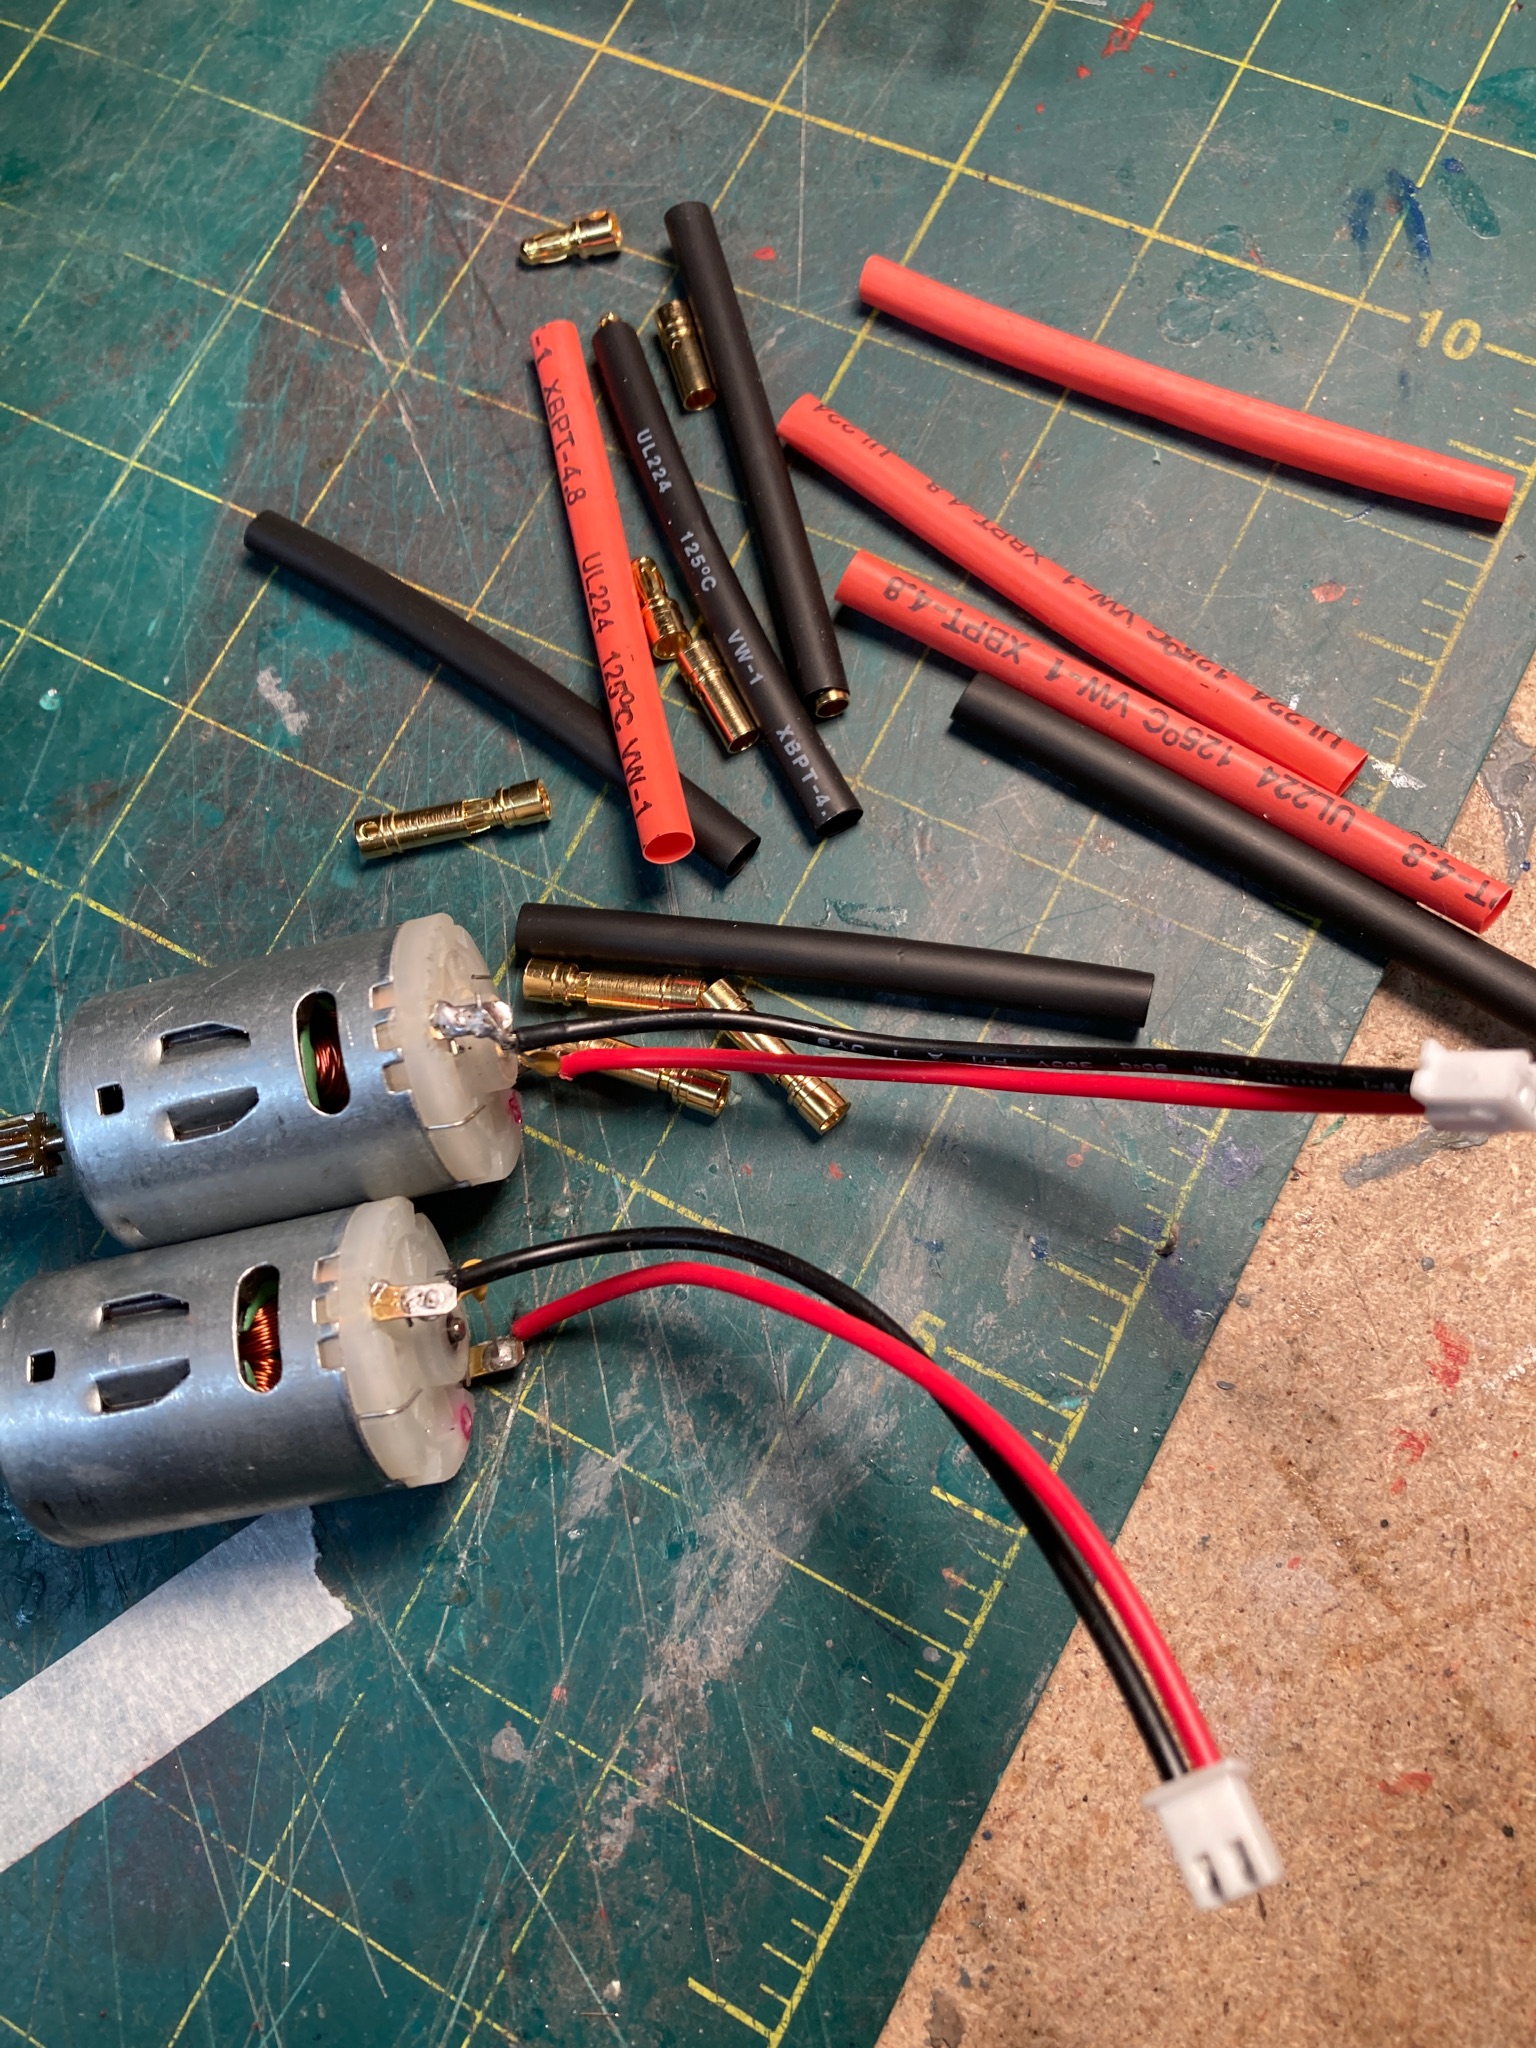
- Doners !
- DDF648AF-FEAB-4A5E-AAE9-C02C03930499.jpeg (939.64 KiB) Viewed 714 times
I remembered that I had tested the wiring with a pair of basic motors plugged into the board - so I cut the leads off of these motors and found some gold plugs and sockets in my spares and jointed them onto the new motor wires.
This saved me having to take the motors and gearboxes out of the tank again and it does not look too untidy, so that should take care of the motor wires.
......and the polarity is correct!
Amateur Build. HAYA Centurion KIT. Hot Melt Gun.
Posted: Fri Nov 08, 2024 9:27 pm
by zooma
To finish the wire joints, I used my new hot melt glue gun to run a thin seal of hot melt around the wires where they enter the plug.
All of the plugs have now been "sealed" in this way so this should (hopefully) reduce the risk of the wires being pulled out of their sockets or breaking away in use - thanks for the idea Derek (tankme).
Some of the wires come under a lot of tension when the deck is removed to change the battery etc - so every little helps!
HAYA Centurion KIT. Second rear axle bearing?
Posted: Fri Nov 08, 2024 9:50 pm
by zooma
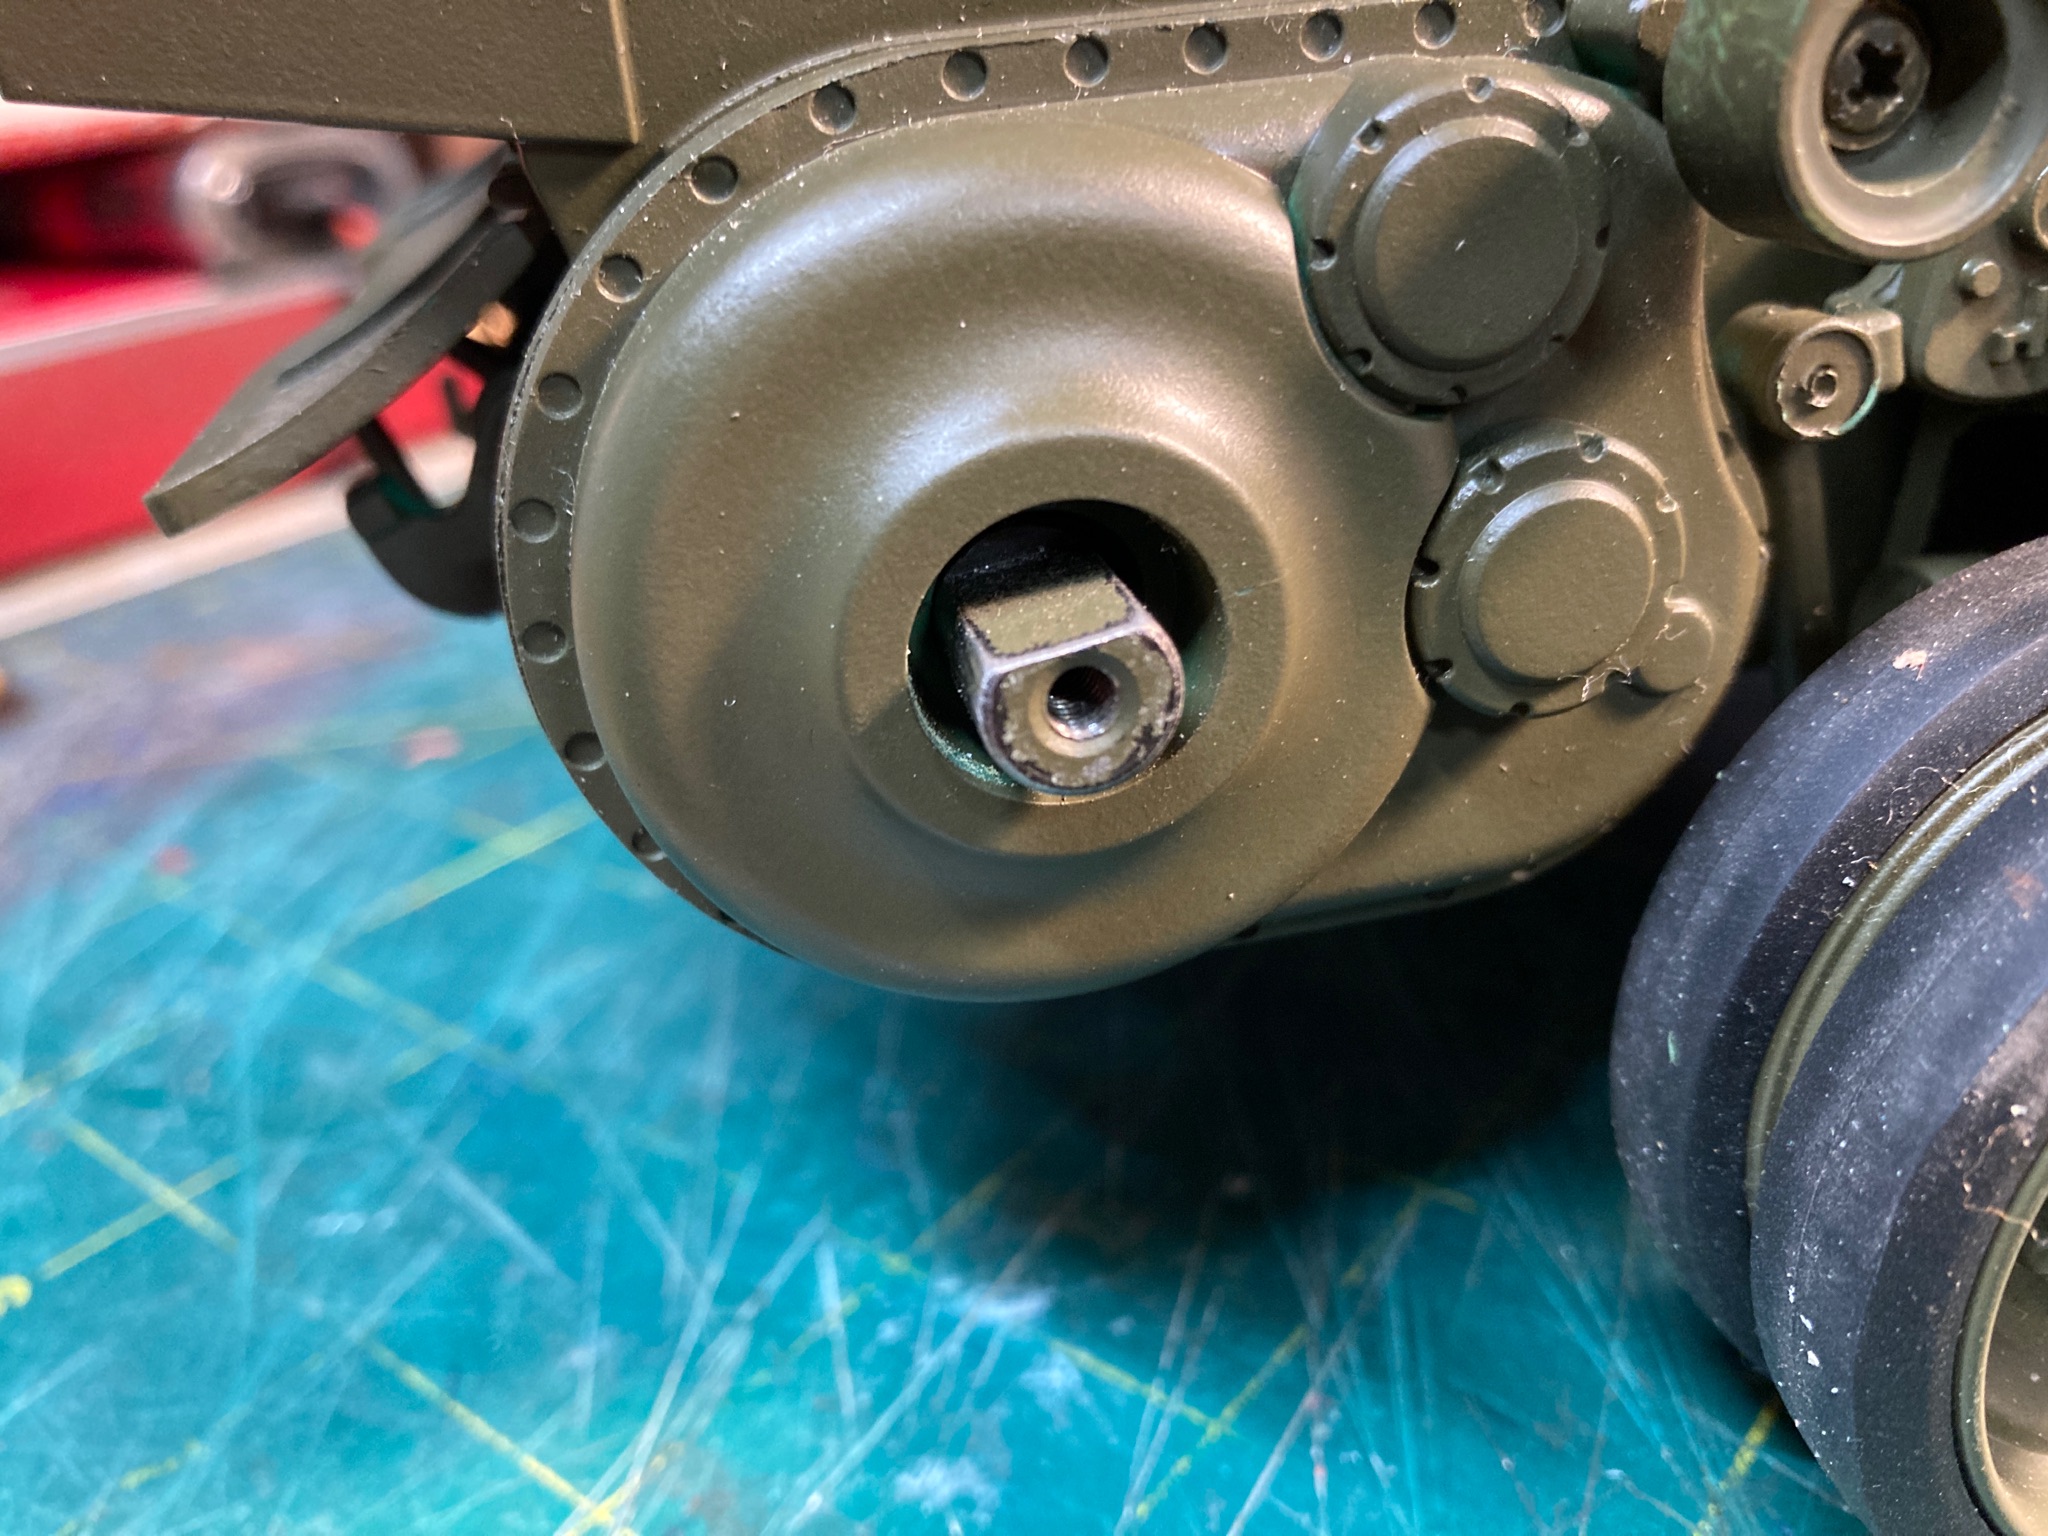
- Only the inside axle bearing has been fitted.
- 2AE924E6-A91F-4287-B0A0-311BE1D8F08A.jpeg (673.97 KiB) Viewed 695 times
Does anyone fit the second (outside) gearbox axle bearing - or just run with the inside bearing fitted?
Everything feels nice and smooth with just the inside axle bearing fitted, but fitting the second (outside) bearing does not feel like it aligns properly - it is very tight and would be a "force fit" to drift it onto the axle shaft.
Re: Amateur Build. HAYA Centurion KIT
Posted: Sat Nov 09, 2024 8:33 am
by Meter rat
zooma wrote: ↑Fri Nov 08, 2024 12:17 pm
If you buy your Clark board from Andrew at HAYA he can supply it pre-loaded with the correct engine sound.
What I did not realise is that you need to specify all of the electrical functions that you have on your tank so that the board is correctly programmed for your tank!
I bought a gun flash LED with my Clark board and so the board had to be programmed to work it. If/when I add a smoke function to the gun barrel, the board will need to be re-programmed to work the gun smoke unit etc........
Those that know more than myself about these "boards" (probably almost everyone) can change the programming themselves using a TV type controller. Oh well you live and learn.
You probably now know more than I.
I wish I had known about this before purchasing from Andrew. He did program the sound, but nothing else. If he advertised this on his site, that other items would be required it would help. Or offer the option of a complete kit to get these boards to function, this would give the purchaser, the option of board only, or a complete package to install.
Re: Amateur Build. HAYA Centurion KIT
Posted: Sat Nov 09, 2024 10:45 am
by zooma
Meter rat wrote: ↑Sat Nov 09, 2024 8:33 am
zooma wrote: ↑Fri Nov 08, 2024 12:17 pm
If you buy your Clark board from Andrew at HAYA he can supply it pre-loaded with the correct engine sound.
What I did not realise is that you need to specify all of the electrical functions that you have on your tank so that the board is correctly programmed for your tank!
I bought a gun flash LED with my Clark board and so the board had to be programmed to work it. If/when I add a smoke function to the gun barrel, the board will need to be re-programmed to work the gun smoke unit etc........
Those that know more than myself about these "boards" (probably almost everyone) can change the programming themselves using a TV type controller. Oh well you live and learn.
You probably now know more than I.
I wish I had known about this before purchasing from Andrew. He did program the sound, but nothing else. If he advertised this on his site, that other items would be required it would help. Or offer the option of a complete kit to get these boards to function, this would give the purchaser, the option of board only, or a complete package to install.
My Clark board was only ordered very recently and I mentioned that I would like to strip the BB firing mechanism to make space for a muzzle flash bulb and lead .......and maybe add barrel smoke at a later date.
Andrew at HAYA advised that he would supply the barrel flash wire with the Clark board and he would set it up to work the barrel flash before he posted them to me.
When I mentioned adding barrel smoke at a later date, it was then that he told me I would need to reprogram the Clark board so it would work the smoke unit and that I would also need a small supplementary board as well (this is what my RTR HAYA Centurion came with - and is why I could not just copy all the wiring as I had hoped) .....and that is the full extent of my Clark board knowledge!
Sometime in the future I will buy a barrel smoke unit and find out exactly what I need to do to get the Clark board to power it. I will add this process to this Centurion KIT build as it will be new to me and I will share my findings ( good and bad) as it may be of some interest to others.
......and with my failing memory - it will make a good reference for me when I want to do another one in the future !
Re: Amateur Build. HAYA Centurion KIT
Posted: Sat Nov 09, 2024 2:38 pm
by Herr Dr. Professor
If you have access to Amazon, just search under "jst plug connector kit" and there will be a selection, complete with the tool to crimp the connectors. Here in the U.S. they are around $10 U.S.
Re: Amateur Build. HAYA Centurion KIT
Posted: Sun Nov 10, 2024 10:49 am
by zooma
Herr Dr. Professor wrote: ↑Sat Nov 09, 2024 2:38 pm
If you have access to Amazon, just search under "jst plug connector kit" and there will be a selection, complete with the tool to crimp the connectors. Here in the U.S. they are around $10 U.S.
Thanks Prof -we have nothing like that at that price in the UK Amazon catalogue - as a matter of interest - could you send me a link to the kit that Amazon US sell? - it would be interesting to see how much more it costs in the UK.
Re: Amateur Build. HAYA Centurion KIT
Posted: Sun Nov 10, 2024 11:11 am
by Meter rat
Thereare sets on Amazon, for about £35. Or you can buy them already done.
Amateur Build. HAYA Centurion KIT. Clark Board Installed.
Posted: Sun Nov 10, 2024 2:19 pm
by zooma
The Clark board was positioned on the moulded cradle next to the speaker that clips nicely into the front part of this same cradle. The Clark board needs a piece of double sided foam tape (servo tape) under it to hold it in place.
The three parts of the turret can now be screwed together (top, middle and lower sections) with the gun mounted between the trunnions and the large black ring gear screwed under the turret assembly to keep it in place.
The non-geared tab on the ring gear faces directly forwards to give an equal left and right turn of the turret before it acts as a "stop' at the rear of its travel. All the above used the 2.6 x 6 STS to join them together.
The turret turning motor was engaged with the ring gear and screwed back onto the underside of the deck using more of the 2.6 x 6 STS. I noticed how these wires could be seen through the engine deck vents on the RTR Centurion, so some spray paint was allowed to drift onto them to stop them being so readily seen from outside the tank.
Until the mantlet is slid over the barrel and screwed into position the barrel is quite wobbly and relies on the mantlet to give it some stability. The red flashing LED is held into the mantlet by a small plastic cover plate and the wires can be passed over (or under) the barrel pivot shaft ready to plug into the small extension board that is screwed to the underside of the deck next to the turret turning motor.
The servo recoil operating wire has the be screwed to the end to the barrel with the provided special steel collared screw before the mantlet is retained by the two countersunk 2.5mm machine screws (one of each side).
I put a piece of masking tape on each wire and labeled its function so I could find them easily if I need to check anything - it also stopped me wasting a lot of time continually checking the colours of the wires every time I wanted to locate them. Tamiya supplied printed labels for this job and this would be a good idea for the HAYA tanks as well'. It would look a lot more professional than my rubbish hand writing on bits of masking tape......although both do the same job!
Briefly (only briefly) I did think about painting the matching sockets and plugs once their location had been established as it would save a lot of time when disconnecting them for servicing....or when they were pulled out accidentally when changing the battery.
I have noticed that the wires on the HAYA Chieftain and the HAYA Centurion come under a lot of pressure when the deck is removed (and placed alongside the hull) to change the battery. On my Chieftain this often results in one (or more) of the plugs being pulled out of the board. Some of these very thin wires are put under a lot of pressure (even when the deck is handled and positioned carefully) and may eventual break off in the weakest position next to the plug!
Maybe in the longer term I can find a way to hold the turret top on with magnets and find enough space to fit the battery in the turret (like the Tamiya Leopard 2A6). This would be the ideal solution if it could be made to work but the Centurion turret is not that roomy inside and the side bins actually stop the turret top being lifted-off as they form over the edge of the turret slightly. I could try spacing the bins away from the turret sides slightly to give a more realistic scale appearance and se if this would give enough clearance to lift the turret top off?
All the plugs were put into the sockets that "looked right" and were the same ones as used on my RTR Centurion - so what could go wrong.........?