Page 13 of 41
Re: HL Panther G customization diary
Posted: Mon Jul 02, 2012 10:51 am
by jeff1101
Red Devils wrote:That is sweet, watching this WiP has made the decision for me that the HL Panther G will be the next project after my HL Tiger 1. Well done dude...

Thanks Red Devils.
Re: HL Panther G customization diary
Posted: Fri Jul 06, 2012 5:14 pm
by littletankman
Hi mate this just keeps getting better . I might have a spare cap if you PM your address I will post it , no charge .
Andy
Re: HL Panther G customization diary
Posted: Sun Jul 08, 2012 8:59 am
by jeff1101
littletankman wrote:Hi mate this just keeps getting better . I might have a spare cap if you PM your address I will post it , no charge .
Andy
Thanks littletankman. As you will see in my next post I managed to damage not just the cap but the wheel as well. (which i further damaged

). Since I plan to order some additional stuff online anyway I may buy it with that. But let me think about it as I may still take you up on your offer. Will let you know.
Re: HL Panther G customization diary
Posted: Sun Jul 08, 2012 9:16 am
by jeff1101
Update 07/08/12
Wasn't able to post these pics yesterday as it was the wifeys birthday. Anyway I'm posting it today.

I had to redo the fuel overfill hose since it doesn't clear the new track hangers. I just re-measured and recut a new paper clip and glued it in place.
How I prepped and attached the overfill hose before starts in this thread.
http://www.rctankwarfare.co.uk/forums/v ... 6&start=20 - update Feb 18
and
http://www.rctankwarfare.co.uk/forums/v ... 6&start=40 - update March 21
Re: HL Panther G customization diary
Posted: Sun Jul 08, 2012 9:56 am
by jeff1101
Update 07/08/12 contd.

Next, I attached the rear column light holder from Modellbau. I was just winging it at this point since I wasn't planning how I will attach this part. So I was making it up as I went along. Which resulted in some steps being skipped. (More on this later.)

One of the things missing in the ModellBau kit were the bolt heads. Since I not only damaged the wheel caps ( while trying to pry it off), but also badly scuffed one of the wheels, I decided to right off that wheel and cannibalize it for bolt heads.
Here you can see I used nail nippers to cut the bolt heads from the wheel. Don't just cut the bolt heads all the way through but move the nippers around in a circular path until the bolt head is cut free. This way the cut portion stays relatively flat. Also I taped over the bolts to prevent them flying off when freed.

Here is a pic of the holder assembled with one of the bold heads I used to detail it.

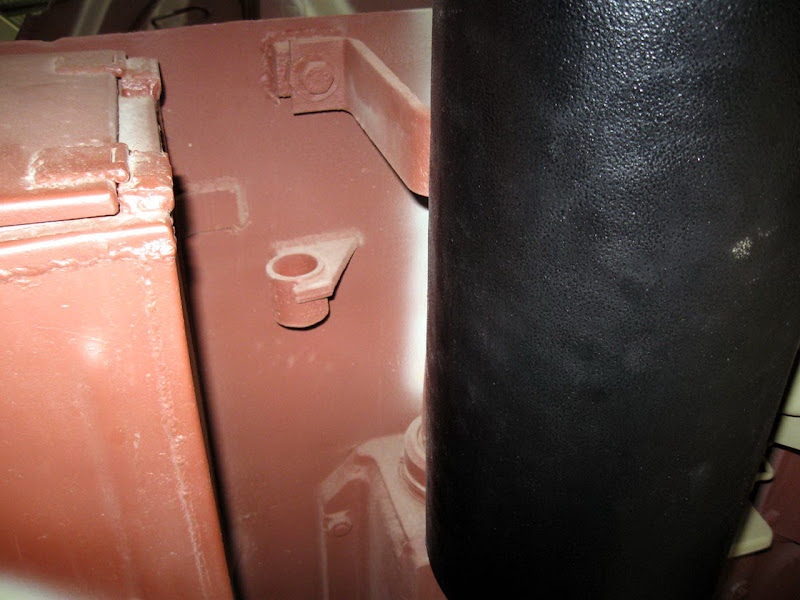
And here is the finished column light holder attached.As you can see I forgot to remove the molded on column light on the tank itself. I realized I should have shaved this off before attaching the column light holder. However thinking about it, I can use the molded on column light as an additional brace for the holder if I glue the top of the holder to this.
I could then buy a led emitting column light (I think Welshdragon sells them) and that should cover the molded on light.
Re: HL Panther G customization diary
Posted: Sun Jul 08, 2012 10:29 am
by jeff1101
Updates contd.

One of the nice accessories that Modellbau makes are the exhaust brackets. I think these are details that HL should have included in its tank but its still nice that they are available from third parties. As you can see the kit comes in three parts, the brackets themselves and the metal base (standoffs) for the brackets that need to be cut and separated.

Here I cut the base into individual pieces. These are then glued to the ends of the exhaust brackets.
Again the Modellbau exhaust brackets lack the bolt heads. See the above pic courtesy of
http://blog.net-maquettes.com/. I decided to add this detail to the kit using the bolt heads sourced from the damaged wheel.

Once the base have been glued, I sanded it since when I dry fitted the brackets to the exhaust, they were a bit tight.


I then gauged a small hole on the base since the bolt heads I cut up from the wheel will not be absolutely flat and this way the bolts can sit flush.

Then add a small drop of plastic cement...

Then attach the bolt head.

And here it is attached and glued to the tank.

Here is a back view to better show the bolt heads. I think It adds a nice detail to the brackets.
Re: HL Panther G customization diary
Posted: Sun Jul 08, 2012 10:53 am
by jeff1101
Updates contd. - Odds and ends
Here are some misc. pics I did that don't fall in any particular category. Some of these I did quite sometime ago but I'm posting as it might be useful.

When you attach the MG ring on top of the commander's cupola, the stud from the MG ring (its used as the attachment point) can protrude into the periscope housing. I realized this too late and rather than removing the ring again and risk damaging it (since its already glued), you can remove the unsightly stud from the periscope housing using an exacto knife.

This is the same method I used for removing the stud from the driver's swiveling periscope when I attached the periscope hood.

Also, the plastic molded rope that came with the rope bracket looked fake. (its a perfect circle) I didn't use it, but sourced a brass wire instead. However decide whether you will use the plastic rope or not before attaching it to the rope bracket as the molded plastic rope will be difficult to remove once its attached to the bracket and the bracket glued to the tank's hull.
Here you can also see the weld beads I added to the rope bracket using putty.
Re: HL Panther G customization diary
Posted: Sun Jul 15, 2012 1:00 pm
by jeff1101
Update 7/15/12
I decided next to continue to complete the rear engine deck by adding the bolt heads fastening the radiator grilles. The original PE set contained the brass sheets that need to be folded to become the bolt heads. I decided to not do this and not attach the original PE bolt heads simply because the parts were way too small and I could not bend it correctly.

What I did was source the bolt heads from the left over sprue that came with the tank.

Since the molded part was rounded (cylindrical) I had to file the entire length to form the 6 sides of the hex bolt head.

I then cut the part with the knife to the thickness I wanted. I had some spare CD stickers and I peeled off the sticker and reversed it and use it as a mat so that the cut piece would stick and not fly off during the cutting.

Here is a pic of the plastic pieces I intend to use as bolt heads. Having a pair of tweezers is really helpful here as its near impossible to handle these with just your fingers.

To attach, simply dip a small amount of CA glue to the piece.

Then carefully place the piece to the grille corners.


And here are the pics of the grilles with the bolts attached.
Re: HL Panther G customization diary
Posted: Sun Jul 15, 2012 1:20 pm
by jeff1101
Updates cont'd

The piece that holds the spare covers for the radiator tower also needed a bolt. For this I had to find a smaller sprue to match the size of hole that mates with it.

For this I decided to use the plastic grab handles for the rear loader hatch (since it was just the right size) that got broken before. (I had since used a bent paper clip to replace the grab handles)

Again just do the same here. Since the piece was way to small, I didn't even file it to a hex shape. Just cut, glue and attach.
Re: HL Panther G customization diary
Posted: Sun Jul 15, 2012 2:26 pm
by jeff1101
Updates cont'd
Finally I completed the rear tracker hangers.

The nice thing about the Modellbau kit is that it includes the locking pins attached to chains for the track hangers. It comes in 12 pieces for both sides of the tank. For attaching these I followed the method JayBrd used for his Panther G. (see
http://www.rctankregiment.com/rctankfor ... 141&t=2991)

Since I was going to do a lot of drilling I decided to purchase a drill bit set and pin vise. There was no other brand available at the hobby shop but these Tamiya ones so these were the ones I bought. At first I was a bit dismayed because they were expensive but then that disappeared the moment I used it. I didn't know drilling holes using this tool would be so easy, quick and fun! If you are serious in customizing your HL panther, then buying this tool is a good investment.


I drilled holes using the tool above the track hangers. Six holes on each side using the 0.8 drill bit.


To insert the chains to the hole, you need a piece of wire that is thin enough to fit in the hole. Using a tweezer I made a loop and attached the chain. Then I used needle nosed pliers to close the loop.

I finished all 12 chains before going to the next step. That was a good 2 hours of work. It was like threading a needle. Even squinting with my glasses on, I couldn't see what I was doing and mainly did the job by feel. It helped that I had a camera that had a 1:4 macro lens on so I would often take pictures and preview it just to see how it looked.


I was afraid that the chains would come off after it was attached to the tank and painted. That would be a PITA to re-attach. To be absolutely sure this wouldn't happen, I decided I would solder the loop. First I added a drop of flux on the loop...

and proceeded to solder it.

And here is the loop soldered. I have to admit I was getting good at the soldering bit. What I do is I would always have a drop of solder at the tip of the soldering iron and then gently use the tip to solder the loop. I let the surface tension break and at this point a piece of solder would flow from where the flux was applied. When this happens remove the tip so that not too much solder is used. You wouldn't know the solder was already applied until you look at it closely. This way the solder joins neatly and without the solder droplets forming.