Page 12 of 19
Re: DUKW Scratch Builds
Posted: Sun Jul 30, 2023 3:39 pm
by Ecam
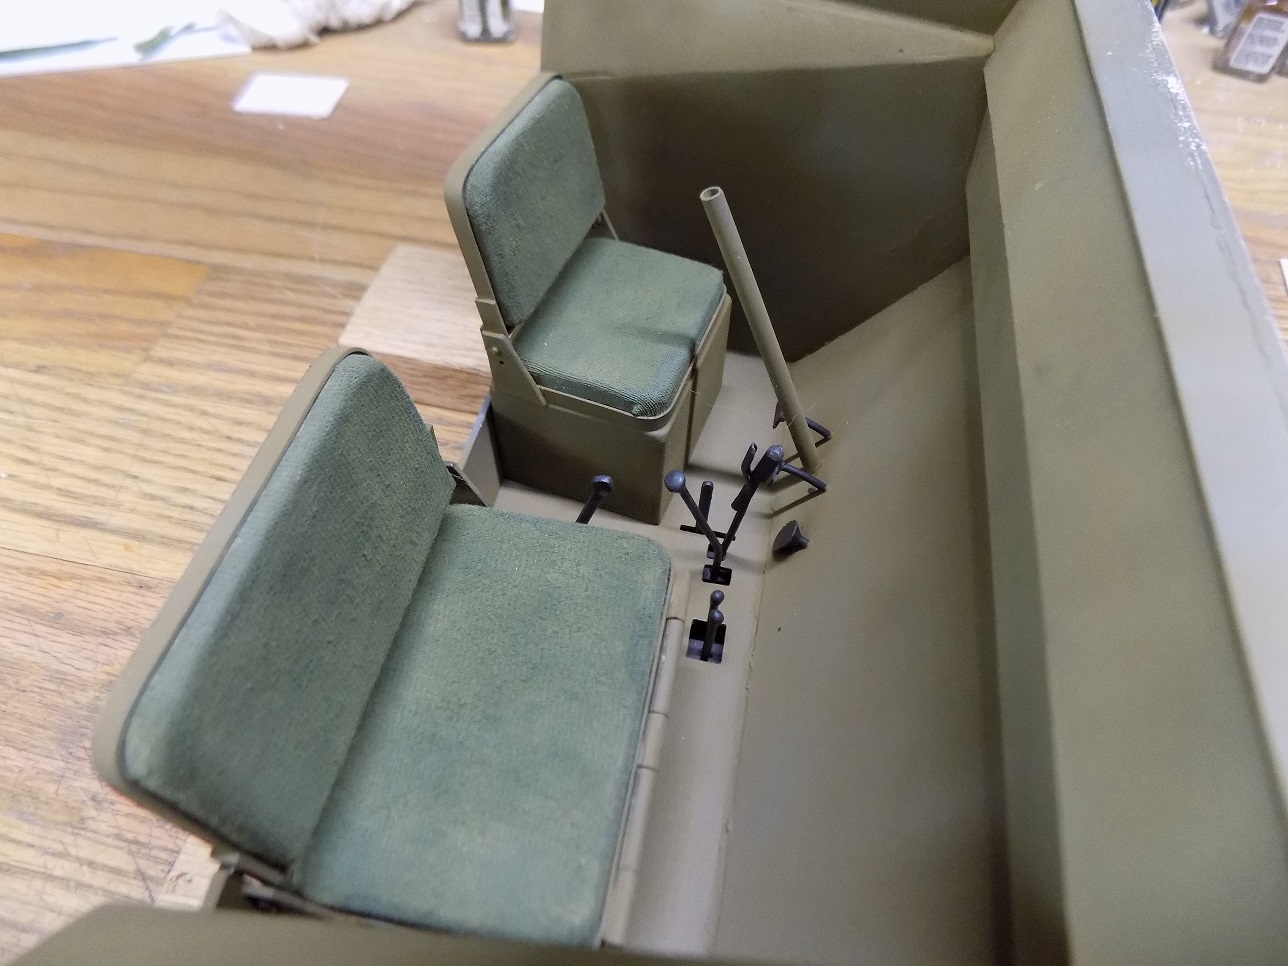
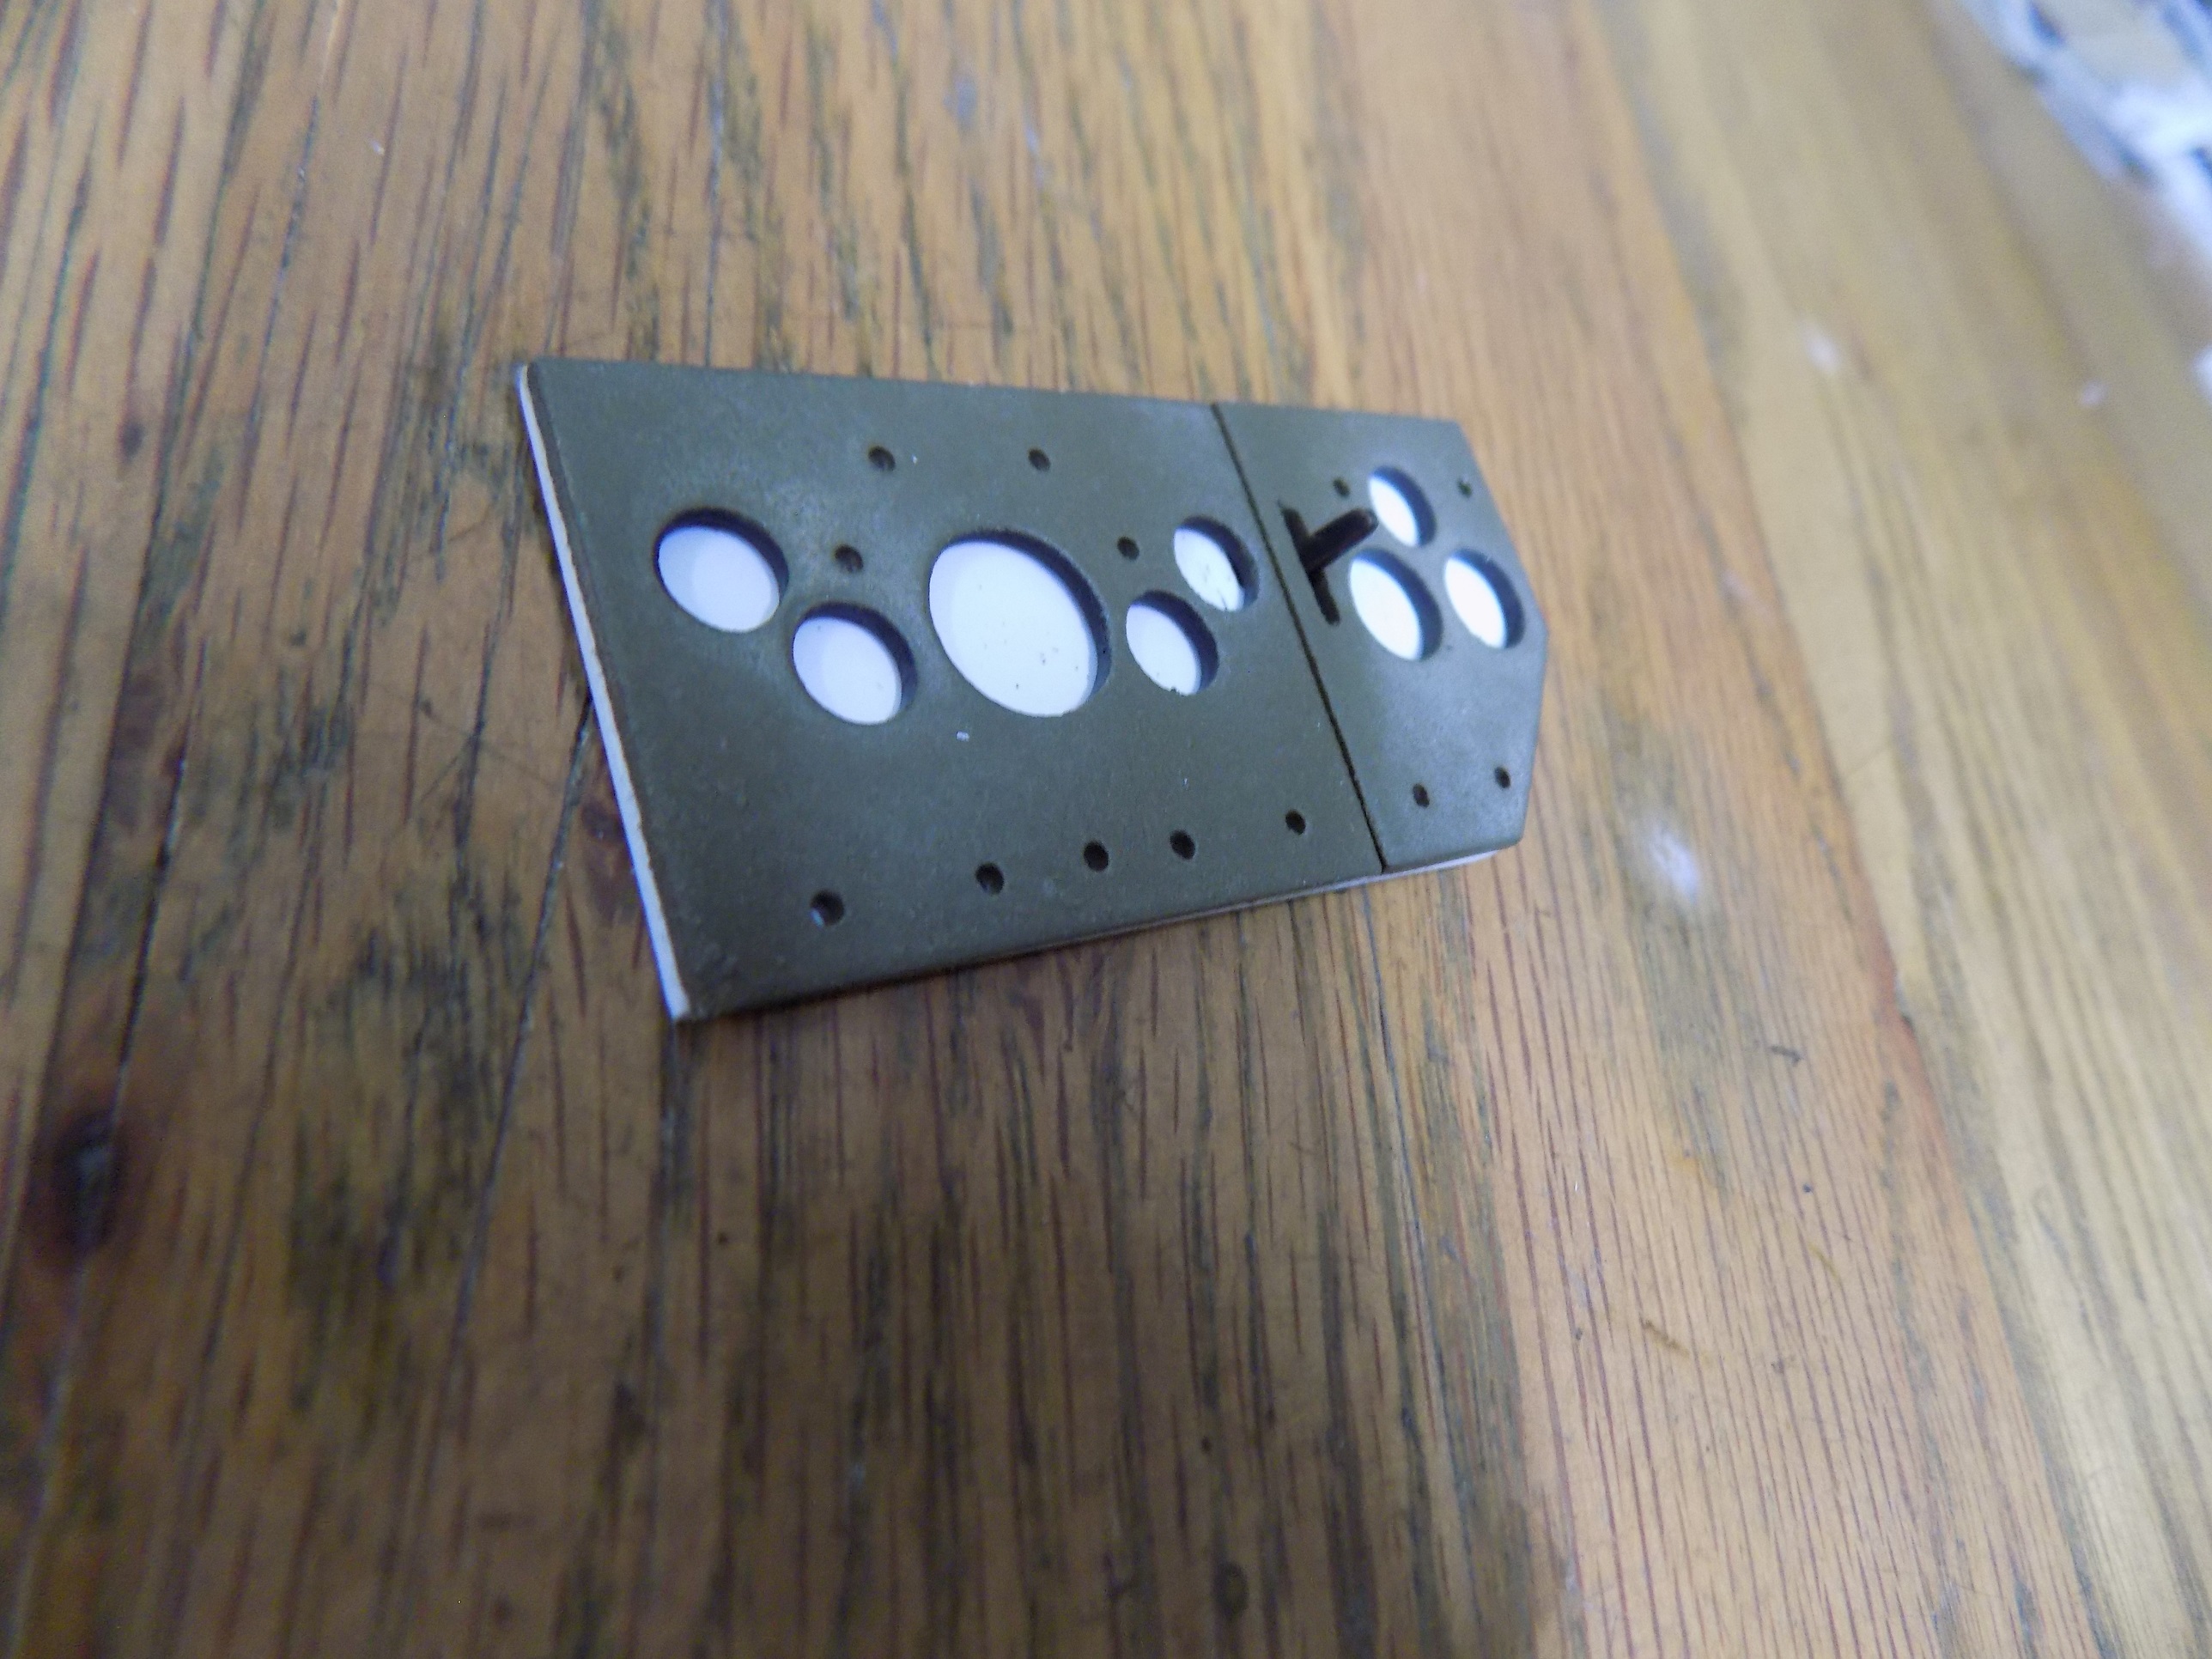
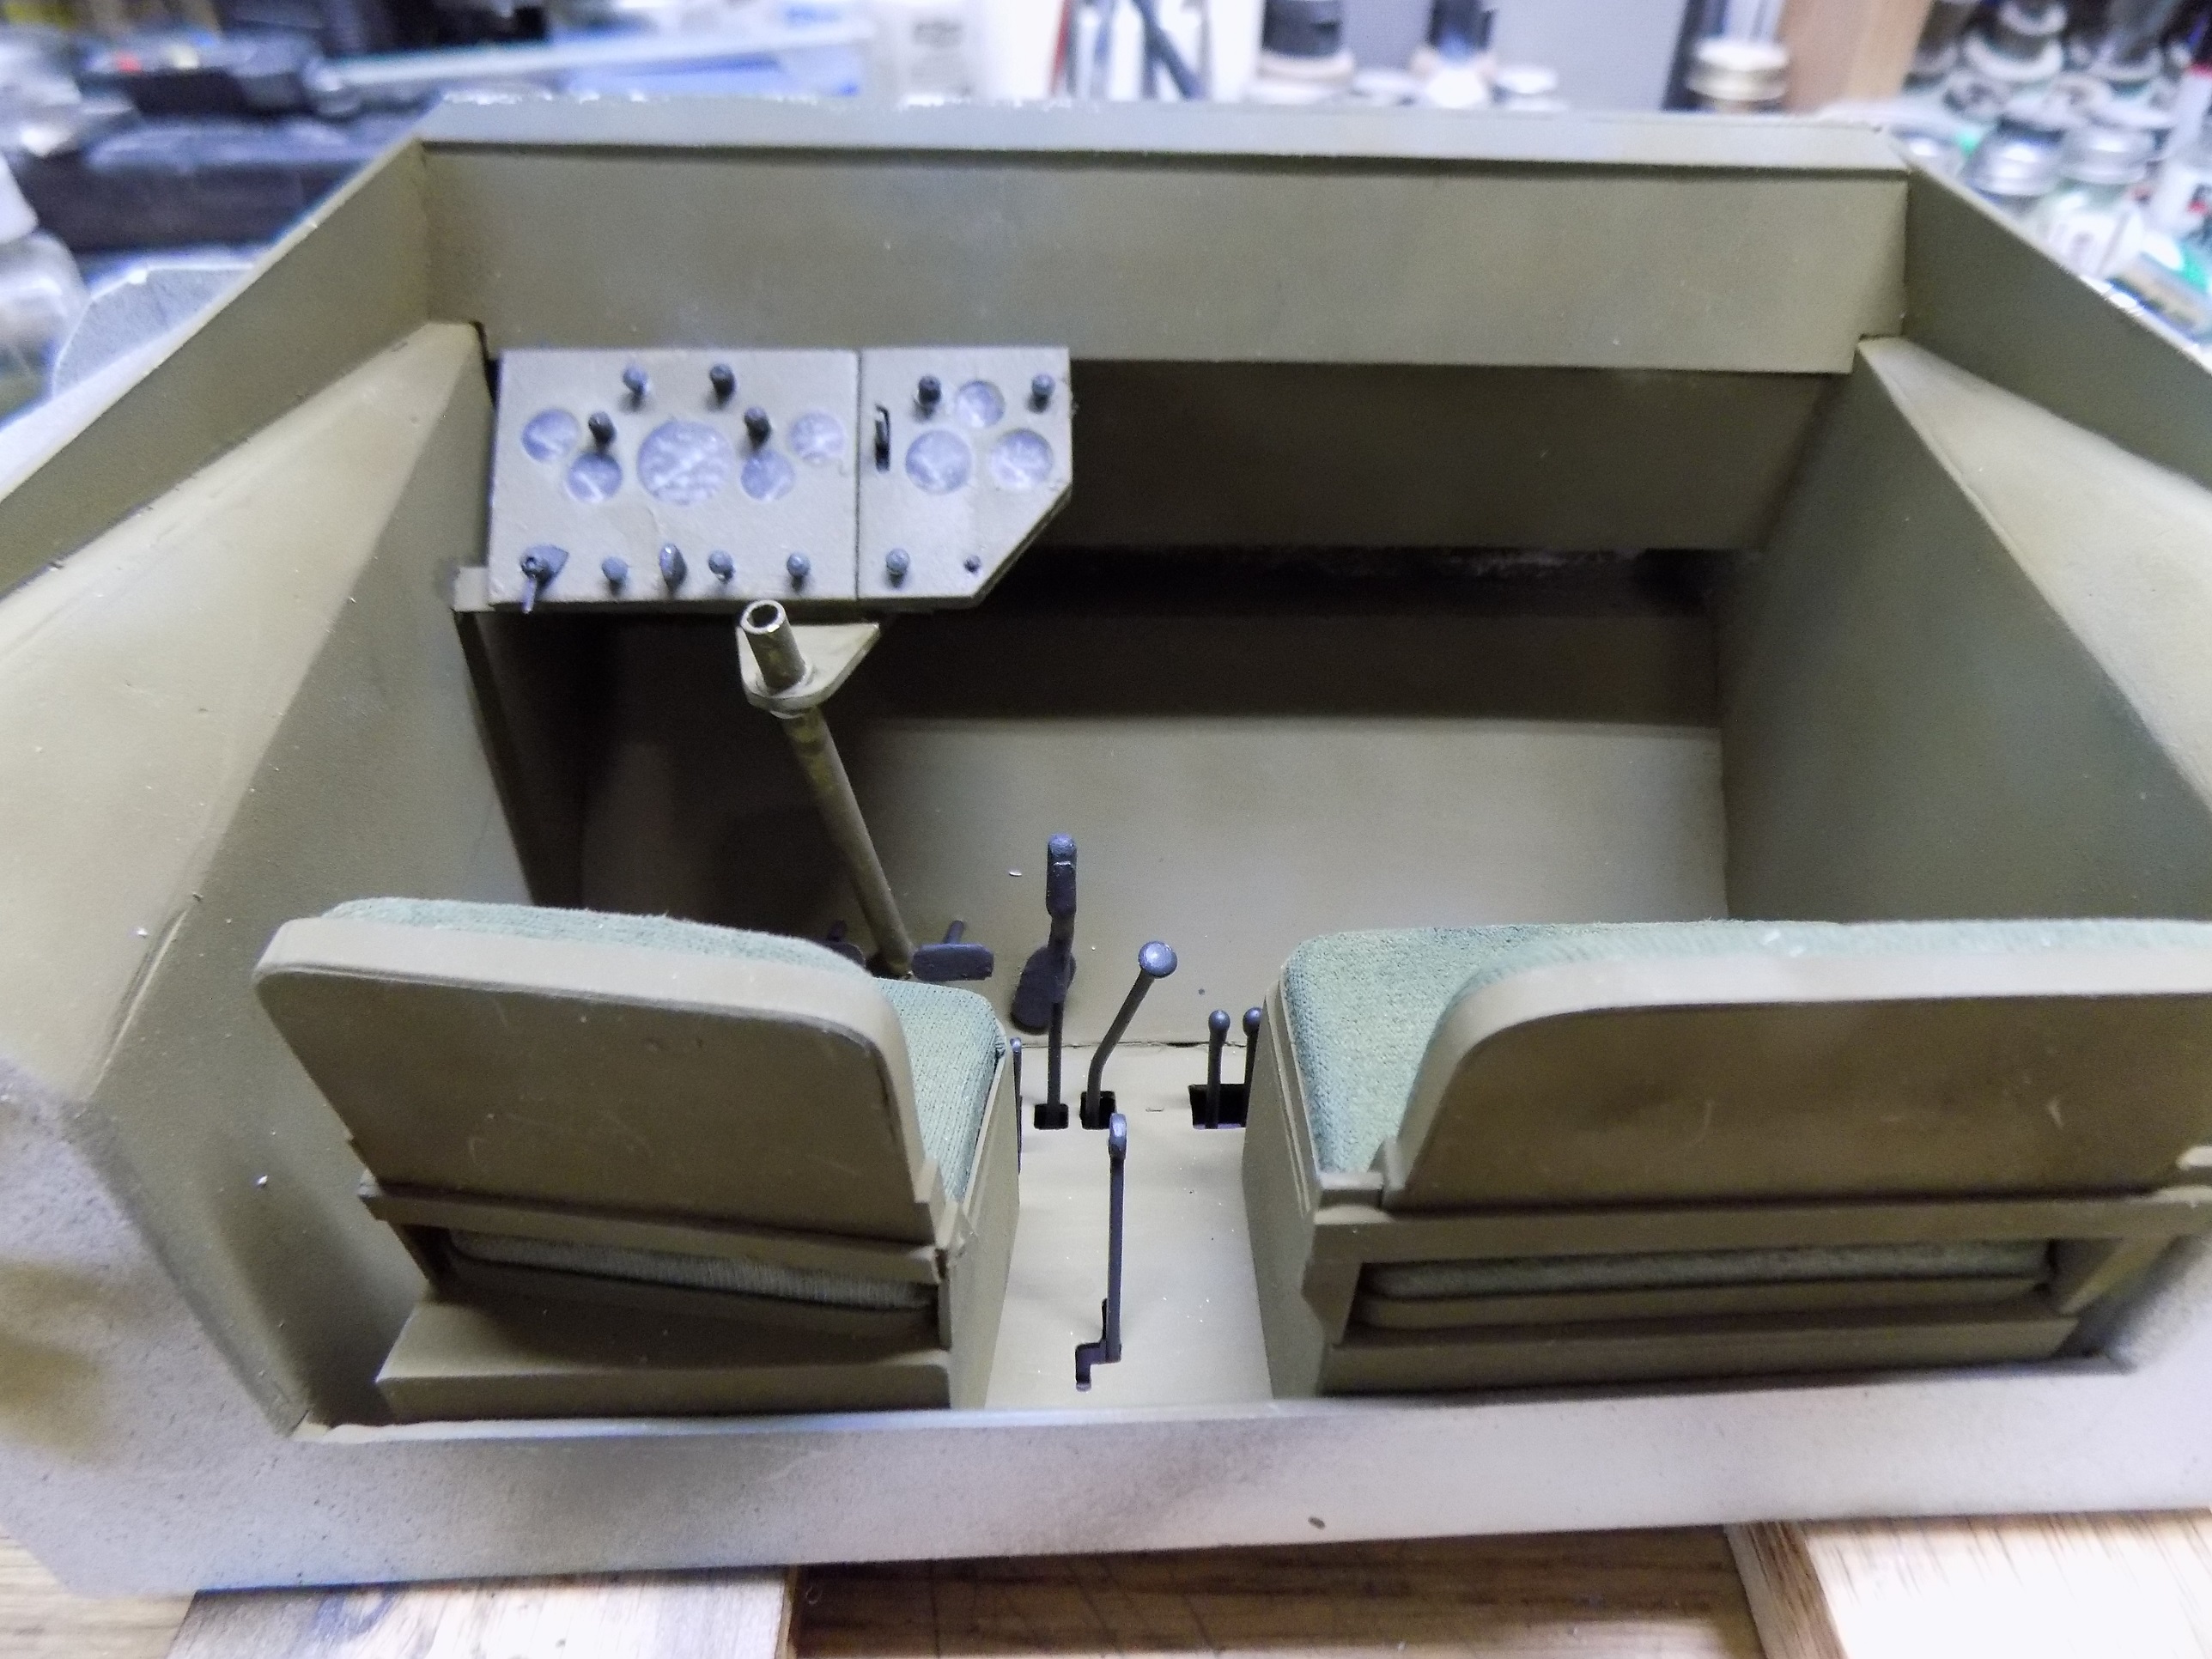
My rich Corinthian canvas got a dye job, and a little more work on the dash. The main part of the dash with the five gauges were on all the DUKWs. They added CTIS (central tire inflation sys.) after chassis 2005. Before that the tire pressures were adjusted manually by an onboard compressor and an air hose. The smaller panel was mostly tire inflation and a tachometer.
- D143.JPG (405.85 KiB) Viewed 63 times
- D144.JPG (1.17 MiB) Viewed 63 times
Re: DUKW Scratch Builds
Posted: Sun Jul 30, 2023 4:42 pm
by Herr Dr. Professor
"I've also seen people download good pictures and print them off...(reducing as needed)." Oh for pity's sake! Why didn't I think of such a simple solution?

I can make my own gauge decals. What a doofuss!

Re: DUKW Scratch Builds
Posted: Sun Jul 30, 2023 10:41 pm
by Ecam
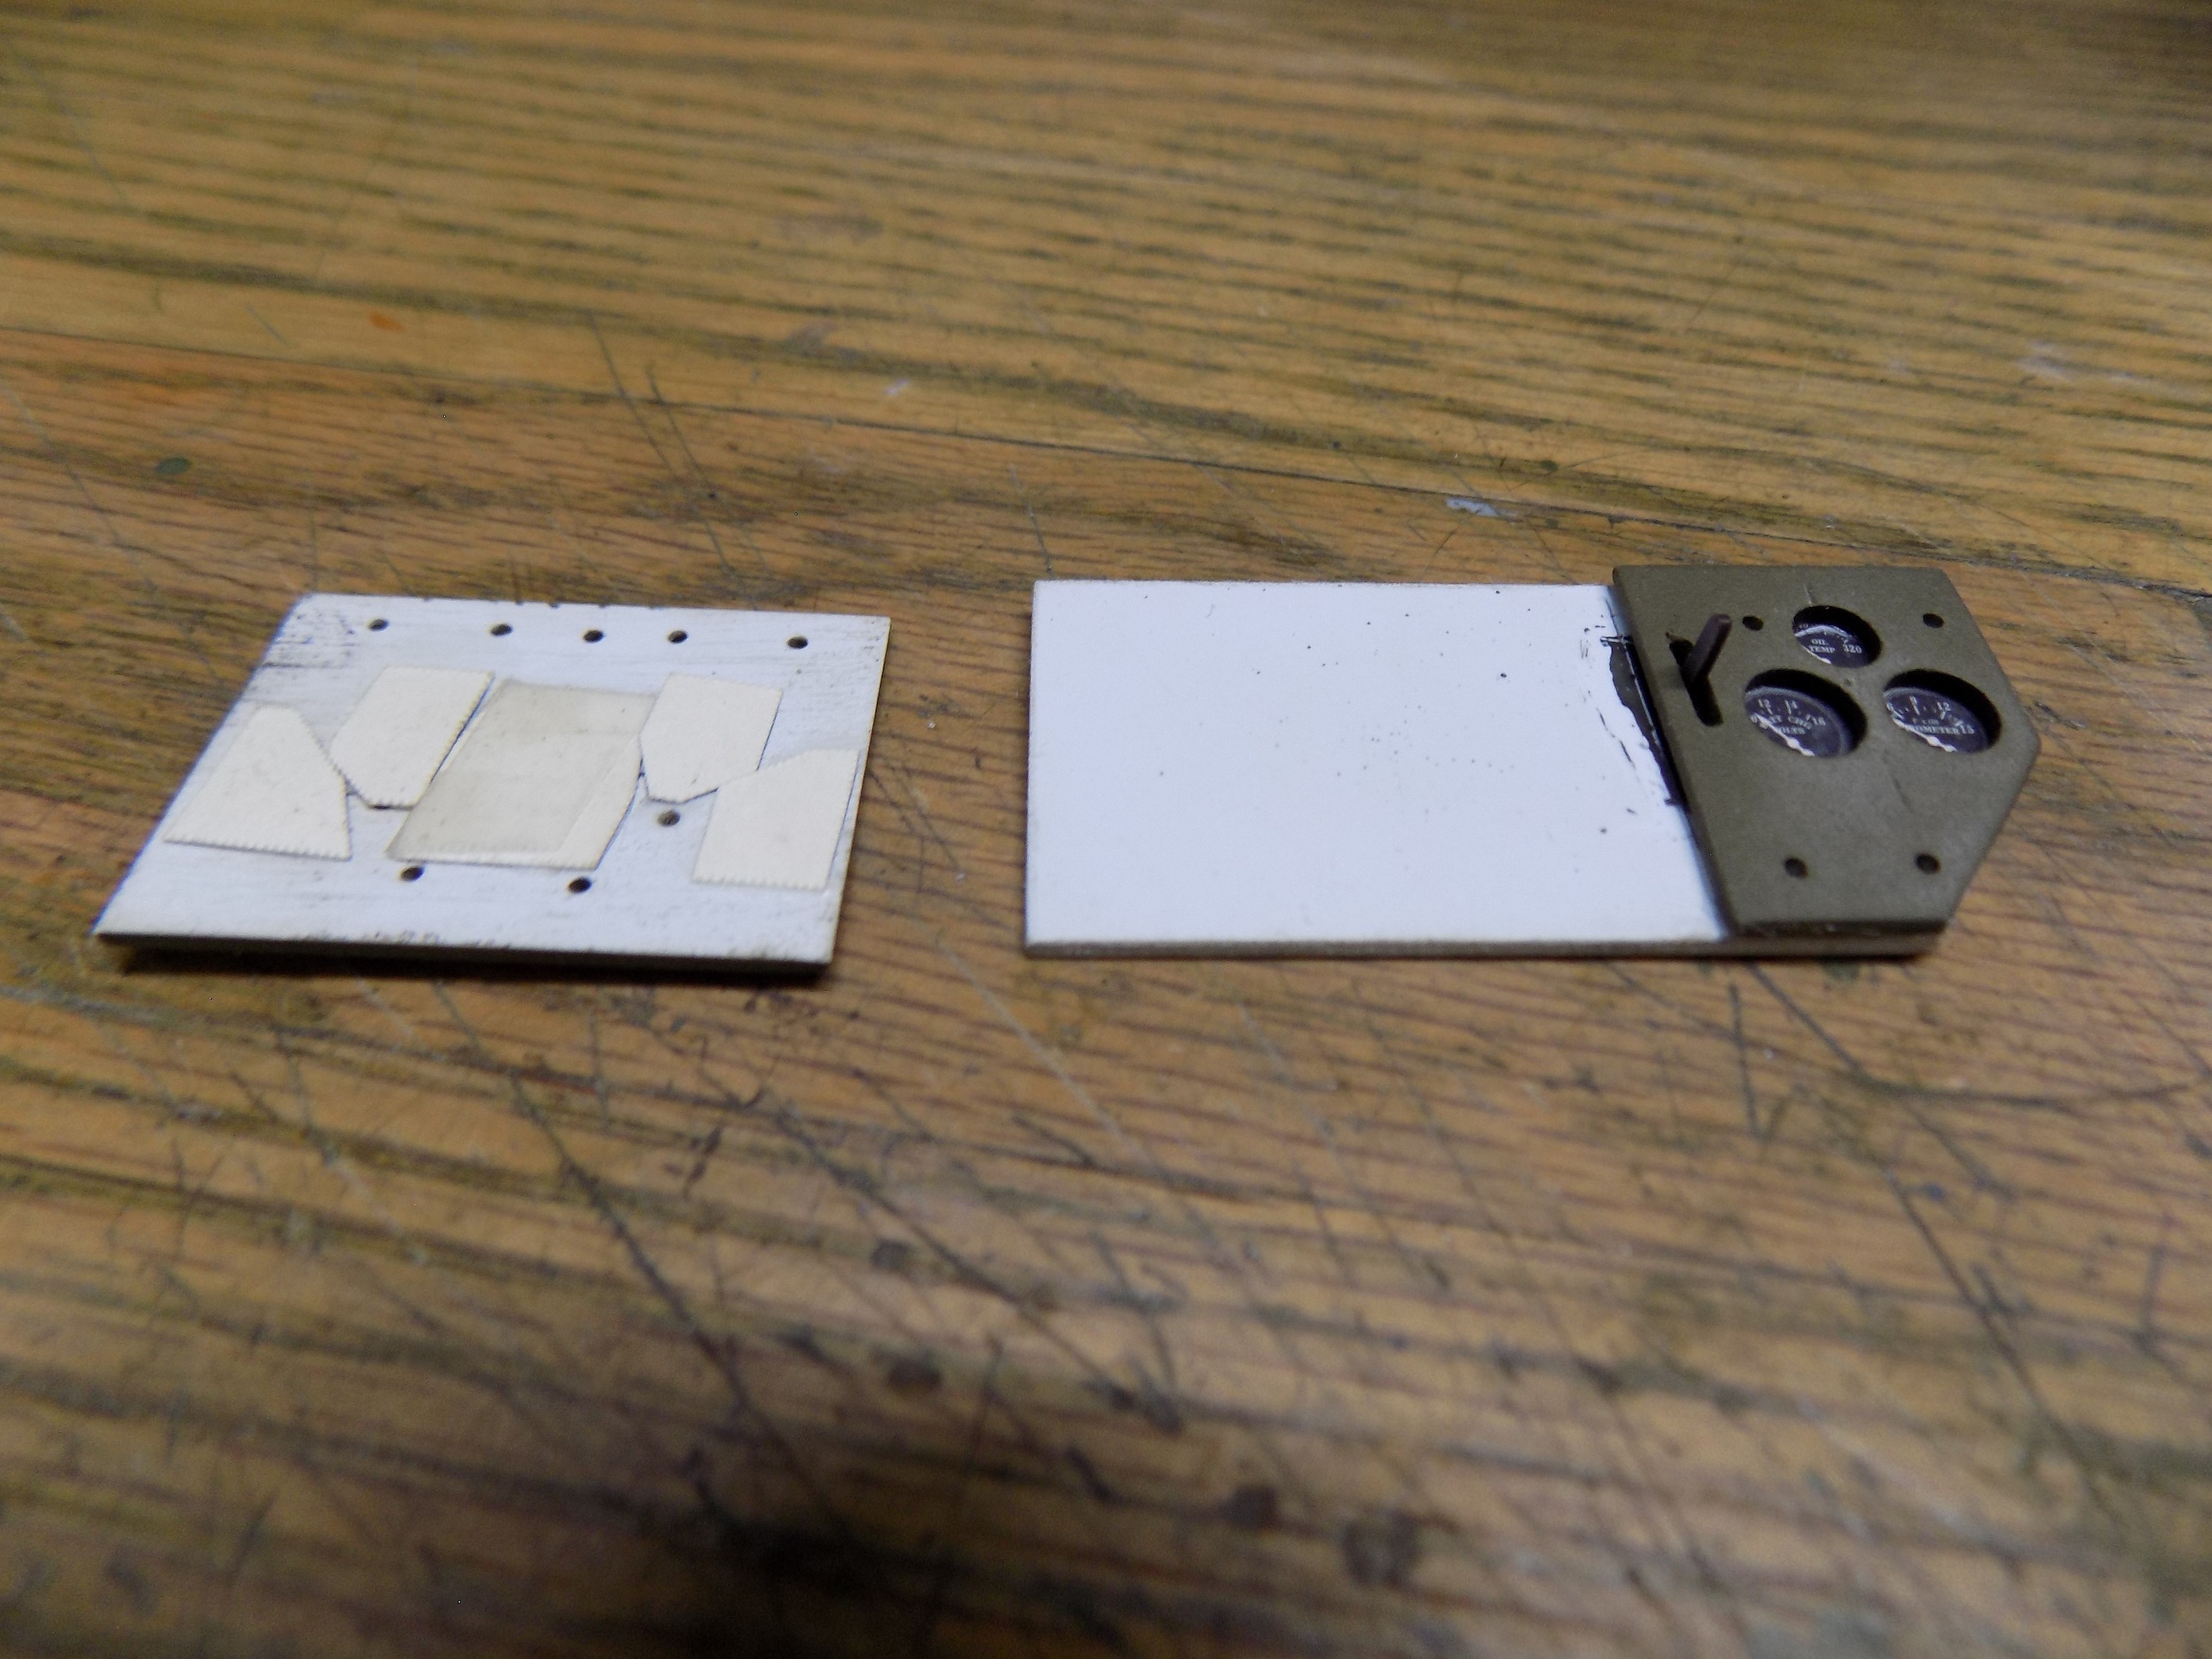
Finishing up on the dash and steering column mount. Never mind that the speedo reads to 120 MPH and the rest of the hot rod decal set is wrong....
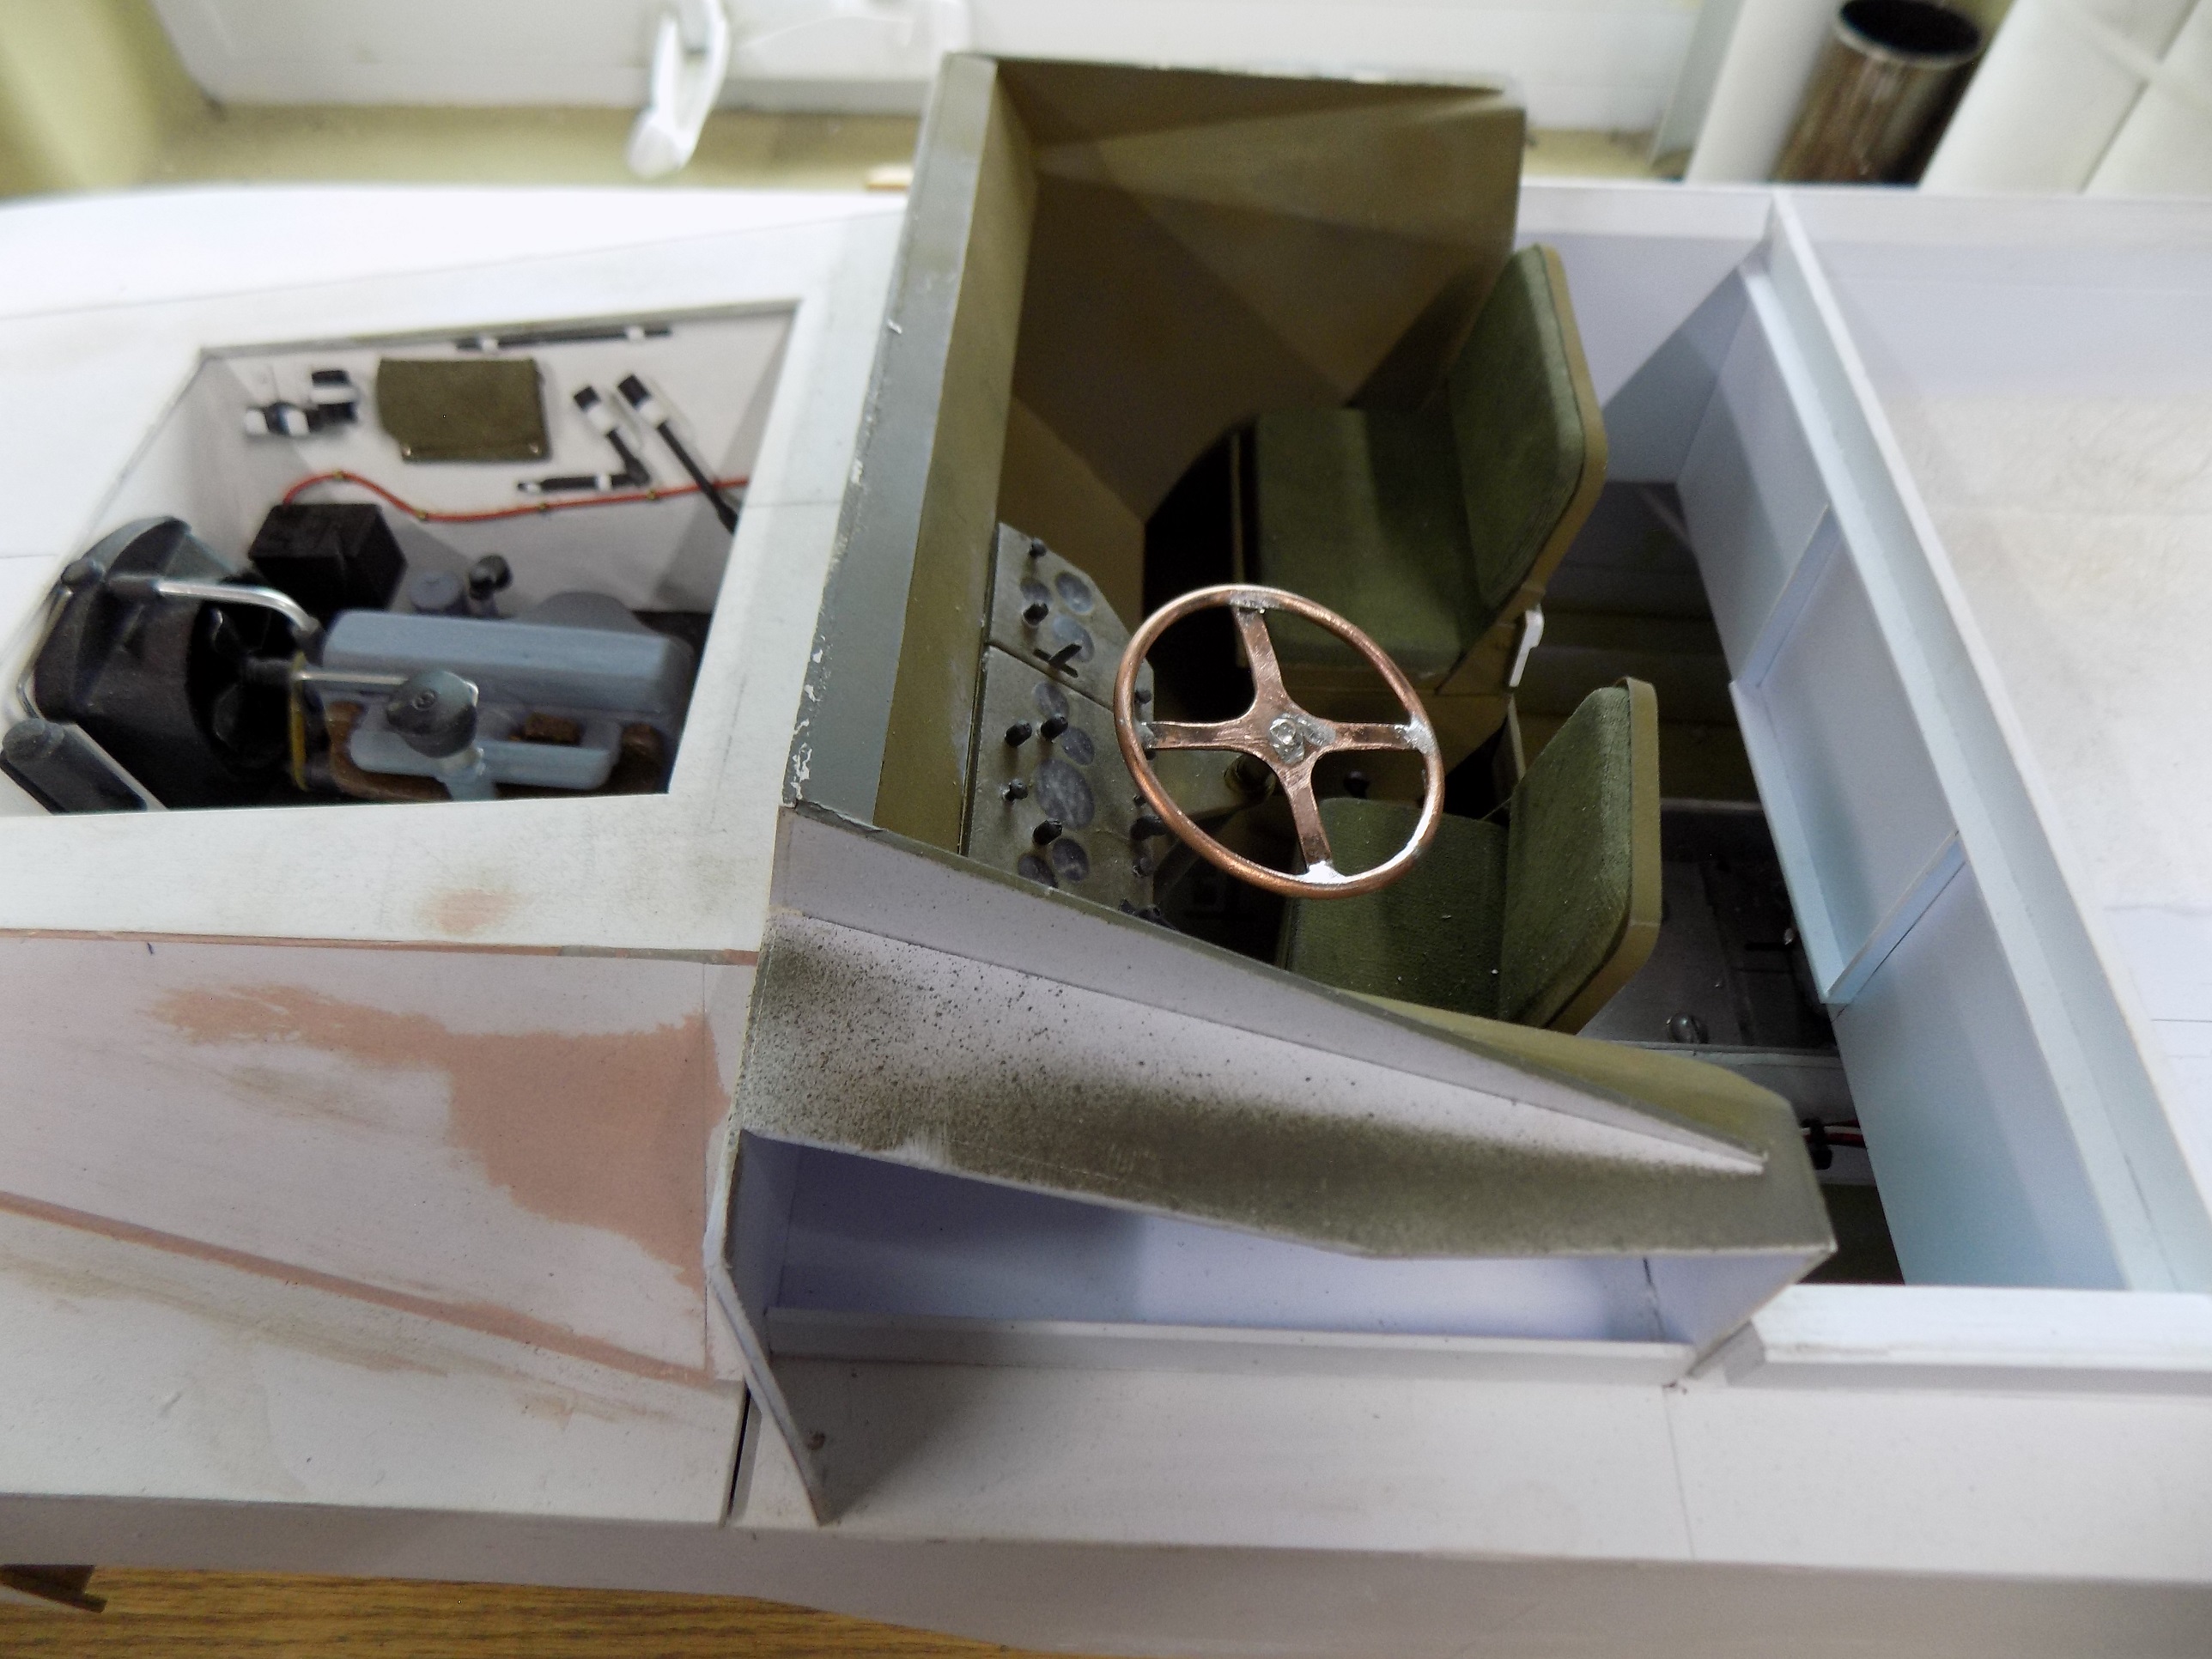
I used a layer of Scotch tape on the surface of the decal, didn't want to risk damaging the only set I currently have when the epoxy went down for the lenses. Made the panel lights and switches, then adjusted the steering column for an appropriate angle to the driver. Next up the steering wheel...
- D145.JPG (1.06 MiB) Viewed 62 times

- D146.JPG (2.76 MiB) Viewed 62 times
- D147.JPG (1.23 MiB) Viewed 62 times
Re: DUKW Scratch Builds
Posted: Sun Jul 30, 2023 10:59 pm
by Herr Dr. Professor
Re: DUKW Scratch Builds
Posted: Mon Jul 31, 2023 8:02 am
by Model Builder 4
Lovely detail work Ecam

this is going to be a stunning build

Cheers,Lee.
Re: DUKW Scratch Builds
Posted: Mon Jul 31, 2023 5:27 pm
by Ecam
I don't know about stunning... But it should be good enough for me (ten footer) and hopefully it will float!
But thank you. It was your DUKW that inspired me to give this a try!
Re: DUKW Scratch Builds
Posted: Mon Jul 31, 2023 5:45 pm
by Ecam
Steering wheel...
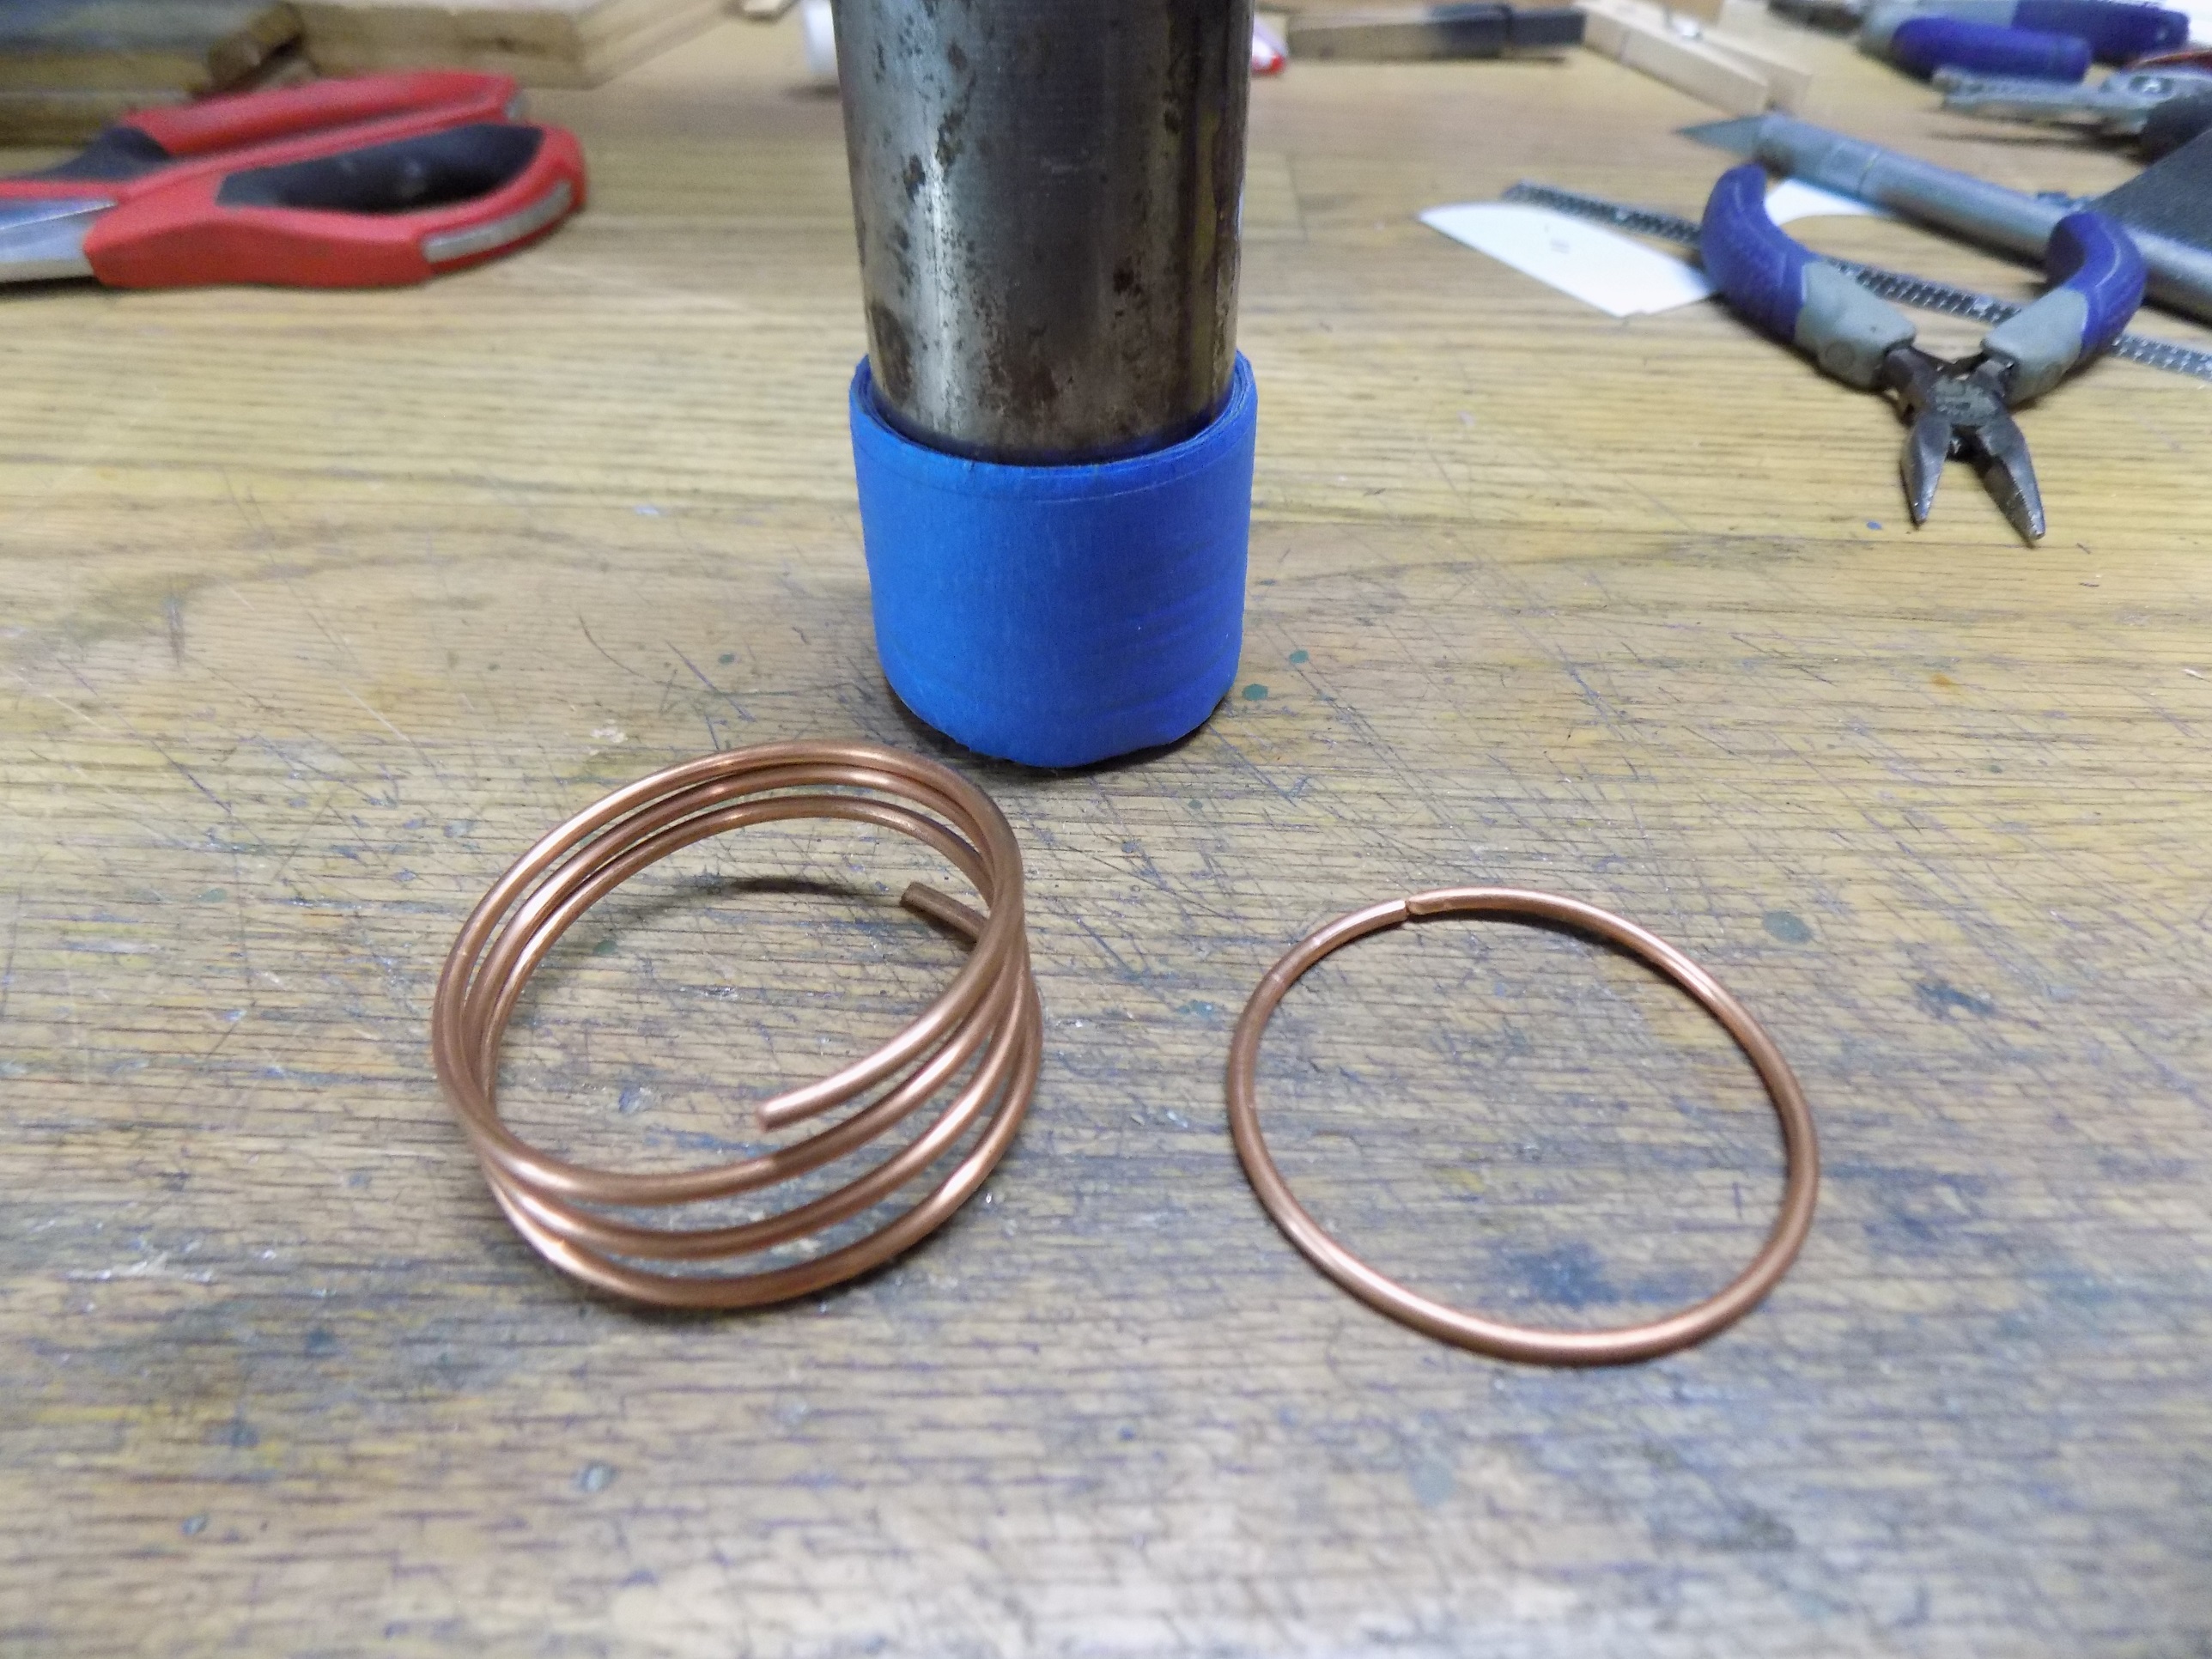
First time around I measured and scaled up the 1/35th kit for wheel diameter. Wrapped tape on the 1.5 exhaust tube to get closer to the 2.16 dia. I was aiming toward. The copper wire is springy so wrapping around a 2" would end up being closer to 2.5"
- D148.JPG (1.34 MiB) Viewed 61 times
I was not attempting the New Mexico flag..
- D149.JPG (1.36 MiB) Viewed 61 times
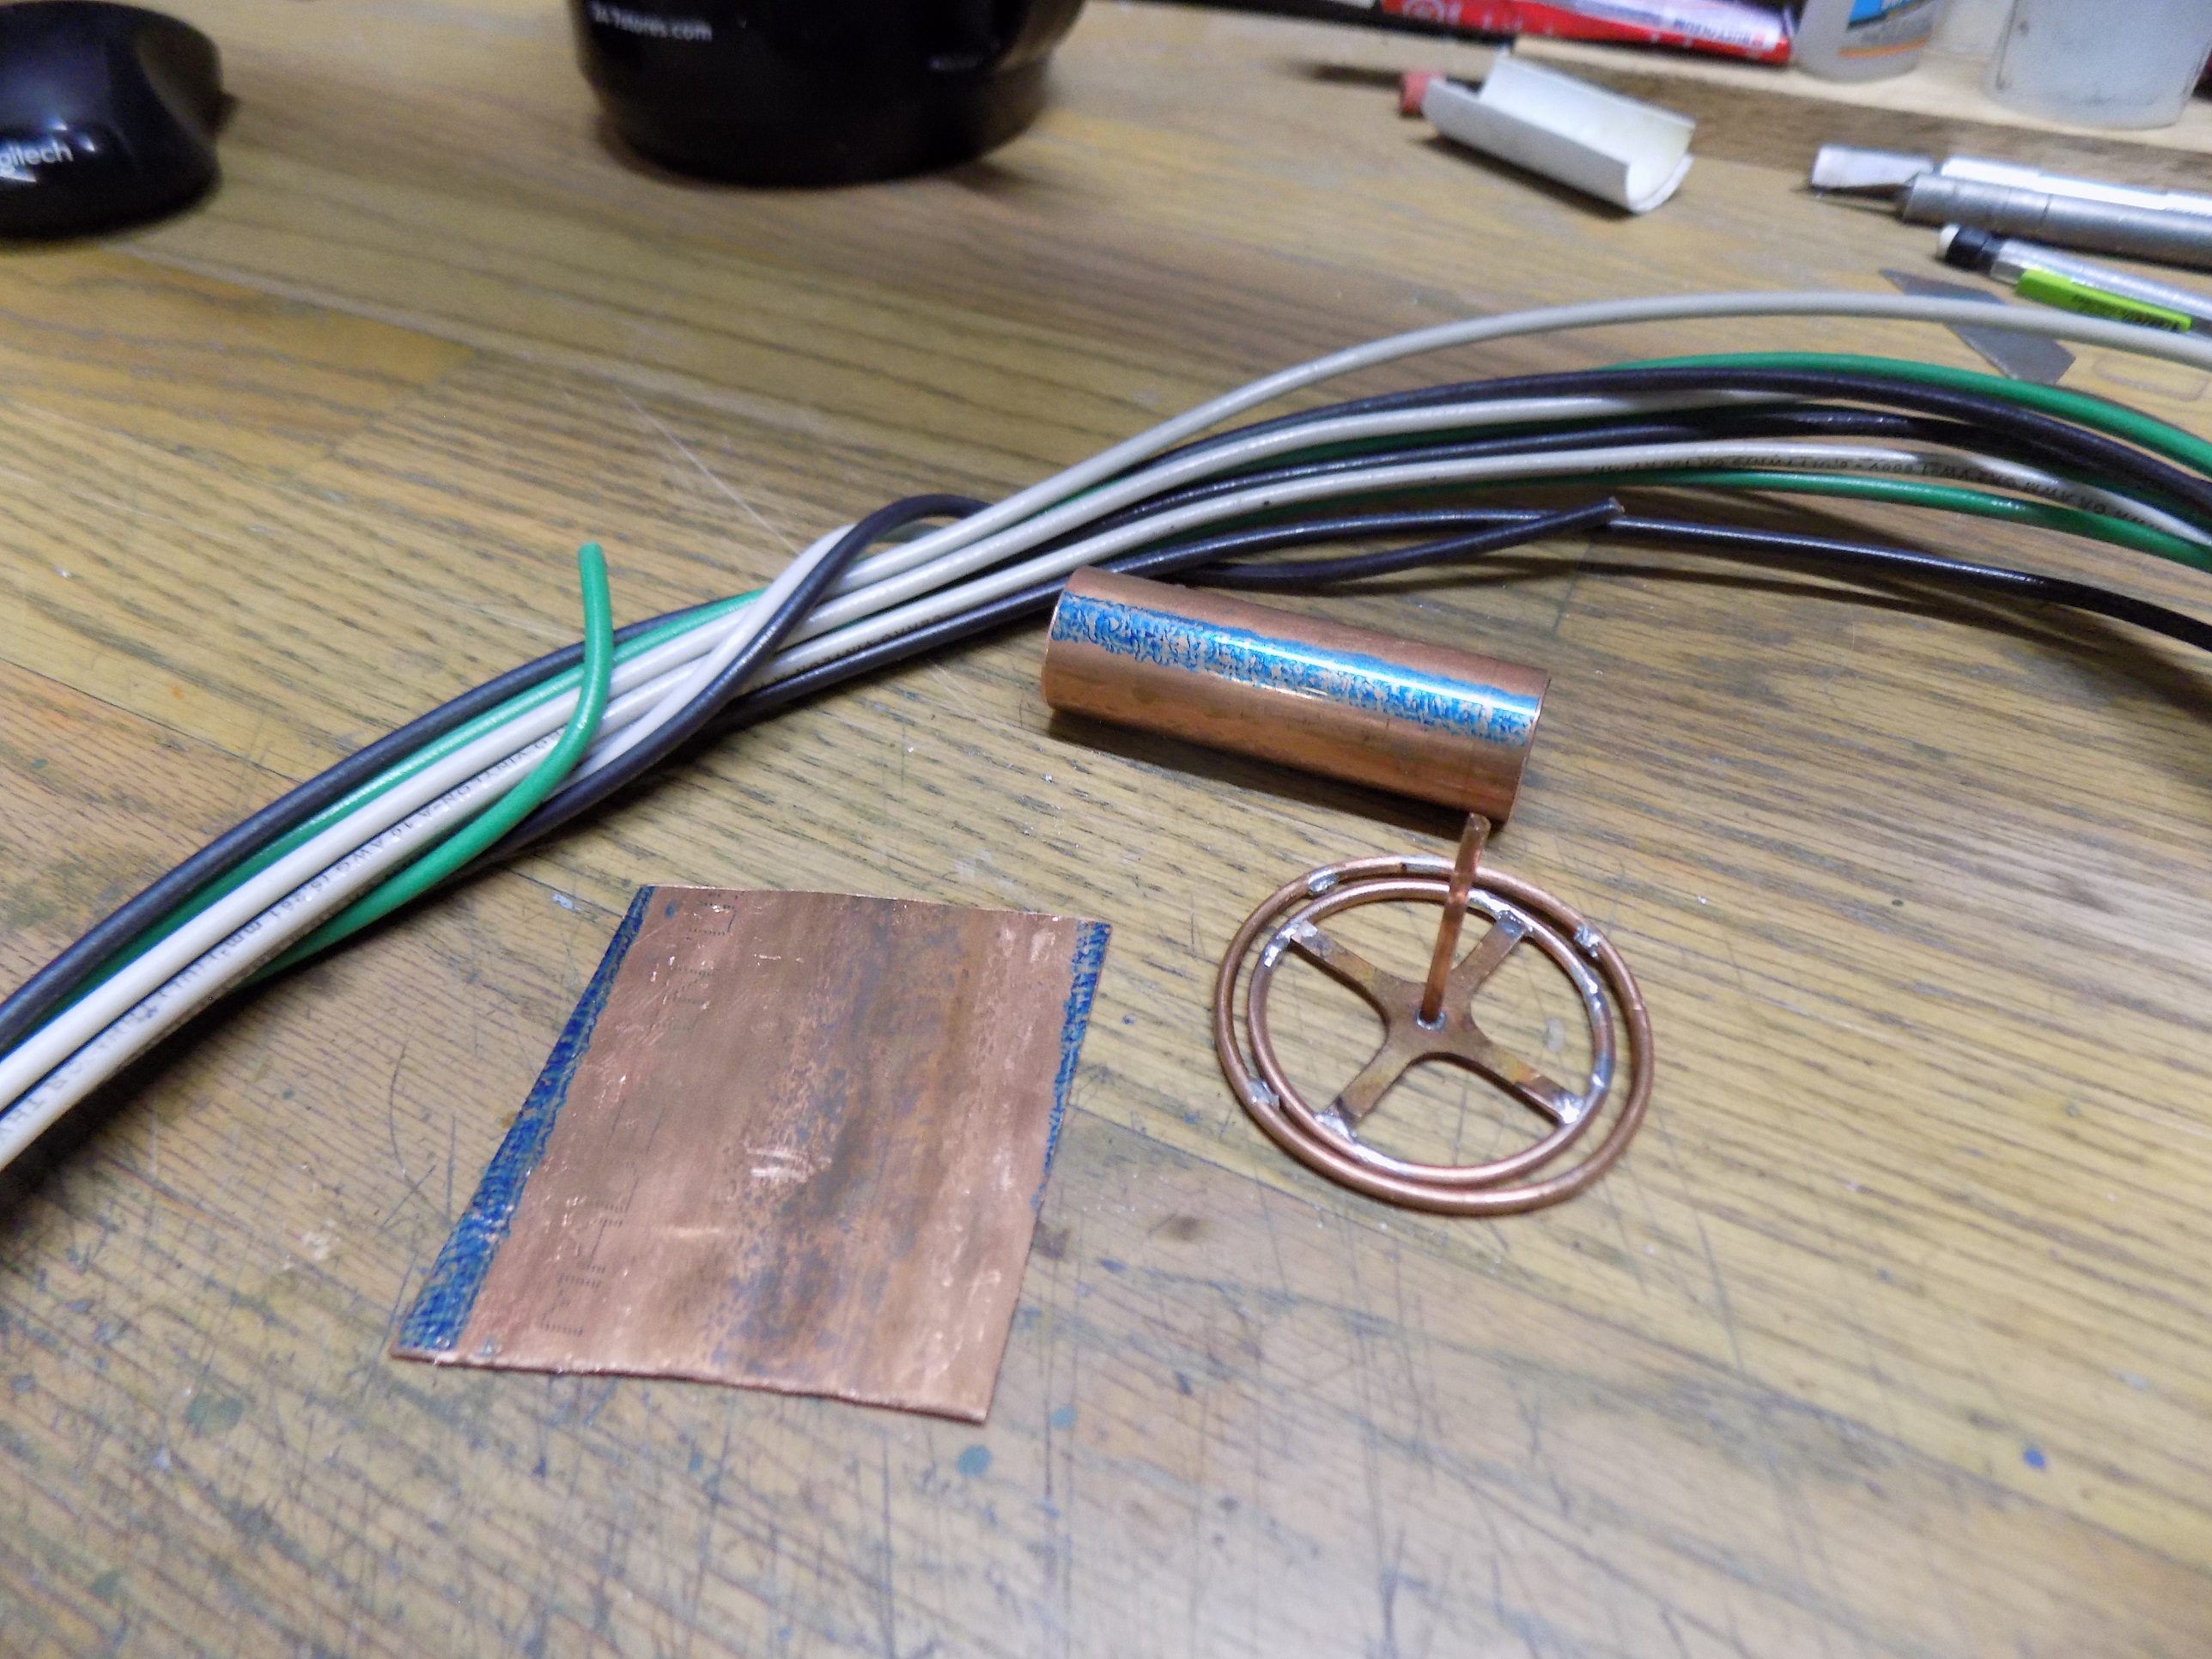
Here are the supplies I used. 10 gauge AWG (2.5mm) left over from when I wired the garage and 3/4 (19mm) copper pipe, split and flattened. The wheel is version two because although it came out the right size, visually I thought it way too large. The rim surrounding the wheel is version one.
- D150.JPG (1.34 MiB) Viewed 61 times
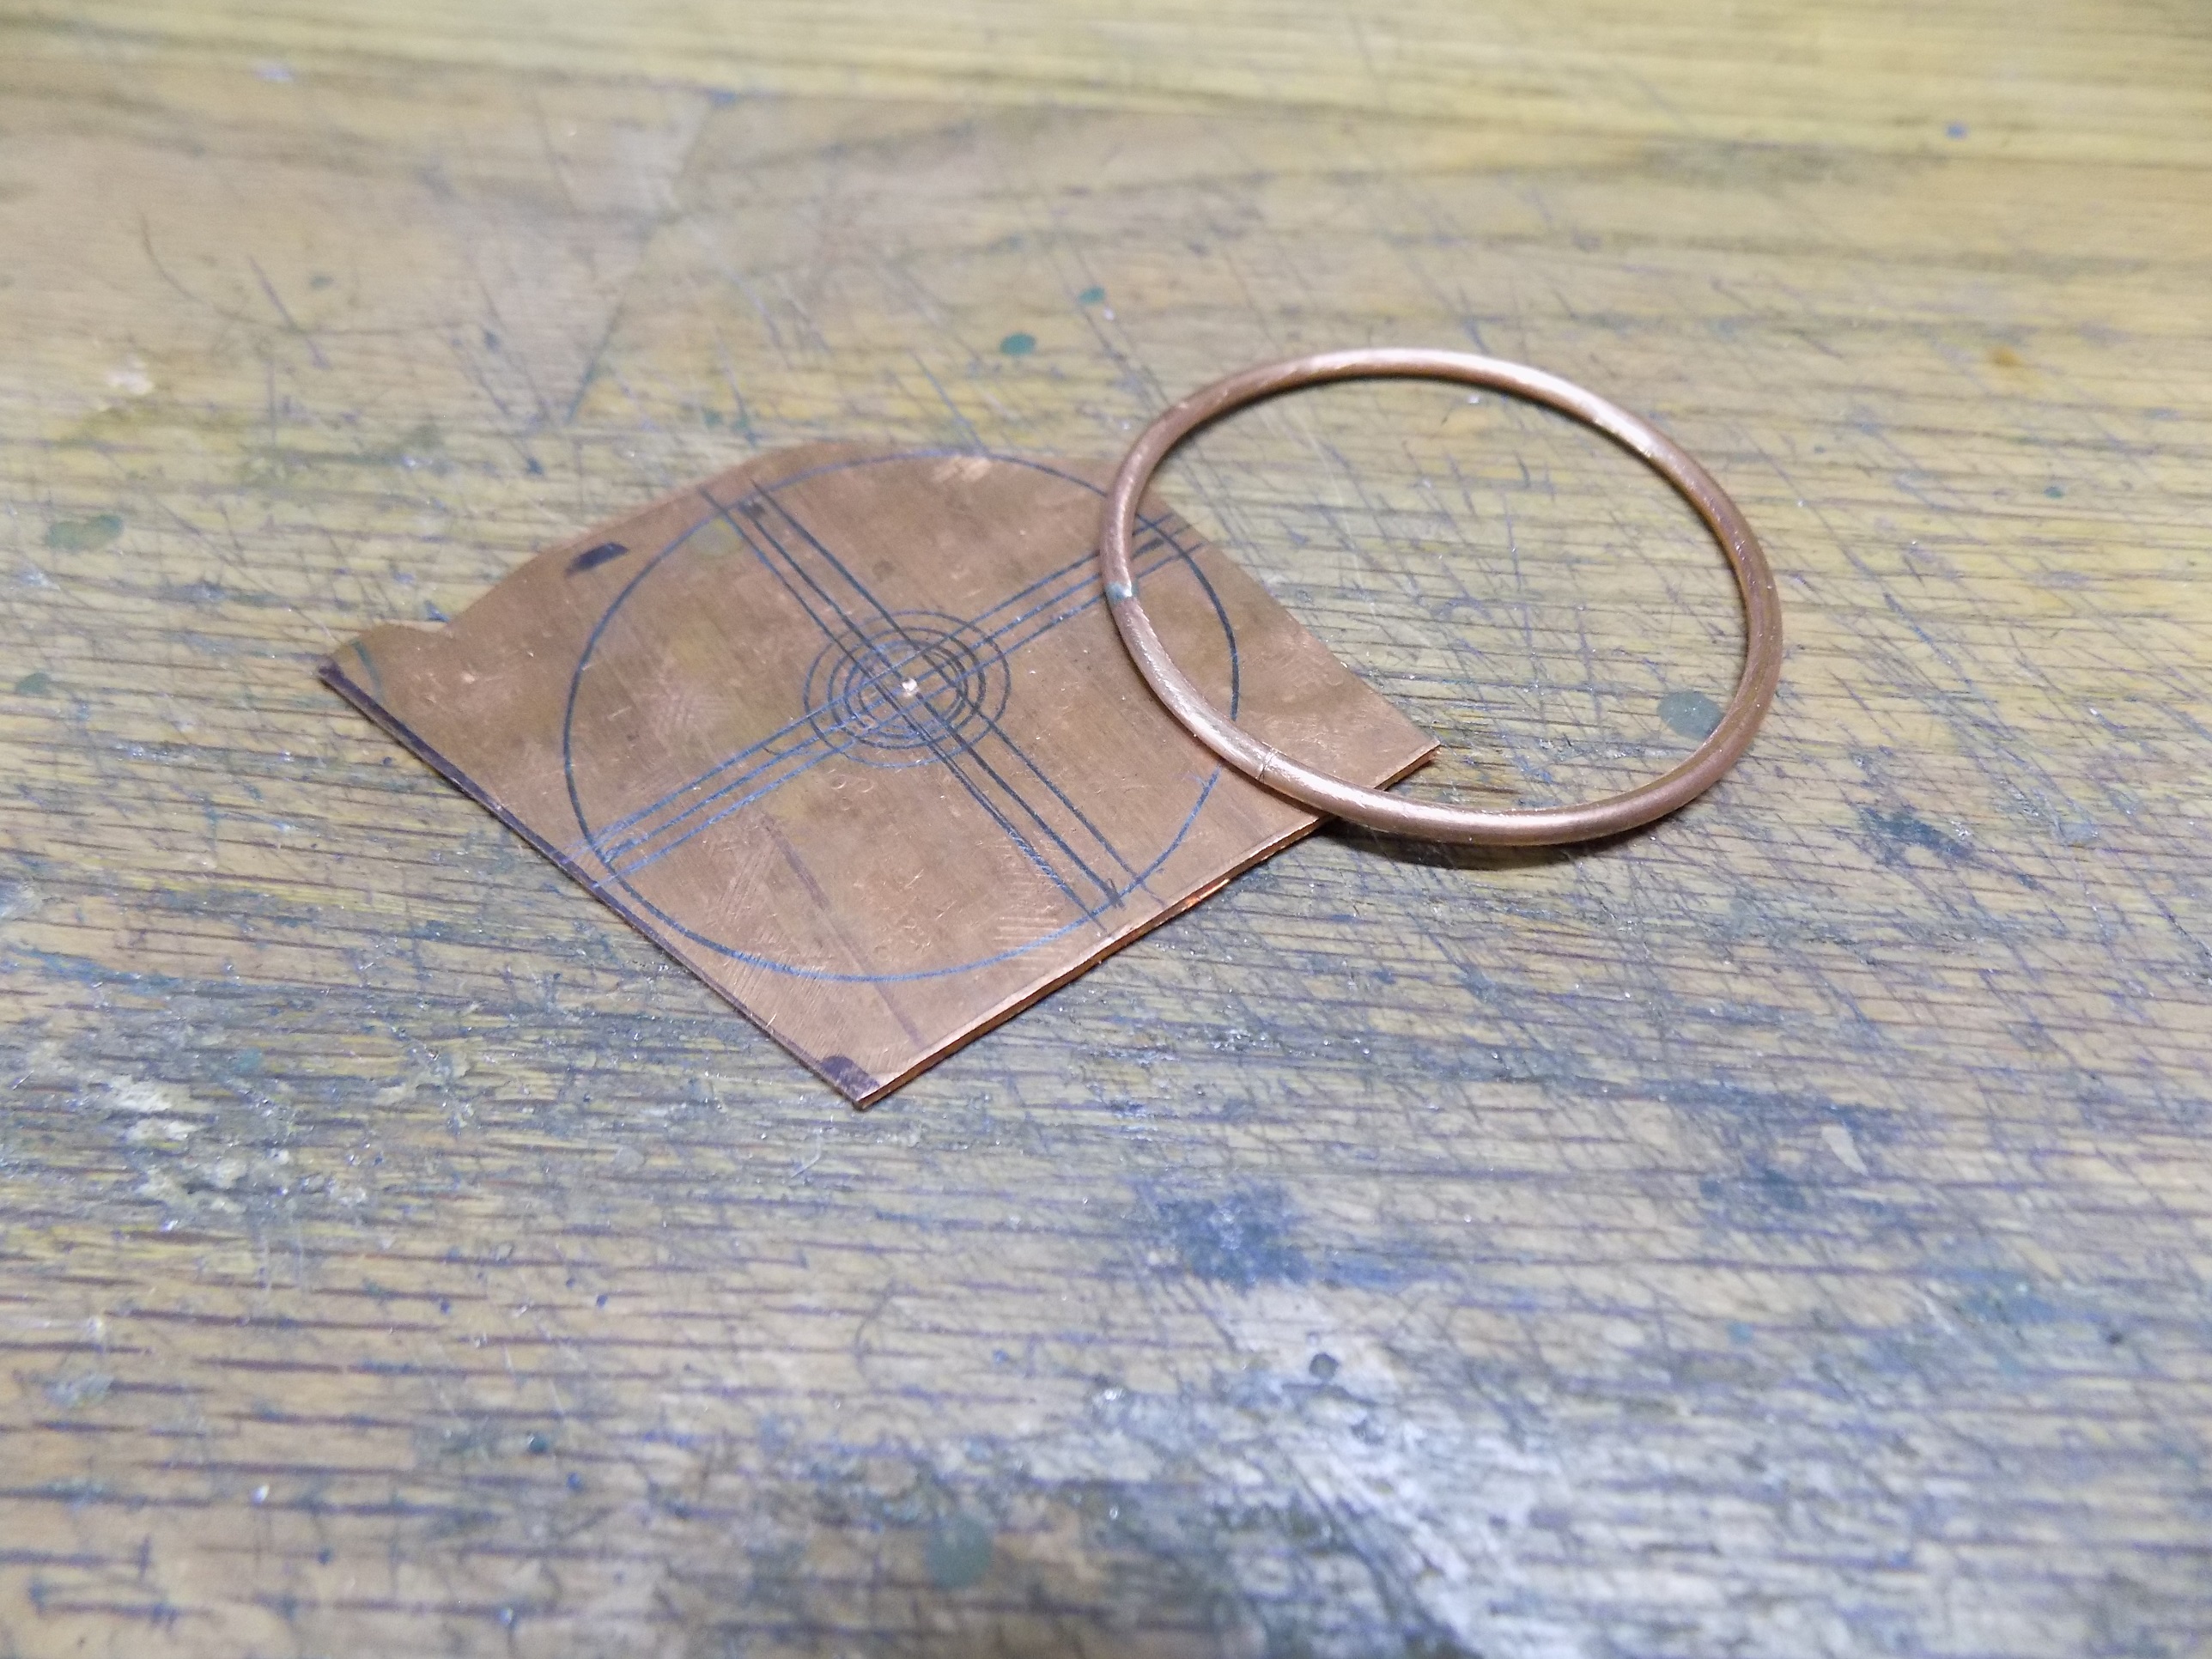
Outside dia. reduced to 1.86" (47.2mm). To me that looks more appropriate.
- D151.JPG (1.04 MiB) Viewed 61 times
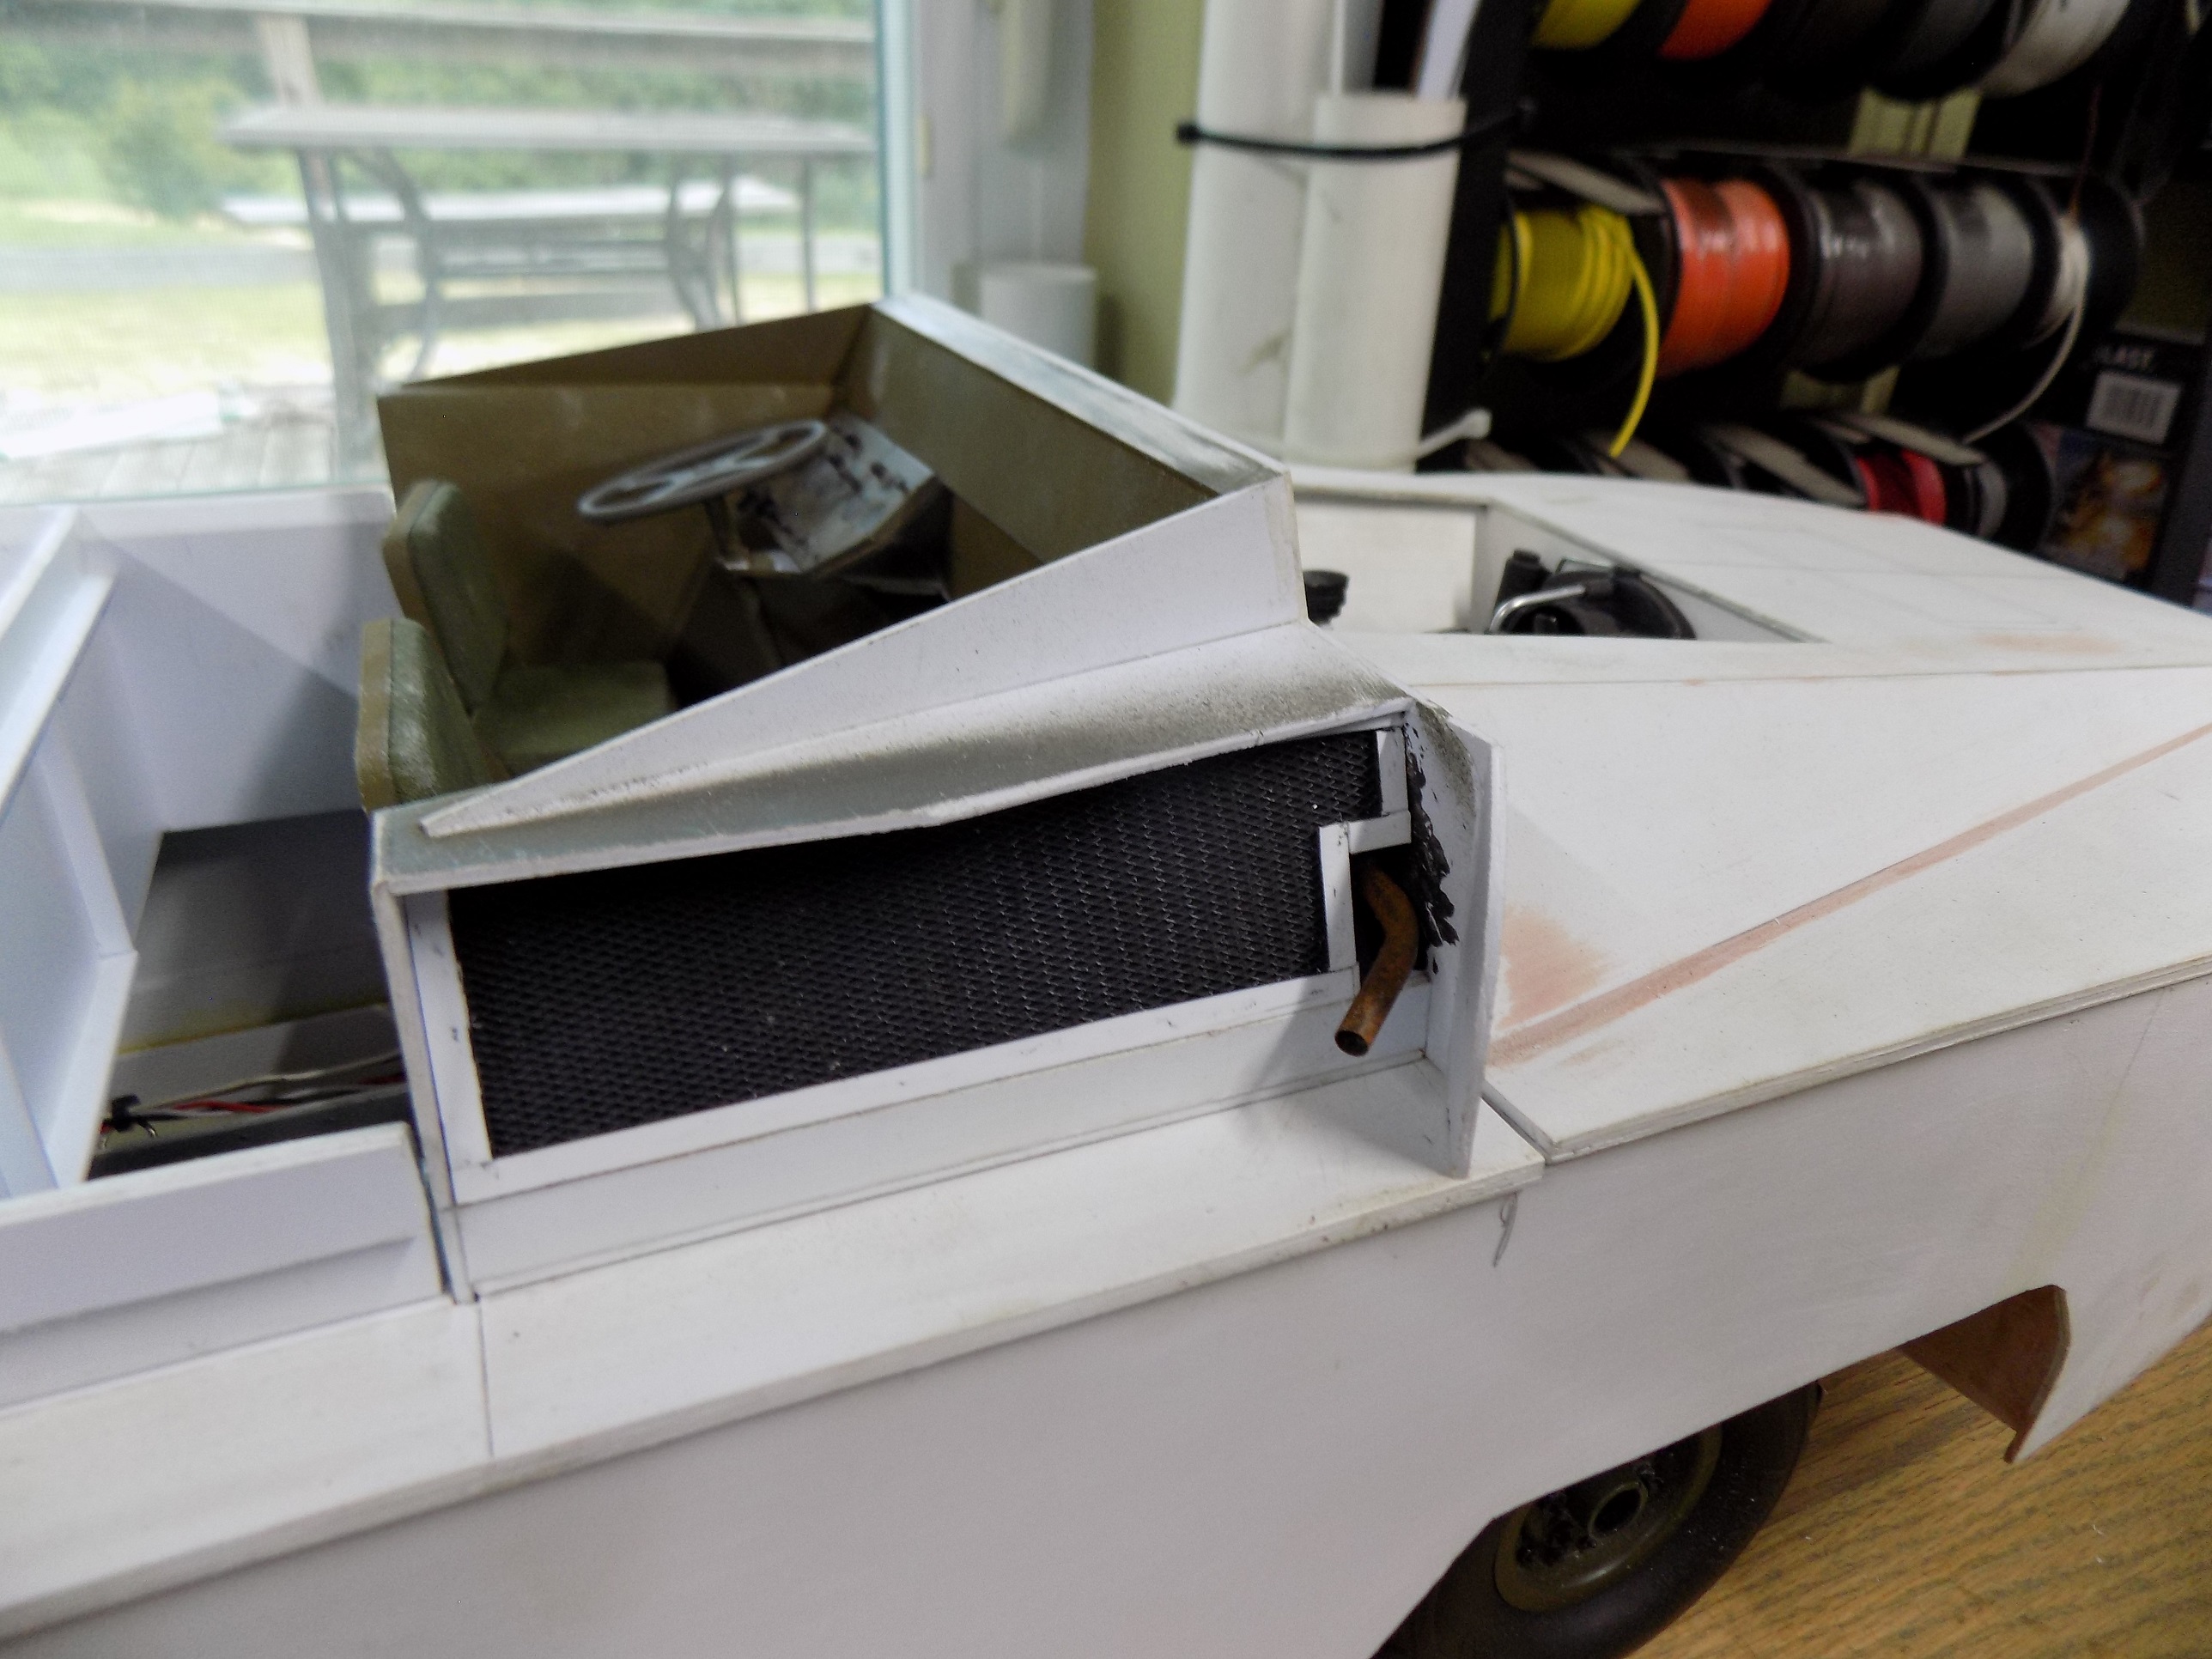
On to the side vents and coaming.
Re: DUKW Scratch Builds
Posted: Mon Jul 31, 2023 7:12 pm
by Herr Dr. Professor
Ecam, do you remember the old Masterclass threads? You have one going here on interior detailing. Wow!
Re: DUKW Scratch Builds
Posted: Mon Jul 31, 2023 7:25 pm
by Luis Manuel Marques
Excellent work...!!
Re: DUKW Scratch Builds
Posted: Tue Aug 01, 2023 12:38 am
by Ecam
I've two books on the DUKWs (both provided by my brother). In 350 combined pages full of pictures, I found only one that showed the muffler and it was on one of the four prototypes prior to production. It was located in front of the radiator (perhaps a way to enhance the heat output for crew). It was only recently I discovered the starboard side vent was where the exhaust outlet was located. Still working on the coaming, have some card stock in boiling water right now.
- D152.JPG (1.03 MiB) Viewed 60 times