Page 11 of 37
Re: Building a Mid-Production Normandy Tiger 1
Posted: Tue Jun 03, 2014 12:47 pm
by billpe
The damage looks good and real! Looking at your work I'm really tempted to give it a shot as well, the results are fantastic.
I guess its a little too late but it might have worked to spray the plastic on the lowest plate section with the primer colour before applying the zimmerit (would it hold on the paint though?) so when it chips through driving it, it would leave natural looking wear and tear marks.
Re: Building a Mid-Production Normandy Tiger 1
Posted: Tue Jun 03, 2014 11:32 pm
by tanks_for_the_memory
Re: Building a Mid-Production Normandy Tiger 1
Posted: Wed Jun 04, 2014 9:42 am
by lister fiend
Hi tftm,
Looking good there

In your opinion how is magic sculpt better than milliput?
Cheers
Micky
Re: Building a Mid-Production Normandy Tiger 1
Posted: Wed Jun 04, 2014 10:38 am
by billpe
Looking great.
Re: Building a Mid-Production Normandy Tiger 1
Posted: Wed Jun 04, 2014 11:20 am
by tanks_for_the_memory
lister fiend wrote:Hi tftm,
Looking good there
In your opinion how is magic sculpt better than milliput?
Cheers
Micky
To answer your question Micky, I would say that Magic Sculp spreads/rolls more easily and more evenly than Milliput - although perhaps the finer grade of the latter would work as well (I have never tried it).
Re: Building a Mid-Production Normandy Tiger 1
Posted: Thu Jun 05, 2014 7:45 pm
by Markocaster
Fantastic detail, the zim looks very realistic

Re: Building a Mid-Production Normandy Tiger 1
Posted: Fri Jun 06, 2014 4:39 pm
by lister fiend
thank you, i might just give it a go,
you've certainly got a nice neat & uniform looking pattern.
yes looks very tempting

Re: Building a Mid-Production Normandy Tiger 1
Posted: Sat Jun 07, 2014 1:22 am
by tanks_for_the_memory
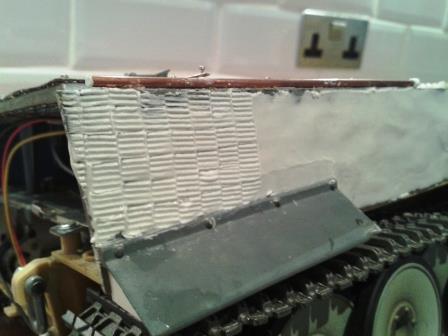
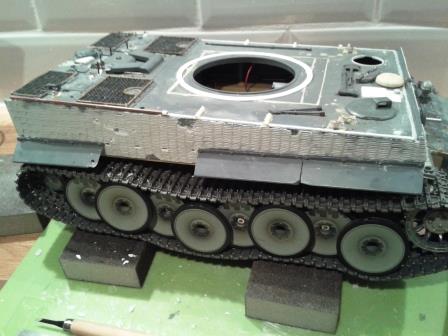
Applying zimmerit to the hull sides
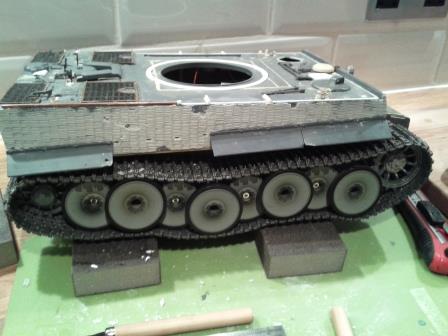
- The overall finish.jpg (31.24 KiB) Viewed 8058 times
Well, onward with the brave or the foolish I suppose...
The hull sides are a yawning expanse of armour plate just crying out for zimmerit - but I was almost crying out once I had finished this lot. At least this time I was able to make the zimmerit showing below the missing side skirt blend in perfectly with the rest.
I'm not sure why, but the Magic Sculp didn't behave quite as well as before - perhaps it was the fact that the afternoon had been dry and hot (for a change). Although I rolled it out it was very sticky and so I ended up pressing quite roughly-shaped pieces along the hull sides before using my fingers to spread it out. As a result the thickness (or thinness) was not always as consistent as I would have liked. The top edge is, arguably, the most important place to get the thickness right and here I was pretty content.
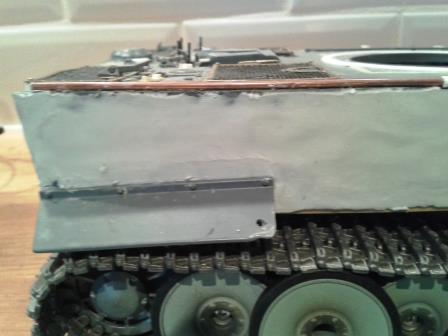
- By far the largest area are the side plates - and somewhat recklessly I decided to to one side in one go.jpg (26.28 KiB) Viewed 8058 times
- Spreading the putty evenly is much more of a challenge.jpg (28.79 KiB) Viewed 8058 times
- Here it's mostly on - but has yet to be trimmed, especially along the top edge.jpg (30.42 KiB) Viewed 8058 times
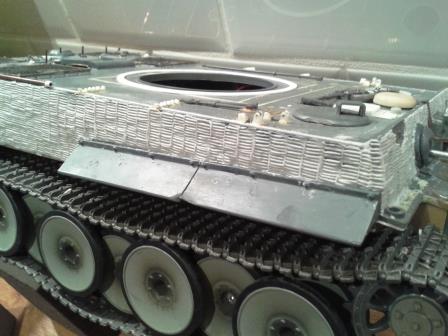
Another important point if, like me, you have kept most of the moulded on side skirts (no, I am NOT going to scrap them all and replace them with the Voyager set this time) is to ensure that the zimmerit doesn't overlap their top edge too much - the illusion you need to preserve here is that the skirts have been bolted on after the paste has been applied.
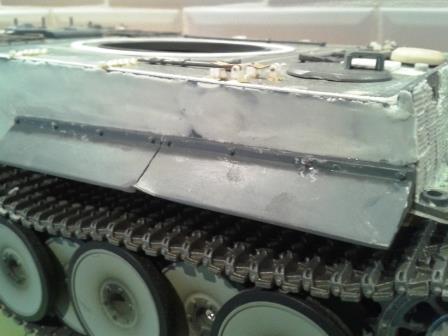
Unfortunately, something I forgot in my haste and excitement were the attachment points for the missing side skirt. A schoolboy error. It would have been so easy to have pressed these into the putty whilst it was still wet. I didn't and so I have chipped away small rectangles to add these later.
Anyway, I will let the remaining pictures do the talking. Next, of course, I am going to attempt the trickier port side - where there are all those fiddly track cable mounts to be incorporated. Yikes!
- For some reason - probably reading habits - I tend to work from left to right with the indentations.jpg (27.41 KiB) Viewed 8058 times
- Working gradually along started to give me an aching shoulder - but eventually it's finished.jpg (34.61 KiB) Viewed 8058 times
- It's very important to keep the pattern vertical despite the gradual rake of the armour plate.jpg (28.18 KiB) Viewed 8058 times
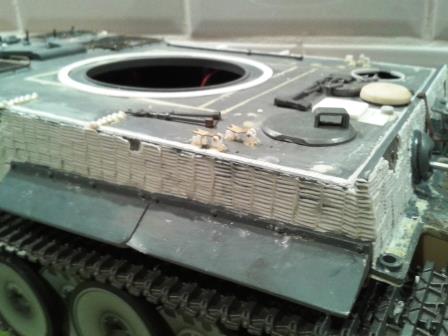
- I am much happier with the scale thickness here - especially along the top edge.jpg (31.38 KiB) Viewed 8058 times
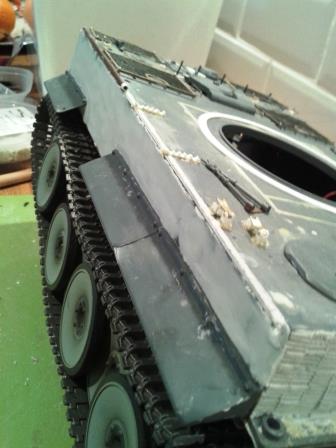
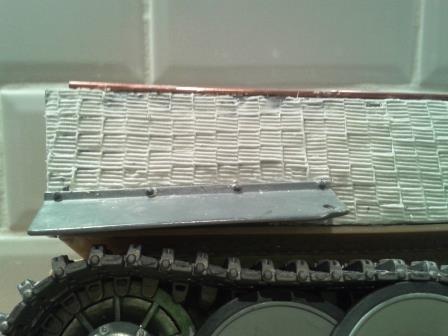
- The final touch - after the putty had been allowed to cure for an hour or so - was to add the battle damage.jpg (33.09 KiB) Viewed 8058 times
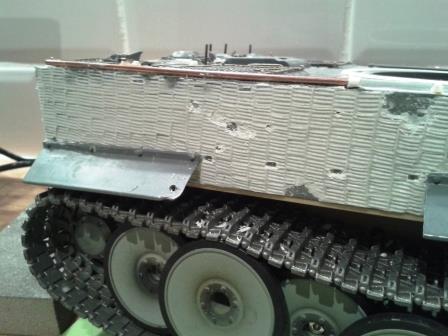
- Here there is a gouge - perhaps from a deflected shot - to give some explanation for the lost side skirt.jpg (32.63 KiB) Viewed 8058 times
Re: Building a Mid-Production Normandy Tiger 1
Posted: Sat Jun 07, 2014 11:25 am
by HERMAN BIX
Simply Wow.
That zim application & realism is breathtaking.
How was the compound by the time you got from back to front cured - wise ?
Re: Building a Mid-Production Normandy Tiger 1
Posted: Sat Jun 07, 2014 2:29 pm
by billpe
You're getting pretty good at the zimmerit stuff. Can I send you a tank...?:)