Page 11 of 26
Re: Converting HL Panther "G" to a Late "A"
Posted: Sat Nov 01, 2014 3:48 pm
by tomhugill
So as I sent Michael an f across the pond it's only fair puns end this over to me when your done....ta!

In all seriousness you're building something awesome, I've got one of these planned so I'll be using your build as a blueprint.
Re: Converting HL Panther "G" to a Late "A"
Posted: Sat Nov 01, 2014 4:42 pm
by Bogeyman
Hi,
Amazing work, loving this build, can't wait to see this done.
John
Re: Converting HL Panther "G" to a Late "A"
Posted: Mon Nov 03, 2014 4:52 am
by dgsselkirk
Thanks Tom, thanks John, I have learned a lot on this site and if my so called " skills" can help someone else with ideas to than all the better!

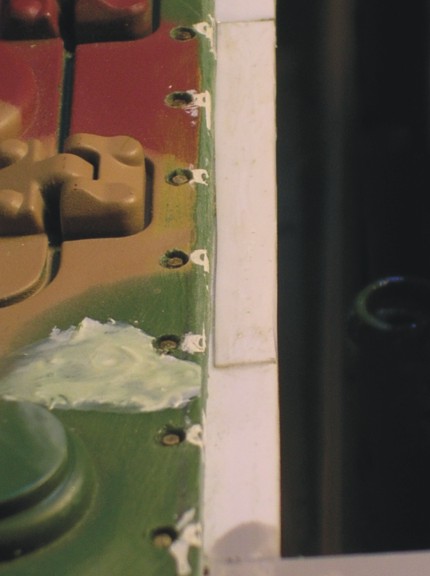
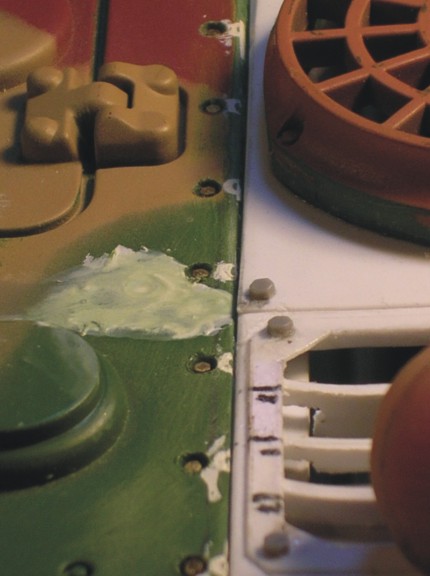
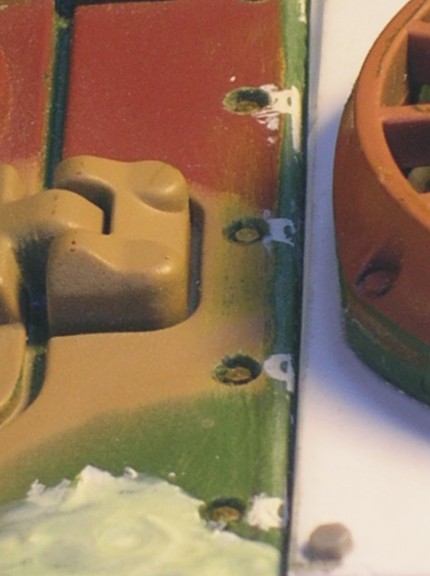
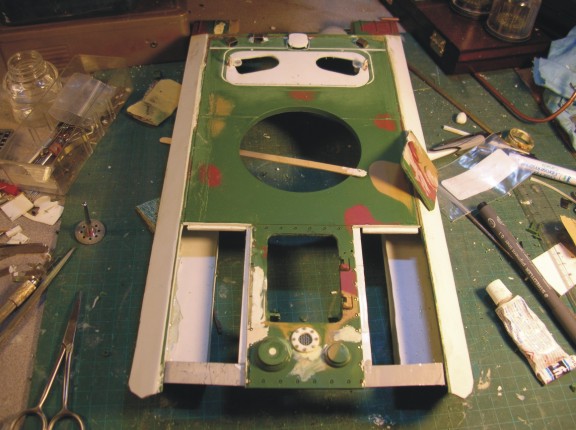
Got a little more done. One of the issues I had when I cut the rear panels out was I basically destroyed the vertical lines of molded countersunk bolts so I knew at some point I was going to have to fix this. So first I filled in the old ones with putty and sanded them off. I also filled in the rear lift hooks holes as they are a little out of position on the deck and will be re-located. Next I drew a line up the hull and marked off where the bolts should be. I then drilled .8mm holes right down through except where the holes are on the aluminum strut. Those I drilled as deep as possible. Next the simulate the countersunk holes I use a 2mm bit and gave it 2 and a 1/2 gentle rotations. cleaned the holes out and put in some more of the .8mm brass bolts I had with some super glue on the bottom of them to lock them in. Gently pushed them into the holes with an xacto knife and set them at the right depth. They are really close to the same size and once primed and painted I think they should blend right in nicely...

- Panther A 143.jpg (35.86 KiB) Viewed 4274 times
- Panther A 144.jpg (35.86 KiB) Viewed 4274 times
- Panther A 145.jpg (44.91 KiB) Viewed 4274 times
- Panther A 146.jpg (44.06 KiB) Viewed 4274 times
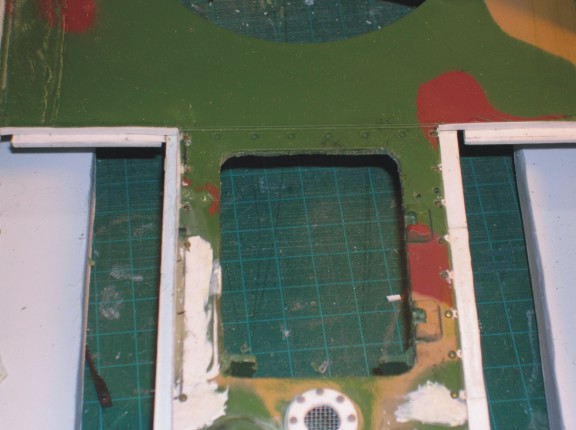
Next, I wanted to open the rear engine hatch so I can locate my on/off and smoke switch. so proceeded to cut this out using small drill holes for the corners and heated up an xacto knife for the straight parts with a candle. I have tried little saws, wire, thread, dental floss, etc... nothing really worked for me as well as the candle knife method.
- Panther A 147.jpg (67.93 KiB) Viewed 4274 times
- Panther A 148.jpg (47.63 KiB) Viewed 4274 times
now one of the things I learned a long, long, time ago in 1/35th world is that styrene shims can be your friend when opening hatches! In this case one corner got cut off a little too square so out comes the thin, thin styrene and regular thin model glue and new corner applied. Still has to be shaped with sanding of course.
- Panther A 149.jpg (42.34 KiB) Viewed 4274 times
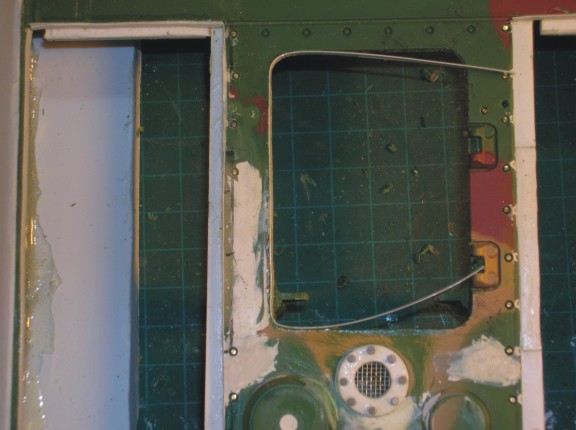
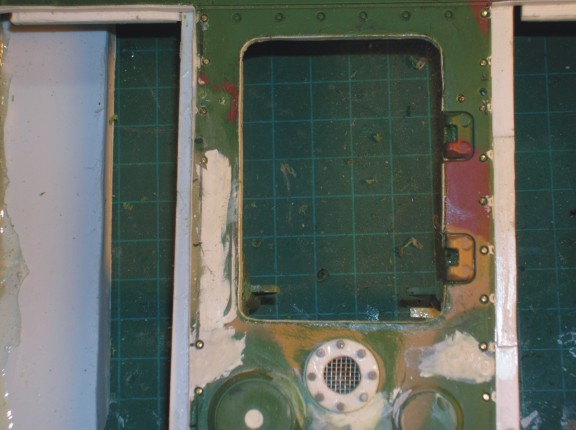
Now, this also works great with the hatch openings themselves. Lining them makes a nice smooth clean edge and makes the gaps more thin and realistic looking. In case you didn't see it before I have also done this on the front hatches and the rear deck plates to correct some misshapen edges and smooth them off.
so start with a piece that is long enough to go all the way around. Soak the side of the hatch and the middle of the strip and wait a minute for the strip to soften a bit and then stick it on.
- Panther A 150.jpg (49.71 KiB) Viewed 4274 times
- Panther A 151.jpg (51.99 KiB) Viewed 4274 times
Repeat this process and make your way around the hatch and when it has dried a little you can nick out the sections where you don't want it. In this case I didn't want it in front of the hinges.
- Panther A 152.jpg (50.06 KiB) Viewed 4274 times
I left the female end of the hinges on the body of the tank and will scratch them on the hatch but will make them a little more to scale too as they are a little to big and clunky compared to the real thing. and more proper bolt heads!
Re: Converting HL Panther "G" to a Late "A"
Posted: Mon Nov 03, 2014 9:51 am
by ALPHA
Hey... I thought this build wasn't for rivet counters

ALPHA
Re: Converting HL Panther "G" to a Late "A"
Posted: Mon Nov 03, 2014 1:10 pm
by dgsselkirk
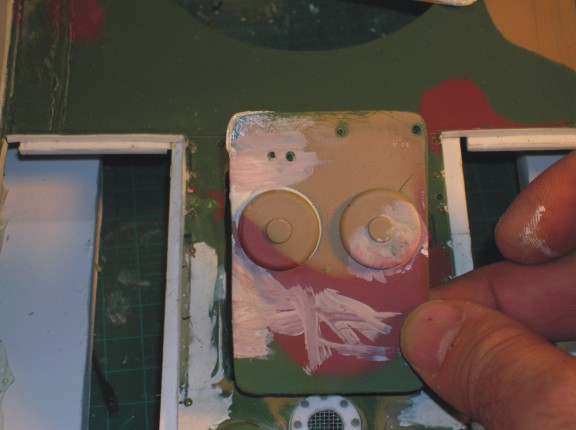
Hey you didn't even notice the putty on my finger just for you!
Re: Converting HL Panther "G" to a Late "A"
Posted: Mon Nov 03, 2014 1:38 pm
by ALPHA
dgsselkirk wrote:Hey you didn't even notice the putty on my finger just for you!
UHHHHHH actually no I didn't

.... all your non rivet counting construction kind of got more of my attention than your finger
especially that lining of the hull for those now operational hatches with home made hinges

ALPHA
Re: Converting HL Panther "G" to a Late "A"
Posted: Sat Nov 08, 2014 6:20 am
by dgsselkirk
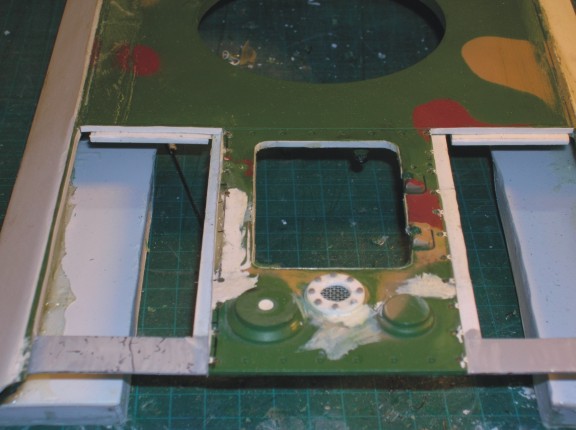
Well, fail on the hatch. I did it all up, drilled the holes, put pins in but couldn't keep them as straight as I wanted to so then it occurred to me, why am I dinking around trying to make the hatch function? Just make it like my KT everything is in place just little magnet hold it on and be done with it so that is what I am going to do. you simply lift the hatch off to get at the switches. Still have to trim and file and sand a bit but you get the idea...

- Panther A 153.jpg (50.63 KiB) Viewed 4246 times
you will also notice I have started to add handles in the right spots and also did the lift hooks. These were stock but they are too fat compared to the real thing so I thinned them out.

- Panther A 154.jpg (46.08 KiB) Viewed 4246 times
so while the hatch and stuff was drying I decided to tackle the other big thing I wanted to do on this tank, the exhaust. You remember I bought 2 Pantiger uppers and used the cooling fan covers on this tank. Well they also came with the triple exhaust.
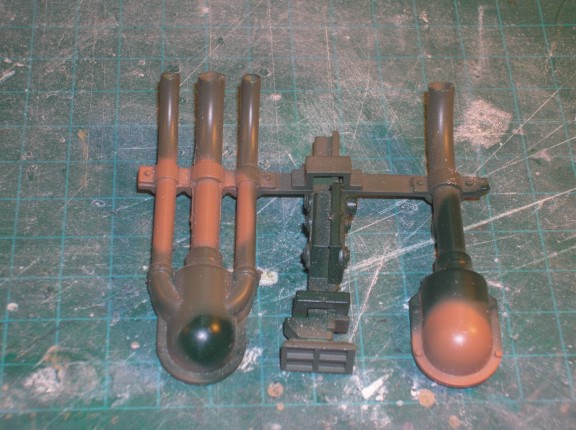
- Panther A 155.jpg (74.39 KiB) Viewed 4246 times
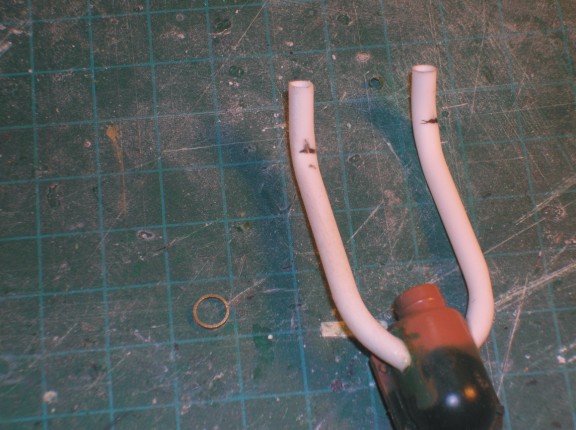
I was going to work on them to make them better but really, the pipes and the attachment point are not right so had to come up with a plan. I decided since the smaller cooling pipes actually are bent in 2 spots I wasn't going to try metal as it would really be hard to get 2 to match closely I think. So I opted for styrene tubes and used my trusty candle to slowly heat and bend the tubing till I got the 2 to look close. I am using the single exhaust and cut the pipe off to use the base.
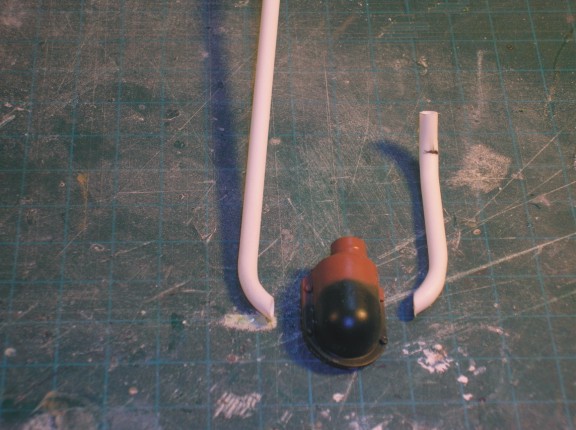
- Panther A 156.jpg (64.58 KiB) Viewed 4246 times
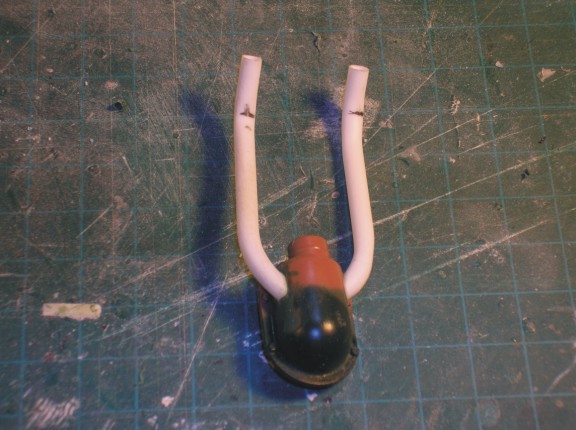
I drilled 2 holes in the side and made them oblong to fit the pipes in. I sealed them in place with 2 part epoxy so it will take some force to break them off.
- Panther A 157.jpg (64.79 KiB) Viewed 4246 times
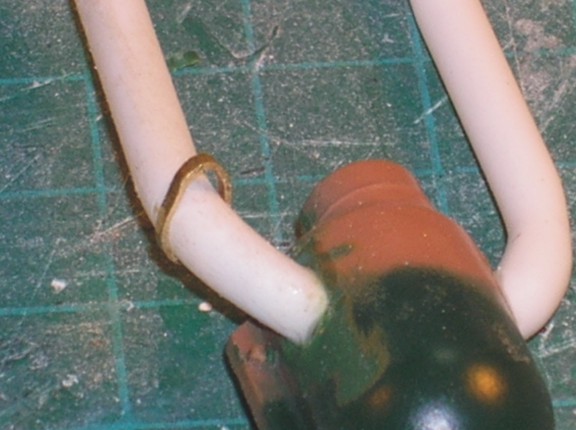
Next I wanted to add the flanges that are on the pipes where they change direction on the base so got some brass tube and cut it thin with dremel.
- Panther A 158.jpg (65.93 KiB) Viewed 4246 times
I used a slightly bigger diameter tube so I can simulate the flange coming out and will add a bolt head and nut to it late. So to do this you simply squeeze the ring with small needle nose pliers
- Panther A 160.jpg (55.66 KiB) Viewed 4246 times
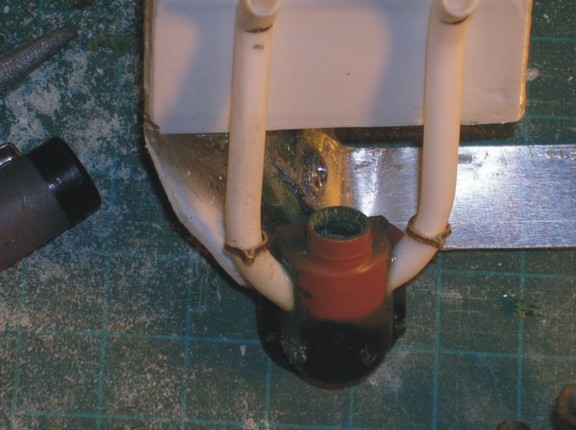
And then squeeze the front of the ring together and viola! you have a neat little flange and it is tight on the tube but just to make sure I did some dots of crazy glue under the ring.
- Panther A 161.jpg (59.54 KiB) Viewed 4246 times
- Panther A 162.jpg (57.26 KiB) Viewed 4246 times
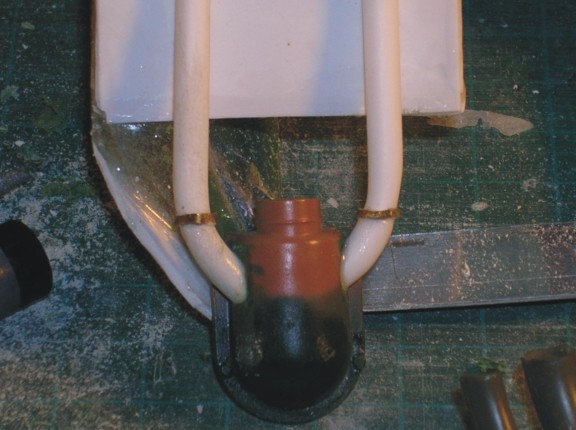
And here is how they compare. I still have to bend the large center brass tube. I think they should look pretty good once finished up...
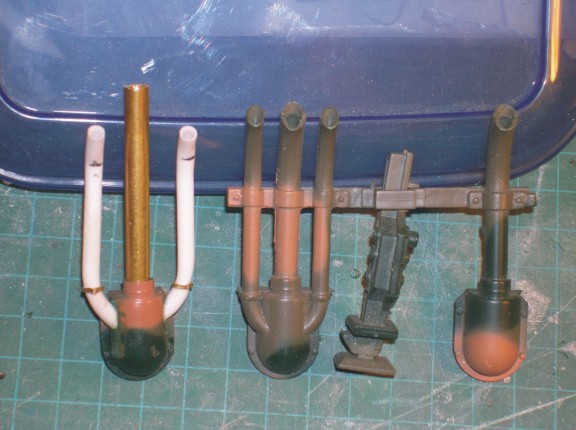
- Panther A 163.jpg (61.58 KiB) Viewed 4246 times
Re: Converting HL Panther "G" to a Late "A"
Posted: Sat Nov 08, 2014 9:24 am
by ALPHA
Going to throw up some nice smoke dgsselkirk... outstanding fabrication

ALPHA
Re: Converting HL Panther "G" to a Late "A"
Posted: Mon Nov 10, 2014 3:51 am
by dgsselkirk
Re: Converting HL Panther "G" to a Late "A"
Posted: Mon Nov 10, 2014 4:03 am
by PainlessWolf
Beautiful work! I don't see any problems with those. It is extra nice that they function but at that size I would share your concern if they were on a tank of mine. Following along.
regards,
Painless