1/16 Pz2 F - WIP

All things 3D printing. Printers, design, CAD, hints and tips, models built.
User avatar
Raminator
Warrant Officer 2nd Class
Posts: 1309
Joined: Tue Aug 11, 2015 9:57 am
Location: Newcastle, Australia

Re: 1/16 Pz2 F - WIP

Post by Raminator »

Coming together really nicely, having the flat armour sections on the build plate must get you to this stage pretty quickly! Great work, I'm looking forward to seeing a test drive!
ziddan wrote: Fri Apr 21, 2023 3:43 pm Thank you, no CAD here unfortunately, have tried to learn it twice but cant get on with the constraints and all the order of operations, im doing this by stupid brute forcing and eyeballing 3d models in Blender :P
In that case, you'll be ready to put the tank in animations once you're done modelling! :haha:

I had the opposite experience, I'd tried learning Blender (having had a passing familiarity with 3DS Max) but found it easier to pick up CAD. I agree the the parametric modelling stuff like you see in OpenSCAD is confusing and daunting, but I've found sketch-based CAD (having had previous experience using AutoCAD nearly 20 years ago) a lot more approachable. I use DesignSpark Mechanical, it's free software worth taking a look at if you're interested in dipping your toe into drawing. It's nice being able to have completely smooth curves rather than having everything faceted.
ziddan
Private
Posts: 56
Joined: Sun Mar 19, 2023 5:10 pm
Location: Just outside of Stockholm in Sweden.

Re: 1/16 Pz2 F - WIP

Post by ziddan »

Thanks, real happy with how its been going this far.

Cant do 3d animation either :P

Having a handle on parametrics and sketch based stuff would probably make this easier, possibly quicker too, in the long run.

One can get as close to smooth as makes no difference by using subdivisions and exports from a cad prog cant do any better as at some point both methods just explode in filesize without any gain in end product quality.

Working on the track links now, i have one i could multiply and print but i have a different solution else in mind.

Image

Gonna try casting them in pewter, mold making is annoying and messy so im having a try at doing the layout, sprues, venting and keying as well and a raised perimeter that will be the mold box integrated into the print so i effectively get two complete master halves from which i could then get the complete molds.

Print, UV cure, varnish, mold release, silicone, wait for it to cure, demold and then pretty much just pour the pewter.

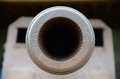
Ive closed off the holes for the track pins as those would make removal impossible and instead made guide indentations for drilling which should be fine with the flex of the silicone, figure that having the links still on the sprue should make the drilling relatively painless as it would make holding them easier as well as the sprue stabilizing the thin parts

Got no idea if it will work but i think im going to try doing four times whats in the pic, each cast would then give 16 links.
ziddan
Private
Posts: 56
Joined: Sun Mar 19, 2023 5:10 pm
Location: Just outside of Stockholm in Sweden.

Re: 1/16 Pz2 F - WIP

Post by ziddan »

Had a go at the "reverse" mold making i thought up, printing a "positive mold half" with gates, keys, venting, the model and an outline to make a mold box, just add silicone after curing and varnishing (to make sure the printer resin doesnt inhibit the silicone from curing, unless you have the right kind of silicone).

The process itself works well enough, very few air bubbles even though i dont have a vacuum/pressure chamber, no making a mold box, gluing stuff down, embedding in clay, putting in registration or cutting a solid chunk apart by hand.

The parts however seem to be too tiny, even after doing a few pours to let the molds get up to temp, i think id need to spin cast to fill these track links properly, or maybe make the gate taller/bigger so there is more pressure into the mold, im gonna try cutting air outlets from the bottom bit but i figured that since there are two ways down it should be ok.

Anyways, i thought id share since someone else might be interested.

Image

Ill be getting some screws in an hour or three so ill be able to put the road wheels on the chassi, been taking it pretty slow this week, finished up and printed the fenders+boxes and aerial mount that go on them, did the box on the back and the muffler, attached the tow hook.

Will add a pic when ive gotten the wheels on later today.
ziddan
Private
Posts: 56
Joined: Sun Mar 19, 2023 5:10 pm
Location: Just outside of Stockholm in Sweden.

Re: 1/16 Pz2 F - WIP

Post by ziddan »

For the moment the fenders are held to the lower hull and the details held on the fenders with screws, if there is space for the screw heads when tracks are on then they will stay, otherwise ill be replacing them with glue and pins that can be cut flush with the surfaces.

Image
User avatar
jee
Staff Sergeant
Posts: 949
Joined: Thu Apr 22, 2021 4:16 am
Location: Siberia
Contact:

Re: 1/16 Pz2 F - WIP

Post by jee »

ziddan wrote: Sat Apr 29, 2023 3:45 pm Had a go at the "reverse" mold making i thought up, printing a "positive mold half" with gates, keys, venting, the model and an outline to make a mold box, just add silicone after curing and varnishing (to make sure the printer resin doesnt inhibit the silicone from curing, unless you have the right kind of silicone).

The process itself works well enough, very few air bubbles even though i dont have a vacuum/pressure chamber, no making a mold box, gluing stuff down, embedding in clay, putting in registration or cutting a solid chunk apart by hand.

The parts however seem to be too tiny, even after doing a few pours to let the molds get up to temp, i think id need to spin cast to fill these track links properly, or maybe make the gate taller/bigger so there is more pressure into the mold, im gonna try cutting air outlets from the bottom bit but i figured that since there are two ways down it should be ok.

Anyways, i thought id share since someone else might be interested.

Image

Ill be getting some screws in an hour or three so ill be able to put the road wheels on the chassi, been taking it pretty slow this week, finished up and printed the fenders+boxes and aerial mount that go on them, did the box on the back and the muffler, attached the tow hook.

Will add a pic when ive gotten the wheels on later today.
This is very interesting. Curious how you melt the pewter etc. Is it possible to make some pictures of that?
Regards,
Jaap :wave:
ziddan
Private
Posts: 56
Joined: Sun Mar 19, 2023 5:10 pm
Location: Just outside of Stockholm in Sweden.

Re: 1/16 Pz2 F - WIP

Post by ziddan »

jee wrote: Sun Apr 30, 2023 4:48 am This is very interesting. Curious how you melt the pewter etc. Is it possible to make some pictures of that?
Sure, there really isnt much to it.

I put a small propane torch in my sink, a stainless steel deciliter measuring cup in a vice grip and those on top of a stainless bowl to get the height right, then just flame on ;)

Image
User avatar
jee
Staff Sergeant
Posts: 949
Joined: Thu Apr 22, 2021 4:16 am
Location: Siberia
Contact:

Re: 1/16 Pz2 F - WIP

Post by jee »

ziddan wrote: Sun Apr 30, 2023 5:12 am
jee wrote: Sun Apr 30, 2023 4:48 am This is very interesting. Curious how you melt the pewter etc. Is it possible to make some pictures of that?
Sure, there really isnt much to it.

I put a small propane torch in my sink, a stainless steel deciliter measuring cup in a vice grip and those on top of a stainless bowl to get the height right, then just flame on ;)

Image
ow, that looks nice, not too much expensive equipment involved :D
I was looking at a hot pot 2, but cant find it where I live
Regards,
Jaap :wave:
ziddan
Private
Posts: 56
Joined: Sun Mar 19, 2023 5:10 pm
Location: Just outside of Stockholm in Sweden.

Re: 1/16 Pz2 F - WIP

Post by ziddan »

jee wrote: Sun Apr 30, 2023 5:30 am not too much expensive equipment involved :D
Yeah its very minimal and very cheap, good for small stuff and experimenting but if you want to be casting a lot i think something like the hot pot might be a worthwhile investment.

A DIY variant ive seen is to weld or silver solder a small crucible to a tip for a strong soldering iron and making a stand for it, if its a good soldering iron you will have temperature control built in.
User avatar
jee
Staff Sergeant
Posts: 949
Joined: Thu Apr 22, 2021 4:16 am
Location: Siberia
Contact:

Re: 1/16 Pz2 F - WIP

Post by jee »

ziddan wrote: Sun Apr 30, 2023 6:04 am
jee wrote: Sun Apr 30, 2023 5:30 am not too much expensive equipment involved :D
Yeah its very minimal and very cheap, good for small stuff and experimenting but if you want to be casting a lot i think something like the hot pot might be a worthwhile investment.

A DIY variant ive seen is to weld or silver solder a small crucible to a tip for a strong soldering iron and making a stand for it, if its a good soldering iron you will have temperature control built in.
Thanks for the tip!
Regards,
Jaap :wave:
ziddan
Private
Posts: 56
Joined: Sun Mar 19, 2023 5:10 pm
Location: Just outside of Stockholm in Sweden.

Re: 1/16 Pz2 F - WIP

Post by ziddan »

Decided id rather keep building than experimenting with casting so ive started printing track links, soo many links.

Printing 48 per plate, takes about 40 minutes.
Image

The supports are only on the underside, doesnt leave a perfect surface but with a bit of weathering it should look like rust and mud, they come off the support very easily, just running a knife under them.

After cleaning, removing supports and curing they get put together using thin wire, ill be applying PVA glue to the pins on under the tank and that should hopefully hold them in.

Image

Dunno if i mentioned earlier but ive ordered Baldock shield PCBs and i think all of the components i will need for two or three of them, should hopefully be here in the coming week.
Post Reply

Return to “3D Printing”