Page 2 of 5
Re: Make one 1/16 sd.kdz.234/2 PUMA
Posted: Sat Mar 11, 2023 12:31 am
by tankme
Well I just purchased the IS-3 files and I think I've got all the ones on Thingiverse. Now I just need the time to print and build them.

Derek
Re: Make one 1/16 sd.kdz.234/2 PUMA
Posted: Wed Mar 15, 2023 10:58 am
by USSR1991
- IMG_20230315_185710.jpg (1.77 MiB) Viewed 1694 times

- IMG_20230315_185651.jpg (2.24 MiB) Viewed 1694 times

- IMG_20230315_185645.jpg (1.7 MiB) Viewed 1694 times
I only received part of the mail, and the rest will arrive in a few days
Fortunately, all the electronic equipment has been sent. I tested it and found no problem
Re: Make one 1/16 sd.kdz.234/2 PUMA
Posted: Sat Mar 18, 2023 4:01 pm
by USSR1991
Re: Make one 1/16 sd.kdz.234/2 PUMA
Posted: Sat Mar 18, 2023 4:22 pm
by USSR1991
According to my calculation, the weight of my PUMA fully loaded (including batteries and various electronic systems) is 1.2-1.4KG. In fact, I believe that 1/16 RC tanks should not be too heavy, and lighter weight can ensure lower costs. Moreover, due to the lighter load of the vehicle, reliability will also be greatly improved.
Re: Make one 1/16 sd.kdz.234/2 PUMA
Posted: Sun Mar 19, 2023 1:35 pm
by USSR1991
Re: Make one 1/16 sd.kdz.234/2 PUMA
Posted: Sun Mar 19, 2023 8:53 pm
by tankme
This is a really nice project.
Re: Make one 1/16 sd.kdz.234/2 PUMA
Posted: Tue Mar 21, 2023 7:18 pm
by Ecam
I am really impressed with the project. I'd call it a scratch build just with CAD and a printer instead of card and glue.
Re: Make one 1/16 sd.kdz.234/2 PUMA
Posted: Thu Mar 23, 2023 3:21 am
by Herr Dr. Professor
Another fine quality of this project is the neatness of the design, the fitments, even the printing.
Re: Make one 1/16 sd.kdz.234/2 PUMA
Posted: Thu Mar 23, 2023 12:41 pm
by Will01Capri
Looks really very good, excellent work
Would love to see some running videos aswell
Re: Make one 1/16 sd.kdz.234/2 PUMA
Posted: Thu Mar 23, 2023 4:55 pm
by USSR1991
- IMG_20230324_004708.jpg (109.31 KiB) Viewed 1525 times
- IMG_20230324_004719.jpg (69.32 KiB) Viewed 1525 times
- IMG_20230324_004722.jpg (77.1 KiB) Viewed 1525 times
- IMG_20230324_004731.jpg (85.53 KiB) Viewed 1525 times
- IMG_20230324_004742.jpg (108.57 KiB) Viewed 1525 times
- IMG_20230324_004750.jpg (76.54 KiB) Viewed 1525 times

- IMG_20230324_004817.jpg (135.44 KiB) Viewed 1525 times
- IMG_20230324_004825.jpg (81.8 KiB) Viewed 1525 times
- IMG_20230324_004848.jpg (124.13 KiB) Viewed 1525 times
- IMG_20230324_004940.jpg (141.23 KiB) Viewed 1525 times
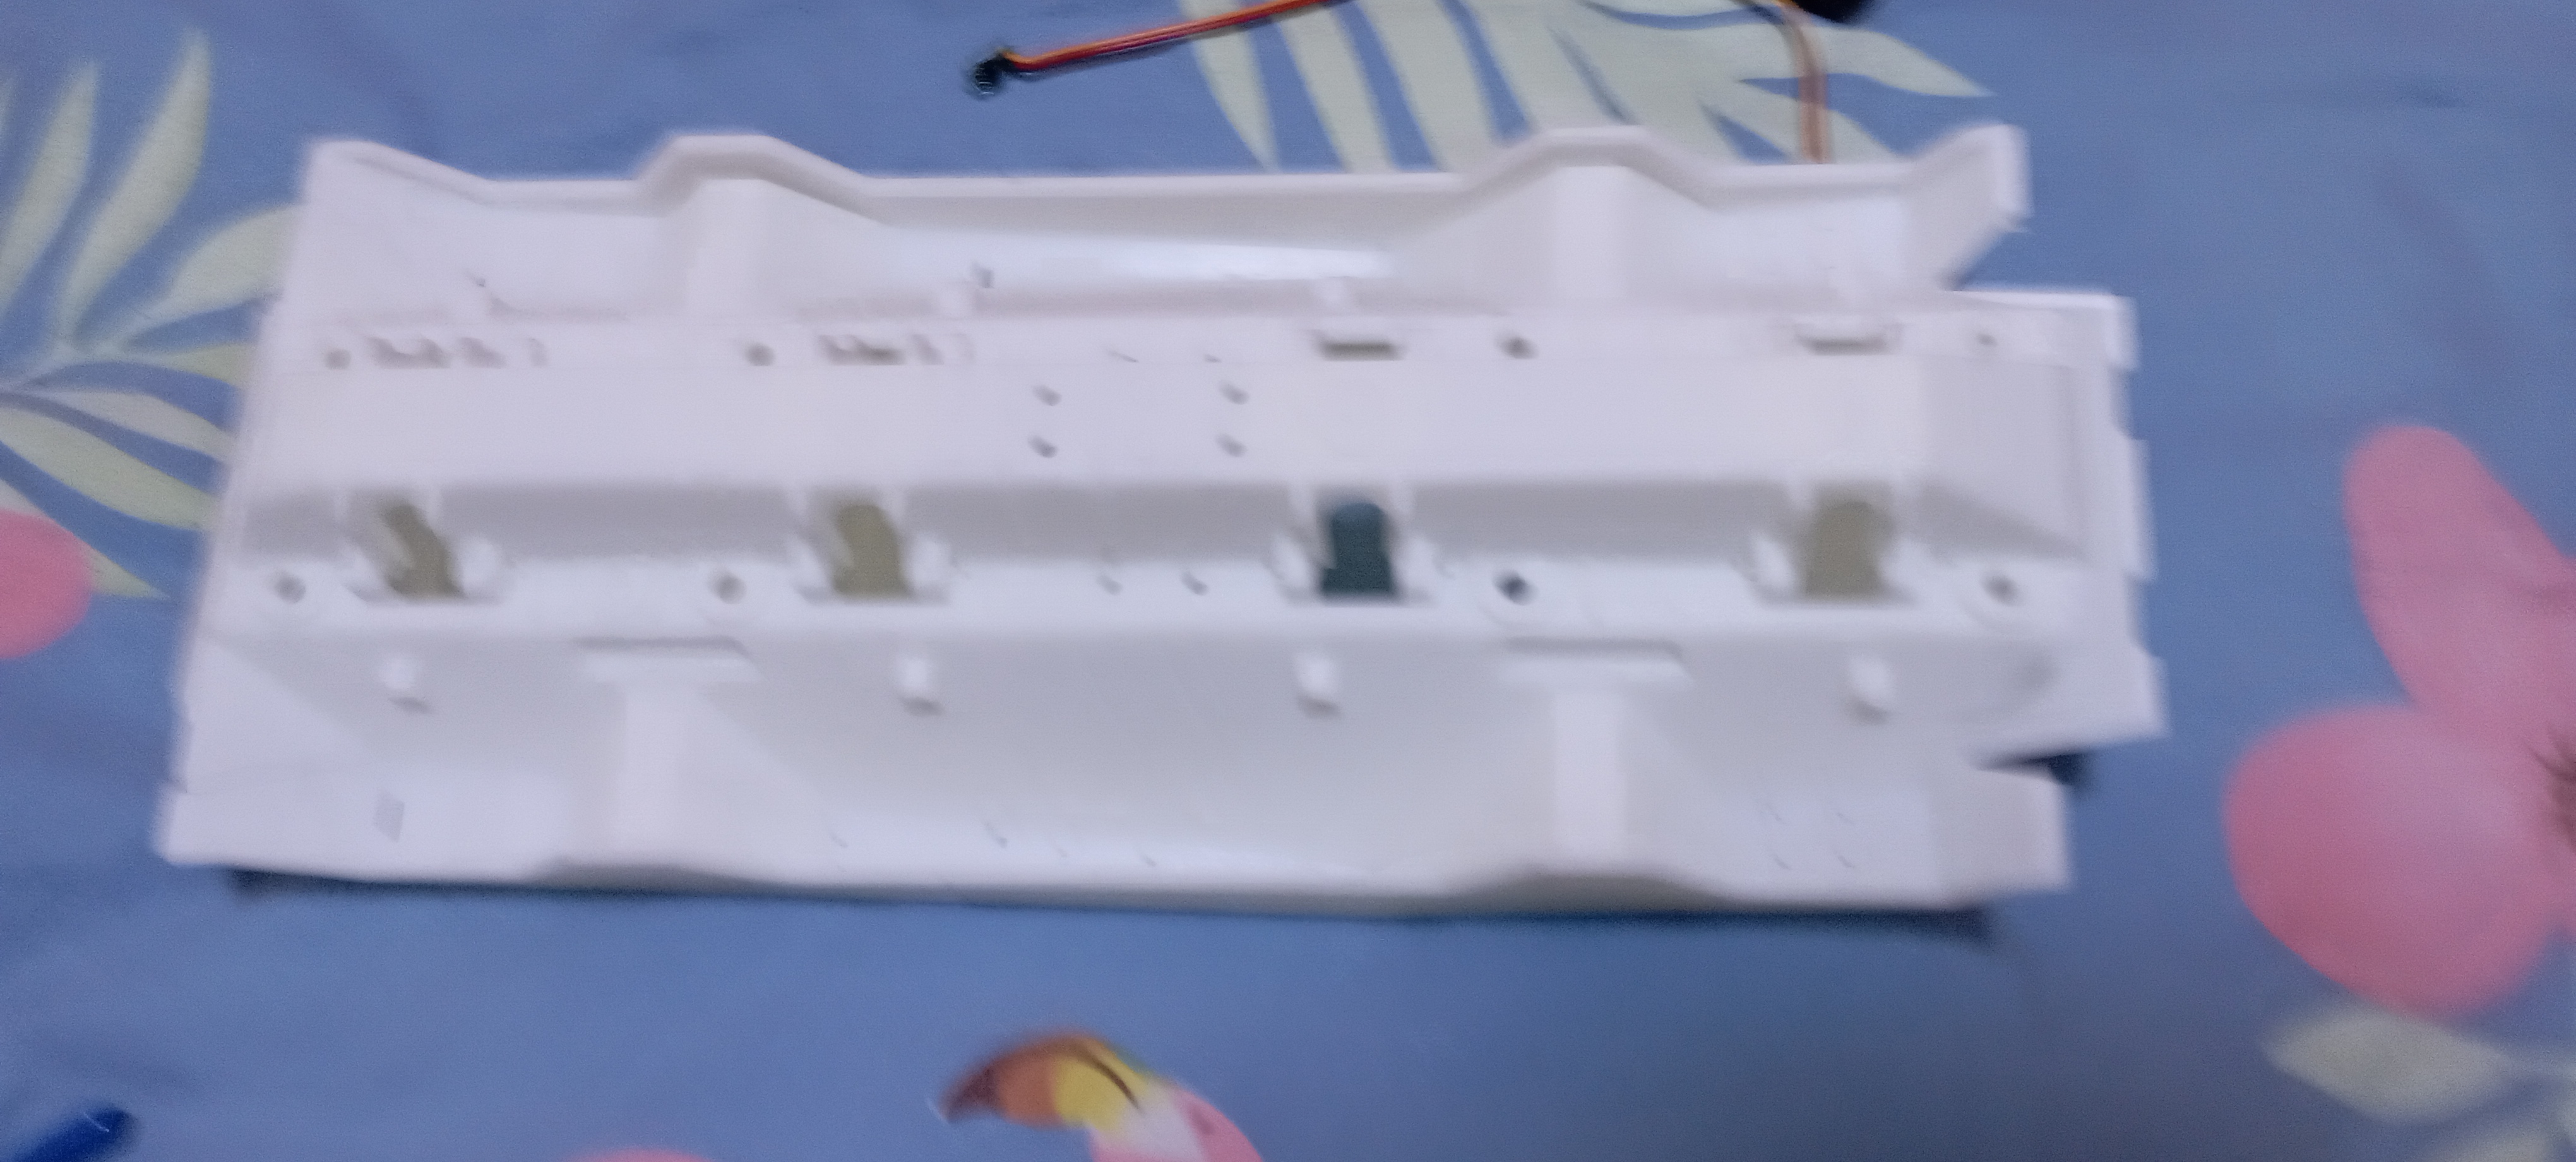
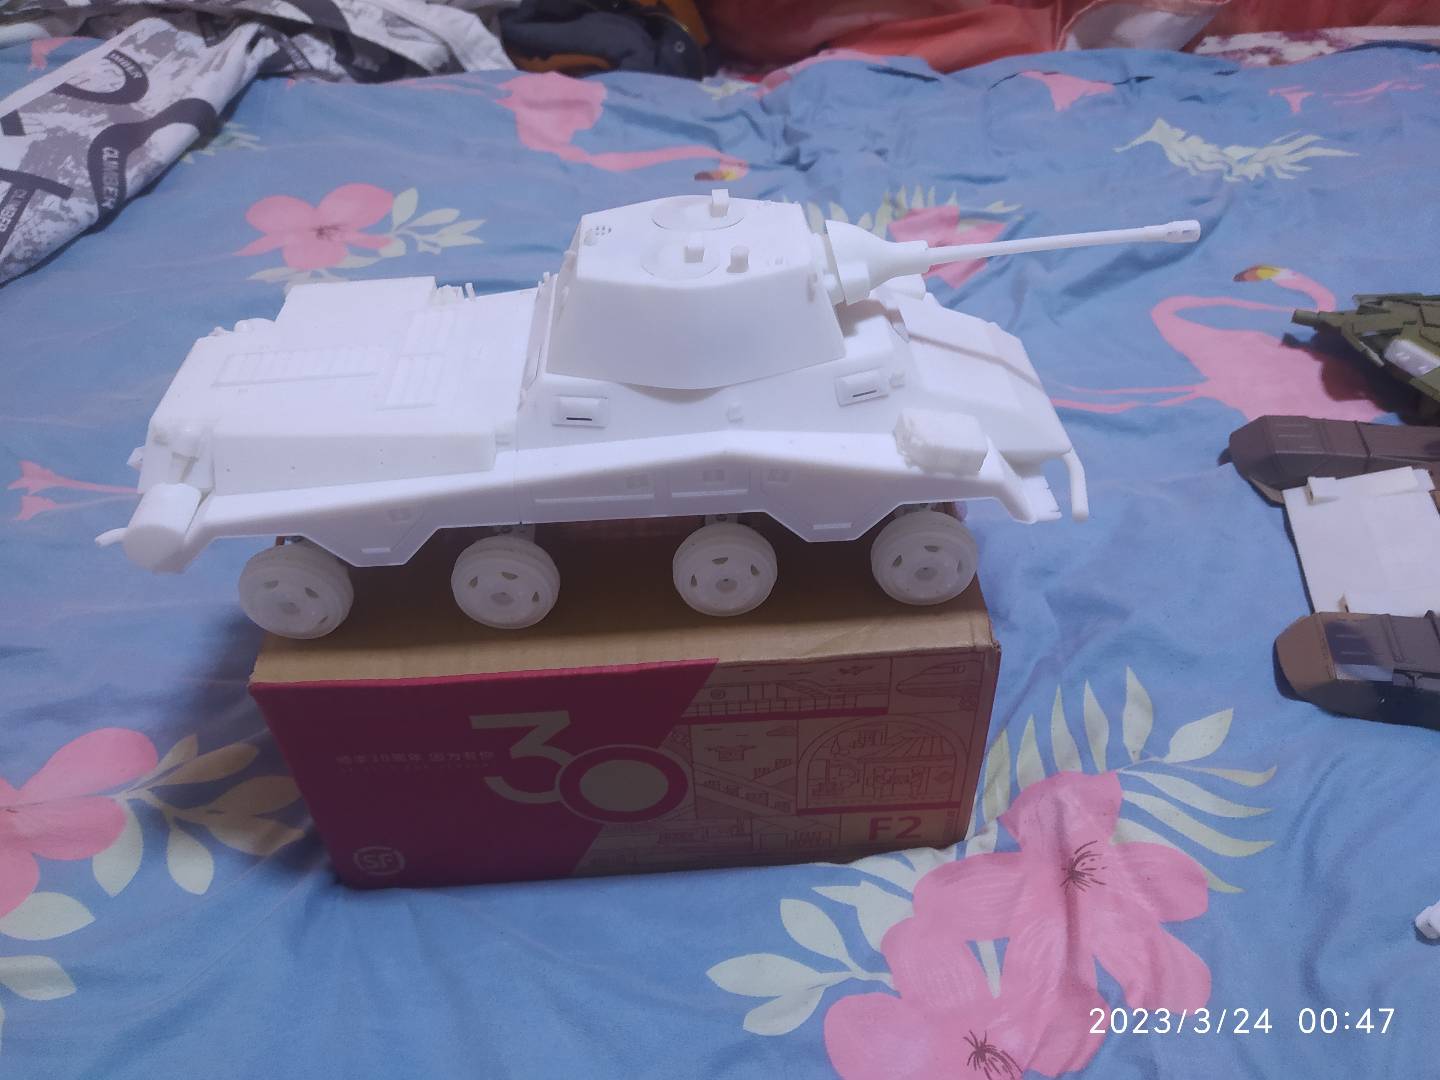
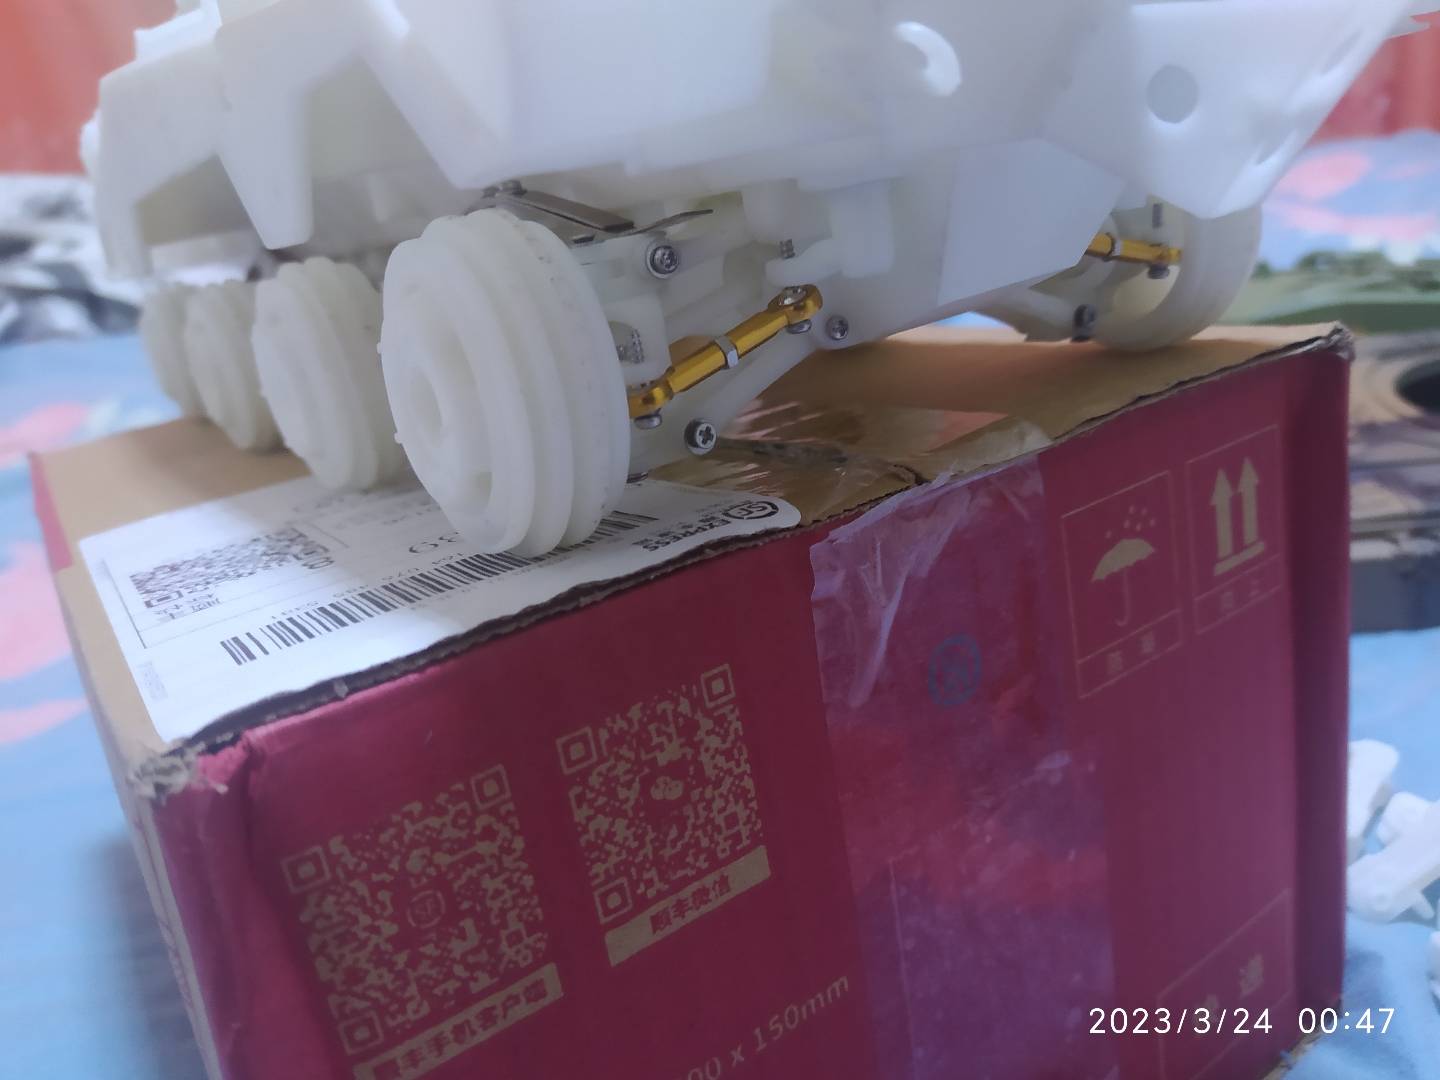
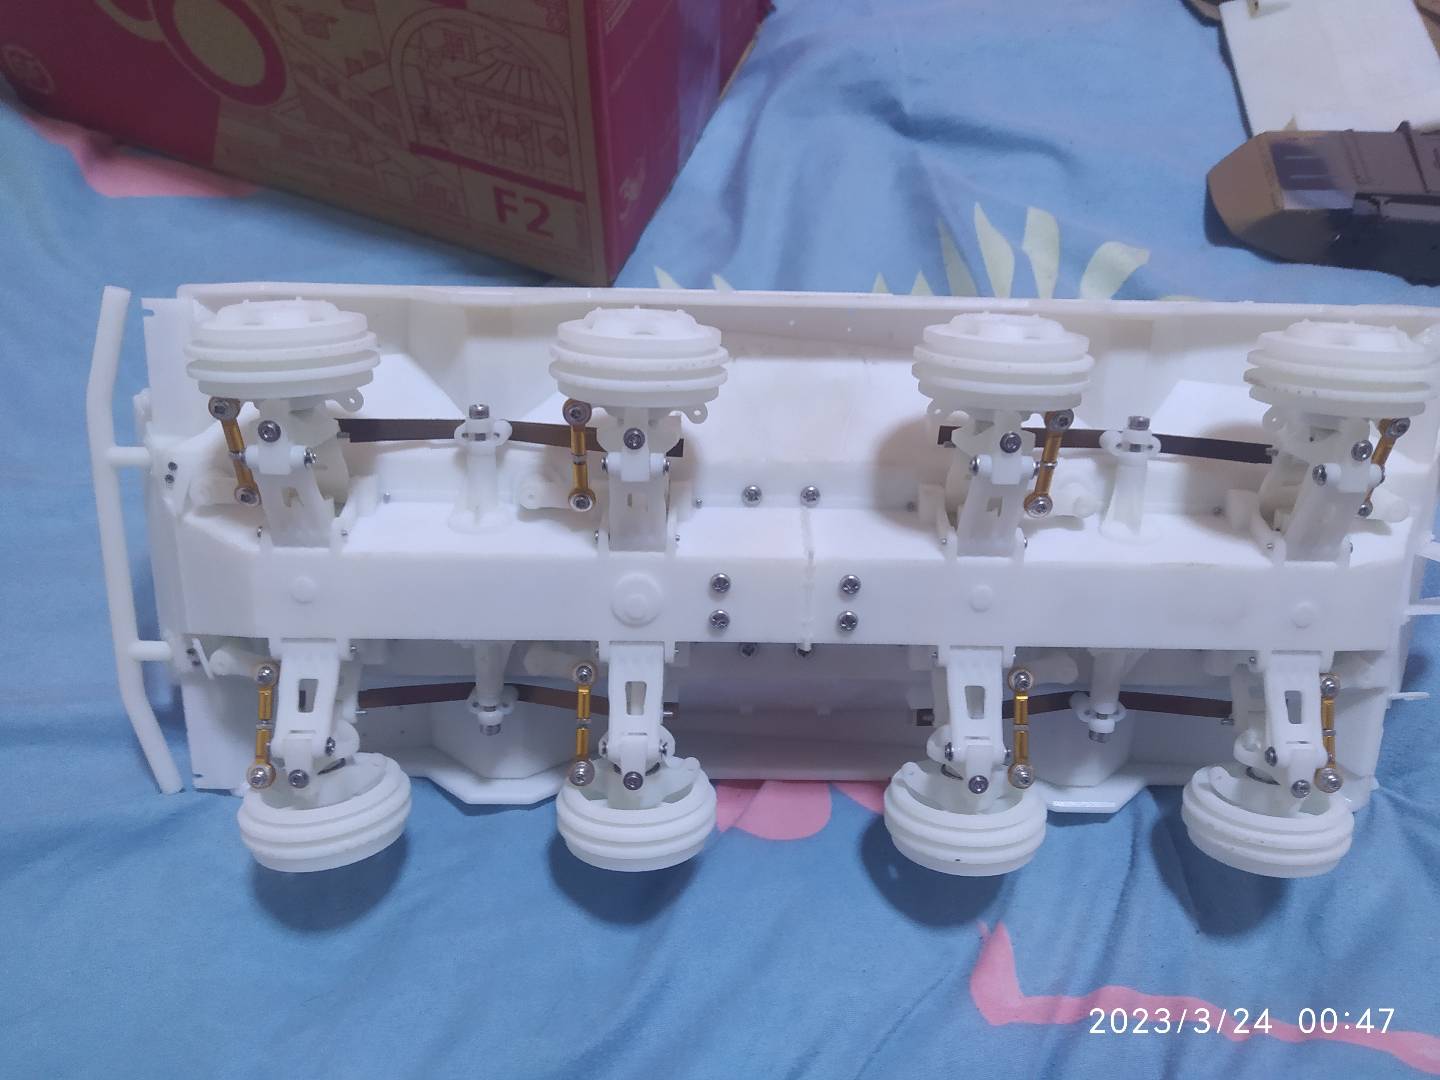
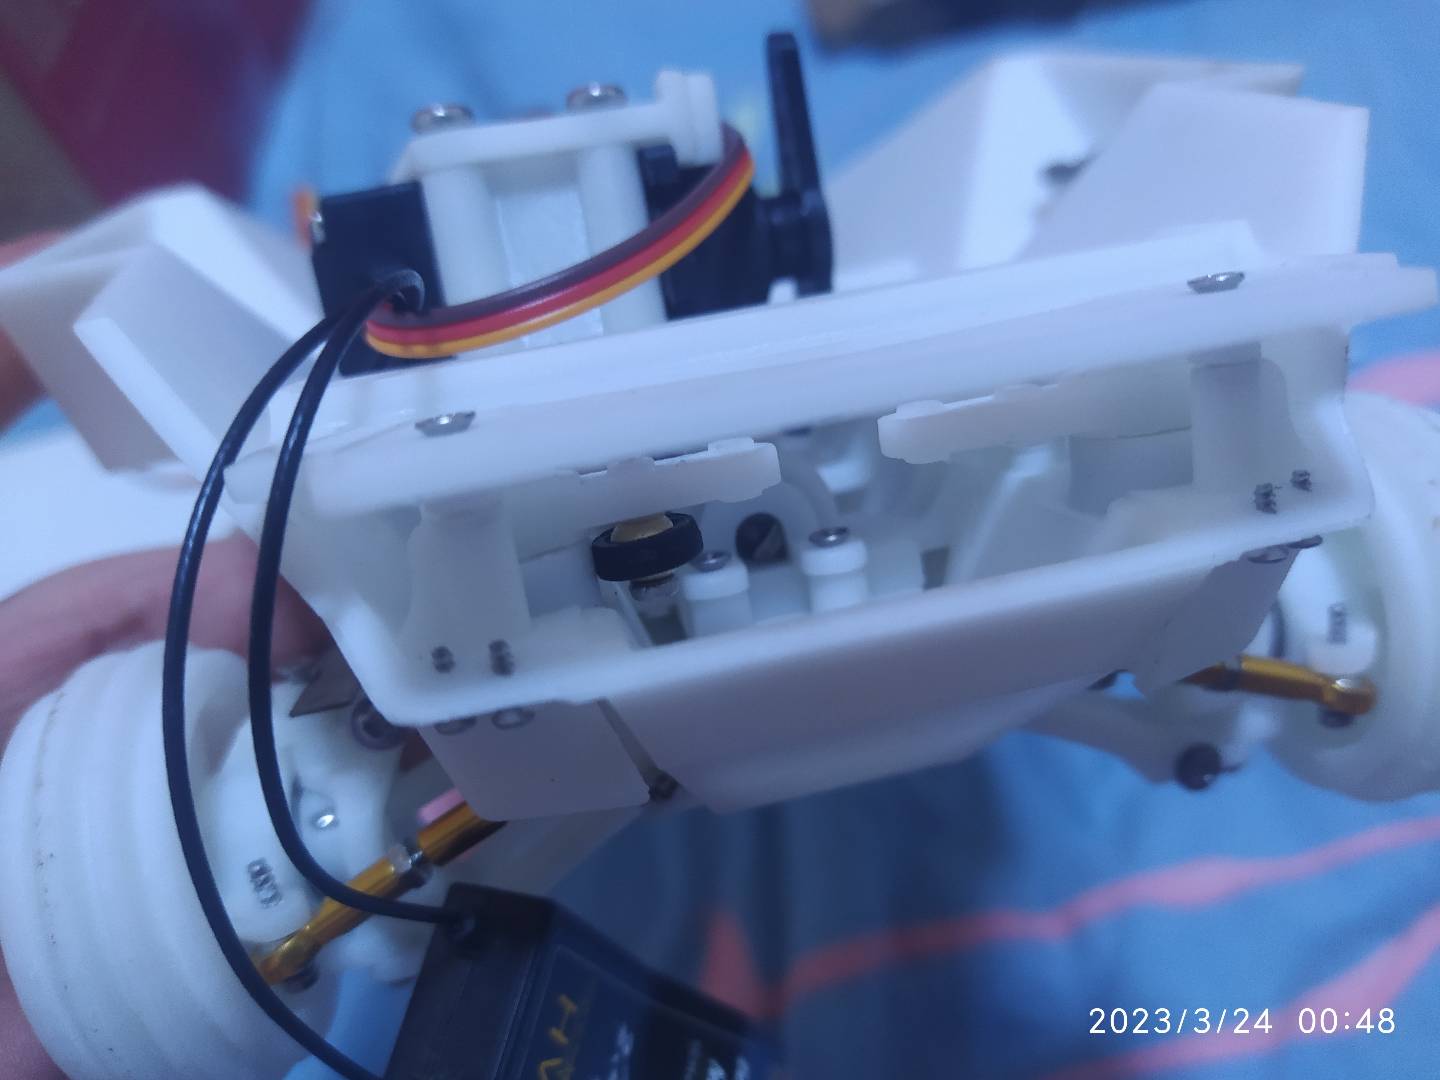
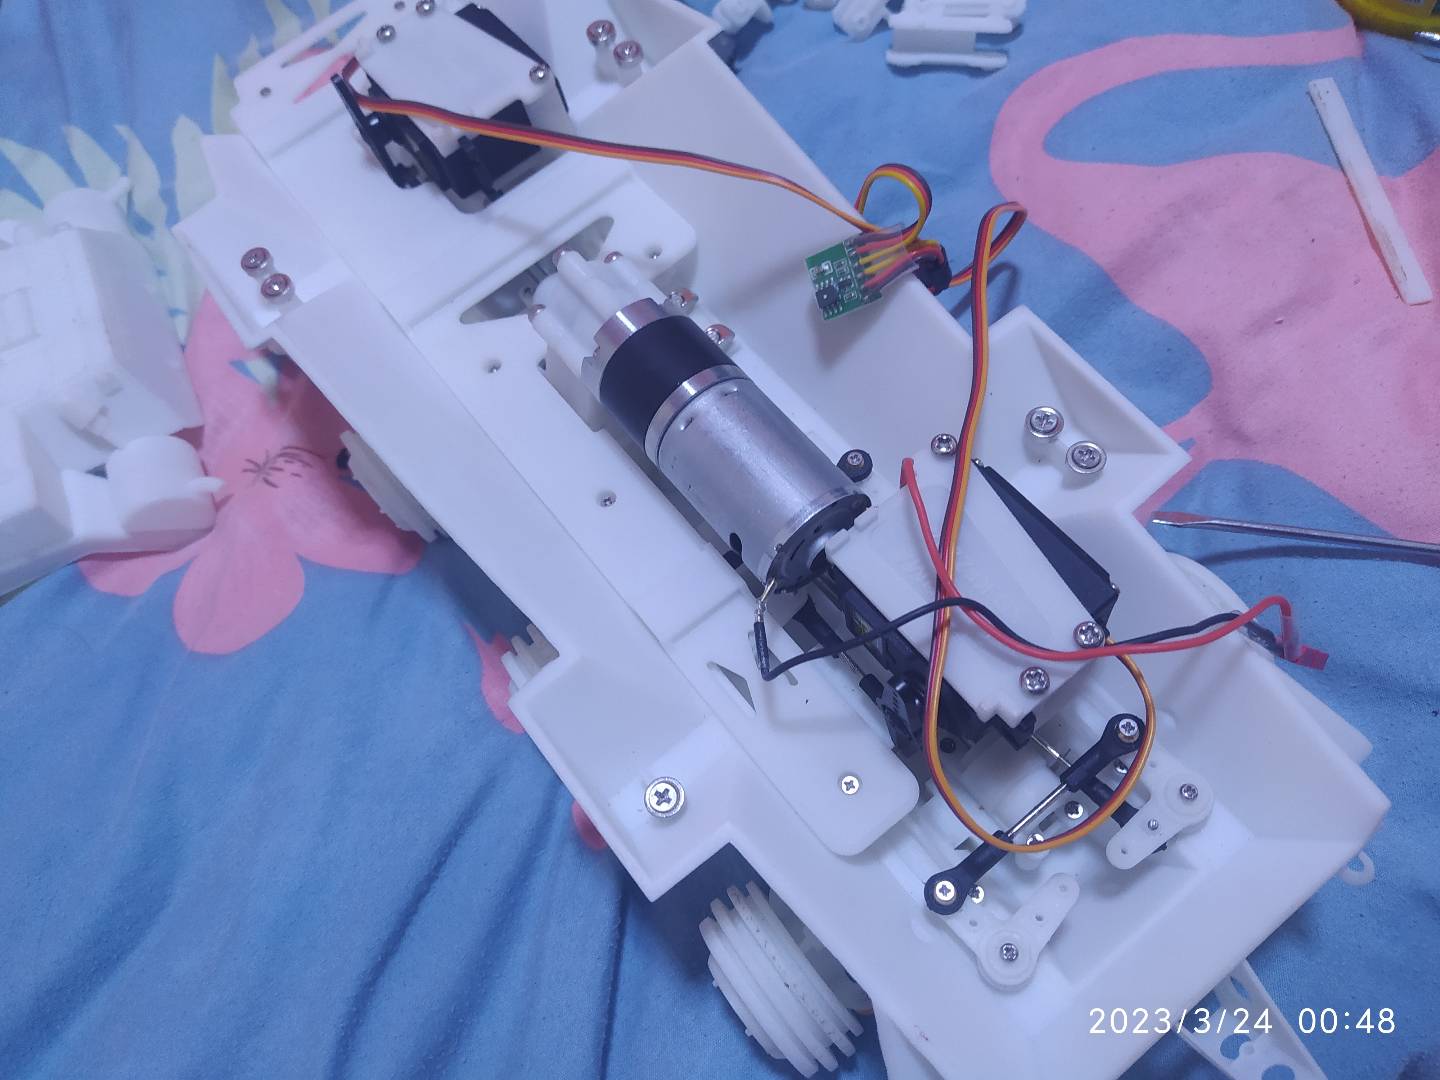
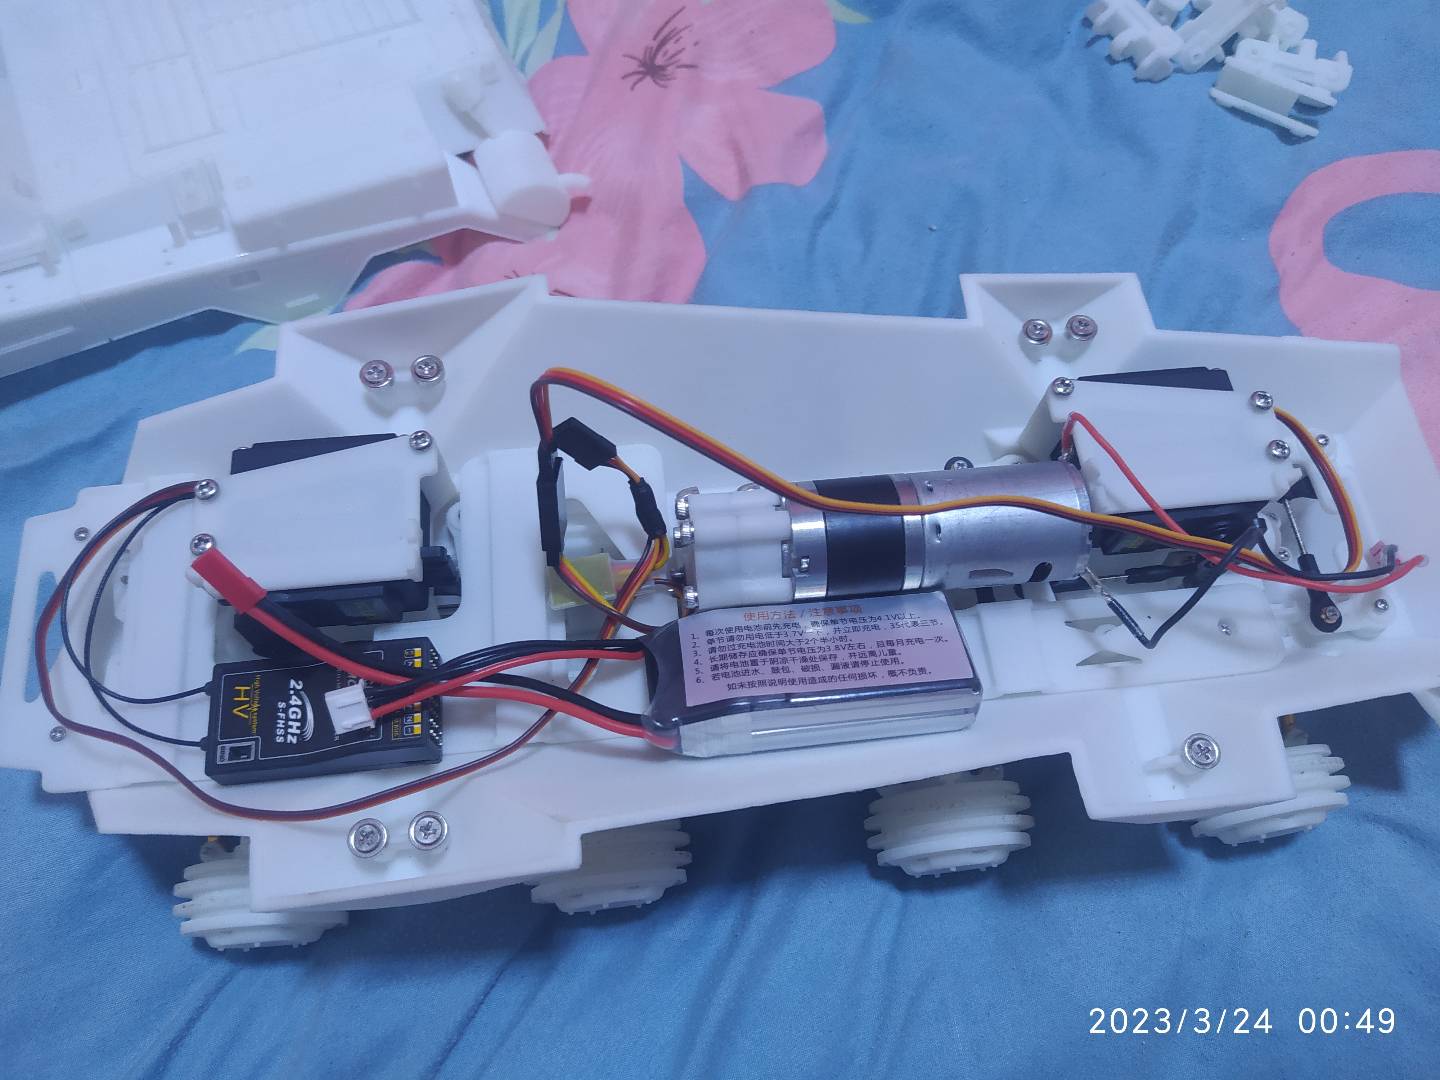
Due to the fact that the lower part of the chassis of PUMA is too narrow and the middle part is filled with mechanical structures, it is necessary to create a platform on the chassis for fixing electronic equipment.At the same time, the triangular cutout on the platform can fix the wires. Because in my experience, sorting out the wires inside the model is very troublesome.
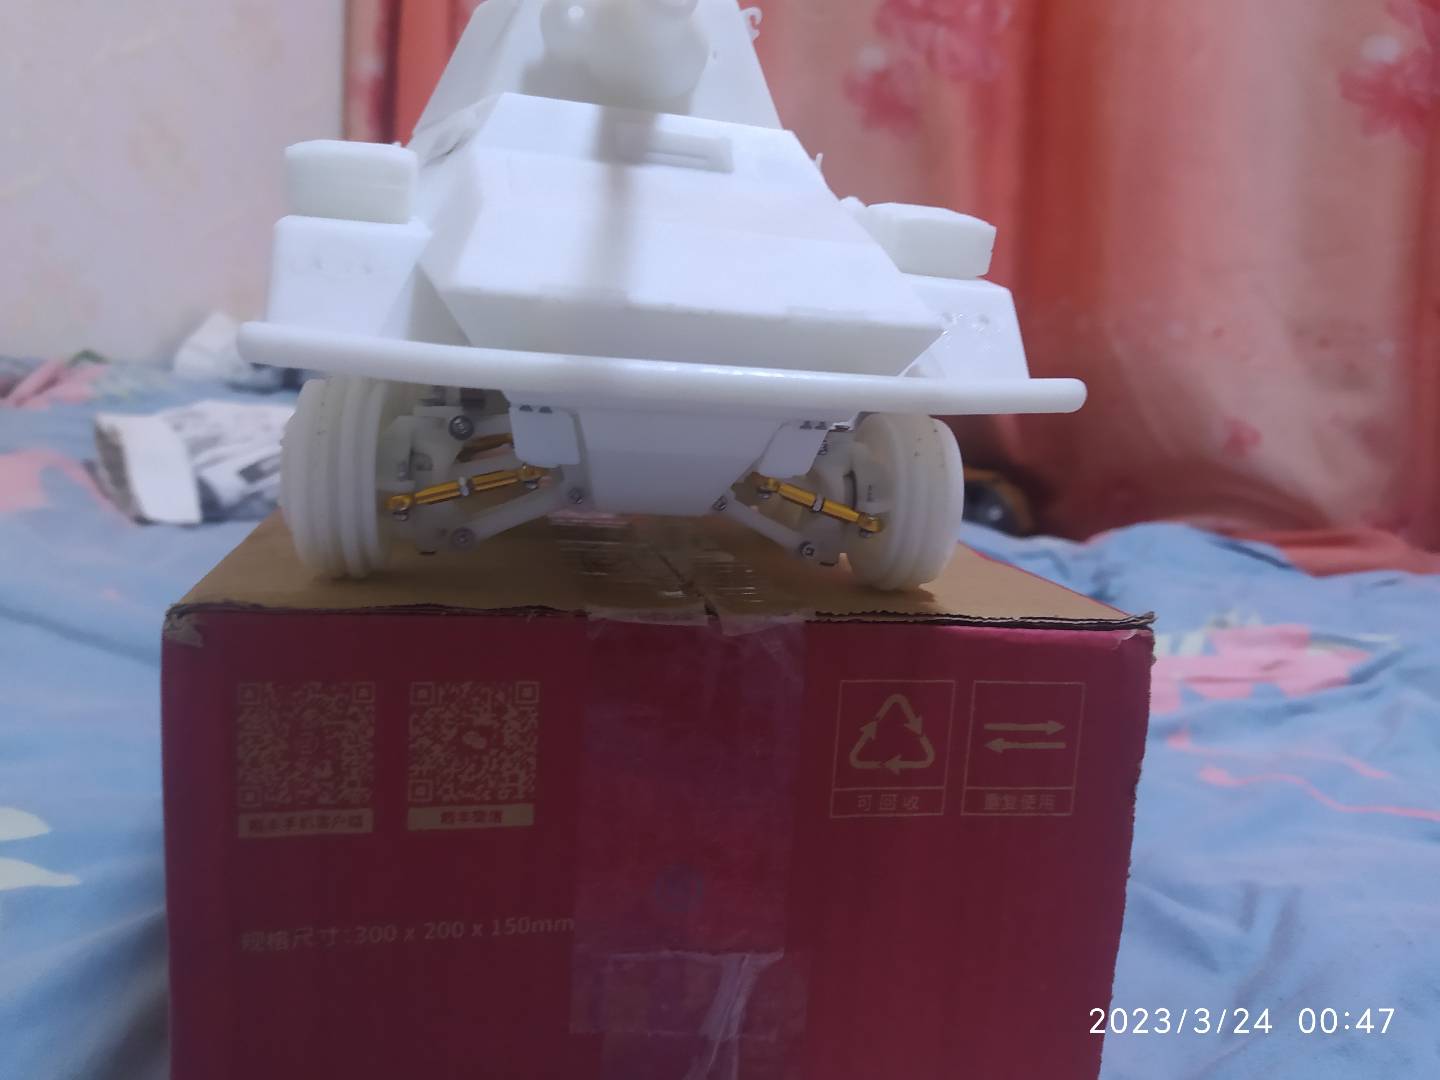
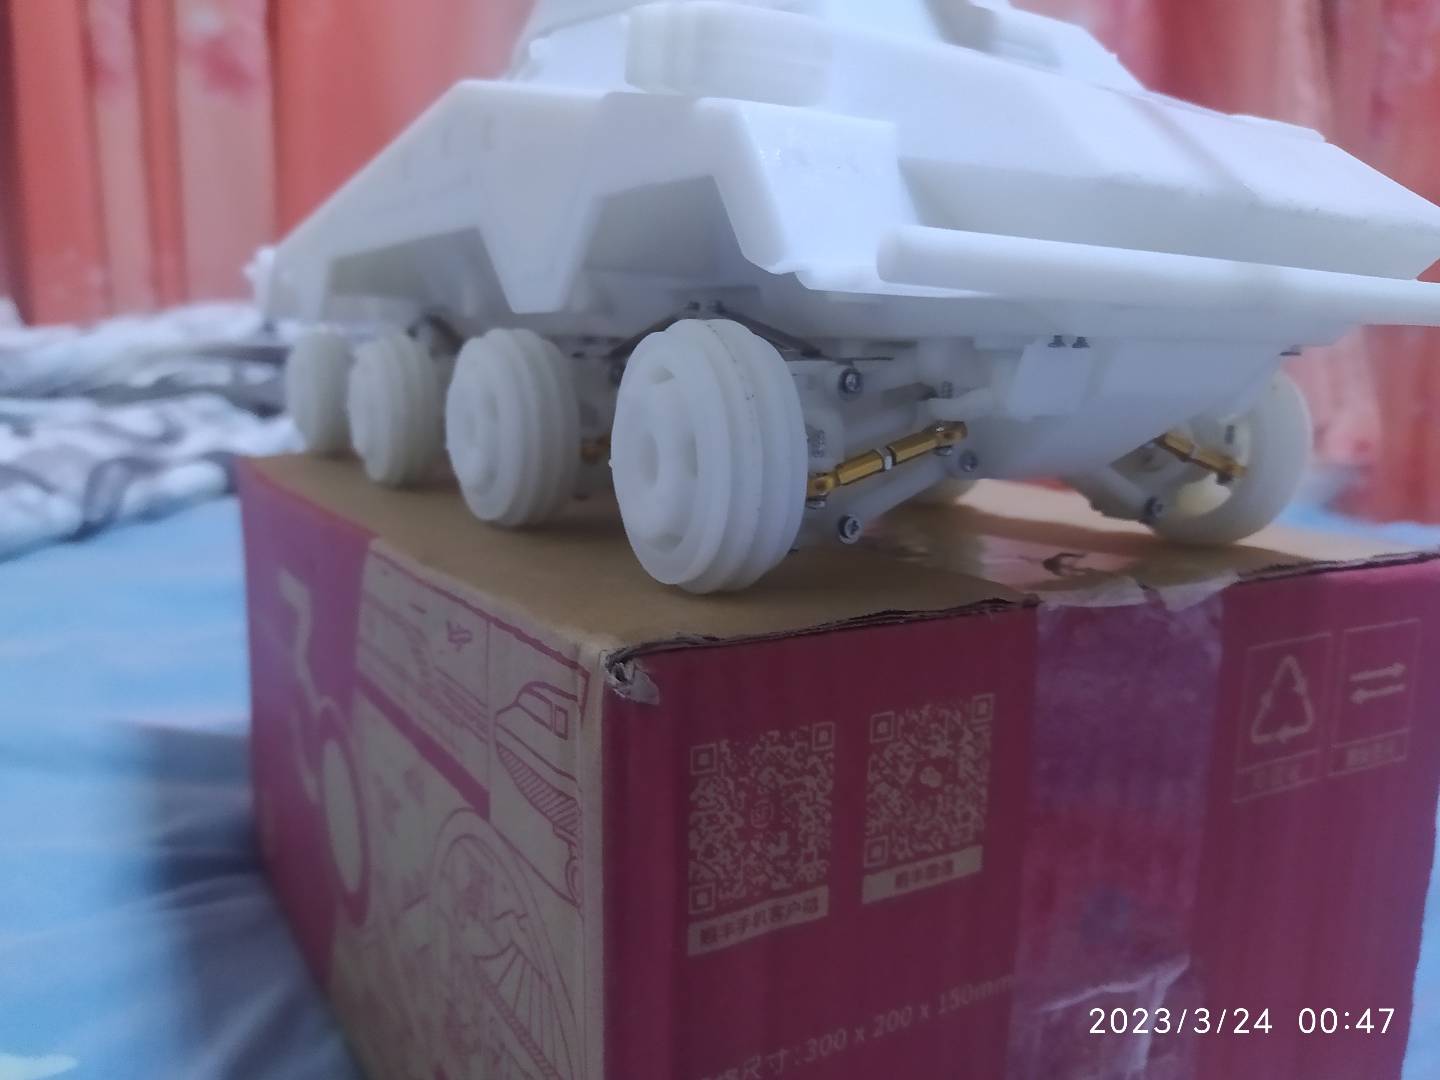
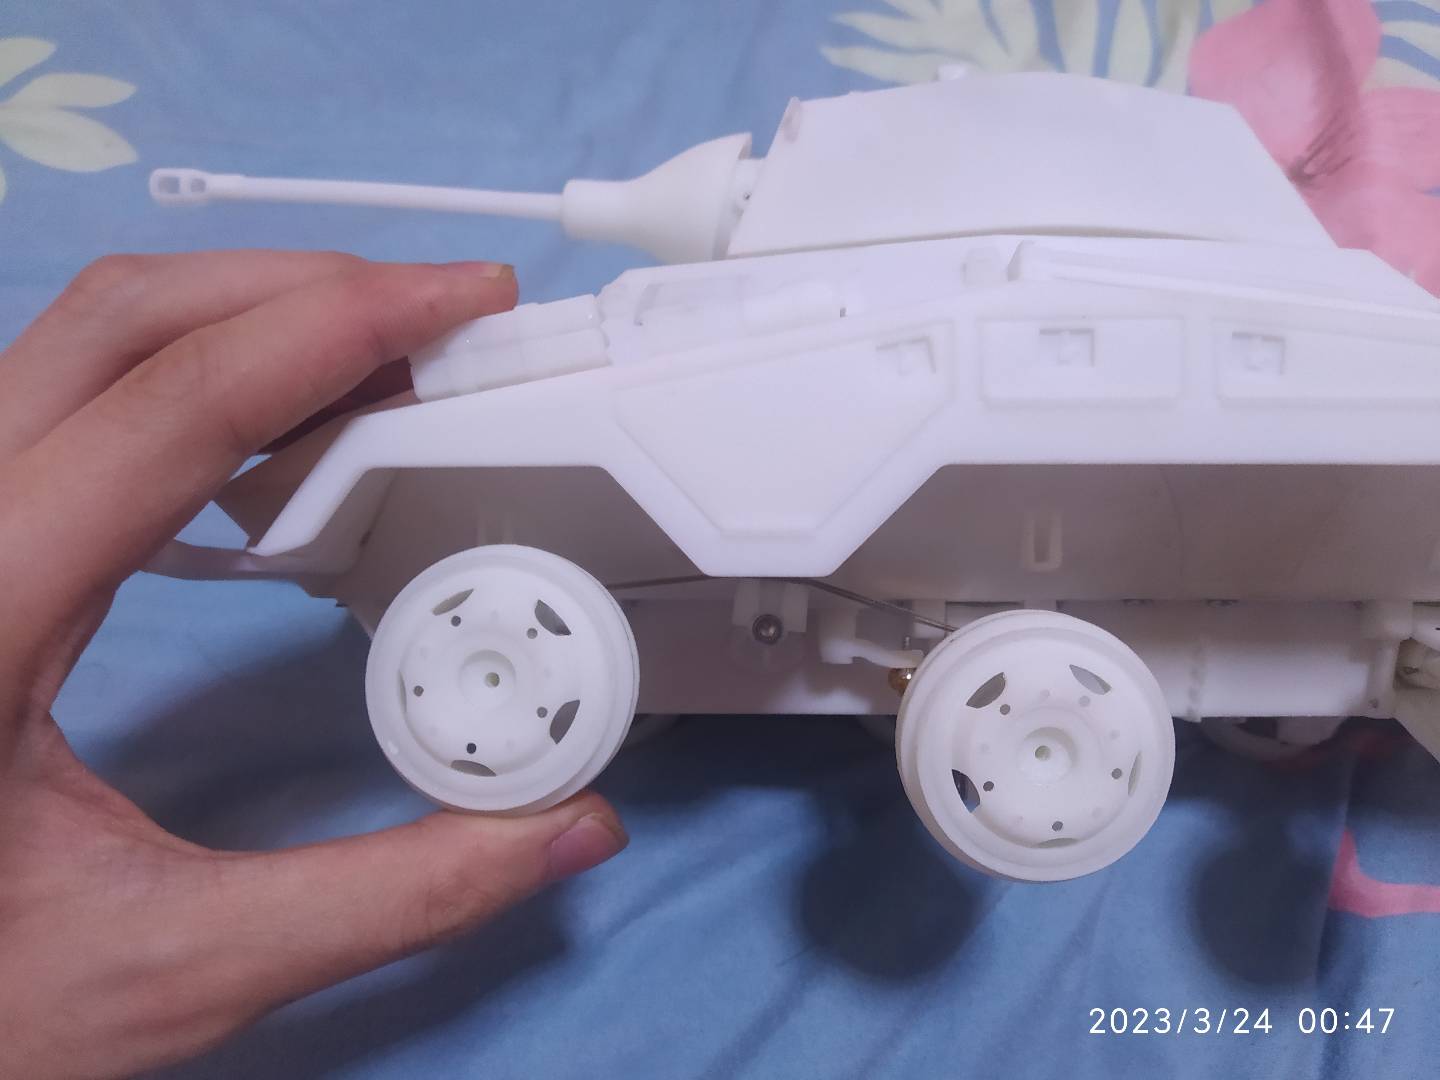
I powered on and tested that the suspension and steering parts worked well. However, due to the low voltage, the power of the motor is weak, and the driving speed on flat ground is very slow. Therefore, I purchased a new 3S lithium battery, a new electronic governor, and a step-down module. Since the main board can only use 7.2 volts, I first need to connect the electrical regulator and step-down module responsible for the main motor in parallel. This way, the system responsible for advancing has a voltage of 12V, while the rest of the system is still 7.2V