Hi,
For those who might be tempted to build ab A7V, be aware that of the 20 build, it seems that each are not totally identical, so for accuracy, it is essential to pick one vehicle from the start as reference and stick to it.
While looking at references, i noticed a main difference between two pictures of A7V. Some, like these two below have separate armored plates on the sides with tons of rivets.
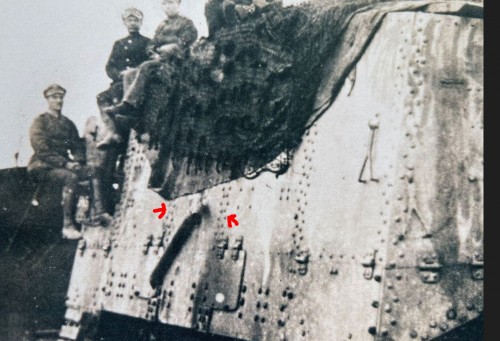
- A7V German WW1 tank 1/16 RC - Build
The lines of rivets are clearer on this picture.
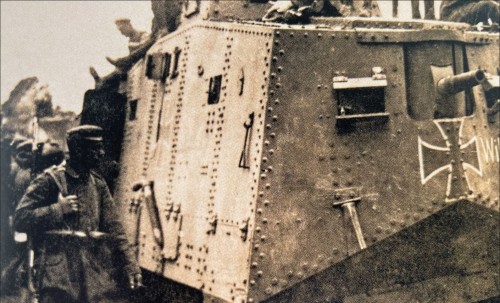
- A7V German WW1 tank 1/16 RC - Build
This one has no rivets in the middle and the the armor seems to be a single plate. So, there are A7V variations.
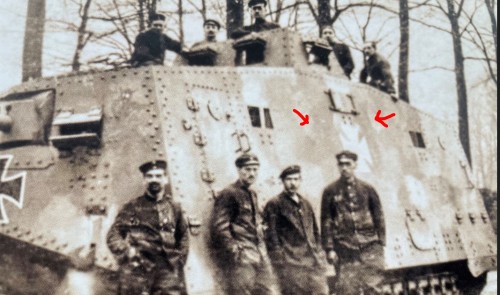
- A7V German WW1 tank 1/16 RC - Build
Through my books, i discovered that there were 3 main batches of A7V.
The first 5 vehicles are called First Lot Rochling. They have the single side armored plate
Next batch of 5 vehicle are called First Lot Krupp. They gave the 5 separate plates
Next batch of 10 vehicles are called Second Lot and have Rochling single plate armor.
The Meng 1/35 kit used as main reference is obviously a First Lot Krupp with separate armored plates. My model will therefore be a First Lot Krupp.
I created two new side armored plates in 1.5mm polystyrene that better match the thickness of the A7V armor, while still being firm enough. All measurements and angles were taken from the Meng kit. There is a right and left side. Although it is not obvious, the angles and dimensions of the A7V are not identical between the front and the back sections.
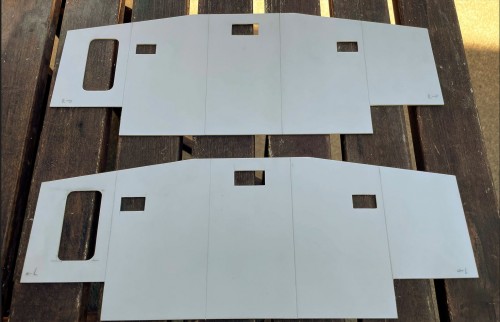
- A7V German WW1 tank 1/16 RC - Build
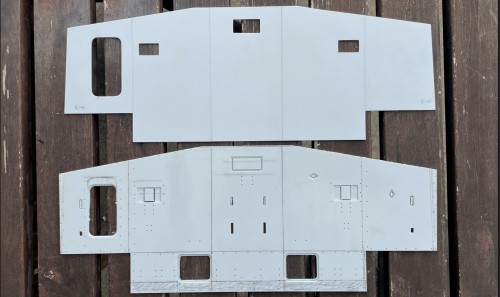
Comparison of one of the new side armor with the Ludwig kit at the bottom, which is a Rochling vehicle, and has some issues with shapes, number and placements of rivets and other items.
- A7V German WW1 tank 1/16 RC - Build
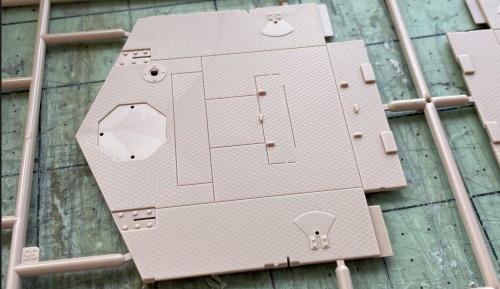
For planning purposes for the interior, i created the floor of the vehicle in the front section. The treadplate lozenge pattern matches the one seen on the Meng kit and also pictures of Mephisto.
- A7V German WW1 tank 1/16 RC - Build
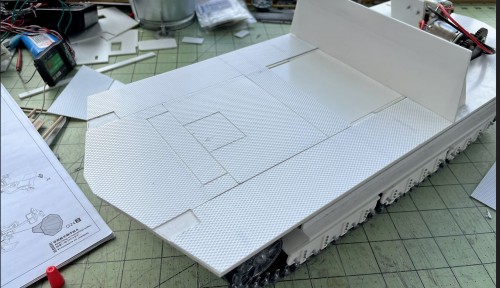
The central section is where the raise platform is for the drivers. The back that holds the gearbox and electronics will not have a detailed interior.
- A7V German WW1 tank 1/16 RC - Build
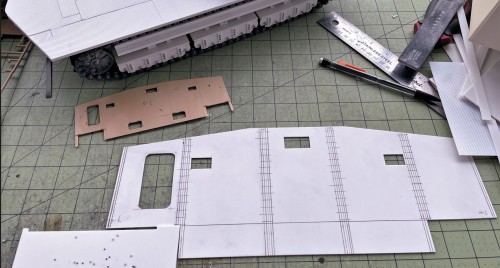
Planning and measurements for the rivets take a while. There are about 450 rivets of at least 5 different types on a single sides, each one requiring analysis, measurements and placement. Because i am no longer using the Ludwig side armor, i cannot use the holes to insert resin or metal rivets, as i had planned. I therefore need to use Meng nuts because i do not want to drill so many holes.
- A7V German WW1 tank 1/16 RC - Build
I bought 6 packs of Meng SPS009 rivets. Not sure i have enough for the interior. I will need to order 2 or 3 more packs.
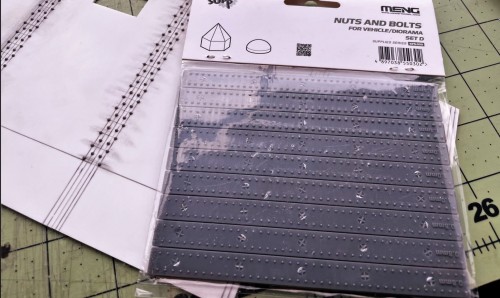
- A7V German WW1 tank 1/16 RC - Build
Each need to be cut from the sprue with a new blade, picked up with the tip of the blade, soaked in superglue and placed.
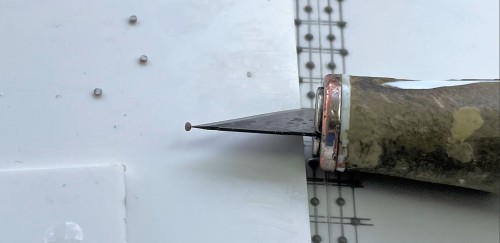
- A7V German WW1 tank 1/16 RC - Build
continuing on following post