Page 2 of 2
Re: Taigen Panther F - internal layout
Posted: Tue Sep 12, 2017 11:23 am
by bfrank1982
maxmekker wrote:Just kept the Stock motor and rewired it to fit the 9pin wire coming from top hull ( tap into the correct wires )
8p.jpg
OK. Since I dont know much about electronics.
Do you think it will possible to use a servo instead?
Sendt fra min HUAWEI VNS-L31 med Tapatalk
Re: Taigen Panther F - internal layout
Posted: Tue Sep 12, 2017 11:37 am
by maxmekker
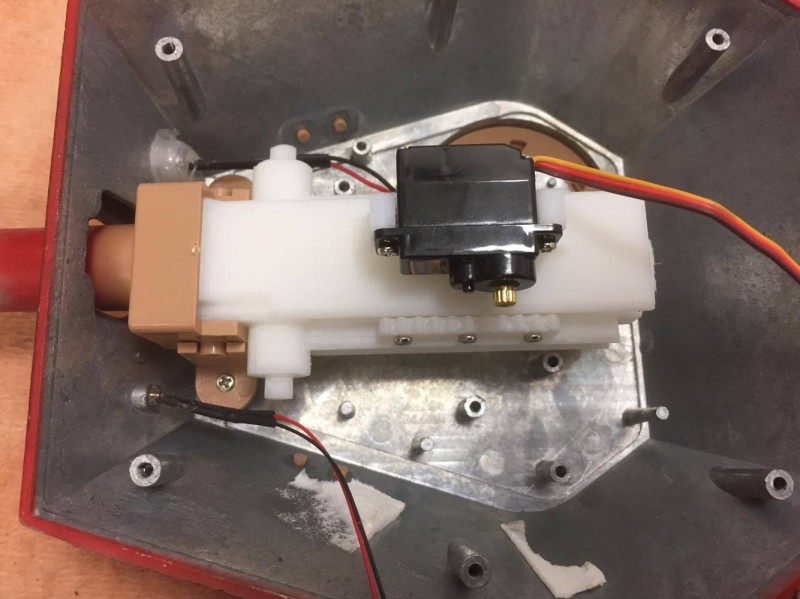
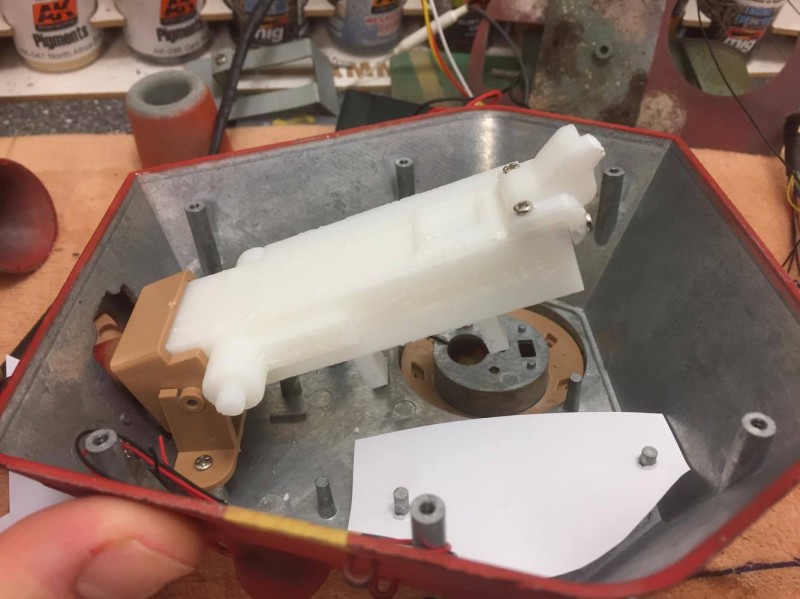
sure.
just need to find a clever way to attach it to the barrel . and plug the servo inti the elevation port of whatever Board you choose to run in the tank .
a recoil unit of the 'universal type also, might slip in With some work .
- cfd6d82627466ea369b322947885a2d5.jpg (88.01 KiB) Viewed 1388 times
- d6964d94d7b5bf773f68be1c7d0137ac.jpg (86.68 KiB) Viewed 1388 times
Re: Taigen Panther F - internal layout
Posted: Tue Sep 12, 2017 12:02 pm
by c.rainford73
maxmekker wrote:sure.
just need to find a clever way to attach it to the barrel . and plug the servo inti the elevation port of whatever Board you choose to run in the tank .
a recoil unit of the 'universal type also, might slip in With some work .
cfd6d82627466ea369b322947885a2d5.jpg
d6964d94d7b5bf773f68be1c7d0137ac.jpg
This is the design I prefer too Stian

Sent from my 2PS64 using Tapatalk
Re: Taigen Panther F - internal layout
Posted: Tue Sep 12, 2017 3:34 pm
by bfrank1982
maxmekker wrote:sure.
just need to find a clever way to attach it to the barrel . and plug the servo inti the elevation port of whatever Board you choose to run in the tank .
a recoil unit of the 'universal type also, might slip in With some work .
cfd6d82627466ea369b322947885a2d5.jpg
d6964d94d7b5bf773f68be1c7d0137ac.jpg
Nice.
If you could take some pictures of the elevation in finished and worling order order I would appriciate it very much
Sendt fra min HUAWEI VNS-L31 med Tapatalk
Re: Taigen Panther F - internal layout
Posted: Tue Sep 12, 2017 4:20 pm
by maxmekker
I kept the stock motor. just unsoldered all wires from the taigen recoil unit and rerute it to the right pins on the board ( in photo it was on the right pins on the 9 pin socket just for test)
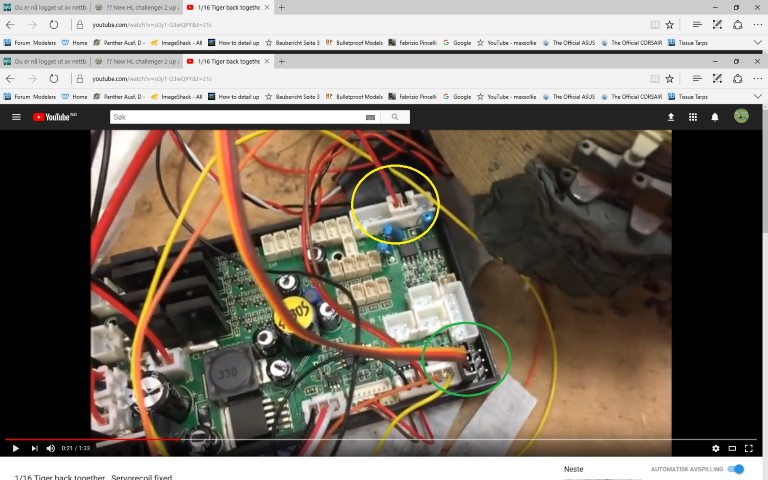
- ss (Small).jpg (93.36 KiB) Viewed 1369 times