Found out that tracks are interchangeable with Leopard 2. I'm not totally sure but it has its own specific track.mcevoyi wrote:It'd longer than the Leo 2 .. and the sprockets at the front the chassis is the same width ..
LEOPARD 2 A4M CAN
Re: LEOPARD 2 A4M CAN
Re: LEOPARD 2 A4M CAN
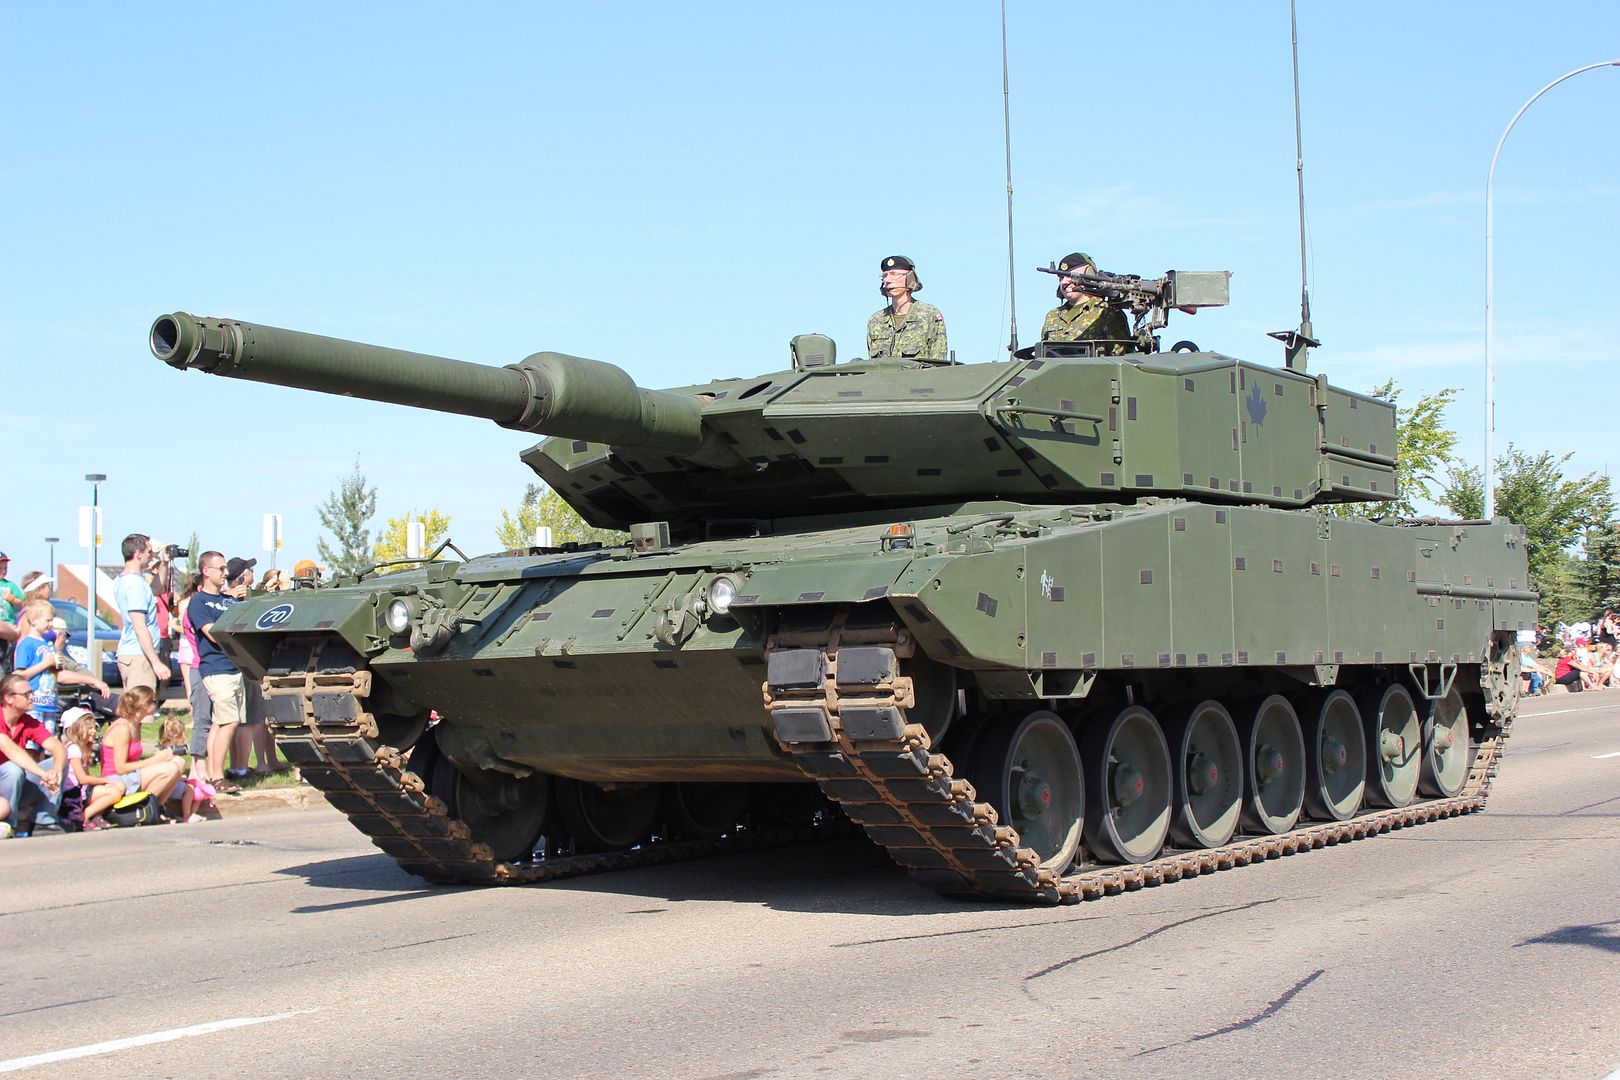
This is the tank I'm going to build. Pictures are for discussion purpose only and full credit to Jason Bobrowich.

Re: LEOPARD 2 A4M CAN
If you're gonna build it as a 2A4, you'd have to shorten the main gun of the HL Leopard 2A6 unless you can source a spare main gun from an HL M1A2 or from the Tamiya Leo2A5. The barrel is metal, and cutting it shouldn't be a problem if you have the tools. I'm looking to build a Polish Leo2PL which doesn't use the L55 gun so I'll be cutting the HL Leo's main gun. I'm just waiting for the Polish upgrade program to commence and produce upgraded tanks, and of course a second HL Leo2A6 as the base tank for it hehehehehe
I want a platoon of NATO tanks, and a Leclerc seems to be a very distant pipe dream, so I'll have to settle for a US M1A2SEP v2, German Leo2A6, British Challenger 2, and Polish Leo2PL hehehehe
I want a platoon of NATO tanks, and a Leclerc seems to be a very distant pipe dream, so I'll have to settle for a US M1A2SEP v2, German Leo2A6, British Challenger 2, and Polish Leo2PL hehehehe
Re: LEOPARD 2 A4M CAN
atcttge wrote:If you're gonna build it as a 2A4, you'd have to shorten the main gun of the HL Leopard 2A6 unless you can source a spare main gun from an HL M1A2 or from the Tamiya Leo2A5. The barrel is metal, and cutting it shouldn't be a problem if you have the tools. I'm looking to build a Polish Leo2PL which doesn't use the L55 gun so I'll be cutting the HL Leo's main gun. I'm just waiting for the Polish upgrade program to commence and produce upgraded tanks, and of course a second HL Leo2A6 as the base tank for it hehehehehe
I want a platoon of NATO tanks, and a Leclerc seems to be a very distant pipe dream, so I'll have to settle for a US M1A2SEP v2, German Leo2A6, British Challenger 2, and Polish Leo2PL hehehehe
Yup, got an idea already. The 2A4M never upgraded their main gun as it is not necessary to do during its upgrade program and the battle its designed to fight. It still even retains the optics thats the original 2A4 have. I'm not sure of the FCS if they have improved this. The ECM is the same as the 2A6M but obviously taken out once back in Canada as this picture was taken. You can clearly see the velcro tapes used for the Barracuda system.
The other thing to note is to simulate the fine weaving on the bore evacuation system as its even prominent in a smaller scale.
Re: LEOPARD 2 A4M CAN
Small updates:
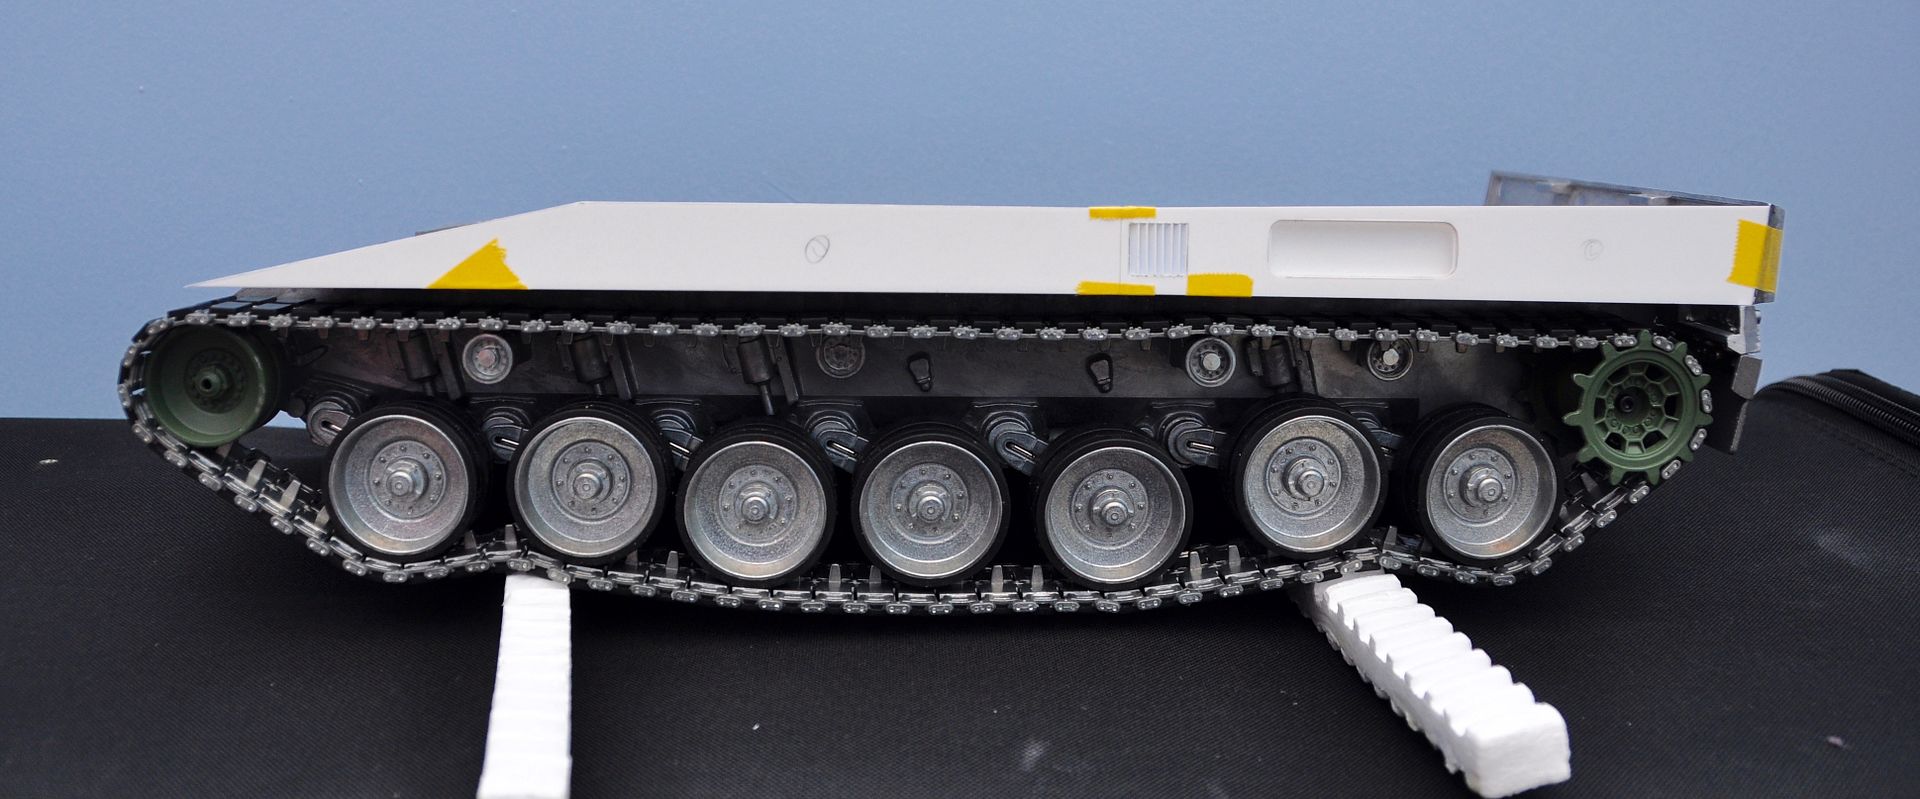
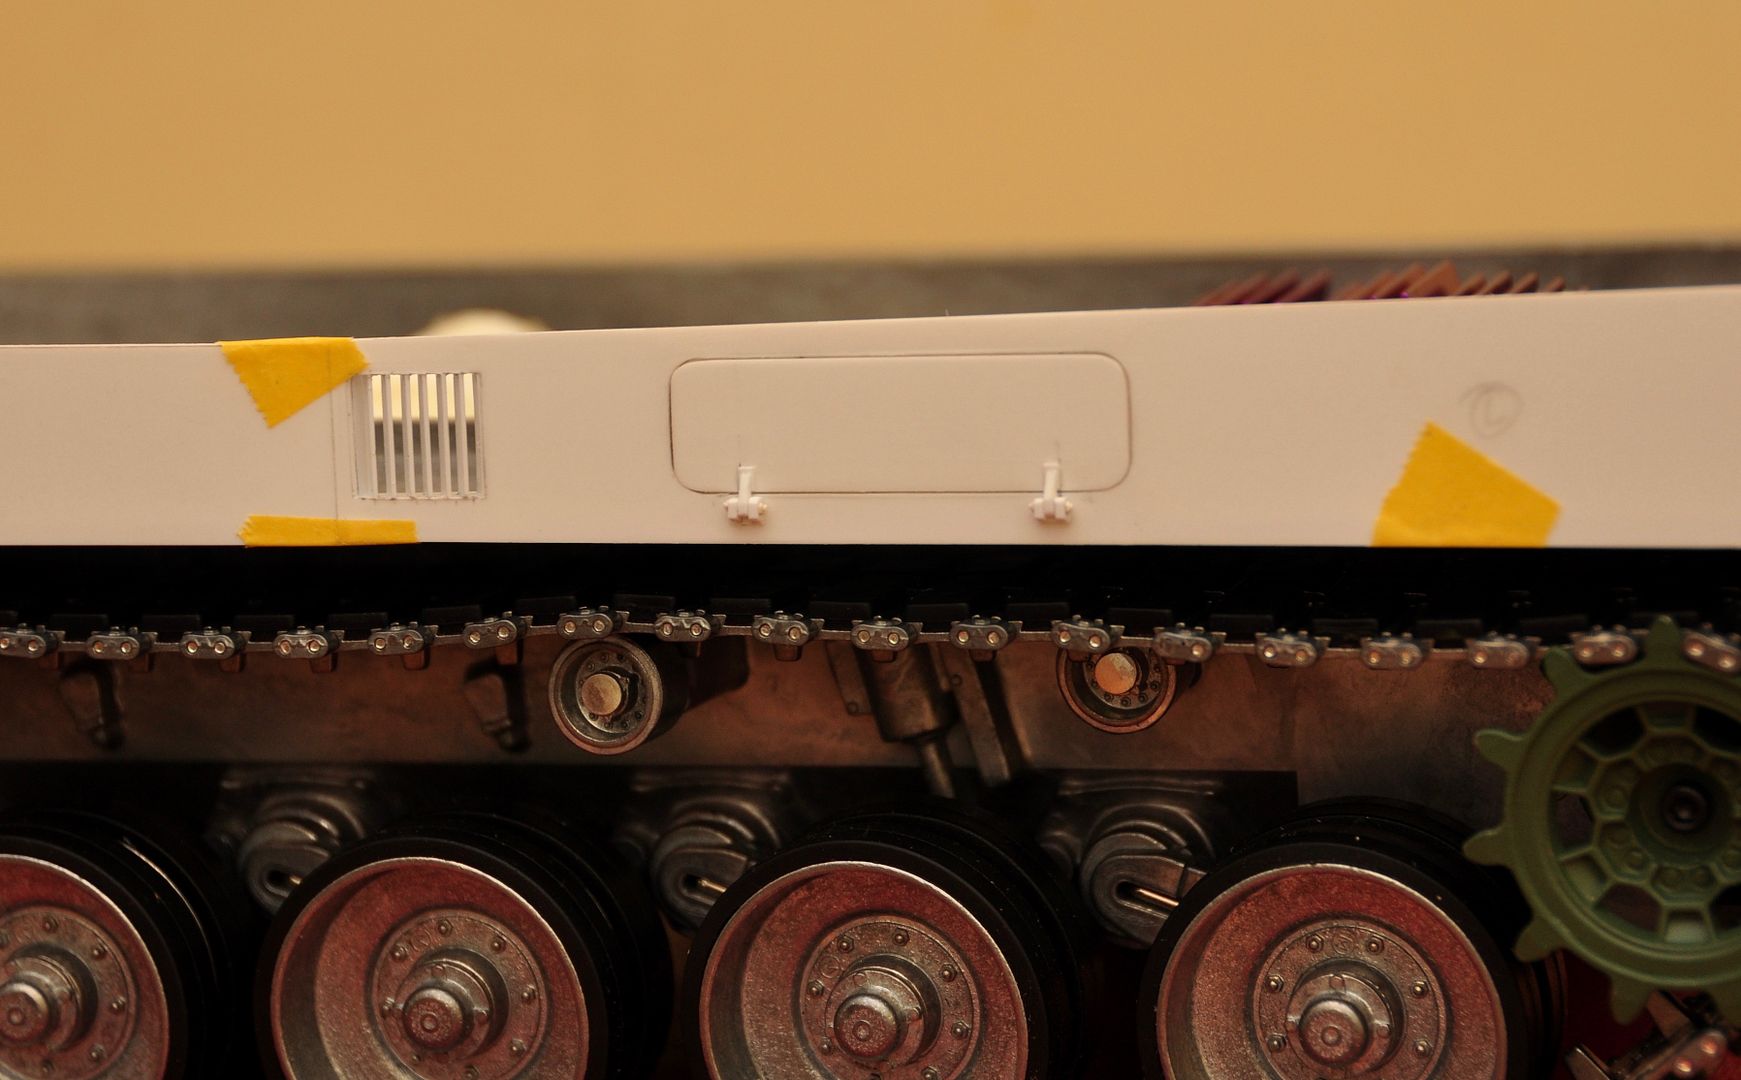
I have done the basic side of the upper hull and added basic details. The left hull side first, here you can see the left tool box and louvers. This will be further detailed soon. Forward section to the louvers is the NBC pack, I will simulate this in close position as this will be covered by the hull armours. I will make the tool box door functional as well. The side hull is dry fitted to check alignment.
I have done the basic side of the upper hull and added basic details. The left hull side first, here you can see the left tool box and louvers. This will be further detailed soon. Forward section to the louvers is the NBC pack, I will simulate this in close position as this will be covered by the hull armours. I will make the tool box door functional as well. The side hull is dry fitted to check alignment.


Re: LEOPARD 2 A4M CAN
Ah. You're going to scratch build the entire upper hull?
Re: LEOPARD 2 A4M CAN
Yes. It will give me options which panel to be made workable. The front glacis of the 2A4 and its driver's hatch is different. Canadian 2A4M is even unique. New add on armour, new pattern anti slip, camera, camo net holder, new front fenders etc. Instead of chopping the 2A6 upper hull, id rather had a clean canvas to work on and to reinforce it properly.atcttge wrote:Ah. You're going to scratch build the entire upper hull?

Re: LEOPARD 2 A4M CAN
Very impressive!
Re: LEOPARD 2 A4M CAN
Thanks Ad Lav!Ad Lav wrote:Very impressive!
Re: LEOPARD 2 A4M CAN
Ok, some small updates:
1. This is the rough parts I've done to make the hinges on the left hull tool box. Scalpel for size comparison.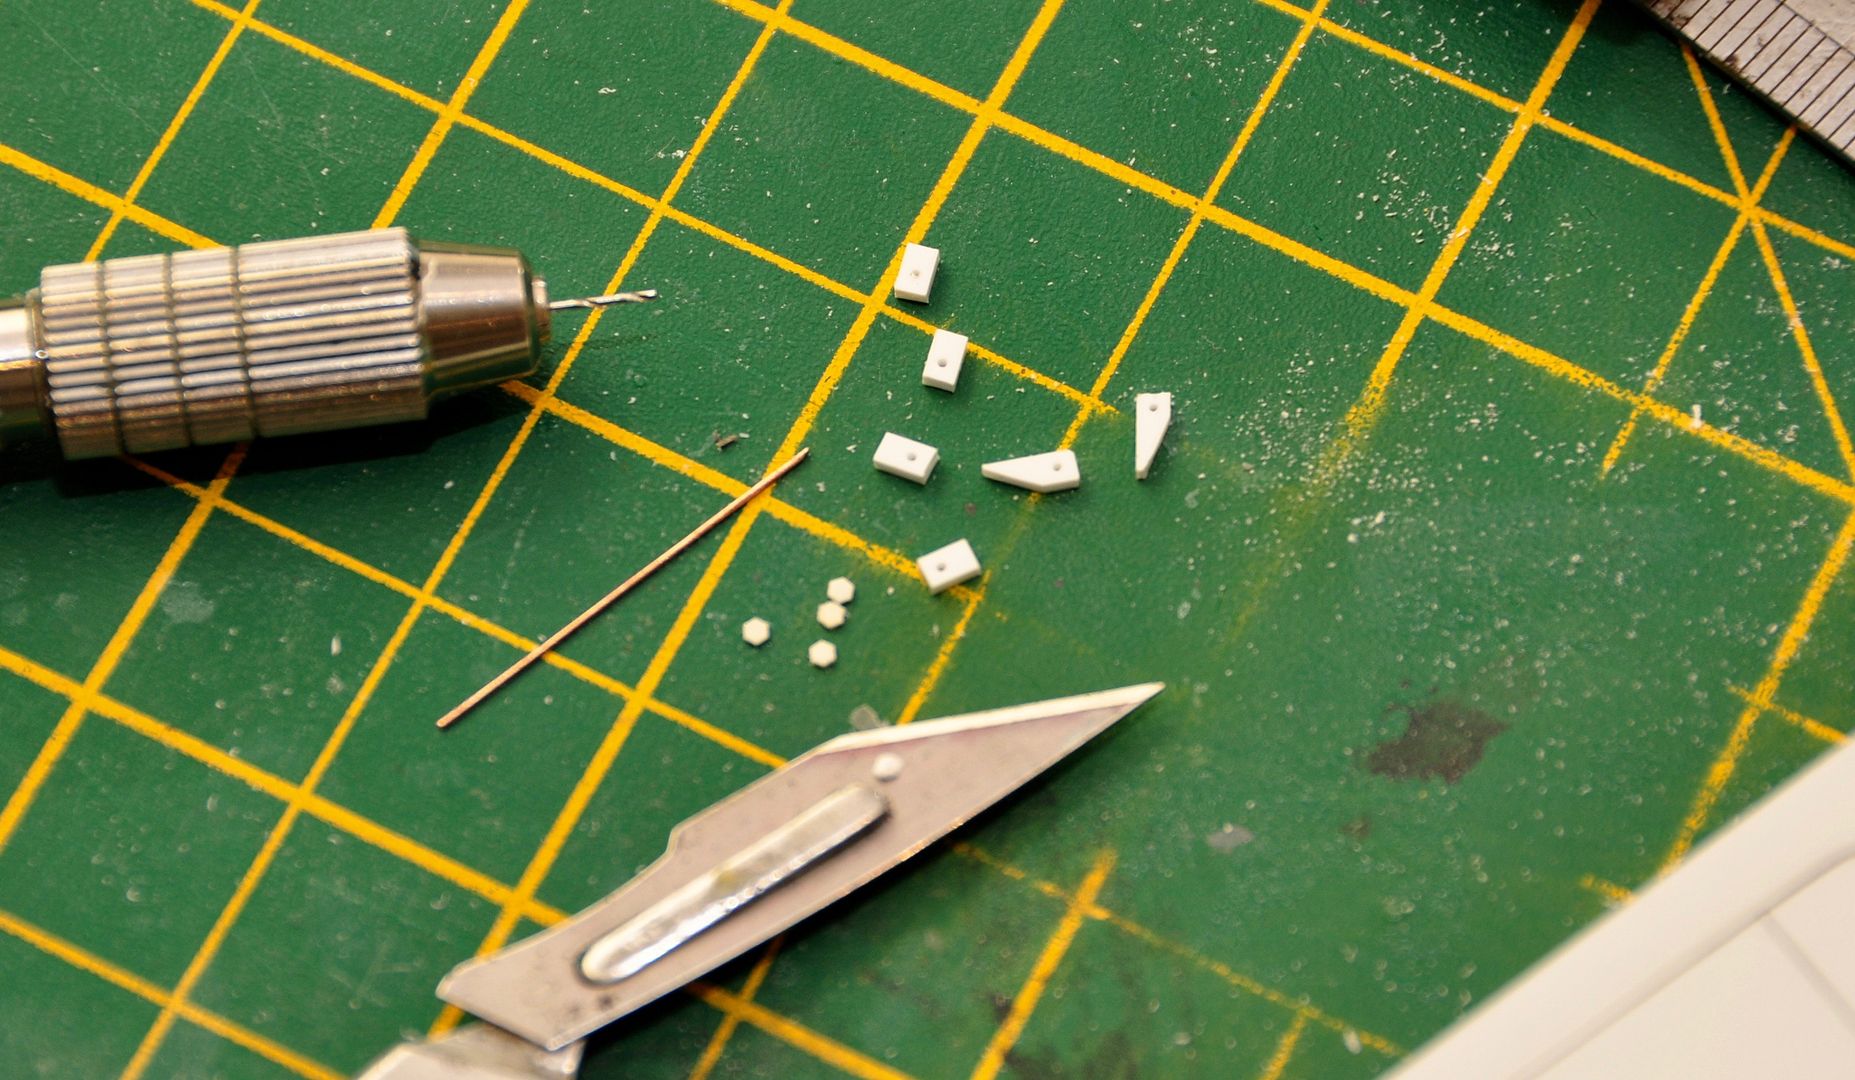
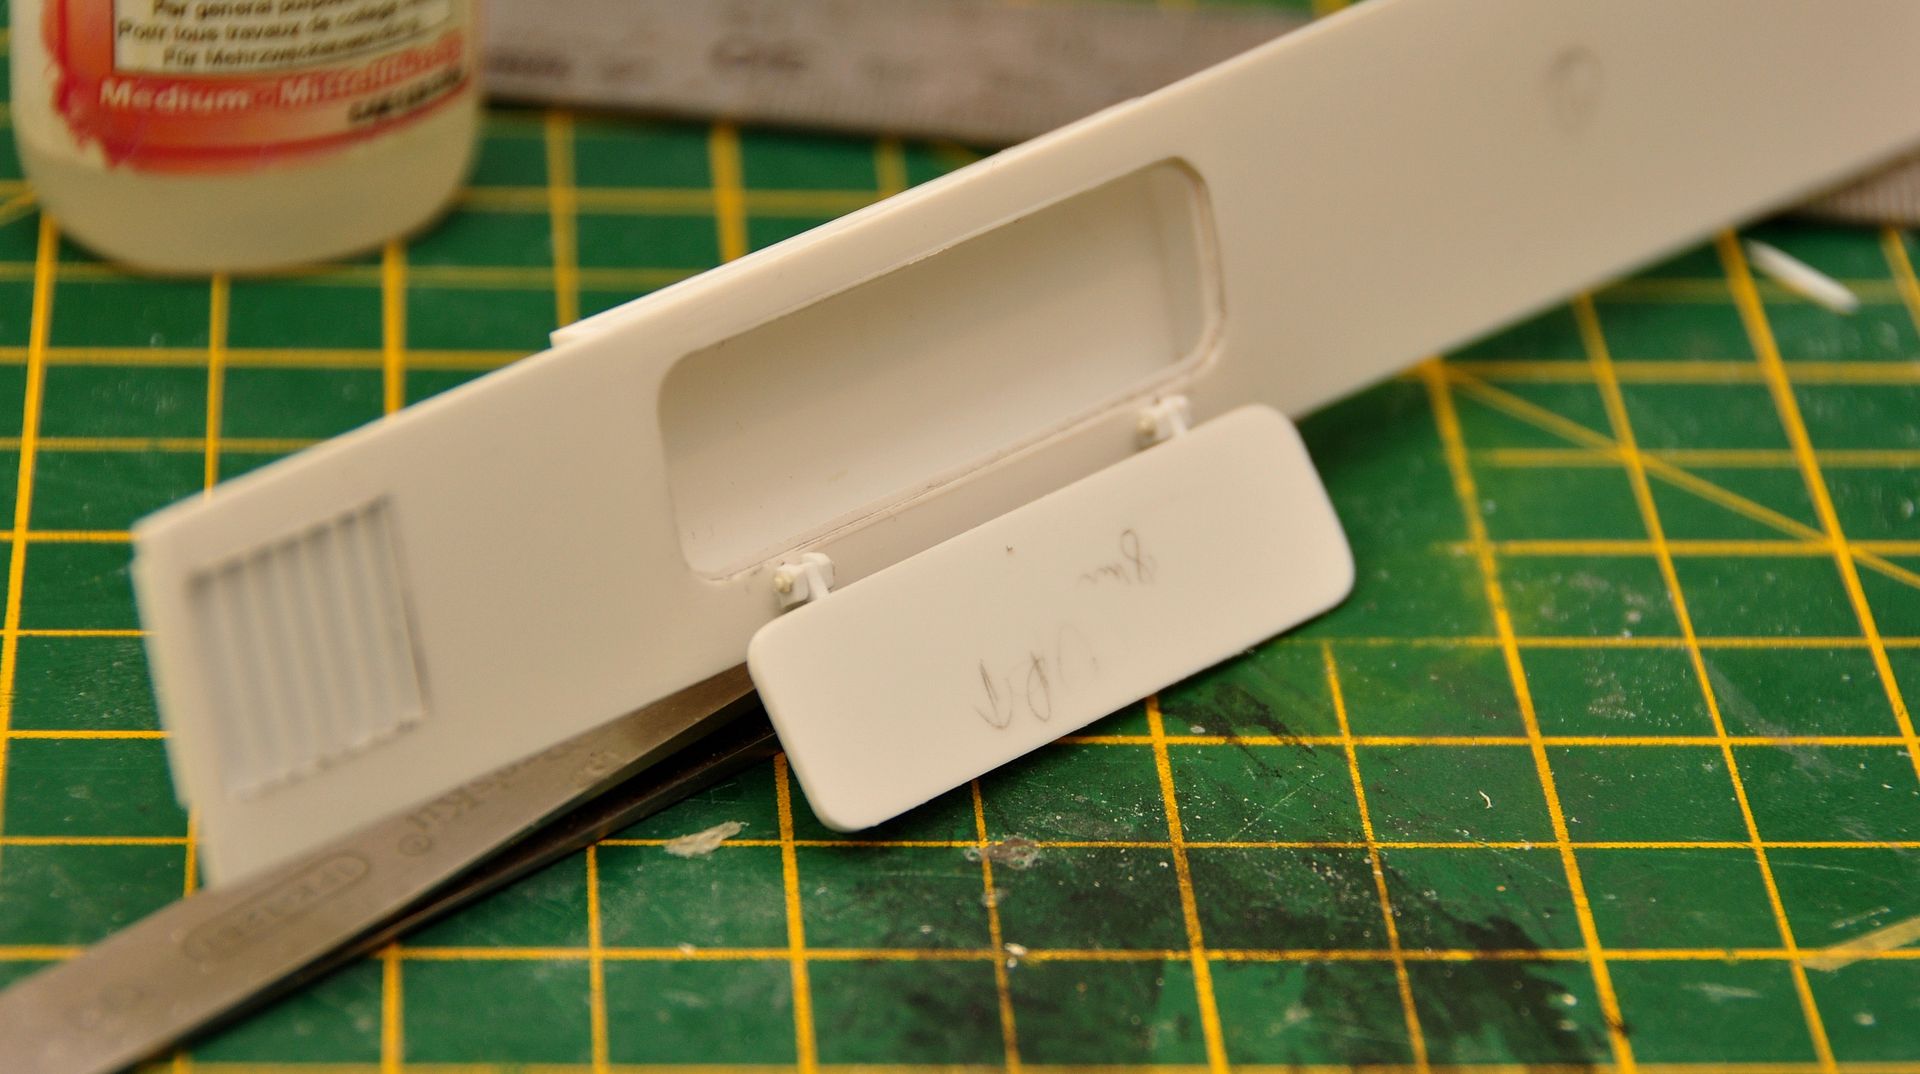
2. After more than an hour of fiddling with it the hinges takes shape. The simulated bolts on the side are made by using my hexagonal punch and die. Exact size of the bolt is 1.4mm.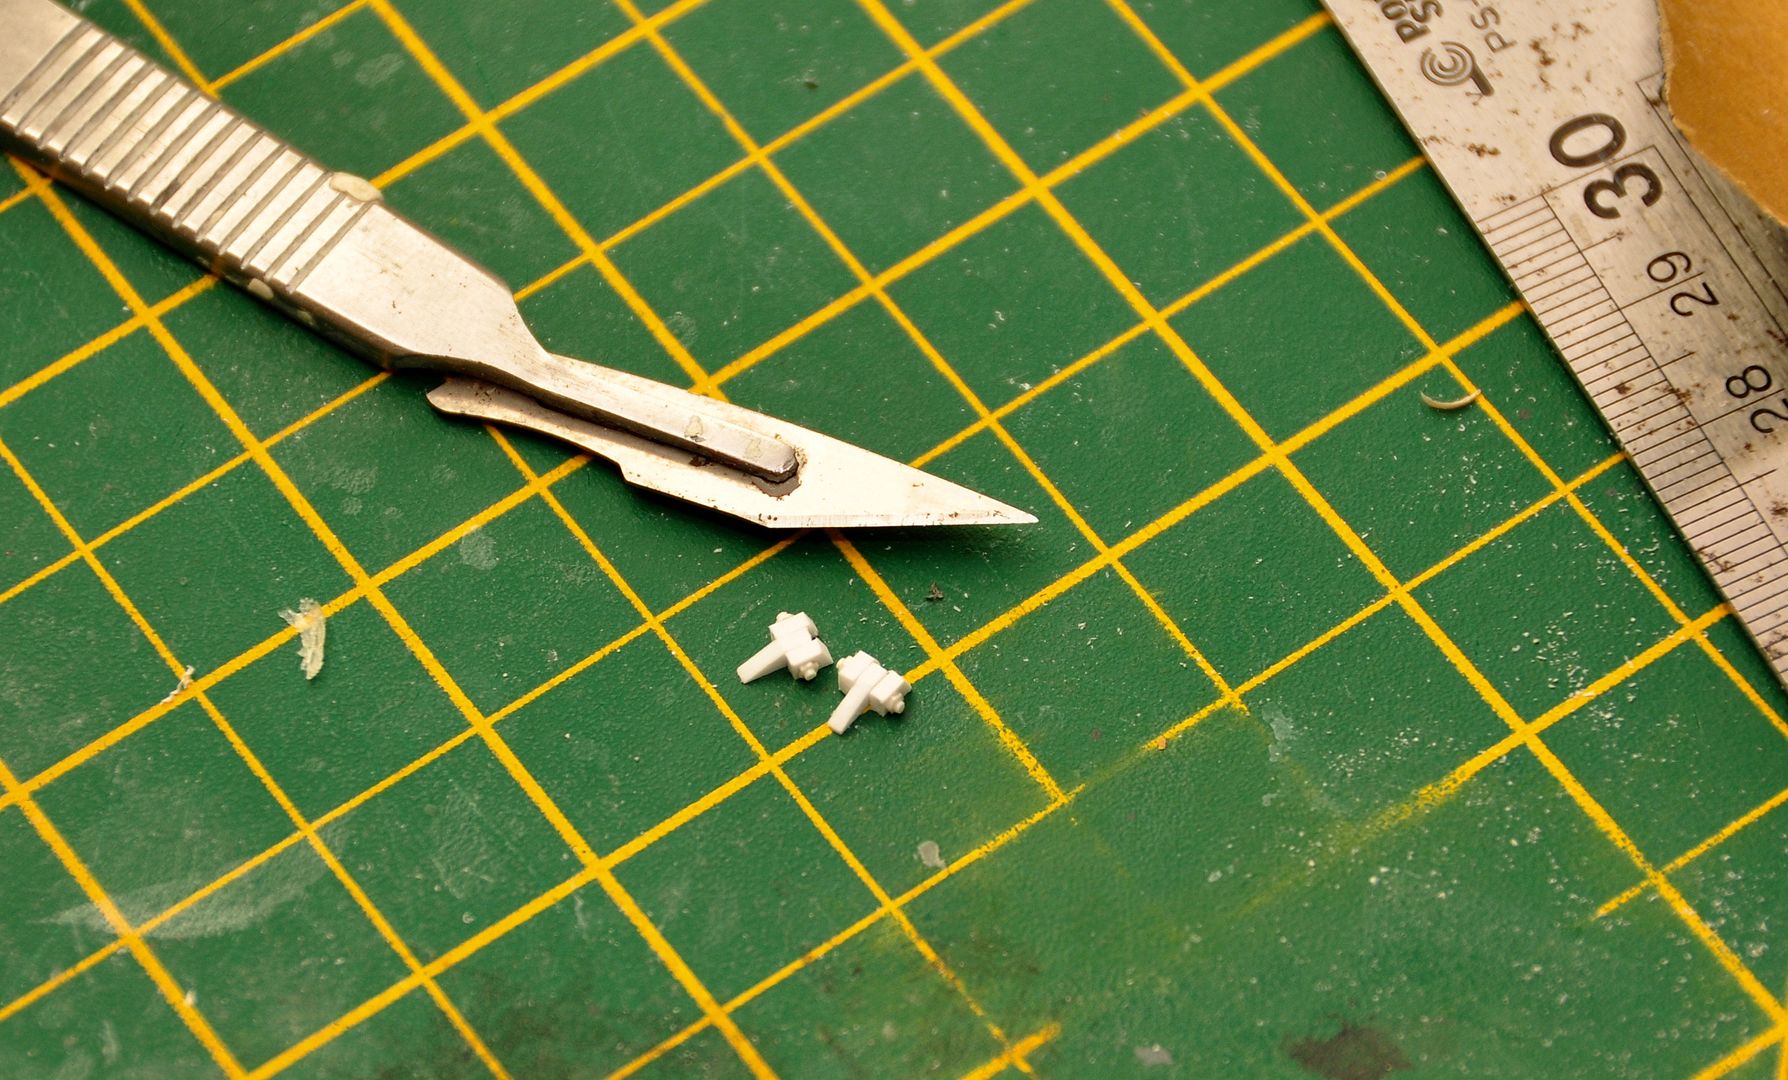
3.Now here it looks attached to the panel door. Getting there bit by bit.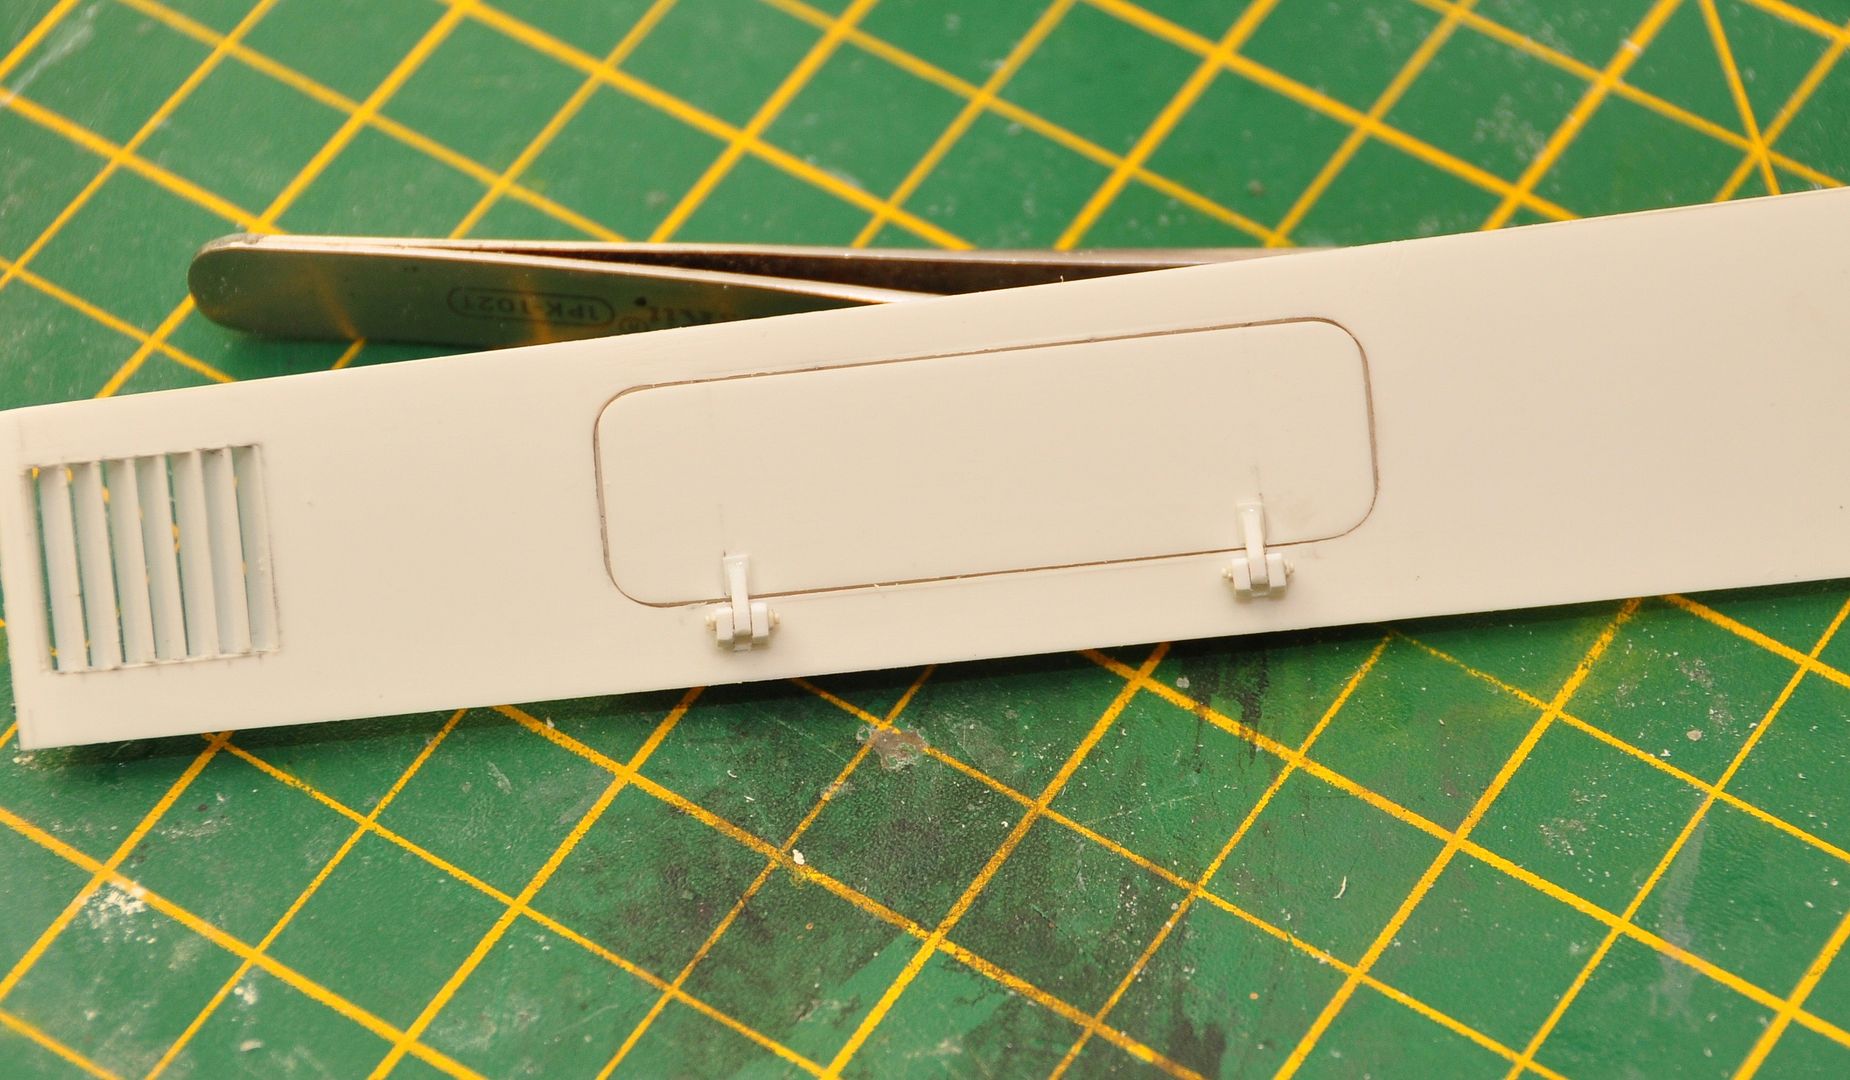
4. Testing the hinge clearance and tolerance for workability.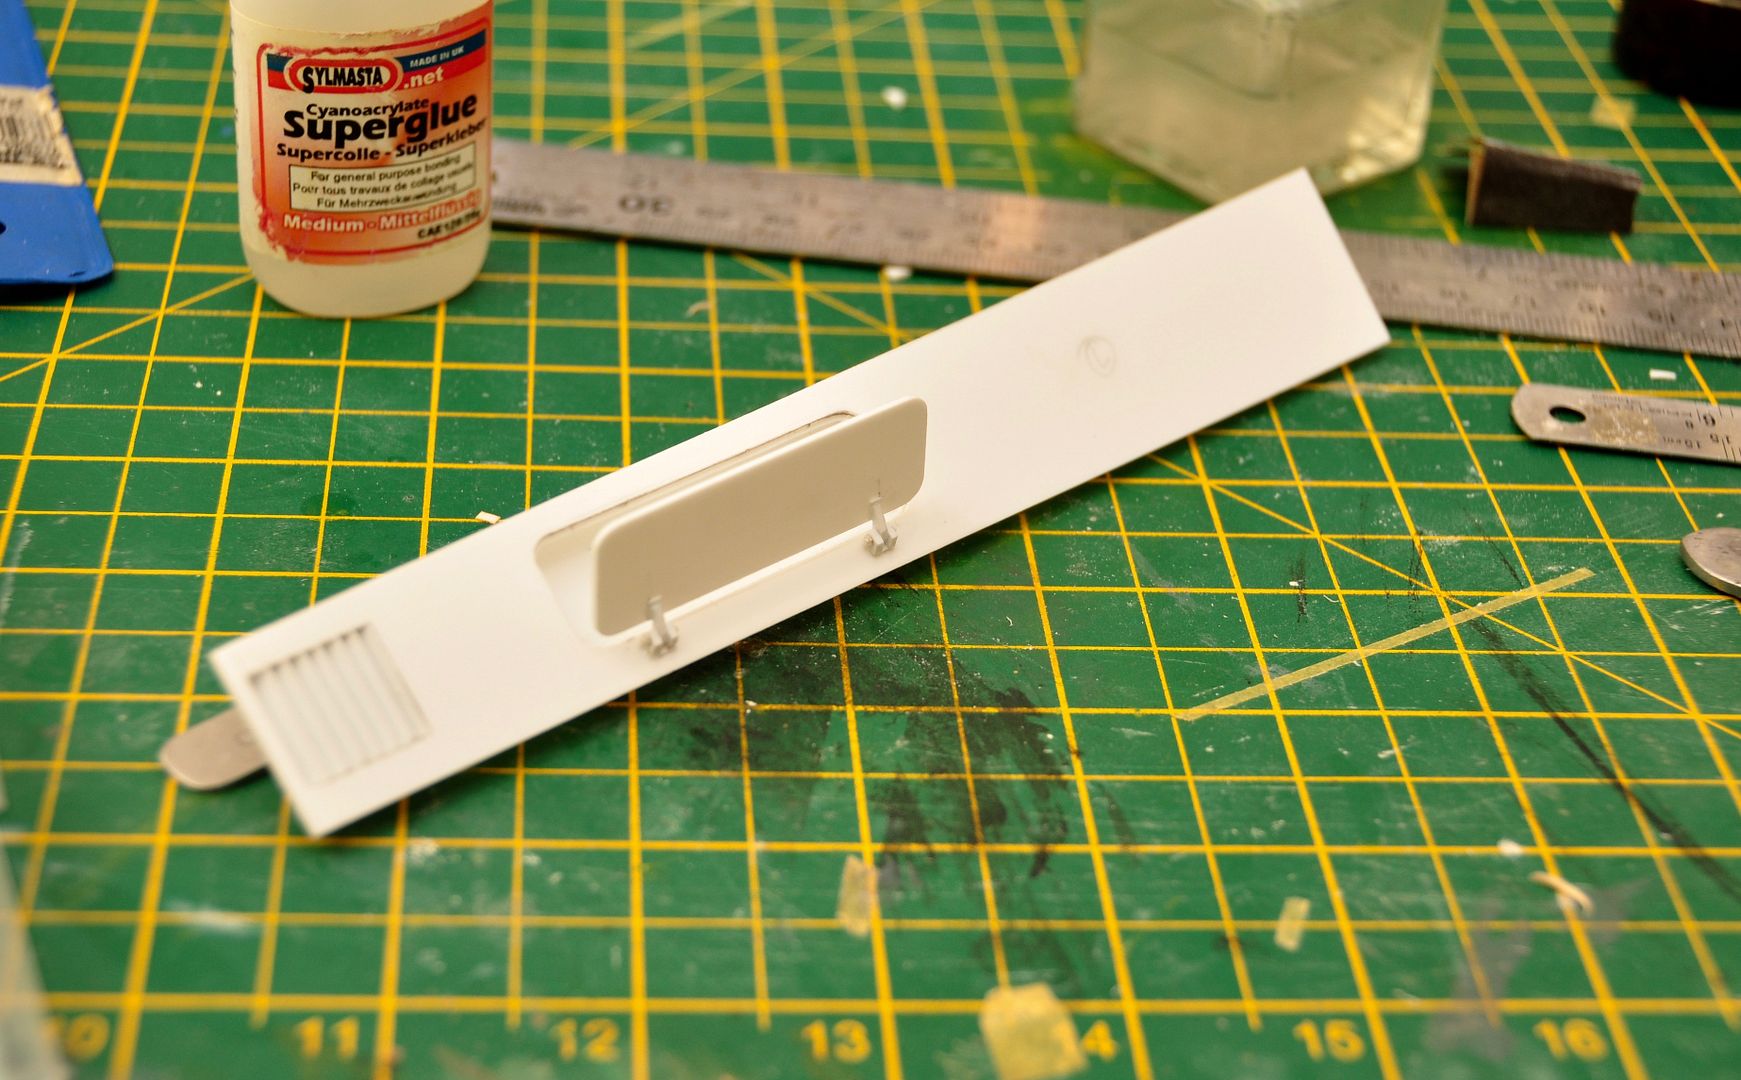
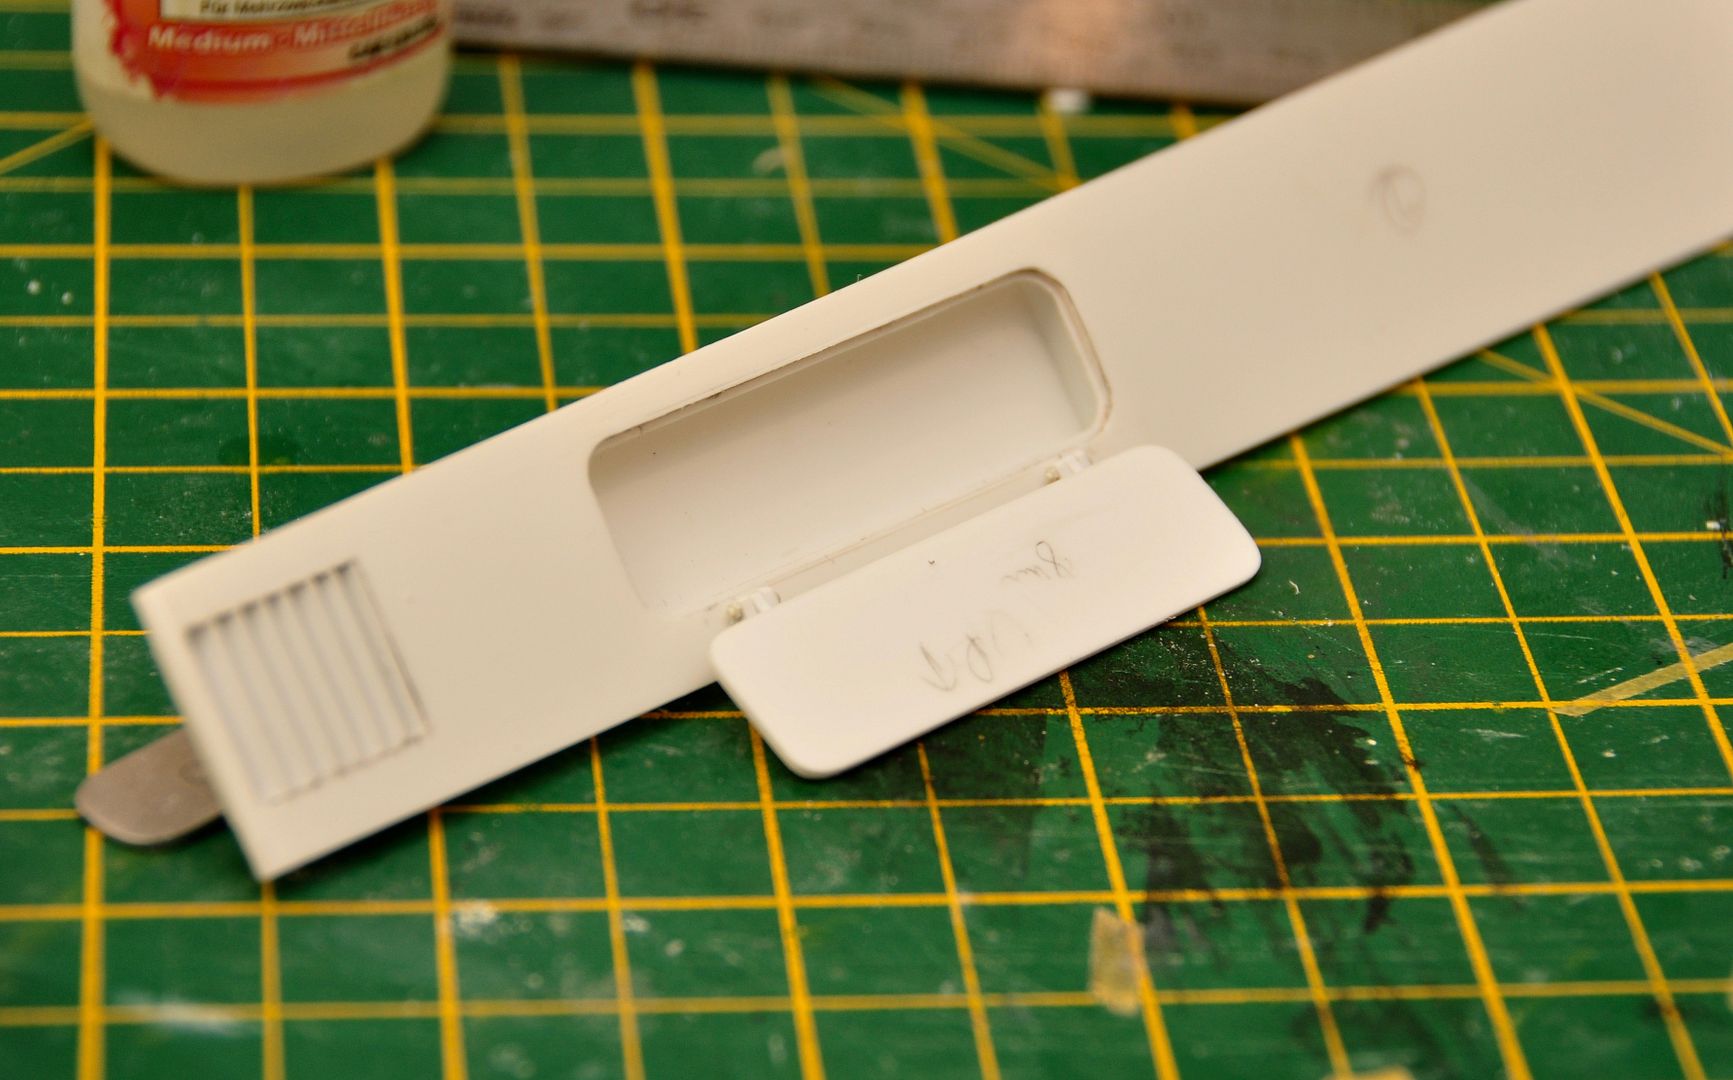
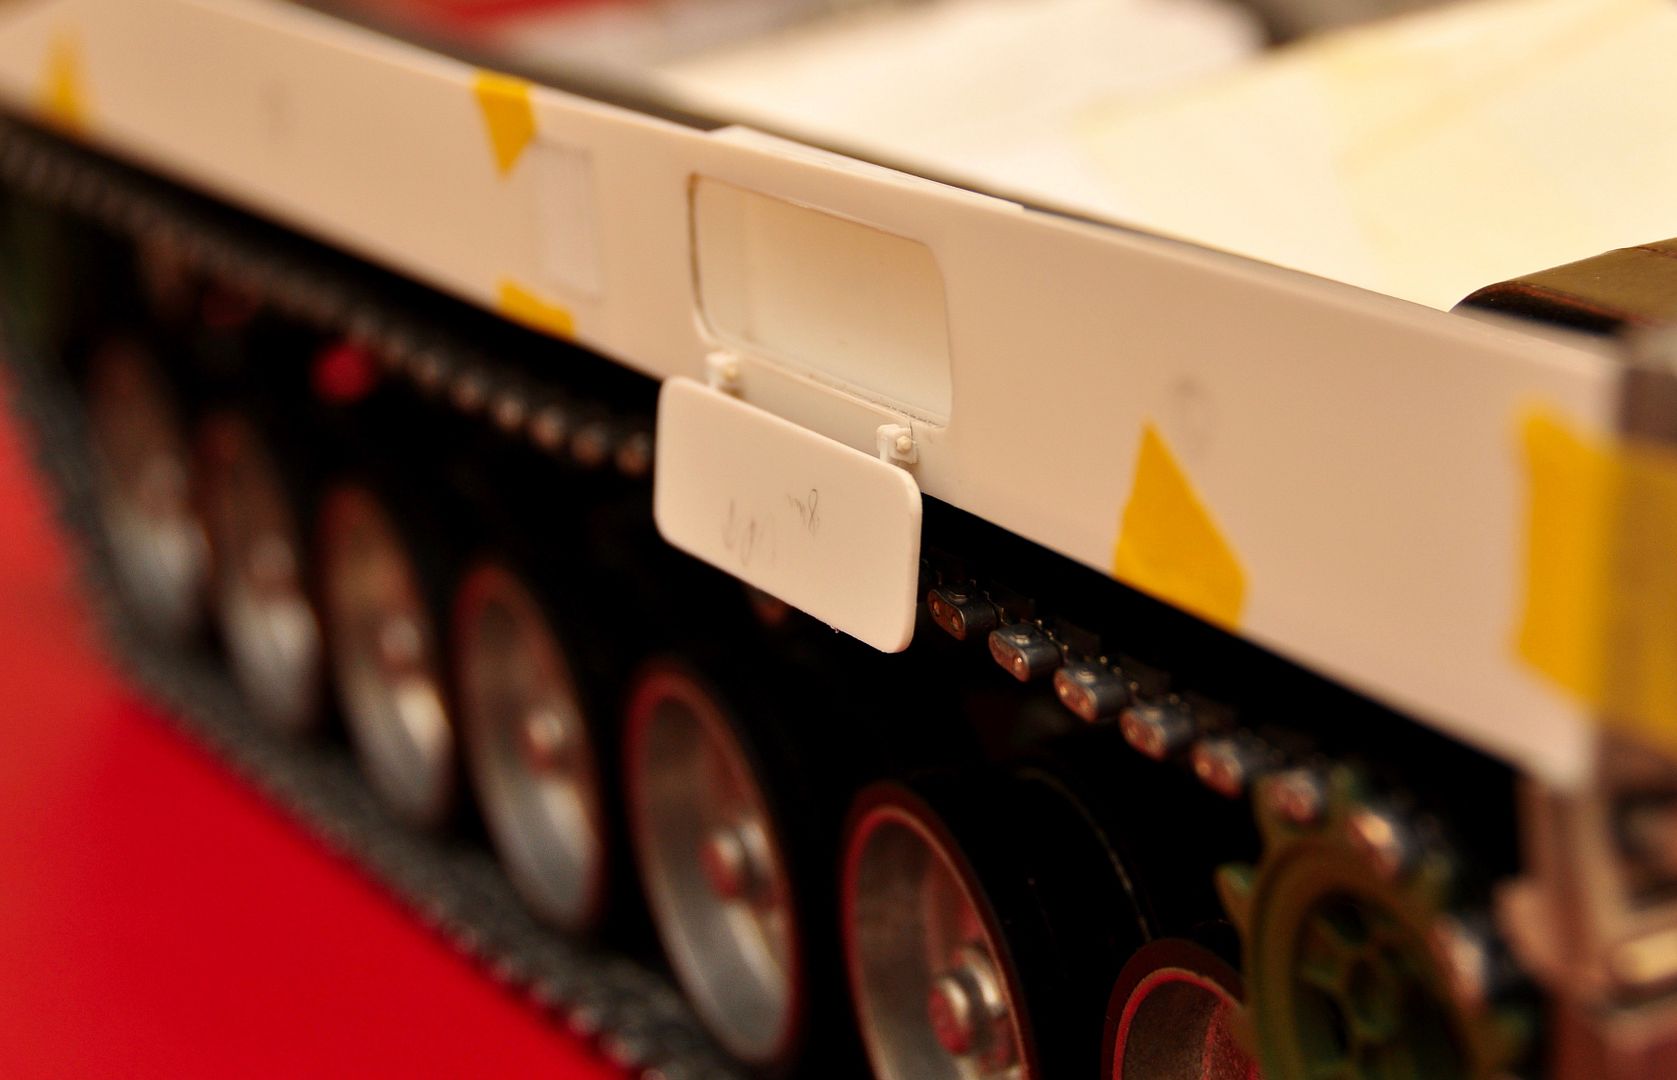
5.Then the full opening....... You can also appreciate the exact depth of this tool box. You can also see the small shim that prevents the panel cover from going too deep.
6.Test fit on the lower metal chassis.....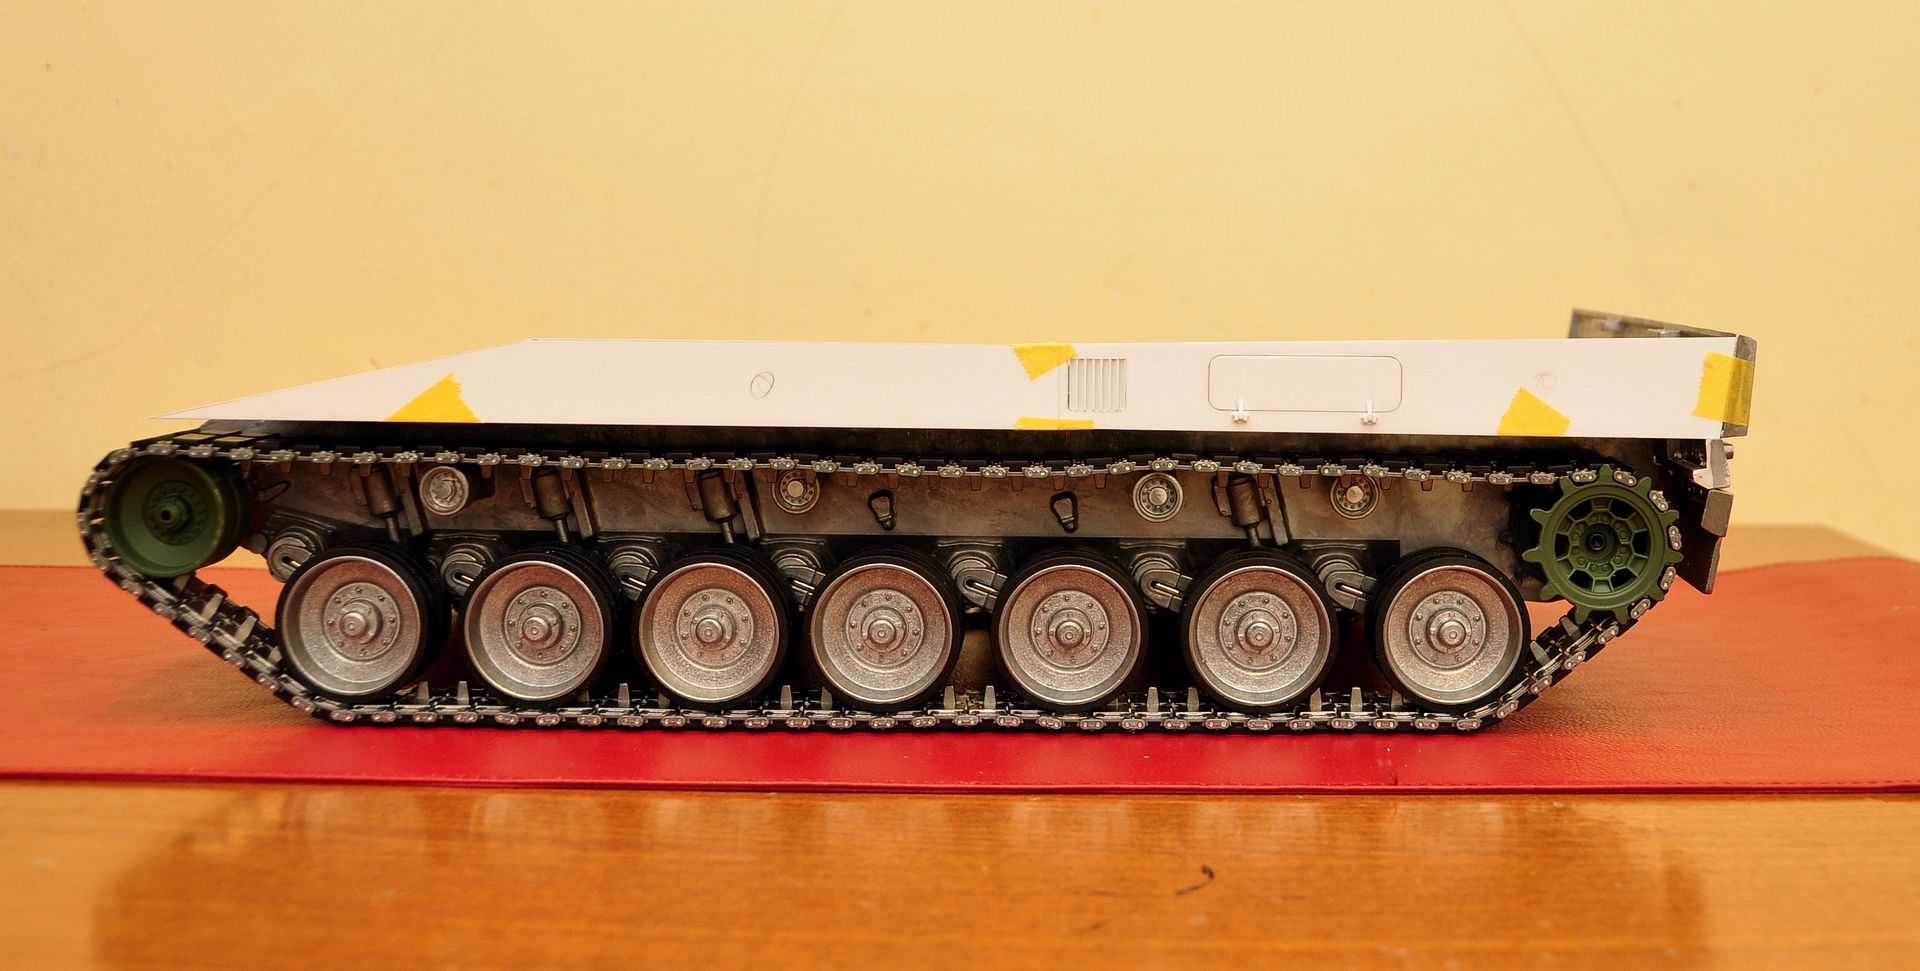
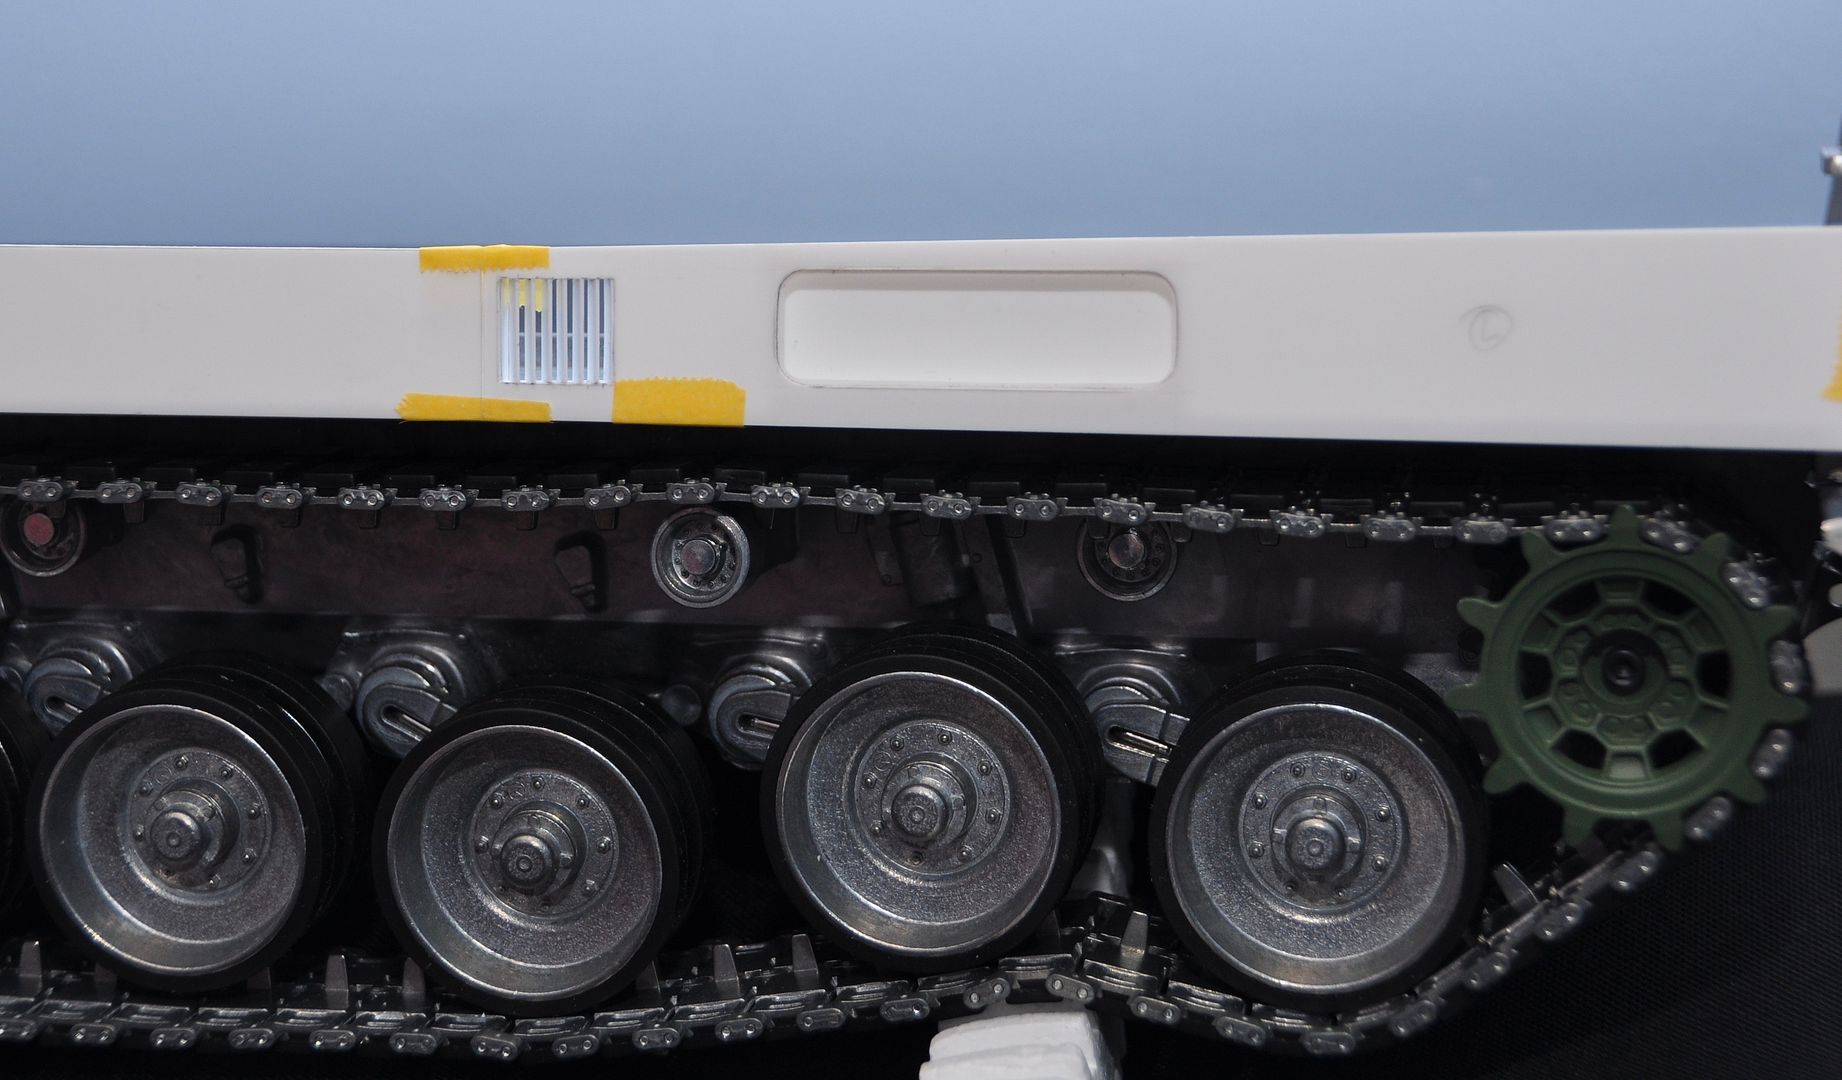
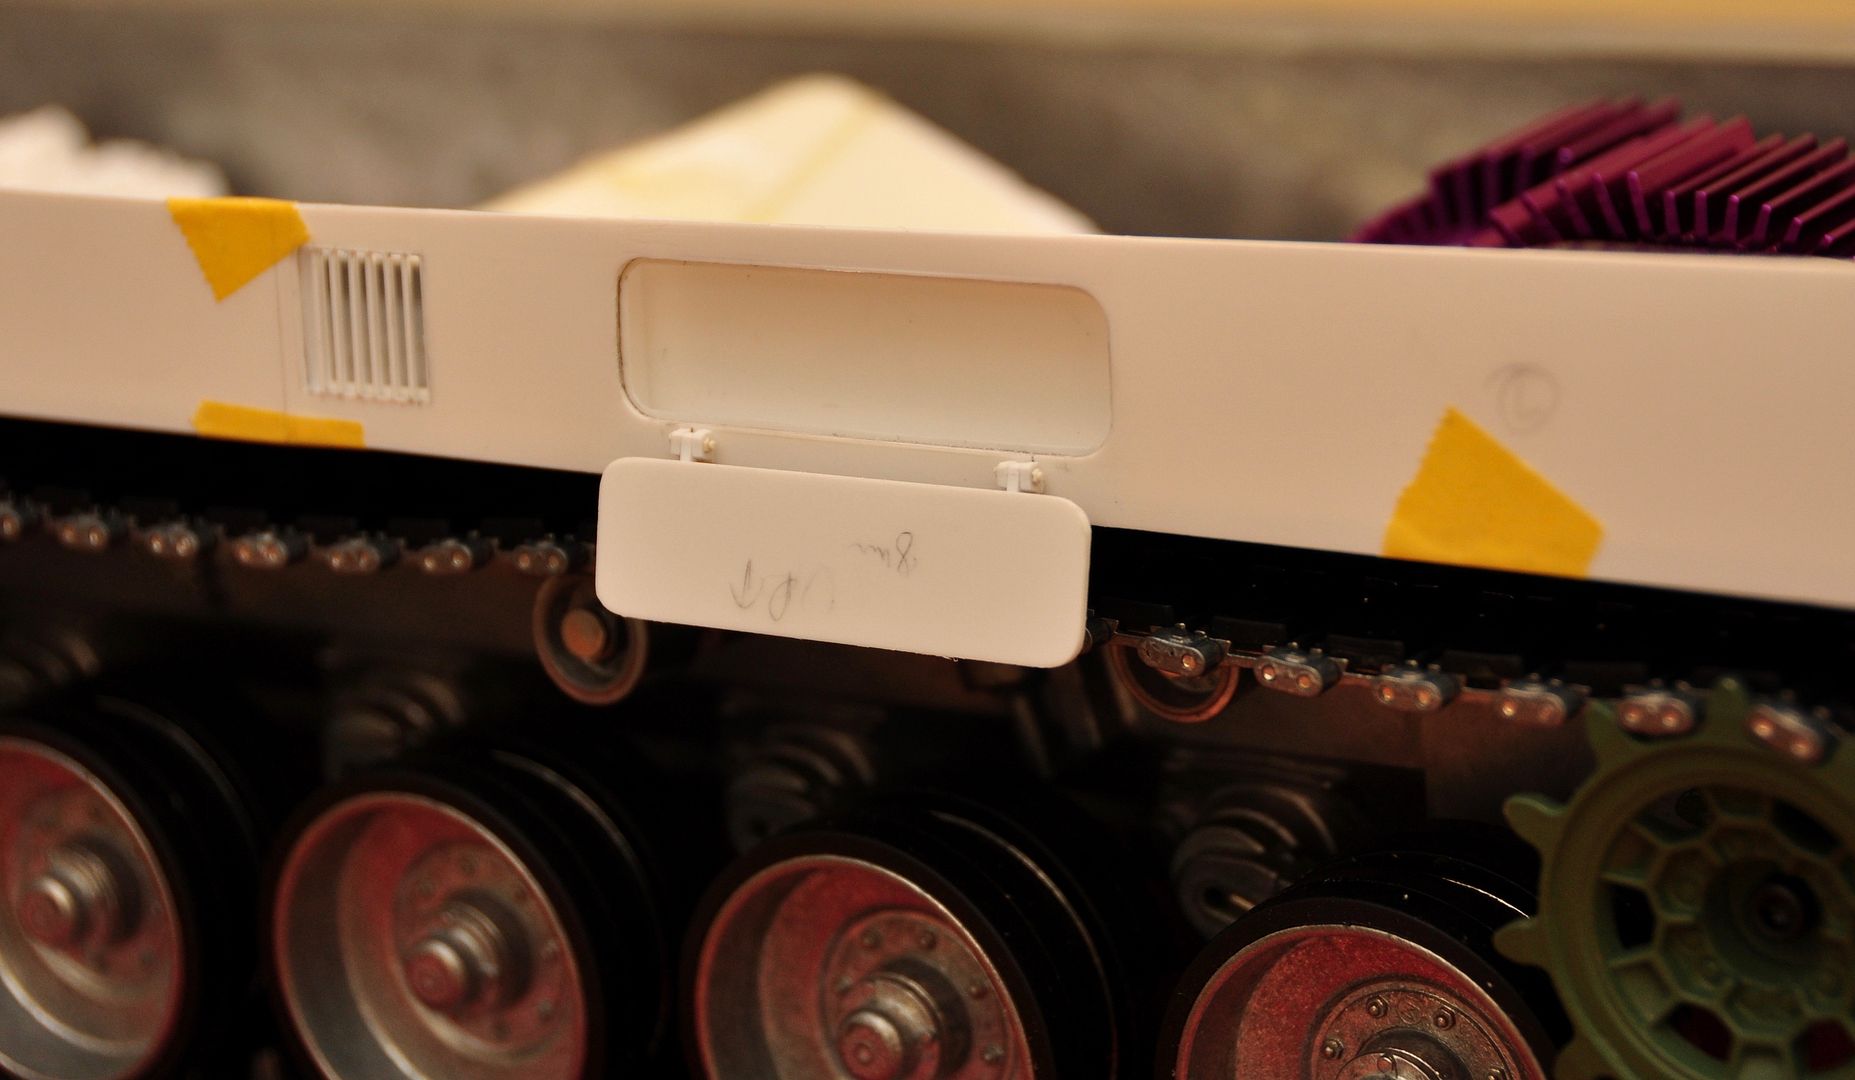
7. A more closer look at the detail and functionality. Take note that this is not done yet. I have to add the 2 hexagonal bolt lock, the grab handle and to detail the inside of the panel cover and tool box. The vertical vents can be visibly seen at this angle giving you the feel of depth in the structure.
8. The full opening of the panel doors.....
Thats it for now......
1. This is the rough parts I've done to make the hinges on the left hull tool box. Scalpel for size comparison.

2. After more than an hour of fiddling with it the hinges takes shape. The simulated bolts on the side are made by using my hexagonal punch and die. Exact size of the bolt is 1.4mm.

3.Now here it looks attached to the panel door. Getting there bit by bit.

4. Testing the hinge clearance and tolerance for workability.

5.Then the full opening....... You can also appreciate the exact depth of this tool box. You can also see the small shim that prevents the panel cover from going too deep.


6.Test fit on the lower metal chassis.....

7. A more closer look at the detail and functionality. Take note that this is not done yet. I have to add the 2 hexagonal bolt lock, the grab handle and to detail the inside of the panel cover and tool box. The vertical vents can be visibly seen at this angle giving you the feel of depth in the structure.


8. The full opening of the panel doors.....

Thats it for now......
