Page 2 of 7
Re: billpe Leo 2A6 build
Posted: Fri Aug 15, 2014 8:27 am
by billpe
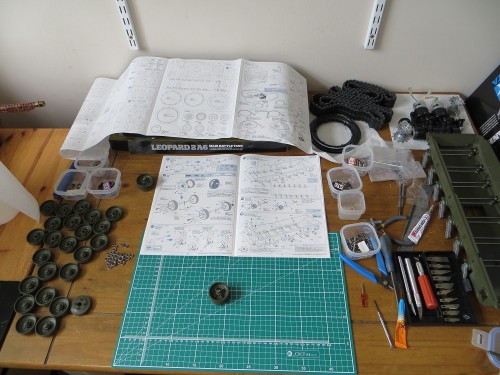
Here's some pics. I didn't bother with the wheels since they're not that interesting.

- Wheels, lots of wheels. But not as many as a Tiger.
I still need to tidy up some of the pin wash but I've highlighted with oils, something I've not done before. I've used oils for effects but I saw a build on a German forum where a guy had highlighted the whole tank in oils and it looks fantasic, I've shamelessly copied.

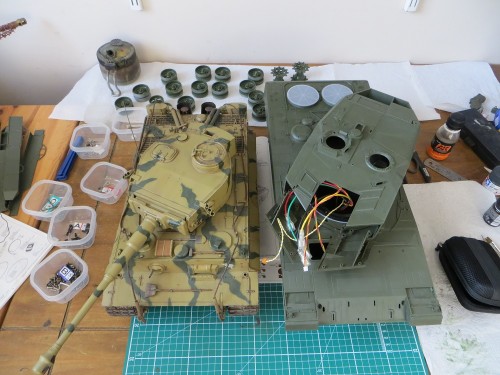
- Its huge!
It makes the Tiger look small in comparison!

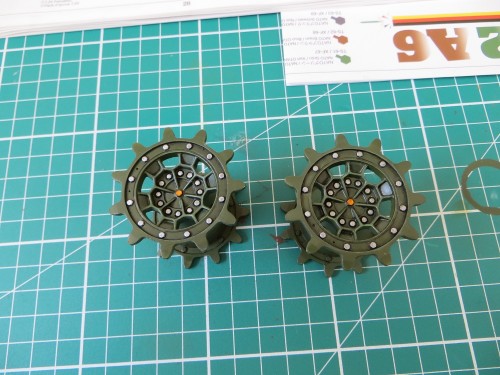
- Sprockets, mostly done
I'll do some more later on once i've finished the gun and mantlet, pin washed the lower hull and added the clear parts.
I hear what you say about masking - i was going to try colour stop however I'm terrible as masking properly and knowing this, went with the route where I can't screw up!
Re: billpe Leo 2A6 build
Posted: Sun Aug 17, 2014 2:23 pm
by billpe
So today is pre-shading. I've build the top of the hull, minus a few parts and the lighting system, covered in primer and pre-shaded with with Vallejo Model Air black. I can categorically state this is horrific paint and while vallejo is great to use with a brush, with an airbrush its nasty. I spent more time cleaning my brush than I did using it.
I'm waiting for the oils to dry on the wheels and sprockets before final sealing and assembly. Fairly happy so far but I think i'll redo some of the dry brushing with a more metallic mixer.
Re: billpe Leo 2A6 build
Posted: Sun Aug 17, 2014 5:14 pm
by billpe
NATO Green done, its a little patching in places but will tidy up later once the brown and black is on. Now applying the NATO Brown and trying not to kill the preshading with very thin layers.
I'm pretty happy with the idea of building and painting from bottom to top. I saw this on a build on a German forum and it worked for that guy and its worked for me also.
Re: billpe Leo 2A6 build
Posted: Wed Aug 20, 2014 7:07 pm
by billpe
More progress today. I've finished the running gear almost completely now, including dusting with Mig Ammo Kursk Earth effects.
Once dry I'll use a brush with the faintest whiff of white spirit to pull it off the raised areas.
And you can see behind I've done the basic camo on the hull and filtered. Once dry I'll paint the fuel line and some of the other deck detail, satin varnish, pin wash, highlight and seal. WIth any luck on Friday I can add the electrics, give it a quick test and the bolt the whole thing minus the turret together.
Its a strange way to build a tank, normally I do the running gear last but the tracks have to go on before the upper hull and that has to be done before the turret as they're all bolted together.
For those that are interested, so far I've used most of a 23ml bottle of XF-67. Its been thinned by about 30%-50%. The last major part that hasn't had a coat is the top of the turret, the spaced armour and the gun mount.
Re: billpe Leo 2A6 build
Posted: Wed Aug 20, 2014 8:18 pm
by Bogeyman
Hi billpe,
Nice job, like the paint work so far, looking forward to the rest of the build, I have just bought a Leo2, but mine is the Heng Long version, its in bits at the moment, metal upgrades going in thanks to forgebear.
John
Re: billpe Leo 2A6 build
Posted: Thu Aug 21, 2014 12:04 am
by billpe
Thanks. I'm following the standard Bundeswehr design in Nato standard colours for Leopard 2's. The kit comes with a nice set of patterns and reference photos to follow.
Re: billpe Leo 2A6 build
Posted: Fri Aug 22, 2014 11:06 am
by billpe
Some pin washing on the body and glass has been added and added the electrics. I broke a piece of fibre optic in the process but there is enough spare for a couple of mishaps.
I used Tamiya X-25 on the back of the transparent plastic to make it look like ballistic glass. Its a weird, sticky acrylic and clogged up my air brush. I think I didn't thin it enough. I like the end effect though.
Next thing to do is plug it all in and see if the lights work, if thats good I'll weather the tracks and put them on, attach the upper to the lower and then start highlighting with oils. I won't weather the top until the turret is on, I Want to get a consistent finish.
Re: billpe Leo 2A6 build
Posted: Fri Aug 22, 2014 4:40 pm
by billpe
Top on, there is a bit of a gap at the front, less then 1mm but its noticeable enough. Going to have to check the fitting at the front as it will bother me if I don't do something about it.
Re: billpe Leo 2A6 build
Posted: Sat Aug 23, 2014 9:11 am
by billpe
I came up against a known problem today - the back of the turret touching parts of the deck. It's only minor but it will scuff the paint.
The tolerance is very fine so to solve it I've raised the turret mount by 2mm using some offcuts of plastic card. Given the number of times I've read about this problem I'm surprised Tamiya haven't fixed it or someone isn't selling a cnc cut ring to go in between the bearing plate and the mount on the hull.
Re: billpe Leo 2A6 build
Posted: Sat Aug 23, 2014 6:06 pm
by billpe
Highlighting with oils. Will need a bit of a tidy up but its so much easier than using acrylics or enamels. I've had to go to extremes to get the dust off as well.