Page 2 of 4
Re: Tamiya panther refurb
Posted: Thu Apr 24, 2014 8:29 pm
by dgsselkirk
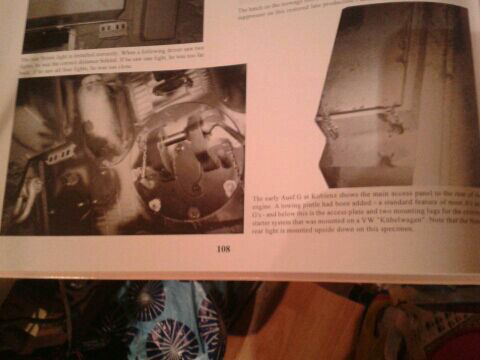
So you going to do an Early G Tom? That is so funny. In a month or so I am about to start on 2 HL G's that I want to make early G's with zim. I have a list of the changes I am going to make. You probably have seen this site and I used this link as my bible for what went where in the early production run...
http://panther1944.de/en/sdkfz-171-pzkp ... anges.html
Re: Tamiya panther refurb
Posted: Thu Apr 24, 2014 8:47 pm
by maxmekker
I think it looks pritty desent in that pic. many would be proud of creating such good stuff 'first' time

Re: Tamiya panther refurb
Posted: Thu Apr 24, 2014 10:25 pm
by tomhugill
dgsselkirk wrote:So you going to do an Early G Tom? That is so funny. In a month or so I am about to start on 2 HL G's that I want to make early G's with zim. I have a list of the changes I am going to make. You probably have seen this site and I used this link as my bible for what went where in the early production run...
http://panther1944.de/en/sdkfz-171-pzkp ... anges.html
Wow I've book marked that, should be very useful!! Cheers sollie, she's always been one of my best runners so I thought it was only fair to give her a bit of a mark over, plus it's a good excuse to try the atak zim!
Re: Tamiya panther refurb
Posted: Wed Dec 03, 2014 2:11 pm
by tomhugill
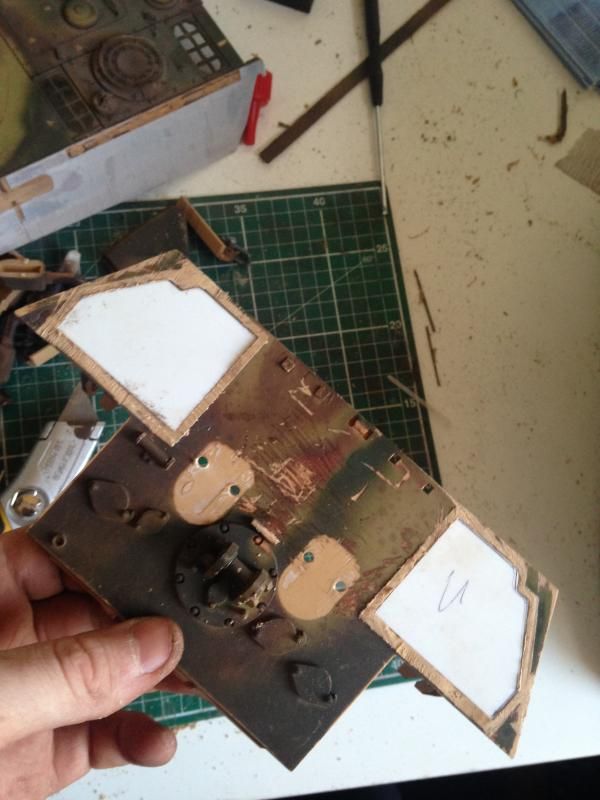
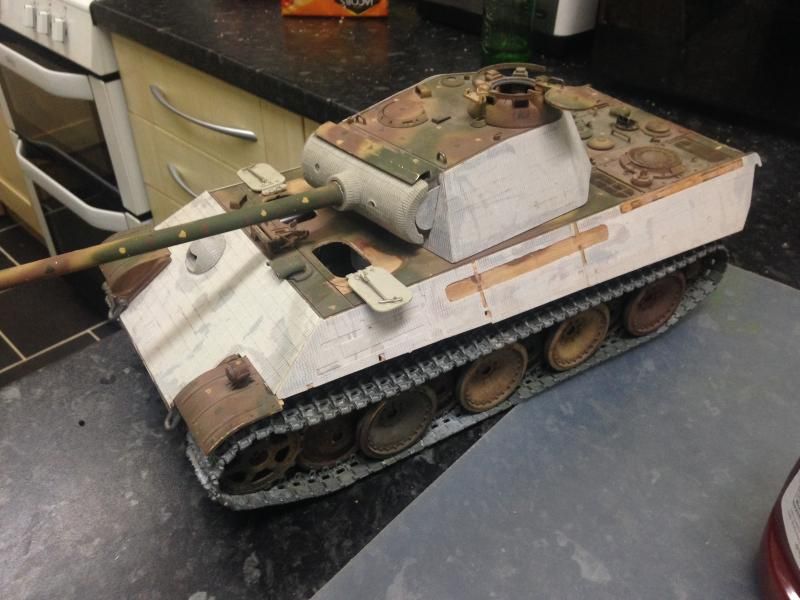
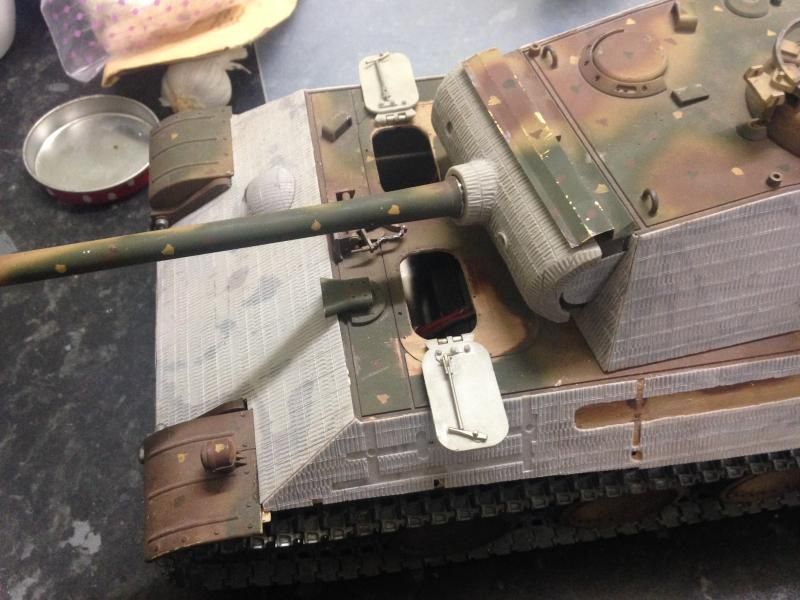
Finally pulled out the panther ready to get some work done. First job was strip everything off the hull. Then I sanded down everything to get rid of the glue marks. Next I've dremeled out the hatches and installed the schumo opening ones. I've started to add zimmerite to the hull, I've cut the moulded stowage bins off in preparation to add the aber ones.
Pics to follow.
Re: Tamiya panther refurb
Posted: Wed Dec 03, 2014 4:14 pm
by wibblywobbly
Well the camo scheme on the Sherman turned out well, the Germans would never notice that behind enemy lines.

RobG
Re: Tamiya panther refurb
Posted: Wed Dec 03, 2014 8:05 pm
by tomhugill
As promised pictures of the progress! I've installed impact gearboxes but the grub screw on the pinions come lose so I'll have to take them out! The sprockets seem too narrow for the kenny kong tracks so will have to do some filing.
Hatches cut out
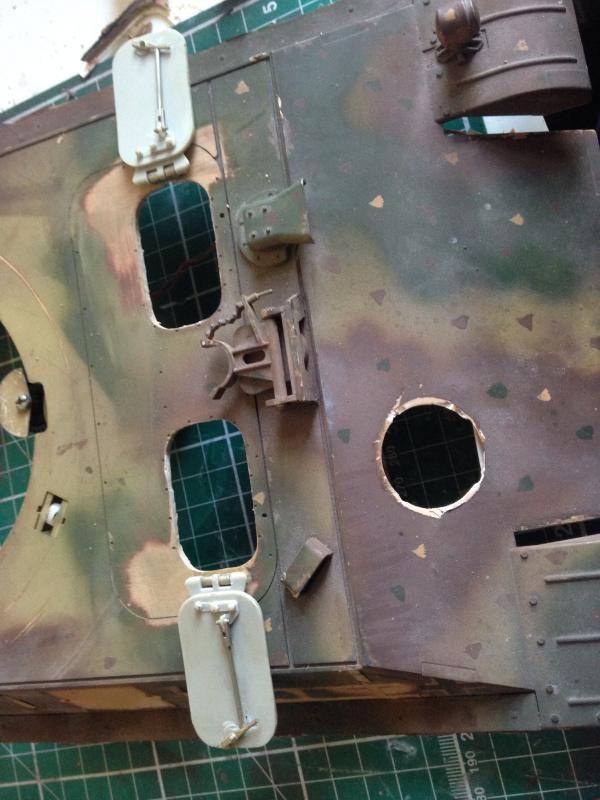
Rear plate off with stowage bins removed
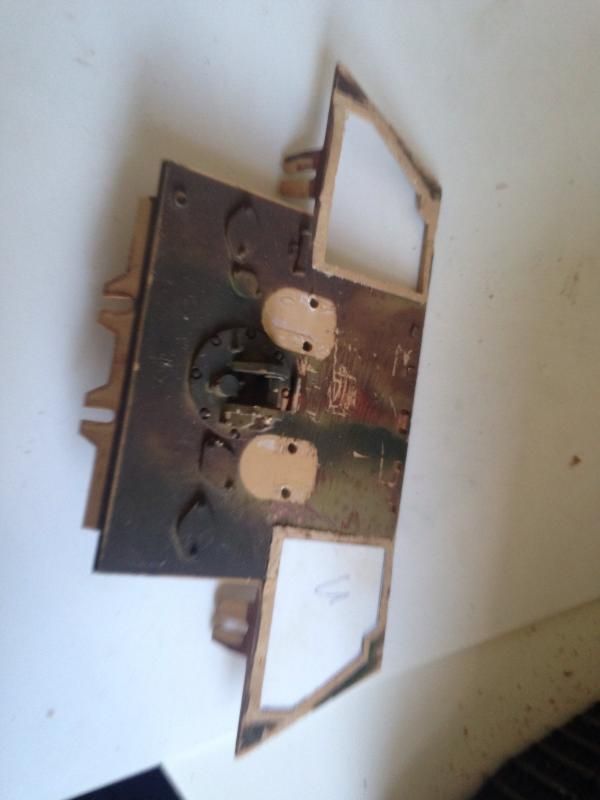
Plasticard in place to fill the holes
Rear with new exhaust bases and zim
More zim
Re: Tamiya panther refurb
Posted: Wed Dec 03, 2014 8:42 pm
by Jake79
I do like a Panther...very nice Tom..I noticed that you have bought a PE set for the build, I was wondering if you could answer a question for me..how important is it to solder PE, could you get away with using a glue...
Cheers
Jake
Re: Tamiya panther refurb
Posted: Wed Dec 03, 2014 8:50 pm
by tomhugill
Jake79 wrote:I do like a Panther...very nice Tom..I noticed that you have bought a PE set for the build, I was wondering if you could answer a question for me..how important is it to solder PE, could you get away with using a glue...
Cheers
Jake
Hey jake, I find solder in most cases far easier to work with, heat the part in question poke with solder, job done. In some circumstances eg where several pieces need to be joined in close proximity I'll revert to super glue as it can be difficult to provide an adequate heat sink.
So short answer yes you can use super glue but in the long run solders better.
Re: Tamiya panther refurb
Posted: Wed Dec 03, 2014 9:07 pm
by Jake79
I didn't realise with solder it was that simple, I'd been over complicating things in my head, having never used an iron before..thanks for clearing that up for me....
Re: Tamiya panther refurb
Posted: Mon Dec 08, 2014 3:56 pm
by tomhugill
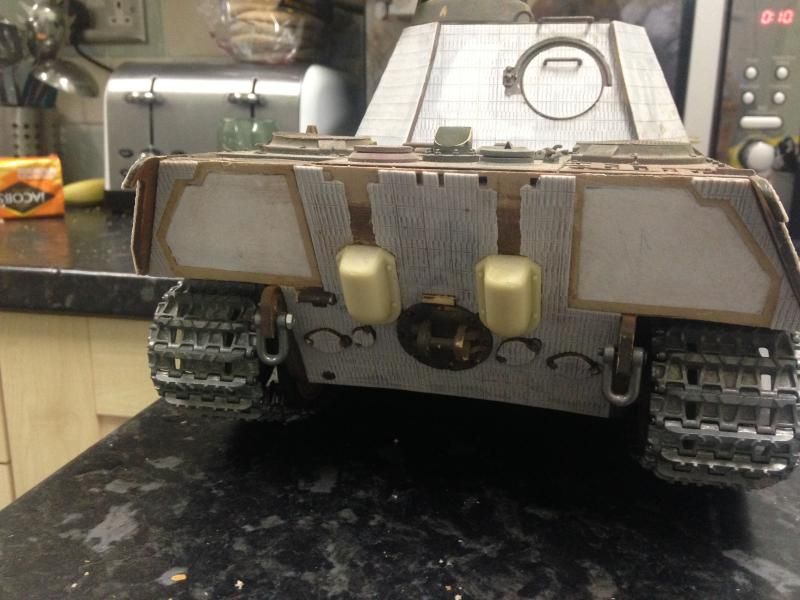
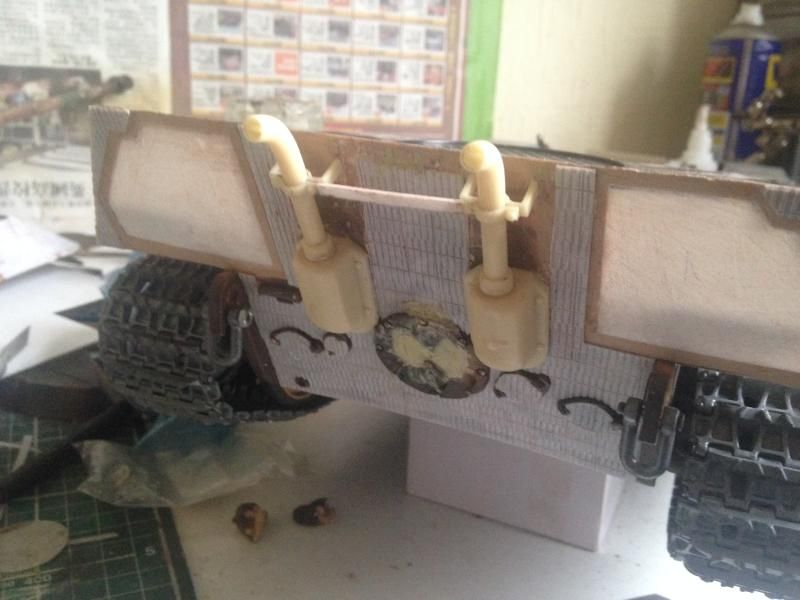
Some more progress and a setback, first the setback. I built up the rear exhausts based on a picture I found online which was backed up by some 1/35 early g's I found. Unfortunately I must have been half asleep when looking up my references as the rear I ended up making was that of a panther D! Epic fail.
So I have tried to amend this and went back into research mode and found some pictures of panther g's with the rounded exhaust bases and went from there.
The incorrect setup:
I went back and built some new exhaust covers from brass, rebuilt the tow hitch and came up with this:
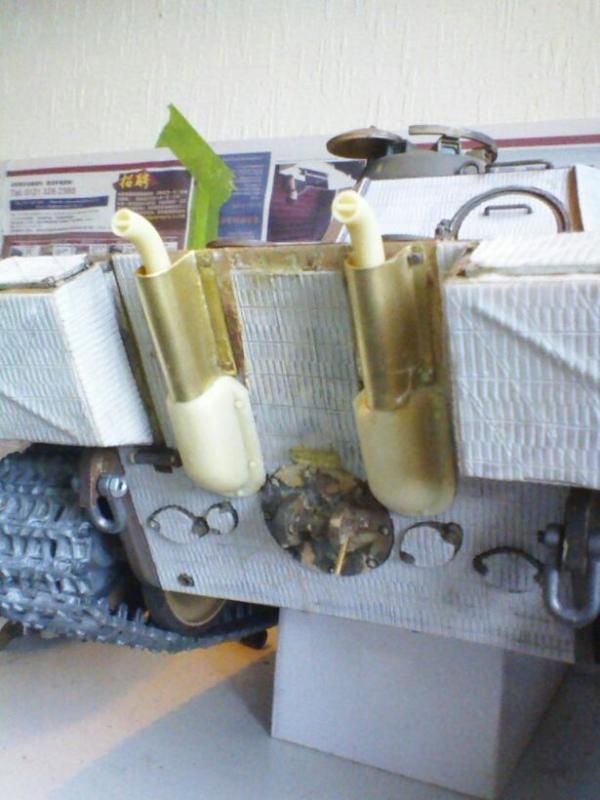
Much better, looking more like this
Next I added the spare track holders, new pins and chain soldered on to keep everything together:
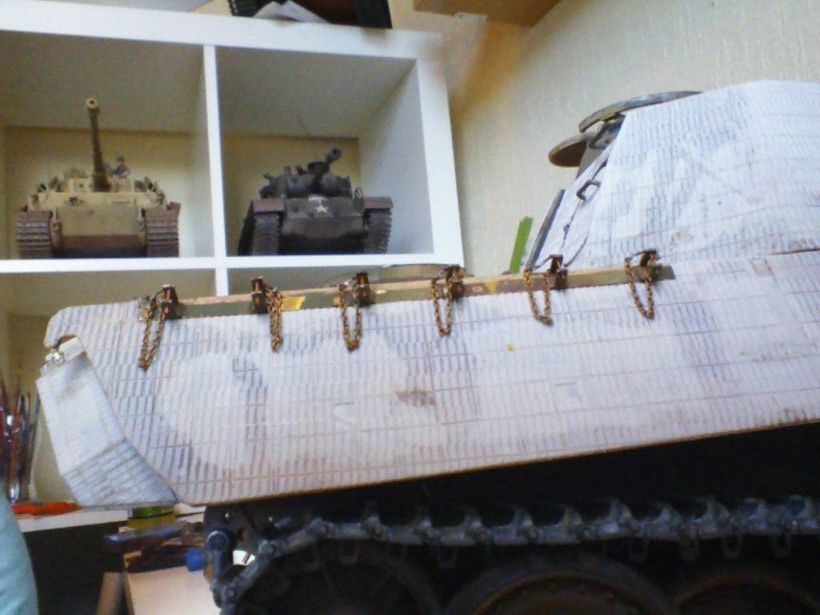
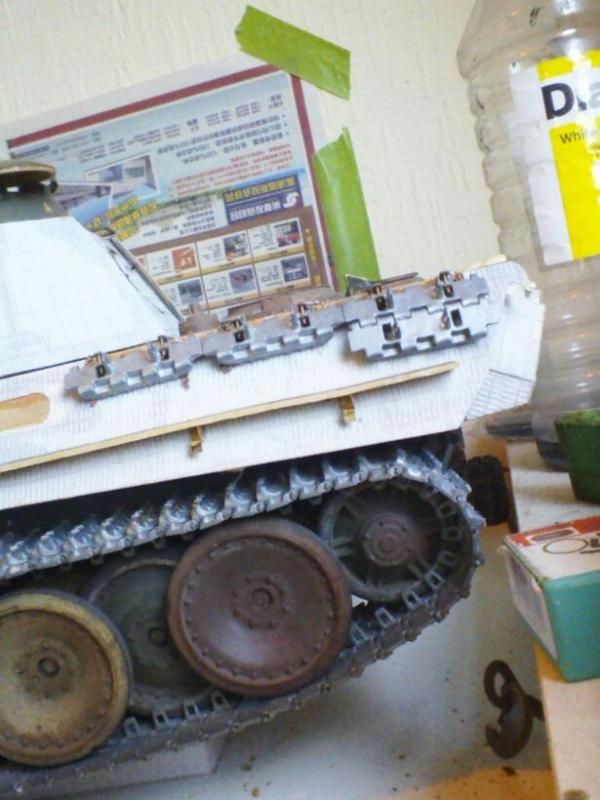
I've also added the the running boards and attached the photo etched hangers for the side skirts.


