Converting a 'Static' Kit to RC...

Post any other Post WWII build loges that do not fit into the other boards here
User avatar
Dietrich
Staff Sergeant
Posts: 973
Joined: Thu Aug 13, 2009 10:29 am
Location: England and Aquitaine,France

Re: Converting a 'Static' Kit to RC...

Post by Dietrich »

Hi Painless,
Thanks for the comment :D .....Pershing makes Perfect sense :thumbup: ...and would explain why I have a really good set of tracks that look and feel like Tamiya and a not quite so good set that must be Heng Long !
I am going to adapt the tanks front hatch so that he can put a 'Lego PlayMobil ' figure in it ....Without, it dropping through into the interior of the tank and jamming the gears....
Very advanced piece of modeling .....called a 'plastic pot' glued to the underside of the deck..:haha:
.
Happy Holiday to you as well !
Never Forget......
   The Propaganda of the Victors....... becomes the History of the Vanquished
User avatar
lister fiend
Sergeant
Posts: 565
Joined: Mon Sep 10, 2012 3:38 pm
Location: ashvale, hampshire

Re: Converting a 'Static' Kit to RC...

Post by lister fiend »

yep, defo pershing.
look like early hl ones although I have no idea what the Tamiya ones look like.
I have heard that the newer hl pershing tracks are not very good.
coming along nicely btw :thumbup:
User avatar
Storky
Private
Posts: 98
Joined: Wed Nov 10, 2010 2:58 pm
Location: Plymouth

Re: Converting a 'Static' Kit to RC...

Post by Storky »

I am doing the same coversion for my son. I have also put the gearboxes in the back. Looks like you have HL Pershing (M26) sprockets and track. I am using these aswell (I have a HL Pershing tank).

Using the existing turret with 2X HL turret rings/cogs warmed up and expanded to fit the existing HMAF turret ring.

Trying to work out some way to elevate the main gun.

Have fitted LEDS front and rear.

Should just be finished by Christmas.

Phil
If you are not living on the edge, then you are taking up too much room.
User avatar
Dietrich
Staff Sergeant
Posts: 973
Joined: Thu Aug 13, 2009 10:29 am
Location: England and Aquitaine,France

Re: Converting a 'Static' Kit to RC...

Post by Dietrich »

Hi Phil,
The 'platform' for the Playmobil figures is in place under the deck hatch... so that figures can stand there or 'lie-down' when the hatch is closed..It also has a mounting point for another MG, cannon or rocket launcher to be fitted in the middle..........
IMG_9025.JPG
IMG_9026.JPG
IMG_9027.JPG
.
My son seems to think that you cannot have TOO MANY weapons on a vehicle / plane....his Lego creations 'bristle' with guns and missile launcher and net launchers...etc etc
In case you cannot guess what it actually is ....Its a 'Ceiling Rose' that you screw to the plastic base that your room lights electric cable comes through :D
.
I am going to move this thread to other builds soon...as it has gone beyond a simply a 'tip'..... :haha:
Never Forget......
   The Propaganda of the Victors....... becomes the History of the Vanquished
User avatar
Dietrich
Staff Sergeant
Posts: 973
Joined: Thu Aug 13, 2009 10:29 am
Location: England and Aquitaine,France

Re: Converting a 'Static' Kit to RC...

Post by Dietrich »

Just a further update,
The wheels are fitted onto the axles by friction with ribs that are cut into the ends of the metal bars. The wheels can be pulled off and then look like this..
IMG_9028.JPG
.
The wheels are actually not too bad....They are larger than a Tiger 1 wheel and might be interesting to use on 'What If' tanks or on 'Paper Panzers'
.
IMG_9030.JPG
.
Panzer III wheel.. Tiger 1 wheel .. and HM Armed Forces wheel as a size comparison......Definitely has possibilities for scratch building
.
IMG_9032.JPG
The wheels are in two halves that are held together by two small screws..
IMG_9029.JPG
.
Which when split look like this..
IMG_9031.JPG
.
These tanks are very cheap on the ebay...just as a few examples...
http://www.ebay.co.uk/itm/161169668946? ... 1436.l2649
.
http://www.ebay.co.uk/itm/321269774780? ... 1436.l2649
.
http://www.ebay.co.uk/itm/331088041096? ... 1436.l2649
.
The last one is at £8 plus a £5 postage.....that might be worth it just for the 10 usable road wheels ( 5 per side ... That is a cost of only £1.30p per wheel !!)....
and would save an awful lot of fabrication time !
After Crimbo when the kids are 'bored' with them...They may be even Cheaper :thumbup:
Never Forget......
   The Propaganda of the Victors....... becomes the History of the Vanquished
User avatar
lister fiend
Sergeant
Posts: 565
Joined: Mon Sep 10, 2012 3:38 pm
Location: ashvale, hampshire

Re: Converting a 'Static' Kit to RC...

Post by lister fiend »

hi alb,
can you tell me the diameter of the road wheels please.
no pressure as theres only 8 days to crimbo!
do you think you'll make it?
good luck mate
lister
User avatar
Dietrich
Staff Sergeant
Posts: 973
Joined: Thu Aug 13, 2009 10:29 am
Location: England and Aquitaine,France

Re: Converting a 'Static' Kit to RC...

Post by Dietrich »

Hi Lister,
The diameter is 56.9mm.....
......which is quite a bit larger than the Tiger 1 wheel which is 49.5mm its a useful size increase for 'scratch building'....
Just as an addition a Tamiya King Tiger wheel is 49.8mm
......
So what would THIS look like with the larger wheels... ??
dsc0483a.jpg
.
Yes I will make it in time for Crimbo.......But exactly what..' IT' will look like is another matter...... :haha:
Never Forget......
   The Propaganda of the Victors....... becomes the History of the Vanquished
User avatar
Storky
Private
Posts: 98
Joined: Wed Nov 10, 2010 2:58 pm
Location: Plymouth

Re: Converting a 'Static' Kit to RC...

Post by Storky »

Here are a few photos of my HMAF tank conversion.

Apologies to Dietrich for hijacking his post.

In the background is my scratch build project. An 1/8th scale M26 Pershing still in production. Not made a turret for it yet.
The wheel covers are held on with 2 screws as mentioned by Dietrich. You need to remove the plastic insides to allow the fitment of the star washer.
DSCF0161.JPG (42.86 KiB) Viewed 4339 times
Rear quarter showing the M26 Pershing tracks and sprockets. These are all plastic at the moment. Will see how they hold up to my sons' driving style!
DSCF0159.JPG (48.17 KiB) Viewed 4339 times
The wheels are drilled out to 4.5mm to allow them to rotate on the axles. Then 4mm Star washers are pushed on to the ends of the axles to stop them coming off. I have put 4mm washers between the whells and the hull to minimise the friction.
DSCF0157.JPG (40.12 KiB) Viewed 4339 times
The crude, but effective track tensioning system. Using 3mm threaded rod and suspension parts from a R/C car.
DSCF0155.JPG (42.87 KiB) Viewed 4339 times
HL gearboxes fitted in the back. The speaker fits nicely between them. (Not using a smoker)
DSCF0154.JPG (49.21 KiB) Viewed 4339 times
2X Heng Long turret rings cut out, warmed up with a heat gun, and glued to the existing turret ring. Standard HL Turret motor is used.
DSCF0152.JPG (50.51 KiB) Viewed 4339 times
Front quarter view with 10mm Phenoptix LED's
DSCF0150.JPG (53.98 KiB) Viewed 4339 times
An R/C conversion for my 7 year old son.
DSCF0148.JPG (55.07 KiB) Viewed 4339 times
A rear view showing red LED lights
DSCF0149.JPG (51.56 KiB) Viewed 4339 times
Attachments
Rear 5mm LED lights in brackets made from soldered brass.
DSCF0153.JPG (39.62 KiB) Viewed 4339 times
If you are not living on the edge, then you are taking up too much room.
User avatar
Dietrich
Staff Sergeant
Posts: 973
Joined: Thu Aug 13, 2009 10:29 am
Location: England and Aquitaine,France

Re: Converting a 'Static' Kit to RC...

Post by Dietrich »

Another update....
I cannot get 'Star type Circlips' locally so I have had to use M4 threaded bar for the axles and then alter the wheels so that they can run independently on each axle ( They are currently a 'Friction Fit' and turn together which is OK for 'Push Along' but not good for RC)......( Thanks Storky for the heads up)
IMG_9047.JPG
.
The threaded bar may well rub an oval in the hull where it passes through and rotates so I will be adding Heat-Shrink tubing to the axle at those points to protect it.
Its just a sliding fit at the moment !
IMG_9049.JPG
.
The wheels are dismantled by undoing the two screws that secure the two halves together. The Friction Fit collar is cut off the outer wheel and reduced in length, before being rotated and glued back into position in the inner wheel. The collar now simply acts as a spacer so that the wheel runs true on the axle.The cut off piece (shown next to the wheel) has to be removed so that there is 'Space' created inside the two halves of the wheel for the pair of lock-nuts and the washer.
IMG_9048.JPG
IMG_9051.JPG
.
The Wheels simply have to be pulled off the axles when they are on the tank.....but once you have pulled one off it is almost impossible to grip the axle to remove the other.
I put the end of the axle in a cordless drill, take a firm grip on the wheel and spin the drill whilst pulling on the wheel....It quickly pops off because the plastic is heated by the friction of the axle spinning !
IMG_9053.JPG
.
Production line of wheels, waiting whilst the glue sets !
IMG_9054.JPG
.
The Idler wheel is 'glued' together so it has to be split and then Countersunk to allow the fitting of the two locknuts and washer on the new axle.
IMG_9055.JPG
.
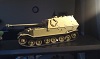
New 'Black' spacer collar added to the HM Armed Forces Tank ....to allow the fitment of a Heng Long Turret.......Sorry for taking the 'Lazy Mans Route' :{ ..but I am pressed for time.
IMG_9059.JPG
.
Panzer III turret in place on top of the Upper Hull...... It looks a bit 'small' ...but I think that it looks OK and is possibly more likely to survive any of the inevitable crashes that will result for a 5 Year old son Driving...... Maybe it could pass as a 'Troop Carrier' type vehicle ...for the Lego PlayMobil Army!
.
IMG_9061.JPG
.
Using the Panzer III turret allows me quick access to a turret rotation and a gun elevation system.....and NO The airsoft will NOT be active.. :D ...Because a 5 year old son who doesn't think that > NO < applies to him...is a recipe for Disaster :O
IMG_9062.JPG
.
Next up ..Fitting all the wheels...a base plate for the electrics...remote charger port..... Oops...How many days til Crimbo ?
....AND my son is now on Holiday.....so no more spare days.... 8O..and..PAINT !!!
Never Forget......
   The Propaganda of the Victors....... becomes the History of the Vanquished
ALPHA
Major-General
Posts: 10960
Joined: Thu Oct 03, 2013 1:06 am

Re: Converting a 'Static' Kit to RC...

Post by ALPHA »

Hey Dietrich... if I were your son ... I'd be thrilled to get that..care to adopt a hellion ??? ;) ....... :haha:

less than a week till Xmas... You can do it man :thumbup:


ALPHA
Post Reply

Return to “Other Modern”