Page 2 of 3
Re: A gear with Brusshless engines, Genuine outdoor gear and
Posted: Tue Jul 02, 2013 3:08 pm
by jeff1101
Simply beautiful. You have got the movement spot on. Very smooth indeed.
Re: A gear with Brusshless engines, Genuine outdoor gear and
Posted: Wed Jul 03, 2013 4:17 pm
by Edwin
Normally work for me after a successful trial run ended and the tub goes to her new owners, but every now and then I build a tank on request largely completed, as this time also.
That is why it went today with poly continue to work on the tub.
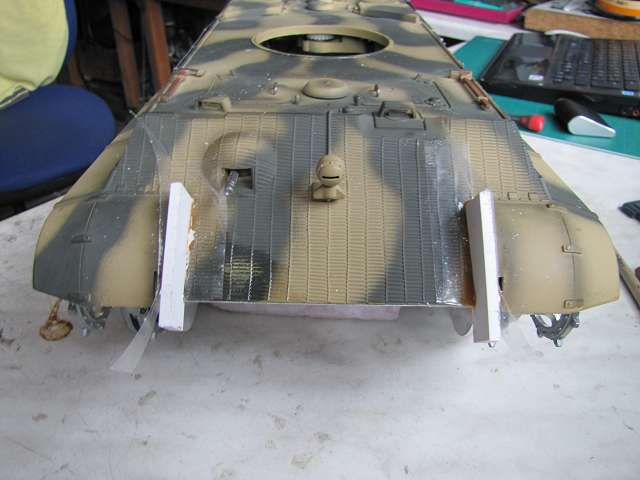
Since the hull sides are made of 1.5 mm aluminum so I have to double up on the ends even with 4mm Ploy. At the same time as I create the attachment for upper hull and transom. To ensure it fits judge the upper hull with transom clean the chassis and glue the corners with adhesive performs well. The Tesa prevents sticking of parts. Then I can stick with STABILITH express the prepared Polys fittings with the supernatants.
- k-IMG_3658.JPG (29.93 KiB) Viewed 3119 times
Then you should wait at the minimum one hours before the upper hull decreases gently but forcefully. So you get an exact match connection for the hull front.
- k-IMG_3659.JPG (35.83 KiB) Viewed 3119 times
Next I make first with the transom. This first gets two hooks with which I can plug it into the rear strut. This I must then adapt so until the upper hull can plug clean.
- k-IMG_3660.JPG (34.52 KiB) Viewed 3119 times
- k-IMG_3661.JPG (38.73 KiB) Viewed 3119 times
Then I glue the transom again to keep everything on top of the no glue.
- k-IMG_3662.JPG (30.37 KiB) Viewed 3119 times
Then I glue again each with a poly STABILITH stripes to the sides. This is not so easy because of the corner mirror is warped and so I press it into shape.

- k-IMG_3663.JPG (34.73 KiB) Viewed 3119 times
- k-IMG_3665.JPG (37.7 KiB) Viewed 3119 times
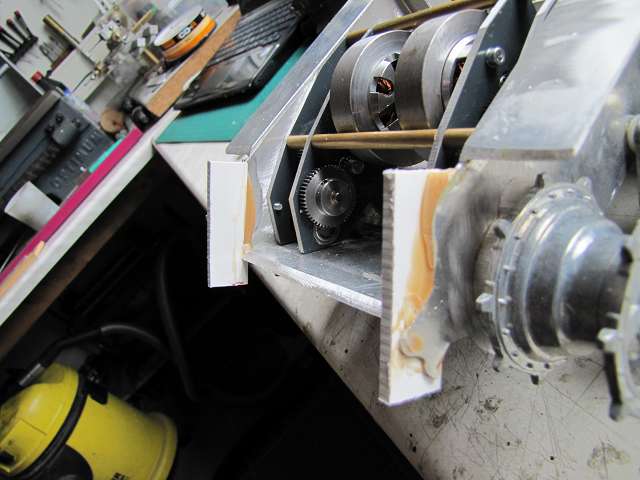
By the way I verklebe also the countershaft.
- k-IMG_3667.JPG (33.02 KiB) Viewed 3119 times
After I was able to remove the transom again I still use this to adjust the glue better and Dustproof. With STABILITH goes perfect and it can work very well with the poly.

- k-IMG_3668.JPG (32.02 KiB) Viewed 3119 times
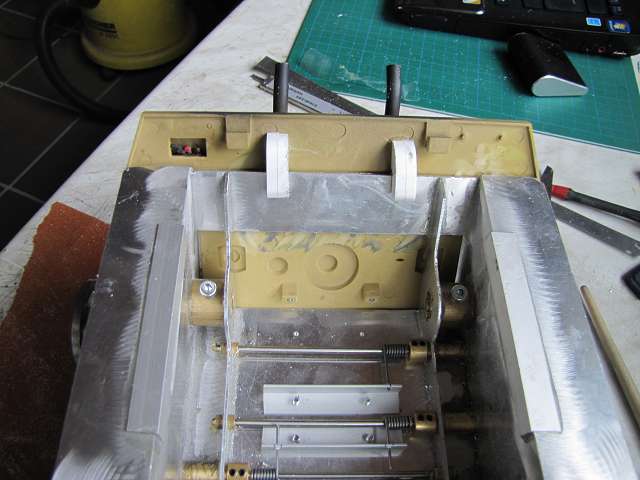
After the glue has cured long enough, man should really have time, I have begun to edit the supernatants on the hull front. I'll do that again tomorrow but only if I continue to can out with the mess.
- k-IMG_3669.JPG (36.22 KiB) Viewed 3119 times
Re: A gear with Brusshless engines, Genuine outdoor gear and
Posted: Thu Jul 04, 2013 3:45 pm
by Edwin
And on it goes with the tub.
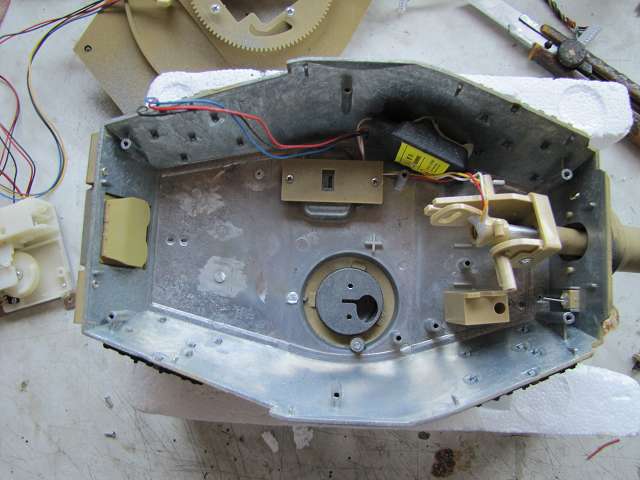
Before I adjusted the ends When finished I wanted to install the solenoid bracket the upper hull.
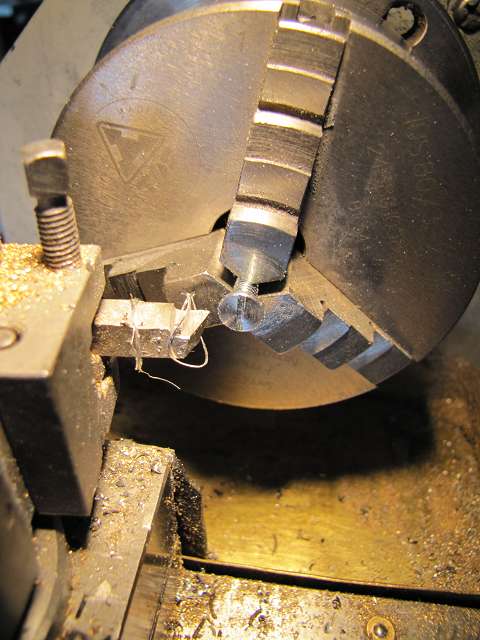
In addition I have just turned M4 screws with flat head 2 pieces and screwed them into a thick piece of poly I-adhesive at the appropriate place under the rear of the tub to the chain covers.
- k-IMG_3671.JPG (41.17 KiB) Viewed 3106 times

- k-IMG_3674.JPG (35.63 KiB) Viewed 3106 times
The height of the screw was adjusted so that it remained a small gap to the upper hull attached to the magnet. Between coil and magnets I had to put a piece of scotch, so I did not connect the magnets with them. On the magnets still a drop STABILITH and put the pan. So I get after curing a perfectly matched magnetic holder.
- k-IMG_3672.JPG (37.74 KiB) Viewed 3106 times

- k-IMG_3673.JPG (22.64 KiB) Viewed 3106 times
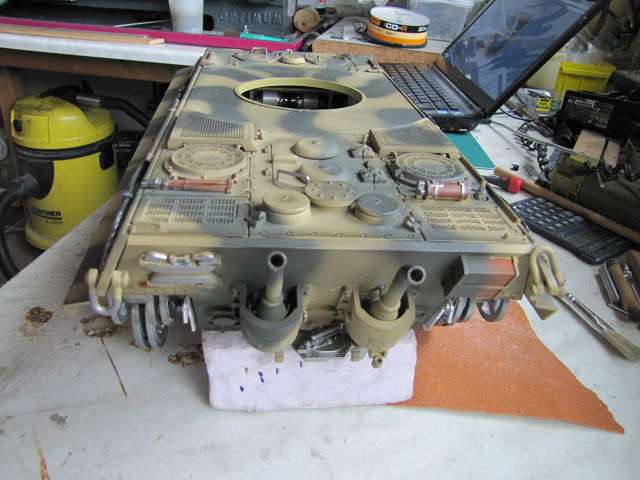
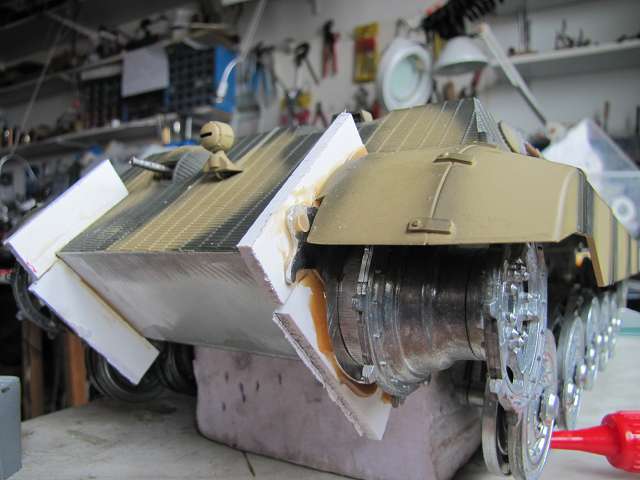
Now it has finally stopped raining and I was finishing the tub ends.

- k-IMG_3675.JPG (31.93 KiB) Viewed 3106 times

- k-IMG_3676.JPG (25.49 KiB) Viewed 3106 times
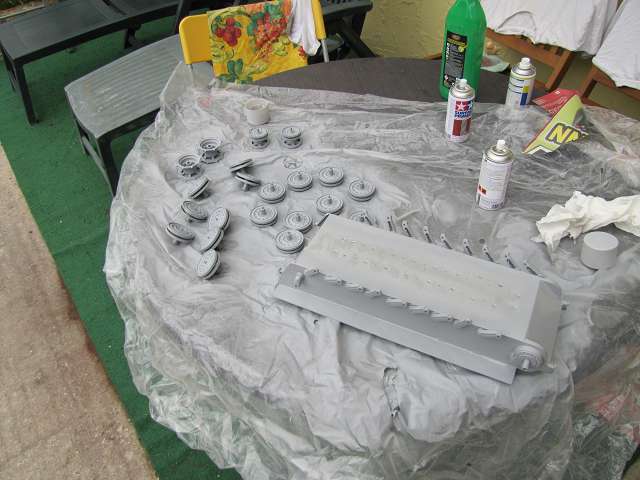
Since I was just I wanted the same even begin painting.
First disassemble everything again after the bottle and spray degreasing metal base.

- k-IMG_3677.JPG (43.93 KiB) Viewed 3106 times
- k-IMG_3678.JPG (39.63 KiB) Viewed 3106 times
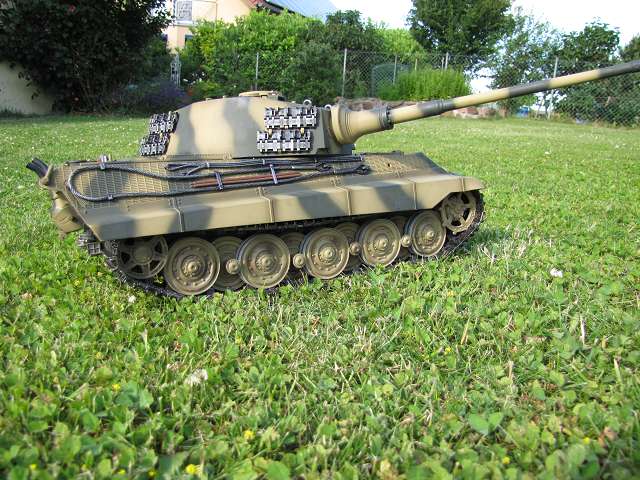
And after appropriate drying time, I could mix the yellow Basecolor match the upper hull and painting everything.

- k-IMG_3679.JPG (42.2 KiB) Viewed 3106 times
Re: A gear with Brusshless engines, Genuine outdoor gear and
Posted: Thu Jul 04, 2013 3:48 pm
by Edwin
Re: A gear with Brusshless engines, Genuine outdoor gear and
Posted: Fri Jul 05, 2013 7:16 pm
by Dietrich
Superb work Edwin...Please keep the updates coming.. I am really looking forward to seeing the completed tank 'roaming' around your garden

Re: A gear with Brusshless engines, Genuine outdoor gear and
Posted: Sat Jul 06, 2013 5:44 pm
by Edwin
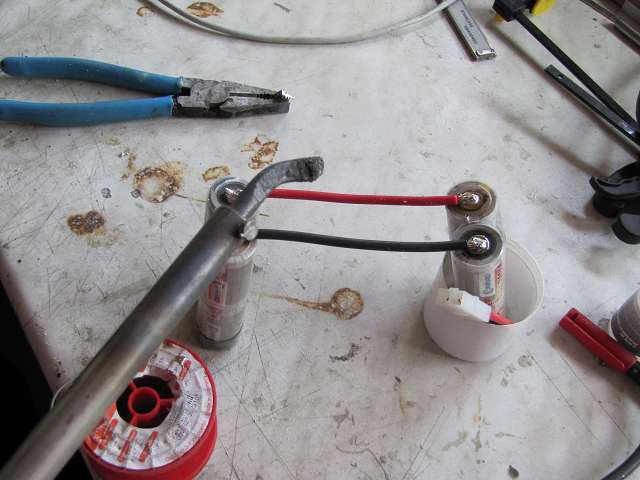
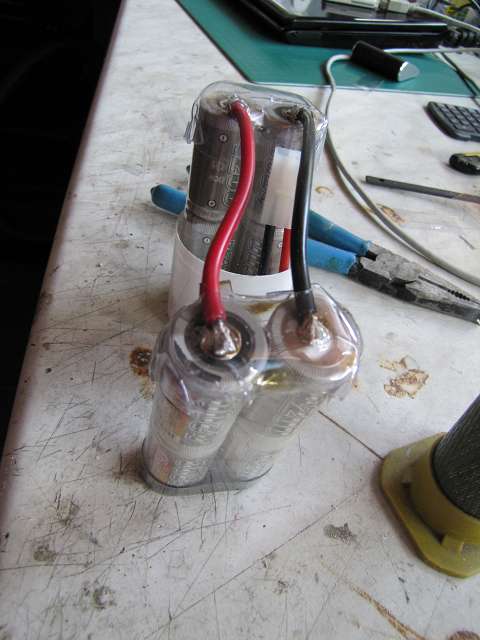
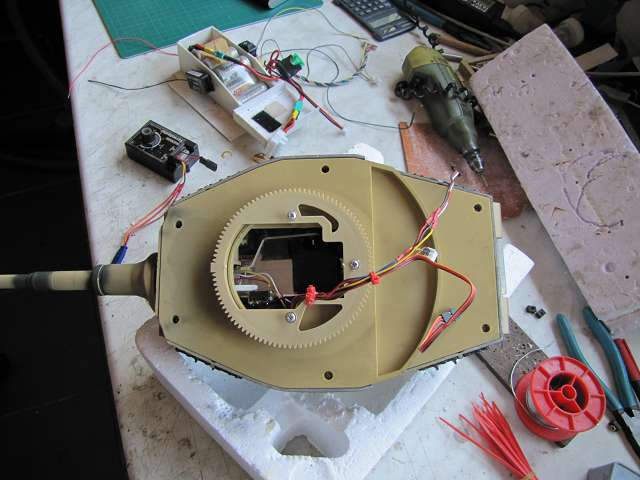
This time was the first battery in the series to be able to start with the installing.
As always, I used with my 8-cell vehicles that I just break apart in the middle.
The open-loop poles, and I solder two cables with a 80W soldering iron to the poles. The cable I have made ??as long as the tank is wide.
- k-IMG_3687.JPG (34.91 KiB) Viewed 3075 times
I cover the open pole with the remains of a blister from which I can adjust with some heat and attach it with a piece of heat shrink tubing.
- k-IMG_3689.JPG (34.77 KiB) Viewed 3075 times

- k-IMG_3690.JPG (24.56 KiB) Viewed 3075 times
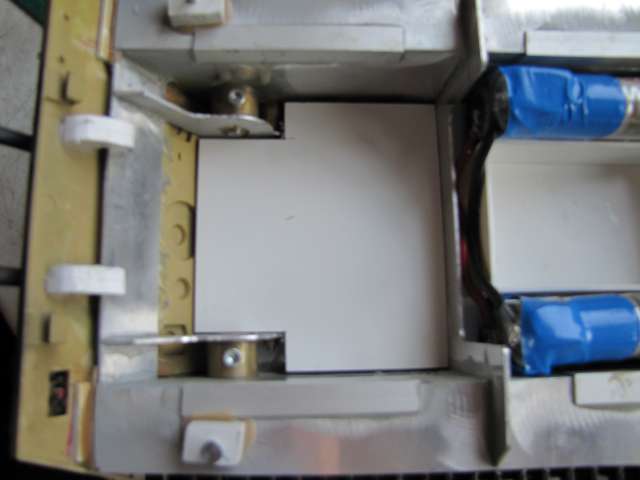
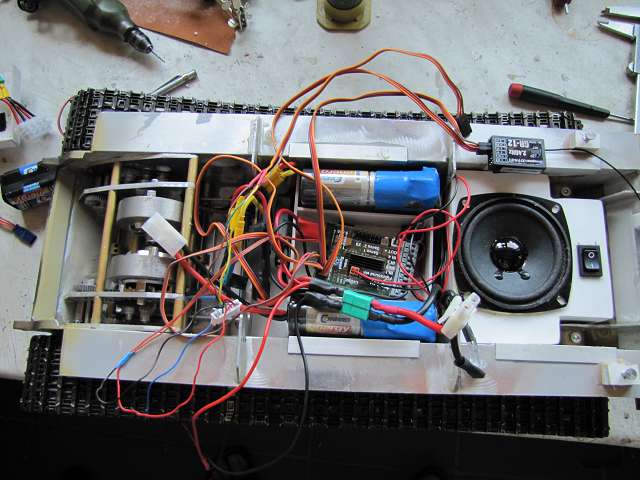
So I can now build the electronics to the battery.

- k-IMG_3709.JPG (38.39 KiB) Viewed 3075 times
As well as the electronics, the speaker box is fitted is formed in the tub and with the on-off switch.
- k-IMG_3711.JPG (20.91 KiB) Viewed 3075 times

- k-IMG_3712.JPG (22.59 KiB) Viewed 3075 times

- k-IMG_3714.JPG (41.72 KiB) Viewed 3075 times
So I'm going to make the Köti slowly finished this week.
Re: A gear with Brusshless engines, Genuine outdoor gear and
Posted: Mon Jul 08, 2013 4:41 pm
by Edwin
Step by step you continue.
The cabinet has yet to get a little insulating material of mine for a better sound.

- k-IMG_3717.JPG (29.4 KiB) Viewed 3060 times
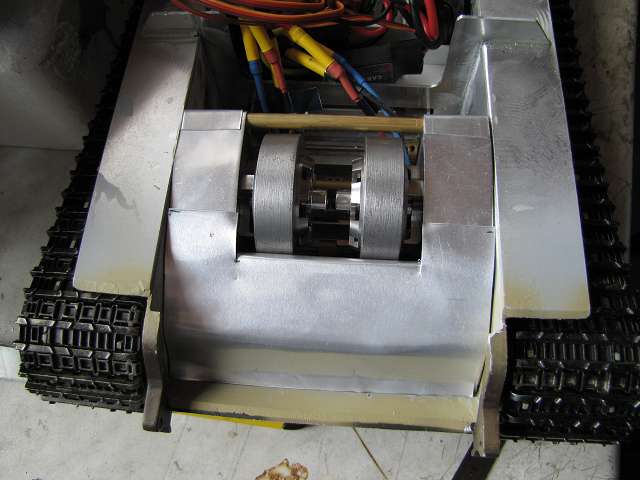
And so the engine then looks through the door. Here too good of a switch is then accessible.

- k-IMG_3723.JPG (41.44 KiB) Viewed 3060 times
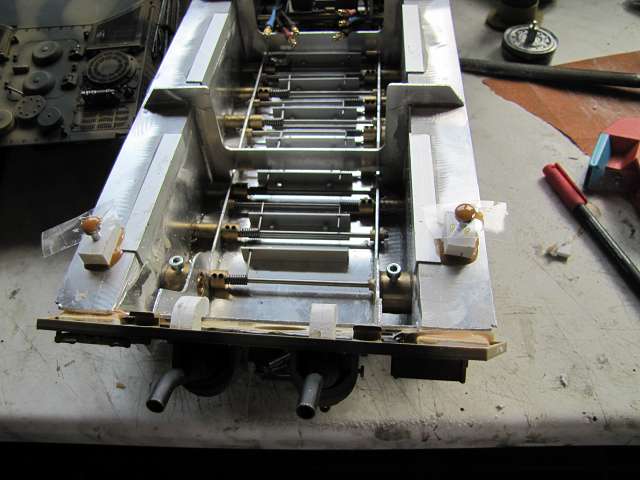
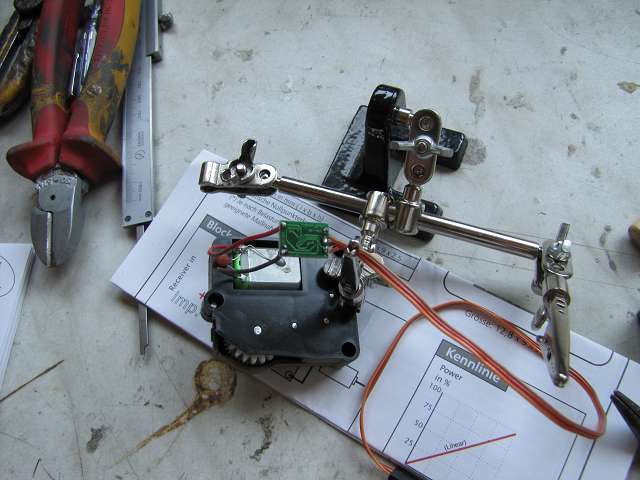
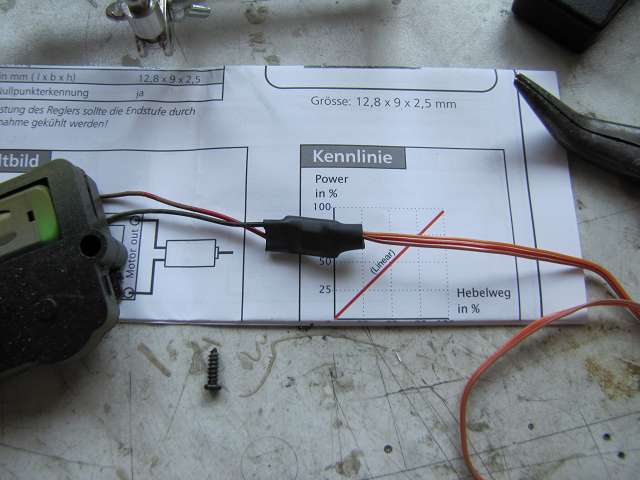
Next, I build a micro controller of the Sol-Expert. This fits perfectly with the orginal tower drives of HL and is therefore not overwhelmed. Moreover, I need no separate power connection as well as the controller gets its power from the receiver and also the speed of Urms fits easily.
The controller I have to solder the cable, which is not easy because of the small size.

- k-IMG_3720.JPG (35.35 KiB) Viewed 3060 times
- k-IMG_3721.JPG (38.15 KiB) Viewed 3060 times
- k-IMG_3722.JPG (33.59 KiB) Viewed 3060 times
Next I do with the tower. The first is disassembled and the recoil away.

- k-IMG_3724.JPG (35.17 KiB) Viewed 3060 times
- k-IMG_3725.JPG (36.26 KiB) Viewed 3060 times
Re: A gear with Brusshless engines, Genuine outdoor gear and
Posted: Mon Jul 08, 2013 4:46 pm
by Edwin
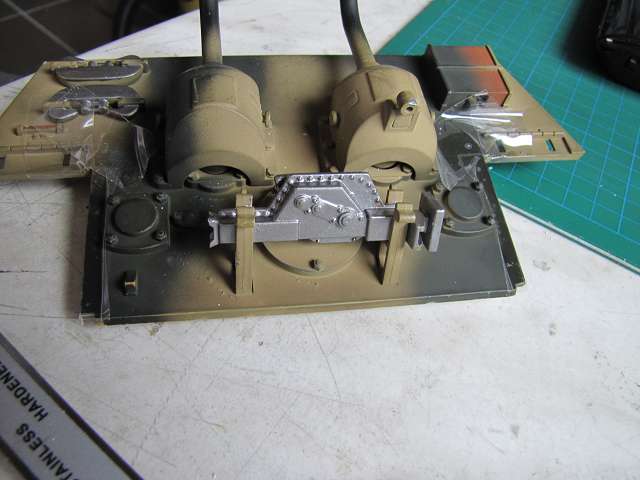
To fix the Sevos well and tarrieren the long tube at least to some extent I screw a aluminum bracket to the cradle.

- k-IMG_3727.JPG (31.76 KiB) Viewed 3060 times

- k-IMG_3726.JPG (38.37 KiB) Viewed 3060 times
Because then I glue the servos for elevation and recoil. For the flash shot I bring to a micro switch that is triggered by the retreat of the pipe. Here I examine precisely the functions with a servo tester.

- k-IMG_3728.JPG (41.87 KiB) Viewed 3060 times
Thus, the tower can be screwed again.
- k-IMG_3729.JPG (37.71 KiB) Viewed 3060 times
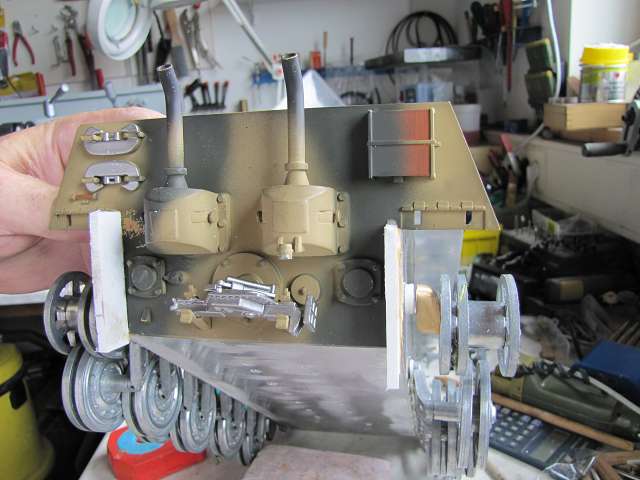
For the movable MG I have come up to me a very simple solution, since no precision is required for the movement. The MG is moved just over a curved 0.8 mm steel wire back and forth. By the way, I also soldered the resistors is equal to the LEDs from the MG and the headlights. Unfortunately, however, seems to have broken the driving lamp. Something just is always ....


- k-IMG_3731.JPG (23.67 KiB) Viewed 3060 times
And right now I'm in the wiring that's already relatively expensive. I will well fit even a charging cable, so you do not always have to remove for charging the tub.
- k-IMG_3732.JPG (47.4 KiB) Viewed 3060 times
Re: A gear with Brusshless engines, Genuine outdoor gear and
Posted: Tue Jul 09, 2013 8:49 pm
by Edwin
Since summer is just and therefore in my local less going with me, I'm just going to program the transmitter and the sound module into the idle times.
He can drive already.

- k-DSCN0607.JPG (38.11 KiB) Viewed 3051 times
Re: A gear with Brusshless engines, Genuine outdoor gear and
Posted: Fri Jul 12, 2013 12:11 pm
by Edwin
After dinner I ever could program in my local key features, but I still had to make some adjustments at home and the sound.

- k-IMG_3740.JPG (41.67 KiB) Viewed 3030 times
Now that Bassis is here I have tinkered on Stefan's request, a transmission cover. The spring is made ??of hard aluminum and is only inserted. So you can for servicing all again very simple Push Open.
- k-IMG_3741.JPG (33.57 KiB) Viewed 3030 times
After everything works so far, of course, was still in a great functional testing and test drive.
- k-IMG_3742.JPG (72.35 KiB) Viewed 3030 times
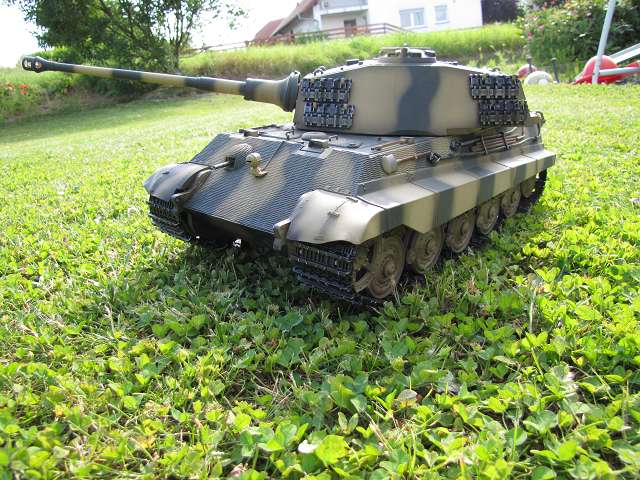
- k-IMG_3743.JPG (73.76 KiB) Viewed 3030 times
http://www.youtube.com/watch?v=_JJCUlY1pDY
What I now have to make a few minor adjustments are the sound and the suspension on the rear still needs to be raised a little, but then Stefan Köti is ready.