Ludwig/ Heng Long King Tiger E-100 build

Up to the end of WWII.
User avatar
mustclime
Sergeant
Posts: 560
Joined: Sat Jul 16, 2011 3:17 am

Re: Ludwig/ Heng Long King Tiger E-100 build

Post by mustclime »

Ok, time for another go at this....sorry for the delay but I was let go at work and there has been other things to do than messing with tanks....I spent some more time on the rear plate....added a little texture to the cast armor cup and installed the middle access plate....

Image

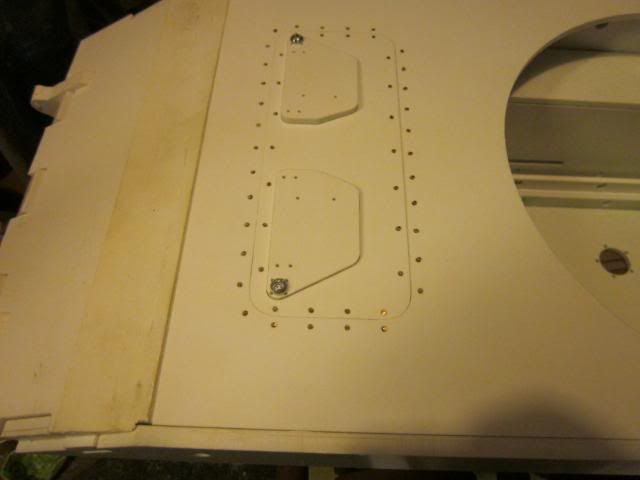
Not sure what I am going to do about the 2 side access hatches....they are very different than the king tigers.
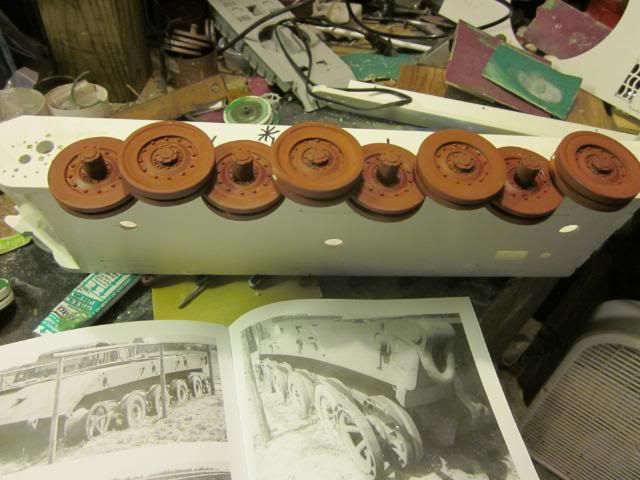
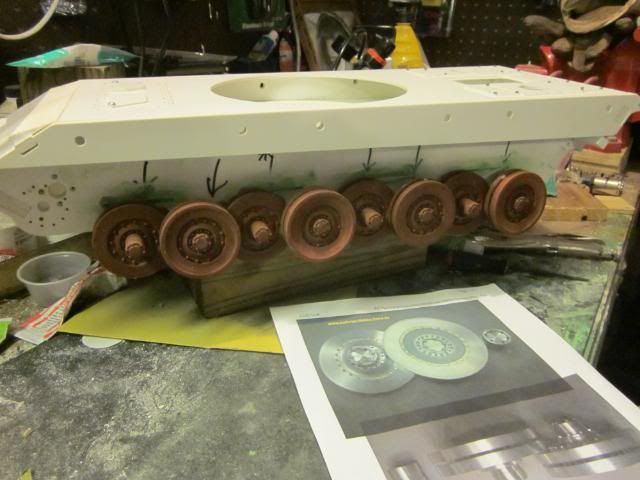
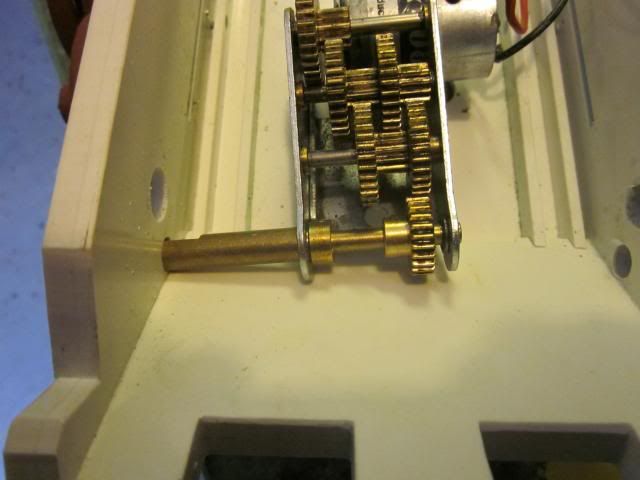
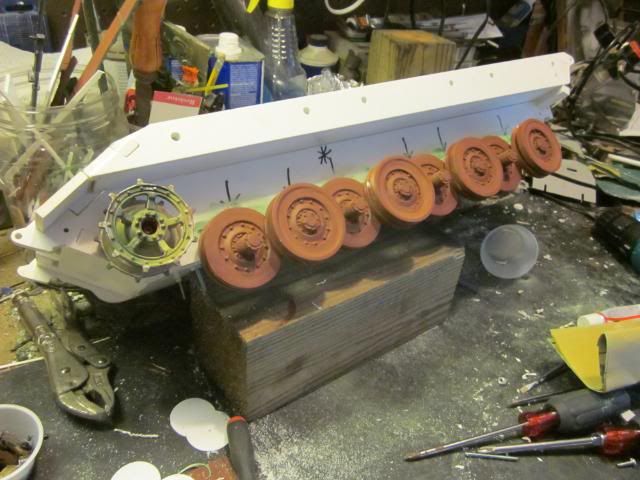
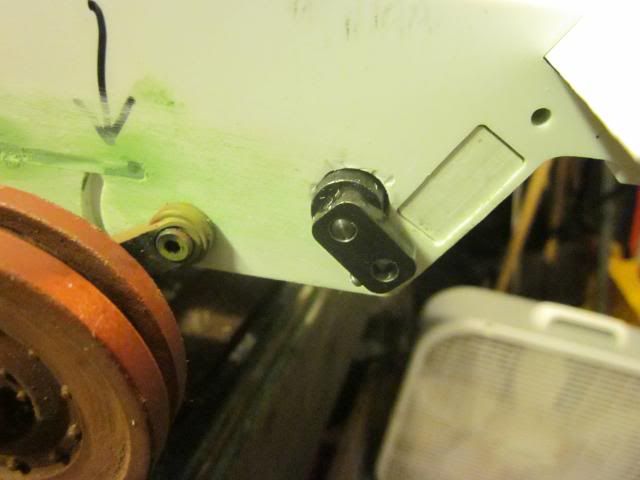
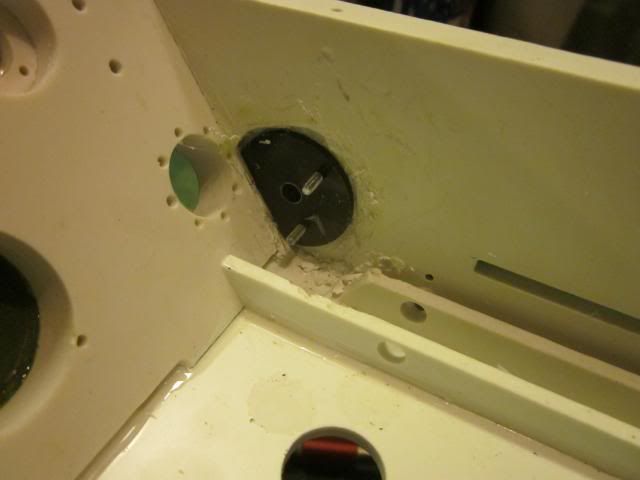
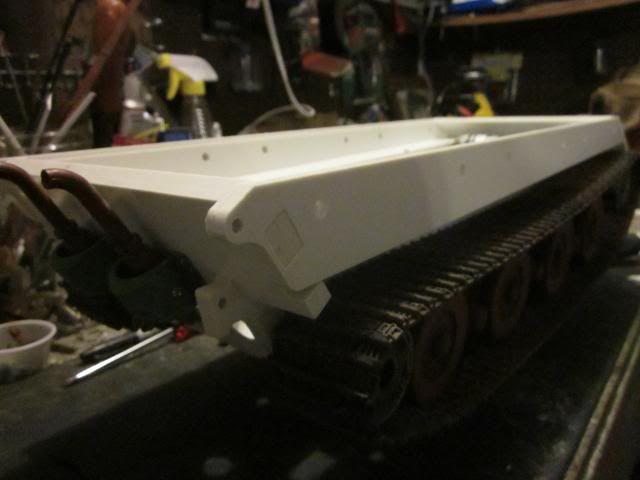
The next thing to get right is the suspension.....the guide slots needed to be extened where the bottom plate slotted into the side plates....

Image

Image

here is what it looks like with the arms off....

Image

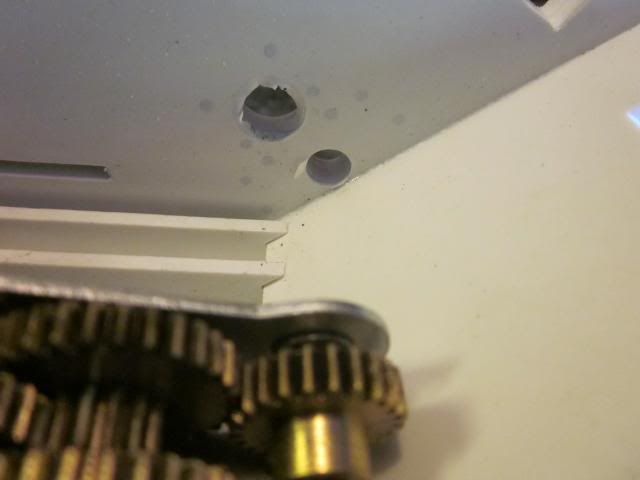
and here is it corrected.....

Image

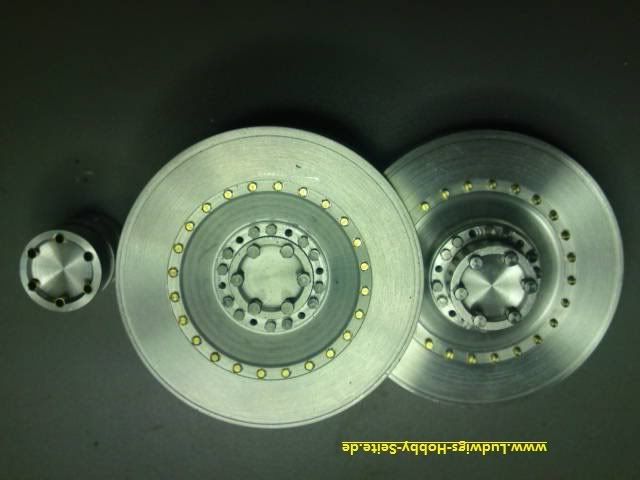
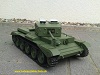
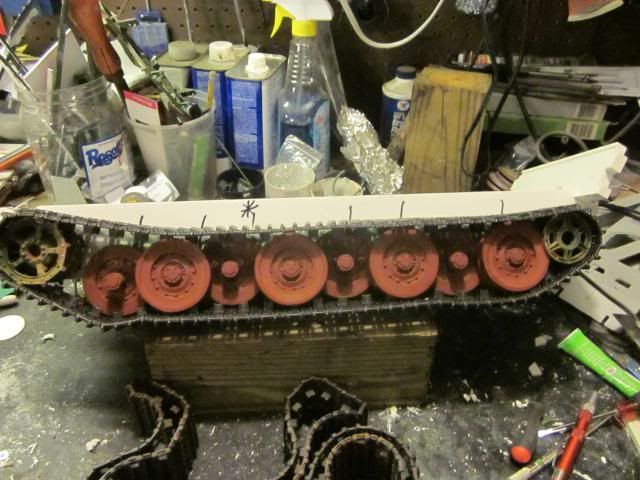
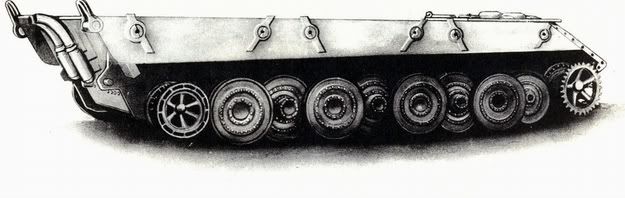
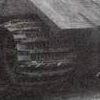
I think I have figured out the wheels...or how I am going to do them....there are 16 wheels, 8 inner and 8 outside. Since I am using hl suspension and wheels I have to work with its issues....the big one is the inside and out side wheels rub each other....so you can not make the inner wheels wider toward the out side and the outer wheels wider towards the inside.....so I going to fill in the grove on the inner wheels with putty and I will make hubcaps for the outer wheels to try to get that slab look...kinda like this

Image


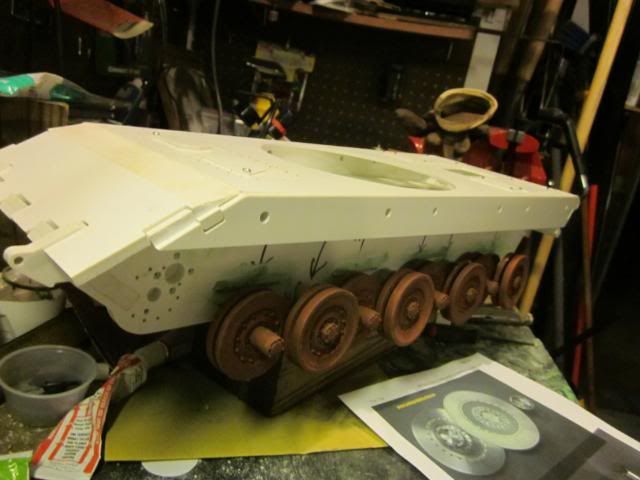
lots of sanding now....let me know what you think...

scott
User avatar
mustclime
Sergeant
Posts: 560
Joined: Sat Jul 16, 2011 3:17 am

Re: Ludwig/ Heng Long King Tiger E-100 build

Post by mustclime »

Lets see...spent most of the day cutting and sanding.....please let me know what you think.....again, here are chris's copies of the 900mm scale prototype wheels....

Image

Here my heng long king tiger wheels....made a scale 900mm and modded to kinda look like the Tiger Mouse wheels.......

Image

And another angle...

Image

And I decided to throw on the upper hull to see how i compaires to the pics...

Image

Image

While waiting for the putty to dry, I did the 1mm bolts in both the front and rear hulls....

Image

Image


Thats about 1/3rd of the build.....next motors and idlers....
User avatar
mustclime
Sergeant
Posts: 560
Joined: Sat Jul 16, 2011 3:17 am

Re: Ludwig/ Heng Long King Tiger E-100 build

Post by mustclime »

Sent some more job apps and got into the workshop to clear my head.....started by trying to fit some of Phil's 3:1 gear boxes and 400 motors(RIP)...
Huston, we have a problem....

Image

Image

I am supose to use the lower hole......Oh well, I love the smell of melting plastic in the moring.... :haha:

Image

Image

Image

any question on how much plastic had to be removed....here you go, I did not include what was in my hair and on my shirt... :/

Image

Ok, that looks great.....but that leads me to the next problem, I am planing on bonding down the the front upper armor plate.....

Image

Gear boxes never go bad in these things ...right?...... :/

Wish I had a tap set this small and buying one at this point is not going to happen till I get a new job..... wonder if I can find some self tapping screws that can come in from the bottom......I am going to have to think about this one..... 8O
User avatar
chris3
Staff Sergeant
Posts: 891
Joined: Fri Jan 22, 2010 9:09 pm
Contact:

Re: Ludwig/ Heng Long King Tiger E-100 build

Post by chris3 »

moin

nice progrss so far, i like to see the hull with the new roadweels :-).

but sorry for my bad understanding, what is your actual problem with the gearboxes? You are afraid to glue the Front uper armore plate?.

cu christian
http://www.Ludwigs-Hobby-Seite.de

-www.hitechcreations.com-
User avatar
mustclime
Sergeant
Posts: 560
Joined: Sat Jul 16, 2011 3:17 am

Re: Ludwig/ Heng Long King Tiger E-100 build

Post by mustclime »

If I bolt down the gear boxes and then glue down the front plate, there will be no way to reach the mounting bolts in the front of he gear boxes if the gears go bad( not uncommen when you battle your tank).
User avatar
The Tank Man
Staff Sergeant
Posts: 971
Joined: Sat Jul 16, 2011 9:06 am
Location: England UK Bolton Manchester

Re: Ludwig/ Heng Long King Tiger E-100 build

Post by The Tank Man »

mustclime wrote:If I bolt down the gear boxes and then glue down the front plate, there will be no way to reach the mounting bolts in the front of he gear boxes if the gears go bad( not uncommen when you battle your tank).
I would of gone with tamiya tiger gearboxes with the schumo gear reductions then drilled and taped the underneath of each gear box and then screed them in from under the tank! I had a set of those gear boxes in my tiger and that was heavy I had one outdoor meet with them and the brass bushes spun on the axels and wore down causing the gear boxes to jam up!!!! And yes I had greased the axels up!! :O
I love the smell of napalm in the morning!
User avatar
mustclime
Sergeant
Posts: 560
Joined: Sat Jul 16, 2011 3:17 am

Re: Ludwig/ Heng Long King Tiger E-100 build

Post by mustclime »

Like any gear box, they need to be broken in....I have no idea why more people do not do that....All I did with my king tiger ( that these gear boxes came out of) was install them, leave the tracks off, put in one of those junkie 1700ma batteries........then start the tank put something on the right stick and just run them. Add a little motor oil for brake in....I run the motor till the battery is dead, then install another battery and do them samething in reverse. You then I pull the motors, blow them out with "brake clean" and lube them....
User avatar
mustclime
Sergeant
Posts: 560
Joined: Sat Jul 16, 2011 3:17 am

Re: Ludwig/ Heng Long King Tiger E-100 build

Post by mustclime »

Ok...job hunting sucks, tied down the gears boxes.....shoe glooed the nuts to the base of the gear boxes.....cut off the hl king tiger final drive covers and stuck them on the e100 and mounted the drive wheels....

Image

Mounting the idlers was a pib....used the dremmel and a cutting bit to reduce the wall thickness for the idler kit I got...

Image

Image

and the joy mof mounting those little screws...*sigh*

Image

and here is the hull with some tamiya kt tracks..........

Image

kinda lookslike this...

Image


A couple notes for those that may try this build......
1) Tamiya king tiger tracks are junk...kicking myself for buying 6 sets of these for this build. Matero are better than tamiya and henglong are the best out the plastic tracks for the king tiger....Why, you may ask....simple, all of the tracks are a open pin design( great for low friction but crappy for being strong)....the tamiya tracks have the least amount of plastic in the closed pin portions , matero is a little better...but hl has the most....this leads to problems...the tamiya and matero have the same spacing for the holes in the tracks for the drive cogs....the hl holes are a little narrower spaced to allow for the extra plastic for the closed loops on the tracks.............

Hint....If ou have a tamiya king tiger......replace your tracks with matero or hl tracks.....If you use the hl tracks, you will need to take a file to your drive coges..... :S
User avatar
chris3
Staff Sergeant
Posts: 891
Joined: Fri Jan 22, 2010 9:09 pm
Contact:

Re: Ludwig/ Heng Long King Tiger E-100 build

Post by chris3 »

moin

you don't like the Tamiya tracks? but they relatively strong, 2 Friends of me using these for their king tigers in over 5-6h outdoor battle days with out any problem, they say its no need for us to buy metal tracks. and of the other side i have tested the HL tracks with my Lion and i must say they are not working fine, after a few meters they see to break, but maybe its just me, because haven't heard about this problem from others?.

cu christian
http://www.Ludwigs-Hobby-Seite.de

-www.hitechcreations.com-
User avatar
mustclime
Sergeant
Posts: 560
Joined: Sat Jul 16, 2011 3:17 am

Re: Ludwig/ Heng Long King Tiger E-100 build

Post by mustclime »

Some have asked me about the differance in tracks....since I have some from each maker here are some shots to sow what I am talking about...
Here are matero, heng long and tamiya in the pic in that order( hl has been used for a year)...


Image

matero and hl use strait wire for pins with a nerled end mounted toward the inside....the tamiya has strait wire pin with a flat head on the pin, they do not rely on a nerl to hold the pins in place, its a strait friction fit.....all of the tracks are a open pin design but the hl tracks have have more closed links than the others....here a close up of the matero and the hl

Image

and a close up of the hl next to the tamiya....

Image

Issues I have with the tamiya's....1)pins pull out toward the inside....tamiya did this to hide the flat ends on the pins, the problem is when the get loose, they will catch on the hull and you will brakea track. 2) just relying on a friction fit means you pull the tracks apart more than a couple times and you are going to have a loose pin. 3) if you look at the pics, tamiya has the least amount of plastic holding the pins....anyway, thats jmo....here is a pic of a hl track (stock lenght) and the amount of tracck you need for the tiger mouse...

Image

here is the hull with the tracks in place....

Image

Image


Now, I have to...
1) figure out how to attech the hull deck...
2) figure out how mount the turret........
3) figure out how to make a servo recoil to work with the clark...
4) make that work with the stug elevation unit....
and the thing that really has me scratching my head....

how to scratch build these........

Image

8O
Post Reply

Return to “Other”