Tiger Ebbey .....
Re: Tiger Ebbey .....
What a cracking build fella, truly inspirational stuff. The weathering is terrific as is the paint work..... if only, if only.
Take care...... Gary
-
streetfighterjeff
- Sergeant
- Posts: 516
- Joined: Sun Dec 04, 2011 10:05 am
- Location: near whitby, north yorkshire
Re: Tiger Ebbey .....
i had forgotten how much fun this thread was. ebbey looks great, paint is superb. an inspired build bud.
jeff
jeff
only here for a good time, not a long time
HL King Tiger
Torro Tiger I
HL King Tiger
Torro Tiger I
-
majordisastor

- Lance Corporal
- Posts: 208
- Joined: Fri Apr 23, 2010 5:24 pm
- Location: Llantrisant, South Wales
Re: Tiger Ebbey .....
A little more detail .....

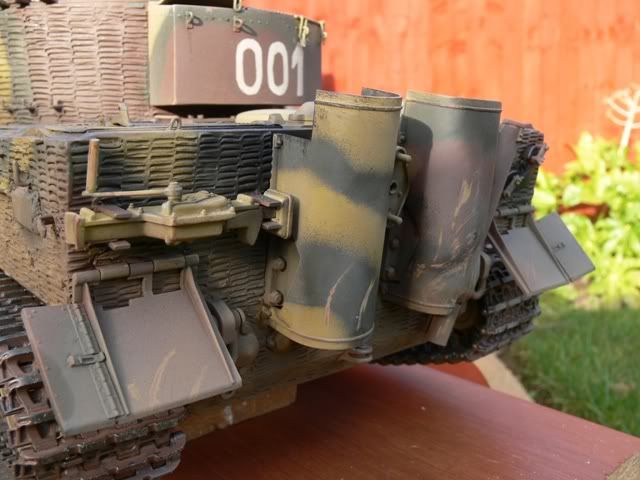
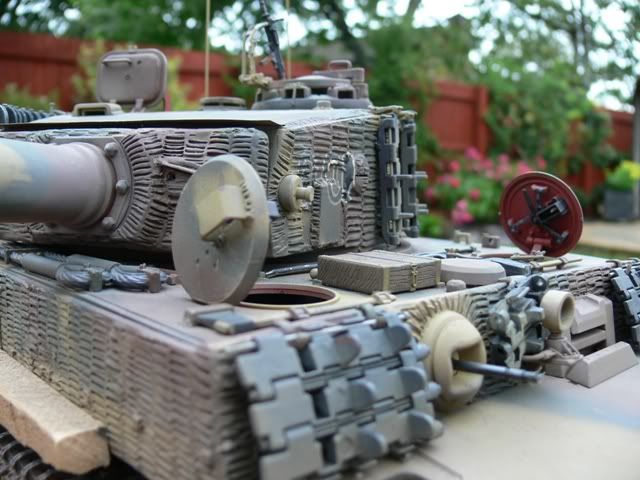
Shot of the rear, now with both exhaust heat shields fixed on and tow hook added ....
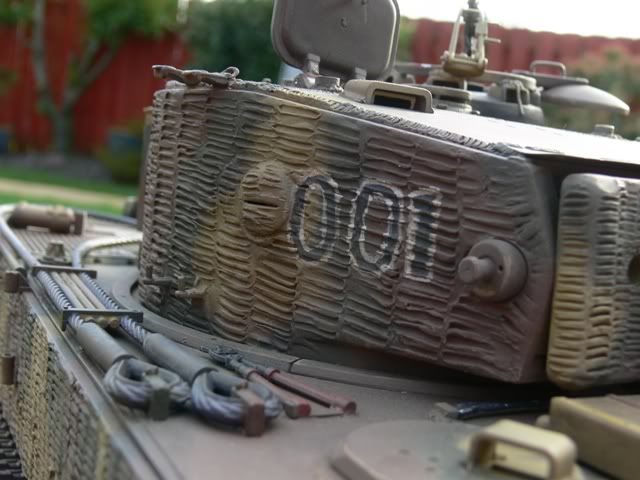
Turret numbers as well ...
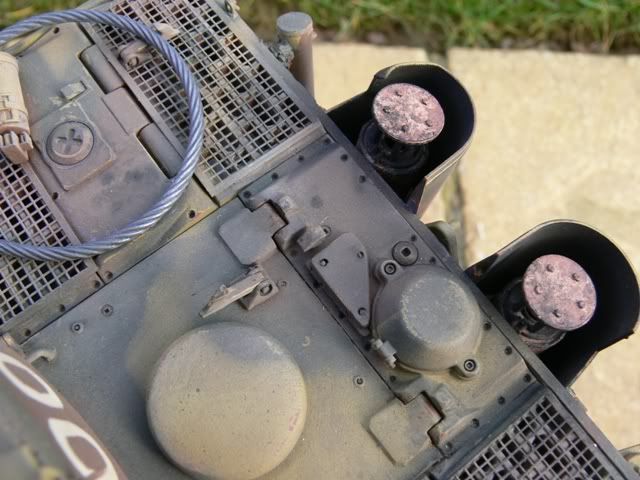
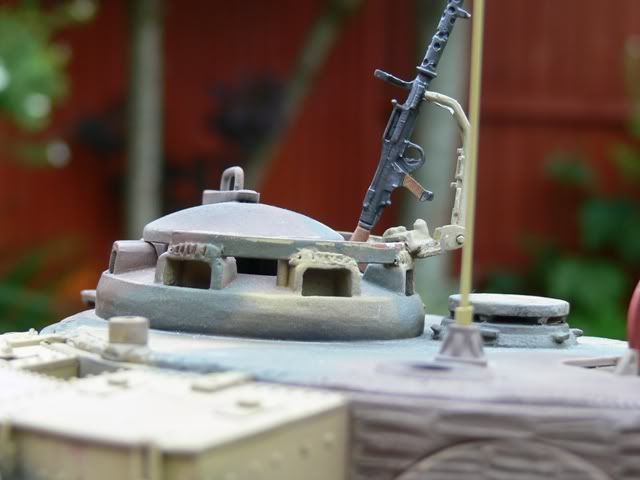
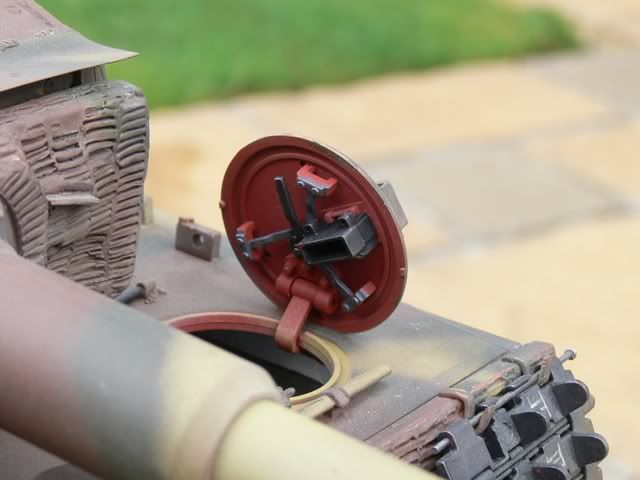
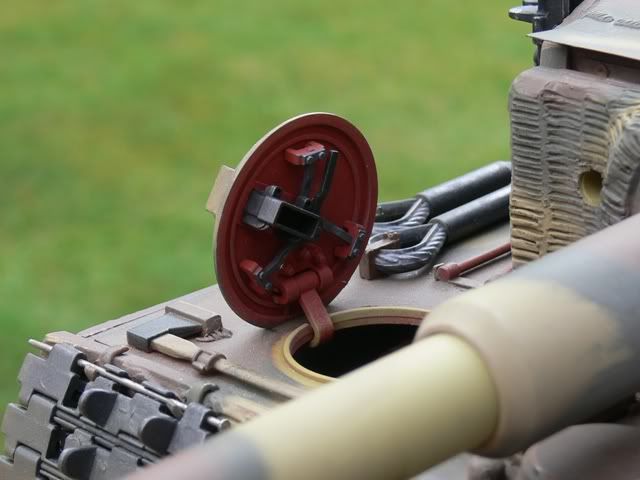
Some Machine gun detail .....battle system fitted.

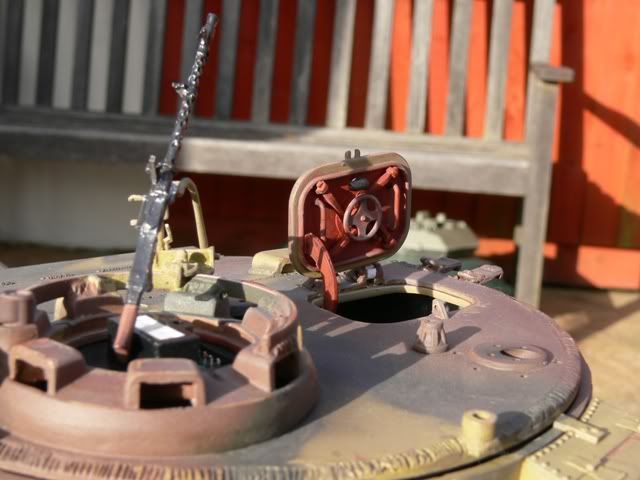
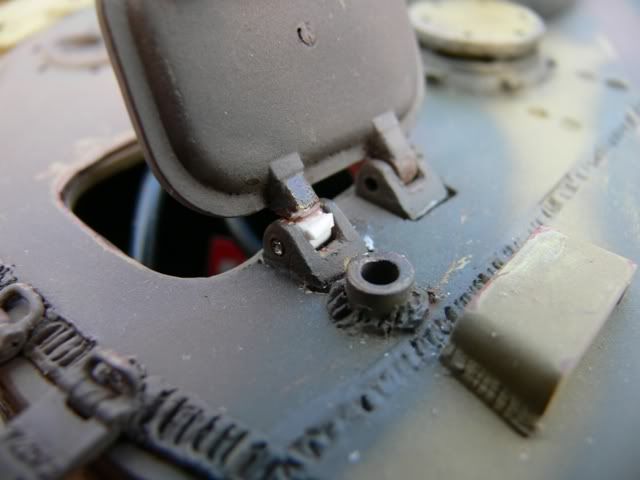
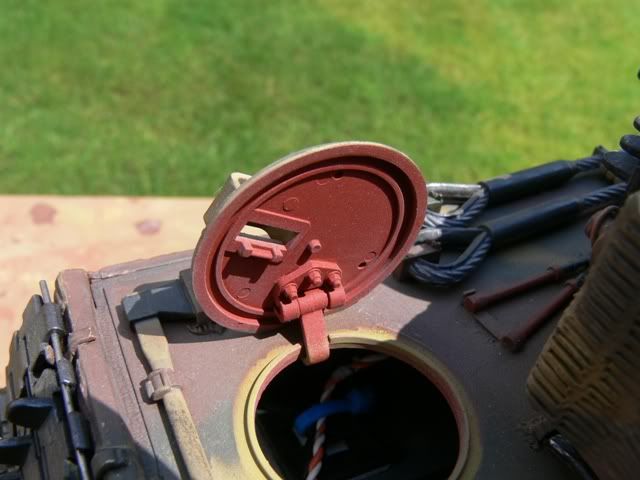
Shot of both hatches ....which leads me onto a couple of problems ...........
The loaders hatch hinge was snaped off - clumsy moment , caught it with my cuff....I might well replace the whole hatch as parts of the broken hinge have now gone ..
Moving inside and another breakage ...
This time its the end of the barrel recoil attatchment ...
Its an ETO part - or was and they apperar to be out of production at the moment. Really annoying as the ETO part allowed you greater flexibility when stripping down the recoil unit.
I need to paint the jackblock properly as well ...
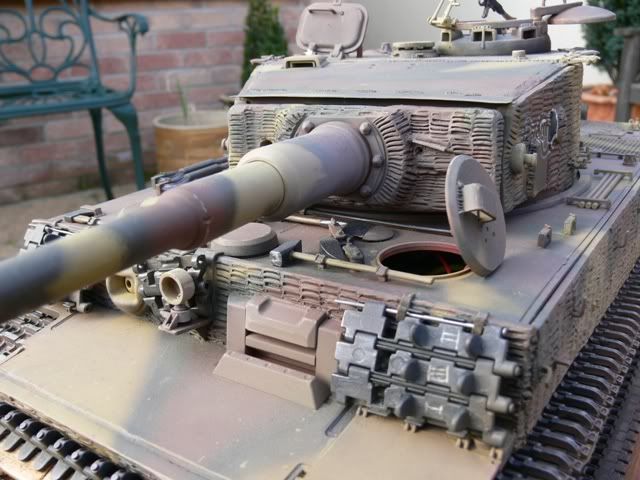
Another step closer at least ....
Andy
Shot of the rear, now with both exhaust heat shields fixed on and tow hook added ....
Turret numbers as well ...
Some Machine gun detail .....battle system fitted.
Shot of both hatches ....which leads me onto a couple of problems ...........
The loaders hatch hinge was snaped off - clumsy moment , caught it with my cuff....I might well replace the whole hatch as parts of the broken hinge have now gone ..
Moving inside and another breakage ...
This time its the end of the barrel recoil attatchment ...
Its an ETO part - or was and they apperar to be out of production at the moment. Really annoying as the ETO part allowed you greater flexibility when stripping down the recoil unit.
I need to paint the jackblock properly as well ...
Another step closer at least ....
Andy
It always gets darkest before it goes completley black......
-
majordisastor
- Lance Corporal
- Posts: 208
- Joined: Fri Apr 23, 2010 5:24 pm
- Location: Llantrisant, South Wales
Re: Tiger Ebbey .....
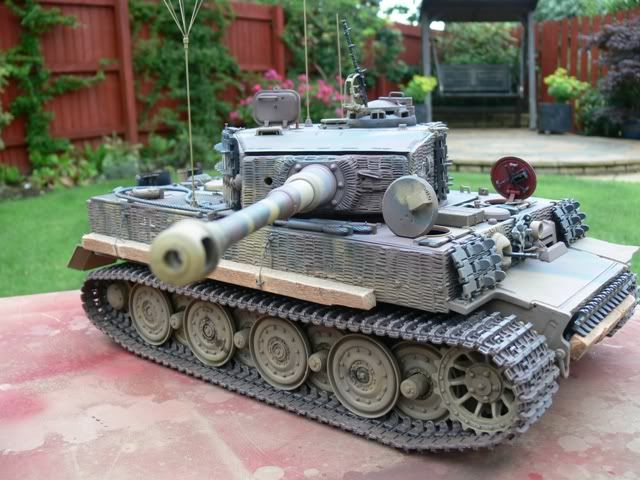
APPROACHING JOURNEYS END.......
Well as the above title suggests, We are finaly getting to the end of the road for Tiger Ebbey .....................and probably about bloody time as well I hear you call !!
So lets have a another update to the saga.....
First off I completly replaced my broken loaders hatch as I knackered the hinge on one side ....
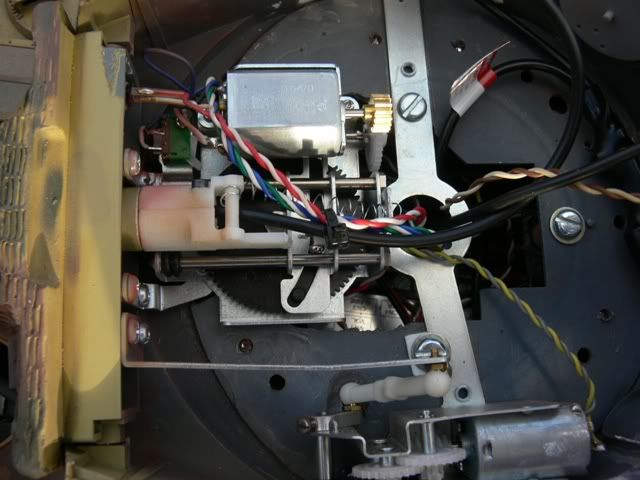
Next issue to address was the problem I had with my old controller - I could not fire the guns - slight disadvantage for a tank I thought to myself.
So a change to a planet system solved that problem and created another .......first shot and this happened ..
Ohh dear I thought, Well more like @"***$ and *&@####~ks ! I have not had a good run as far as the recoil system goes - so let me share it with you - I will feel much better for it ...
First off was the orgianal offering from Mr Tamiya ....
As you can see its suffered a serious mis-moulding at the factory ....
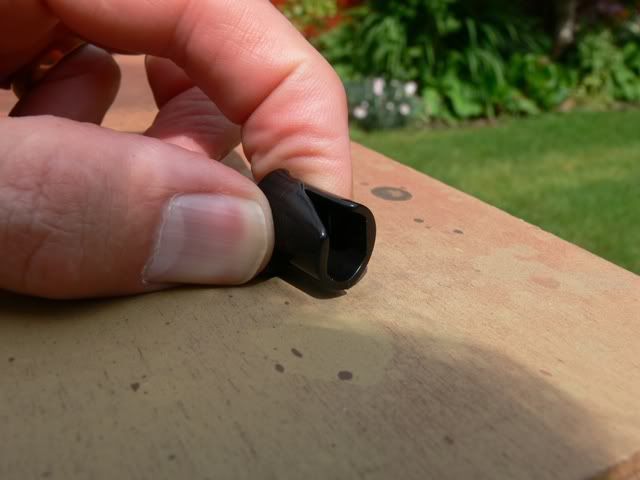
Quality control my Ar**!!!
So onto ETO armour then for an after market part to solve that problem - or so I thought ....
Here we are earlier on in the build..
However....it snapped ...
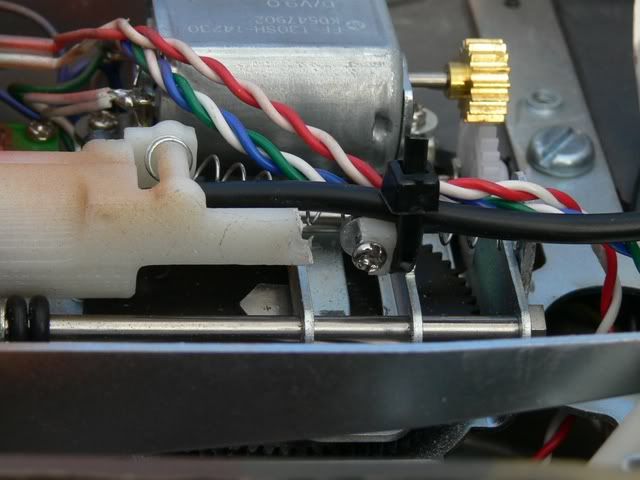
Further problems revealed themselves as well - for a start I wanted a qucker recoil for the main gun - I know -just battlefield vanity !
When I removed the required number of teeth from the recoil gear wheel - took just too many off - insert your favoured swear word here -
Then to add to Ebbeys woes it appeared that the Eto part was not passing into the barrel inner barrel sleve properly ....
B***'%r !!
So back to basics and fitted the standard Tamiya barrel retainer, a new recoil master cog thingy - bought from e-bay for a steal as it had no motors with it, and .....
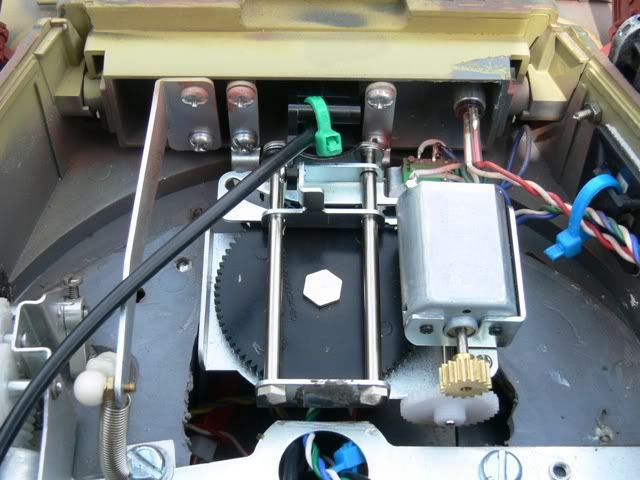
Hey Presto Working recoil !! At LOOONNNNGGG last !! - I will get over this at some point - promise !!
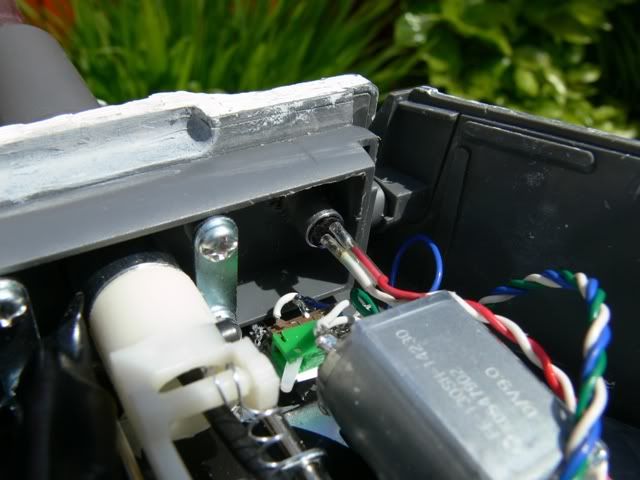
At the Mvt show Paul Septon Kindly reconfigured Ebbeys wiring - apparantly not as the instructions said they were ...
Sadly at the MVT show I lost my turret MG somwhere in the back room area ....might well be still there under a sod prehaps ...
No time to ponder so out with a spare I had earmarked for another build ...
There now - who could tell ??
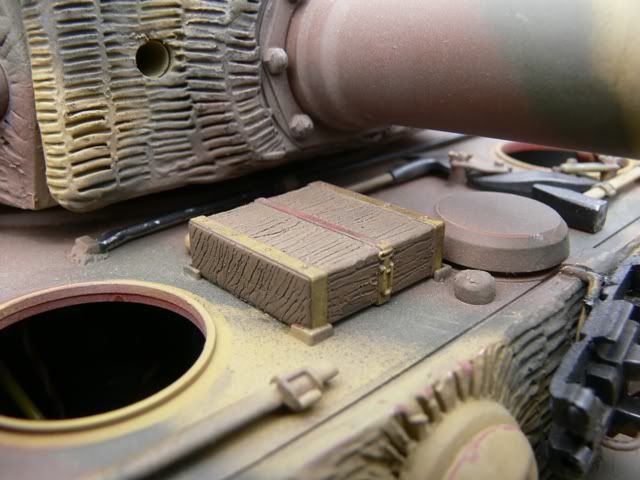
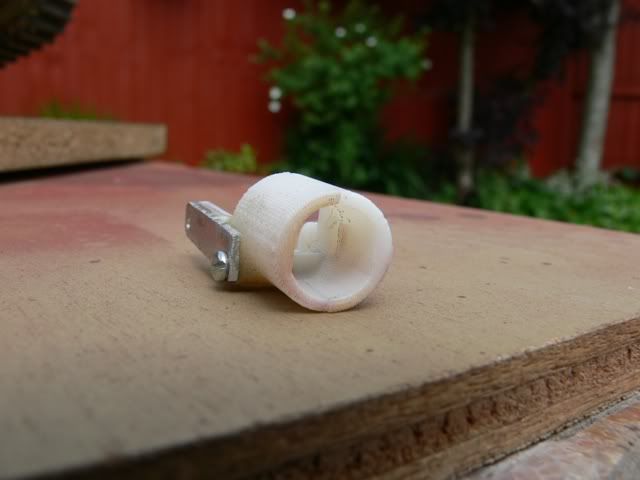
I also reworked the jack block as well - and stuck it in place ..
Next up was turning my attention to the front hatches - always looked rather bare to me when open....

As luck would have it, Custom Commander was selling off some Tiger 1 deserters sprues from the static model - hatch details but no tank commander !!
So ....
Much better - a luxery I know for a battler - but they do finnish off the model as a whole ...
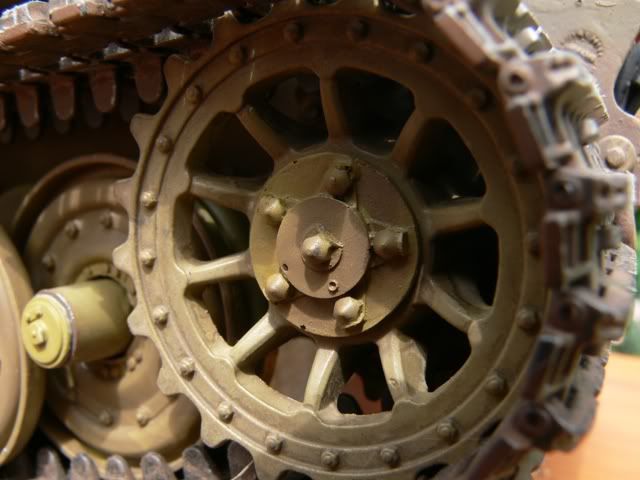
Next stop - wheels !!
Going from this - the rough estate look with missing hubcaps....... ....
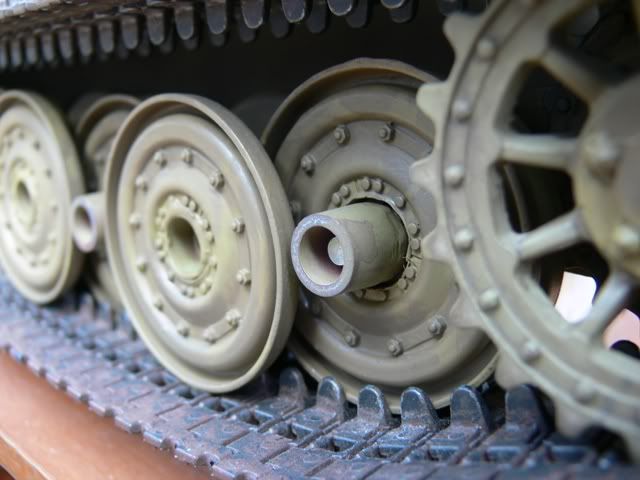
To this ......
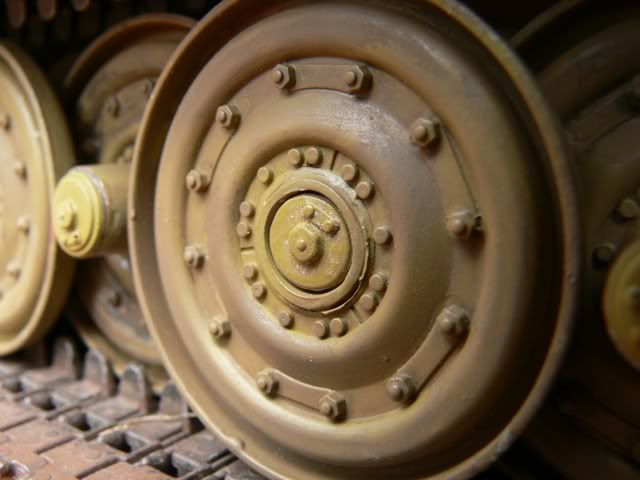
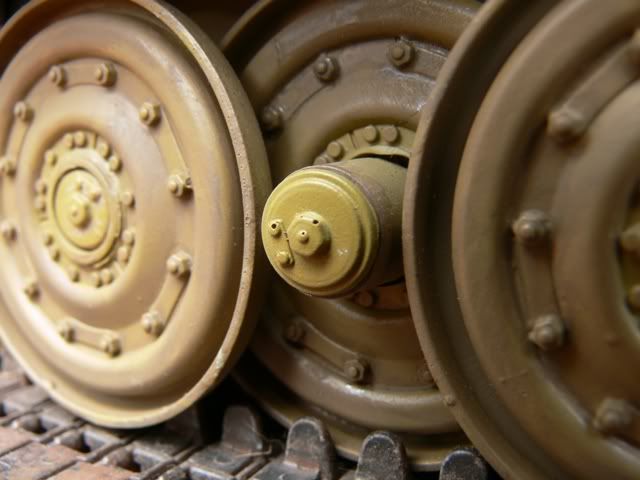
These inner and outer caps were kindly cast for me by Blimp - and a superb job he made of them as well !!
Add a bit of mud ....
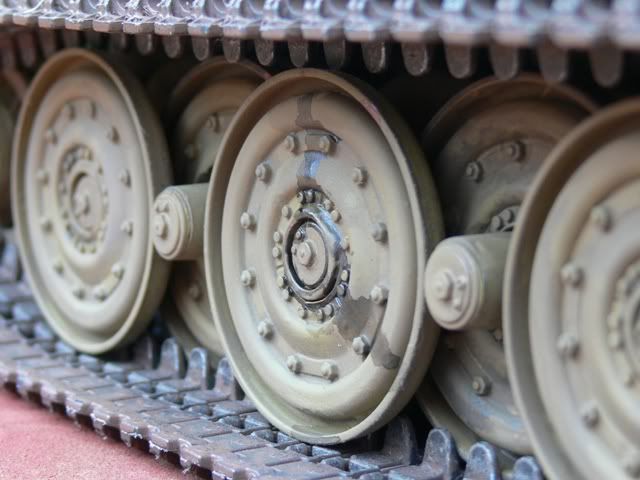
And a nod to the usual leaky hub syndrome that all Tiger 1's appear to have had with the later steel wheels ....
More to follow .....
Andy
Well as the above title suggests, We are finaly getting to the end of the road for Tiger Ebbey .....................and probably about bloody time as well I hear you call !!
So lets have a another update to the saga.....
First off I completly replaced my broken loaders hatch as I knackered the hinge on one side ....
Next issue to address was the problem I had with my old controller - I could not fire the guns - slight disadvantage for a tank I thought to myself.
So a change to a planet system solved that problem and created another .......first shot and this happened ..
Ohh dear I thought, Well more like @"***$ and *&@####~ks ! I have not had a good run as far as the recoil system goes - so let me share it with you - I will feel much better for it ...
First off was the orgianal offering from Mr Tamiya ....
As you can see its suffered a serious mis-moulding at the factory ....
Quality control my Ar**!!!
So onto ETO armour then for an after market part to solve that problem - or so I thought ....
Here we are earlier on in the build..
However....it snapped ...
Further problems revealed themselves as well - for a start I wanted a qucker recoil for the main gun - I know -just battlefield vanity !
When I removed the required number of teeth from the recoil gear wheel - took just too many off - insert your favoured swear word here -
Then to add to Ebbeys woes it appeared that the Eto part was not passing into the barrel inner barrel sleve properly ....
B***'%r !!
So back to basics and fitted the standard Tamiya barrel retainer, a new recoil master cog thingy - bought from e-bay for a steal as it had no motors with it, and .....
Hey Presto Working recoil !! At LOOONNNNGGG last !! - I will get over this at some point - promise !!
At the Mvt show Paul Septon Kindly reconfigured Ebbeys wiring - apparantly not as the instructions said they were ...
Sadly at the MVT show I lost my turret MG somwhere in the back room area ....might well be still there under a sod prehaps ...
No time to ponder so out with a spare I had earmarked for another build ...
There now - who could tell ??
I also reworked the jack block as well - and stuck it in place ..
Next up was turning my attention to the front hatches - always looked rather bare to me when open....
As luck would have it, Custom Commander was selling off some Tiger 1 deserters sprues from the static model - hatch details but no tank commander !!
So ....
Much better - a luxery I know for a battler - but they do finnish off the model as a whole ...
Next stop - wheels !!
Going from this - the rough estate look with missing hubcaps....... ....
To this ......
These inner and outer caps were kindly cast for me by Blimp - and a superb job he made of them as well !!
Add a bit of mud ....
And a nod to the usual leaky hub syndrome that all Tiger 1's appear to have had with the later steel wheels ....
More to follow .....
Andy
Last edited by majordisastor on Thu Jan 17, 2013 12:09 pm, edited 1 time in total.
It always gets darkest before it goes completley black......
-
lister fiend
- Sergeant
- Posts: 565
- Joined: Mon Sep 10, 2012 3:38 pm
- Location: ashvale, hampshire
Re: Tiger Ebbey .....
Wow, what an epic build
So many ups & downs.
Well done.
& what a story,
Your not a novelist are you?

Good work fella & keep it comming
Lister
So many ups & downs.
Well done.
& what a story,
Your not a novelist are you?
Good work fella & keep it comming
Lister
-
majordisastor
- Lance Corporal
- Posts: 208
- Joined: Fri Apr 23, 2010 5:24 pm
- Location: Llantrisant, South Wales
Re: Tiger Ebbey .....
Thanks Lister....now next post.......
It always gets darkest before it goes completley black......
-
majordisastor
- Lance Corporal
- Posts: 208
- Joined: Fri Apr 23, 2010 5:24 pm
- Location: Llantrisant, South Wales
Re: Tiger Ebbey .....
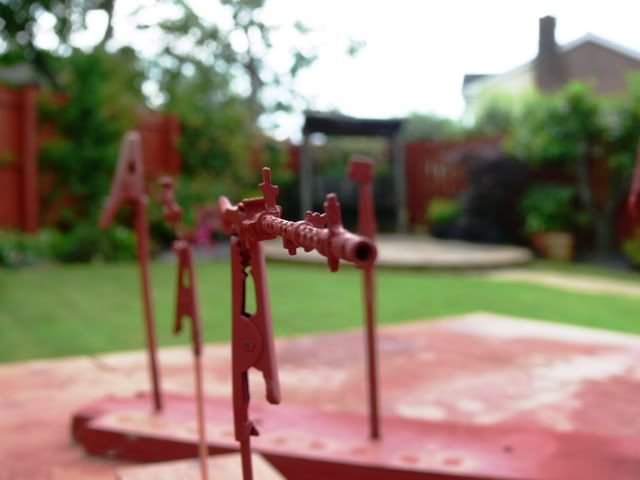
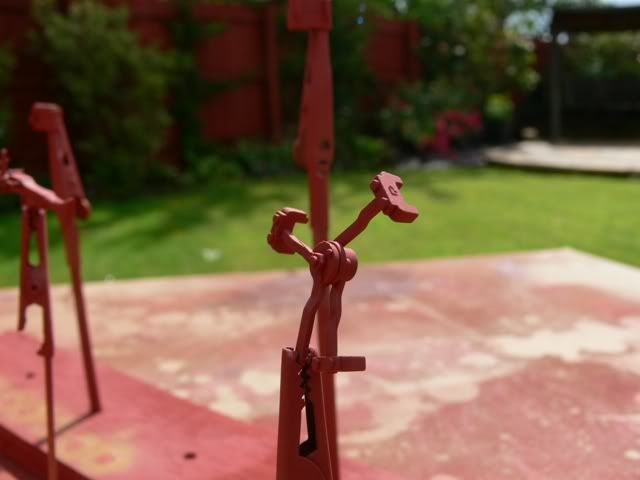
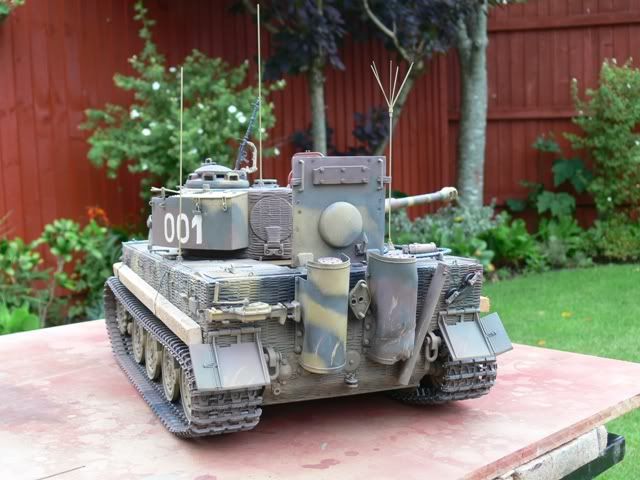
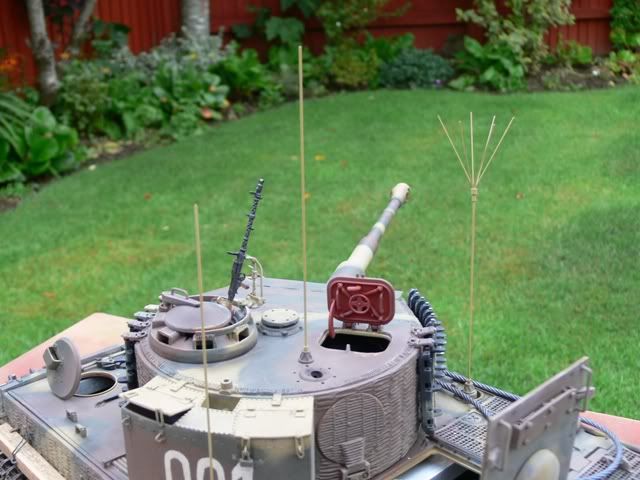
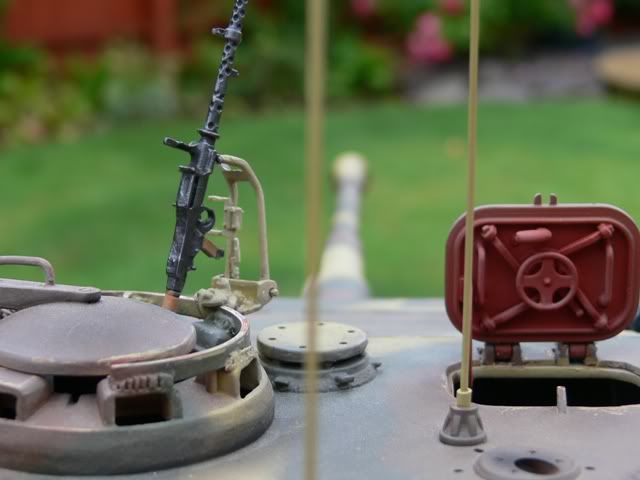
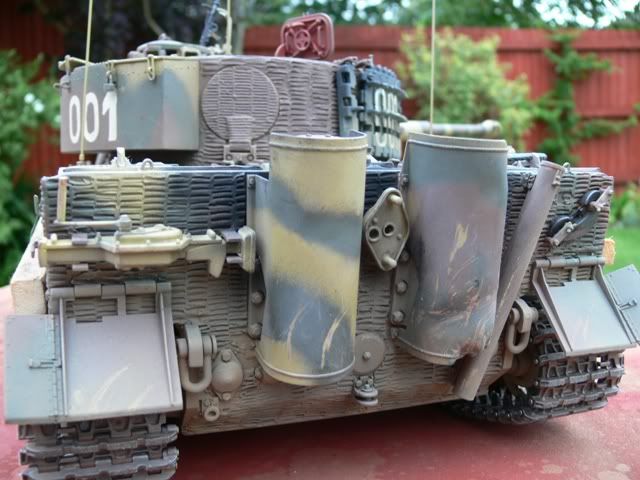
Befehlswagon bits......or mounting the aeriels to put it another way....
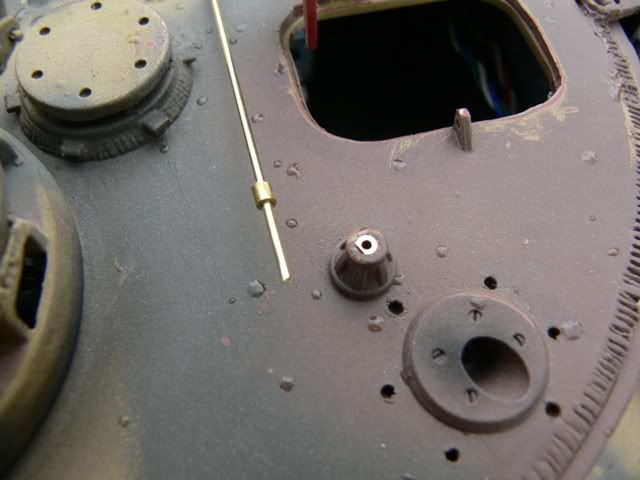
Right then, right from the word go I wanted Ebbey to be a late Tiger 1, but felt they were always a bit plain. So, to counter the stripped down look I decided to make Ebbey a command tank - easier to say than ' Befehlswagon' by far. Whats needed are the additional three aerials,so here we go ....
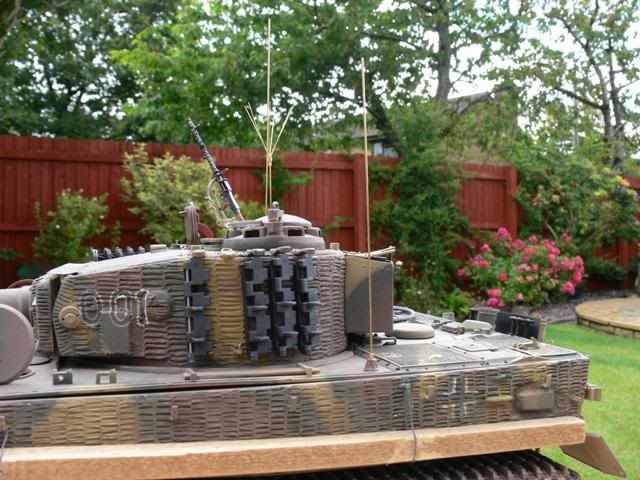
They are made from 0.5mm,1.00mm and 2.00mm brass rod and tube, oh and a peice of 3.00mm snuck in there as well. Many thanks to Precision Panzer for his advice on this one ...
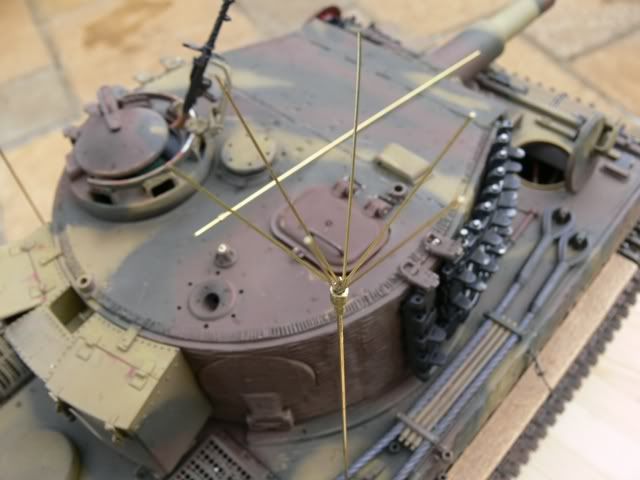
I countersunk some 2.00mm brass rod into all of the aerial sockets to stop the aerials from swaying about too much ....
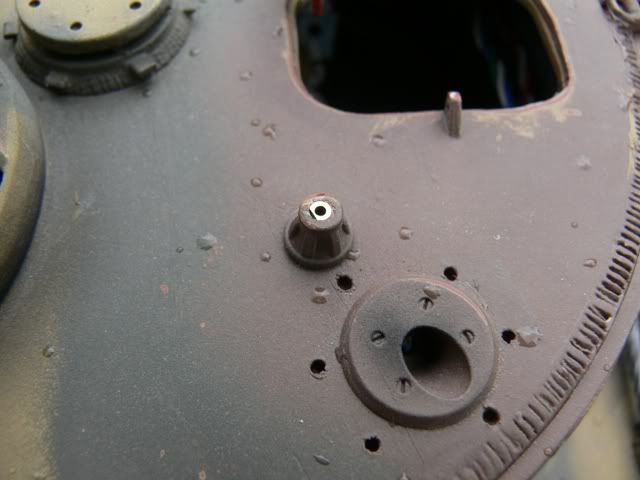
I then added a 2.00mm brass coller to each of the aerial bottom sections to stop them eventually boring into the plastic of the hull and turret.
It also means I will know which end to insert into the tank as well ..
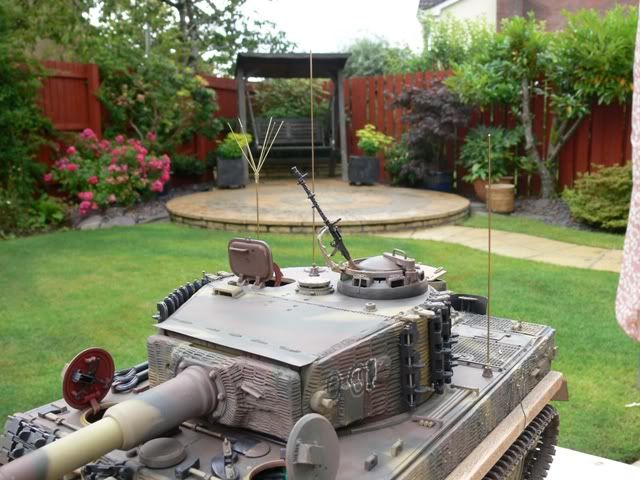
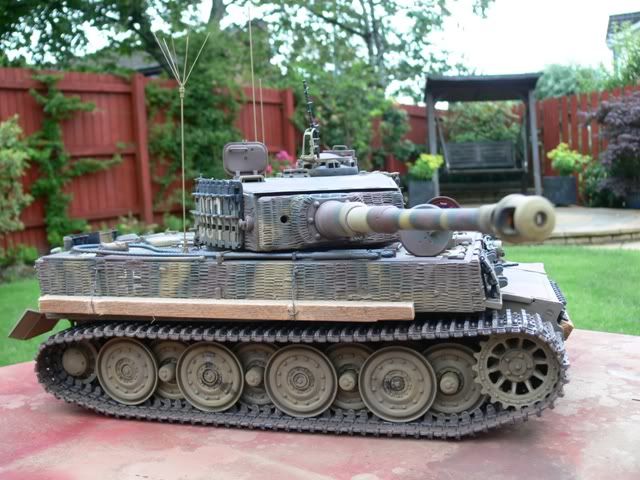
Once installed I think they add quite a bit to the model overall.....
I painted them all in the Dunklegleb yellow base colour.
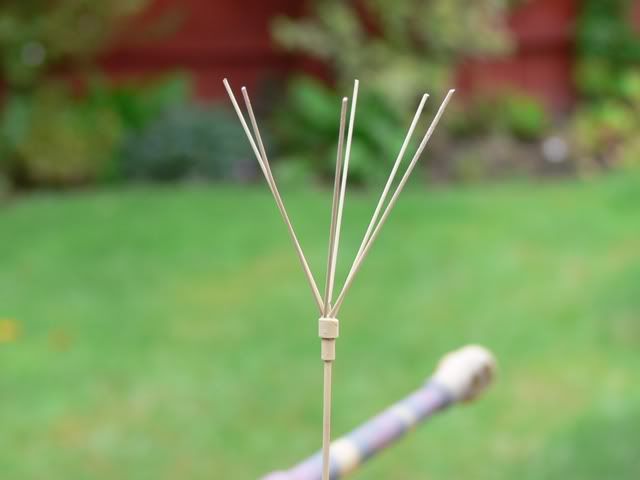
Detail of the star aerial - the cup was formed from 3.00mm brass tube - the thinner starwhips are 0.5mm rod - by rights these should be flat apparantly.
One thing I found out - aerials are hard to photograph against the sky - they just do not appear because of the exposure needed for the tank body itself...
I must start thinking about a crew next as I feel it would give Ebbey a sense of scale .....
And as one project draws to a close .....
Another starts .....................
Andy
Right then, right from the word go I wanted Ebbey to be a late Tiger 1, but felt they were always a bit plain. So, to counter the stripped down look I decided to make Ebbey a command tank - easier to say than ' Befehlswagon' by far. Whats needed are the additional three aerials,so here we go ....
They are made from 0.5mm,1.00mm and 2.00mm brass rod and tube, oh and a peice of 3.00mm snuck in there as well. Many thanks to Precision Panzer for his advice on this one ...
I countersunk some 2.00mm brass rod into all of the aerial sockets to stop the aerials from swaying about too much ....
I then added a 2.00mm brass coller to each of the aerial bottom sections to stop them eventually boring into the plastic of the hull and turret.
It also means I will know which end to insert into the tank as well ..
Once installed I think they add quite a bit to the model overall.....
I painted them all in the Dunklegleb yellow base colour.
Detail of the star aerial - the cup was formed from 3.00mm brass tube - the thinner starwhips are 0.5mm rod - by rights these should be flat apparantly.
One thing I found out - aerials are hard to photograph against the sky - they just do not appear because of the exposure needed for the tank body itself...
I must start thinking about a crew next as I feel it would give Ebbey a sense of scale .....
And as one project draws to a close .....
Another starts .....................
Andy
It always gets darkest before it goes completley black......
