1/16 RC Sd.Kfz. 234/2 Puma armored car - lmcq11 build

This section is for builds that are not strictly Tamiya or Heng Long. For instance, replacing the electronics from a WSN or Matorro, or even a scratch-build.
User avatar
lmcq11
2nd Lieutenant
Posts: 2610
Joined: Mon Dec 19, 2016 7:42 pm
Location: Quebec, Canada

Re: 1/16 RC Sd.Kfz. 234/2 Puma armored car - lmcq11 build

Post by lmcq11 »

Raminator wrote:Moving ahead smoothly Louis, I can tell that your meticulous and methodical approach is already paying off. It looks like several key parts can be installed the wrong way, which is asking for trouble and no doubt contributes to these kits' reputation. They don't leave much margin for error! That steering servo is a beast, definitely makes a difference. Looking forward to seeing more.

I'm a big fan of the 234/1 personally, but that's probably because I think autocannons are cool
Thanks Raminator, i might build another one eventually.
MichaelC wrote:Louis looks great and runs perfect. I will have to take mine apart and follow your steps !
Good luck, the solution is to keep everything as loose as possible to give a break to the servo and gearbox.

Continuing with the build.

This post is for the turret rotation.

Upper hull sides are attached without problems. I found the plastic upper hull to be on the thin side but well detailed.
1/16 RC Sd.Kfz. 234/2 Puma armored car - build
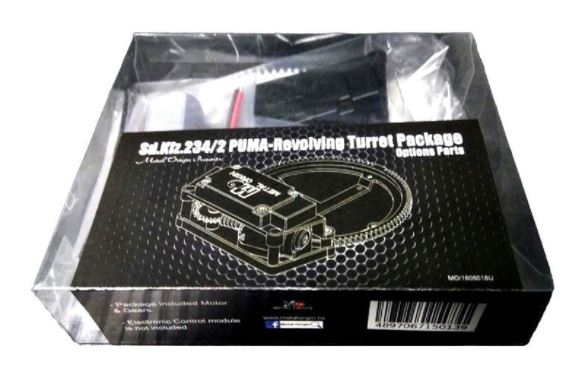
I hesitated in purchasing the Metal Origin turret rotation set. At $68, it is overpriced and looks weak with a small motor and gears. Availability of spare parts is non existant.
1/16 RC Sd.Kfz. 234/2 Puma armored car - build
Capture2.JPG (41.93 KiB) Viewed 2427 times
For $20, i could get a standard Mato 360 rotation wheel and a proven Heng Long rotation unit. The size of the wheel is perfect for the Puma, no need for custom size. The attachment points on the turret base are reinforced with a plasticard layer and holes are made for M3 hex bolts.
1/16 RC Sd.Kfz. 234/2 Puma armored car - build
The wheel is centrally installed on the base of the turret, with removable hex bolts. The rotation unit needs to be installed at an angle under the glacis.
1/16 RC Sd.Kfz. 234/2 Puma armored car - build
A hastily made plasticard base was created as a platform to screw the unit at the right height. Notice that i had to grind the lip that was touching the hull transversal bar.
1/16 RC Sd.Kfz. 234/2 Puma armored car - build
It works perfectly well at an angle. No need to be too difficult or purist.
1/16 RC Sd.Kfz. 234/2 Puma armored car - build
The wheel is installed just to be a bit loose but firmly holding the turret base in place like any other turret. It took about 1 hour to do this.
1/16 RC Sd.Kfz. 234/2 Puma armored car - build
I had to grind the lip of the rotation unit to clear the hull front transversal metal bar. The rotation unit is actually resting on it, which is ok as it provides some support because the plastic of the upper hull is quite thin.
1/16 RC Sd.Kfz. 234/2 Puma armored car - build
Shown here is the new planned layout of the electronics. Small speaker at the back, receiver on the right side, Clark TK-22 control board in the middle, battery at the front, rotation unit on top of the battery. I replaced the planned TK40 by an available TK22. I need the TK40 for the GTK build.
1/16 RC Sd.Kfz. 234/2 Puma armored car - build
Everything fits well inside. This is the model as it stands today after only 4 days of part time work. I will put this build aside for a while, going back to the GTK build while i wait for a hollow Puma gun barrel from MK Modellbau. The plan is to give the gun elevation, recoil, flash, sound with coax MG flash and sound.
1/16 RC Sd.Kfz. 234/2 Puma armored car - build
Regards, Louis
User avatar
Raminator
Warrant Officer 2nd Class
Posts: 1267
Joined: Tue Aug 11, 2015 9:57 am
Location: Newcastle, Australia

Re: 1/16 RC Sd.Kfz. 234/2 Puma armored car - lmcq11 build

Post by Raminator »

It's amazing how much you've managed to pack into such a small space, Louis. Hardly a millimetre to space in some places!
User avatar
HERMAN BIX
Brigadier
Posts: 10299
Joined: Sun Jan 12, 2014 12:15 am
Location: Gold Coast,Australia

Re: 1/16 RC Sd.Kfz. 234/2 Puma armored car - lmcq11 build

Post by HERMAN BIX »

Making it looks easy when Im certain its not !
Amazing looking vehicle when finished, the documentary footage is all too rare..........
HL JAGDPANTHER,HL TIGER 1,HL PzIII MUNITIONSCHLEPPER, HL KT OCTOPUS,HL PANTHER ZU-FUSS,HL STuG III,HL T34/85 BEDSPRING,
HL PZIV MALTA,MATORRO JAGDTIGER,HL F05 TIGER,TAMIYA KT,HL PANTHERDOZER,HL EARLY PANTHER G,TAIGEN/RAMINATOR T34/76,
HL AN-BRI-RAM SU-85
User avatar
lmcq11
2nd Lieutenant
Posts: 2610
Joined: Mon Dec 19, 2016 7:42 pm
Location: Quebec, Canada

Re: 1/16 RC Sd.Kfz. 234/2 Puma armored car - lmcq11 build

Post by lmcq11 »

Thank you Raminator and Herman !

When i compare the Puma with the GTK Boxer than i am building in parallel in the Modern tank section, these are two very distinct modelling experiences.

- The Puma is a small size V shaped metal lower hull not allowing much latitude to the builder unless equipped with a lathe, metal skills and lots of time. The common builder need to reuse the provided mechanical parts, no way around it. I have latitude only on the secondary components. The Boxer is a very large cavernous hull in plasticard with lots of freedom and tons of options to assemble a drive train from available components from the RC Buggy market.
- A big concern for the Puma build is to keep costs down as they explode if you pick up all the custom created options and they only seem to make the model more complicated to build, with no spare parts available for maintenance. The Boxer is being build with inexpensive but very high quality RC parts from China with plentiful spare parts available with consistent free 2 week SpeedPack delivery service.
- I reused a TK22 Clark board for the Puma instead of buying the custom Elmod. I am not picky for the engine sound, as long as it is a diesel that does vroooom and cannon that does boom, i personally do not see the difference... Others seem to find exact engine sound to be important but it comes at a cost. I prefer reusing a board i know than buying and configuring a new one from a brand that i do not know, and its just to drive the Puma around...

Every builder has its own solutions and style for building the Puma. This build is one of them where use of basic skills, limited time available and costs containment are the main drivers.

Regards, Louis
1/16 RC Sd.Kfz. 234/2 Puma armored car - build
User avatar
lmcq11
2nd Lieutenant
Posts: 2610
Joined: Mon Dec 19, 2016 7:42 pm
Location: Quebec, Canada

Re: 1/16 RC Sd.Kfz. 234/2 Puma armored car - lmcq11 build

Post by lmcq11 »

Continuing with the Puma build.

I got the barrel yesterday that i had ordered from MK Modellbau and i took a few hours to create the recoil system and the turret electronics.

These are the parts coming for the turret gun. There is no recoil. A metal bracket is provided for gun elevation purposes but i will not be using it.
1/16 RC Sd.Kfz. 234/2 Puma armored car - build
The metal barrel is not hollow (for flash) and comes with an ugly stub. I tried to salvage it by cutting the stub and drilling the barrel hollow but i was not successful. The barrel is too short for recoil and i do not have the required lathe to drill through such thin barrel.
1/16 RC Sd.Kfz. 234/2 Puma armored car - build
I ordered a Puma L60 barrel from MK Modellbau, seen at the top. However, i was not pleased with it. It is too large and still too short, its more like a 76mm calibre barrel than a 50mm. The slope is not well made and the 3D printed muzzle seems very weak. You can compare the size with the Metal Origin barrel below it.
1/16 RC Sd.Kfz. 234/2 Puma armored car - build
But i was not going to return it. Using a coarse nail file, i thinned the aluminum barrel in a circular movement for about 15 minutes until i was getting close to get through it because the hollow inner is quite wide. So, it is as thin as it can become, i gave it a slow slope for an inch in the area where is exit the mantle, then it was pretty much thinned evenly up to the tip. I inserted another aluminum tube inside it to reinforce it and to provide an anchor for the required extension. It was then polished with a polishing nail file. You can compare the result with the metal origin barrel at the top. Still not thin enough but acceptable.
1/16 RC Sd.Kfz. 234/2 Puma armored car - build
A new wider hole is made on the mantle to insert the metal sleeve coming with the MK Modellbau barrel.
1/16 RC Sd.Kfz. 234/2 Puma armored car - build
There is nothing really complex about creating a custom recoil system. As used in the Stuart and BMP builds, all that is needed are two overlapping metal tubes and a push rod. The secret is to properly select the tubes in relation to the barrel. Not too tight, not too small. When inserted into each other, they just need to slide into each other and be loose, usually a 7mm and a 8mm tube would do it. If it is tight, its not good.

First, a 8mm aluminum tube section is inserted to the kit mantle after a wider hole was made to accommodate it. It is important to test the potential integration at every step. Then the tube is removed.
1/16 RC Sd.Kfz. 234/2 Puma armored car - build
A 2.2mm wide groove is made with a Dremel hard cutting disk on both side of the 8mm tube, then the inside is filed to clean all debris, polished smooth and tube is put back.
1/16 RC Sd.Kfz. 234/2 Puma armored car - build
The barrel is inserted from the tip to see the situation and where the anchor can be drilled for the push rod. It is critical that the barrel manually slides loosely. Some grease is applied. I usually have to make the two part recoil manually for 2-3 minutes, to clear any obstructions and give the recoil a good workout.
1/16 RC Sd.Kfz. 234/2 Puma armored car - build
Capture9.JPG (99.59 KiB) Viewed 2257 times
The MK Modellbau barrel is too short for recoil and need to be extended a bit. An extension is glued over the small tube previously added to the turret end section.
1/16 RC Sd.Kfz. 234/2 Puma armored car - build
Continuing on following post
Last edited by lmcq11 on Thu Jun 17, 2021 10:41 pm, edited 6 times in total.
User avatar
lmcq11
2nd Lieutenant
Posts: 2610
Joined: Mon Dec 19, 2016 7:42 pm
Location: Quebec, Canada

Re: 1/16 RC Sd.Kfz. 234/2 Puma armored car - lmcq11 build

Post by lmcq11 »

The exterior length of the barrel need to be carefully calculated (100mm between mantle tip up to the bottom of the muzzle) and then the hole is drilled at the right location to connect the push rod with a M2 Hex bolt and some washers. Give the recoil a good workout at every step, check for issues and use the hand file as required. Sometimes, it only take a very tiny shard of metal from the cutting phase to create a blockage that is resolved as soon as the shard is cleared. Keep everything polished and clean.
1/16 RC Sd.Kfz. 234/2 Puma armored car - build
An e-Max servo is connected to the push rod. These nice push rods can be found cheaply on eBay China for a few dollars for 5 or 10. They have a swivel mount for the servo arm, they are really nice to work with and to make adjustments fast, at any time. Also makes maintenance easy.

Here we have a custom made Puma gun recoil... No need to wait for a vendor to design and sell something. You can basically make anything recoil with such simple design, specially for small size guns.
1/16 RC Sd.Kfz. 234/2 Puma armored car - build
For elevation, a groove is created in a micro servo regular plastic arm.
1/16 RC Sd.Kfz. 234/2 Puma armored car - build
A plastic stub is glued to the end of the recoil tube into which the elevation servo is connected with an M2 hex bolt.
1/16 RC Sd.Kfz. 234/2 Puma armored car - build
Here we have Puma gun elevation. The Puma turret is surprisingly spacious, no need to put the elevation servo under the turret like the instructions suggest. This way, it provides more room for the electronics and cables inside the hull, and for the turret to turn more freely.
1/16 RC Sd.Kfz. 234/2 Puma armored car - build
Overview of the turret electronics with main gun and coax machine gun flash added. The wiring is just for testing purposes, it will be permanently added once the other electrical components of the model are finished, such as head lights.
1/16 RC Sd.Kfz. 234/2 Puma armored car - build
The ugly kit part for the coax machine gun (top) is replaced with the tip of a Tamiya MG-42 from the spare box. It originally came with a 1/16 figure. A thin fiber optic cable is inserted.
1/16 RC Sd.Kfz. 234/2 Puma armored car - build
Then the coax MG is positioned in place on the mantle.
1/16 RC Sd.Kfz. 234/2 Puma armored car - build
Here is a short video of the turret electronics in action.

phpBB [video]


Overview of the model as it stands today.
1/16 RC Sd.Kfz. 234/2 Puma armored car - build
Regards, Louis
Last edited by lmcq11 on Wed Jun 23, 2021 1:40 pm, edited 5 times in total.
User avatar
Herr Dr. Professor
Lieutenant
Posts: 3589
Joined: Mon Apr 22, 2019 10:48 pm
Location: Southern Wisconsin USA

Re: 1/16 RC Sd.Kfz. 234/2 Puma armored car - lmcq11 build

Post by Herr Dr. Professor »

Louis, I am still watching with a nervous feeling in my stomach. 8O I sure am grateful for the detailed advice you are putting into your Puma build. As I mentioned above, I have a complete kit. However, ahem, I am definitely a "common builder [who] need to reuse the provided mechanical parts." Then, too, for me, “this build [will be] one of them where use of basic skills...and costs containment are the main drivers.”
When your build is done, I will print it all out and keep it by my side when I finally get to the Puma. (I have sold all my 1/32, 1/35 AFVs and 1/48 airplanes :( , so I can concentrate on 1/16 projects.)
LK88
Private
Posts: 62
Joined: Sun May 23, 2021 9:00 pm

Re: 1/16 RC Sd.Kfz. 234/2 Puma armored car - lmcq11 build

Post by LK88 »

you are a very skilful person, we mean it and he is very good at hand, you show beautiful work, and as I already wrote ... for how the model of a cougar is expensive, he still needs more work and investment
User avatar
lmcq11
2nd Lieutenant
Posts: 2610
Joined: Mon Dec 19, 2016 7:42 pm
Location: Quebec, Canada

Re: 1/16 RC Sd.Kfz. 234/2 Puma armored car - lmcq11 build

Post by lmcq11 »

Hi,
Herr Dr. Professor wrote:ouis, I am still watching with a nervous feeling in my stomach.
There is no reason to. This is actually a fast and simple build for those who have some building skills and set normal expectations for an RC vehicle
LK88 wrote:you are a very skilful person, we mean it and he is very good at hand, you show beautiful work, and as I already wrote ... for how the model of a cougar is expensive, he still needs more work and investment
. Thanks, but as you can see on this build, the model can be built without too many additions and expenses.

Continuing with the build.

With the following posts of today, the construction phase is completed. I am providing a short Youtube video of the model in action at the end of today's last post. I am extremely please with the model. This is a first grade kit with construction taking about 1 week. In my case, the construction was pleasant and testing went well. But you need to plan for an initial break-in period with maintenance, in my case requiring the removal of the drive cups at least 4 times to grind the dog bone slots until they stop jumping. This is no plug and play drive train. Set expectations accordingly.

After the gun elevation design was done, the rest of the kit builds easily and is quite pleasant. I am surprised by the quality of the plastic parts, i found them even better than Tamiya.
1/16 RC Sd.Kfz. 234/2 Puma armored car - build
A simple hole is required to make the headlights functional and add the small LED inside.
1/16 RC Sd.Kfz. 234/2 Puma armored car - build
Mounting the headlights is easy.
1/16 RC Sd.Kfz. 234/2 Puma armored car - build
The wires on those LED can't be glued by themselves on the hull for some reason. Need some plasticard bracket.
1/16 RC Sd.Kfz. 234/2 Puma armored car - build
MK Modellbau was selling a metal replacements for the kit plastic rear hooks that i was concerned would easily break. The replacement turn out to be of very poor design and are ugly. I tried to do something with them but the hook section is just too thin and ugly. No way i am putting this on my Puma. In the end, i discarded the MK Modellbau hooks and kept the original plastic ones. I will be more careful going forward with such order.
1/16 RC Sd.Kfz. 234/2 Puma armored car - build
It is only now that i realize that the fenders need to be kept removable in order to open the vehicle all the time. The hull has a lozenge shape and the fenders are going over top and bottom sections, squeezing the hull together like a sandwich. I know some guys like to put magnets on upper hull but forget about it for the Puma.
1/16 RC Sd.Kfz. 234/2 Puma armored car - build
A total of 10 screws from bottom, sides and top need to be unscrewed every time you open the hull... I see no alternative. Well, its the Puma shape to blame.
1/16 RC Sd.Kfz. 234/2 Puma armored car - build
Final view of the electronics with battery inside and all. Keep in mind that a small battery is required as i do not see how a large regular one can fit with a control board, turret rotation, and all the wiring. Maybe it does but things are a lot simpler with a smaller size battery.
1/16 RC Sd.Kfz. 234/2 Puma armored car - build
The kit Jerrycans are the best i have ever seen. Metal Origin should sell them separately.
1/16 RC Sd.Kfz. 234/2 Puma armored car - build
continuing on following post
Last edited by lmcq11 on Wed Jun 23, 2021 1:47 pm, edited 1 time in total.
User avatar
lmcq11
2nd Lieutenant
Posts: 2610
Joined: Mon Dec 19, 2016 7:42 pm
Location: Quebec, Canada

Re: 1/16 RC Sd.Kfz. 234/2 Puma armored car - lmcq11 build

Post by lmcq11 »

Each Jerrycan comes in 5 parts. Eight Jerrycans are provided although only 6 are supposed to fit on the hull.
1/16 RC Sd.Kfz. 234/2 Puma armored car - build
The mounting brackets are enough to create great concerns.
1/16 RC Sd.Kfz. 234/2 Puma armored car - build
The mounting brackets are provided in Photo-Etched parts, each bracket requiring assembly of 7 small PE strips.
1/16 RC Sd.Kfz. 234/2 Puma armored car - build
You need to do this when you have a cool head and rested. A small assembly chain is created.
1/16 RC Sd.Kfz. 234/2 Puma armored car - build
The PE parts
1/16 RC Sd.Kfz. 234/2 Puma armored car - build
I use superglue on everything, i like the fast drying. I know a lot of guy are using some special glue because they think superglue is not strong enough. I personally do not like to mess with exotic toxic glue and smells. My trick of using superglue is to ensure the glue has some anchor to adhere to. Some small scratches are created using a blade on the parts where the glue is required. It helps making superglue a lot stronger.
1/16 RC Sd.Kfz. 234/2 Puma armored car - build
The trick for an easy assembly of the straps is to handle the PE parts like real straps... and avoid putting glue everywhere.
1/16 RC Sd.Kfz. 234/2 Puma armored car - build
I will only be installing 4 jerrycans. The 2 Jerrycans at the front cannot be installed, otherwise you will not be able to open he hull anymore because the screw holding the fenders is right under it. So i will only be installing an empty holder.
1/16 RC Sd.Kfz. 234/2 Puma armored car - build
Construction is finished.
1/16 RC Sd.Kfz. 234/2 Puma armored car - build
continuing on following post.
Last edited by lmcq11 on Sun Jun 20, 2021 4:42 pm, edited 2 times in total.
Post Reply

Return to “Other Builds”