Finishing the front fender attachment points
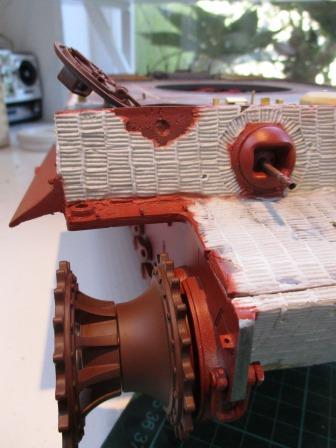
- The front corners of the hull are now complete.jpg (37.92 KiB) Viewed 5422 times
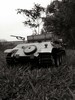
A long time ago I had decided to remove the moulded on front fenders from my Heng Long Tiger. For anyone wanting to replace the fenders with Voyager or Aber photoetch substitutes this is a necessary step anyway - and even the Tamiya Tiger has them moulded on in this way - but for me it was just a question of the tank's 'look'. It just seems so much more business-like without the front fenders. In any event they were frequently lost in combat - as one can see below.
Removing the moulded on fenders is easy enough because the correct outline of the hull corners is moulded underneath. However, once gone the hull thickness then needs to be almost doubled - also easily achieved by plastic card glued underneath and then sanded to shape.

- To increase the hull corner to scale thickness plastic strip was glued underneath and then sanded to shape.jpg (32.46 KiB) Viewed 5422 times
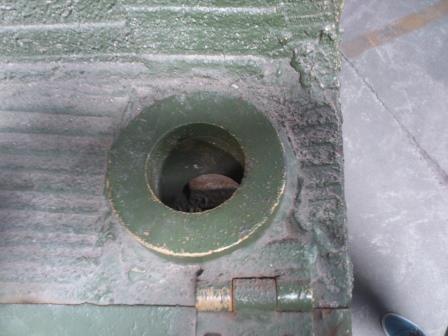
The large rings at each corner of the hull puzzled many of us for years. One suggestion was that they were brackets for holding poles for some sort of camouflage rig. However, the photo below shows their real purpose - to mount a small crane used to replace the sprockets (a little like a larger version of the Pilsen crane mounts which appeared on the turrets of late Tigers and other tanks).
As you can see from the photo below the hole should go all the way through.
- Front hull corner on the Saumur Tiger.jpg (30.8 KiB) Viewed 5422 times
Even though I was going to do without the front fenders themselves I still needed to add the hinge attachment points - four in all on each side. These I made from solid square-section plastic rod which I drilled and then sanded to to a rough inverted 'U' shape. The brackets were then cut sausage-style using a sharp knife and glued in place. I left one off because it seems from photographs that they would often come away when the fender was ripped off.

- Front hull corner on the Vimoutiers Tiger 1 showing the fender attachment points.jpg (46.84 KiB) Viewed 5422 times

- Fender mounting points were cut sausage-like from a length of square plastic tube drilled and sanded to shape.jpg (38.98 KiB) Viewed 5422 times
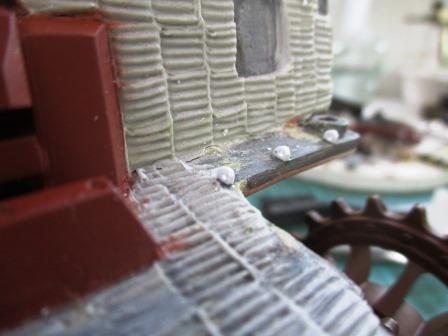
- The fender hinge brackets weere then glued in place - the furthest was left off as 'battle damage'.jpg (33.22 KiB) Viewed 5422 times

- The front fender attachment brackets after a coat of Mr Surfacer Primer.jpg (33.21 KiB) Viewed 5422 times

- Unusual low viewpoint shot showing thickness of hull above the sprocket and attachment hook for front fender. Also of note - this Tiger has early tracks (no chevron ice cleats) and no central headlight.jpg (25 KiB) Viewed 5397 times
Finally, you will notice in the photo at the top of this post that there is a small bracket with a hole in it at the front corner of the lower hull (just in front of the sprocket wheel). This is part of the Voyager set. On the real tank this held a little anchor hook which secured the front of the fender in place when it was hinged in the down position. I haven't bothered with the hooks themselves on the basis that they must have disappeared at the same time as the fenders!