All credit to you mate, scintilating stuff
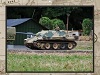
Tamiya-Tiger I early vehicle
Forum rules
This section is for posting a build log of your Tamiya tank.
Questions relating to issues you are having with your tank(s) should be posted in the General Questions forum here: viewforum.php?f=14
This section is for posting a build log of your Tamiya tank.
Questions relating to issues you are having with your tank(s) should be posted in the General Questions forum here: viewforum.php?f=14
-
HERMAN BIX

- Brigadier
- Posts: 10332
- Joined: Sun Jan 12, 2014 12:15 am
- Location: Gold Coast,Australia
Re: Tamiya-Tiger I early vehicle
If it were not for the give away scale comparisons like fingers, you could almost see this as being put togather in a period factory .
All credit to you mate, scintilating stuff
All credit to you mate, scintilating stuff
HL JAGDPANTHER,HL TIGER 1,HL PzIII MUNITIONSCHLEPPER, HL KT OCTOPUS,HL PANTHER ZU-FUSS,HL STuG III,HL T34/85 BEDSPRING,
HL PZIV MALTA,MATORRO JAGDTIGER,HL F05 TIGER,TAMIYA KT,HL PANTHERDOZER,HL EARLY PANTHER G,TAIGEN/RAMINATOR T34/76,
HL AN-BRI-RAM SU-85
HL PZIV MALTA,MATORRO JAGDTIGER,HL F05 TIGER,TAMIYA KT,HL PANTHERDOZER,HL EARLY PANTHER G,TAIGEN/RAMINATOR T34/76,
HL AN-BRI-RAM SU-85
-
Guido Henn
- Lance Corporal
- Posts: 195
- Joined: Mon Jan 27, 2014 6:01 pm
- Contact:
Re: Tamiya-Tiger I early vehicle
Hi there,
Unfortunately, once I had not much time for my tank, but now it's back on ....
After the driving test have been very pleasant, I'm going to pull the cable at the time.
Since I want to equip the driver / radio operator hatch each with Personl and details,
I was at these points obstruct any controls and must dodge accordingly.
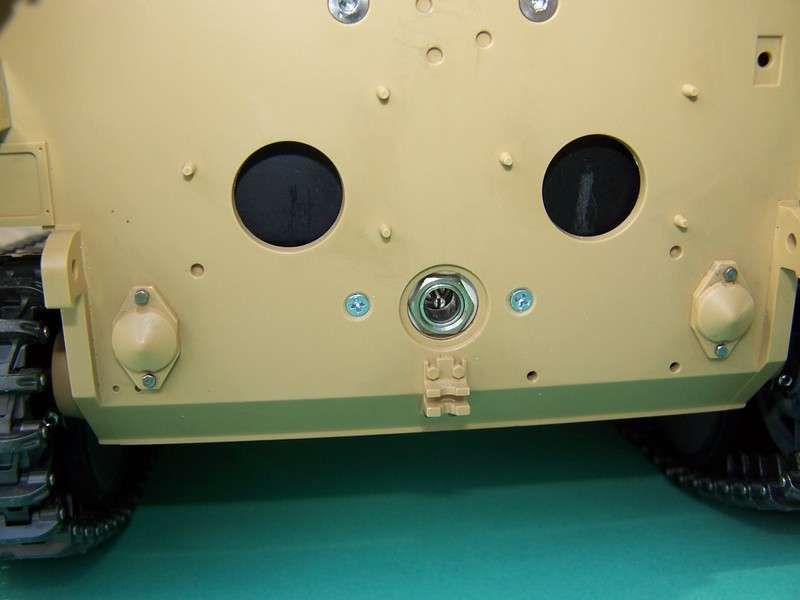
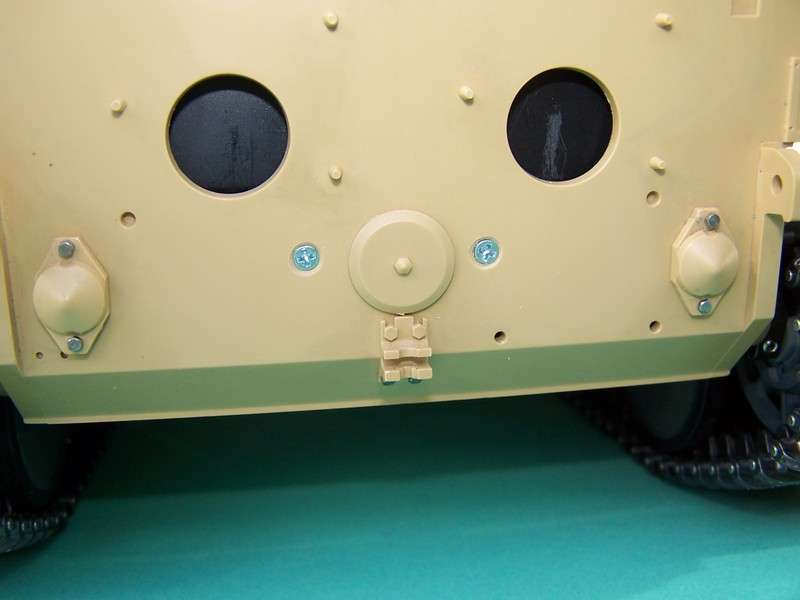
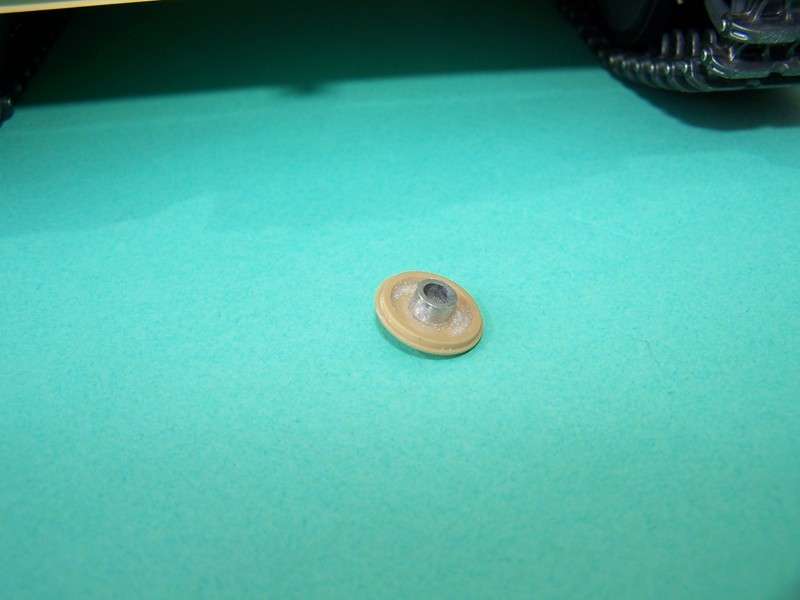
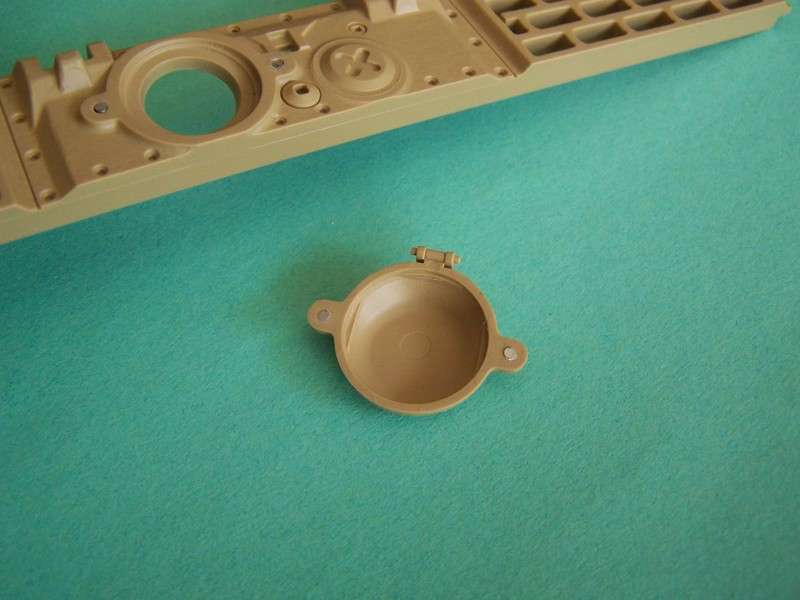
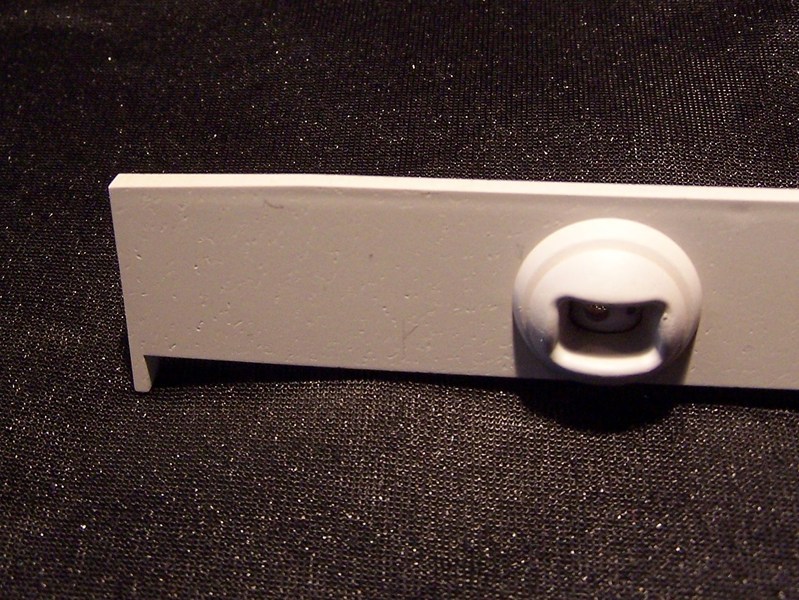
In the event opening, I have had the charging socket disappear.
The cover with the matching counterpart to the socket fitted so that it stays in place and I is not lost.
The On / Off / Load switch I installed under the cover of the snorkel, for the cover I need to get 2mm magnets, because to build such a small hinge I will not do that to me here.
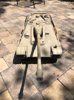
A very early starter baseplate from my shop then found to the model, which unfortunately does not fit out of the box so to an early model.
The toolbox rebuild so was fun, but has yet much time.
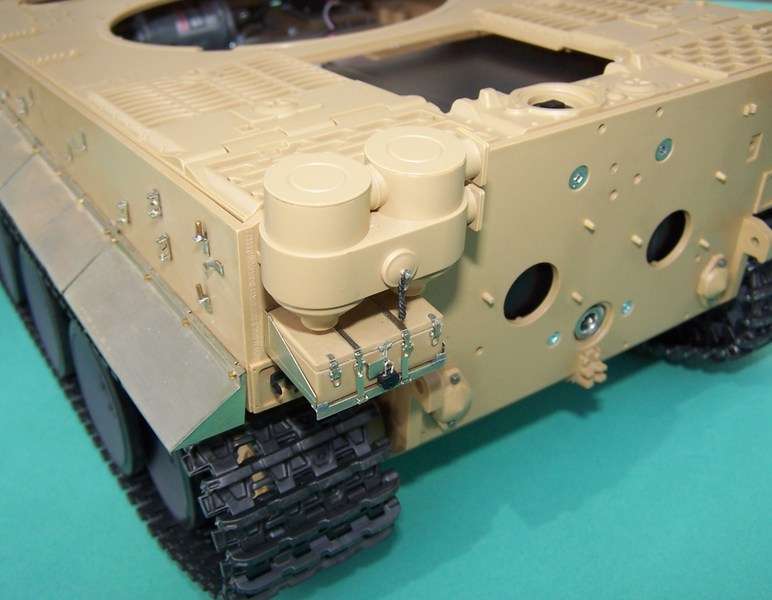
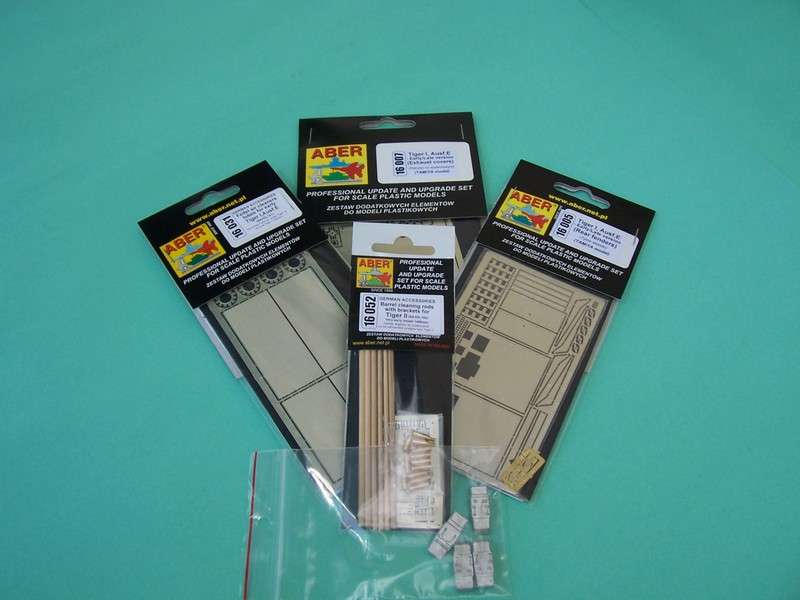
A small delivery also arrived, which again ensures long crafting fun, unfortunately missing the early muzzle brake from Aber
will be continued........
Regards,Guido
Unfortunately, once I had not much time for my tank, but now it's back on ....
After the driving test have been very pleasant, I'm going to pull the cable at the time.
Since I want to equip the driver / radio operator hatch each with Personl and details,
I was at these points obstruct any controls and must dodge accordingly.
In the event opening, I have had the charging socket disappear.
The cover with the matching counterpart to the socket fitted so that it stays in place and I is not lost.
The On / Off / Load switch I installed under the cover of the snorkel, for the cover I need to get 2mm magnets, because to build such a small hinge I will not do that to me here.
A very early starter baseplate from my shop then found to the model, which unfortunately does not fit out of the box so to an early model.
The toolbox rebuild so was fun, but has yet much time.
A small delivery also arrived, which again ensures long crafting fun, unfortunately missing the early muzzle brake from Aber
will be continued........
Regards,Guido
Re: Tamiya-Tiger I early vehicle
A lot of advanced techniques you got there Guido.... Thanks for Schooling us
ALPHA
ALPHA
-
Markocaster
- Staff Sergeant
- Posts: 990
- Joined: Mon Mar 31, 2014 11:16 pm
- Location: Bay Area , California
Re: Tamiya-Tiger I early vehicle
HL /Mato tiger 1 early, Tamiya Tiger 1 early, Taigen tiger 1 mid
Taigen T34/85, HL SU-100
Jagdpanzer Lang
Taiga Jagdpanther
Heng Long Sherman DGS Firefly kit
Tamiya King Tiger (unbuilt)
Mato all metal Panzer III
1/10 Jagdpanther
Taigen T34/85, HL SU-100
Jagdpanzer Lang
Taiga Jagdpanther
Heng Long Sherman DGS Firefly kit
Tamiya King Tiger (unbuilt)
Mato all metal Panzer III
1/10 Jagdpanther

Re: Tamiya-Tiger I early vehicle
fetch me the kitty's lets go to war
-
Guido Henn
- Lance Corporal
- Posts: 195
- Joined: Mon Jan 27, 2014 6:01 pm
- Contact:
Re: Tamiya-Tiger I early vehicle
Hi,
first I would like to thank you for the nice comments 
The control unit is now cabled, the images to I let get away, is always the same.
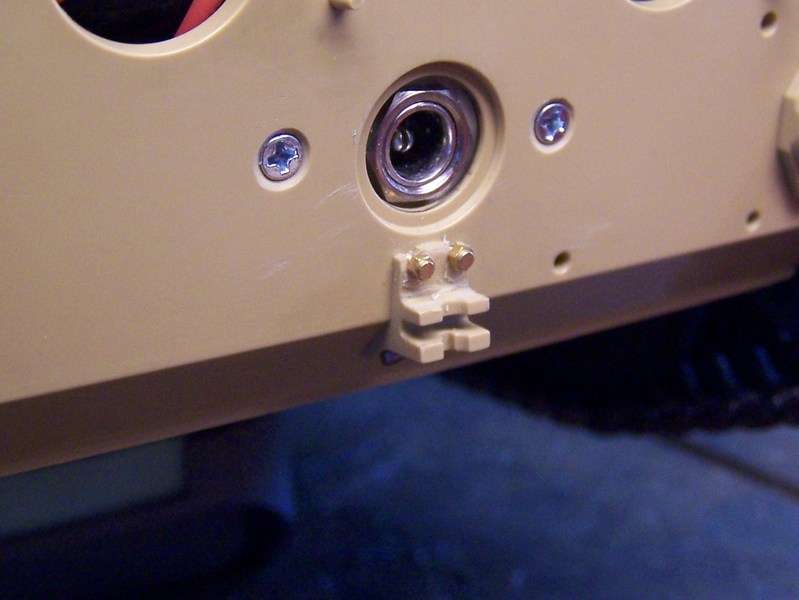
The cap for the ON / OFF switch I fitted with magnets 1x1,5mm
Castle nuts for the tow hook there not in size since then I have time to 1.2mm Steholzen of Knupfer recourse. But I think that there will soon be something on the market, as it has offered WeCoHe,
I could replace the bolt.
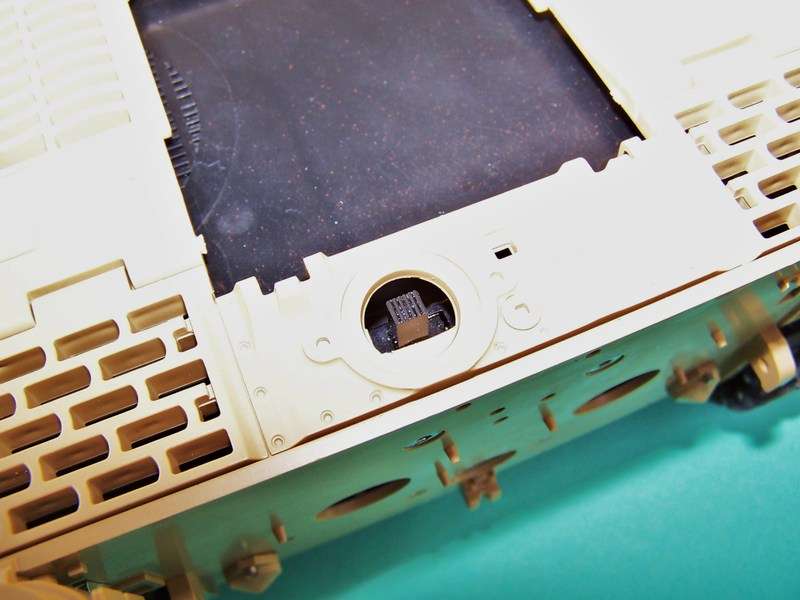
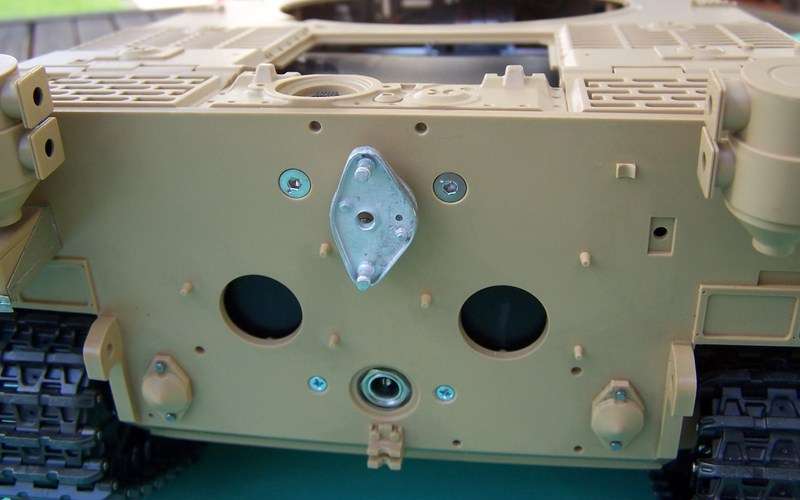
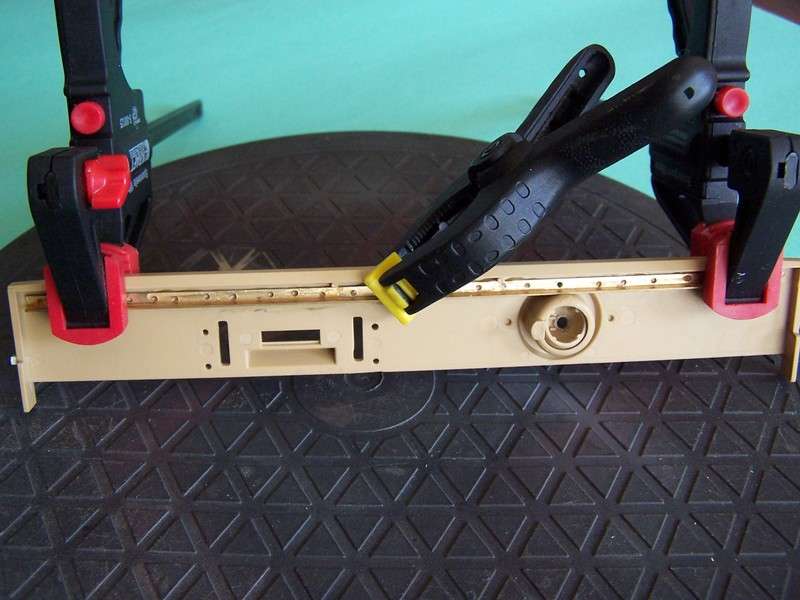
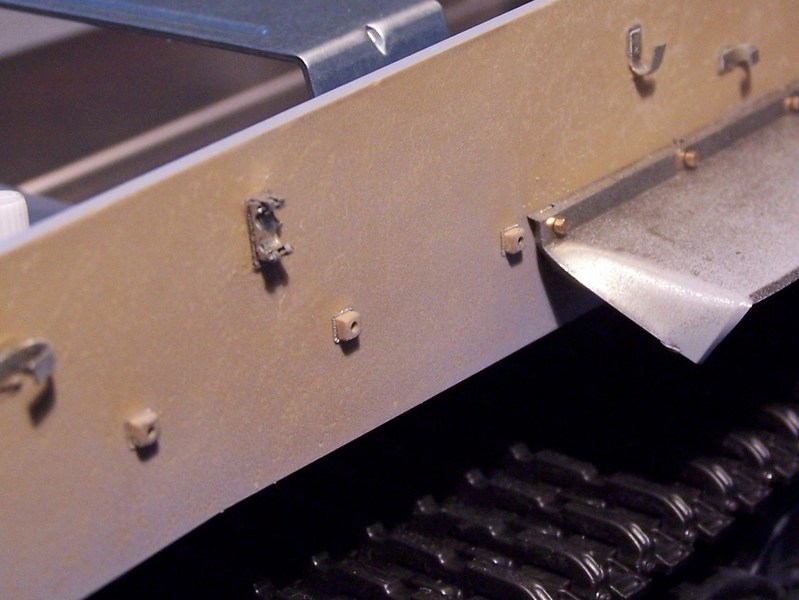
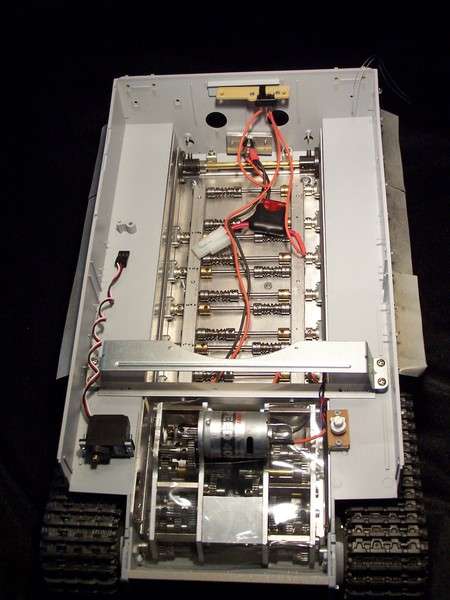
Since the pan cover and the front armor are very unstable I made with MS profile for stability, the profiles I have provided with some 2mm holes and then glued with 2K adhesive.
At the rear, the early Notek has found out the Model alley to the model, but I have here converted to green light, SMD, I then wired with copper wire, the supplied cables were a little too thick.
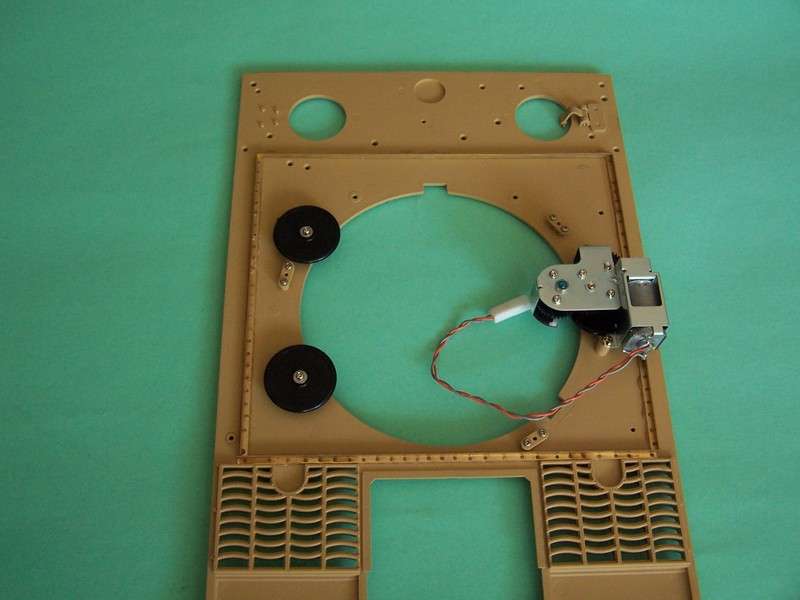
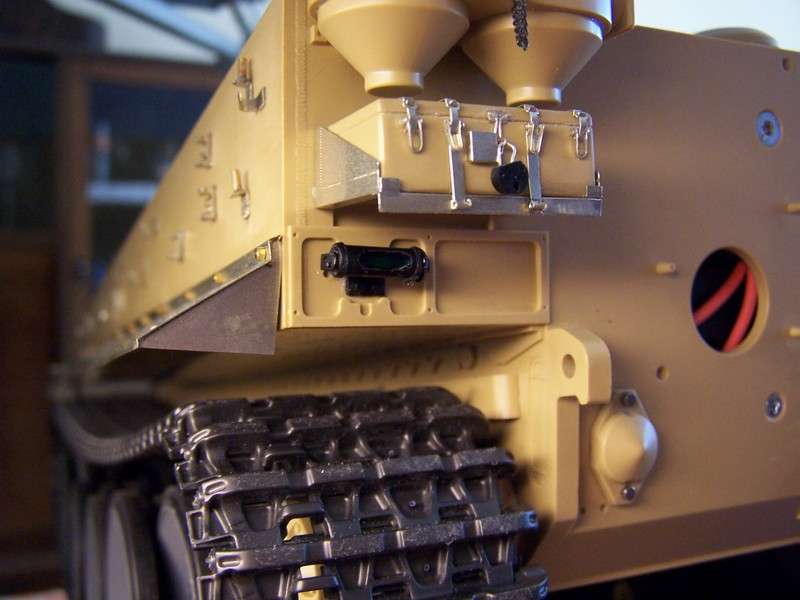
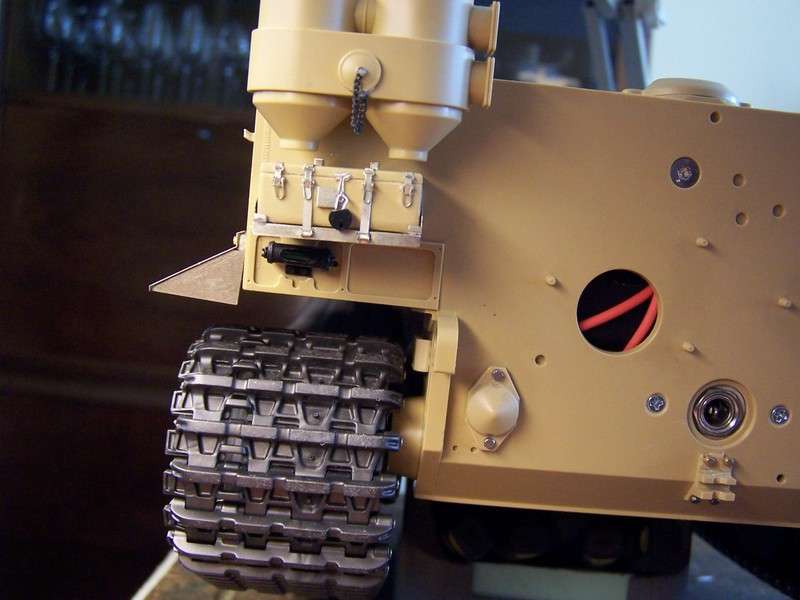
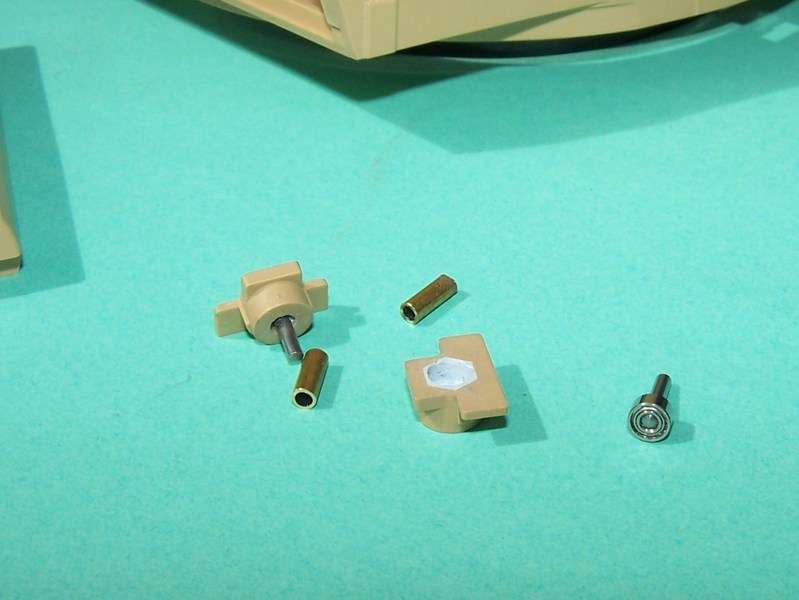
The mounting of the main gun I converted, because the tower prior model is not suitable for continuous operation.
I have ball bearings 5x2mm, 3x2mm and 2mm cylinder pins MS-pipe is used, this should be a Stable solution for the operation.
To be continued ............
Regards, Guido
first I would like to thank you for the nice comments
The control unit is now cabled, the images to I let get away, is always the same.
The cap for the ON / OFF switch I fitted with magnets 1x1,5mm
Castle nuts for the tow hook there not in size since then I have time to 1.2mm Steholzen of Knupfer recourse. But I think that there will soon be something on the market, as it has offered WeCoHe,
I could replace the bolt.
Since the pan cover and the front armor are very unstable I made with MS profile for stability, the profiles I have provided with some 2mm holes and then glued with 2K adhesive.
At the rear, the early Notek has found out the Model alley to the model, but I have here converted to green light, SMD, I then wired with copper wire, the supplied cables were a little too thick.
The mounting of the main gun I converted, because the tower prior model is not suitable for continuous operation.
I have ball bearings 5x2mm, 3x2mm and 2mm cylinder pins MS-pipe is used, this should be a Stable solution for the operation.
To be continued ............
Regards, Guido
Re: Tamiya-Tiger I early vehicle
That's some fine handywork Guido.... I can just tell you have done this many many times before...as you have everything down to a science 
ALPHA
ALPHA
-
Guido Henn
- Lance Corporal
- Posts: 195
- Joined: Mon Jan 27, 2014 6:01 pm
- Contact:
Re: Tamiya-Tiger I early vehicle
Hello,
In the meantime, an update in this building report
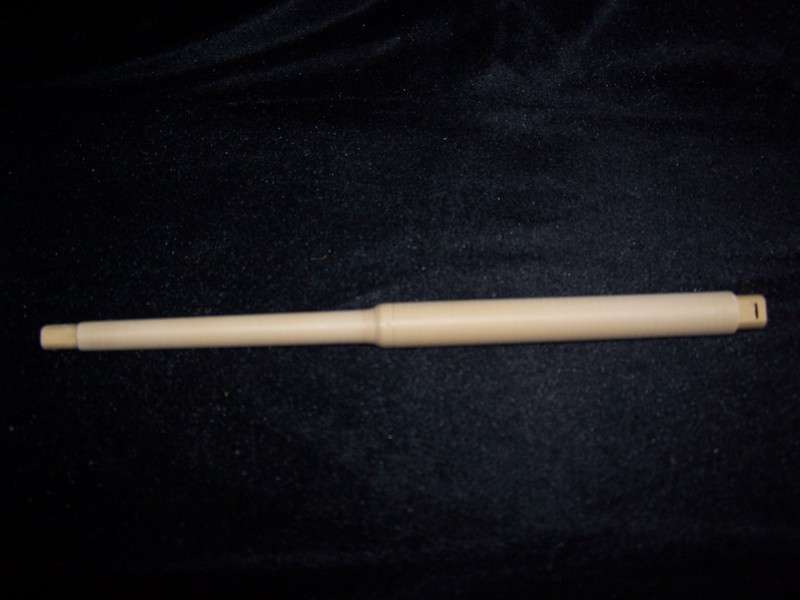
I have decided to use the tube from the kit, asks why one or the other.
Quite simply, I want to prevent the tower on the head is too heavy and prevent problems with the turntable.
Now stand Glue / filling / sanding on the program, and not too tight.
But you can do it, you just have to want to.
The basis for the RCC servo i have to the included in the kit
Mounted component, no problem.

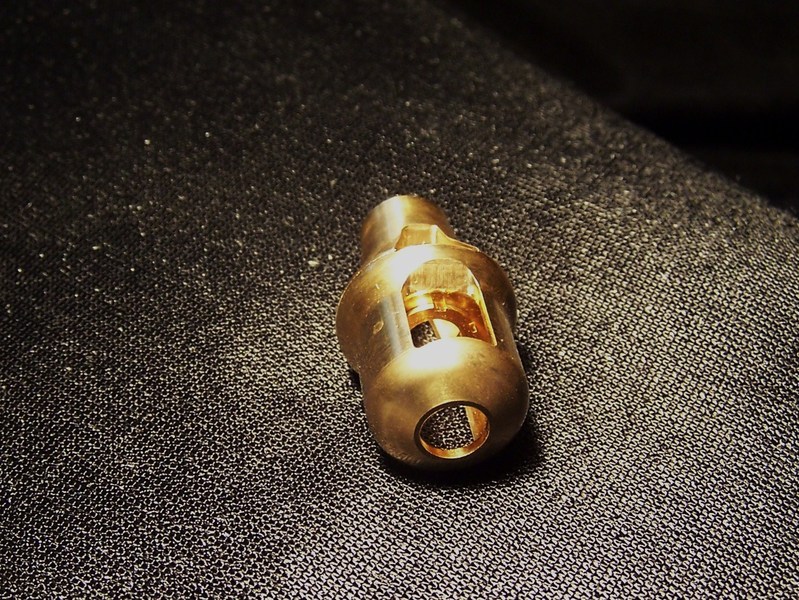
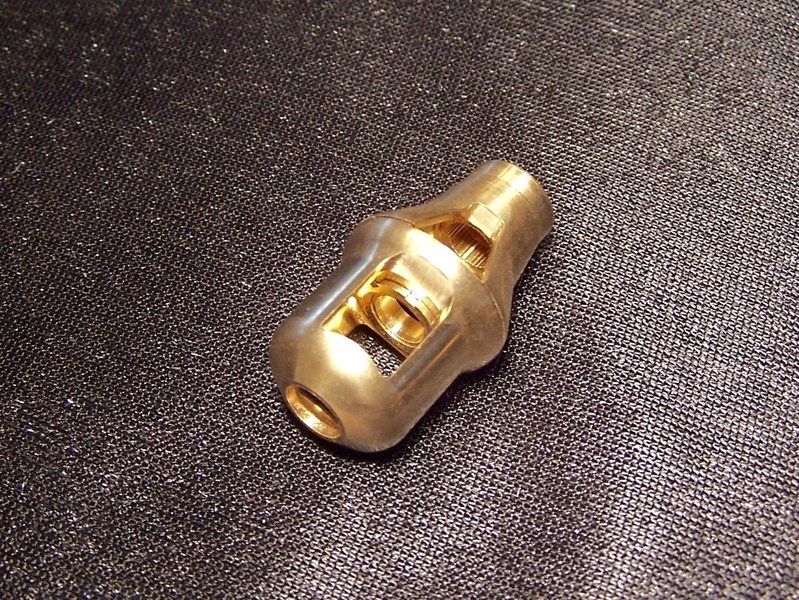
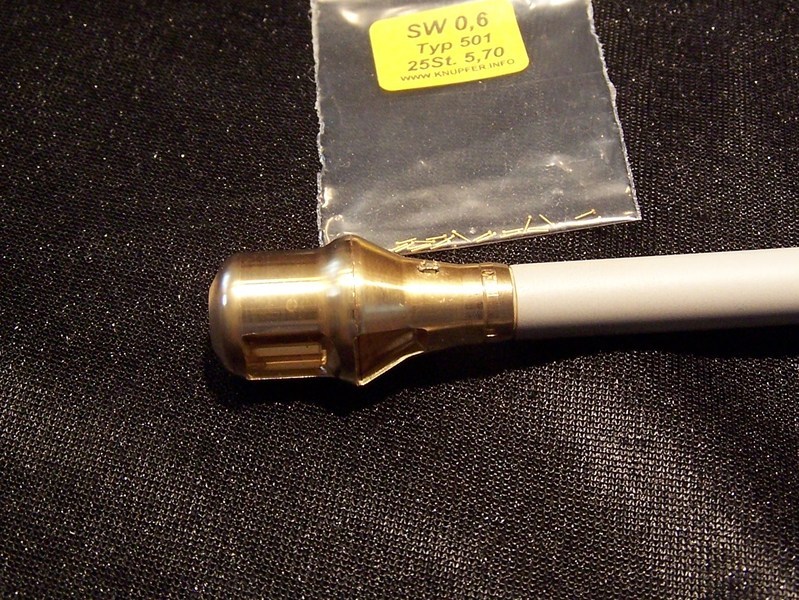
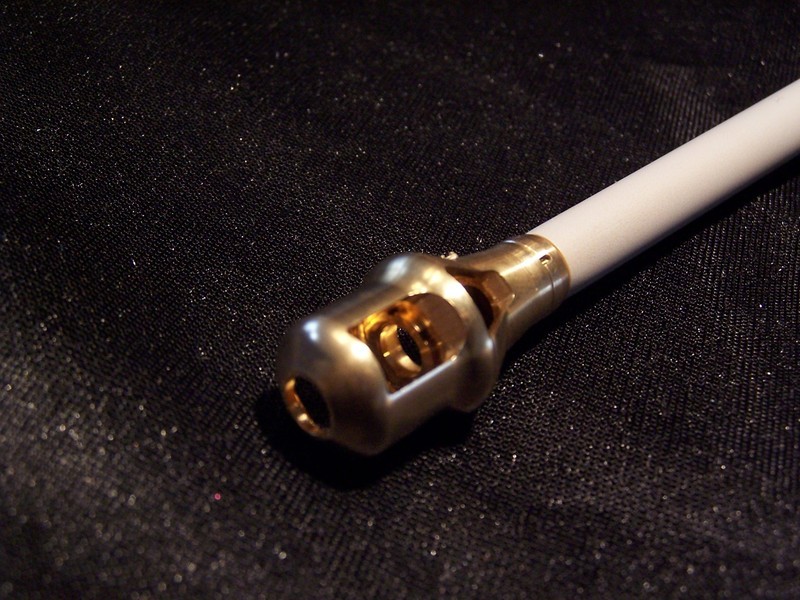
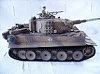
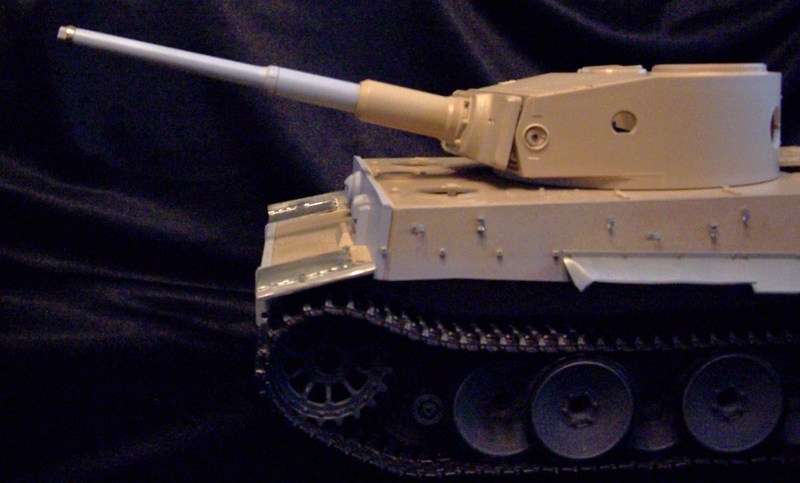
Then I have the early muzzle brake brass ordered, really a nice work and very easy to install.
Instead of the etched part-screw heads I have directly used correct screw, is perhaps hard to see, but you knows what you did everything on the model.
Before I affixes further details on the model, I have been looking around the structure. For example, on the turret. is already quite neat little present on other parts everything is but a mirror finish on the parts I have worked with various ball mills.
The lower hull was then completely dismantled after the driving test, and inside, primed up on the aluminum inner part, which looks attractive later.
To be continued ........
Regards, Guido
In the meantime, an update in this building report
I have decided to use the tube from the kit, asks why one or the other.
Quite simply, I want to prevent the tower on the head is too heavy and prevent problems with the turntable.
Now stand Glue / filling / sanding on the program, and not too tight.
But you can do it, you just have to want to.
The basis for the RCC servo i have to the included in the kit
Mounted component, no problem.
Then I have the early muzzle brake brass ordered, really a nice work and very easy to install.
Instead of the etched part-screw heads I have directly used correct screw, is perhaps hard to see, but you knows what you did everything on the model.
Before I affixes further details on the model, I have been looking around the structure. For example, on the turret. is already quite neat little present on other parts everything is but a mirror finish on the parts I have worked with various ball mills.
The lower hull was then completely dismantled after the driving test, and inside, primed up on the aluminum inner part, which looks attractive later.
To be continued ........
Regards, Guido
-
forgebear
- Warrant Officer 1st Class
- Posts: 1809
- Joined: Fri Nov 21, 2008 11:15 pm
- Location: bedford
- Contact:
Re: Tamiya-Tiger I early vehicle
just brill guido love the work on this tiger
dave
dave
-
Guido Henn
- Lance Corporal
- Posts: 195
- Joined: Mon Jan 27, 2014 6:01 pm
- Contact:
Re: Tamiya-Tiger I early vehicle
Hello,
first I want to say thank you for the nice comments here.
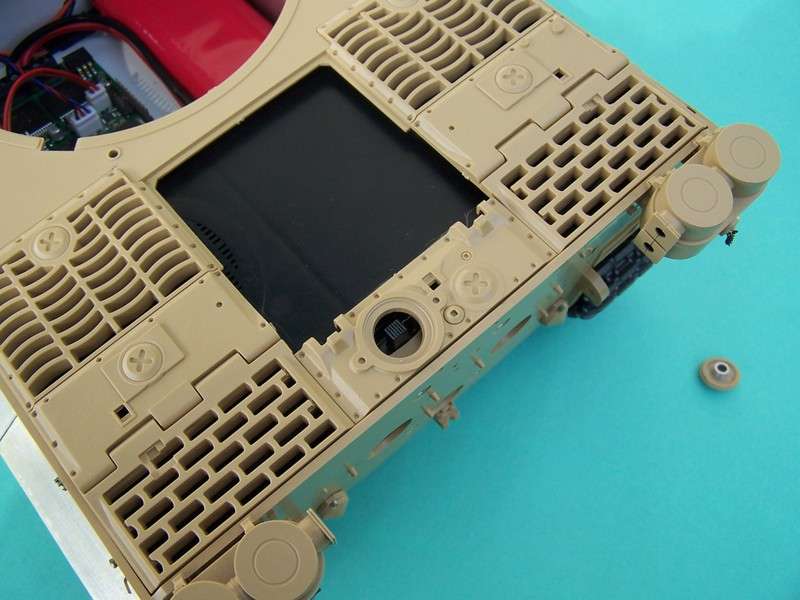
on it goes, I've now gone ahead on the tower and the installation of the servos.
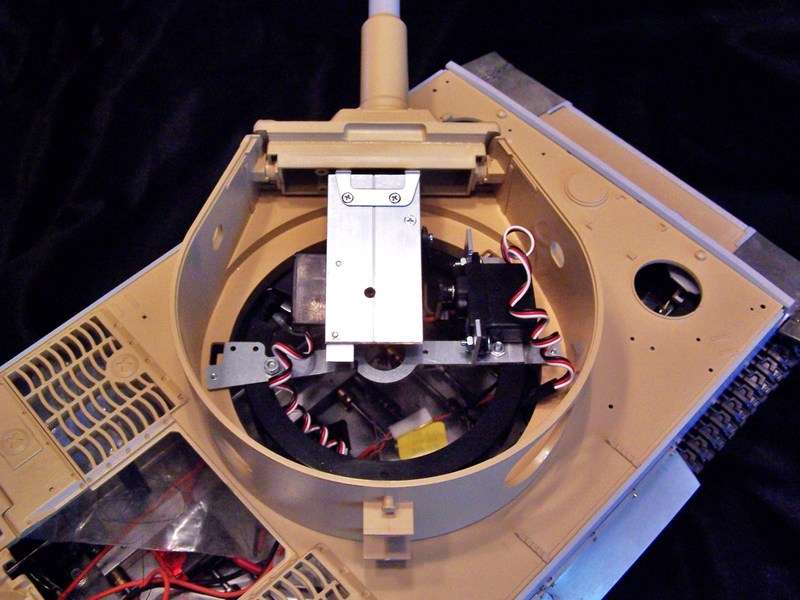
I used here again fServos from New Power, with metal gears .Also in this tower I have installed and aluminum profiles in various strengths.
So that the pipe I have not built me a twisted clevis.
so that the tower gets a very low center of gravity, I made me a 3mm round aluminum plate that is now screwed under the tower bezel.
will be continued.......
regards,Guido
first I want to say thank you for the nice comments here.
on it goes, I've now gone ahead on the tower and the installation of the servos.
I used here again fServos from New Power, with metal gears .Also in this tower I have installed and aluminum profiles in various strengths.
So that the pipe I have not built me a twisted clevis.
so that the tower gets a very low center of gravity, I made me a 3mm round aluminum plate that is now screwed under the tower bezel.
will be continued.......
regards,Guido
