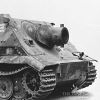
s.I.G 33 Converion
-
HERMAN BIX

- Major-General
- Posts: 11879
- Joined: Sun Jan 12, 2014 12:15 am
- Location: Gold Coast,Australia
Re: s.I.G 33 Converion
HL JAGDPANTHER,HL TIGER 1,HL PzIII MUNITIONSCHLEPPER, HL KT OCTOPUS,HL PANTHER ZU-FUSS,HL STuG III,HL T34/85 BEDSPRING,
HL PZIV MALTA,MATORRO JAGDTIGER,HL F05 TIGER,TAMIYA KT,HL PANTHERDOZER,HL EARLY PANTHER G,TAIGEN/RAMINATOR T34/76,
HL AN-BRI-RAM SU-85
HL PZIV MALTA,MATORRO JAGDTIGER,HL F05 TIGER,TAMIYA KT,HL PANTHERDOZER,HL EARLY PANTHER G,TAIGEN/RAMINATOR T34/76,
HL AN-BRI-RAM SU-85
-
baldrick131
- Lance Corporal
- Posts: 140
- Joined: Fri Oct 04, 2019 8:46 pm
- Location: March cambridgeshire
- Contact:
Re: s.I.G 33 Converion
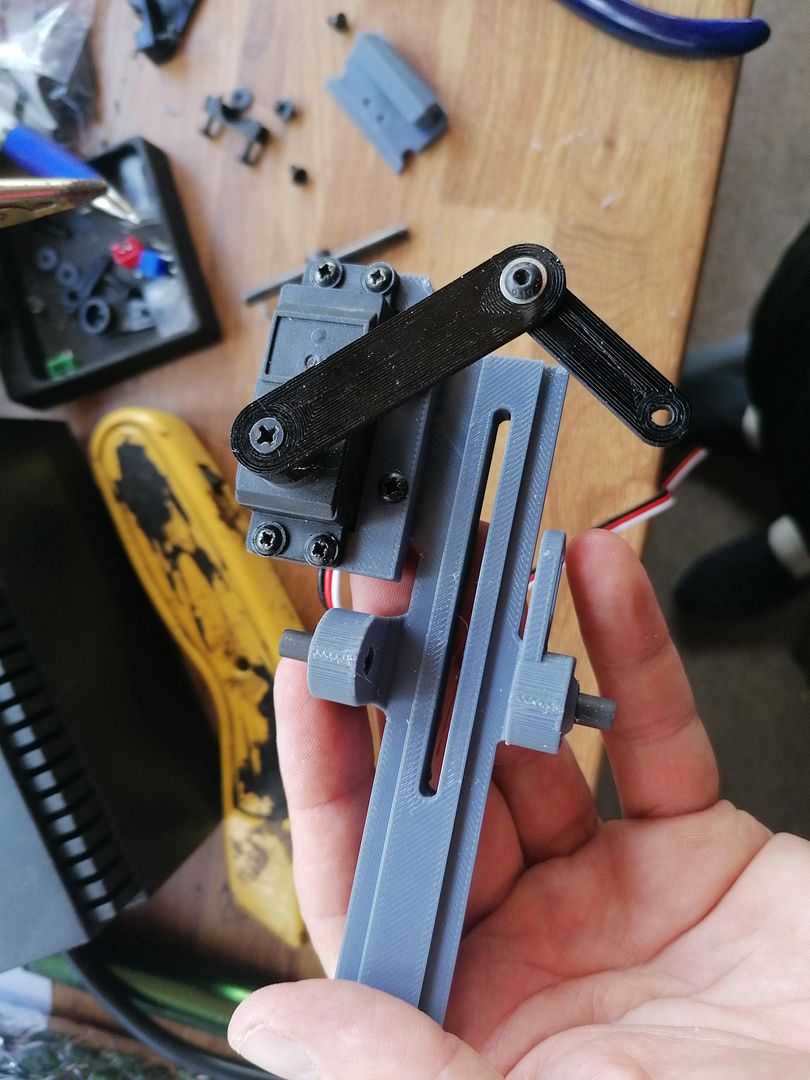
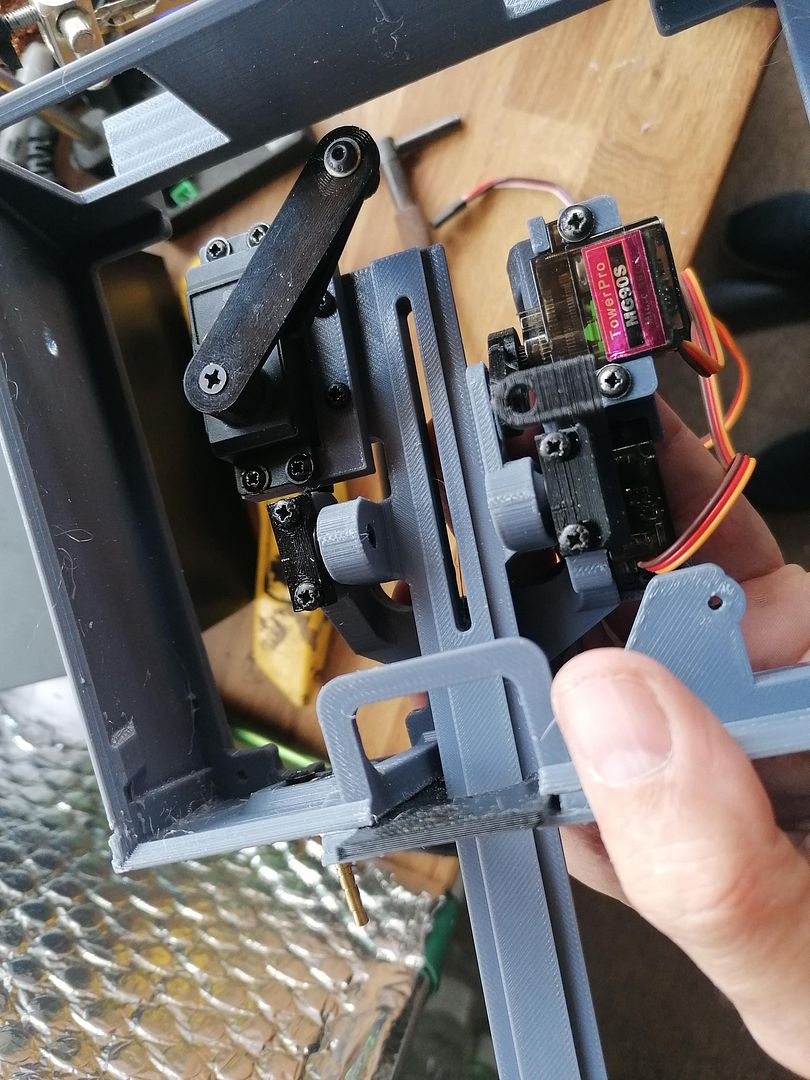
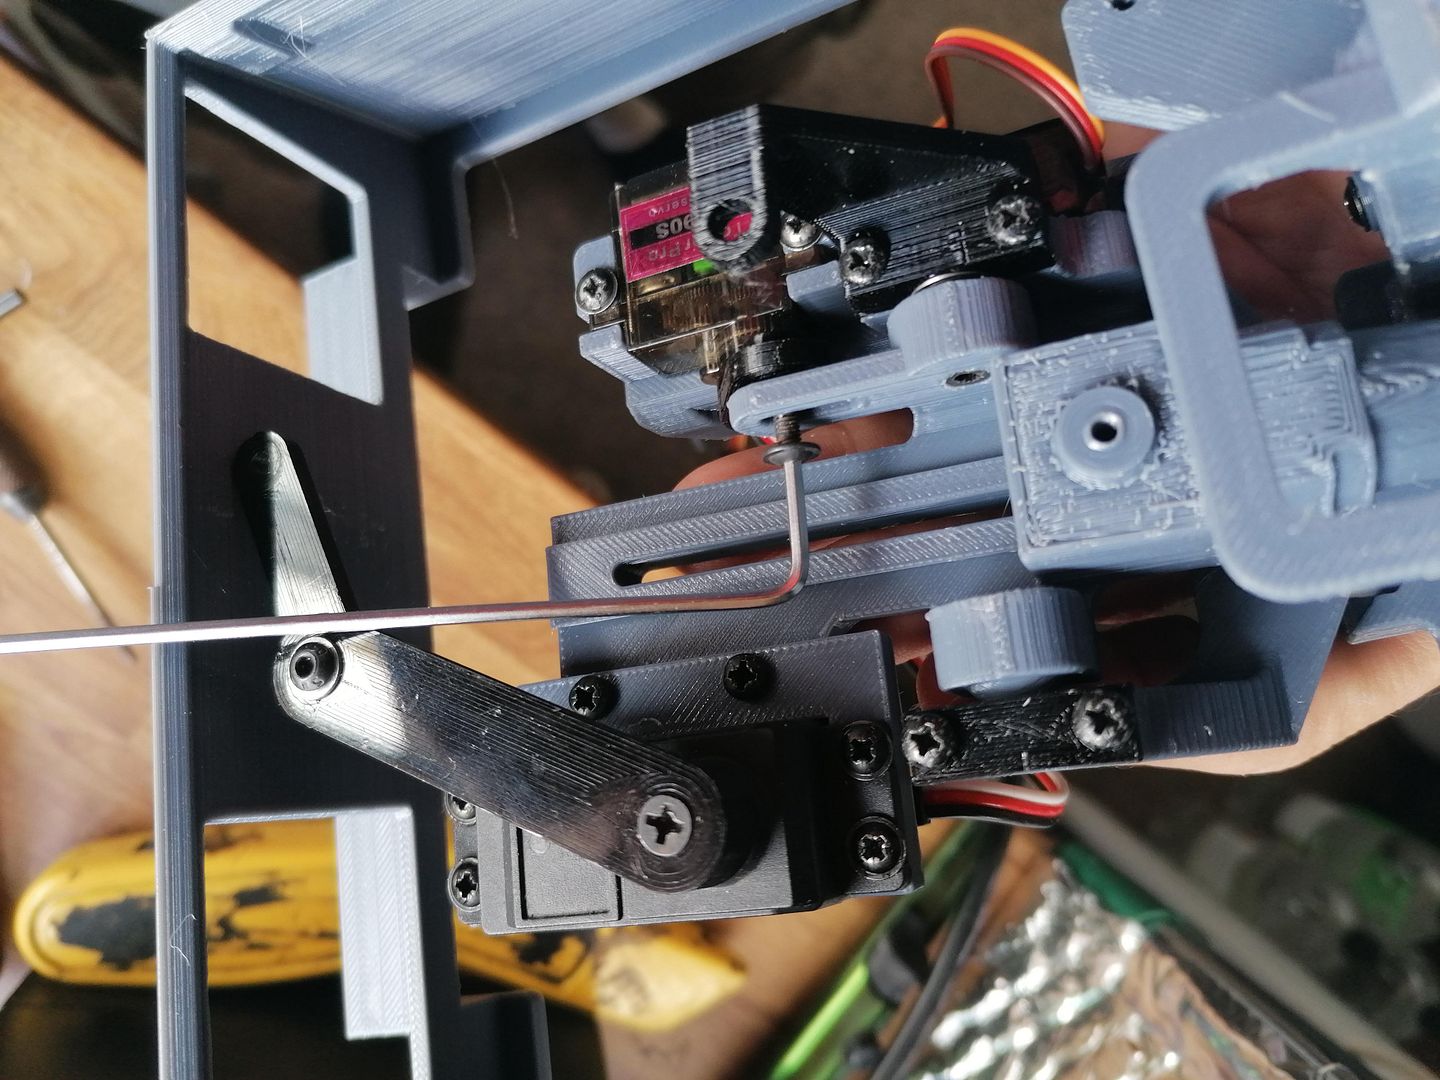
I have had a busy time working on the tank and have made real progress on the gun.
I had to do a few versions with different servos I had knocking about and ended up fitting an old standard steering type servo as it was the only one that had the power to move the barrel the distance needed for realistic effect.
Here it is mounted on the hull of the tank fitted to a cut away casement to allow me to see what was going on and allow me to make ant mods if it was going to catch on anything.
https://youtube.com/shorts/9GMvR-puSm0?feature=share
Sorry I cant post more than a link as youtube posted it as a short format video and it wont appear on here
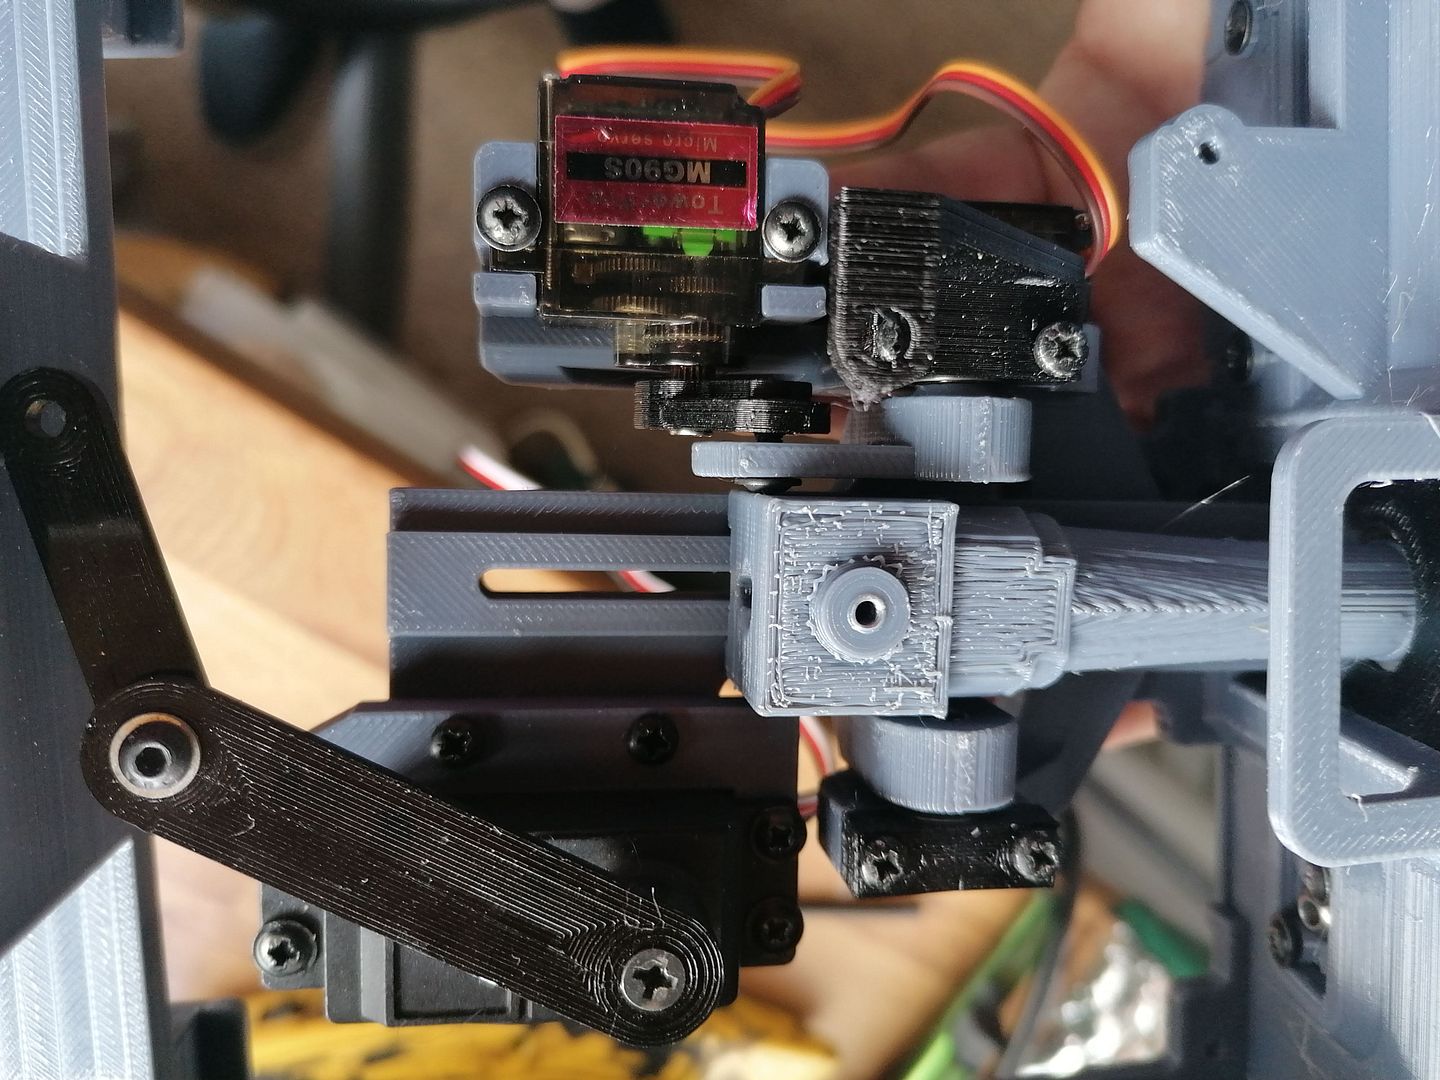
So here it is placed in a almost complete casement fitted to the stug hull I am probably going to have to print it again as I have re designed it to hold a smoke generator pot I got from aliexpress to allow for cannon smoke and when i do the hatches the hinges may require more mods to it.
And here is a front on view to get a better look at how it should turn out'
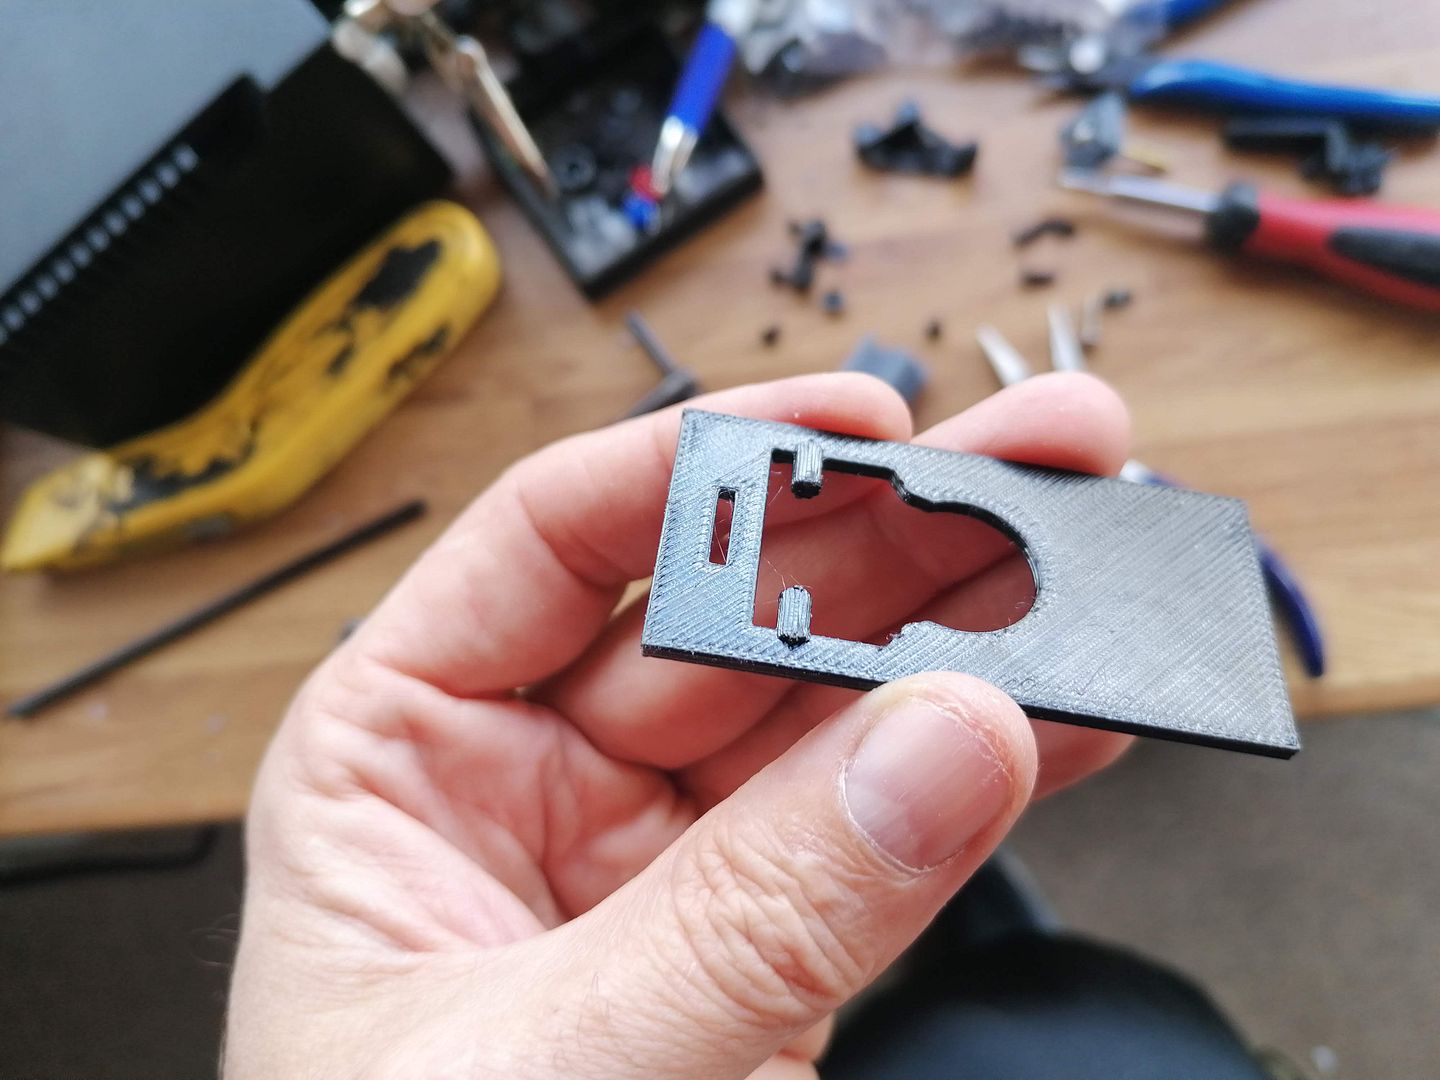
The hull machine gun mount is sepperate and screws in place and the gun is one of these with the gun part that just pops into place -
https://www.aliexpress.com/item/1005002 ... 0166%21sea
The drivers vision slot is also separate and screwed in place from the rear and the guard just pops into place over it and can be positioned either up or down .
So thats as far as I have got with it and the next thing to do is make up the rear hatches and hinges.
I had to do a few versions with different servos I had knocking about and ended up fitting an old standard steering type servo as it was the only one that had the power to move the barrel the distance needed for realistic effect.
Here it is mounted on the hull of the tank fitted to a cut away casement to allow me to see what was going on and allow me to make ant mods if it was going to catch on anything.
https://youtube.com/shorts/9GMvR-puSm0?feature=share
Sorry I cant post more than a link as youtube posted it as a short format video and it wont appear on here
So here it is placed in a almost complete casement fitted to the stug hull I am probably going to have to print it again as I have re designed it to hold a smoke generator pot I got from aliexpress to allow for cannon smoke and when i do the hatches the hinges may require more mods to it.
And here is a front on view to get a better look at how it should turn out'
The hull machine gun mount is sepperate and screws in place and the gun is one of these with the gun part that just pops into place -
https://www.aliexpress.com/item/1005002 ... 0166%21sea
The drivers vision slot is also separate and screwed in place from the rear and the guard just pops into place over it and can be positioned either up or down .
So thats as far as I have got with it and the next thing to do is make up the rear hatches and hinges.
-
baldrick131
- Lance Corporal
- Posts: 140
- Joined: Fri Oct 04, 2019 8:46 pm
- Location: March cambridgeshire
- Contact:
Re: s.I.G 33 Converion
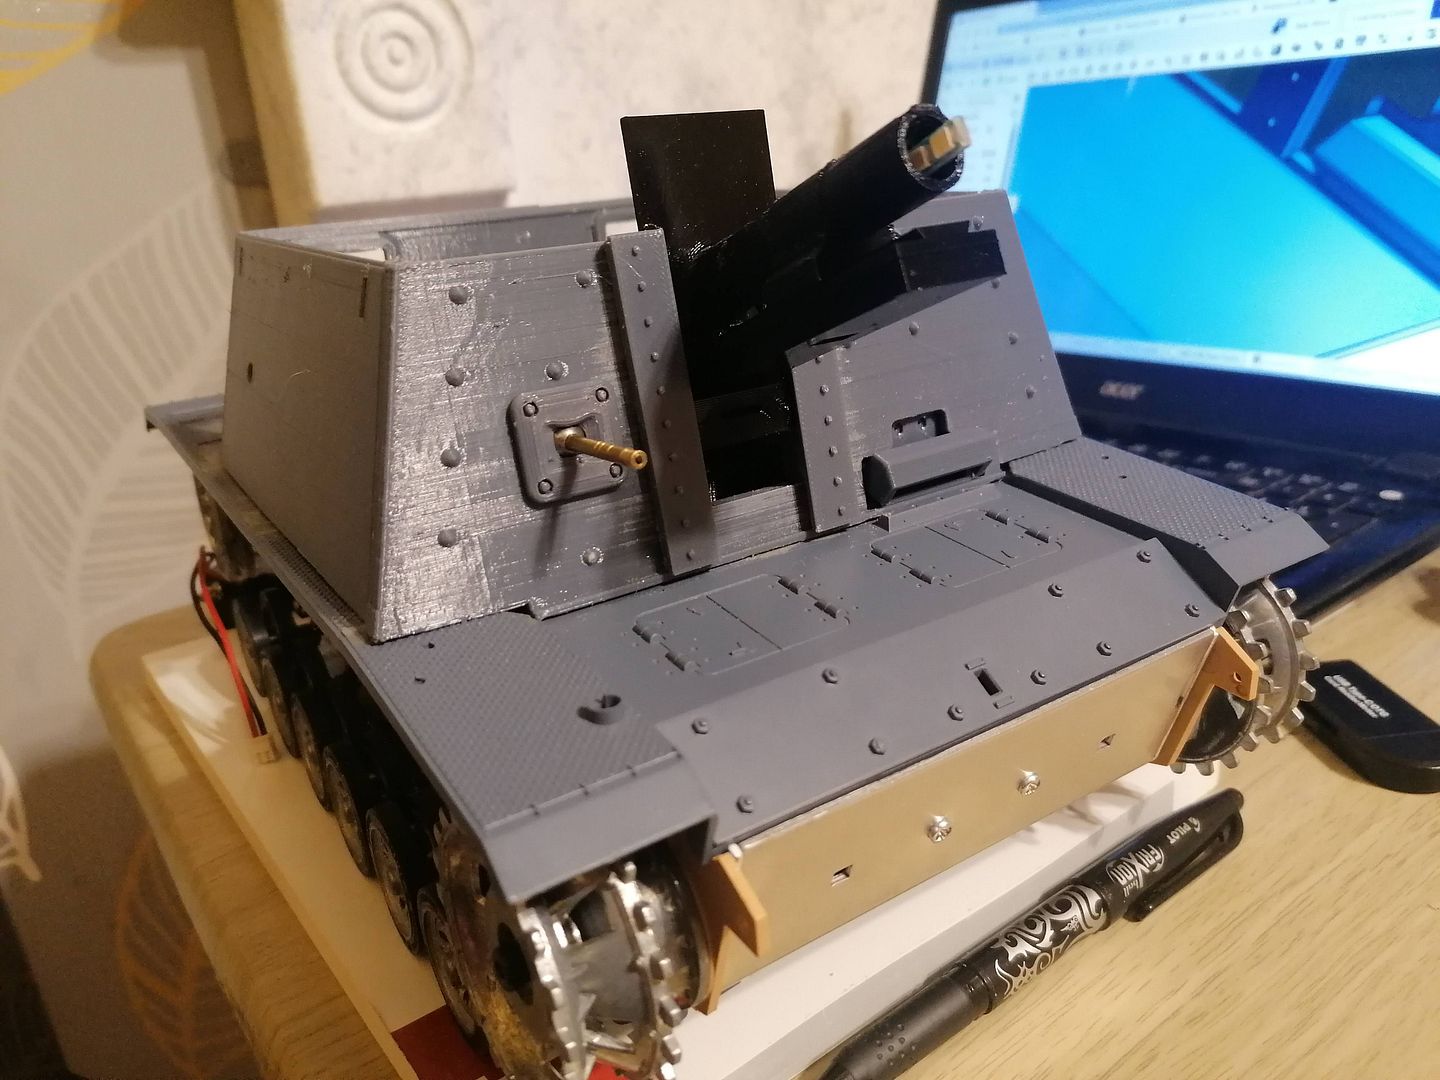
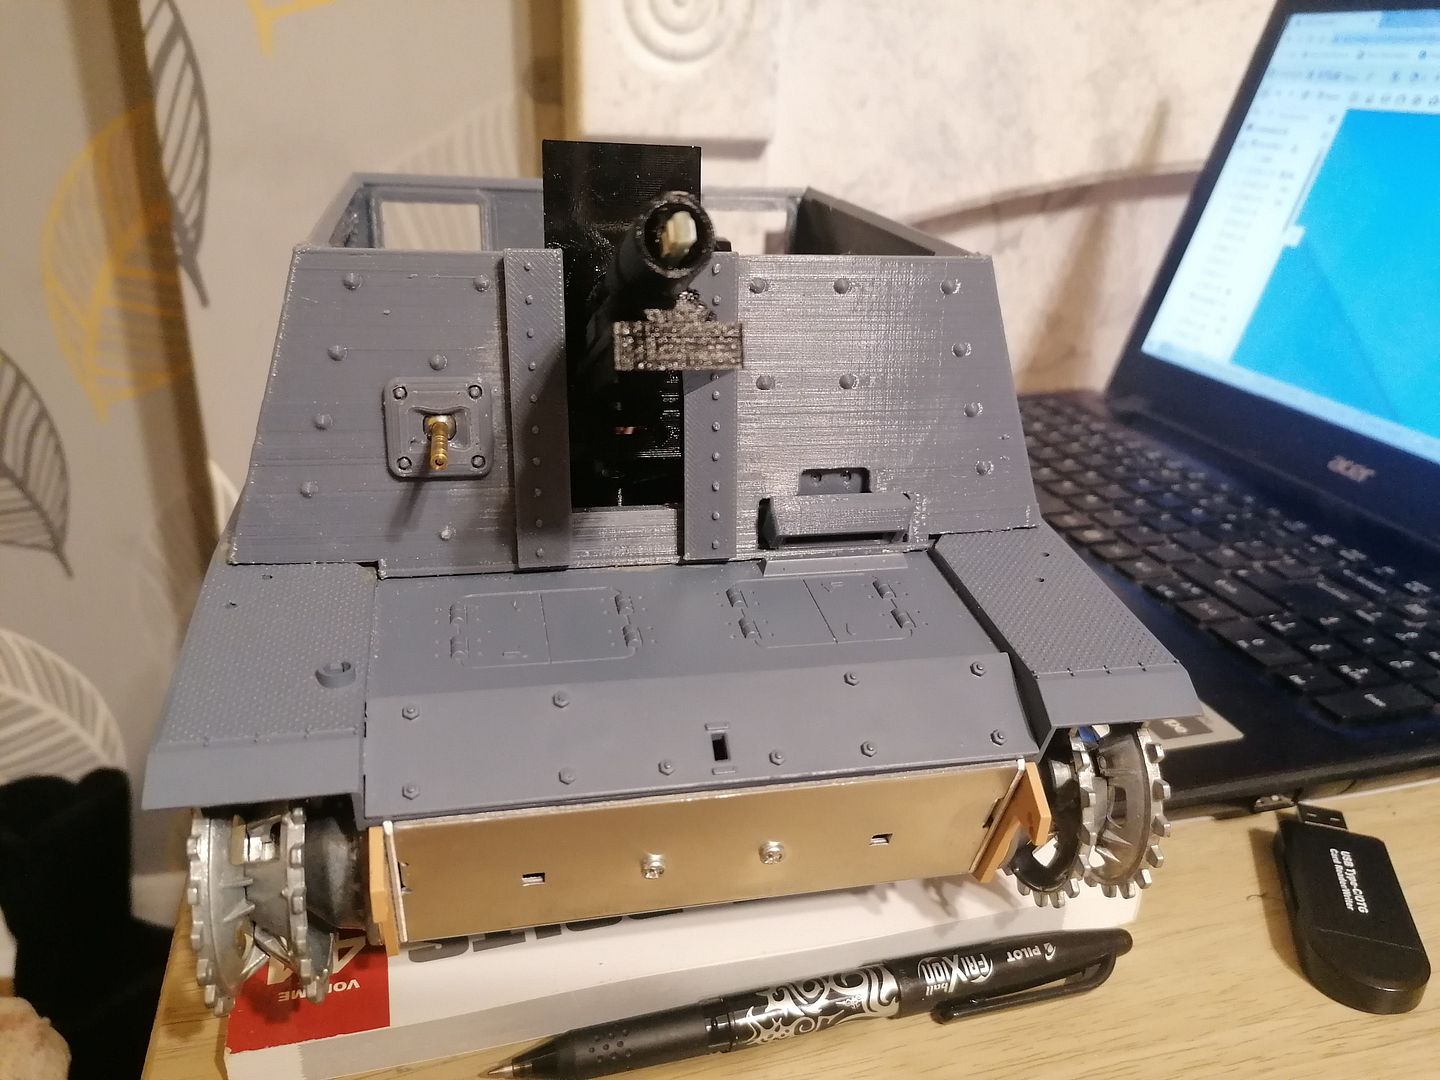
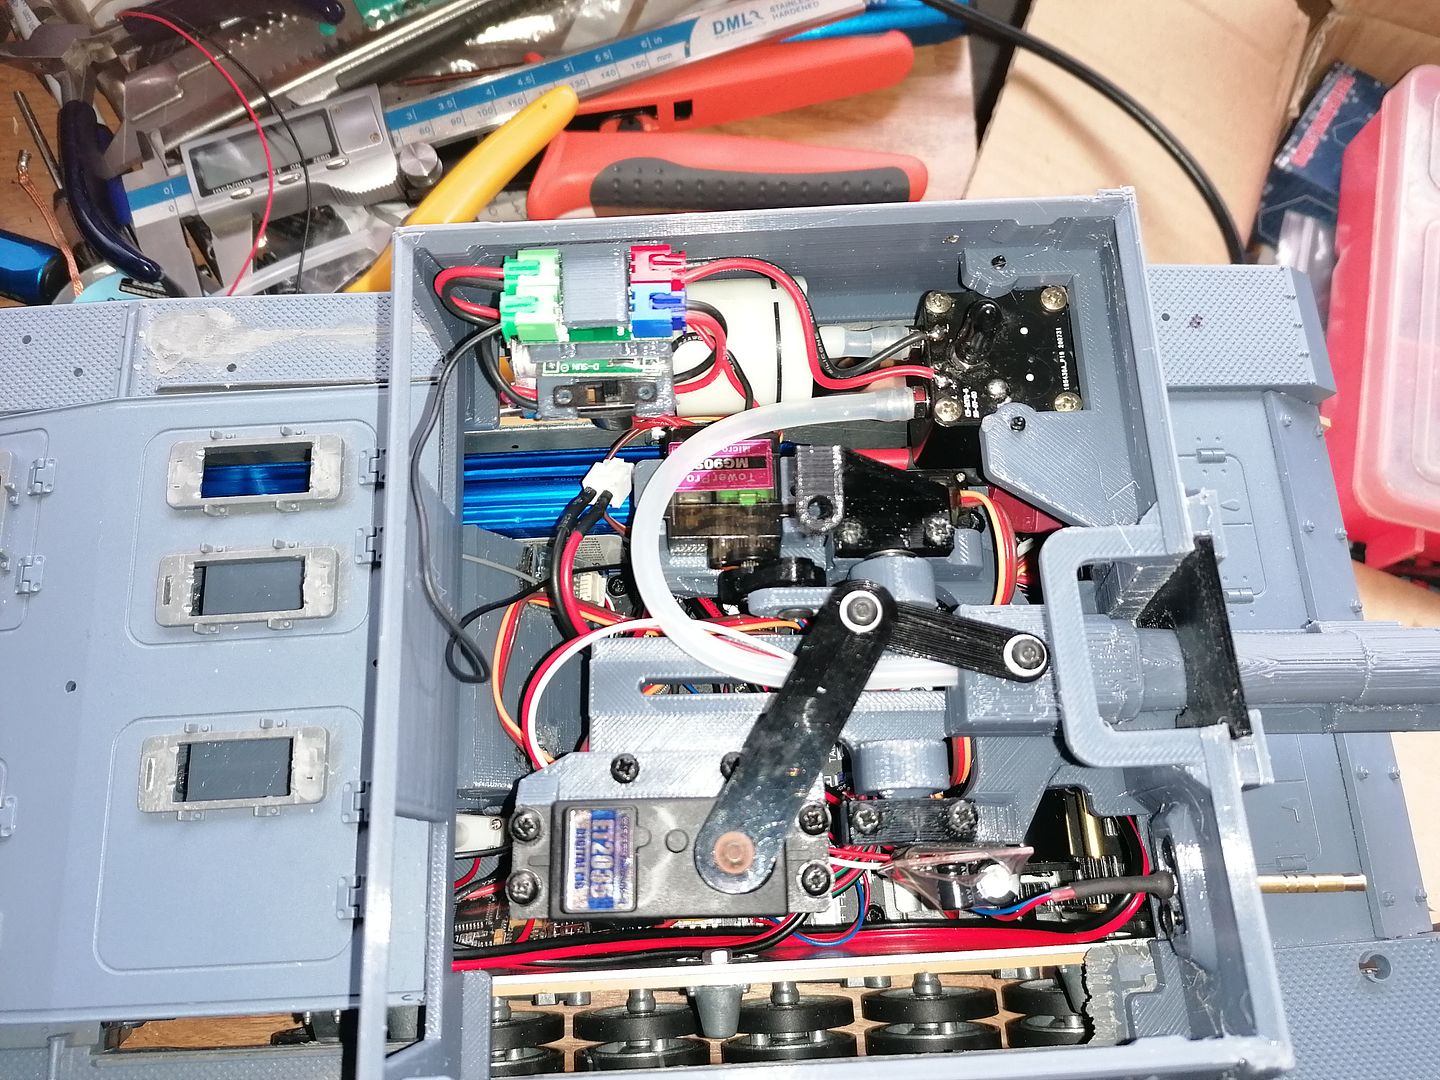
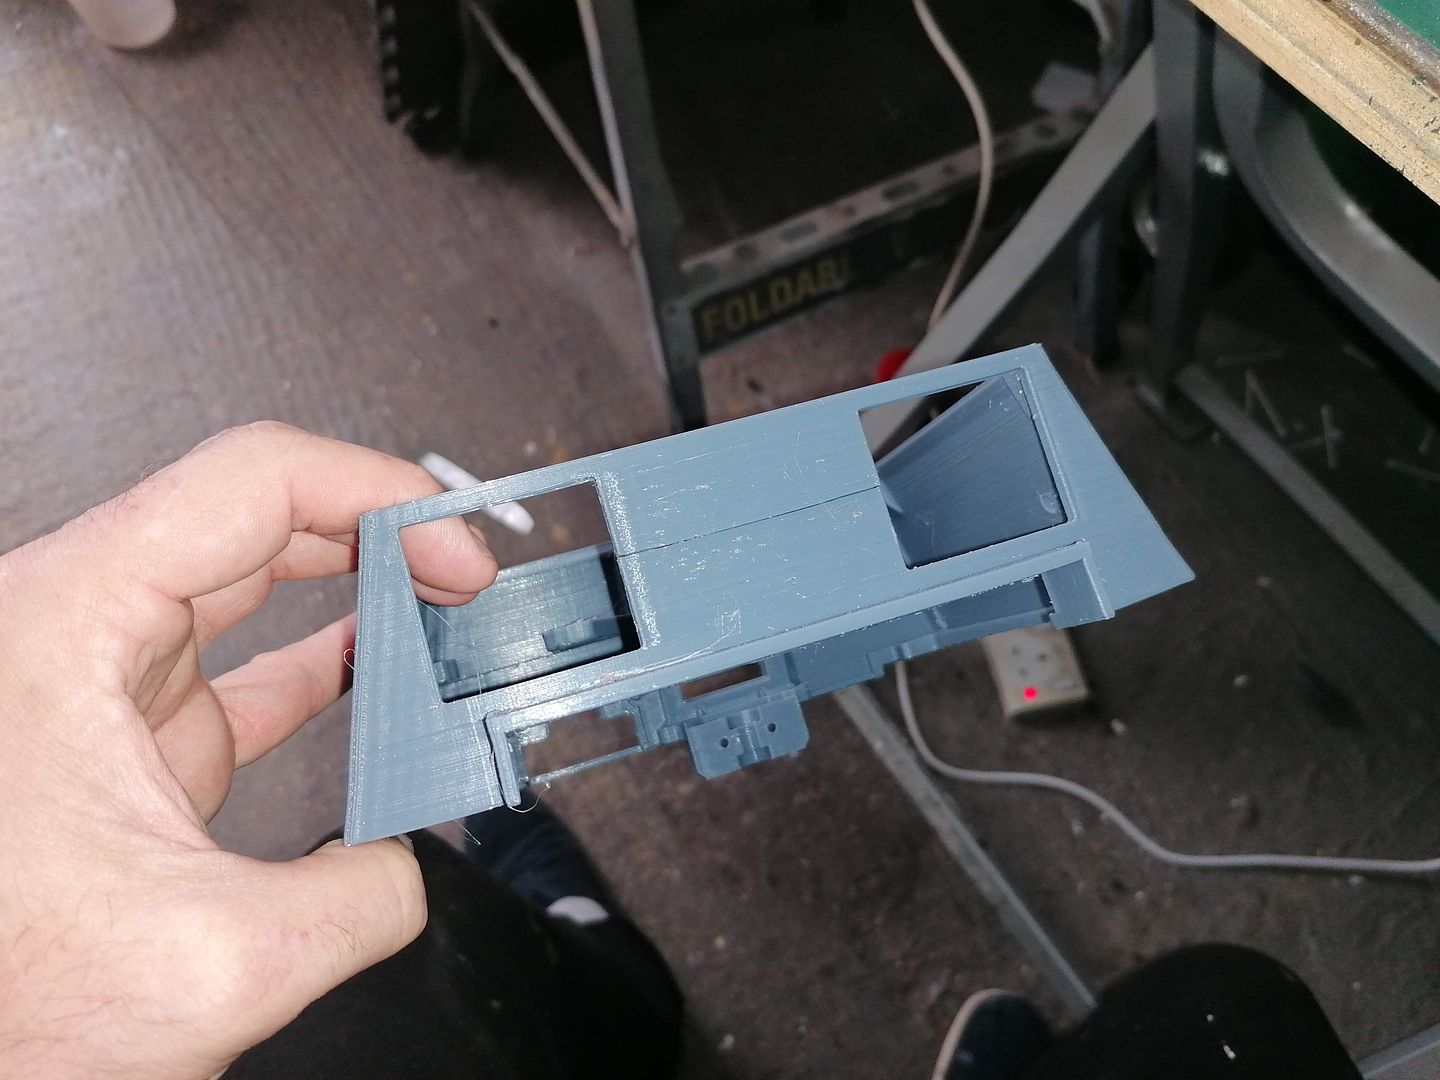
Here Im going to go in to a bit more detail with what I have done so far.
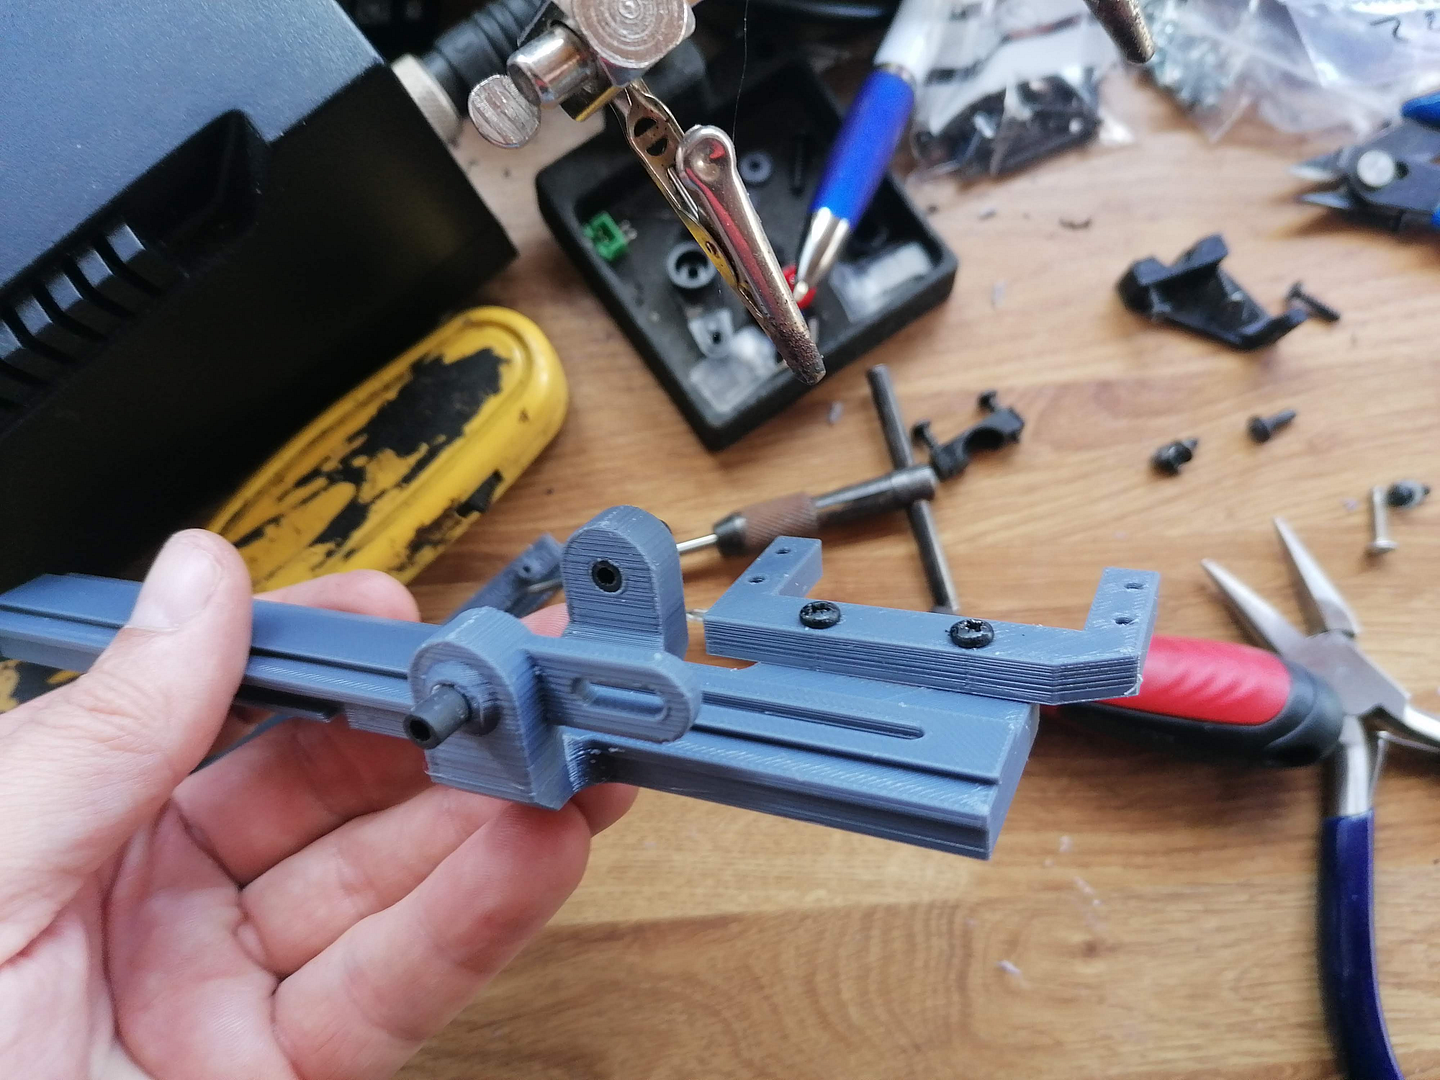
These are the farts to make the front more detailed'
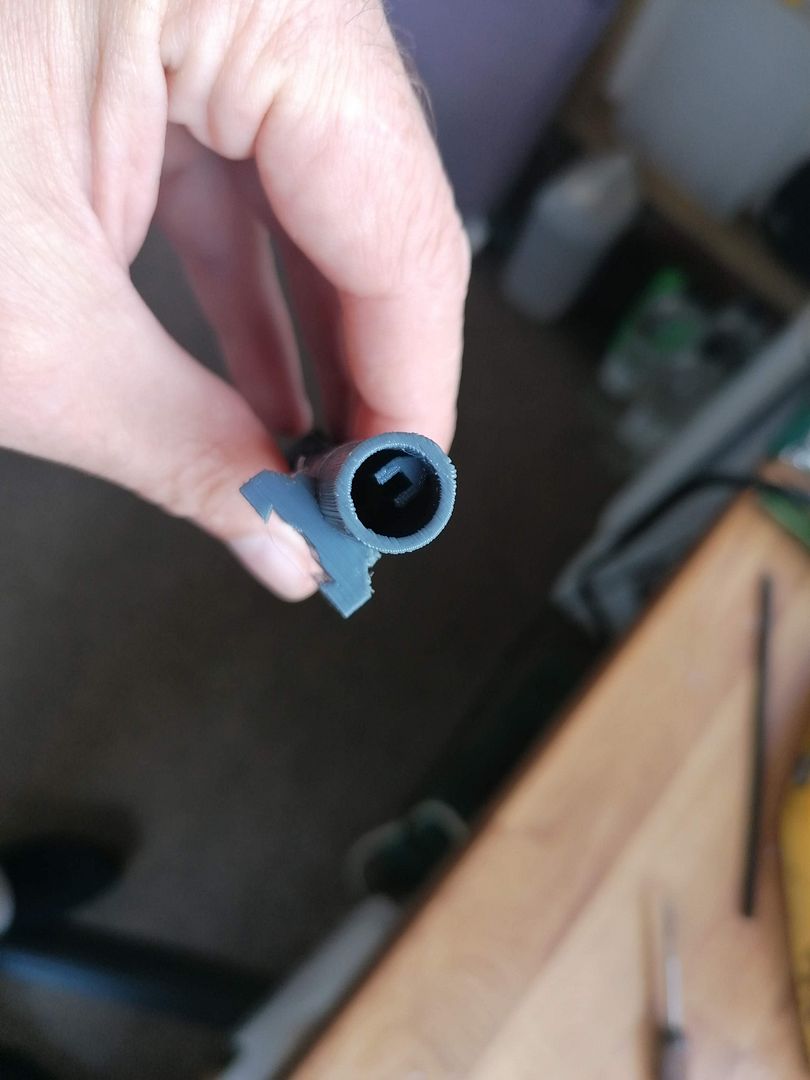
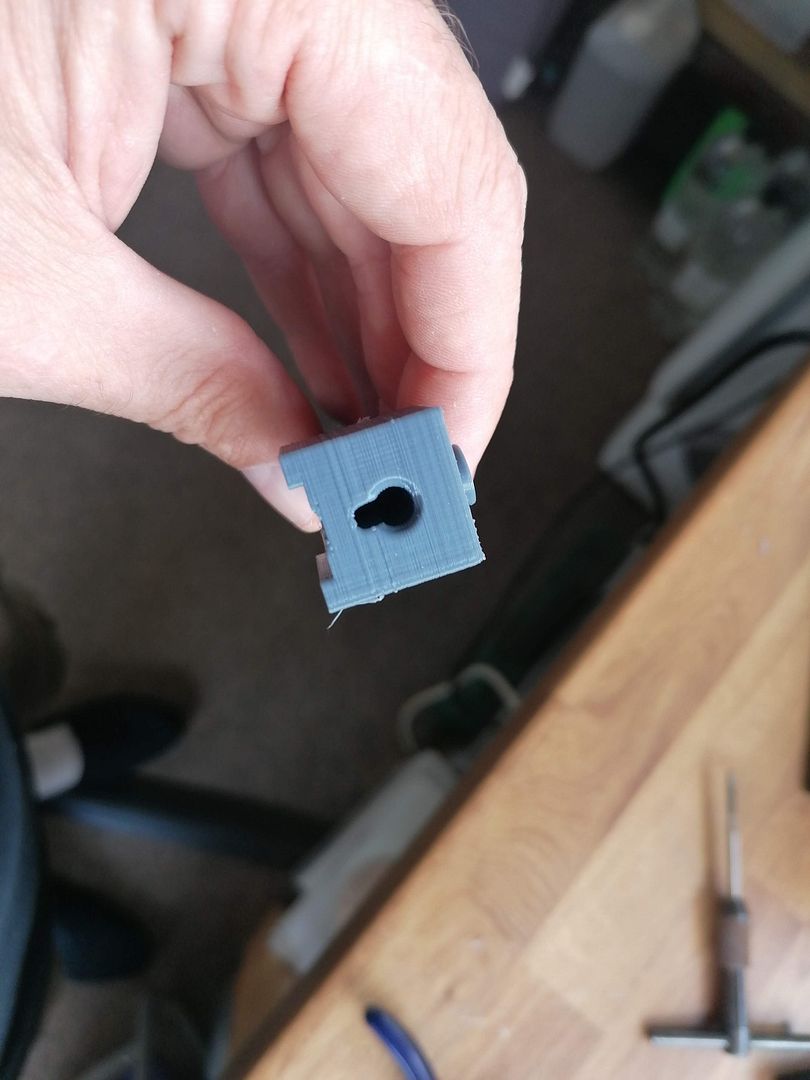
The machine gun just pushes in to the back of the hull mounting and the two holes are for holding it all to the front of the hull.
This is the two part drivers vision slit and they just press together and that allows it to be open or closed and it is held in place with 2 screws with washers I printed.


This is how it goes together.
Next I super glued the shield guides to the front.
And it finally it starts to look good.
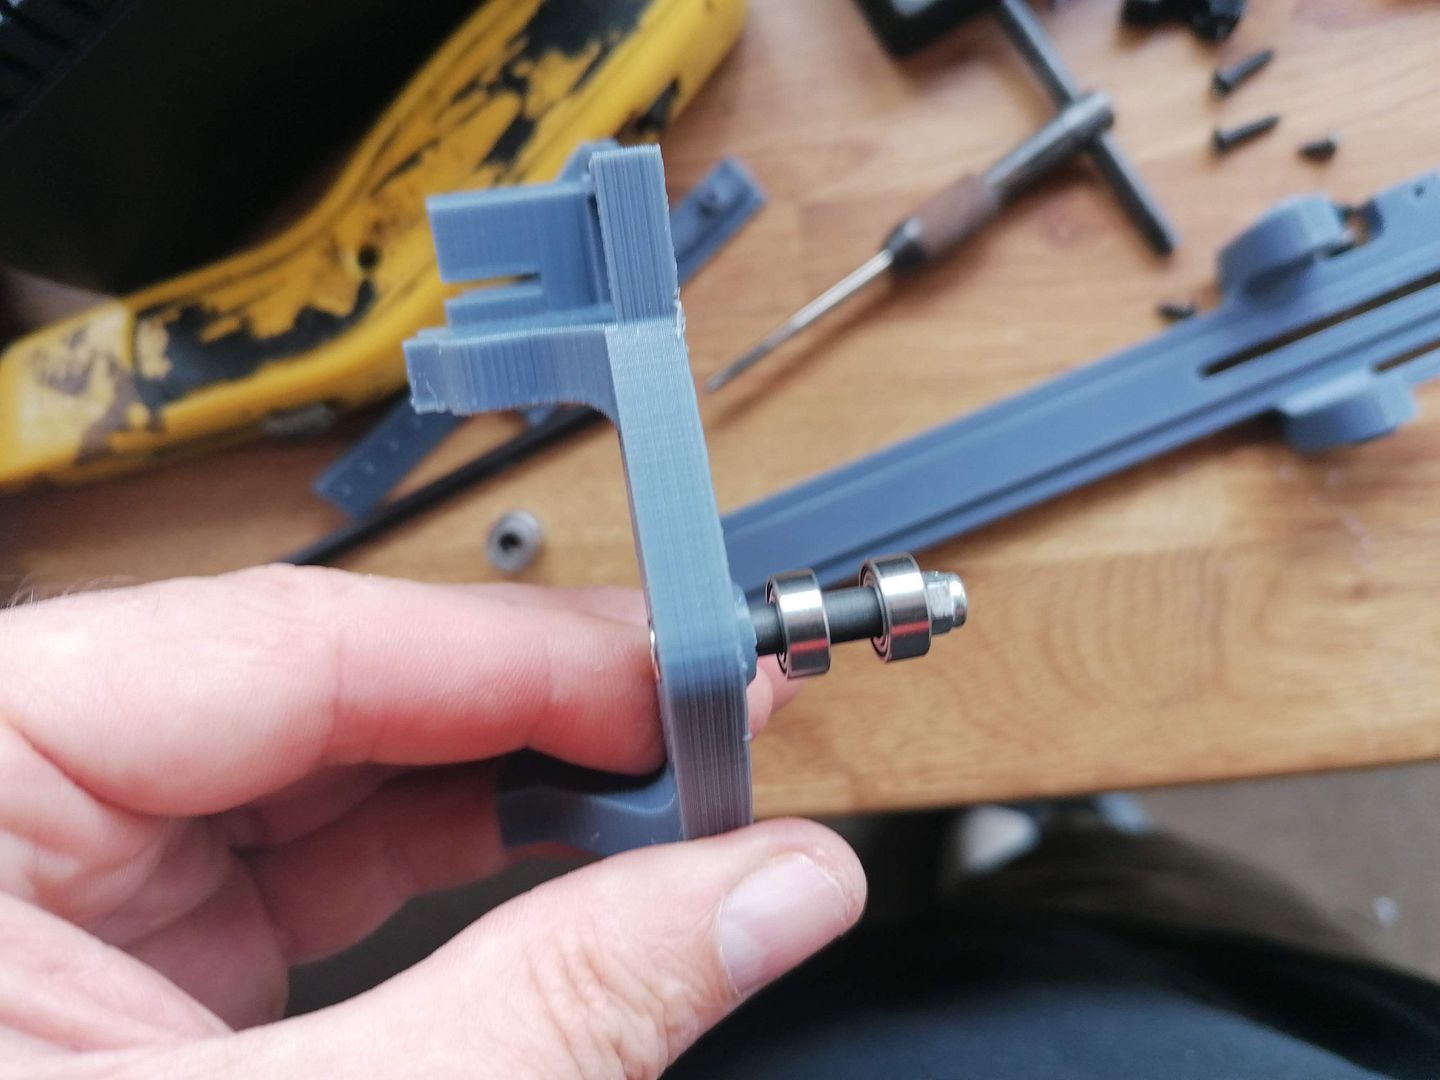
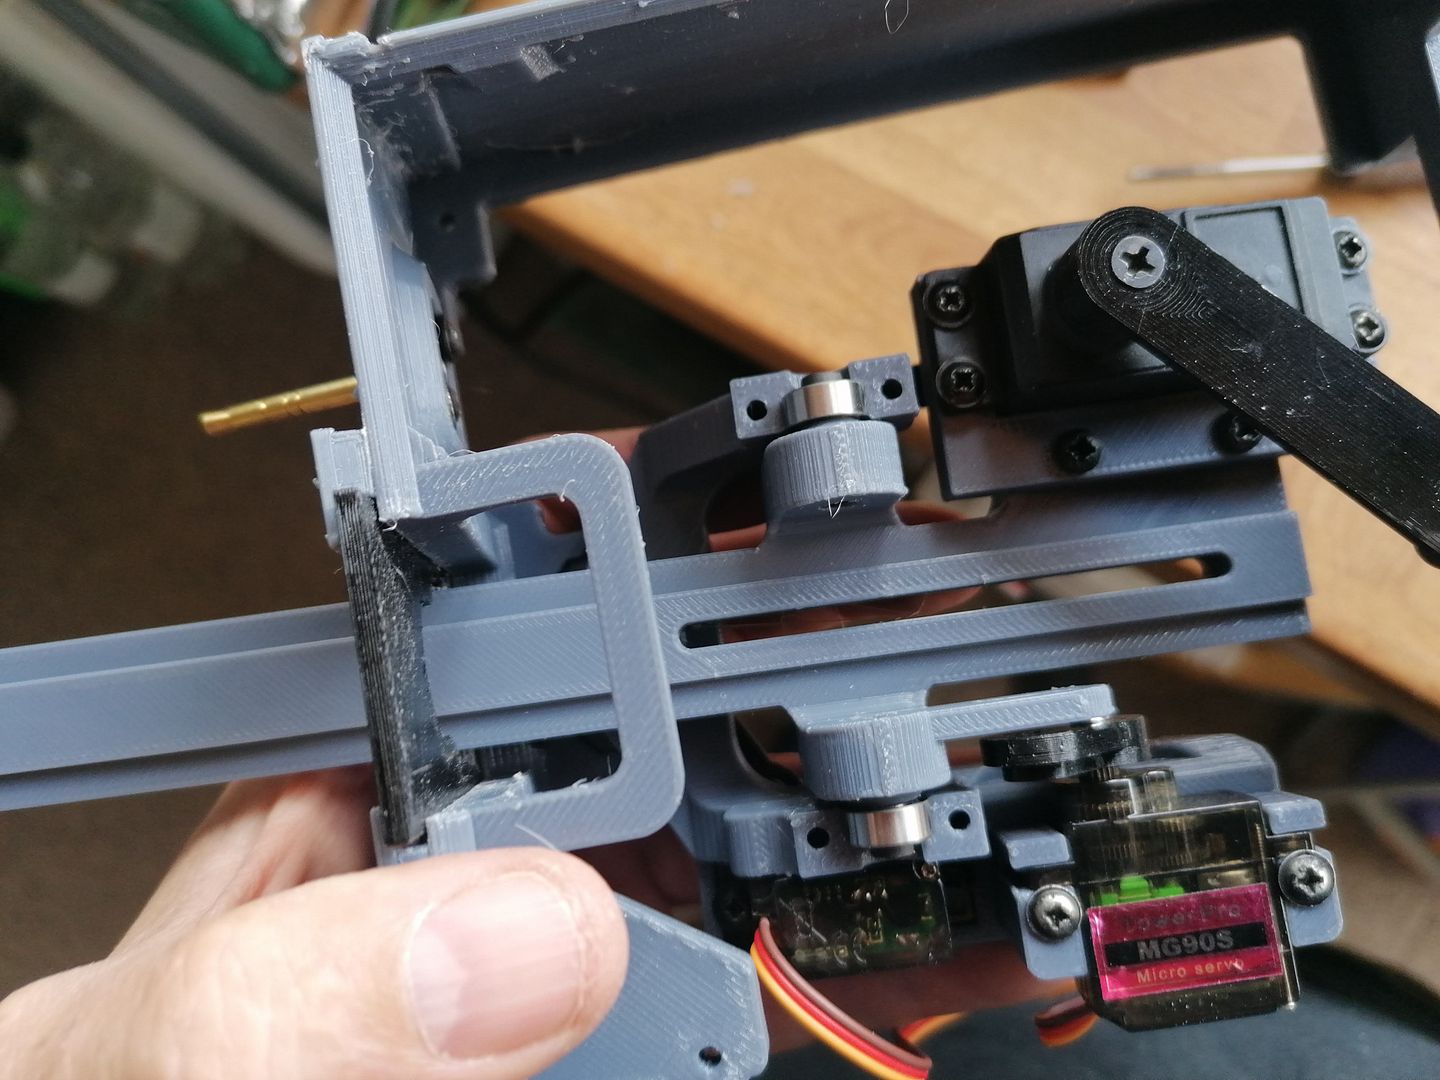
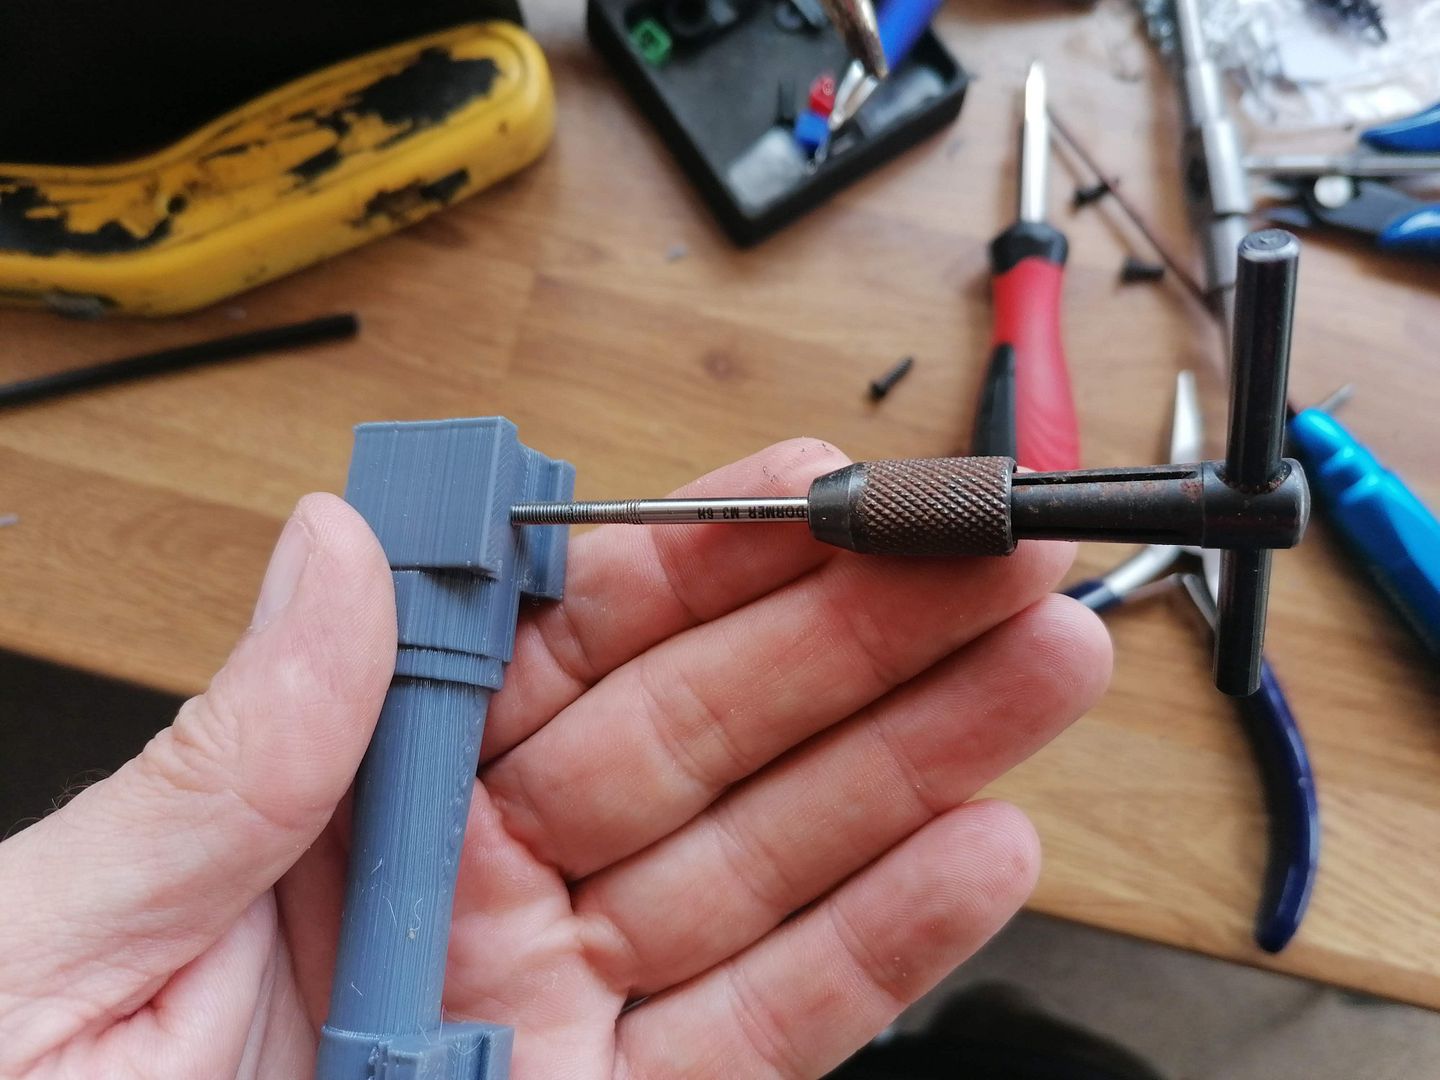
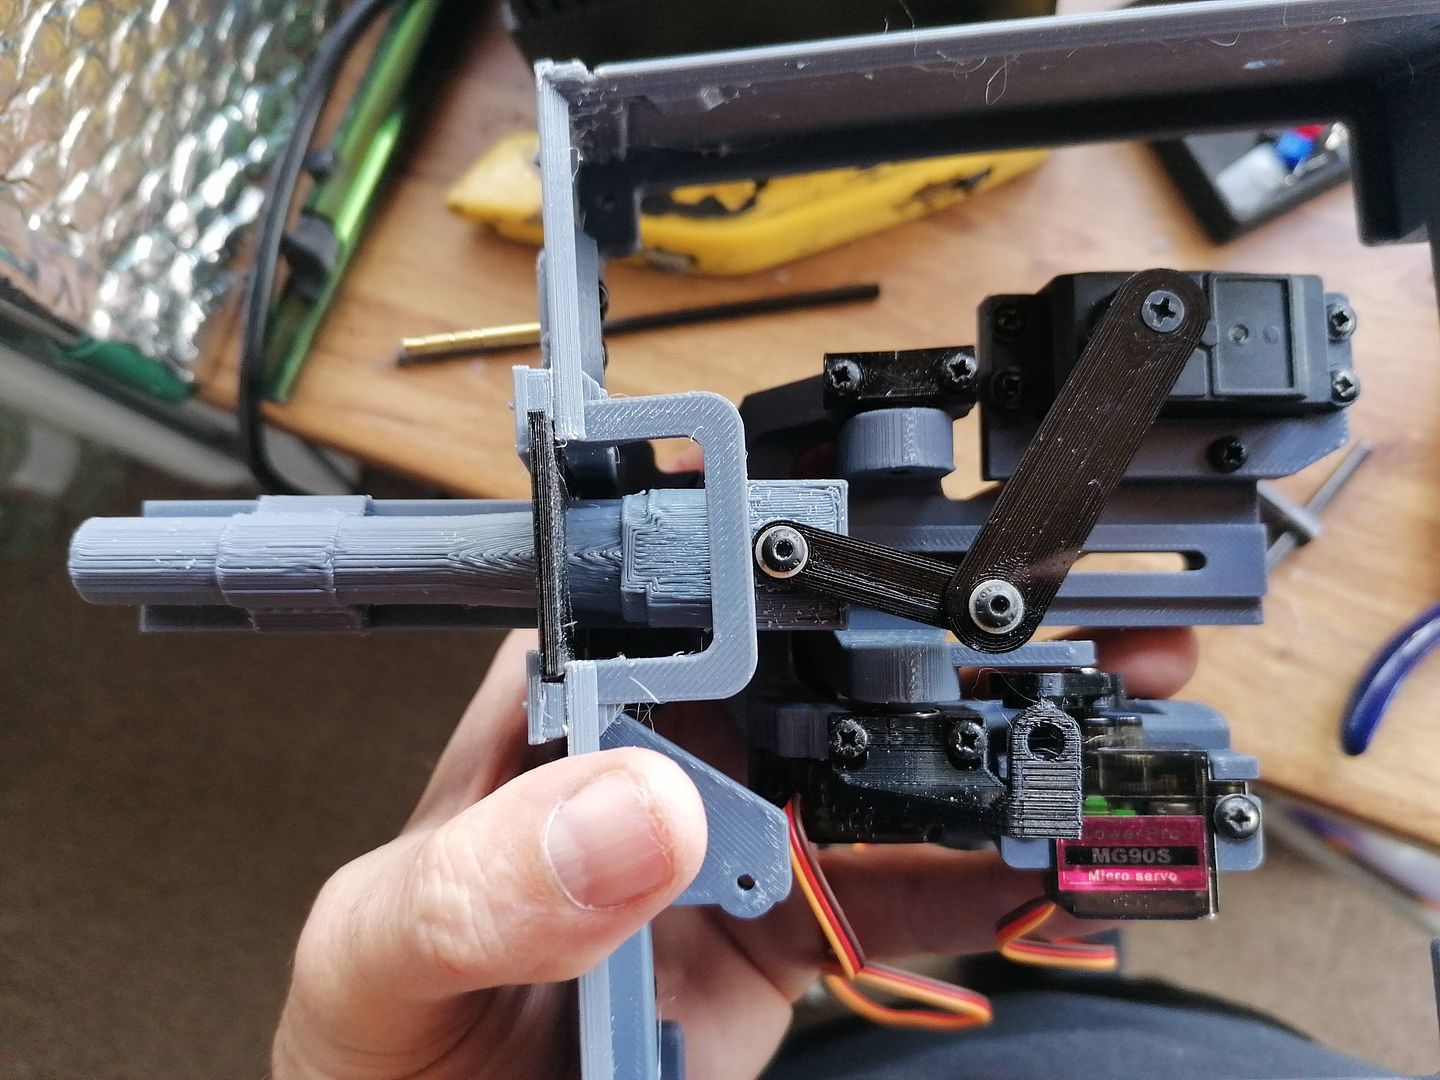
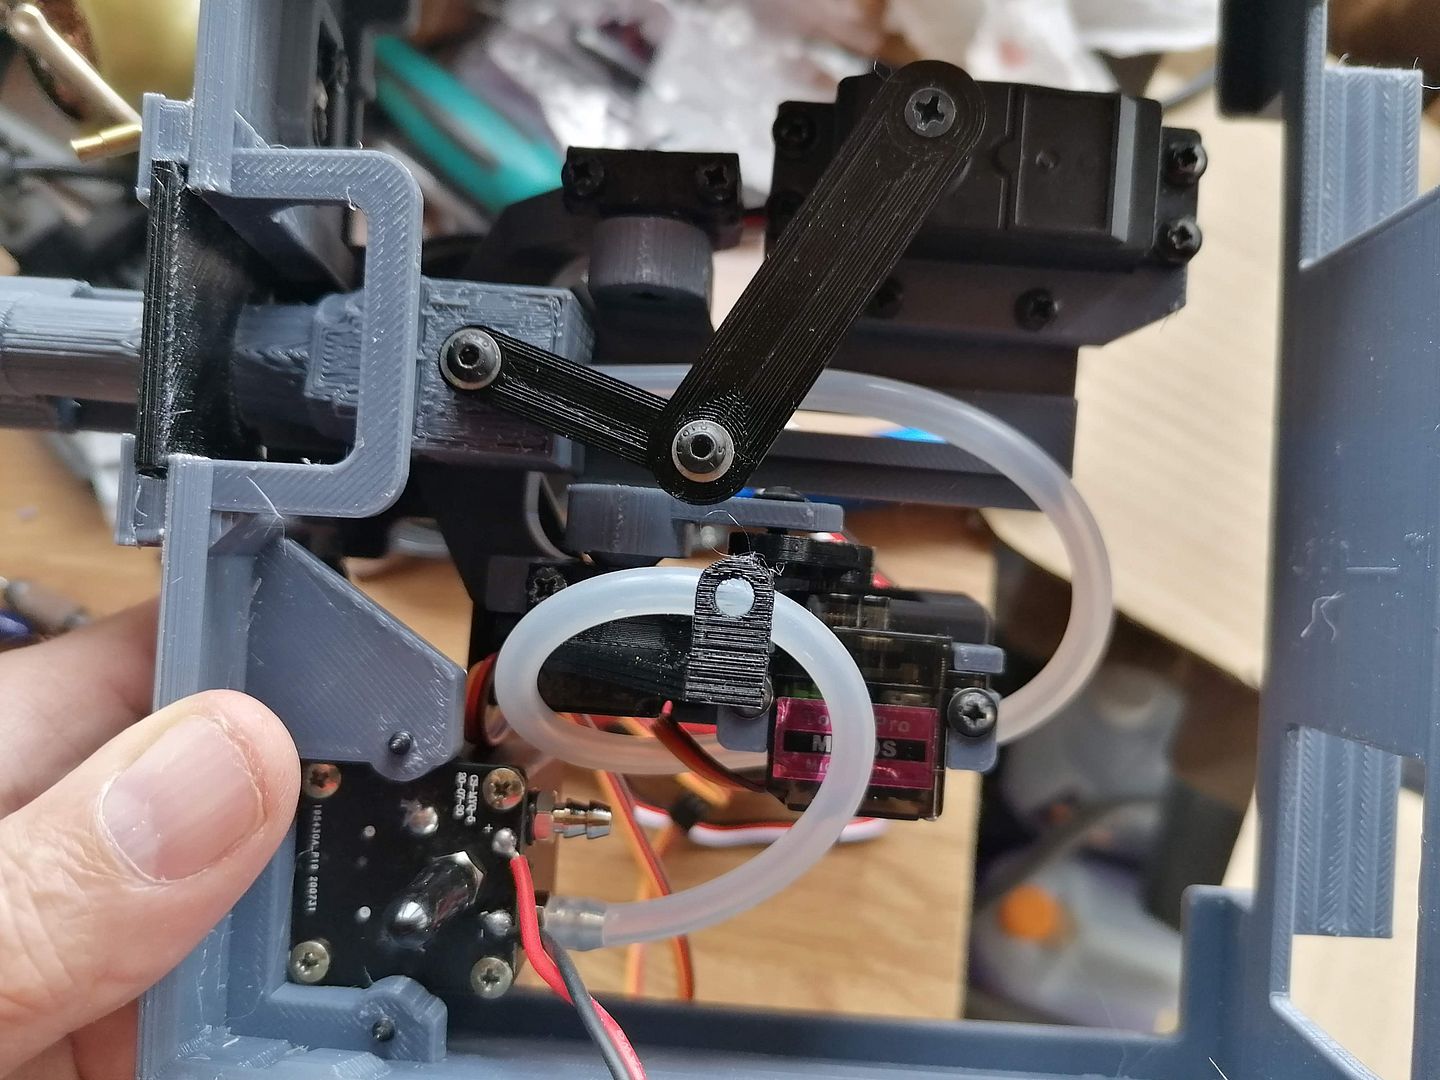
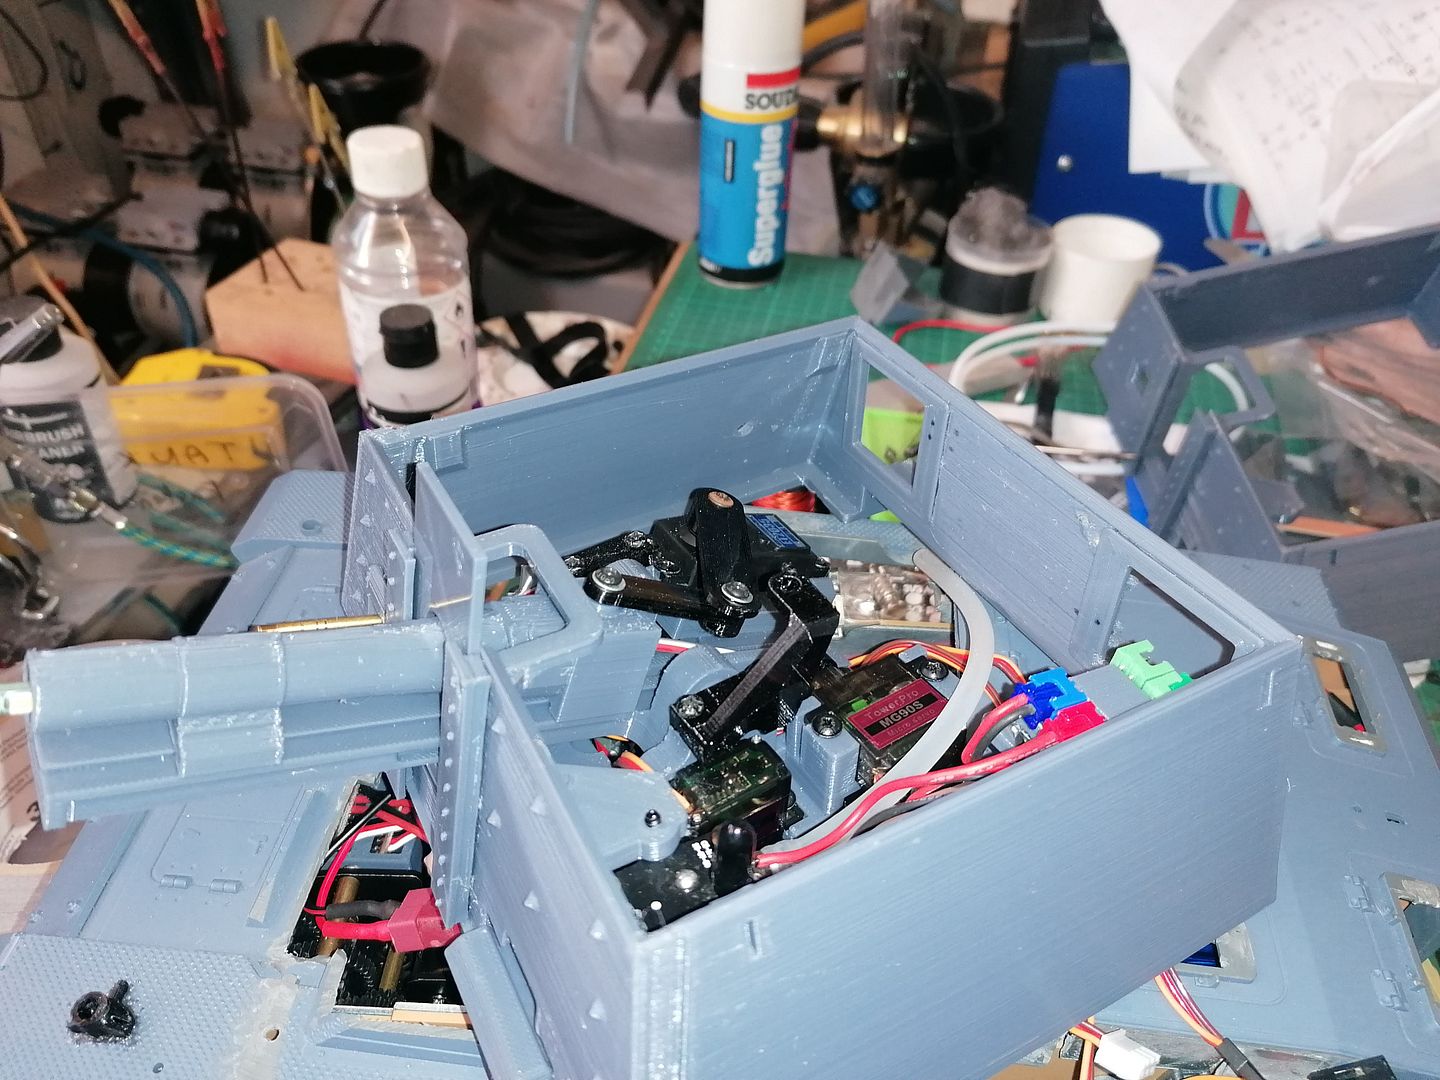
Next I assemble the cannon starting with cleaning the holes to fit some 5mm carbon tube to hold some bearings.
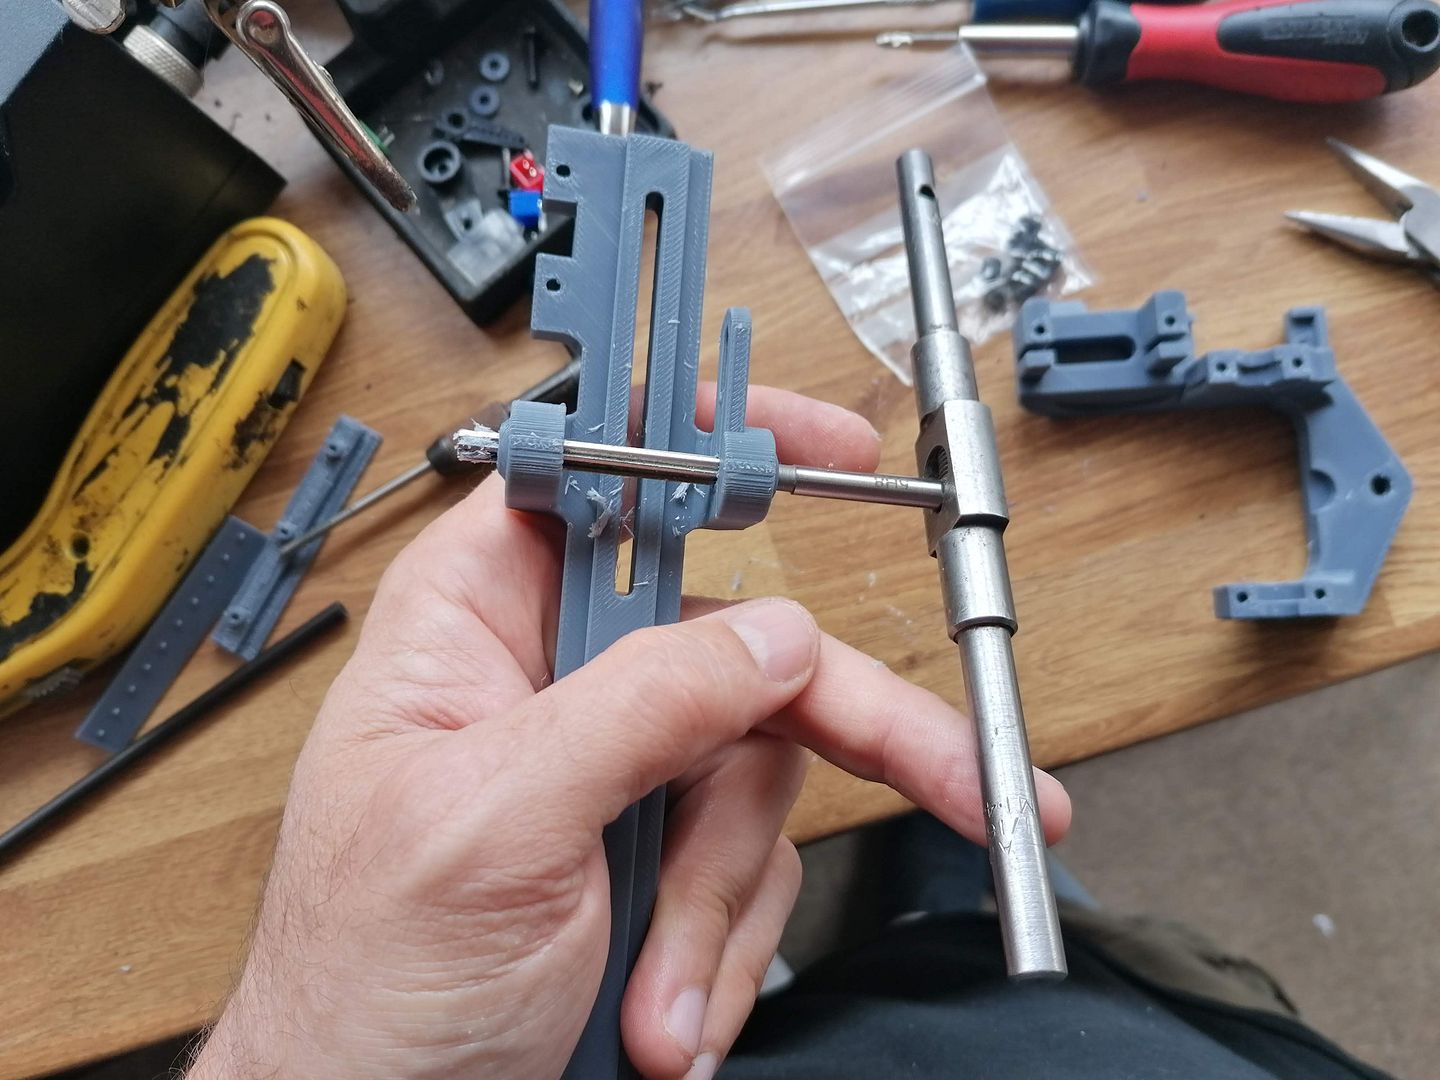
the servos for traverse and elevation are screwed on.
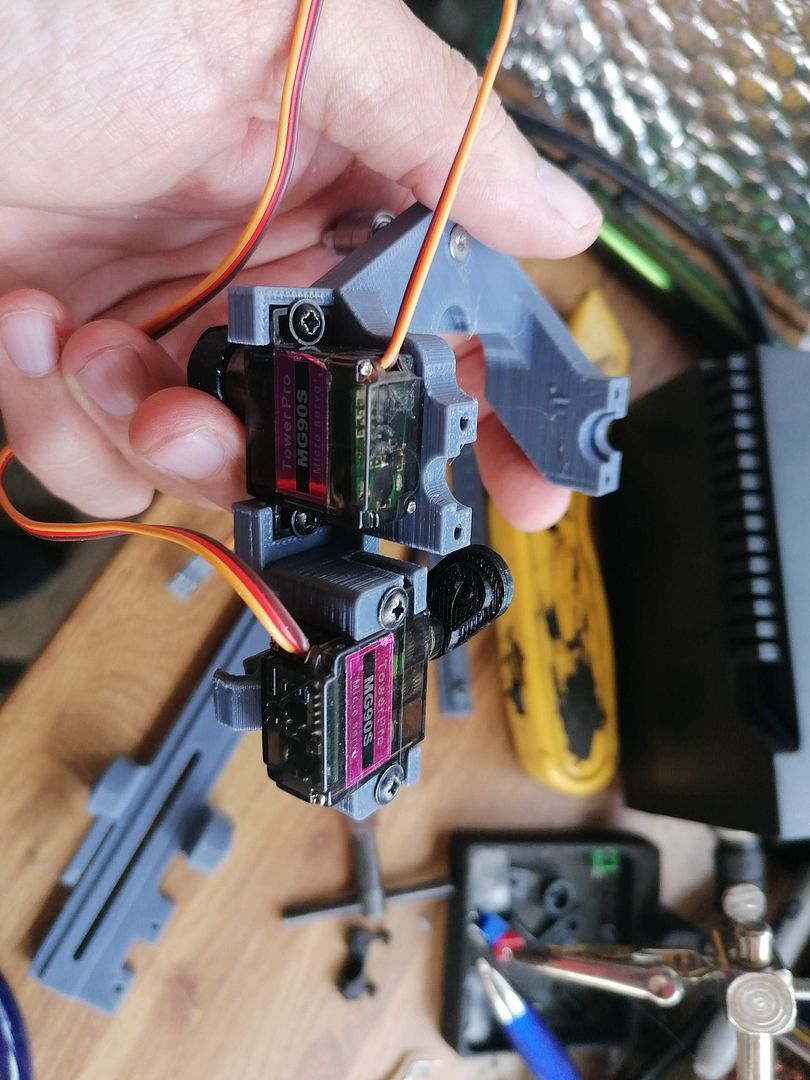
now to assemble the gun slie fitting the bearing axles and servo mount.
The shield for the gun is slid in next with the hinge pin on the inside.
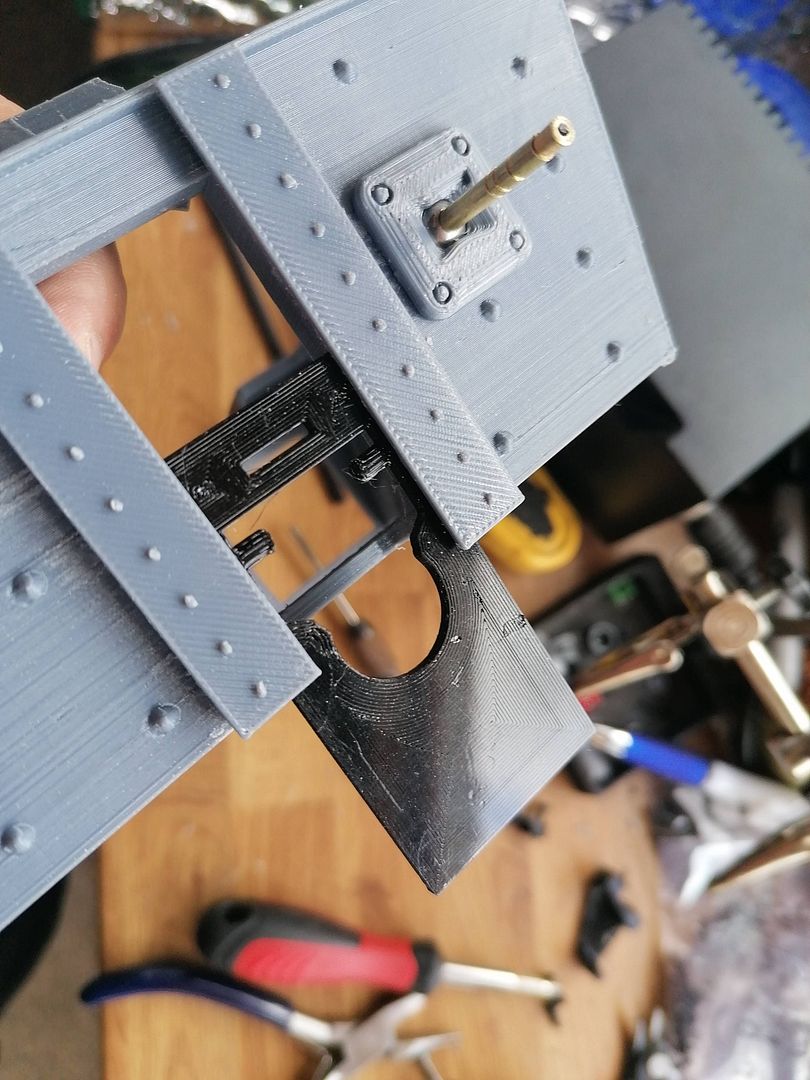
The gun slider is pushed through and hooked on to the shield by 2 slots to allow it to move as the gun is elevated.
Now the gimble can be fitted then the gun slider.
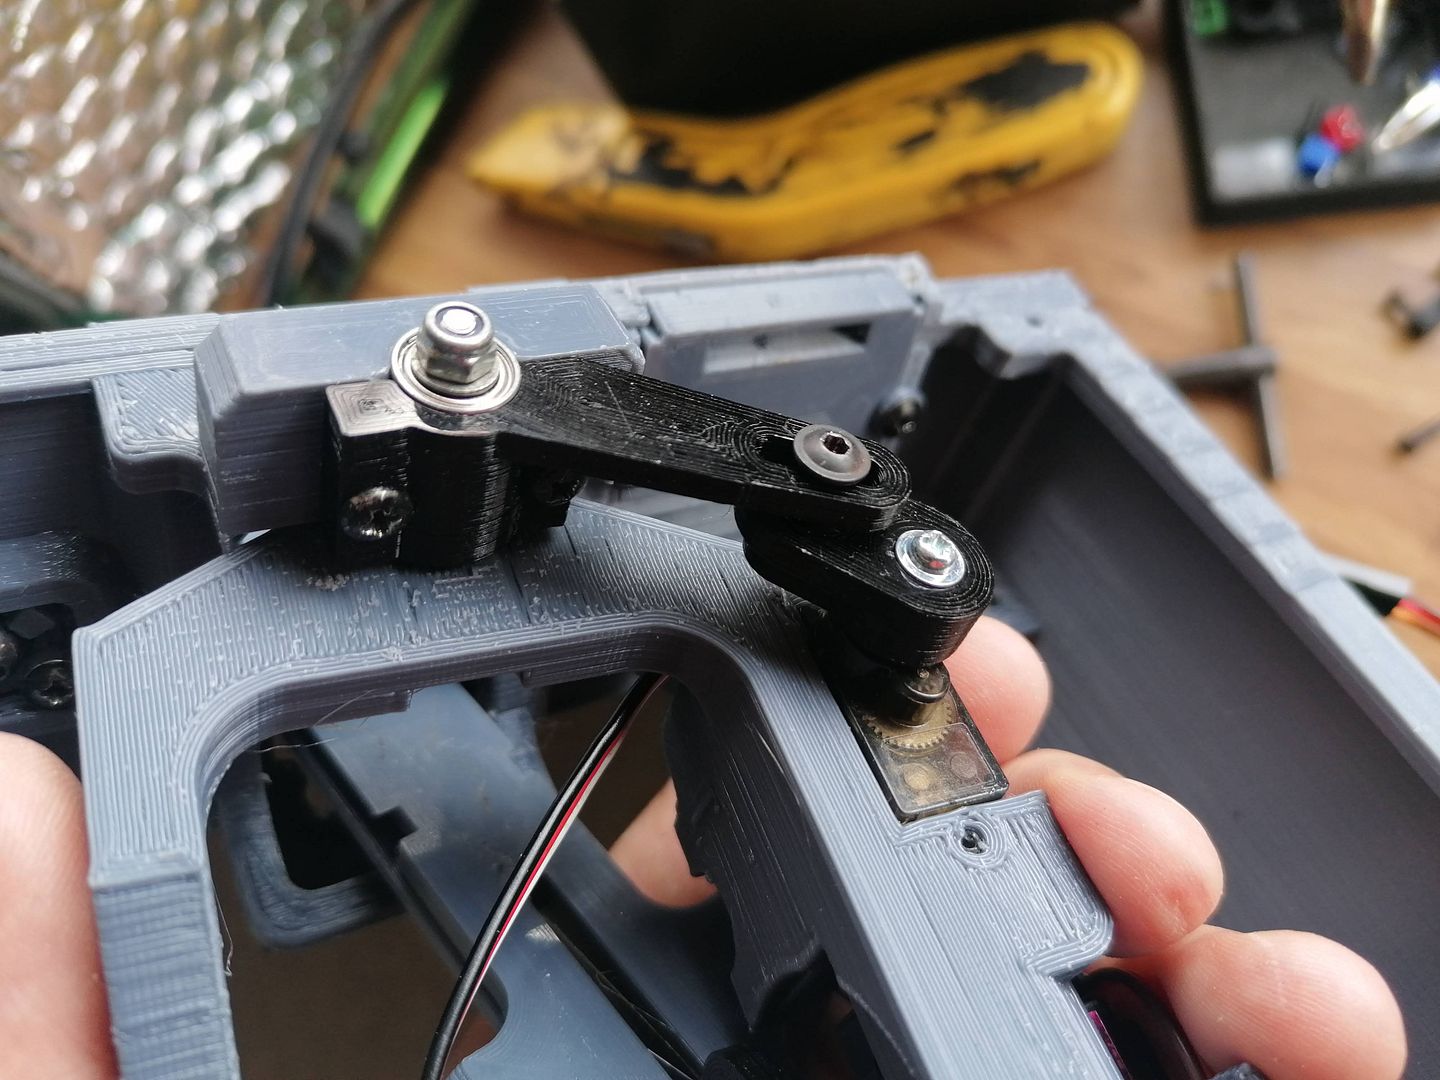
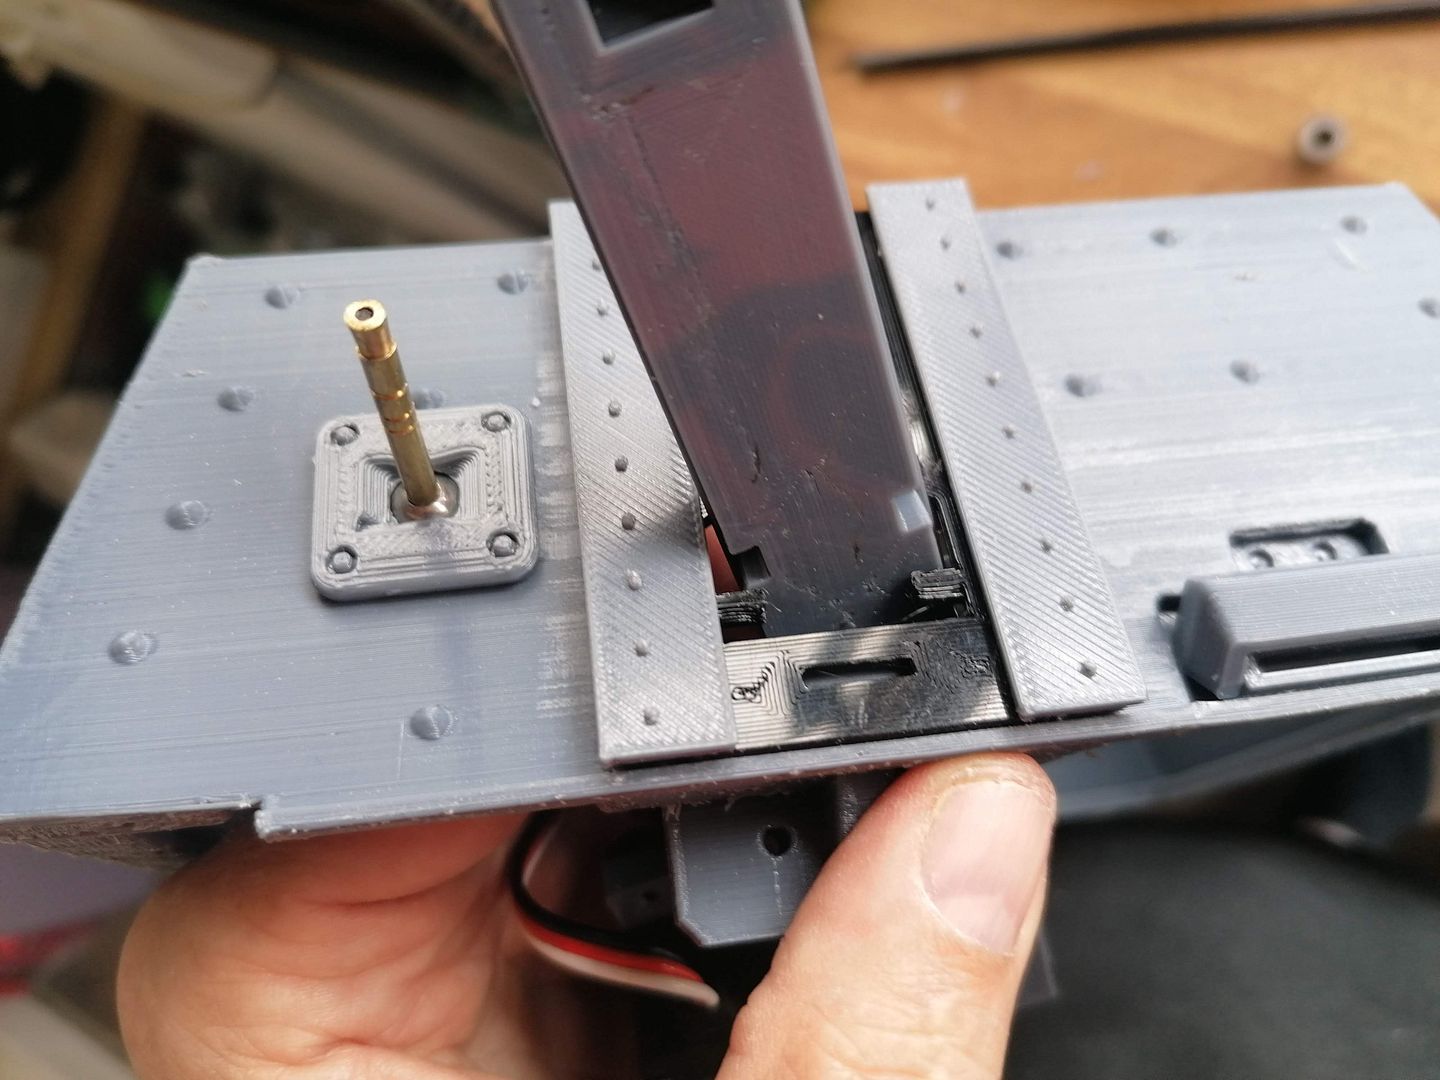
The barrel has a place to hold the Taigen high intensity flash and has a hole at the breech end to allow a smoke unit pipe to be pushed in place and still allow the wires for the flash to go through.
The holes in the top and bottom of the breech are tapped M3 as the bottom hole is to hold that end down and act as a movement limiter and the upper hole is attached to the servo link arm.

Ialmost forgot the screw to attach the slider to the servo arm the screw head is close so I will take some of the side of the breech as a precaution.
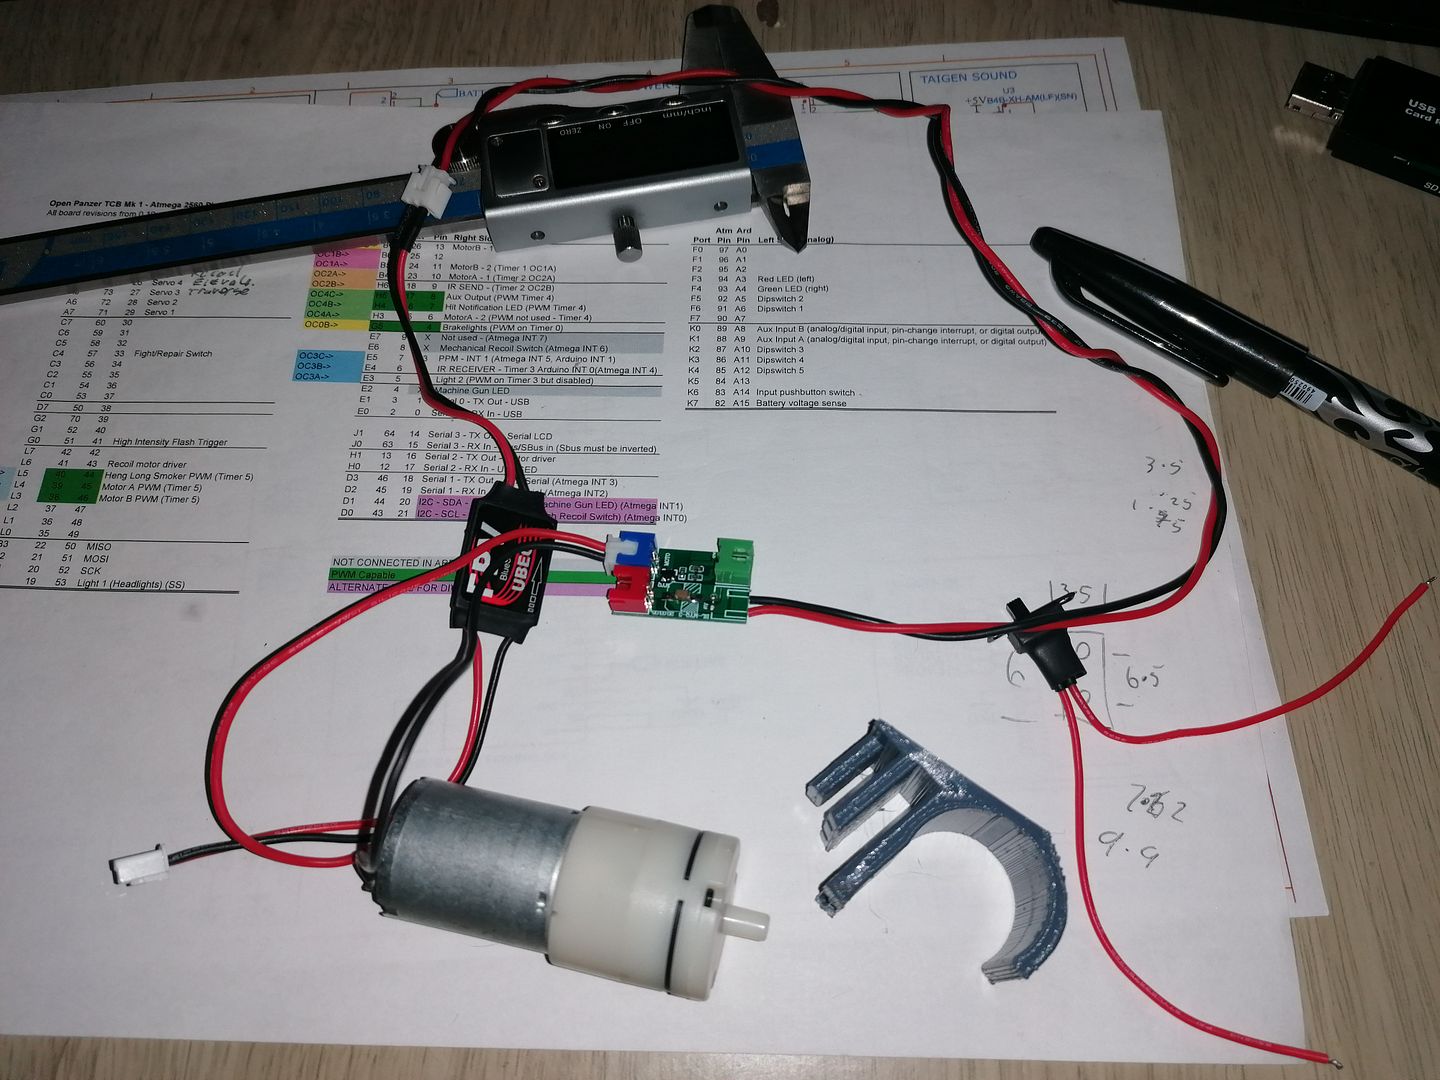
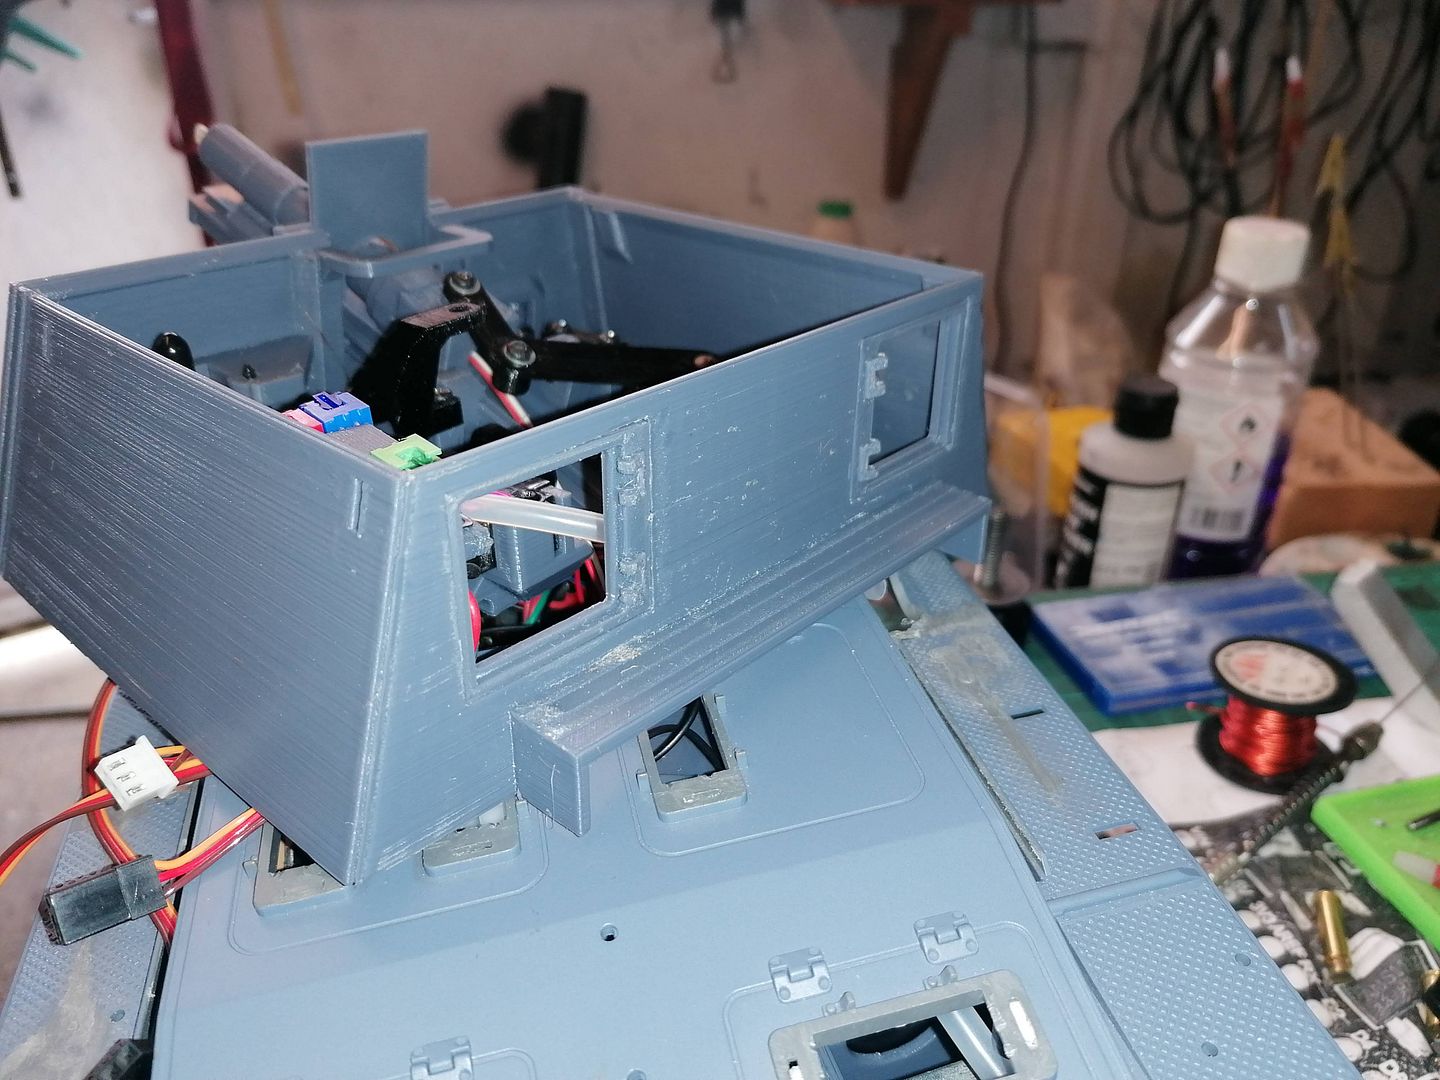
I am fitting gun smoke and the only place to fit the smoke chamber is next to the gun but i had to alter the pipe layout of the units i got from Aliexpress.
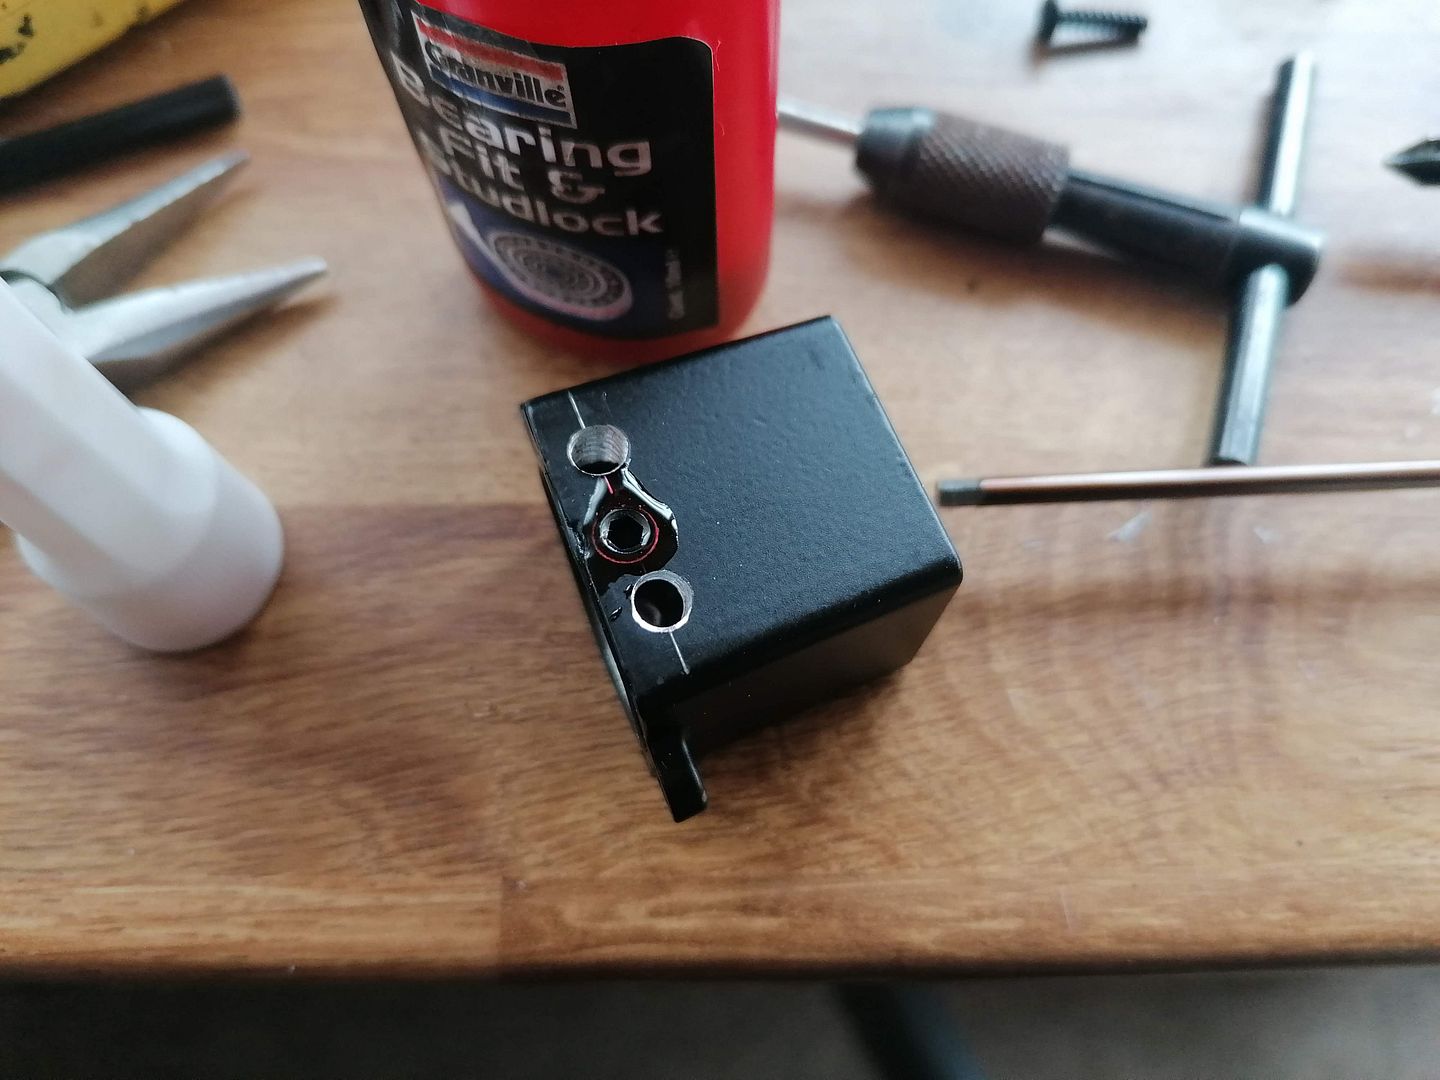
I had to drill and tap a couple of M5 holes either side of one of the existing holes on one side.
The original holes were plugged with a short grub screw loctited in place.
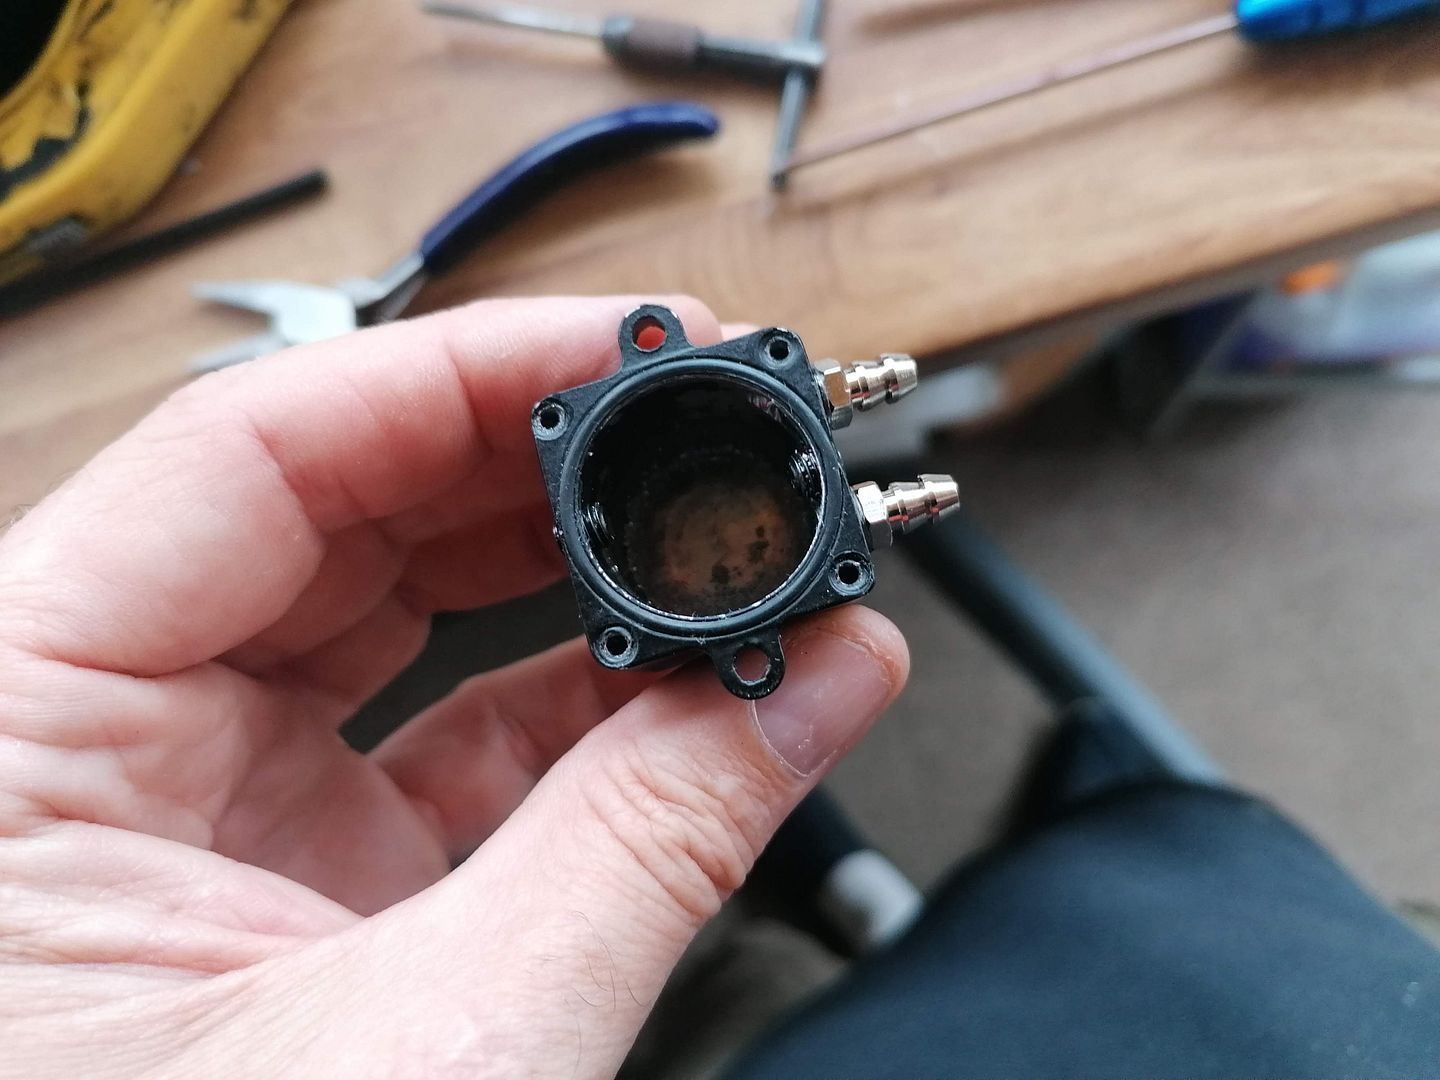
The smoke unit is placed up from underneath and screwed in place and a piece of silicone pipe fitted.
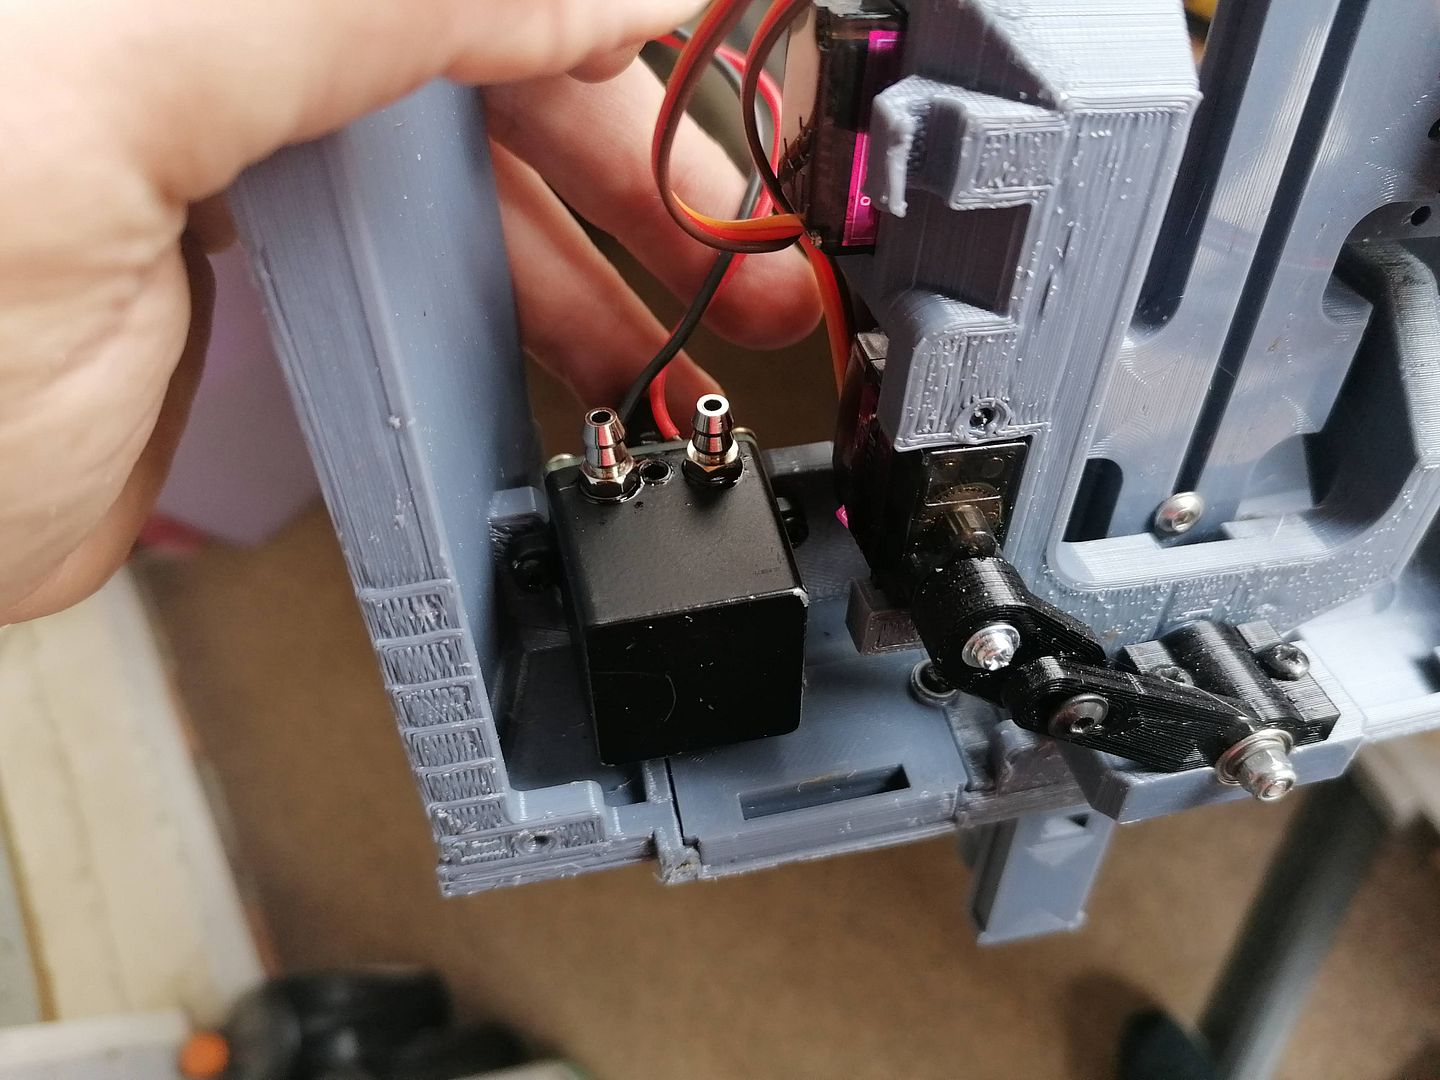
I still have to work out how to fit the pump motor in with the smoke unit but first I will sort out where all the other parts can fit in the lower hull I have got a basic part designed to hold it all in place but I expect it will change quite a bit before I am happy with it.
Plus I have to sort out the rear doors and the roof so still quite a bit to do.
But at least I can show you how it looks so far
These are the farts to make the front more detailed'
The machine gun just pushes in to the back of the hull mounting and the two holes are for holding it all to the front of the hull.
This is the two part drivers vision slit and they just press together and that allows it to be open or closed and it is held in place with 2 screws with washers I printed.
This is how it goes together.
Next I super glued the shield guides to the front.
And it finally it starts to look good.
Next I assemble the cannon starting with cleaning the holes to fit some 5mm carbon tube to hold some bearings.
the servos for traverse and elevation are screwed on.
now to assemble the gun slie fitting the bearing axles and servo mount.
The shield for the gun is slid in next with the hinge pin on the inside.
The gun slider is pushed through and hooked on to the shield by 2 slots to allow it to move as the gun is elevated.
Now the gimble can be fitted then the gun slider.
The barrel has a place to hold the Taigen high intensity flash and has a hole at the breech end to allow a smoke unit pipe to be pushed in place and still allow the wires for the flash to go through.
The holes in the top and bottom of the breech are tapped M3 as the bottom hole is to hold that end down and act as a movement limiter and the upper hole is attached to the servo link arm.
Ialmost forgot the screw to attach the slider to the servo arm the screw head is close so I will take some of the side of the breech as a precaution.
I am fitting gun smoke and the only place to fit the smoke chamber is next to the gun but i had to alter the pipe layout of the units i got from Aliexpress.
I had to drill and tap a couple of M5 holes either side of one of the existing holes on one side.
The original holes were plugged with a short grub screw loctited in place.
The smoke unit is placed up from underneath and screwed in place and a piece of silicone pipe fitted.
I still have to work out how to fit the pump motor in with the smoke unit but first I will sort out where all the other parts can fit in the lower hull I have got a basic part designed to hold it all in place but I expect it will change quite a bit before I am happy with it.
Plus I have to sort out the rear doors and the roof so still quite a bit to do.
But at least I can show you how it looks so far
-
HERMAN BIX
- Major-General
- Posts: 11879
- Joined: Sun Jan 12, 2014 12:15 am
- Location: Gold Coast,Australia
Re: s.I.G 33 Converion
That is outstanding 
HL JAGDPANTHER,HL TIGER 1,HL PzIII MUNITIONSCHLEPPER, HL KT OCTOPUS,HL PANTHER ZU-FUSS,HL STuG III,HL T34/85 BEDSPRING,
HL PZIV MALTA,MATORRO JAGDTIGER,HL F05 TIGER,TAMIYA KT,HL PANTHERDOZER,HL EARLY PANTHER G,TAIGEN/RAMINATOR T34/76,
HL AN-BRI-RAM SU-85
HL PZIV MALTA,MATORRO JAGDTIGER,HL F05 TIGER,TAMIYA KT,HL PANTHERDOZER,HL EARLY PANTHER G,TAIGEN/RAMINATOR T34/76,
HL AN-BRI-RAM SU-85
-
Herr Dr. Professor

- Major
- Posts: 6030
- Joined: Mon Apr 22, 2019 10:48 pm
- Location: Southern Wisconsin USA
Re: s.I.G 33 Converion
Baldrick, the video of the flash and smoke action makes me so envious of all your skills.  What you posted on Sunday, May 29 is primo engineering,
  remarkable ingenuity, and enjoyable captioning, too! ("These are the farts to make the front more detailed")
-
baldrick131
- Lance Corporal
- Posts: 140
- Joined: Fri Oct 04, 2019 8:46 pm
- Location: March cambridgeshire
- Contact:
Re: s.I.G 33 Converion
LOL that's the computers fault I'm not taking any credit for thatHerr Dr. Professor wrote: ("These are the farts to make the front more detailed")
-
baldrick131
- Lance Corporal
- Posts: 140
- Joined: Fri Oct 04, 2019 8:46 pm
- Location: March cambridgeshire
- Contact:
Re: s.I.G 33 Converion
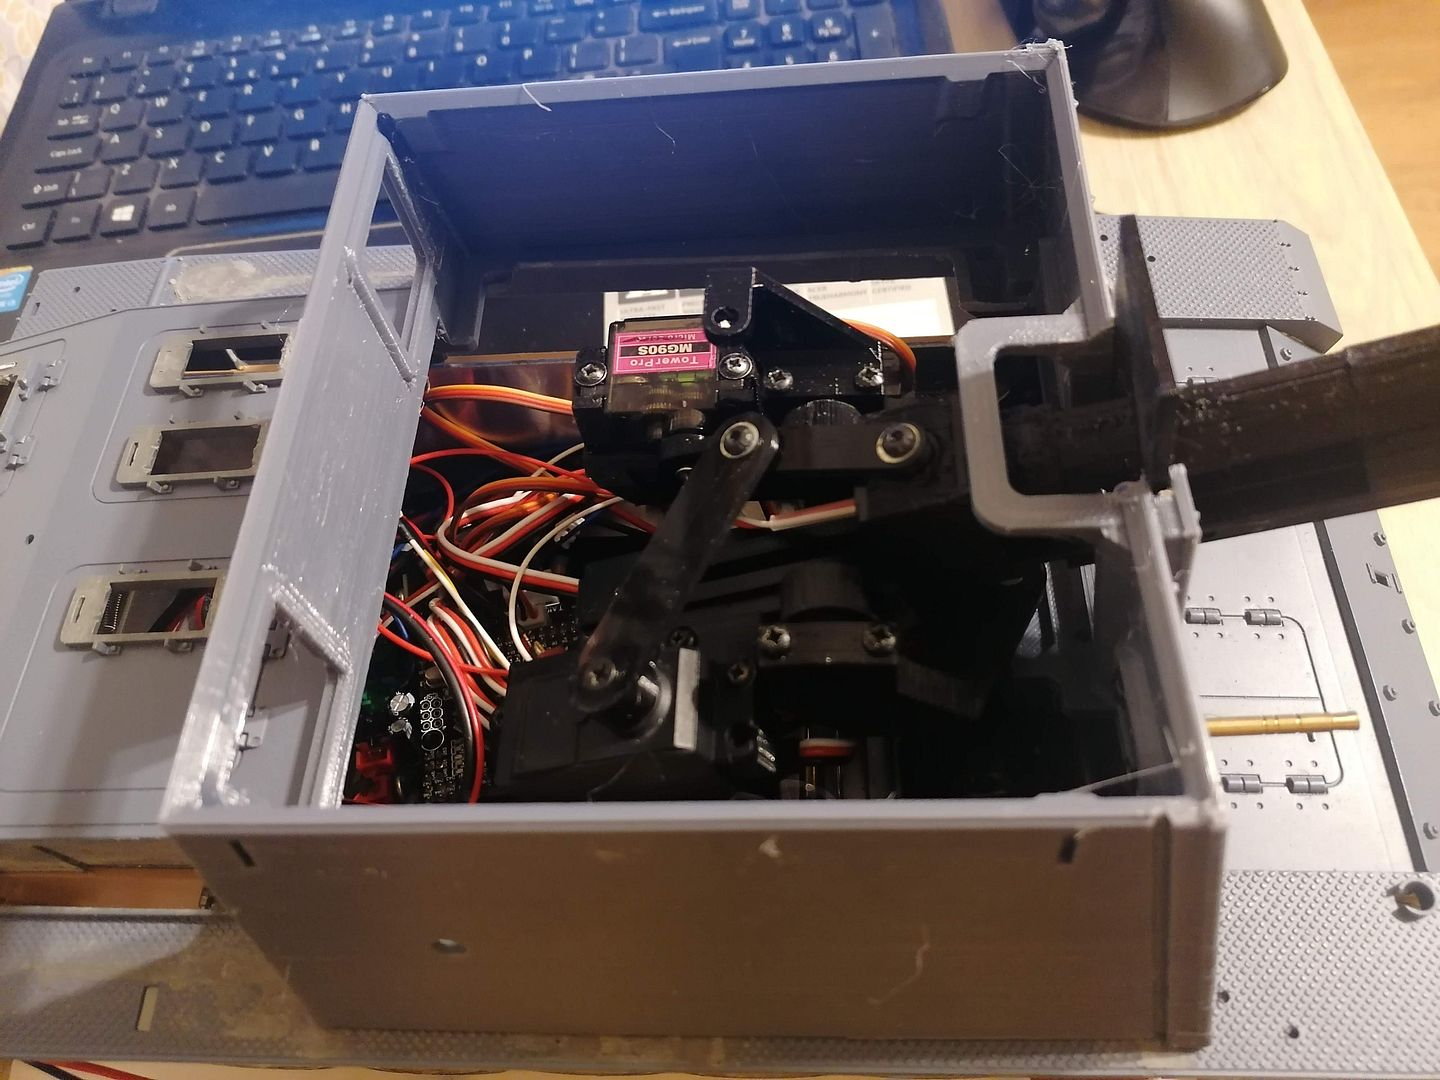
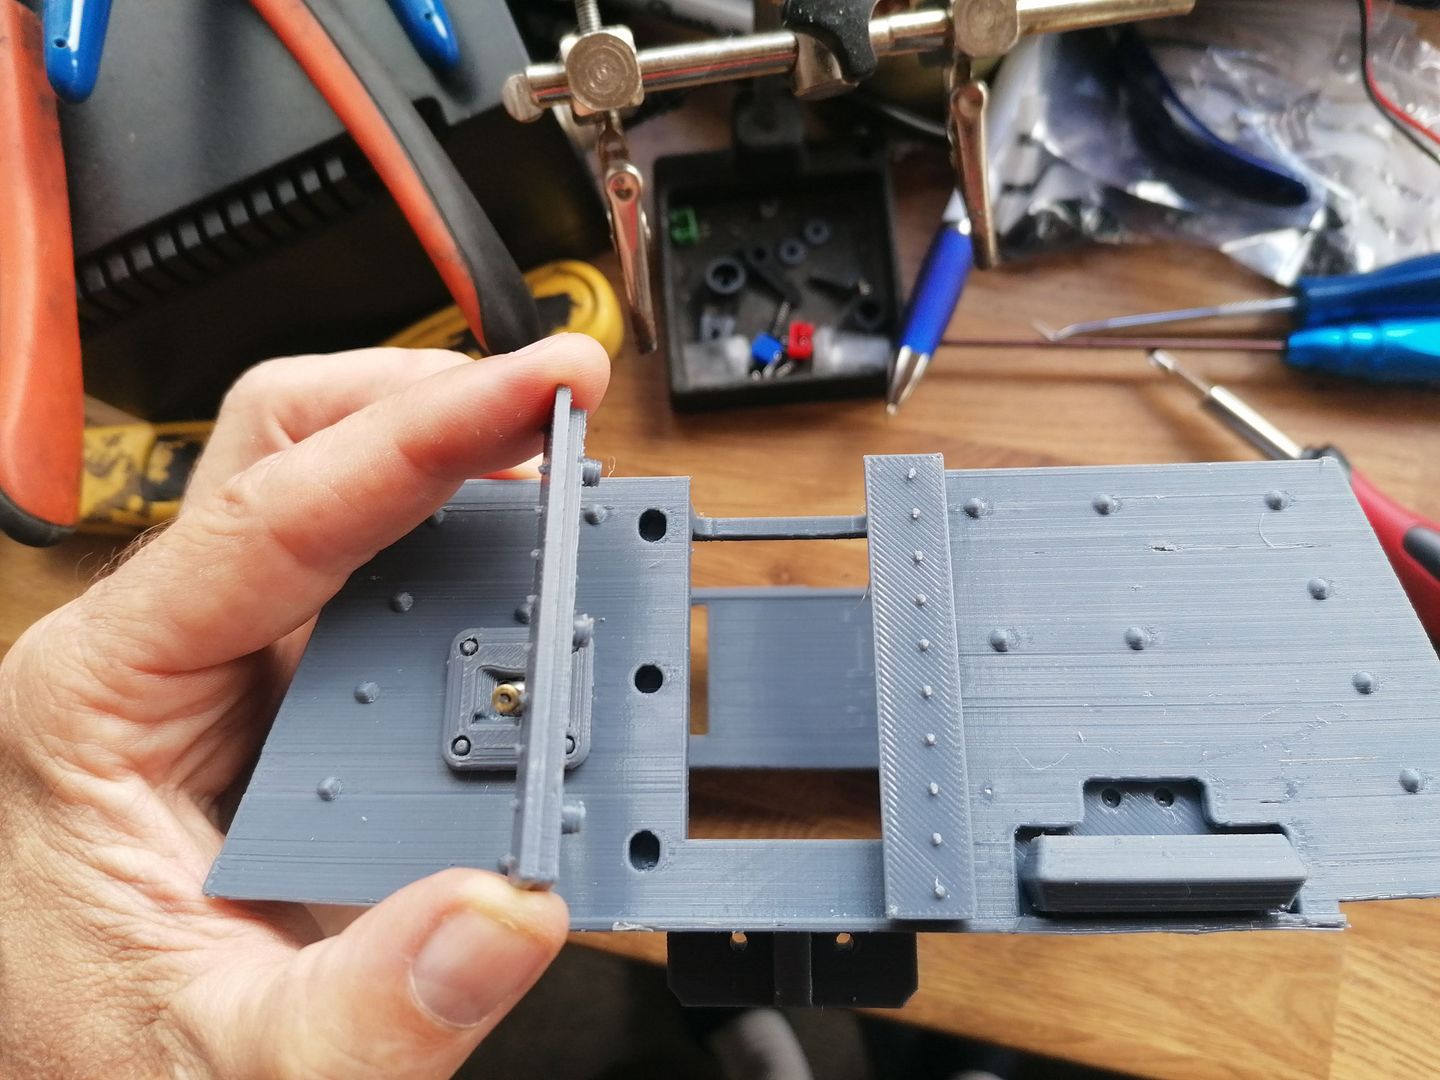
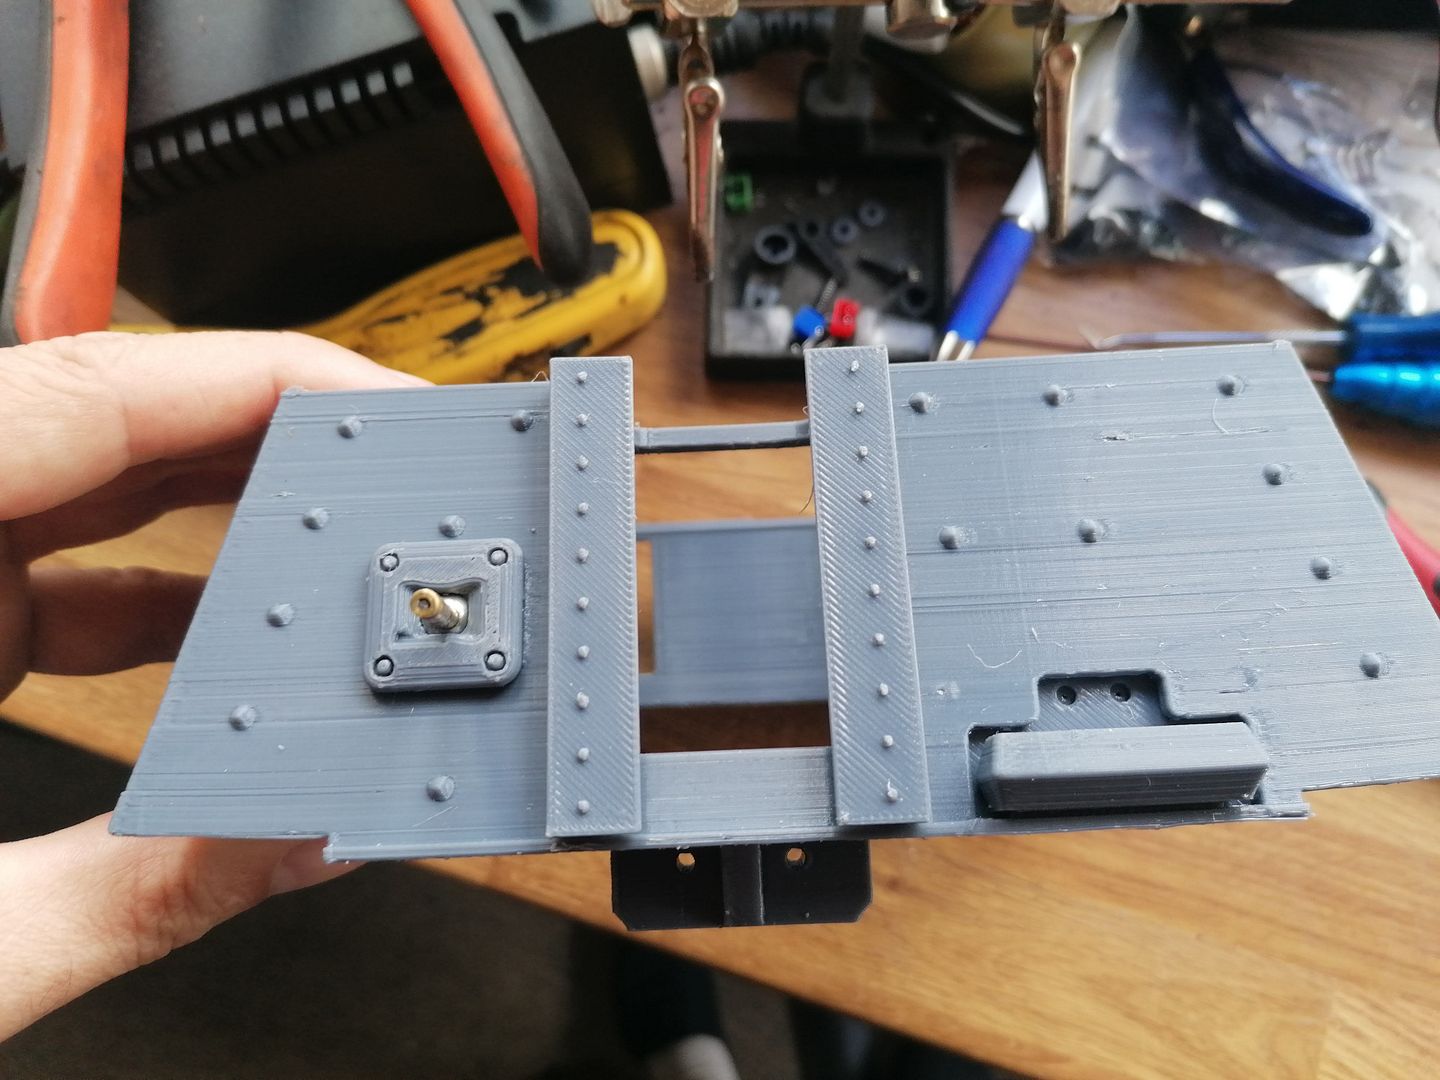
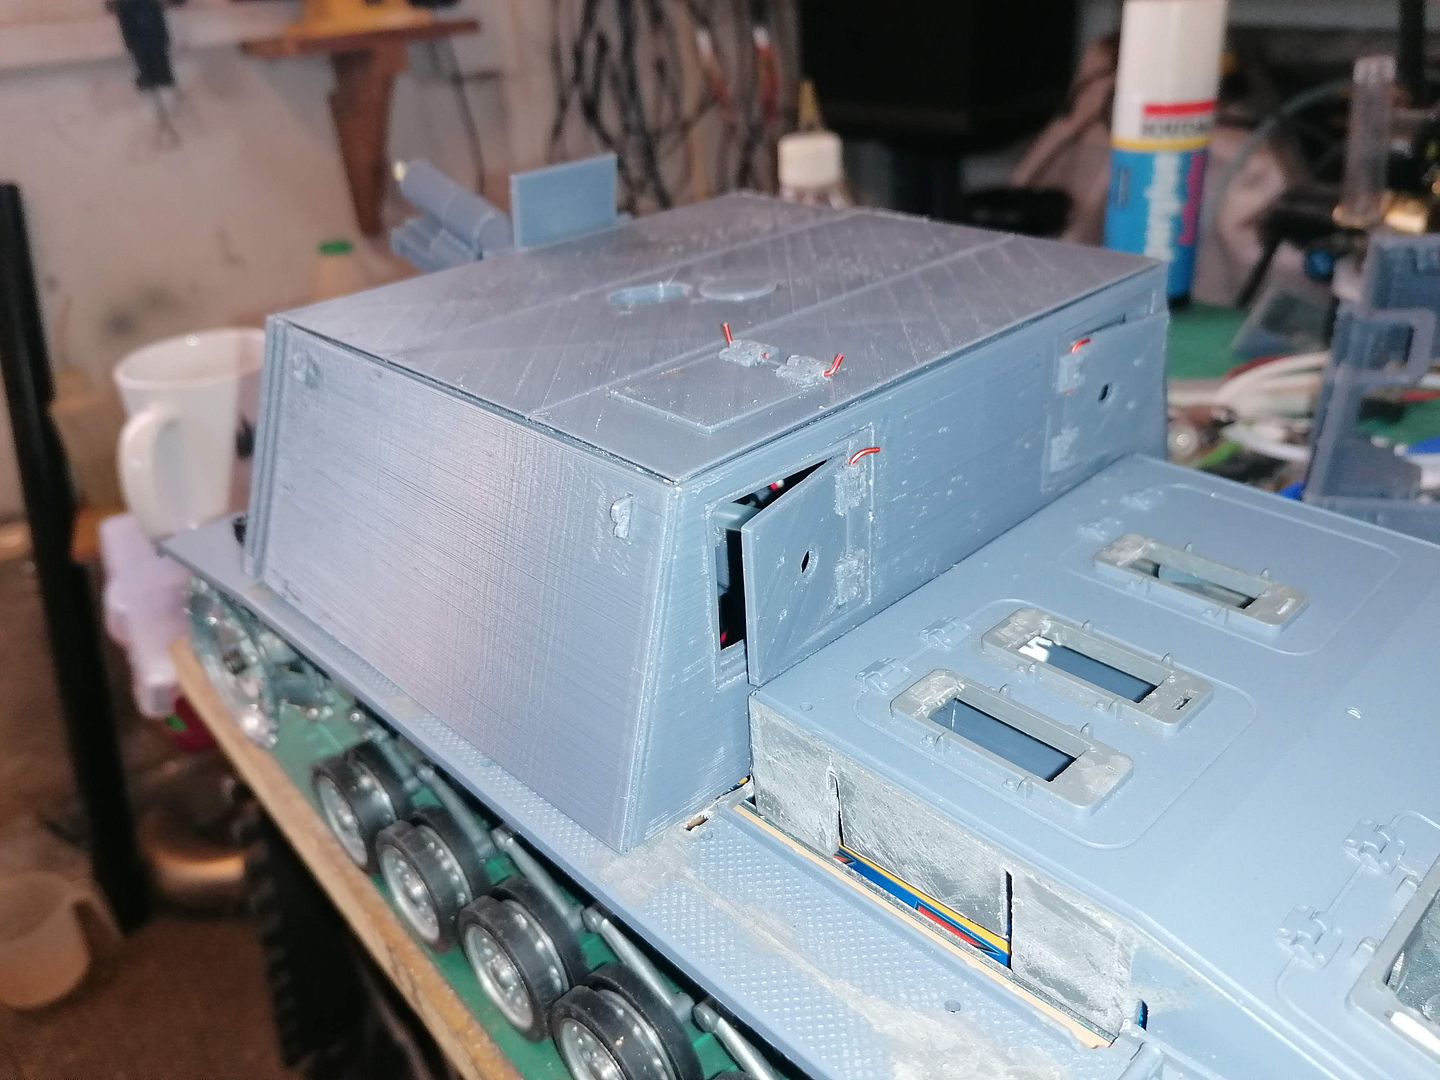
As we have just had a long weekend and most of it was taken up with stuff to do in the garden I have never the less been busy in the evenings designing parts to let me fit all the electronics in to the hull and it was quite a challenge.
Here is my base plate with built in speaker box the hole in the side is to allow a pipe to the smoke generator but I used a pump in the end.
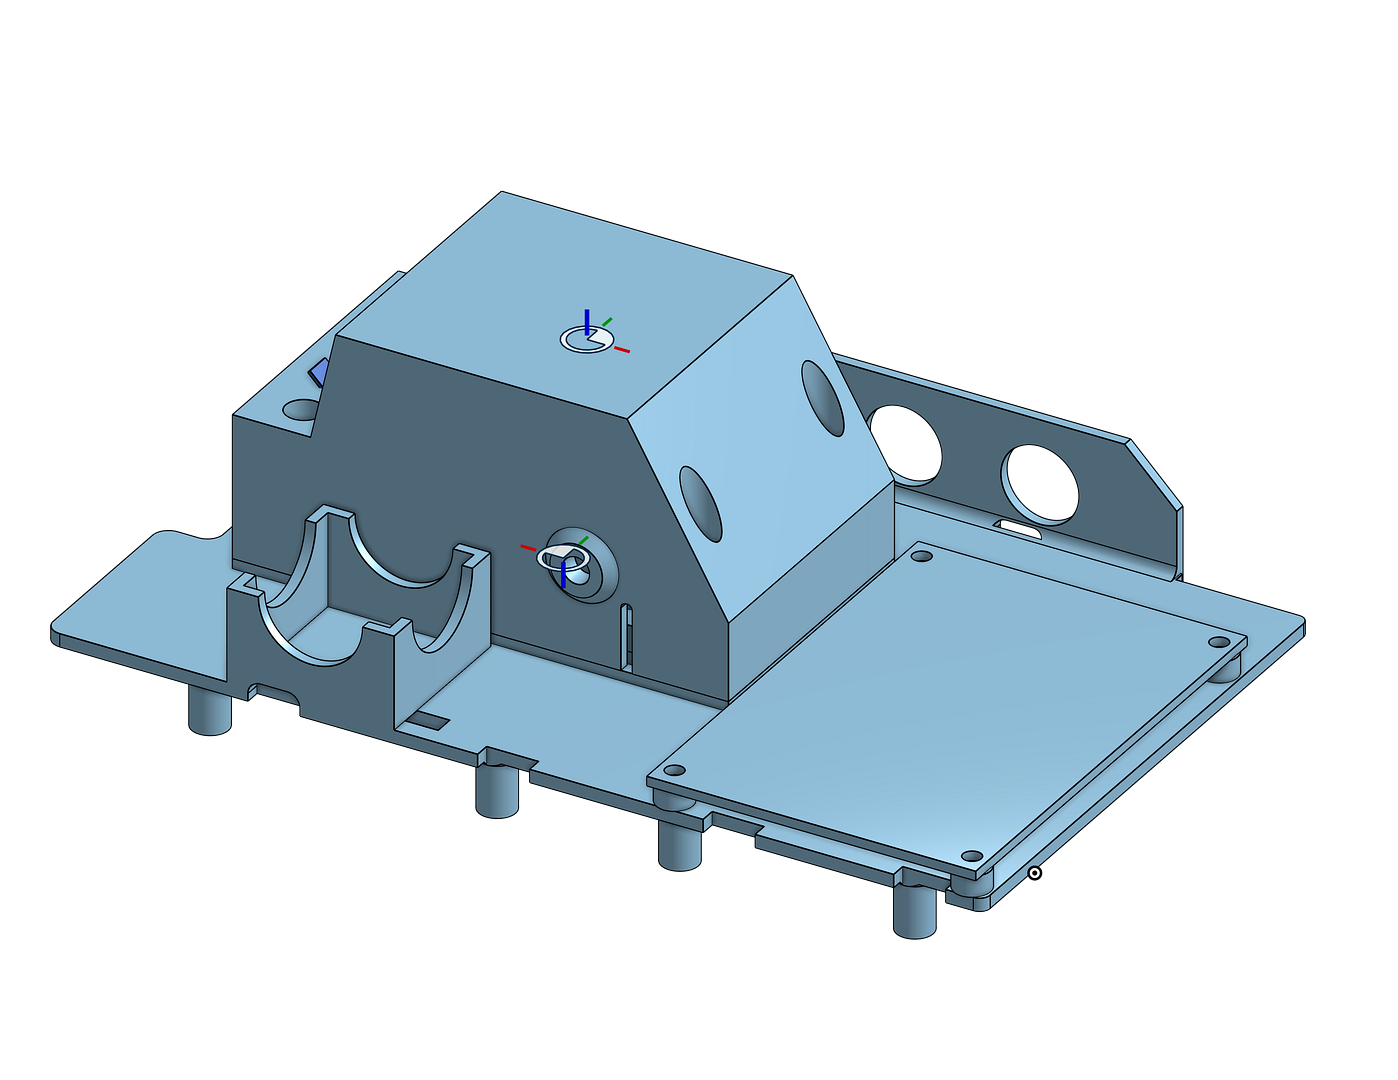
This is how it turned out with all of the parts fitted.
The prop wires to the dasmikro board needed making longer and I made a holder for the 2 ECU's for them to slot into between the gearboxes to keep them out the way.
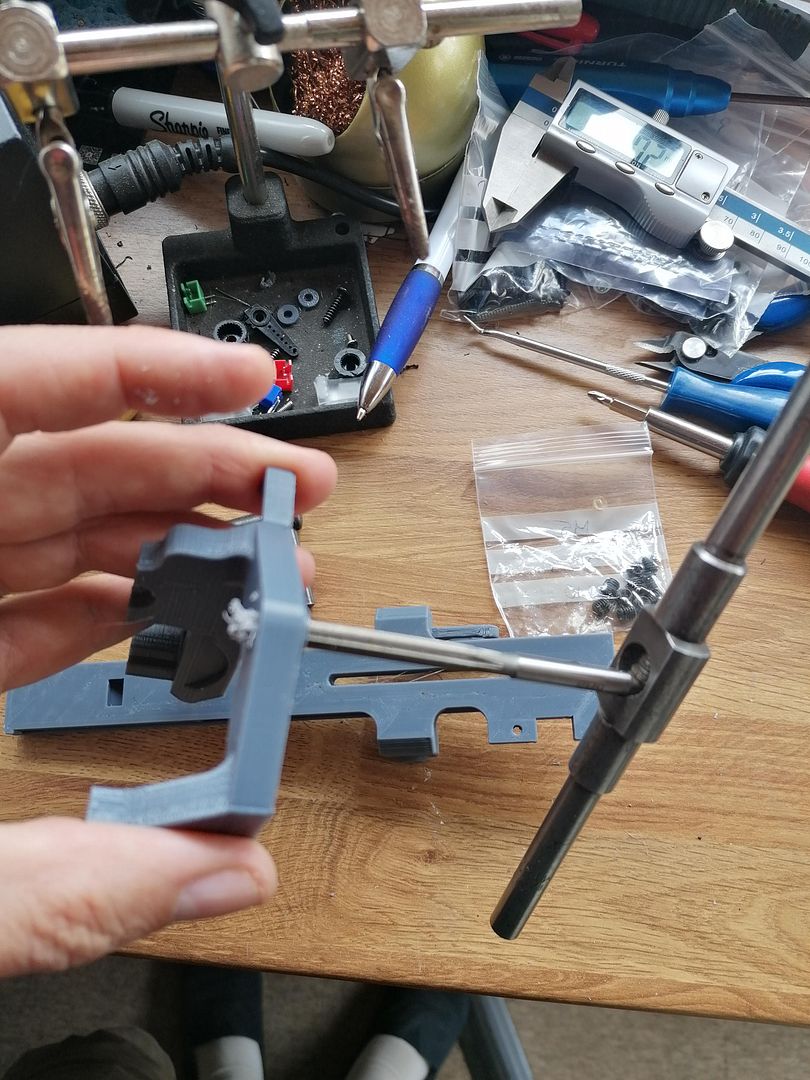
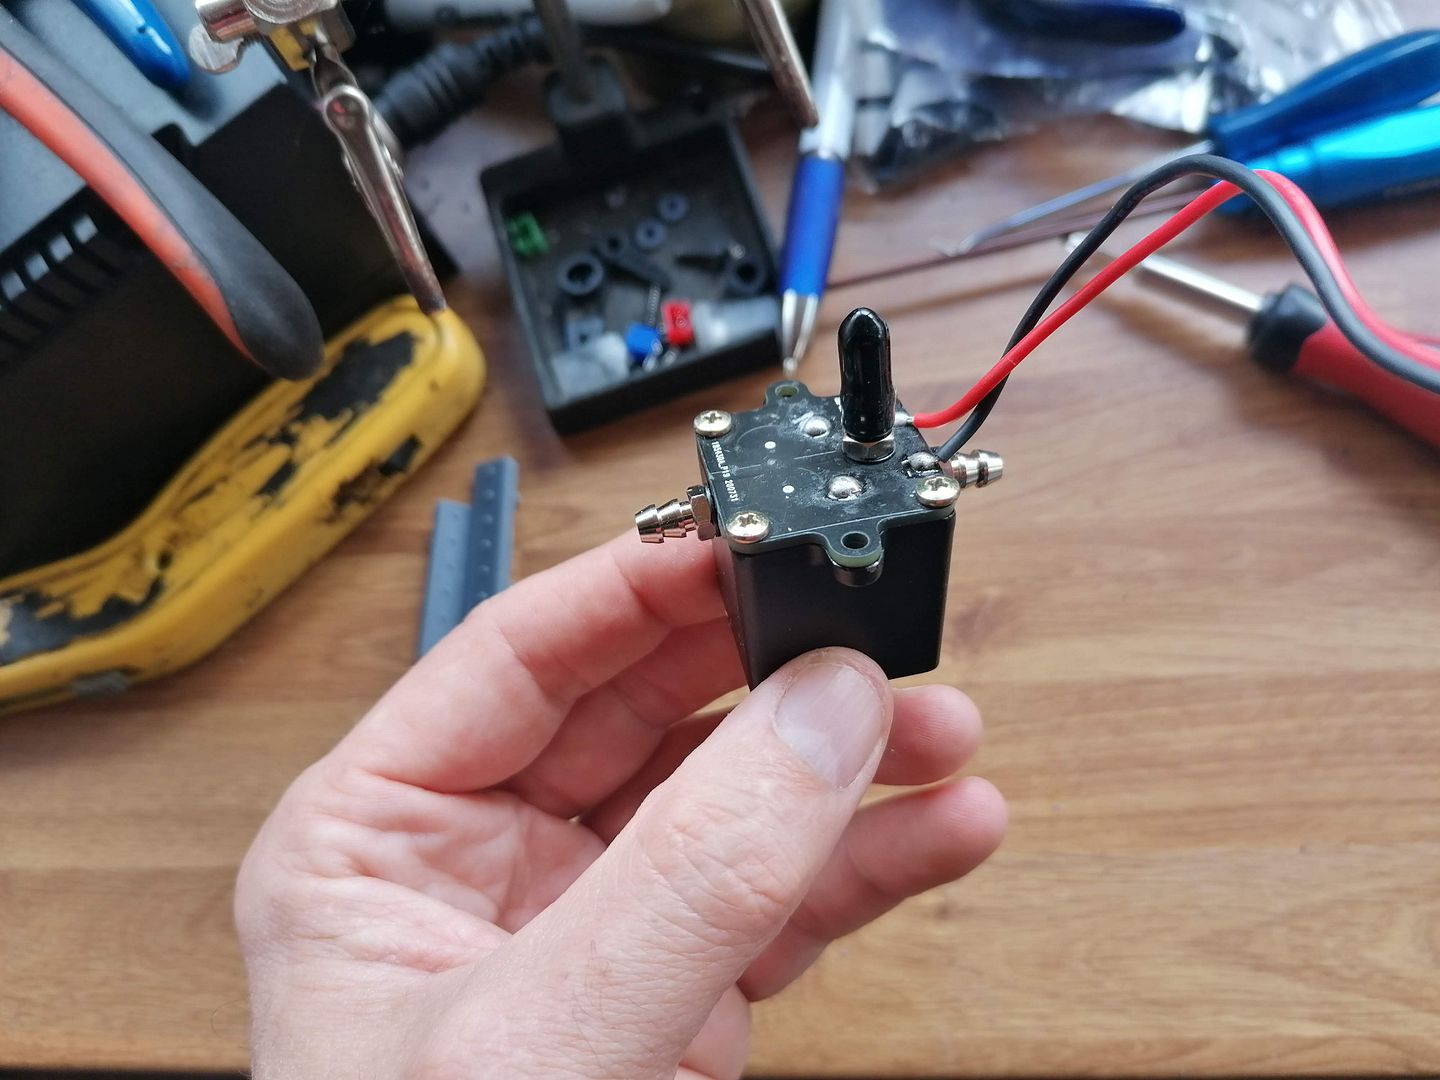
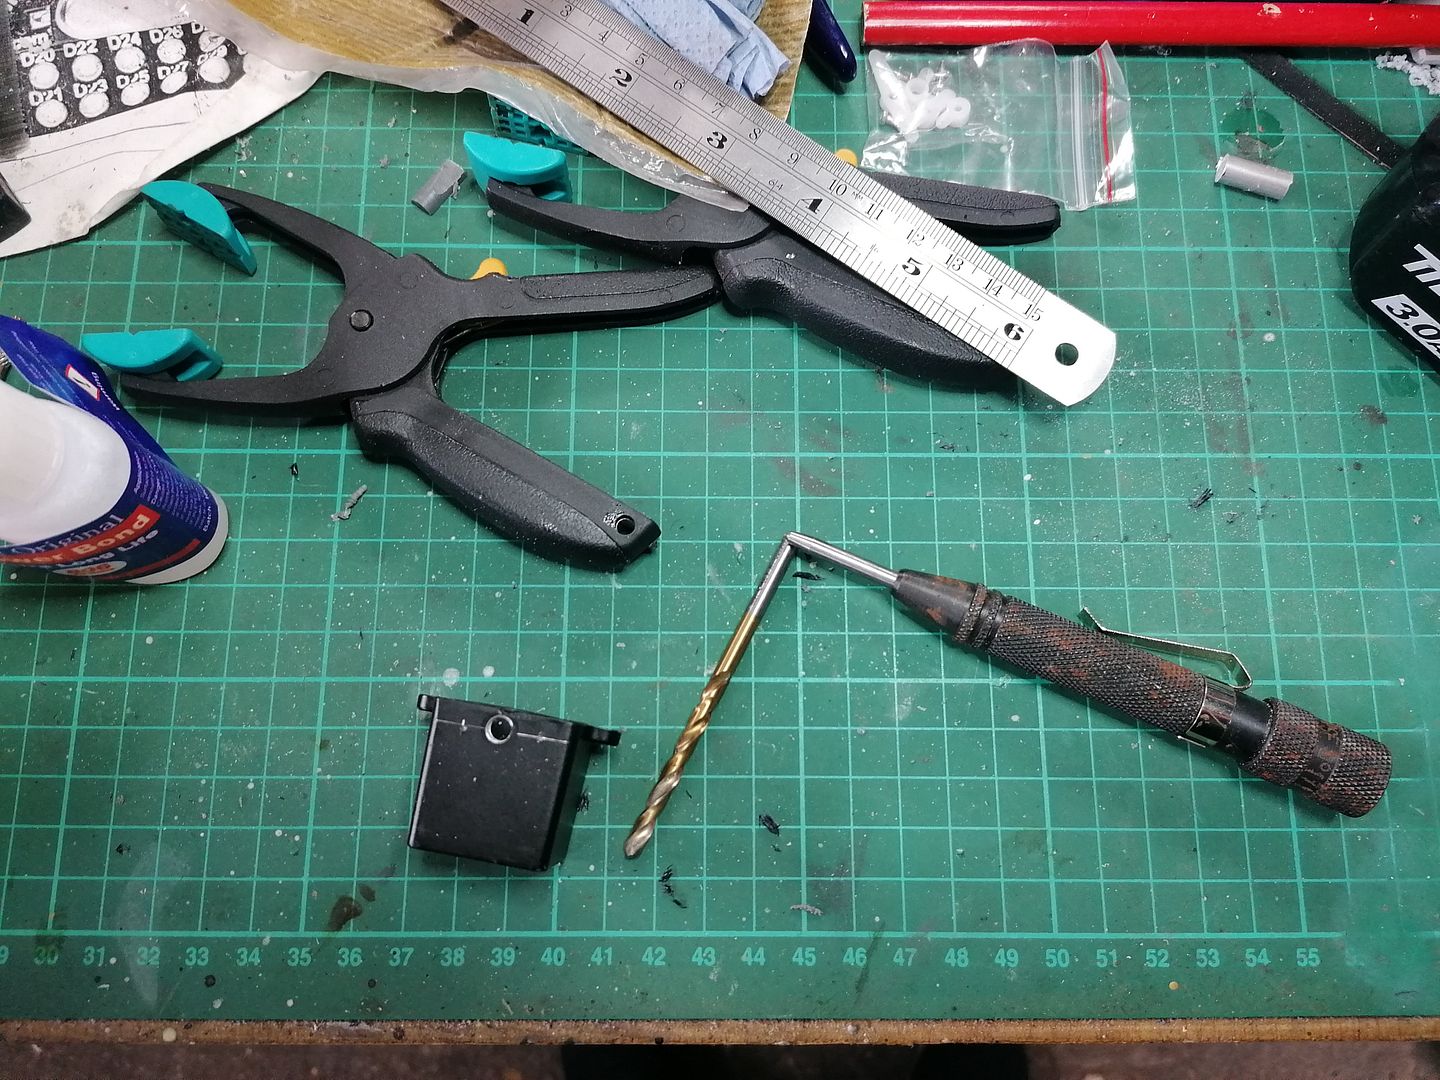
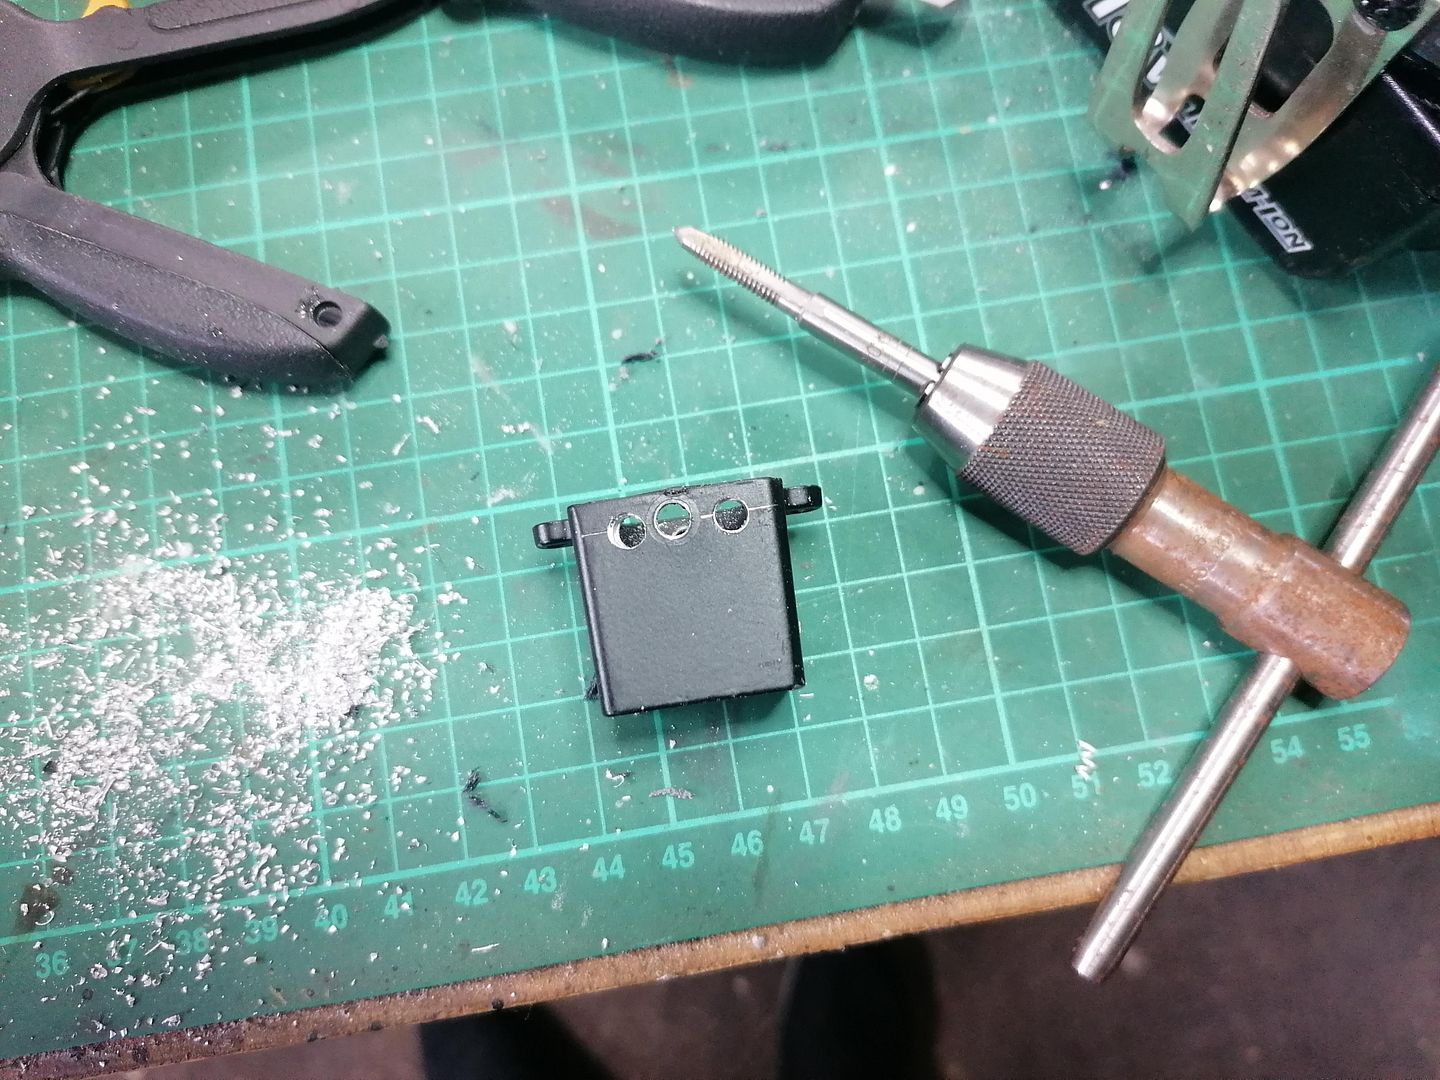
So while the bracket was printing I worked on the barrel smoke electronics to reduce the amount of wire and ad a switch to isolate it and save a bit of battery power.
This is a bracket for the pump and the control board and the 5V supply with a cut out for the switch'
After a bit of cutting crimping and soldering this looks a lot less wiry.
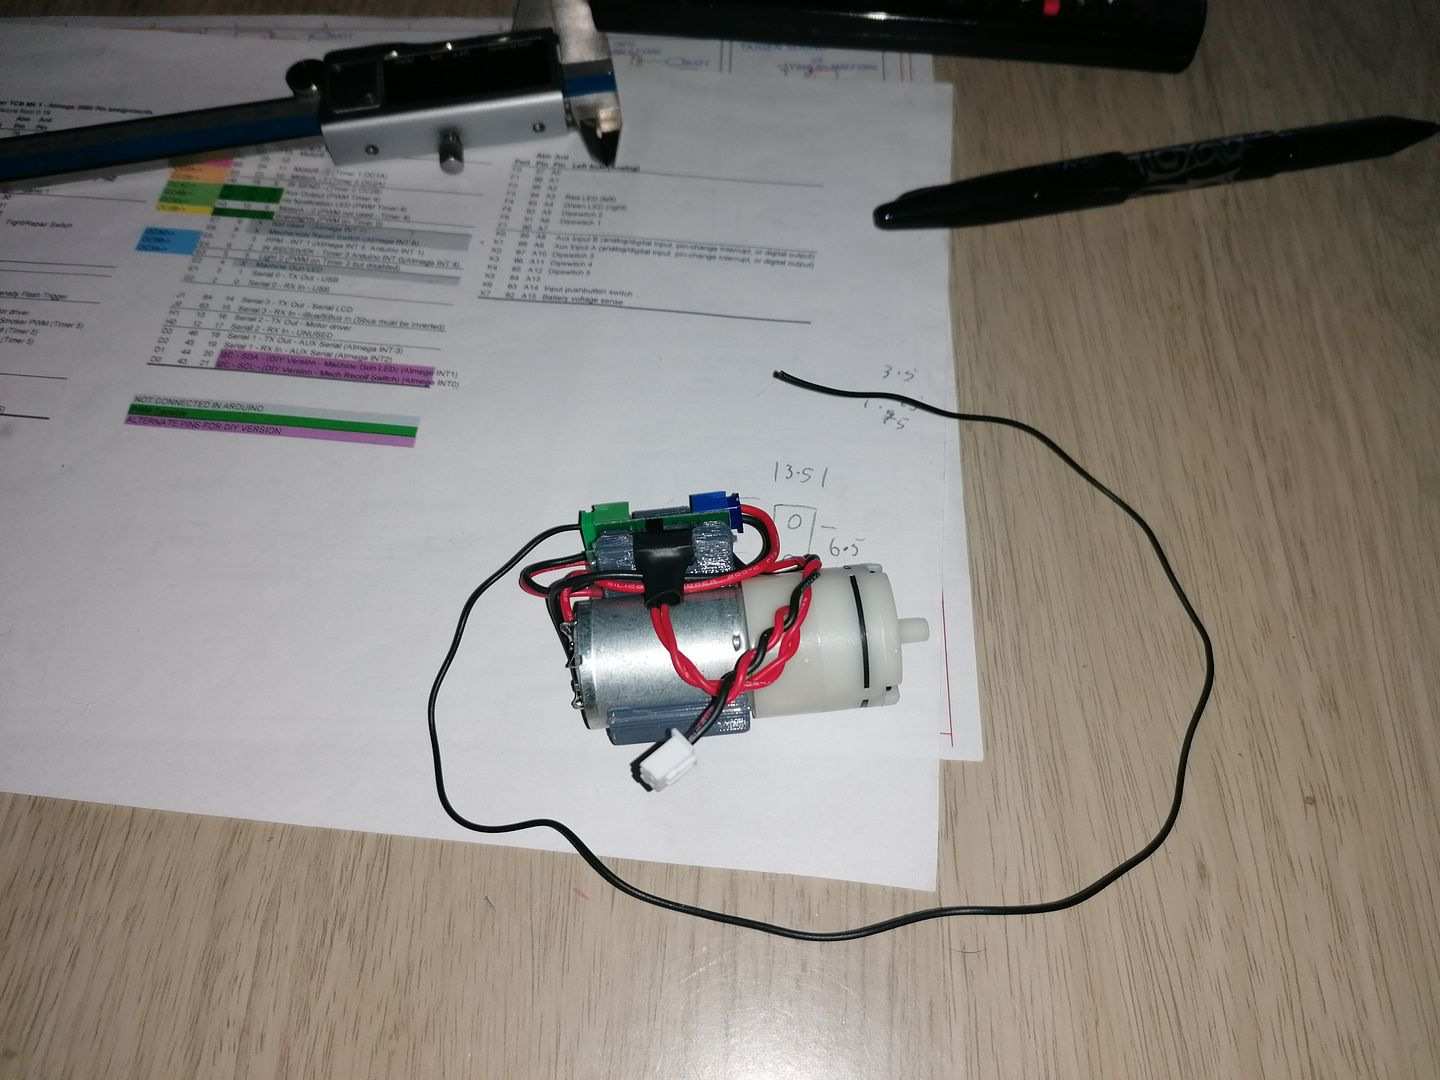
I also gave the wires on the Taigen flash a trim and swapped the 3 wires that go to the board for an old lead from a servo to tidy it up as the original wires were separate and would catch on everything.

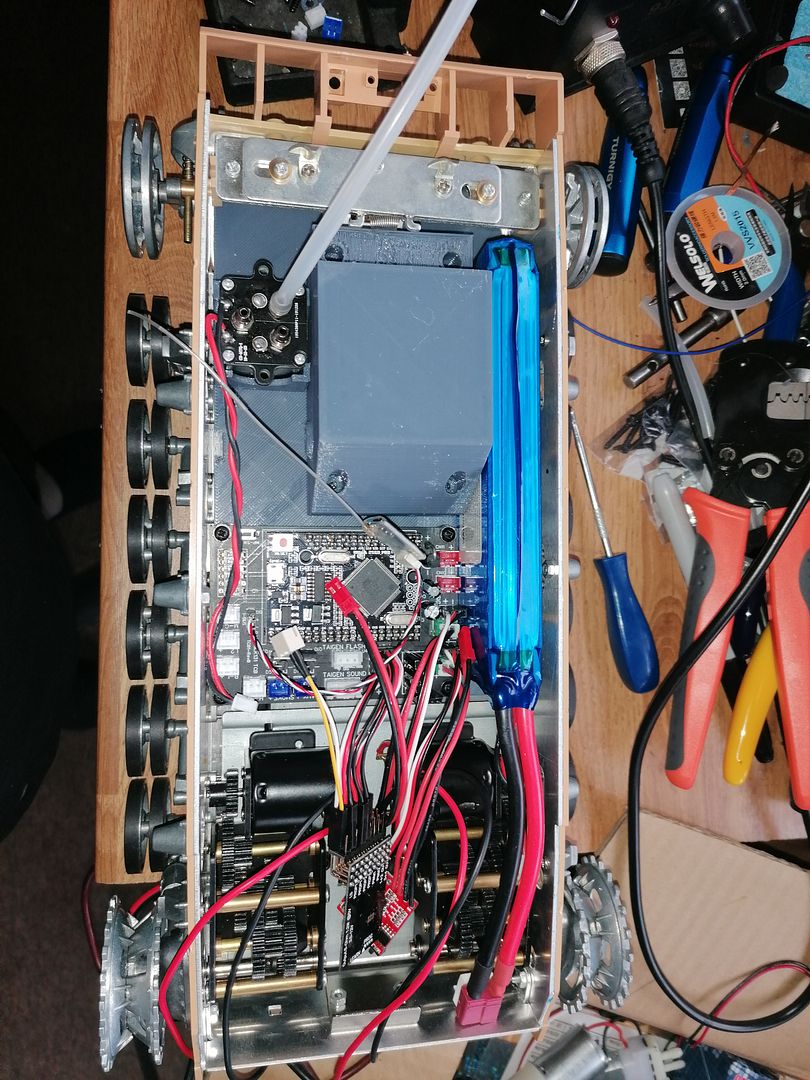
Here is everything shoehorned into the case-mate the pump is held in with some double sided foam tape as is the flash board.
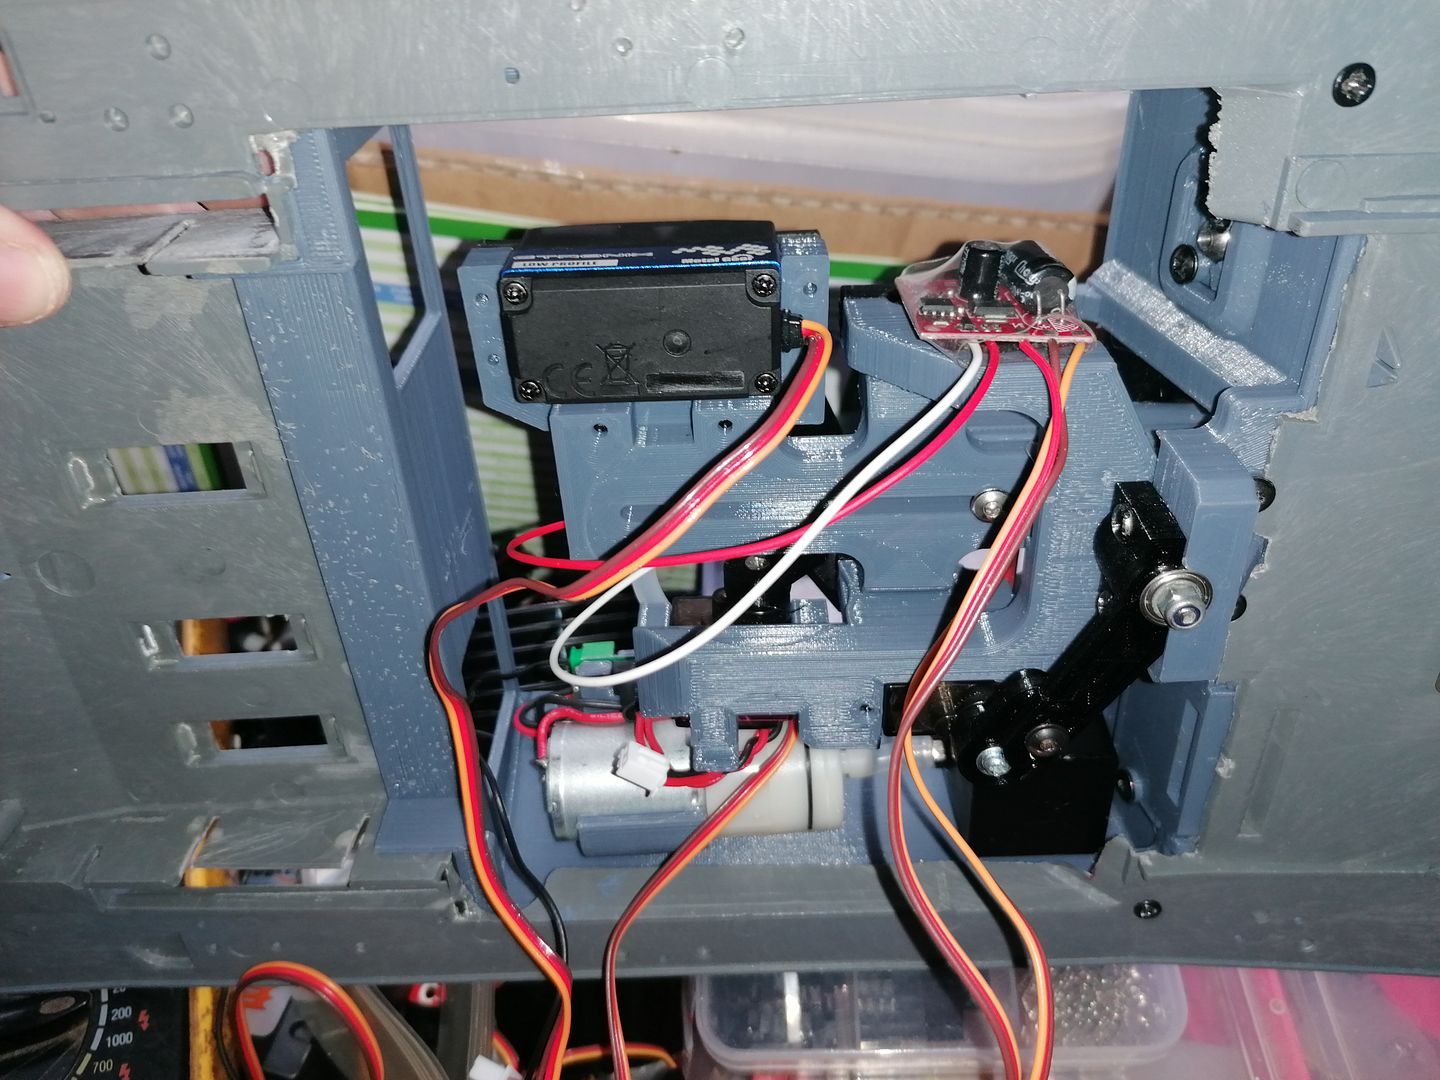
When the bracket was done printing it was time to drop it in place slide the ESC's into it and finish the wiring and tidy it up.
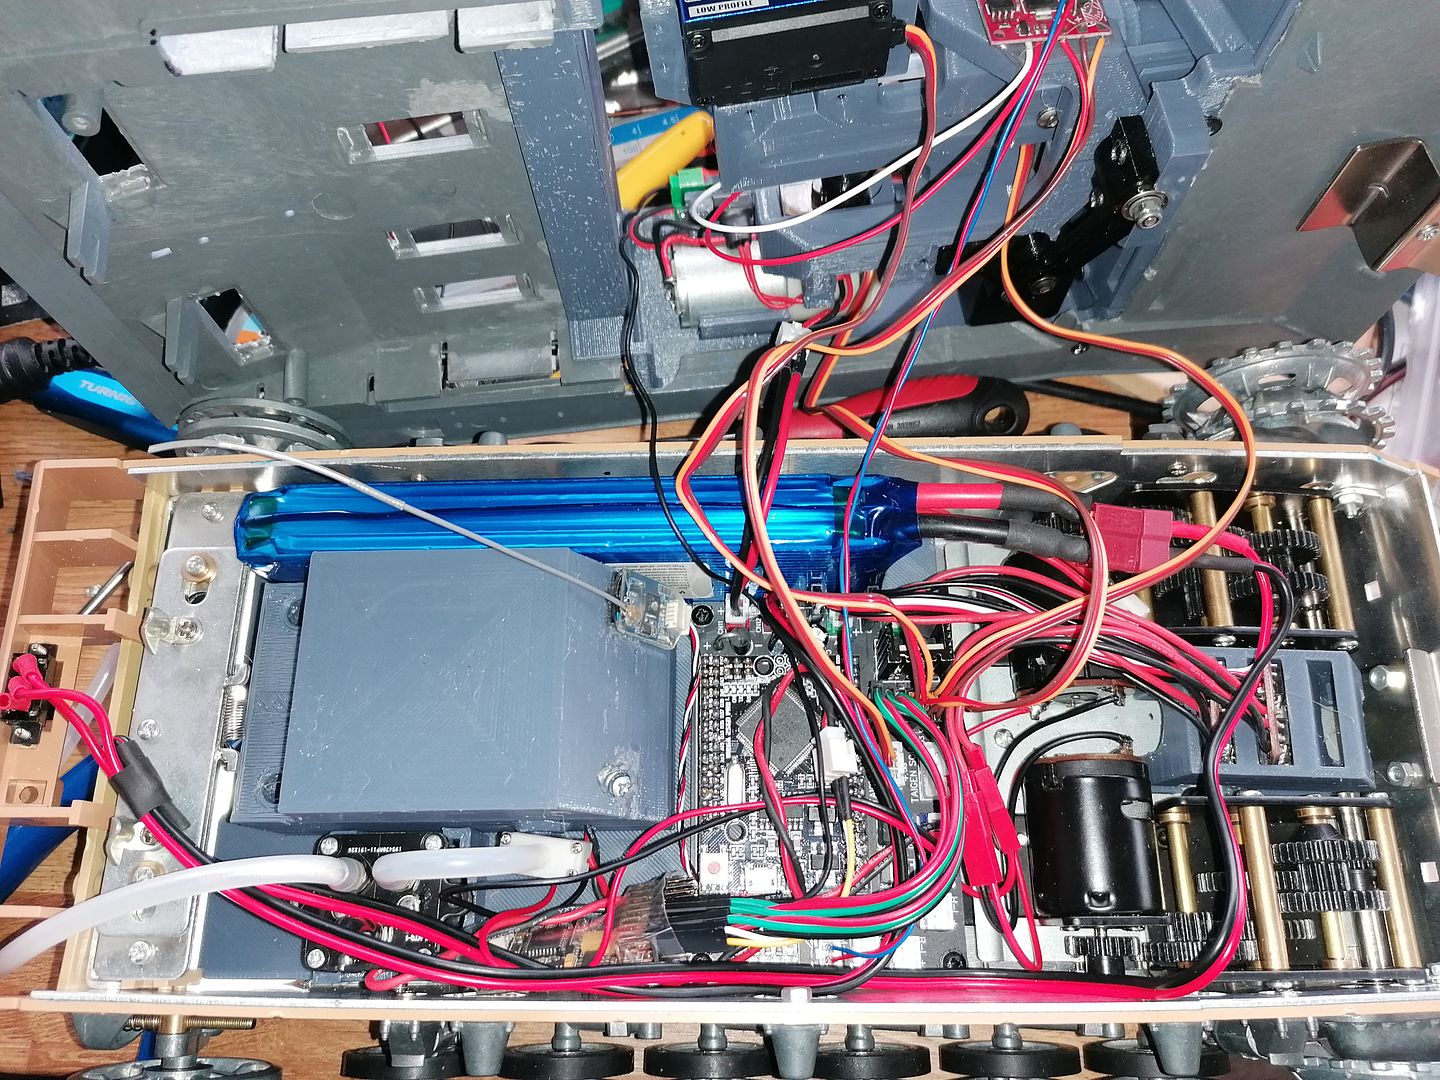
And the lid shuts!
This is it working the buzzing at the beginning is the small pump for the exhaust I think I will get a 5v 20mm square fan and make a funnel for it to fit the silicone pipe in to replace it and get rid of the buzz.
I'm glad it did'nt catch fire or chew any cables in the gearboxes but I now know it all fits I can now finish off the rest of the case-mate parts.
Here is my base plate with built in speaker box the hole in the side is to allow a pipe to the smoke generator but I used a pump in the end.
This is how it turned out with all of the parts fitted.
The prop wires to the dasmikro board needed making longer and I made a holder for the 2 ECU's for them to slot into between the gearboxes to keep them out the way.
So while the bracket was printing I worked on the barrel smoke electronics to reduce the amount of wire and ad a switch to isolate it and save a bit of battery power.
This is a bracket for the pump and the control board and the 5V supply with a cut out for the switch'
After a bit of cutting crimping and soldering this looks a lot less wiry.
I also gave the wires on the Taigen flash a trim and swapped the 3 wires that go to the board for an old lead from a servo to tidy it up as the original wires were separate and would catch on everything.
Here is everything shoehorned into the case-mate the pump is held in with some double sided foam tape as is the flash board.
When the bracket was done printing it was time to drop it in place slide the ESC's into it and finish the wiring and tidy it up.
And the lid shuts!
This is it working the buzzing at the beginning is the small pump for the exhaust I think I will get a 5v 20mm square fan and make a funnel for it to fit the silicone pipe in to replace it and get rid of the buzz.
I'm glad it did'nt catch fire or chew any cables in the gearboxes but I now know it all fits I can now finish off the rest of the case-mate parts.
-
SCHWEREPANZER
- Sergeant
- Posts: 596
- Joined: Thu Jan 08, 2015 1:40 am
Re: s.I.G 33 Converion
Wow! This is absolutely top drawer modeling, conceived and executed to scientific and artistic perfection.
-
baldrick131
- Lance Corporal
- Posts: 140
- Joined: Fri Oct 04, 2019 8:46 pm
- Location: March cambridgeshire
- Contact:
Re: s.I.G 33 Converion
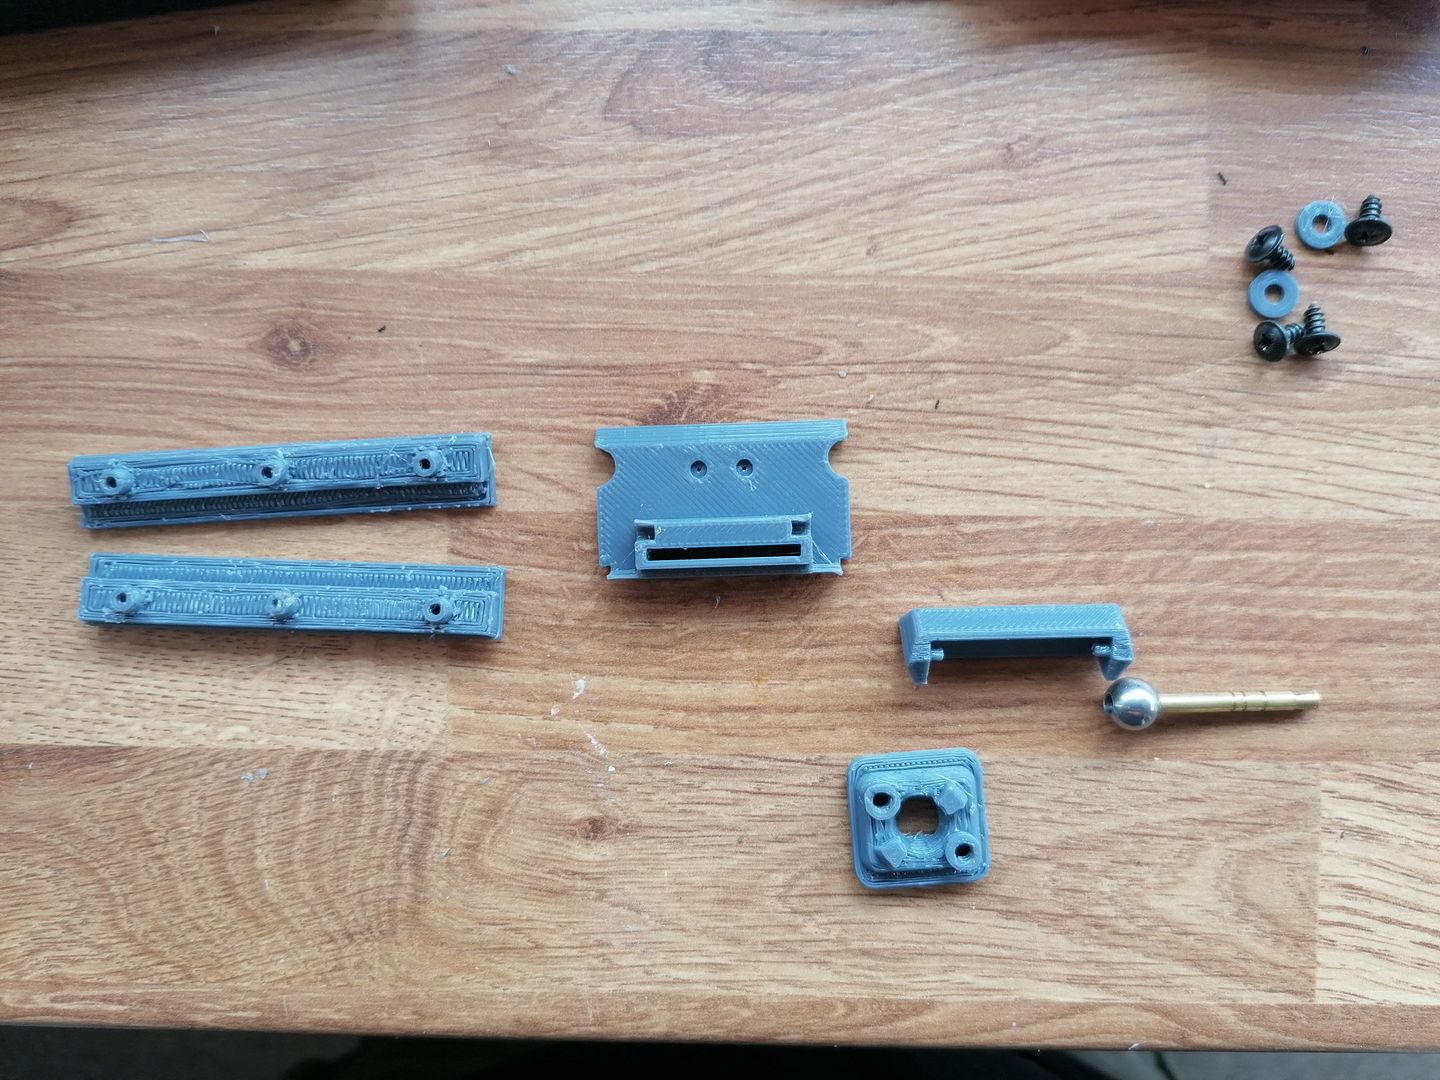
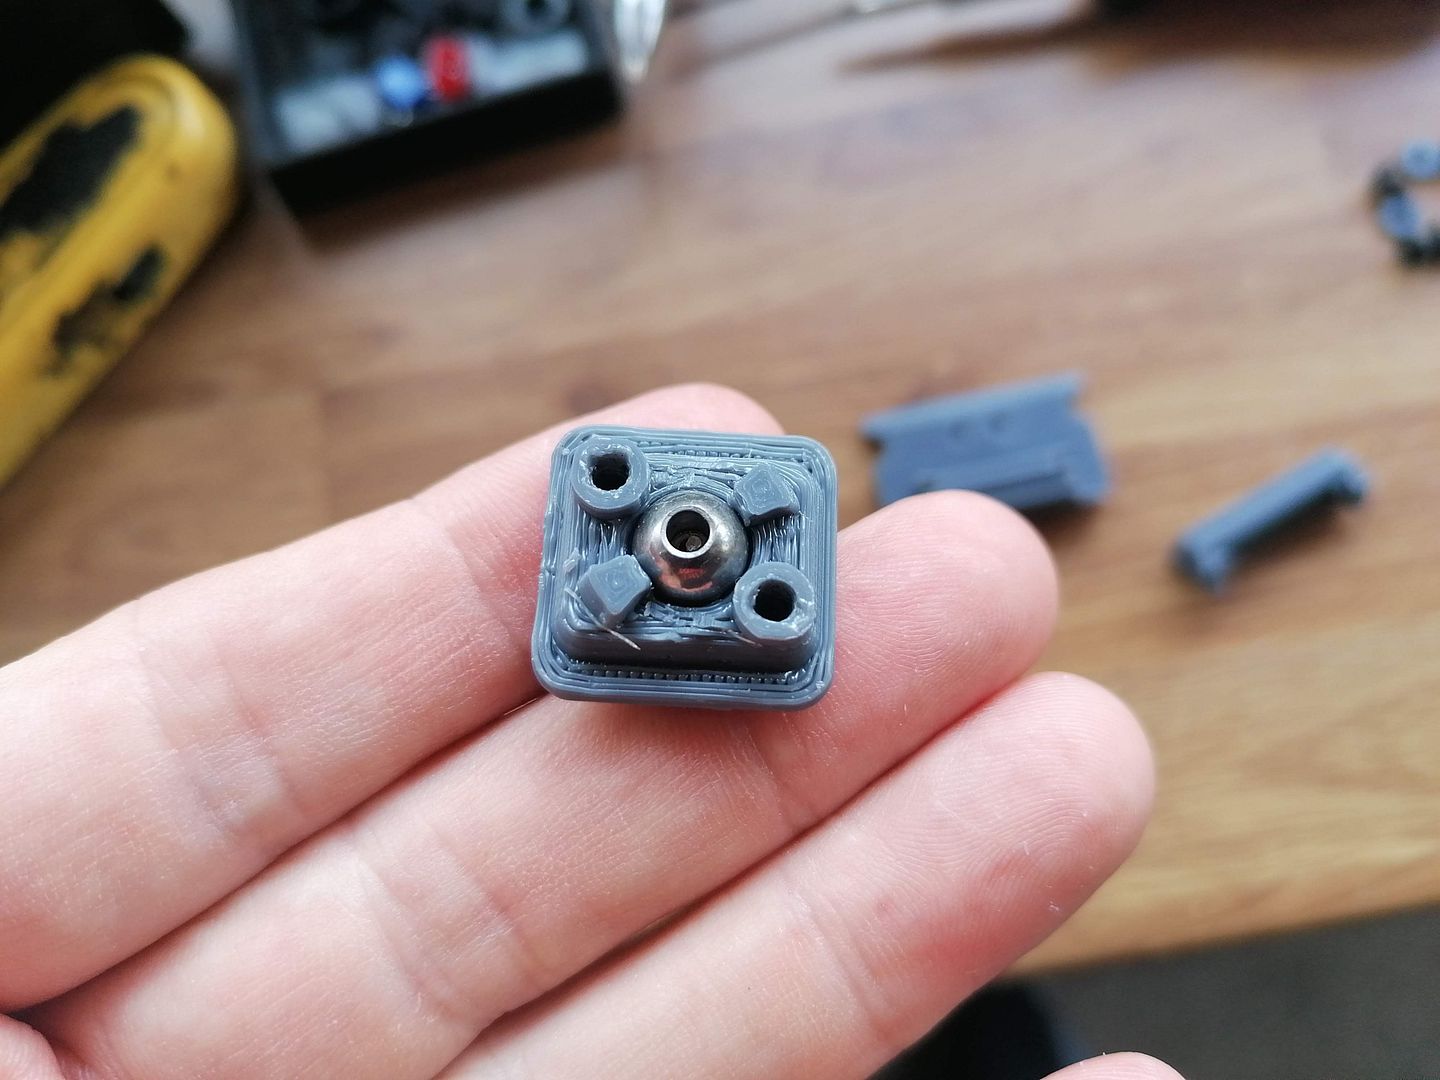
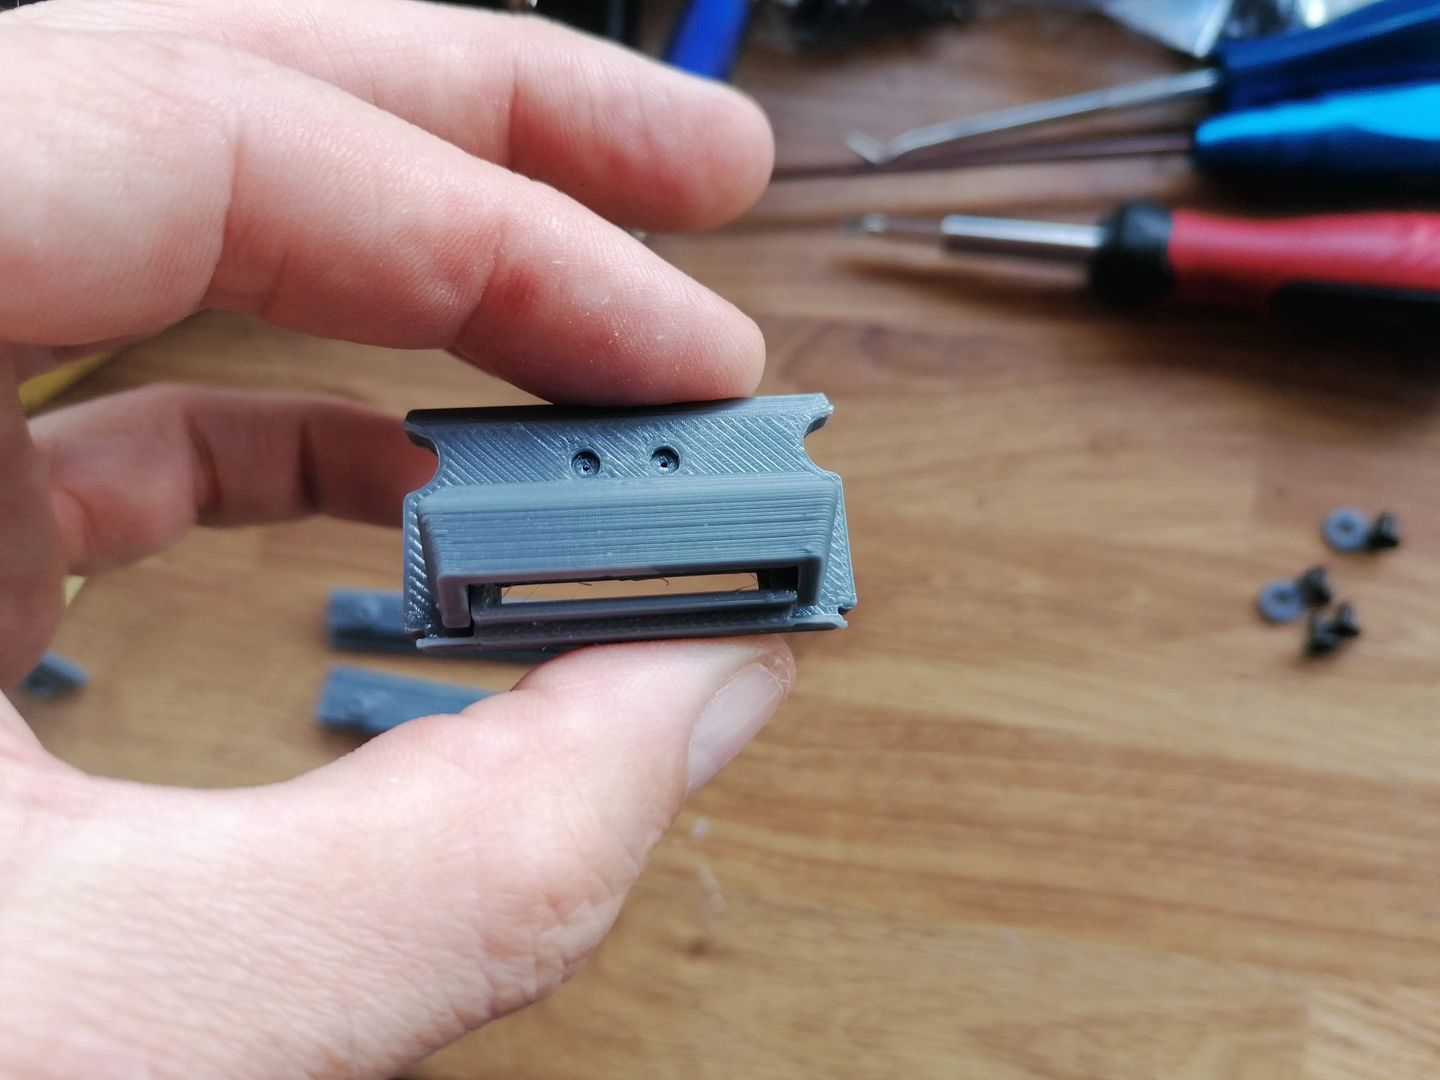
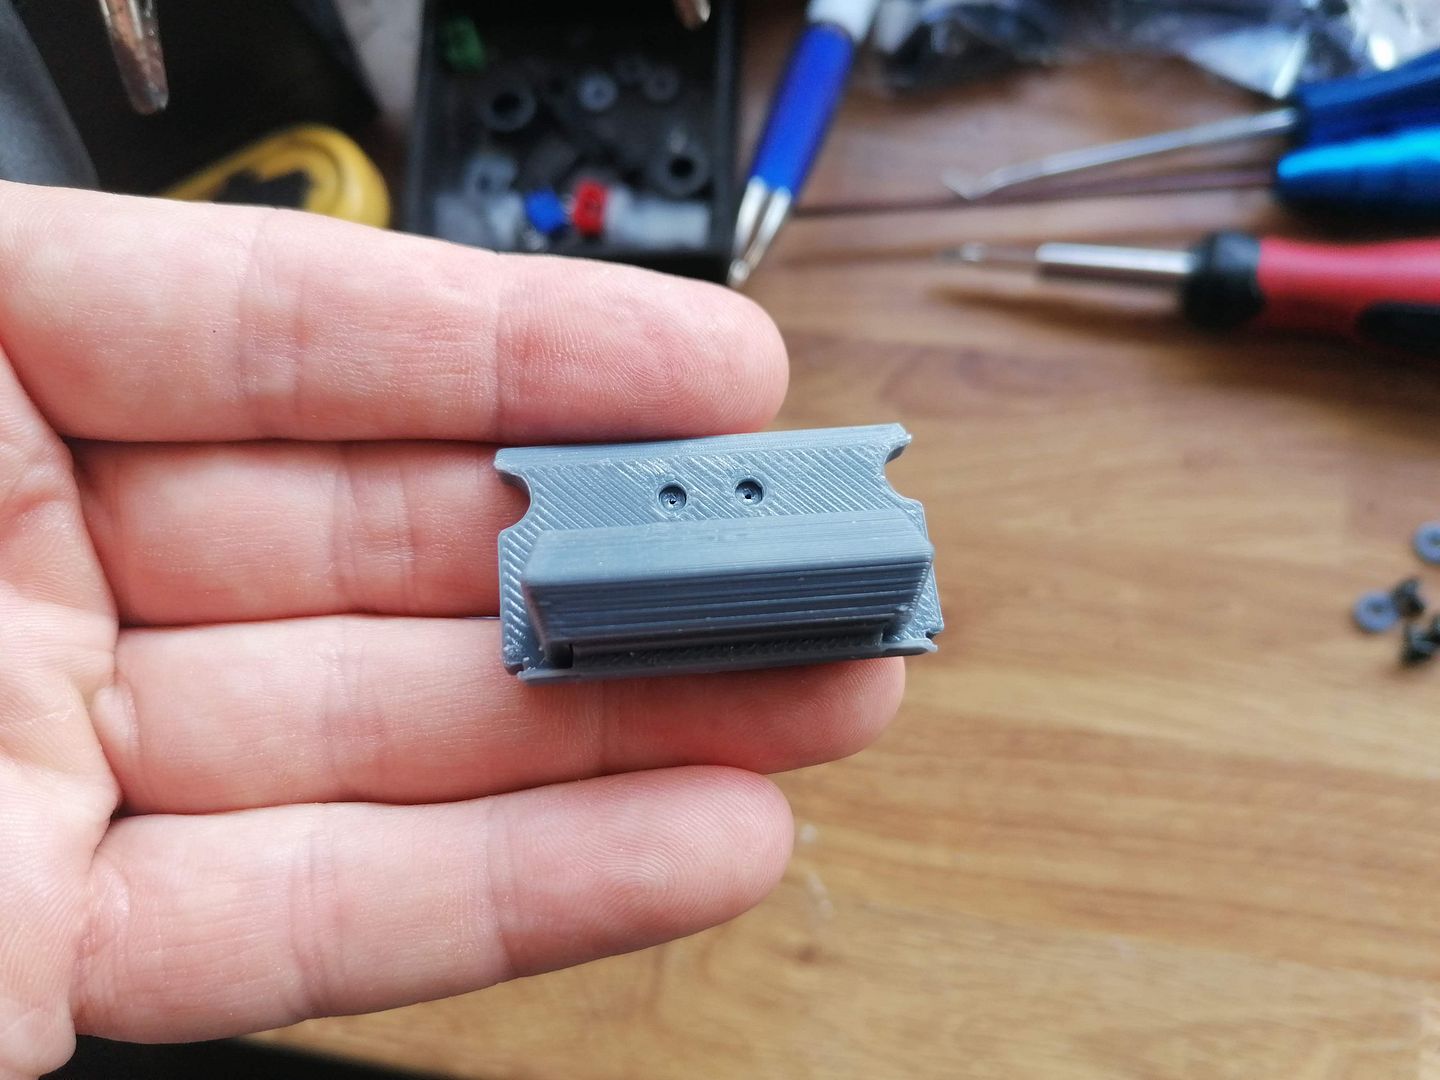
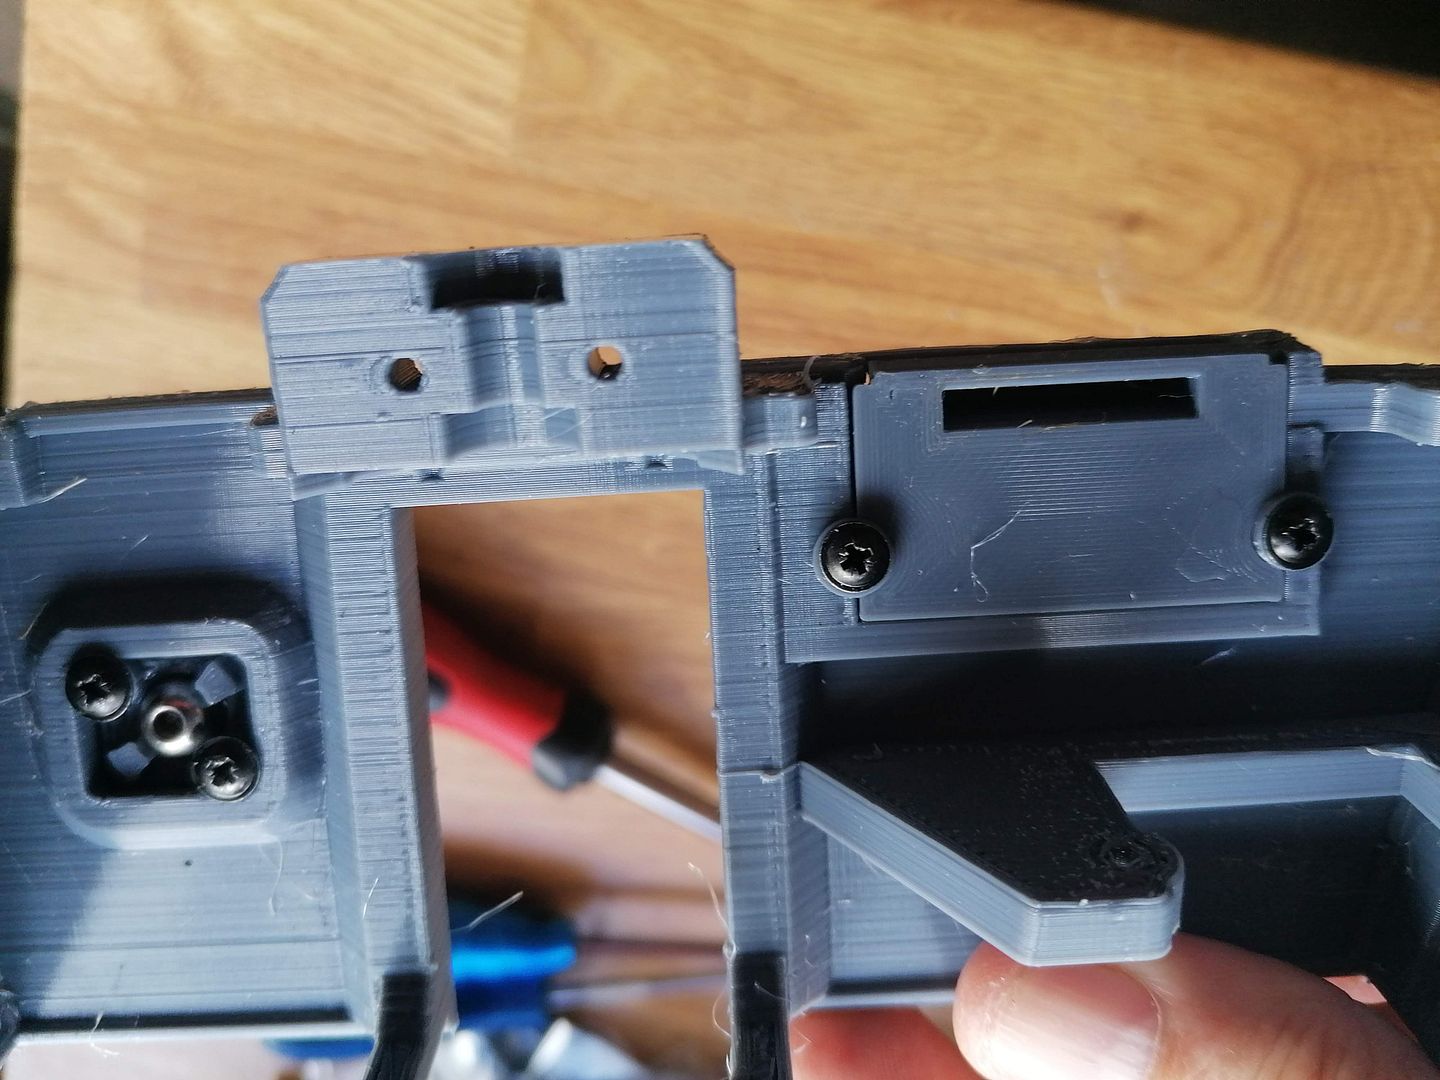
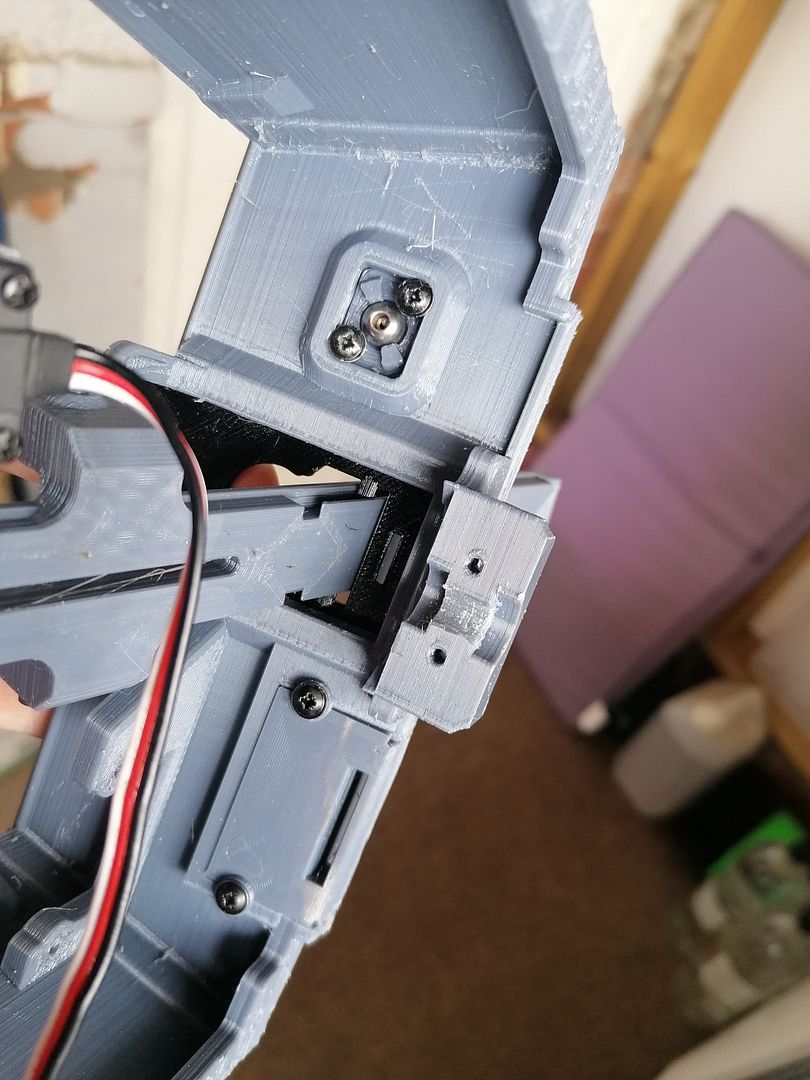
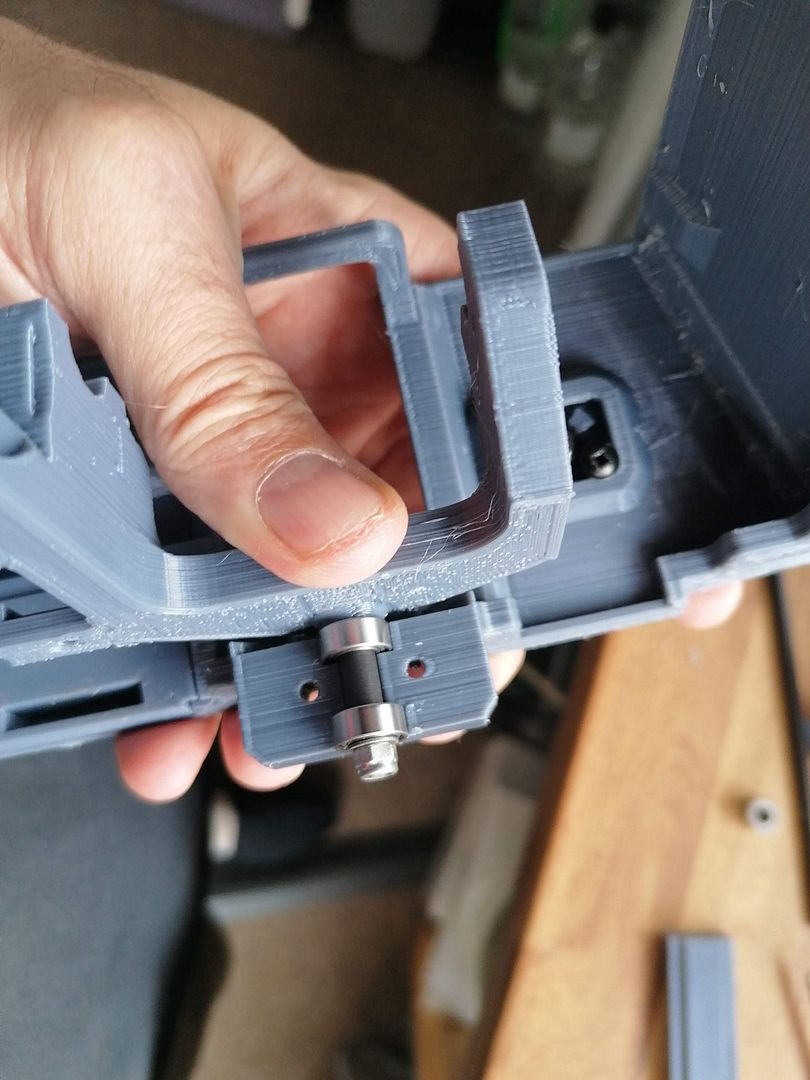
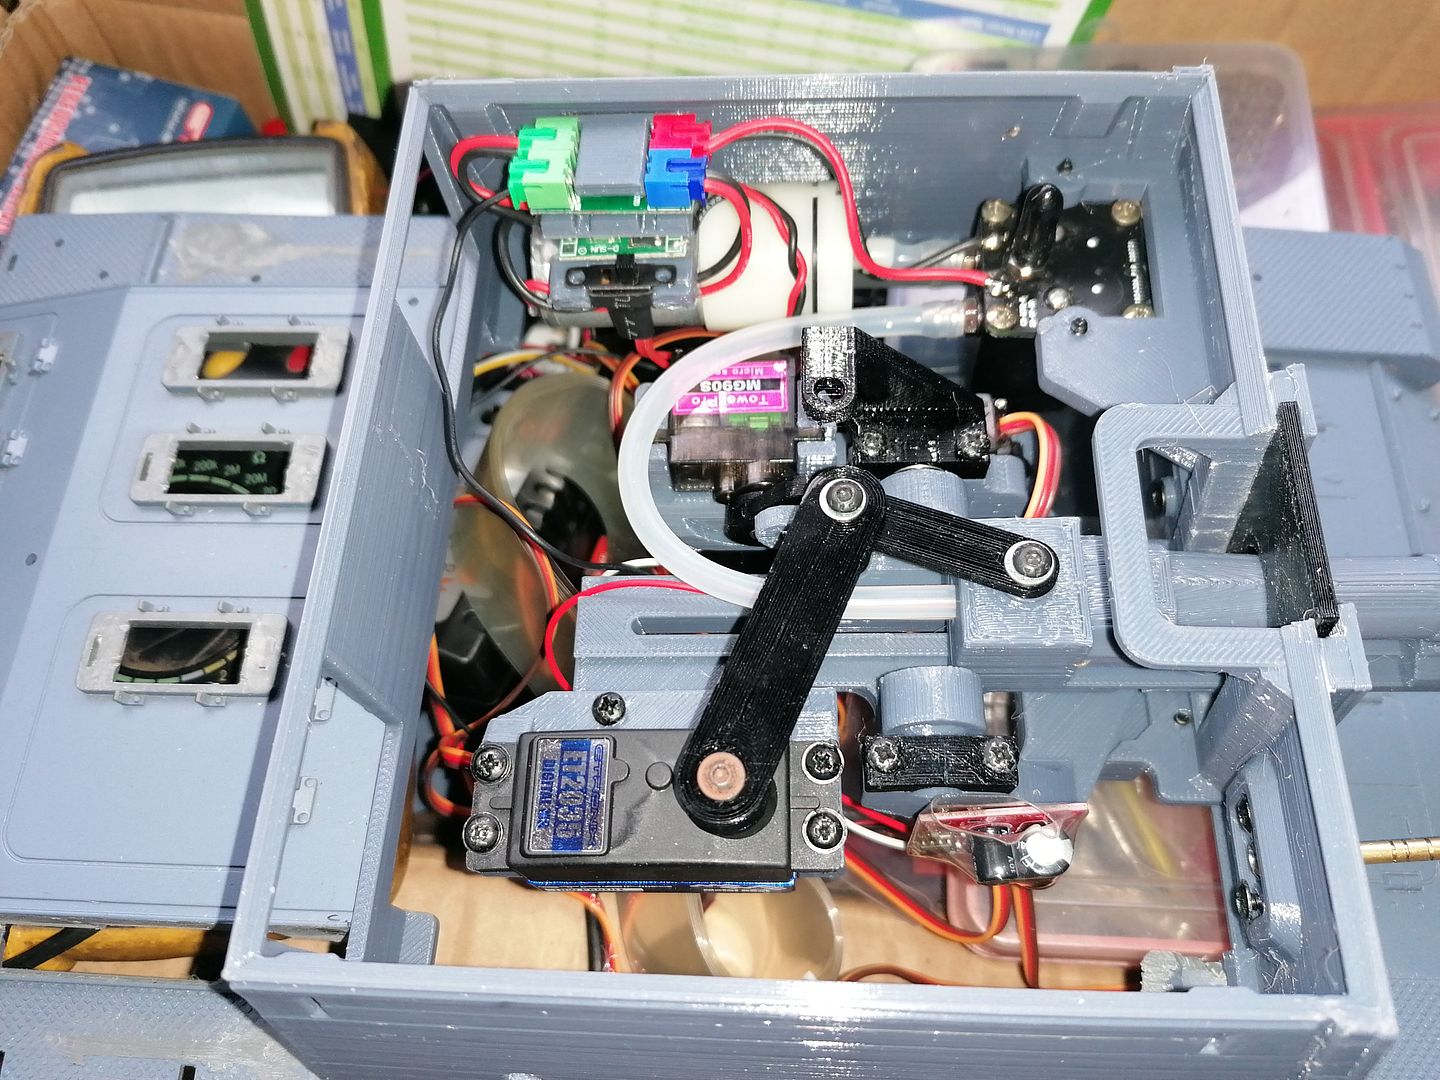
Its been a while since I did any real work on the tank.
I have been making some small detailed parts mainly the rear hatches along with frames with hinge detail Incorporated to make opening doors.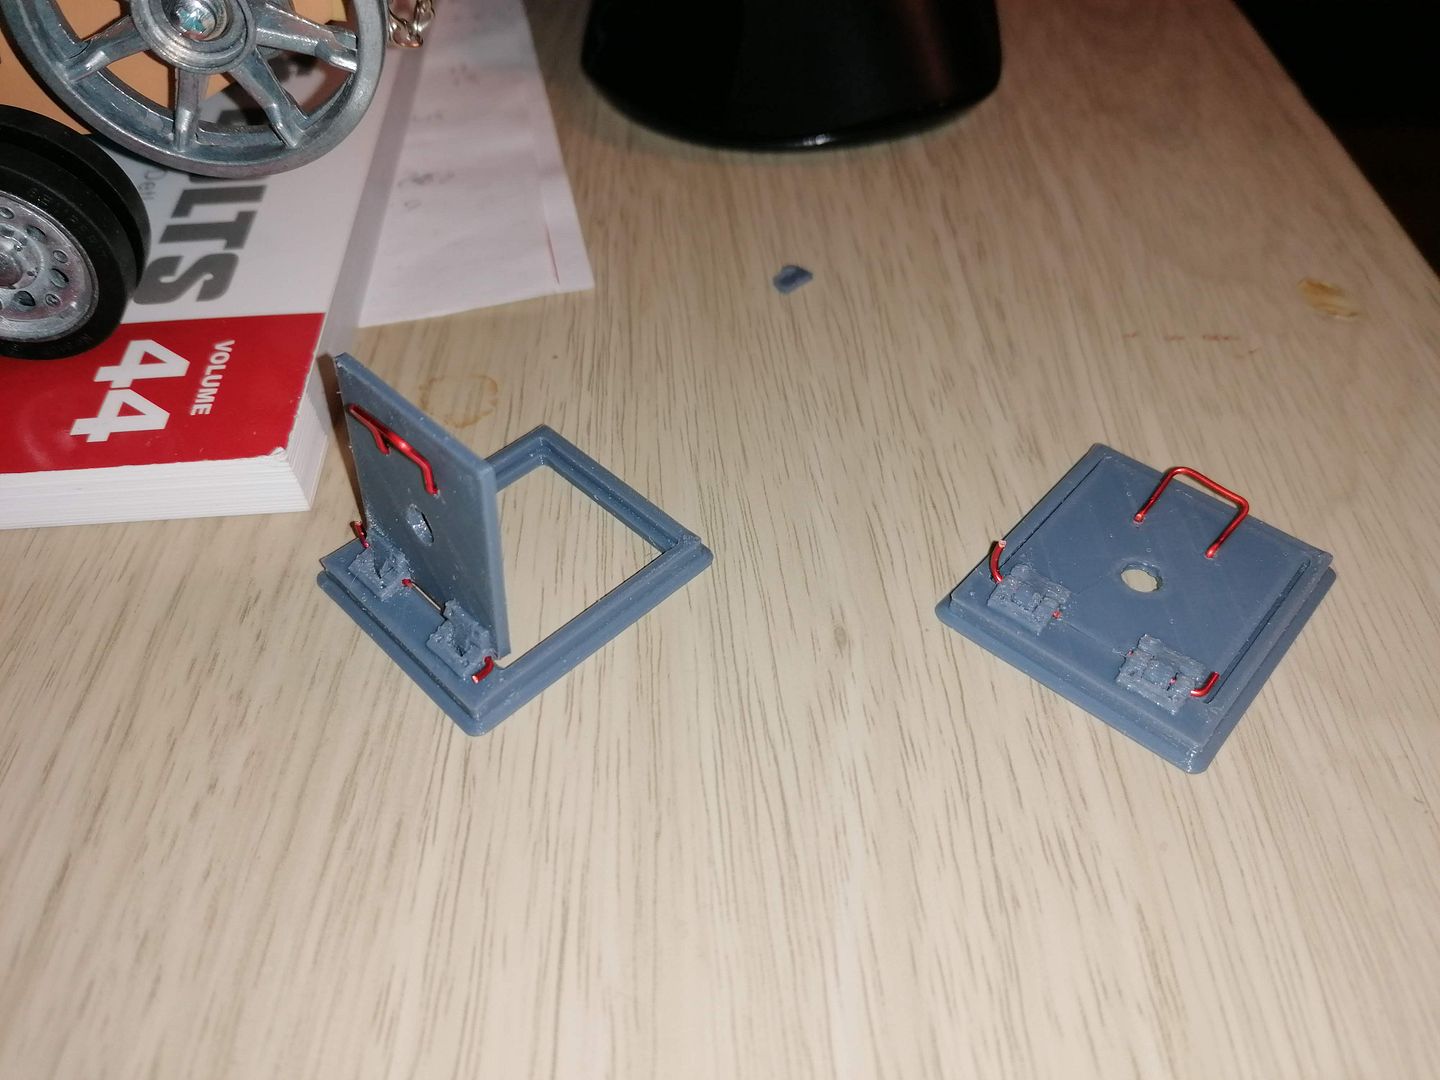
I will glue them in place from the rear and fill any gaps to hide the frames.
but this meant I had to re print the casement with larger holes that's when my 3D printer decided it had had enough and wasn't going comply
So after getting a new power supply and a few other tweaks while waiting for the supply to turn up I re printed the casement
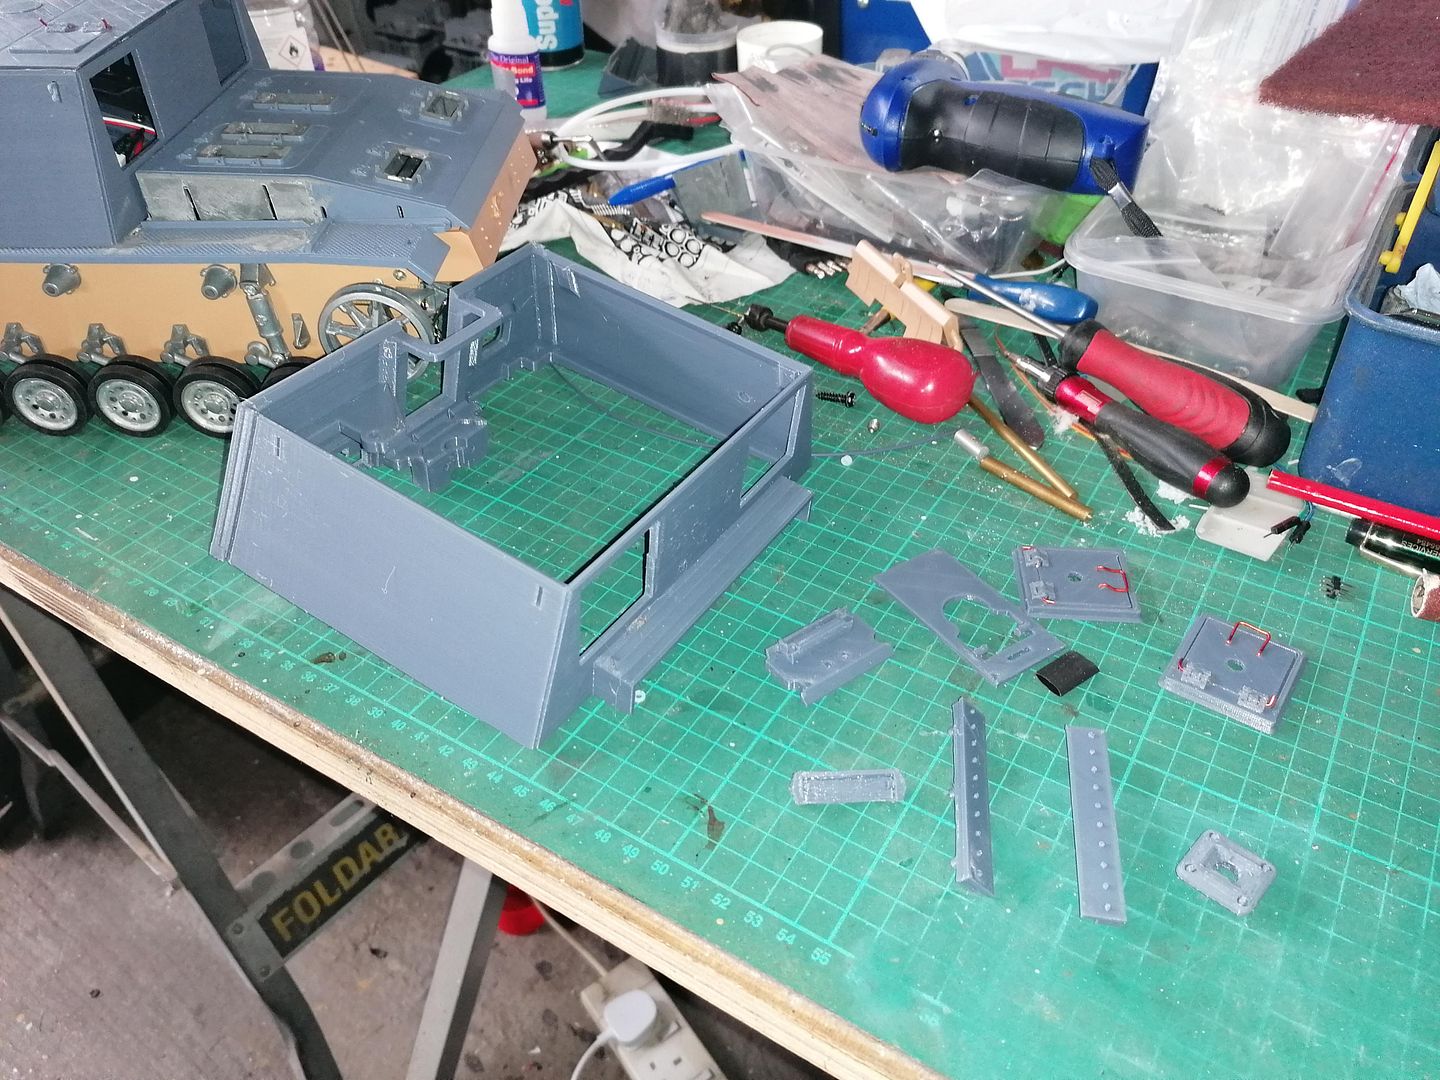
It did de laminate though when I took the support material it only appears to be in this one place:thumbdown:
I transferred all the parts from the first casement to the new one to make sure it was ok and to see if the frames fitted.
The split will be glued and sorted when the frames are fixed in place.
I also printed the roof section and top hatch but it lifted off the printer bed a bit in the middle so I may do another if I cant fix it with filler
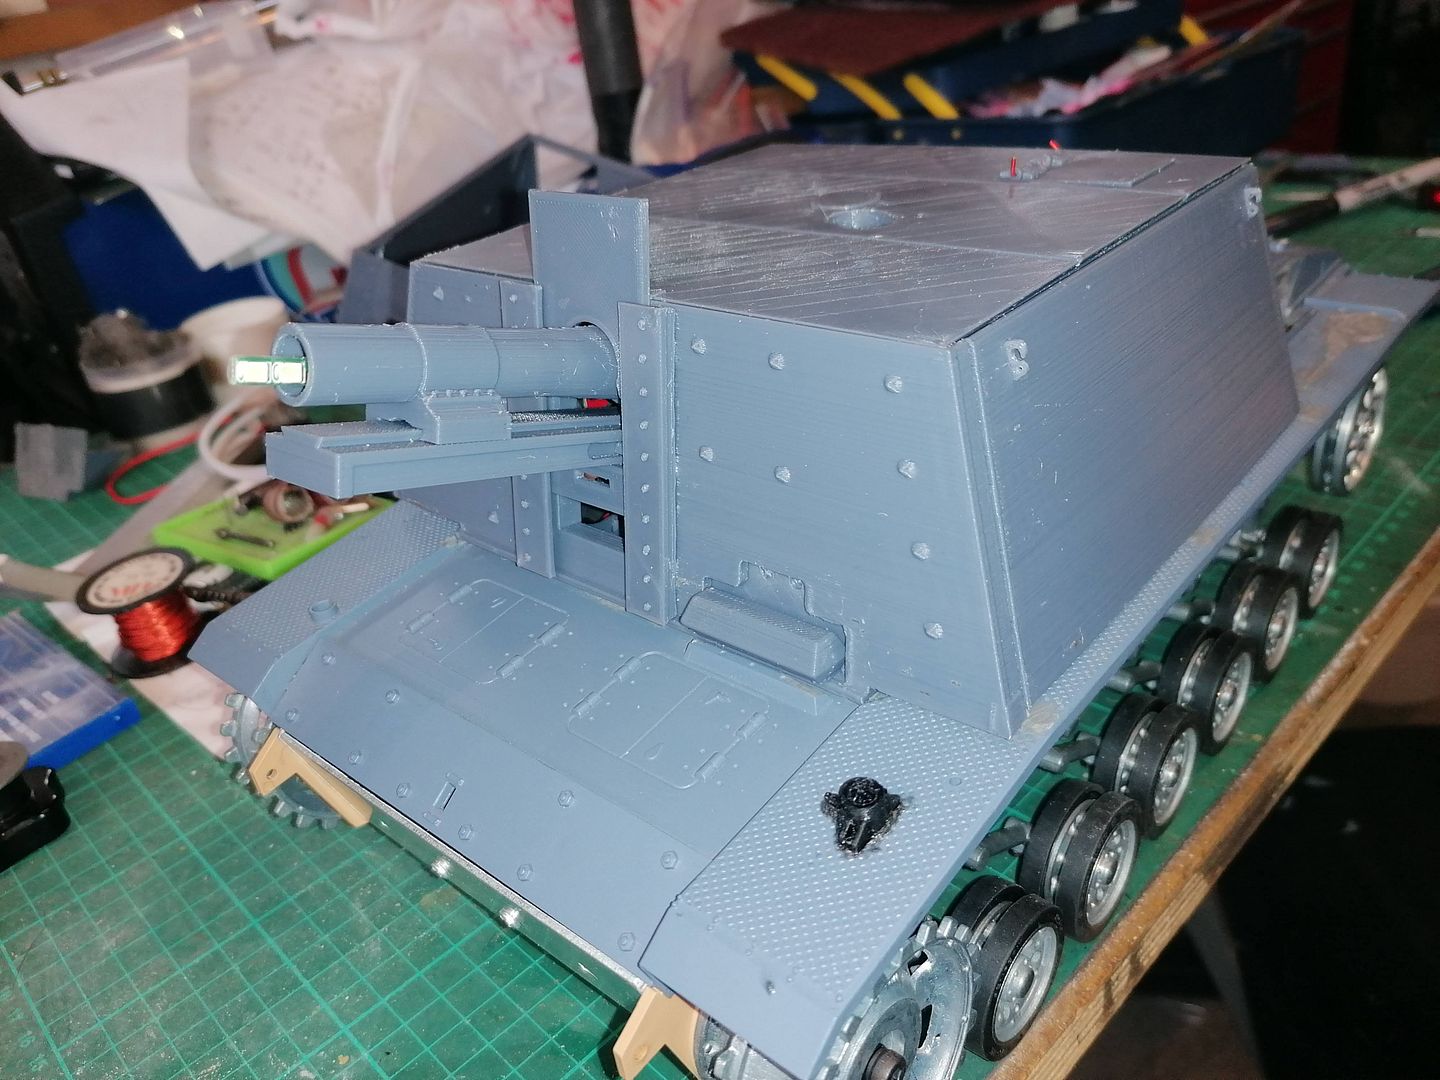
So thats the bulk of the casement is done just a few small parts to do the barrel travel lock and a flap that attaches to the moving shield then time to sort out the rear deck vents and I might fire up the resin printer Ive had for ages but not got around to trying yet so that will be a new adventure for me
I have been making some small detailed parts mainly the rear hatches along with frames with hinge detail Incorporated to make opening doors.
I will glue them in place from the rear and fill any gaps to hide the frames.
but this meant I had to re print the casement with larger holes that's when my 3D printer decided it had had enough and wasn't going comply
So after getting a new power supply and a few other tweaks while waiting for the supply to turn up I re printed the casement
It did de laminate though when I took the support material it only appears to be in this one place:thumbdown:
I transferred all the parts from the first casement to the new one to make sure it was ok and to see if the frames fitted.
The split will be glued and sorted when the frames are fixed in place.
I also printed the roof section and top hatch but it lifted off the printer bed a bit in the middle so I may do another if I cant fix it with filler
So thats the bulk of the casement is done just a few small parts to do the barrel travel lock and a flap that attaches to the moving shield then time to sort out the rear deck vents and I might fire up the resin printer Ive had for ages but not got around to trying yet so that will be a new adventure for me
-
c.rainford73

- Major
- Posts: 6104
- Joined: Thu Aug 25, 2016 7:34 pm
- Location: Connecticut USA
Re: s.I.G 33 Converion
That gun fire and recoil is simply amazing! What style printer are you utilizing for this beast.
Tanks alot.... 
