Hi all,
Had a tidy up of the wiring and replaced the double Tamiya connector with Deans connectors to preserve space, and bullet connectors so the new smoker can be removed if required.
Fitted the new smoker, works well once it gets going, but has condensation problems.
The rotor shield is on its way, so should be able to start that soon.
Hey man....I just ride 'em, I dunno what makes 'em work.
Woof woof woof !
Decided to follow the lead of some other Sherman converts I've seen and make the base of the turret removable for easy access to the gear inside.
First step to remove bottom part of the bustle that is attached to the base ring.
Then fixed the bottom bustle part to the main turret.
Sanded down to get a seamless finish but won't re-paint until I have finished the rotor shield installation, which I'm sure will need cosmetic work after its fitted.
The base ring fitted back into the turret really well and was such a good fit I doubt that it would need any additional fixing, but just to be sure, I fitted a couple of styrene angle pieces with nuts welded to the underdide.
Drilled and countersunk a couple of holes in the base ring and fixed with countersunk screws.
Thats all for now, back when the rotor shield is fitted
Hey man....I just ride 'em, I dunno what makes 'em work.
Woof woof woof !
Hi all,
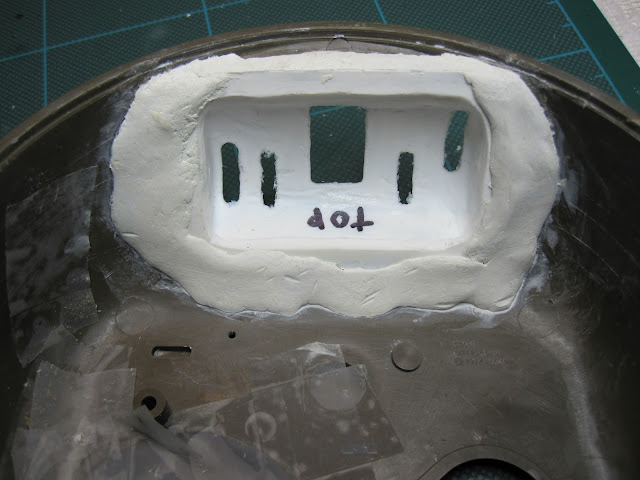
Rotor shield arrived so I got stuck straight in.
OUCH ! Thats a bloody big hole to cut out
Test fit looks OK, so I'll try to fix and fill over the weekend, but have to work tomorrow so not a good start.
BFN
Hey man....I just ride 'em, I dunno what makes 'em work.
Woof woof woof !
Here we go, held in position with super glue, then bonded it in on the inside with Milliput.
Apart from holding it in firmly, the Milliput pushed into the gaps around the edges, so when I filled those from the front with more Milliput a couple of hours later, it held in place and didn't fall through.
Sanded down when dry,a bit hard to get in along the bottom, but hoping that won't be too visible when the mantlet goes on.
Masked up the vision panels on the copula and sprayed up.
BFN
Hey man....I just ride 'em, I dunno what makes 'em work.
Woof woof woof !
looking good keep up the brilliant work
are you gonna have the speaker on ya oddball's tank i think that would look so good spark's
Woof Woof Woof
Derek
Thanks Delboy,
Yeah, there will be a loudspeaker on the turret, (not sure how or what I will make it from yet),
and I have a small mp3 player to go inside to play sound files from the film (see earlier in build log)
sparks
Hey man....I just ride 'em, I dunno what makes 'em work.
Woof woof woof !
Hi all,
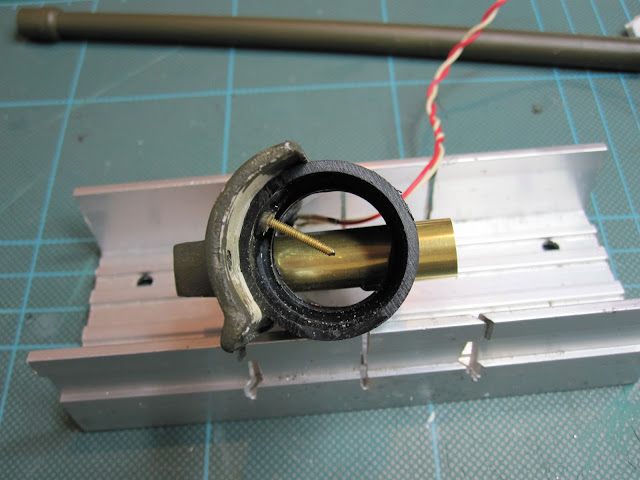
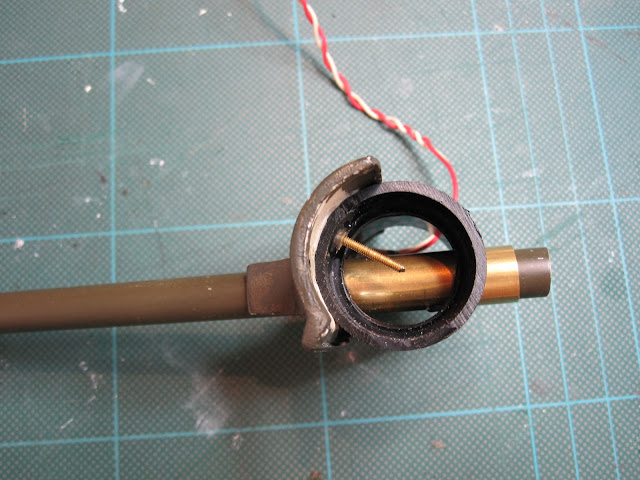
This weekend I had a go at the main gun elevation.
I've seen this pipe method used on other Sherman builds, but not seen how the mechanics of it worked, so this is my version.
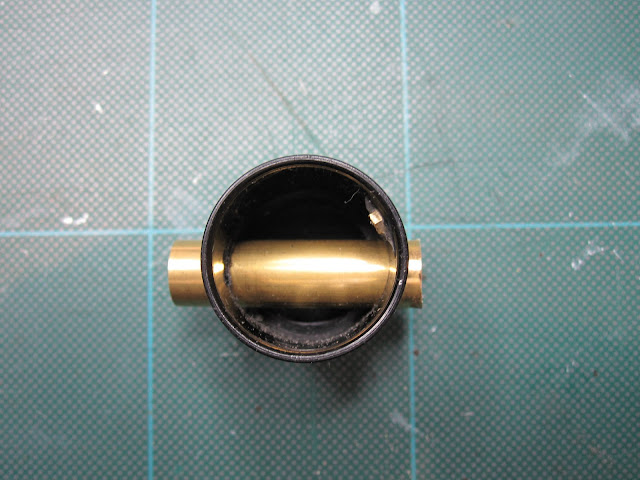
Being an electrician, I had pvc conduit in my store and found that a 25mm coupler was about the right diameter, so cut it down in length and clamped it to the gun mantlet. Drilled through the two moulded bolts and the gun opening on the mantlet into the pvc conduit to get the correct positions.Inserted a piece of 11mm OD brass tube to make the gun recoil (when I do it) smoother.
Used a couple of 10BA brass nuts and bolts to hold it together, fixed the mantlet direct to the conduit so that I could fix the nuts into place, as I knew it would be a promlem trying to fit them during assembly to the rotor shield.
Main gun fits and slides well.
My nuts are fixed Sounds painfull
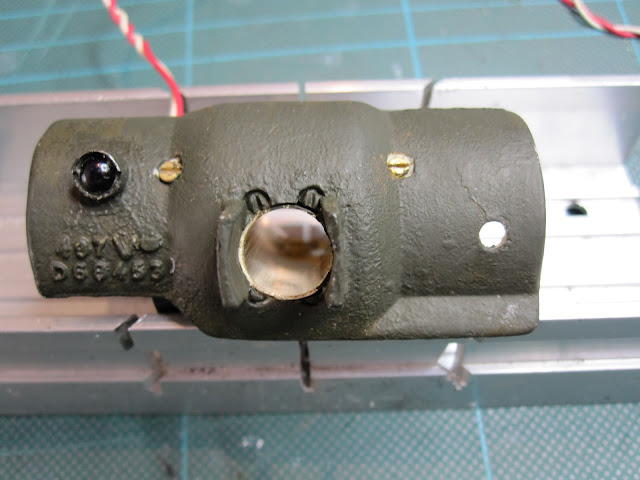
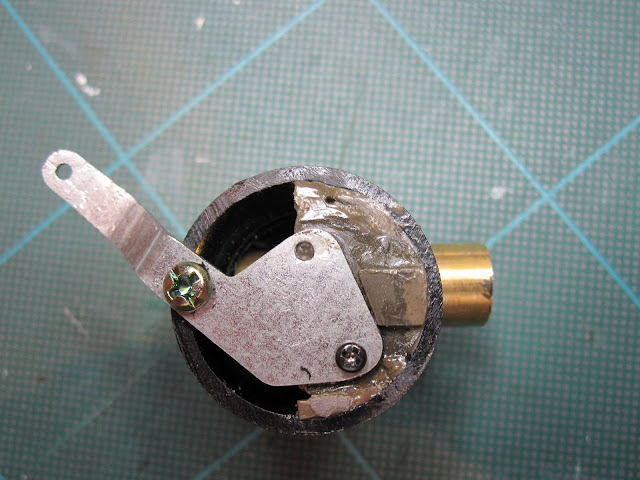
Decided to re-shape and use the original Tamiya elevation arm, already fixed to a semi circular pvc moulding. After trimming the moulding down and cutting out around the afore mentioned nut, I fixed into place with plastic weld. Filled in the gaps where the diameters were different with scraps of pvc and plastic welded them all together,then used a self tapping screw as extra fixing. Not pretty but very strong, it would take an 88 shell from a Tiger to blast them apart
Before assembly I re-fixed the machine gun that had to be removed when I stripped out the old elevation system.
Had to make some adjustments to the connecting rod, but all attached well.
Still needs some fine adjustment and may need to fix a stop on the elevation high point.
Never done this before, but for those who want to see, I uploaded a video clip th Utube.
Gun recoil next
BFN
Last edited by sparks on Tue Oct 11, 2011 9:55 pm, edited 2 times in total.
Hey man....I just ride 'em, I dunno what makes 'em work.
Woof woof woof !