Happy new year !
Thank you for you interest.
The following two posts are for the M3A3 Bradley CFV rear top hatch.
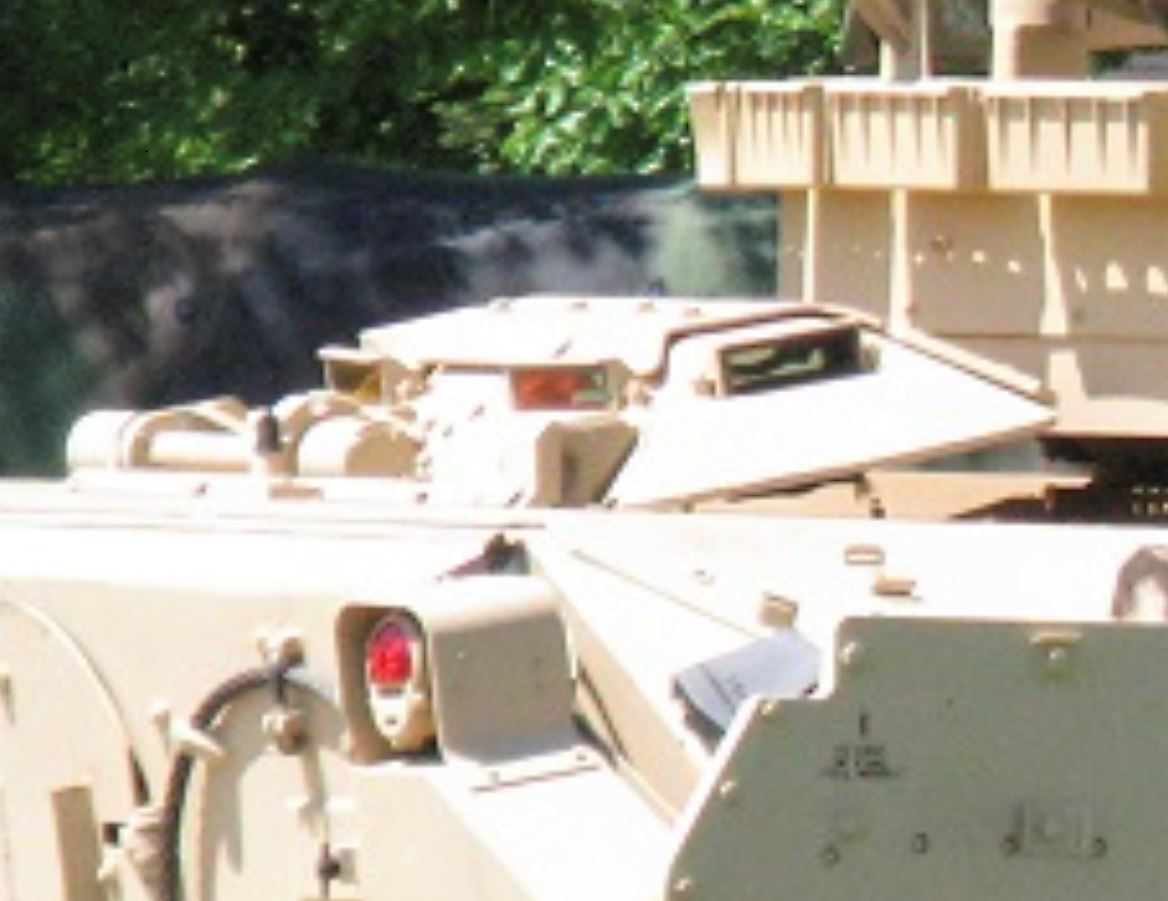
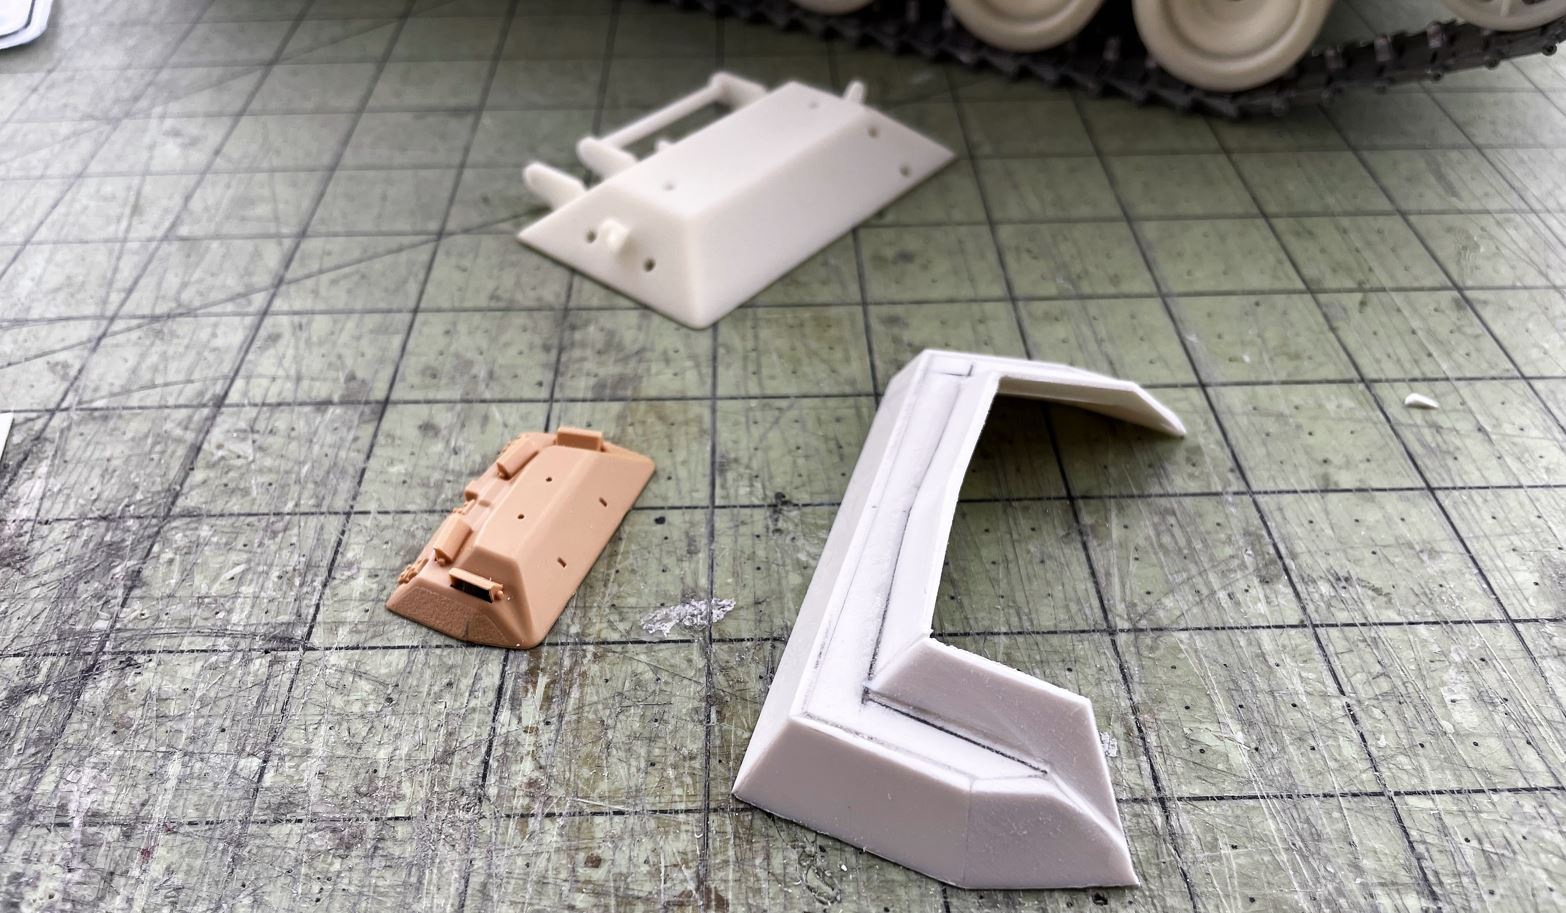
The M3A3 CFV has a totally different rear top hatch than other M2 IFV and M3 CFV versions. It is very difficult to find pictures of it. Being on top, photographers are not able to see or picture the hatch without climbing on the vehicle, something that very few people dare to do. Some pictures i have found were unclear and there even seems to be variations of it. Here we can see an M3A3 hatch with its 4 periscopes and add-on armor.
- M3A3 Bradley US Cavalry Fighting Vehicle - RC 1/16 Build
- Capture.JPG (92.66 KiB) Viewed 3935 times
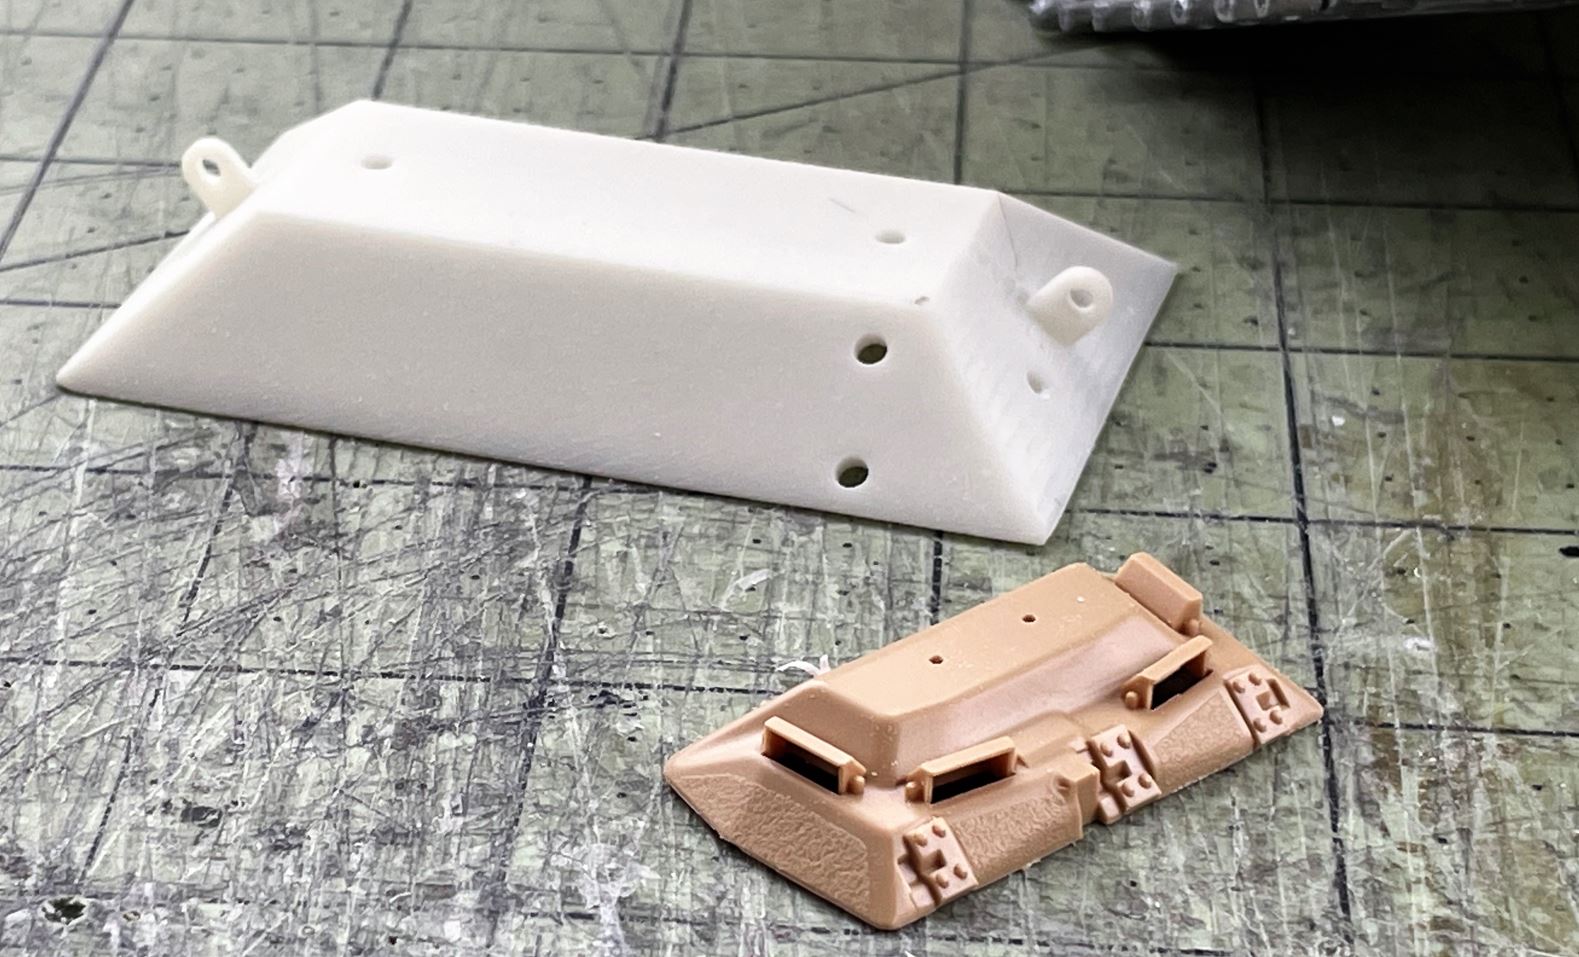
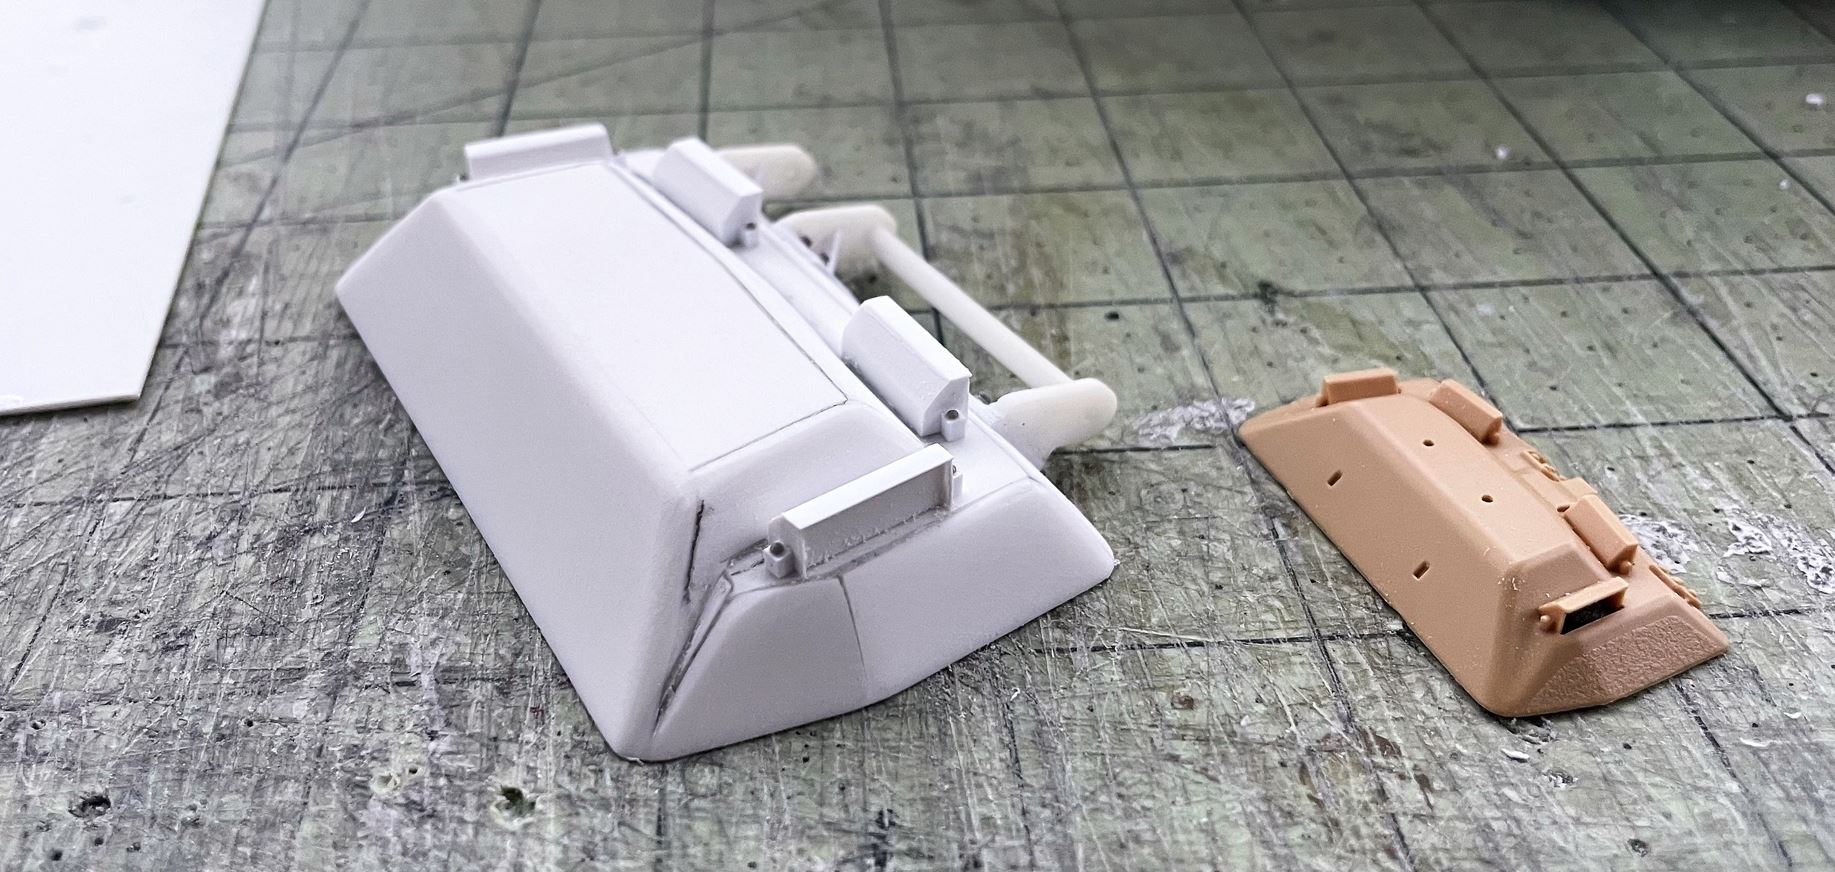
Do to the lack of available photographic evidences, i had to rely entirely on the Meng 1/35 M3A3 CFV model kit for reference on shapes and dimensions. The hatch has a complicated design, has rounded corners and lots of angles. Shown here next to the kit simpler M2A3 IFV hatch, which is too small by the way.
- M3A3 Bradley US Cavalry Fighting Vehicle - RC 1/16 Build
- Capture2.JPG (247.33 KiB) Viewed 3935 times
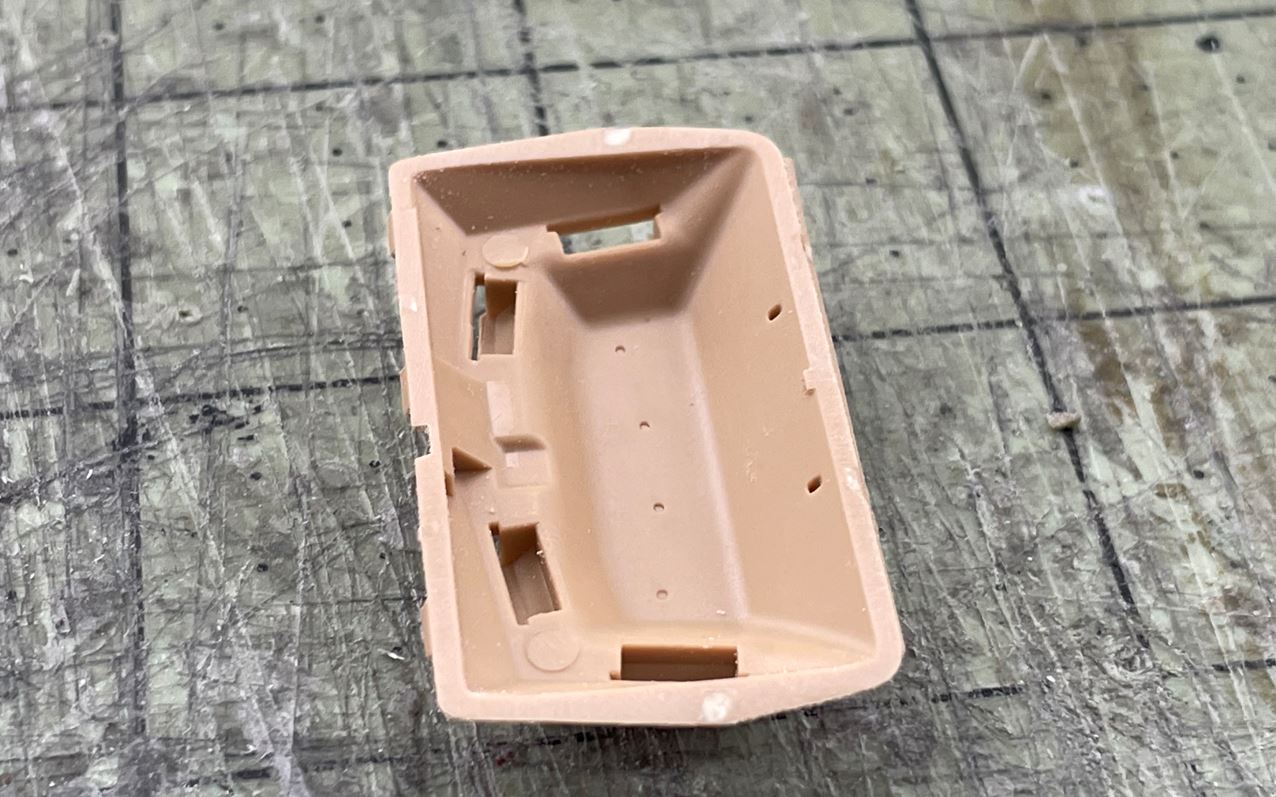
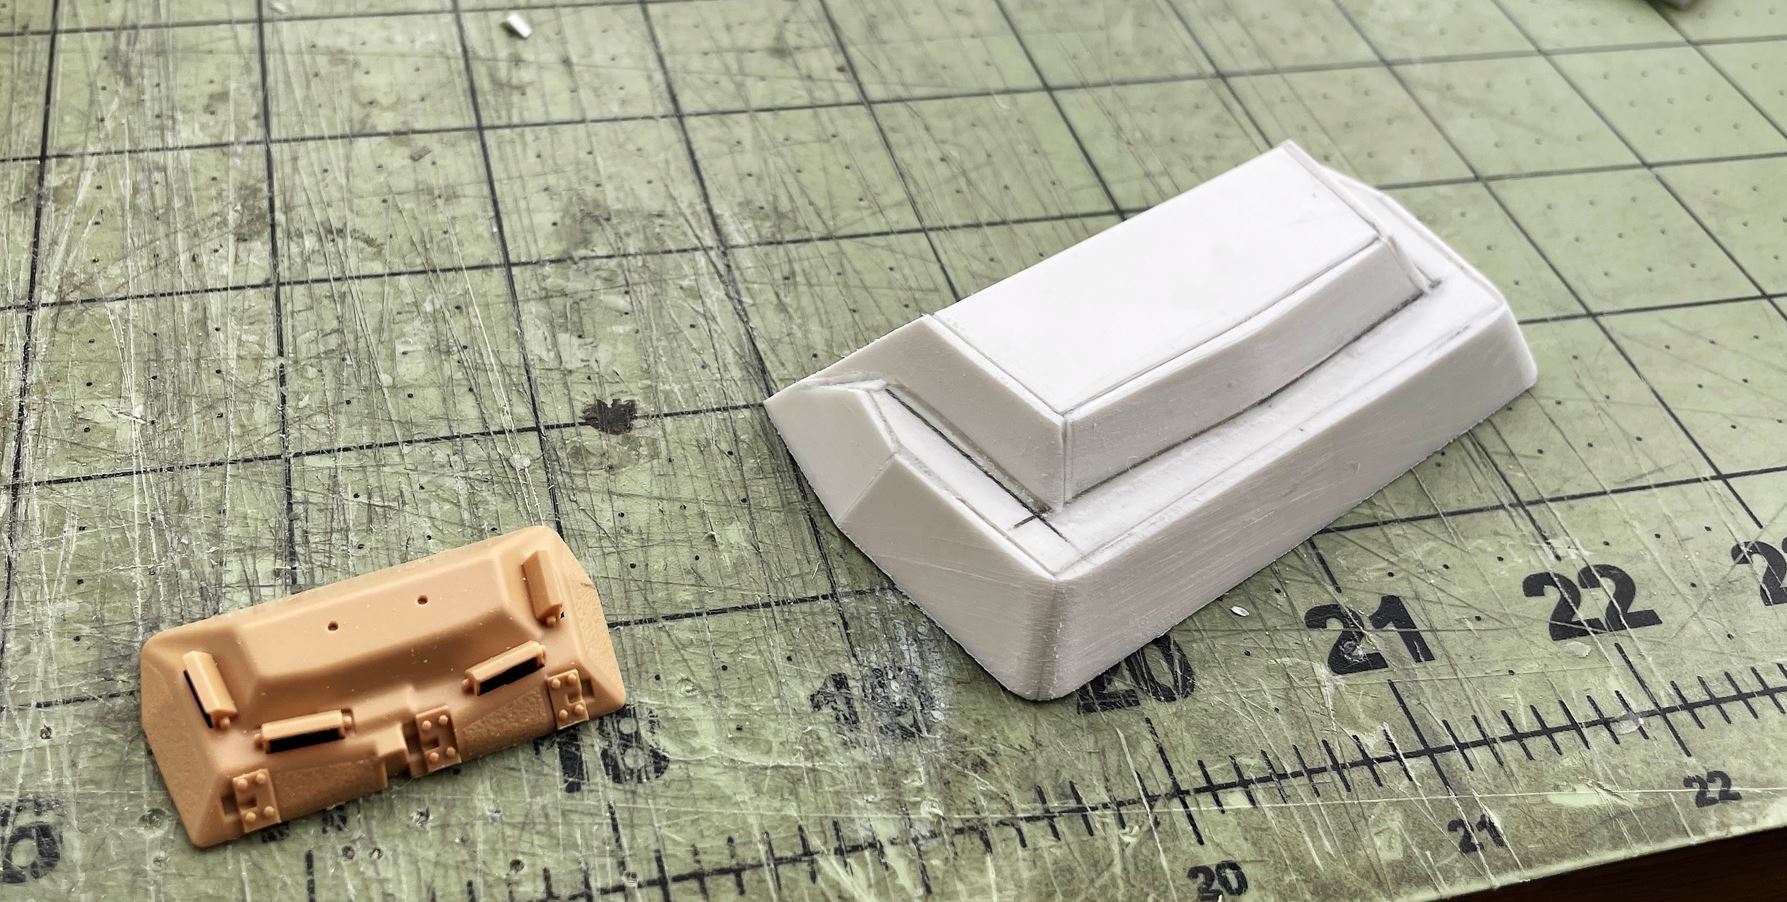
View of the inside of the hatch.
- M3A3 Bradley US Cavalry Fighting Vehicle - RC 1/16 Build
- Capture3.JPG (173.57 KiB) Viewed 3935 times
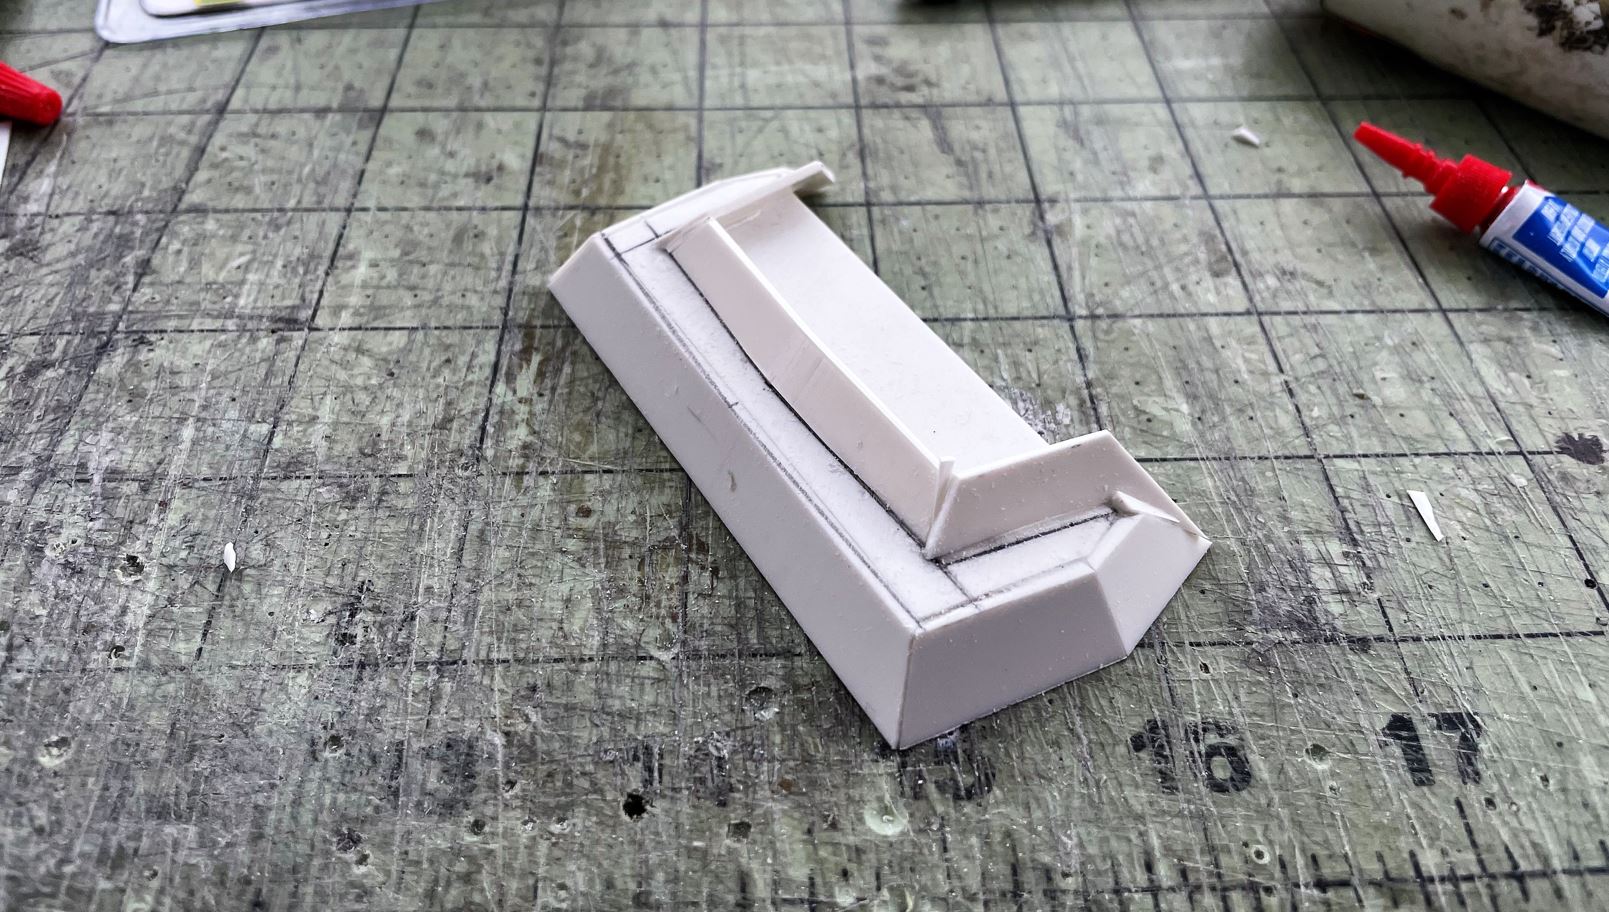
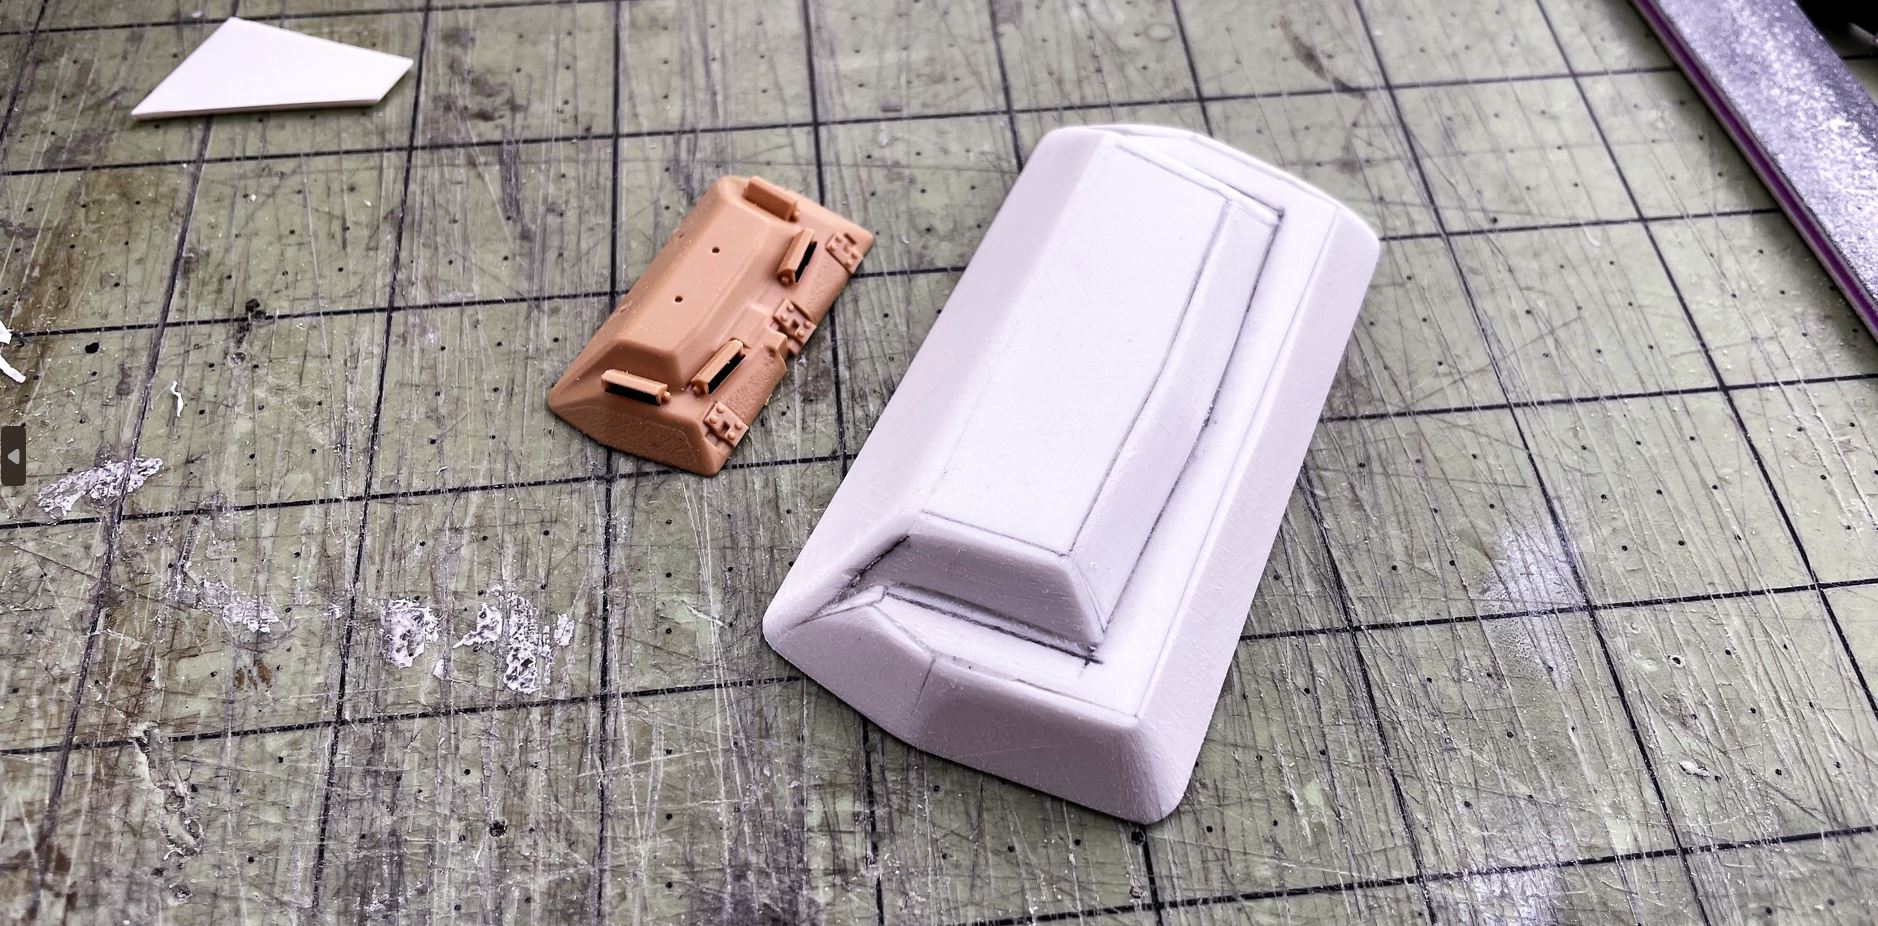
I started the scratch building by drawing a template and cut some parts. It is also important to dry fit it with the hull in order to adjust whatever need to be adjusted to fit the vehicle.

- M3A3 Bradley US Cavalry Fighting Vehicle - RC 1/16 Build
- Capture4.JPG (358.49 KiB) Viewed 3935 times
Telescopic scratch building of the basic shapes, starting at the bottom and going up.
- M3A3 Bradley US Cavalry Fighting Vehicle - RC 1/16 Build
- Capture5.JPG (312.11 KiB) Viewed 3935 times
Progressing. The hatch is built in 1.5mm plasticard which allows for the corners to be rounded later.
- M3A3 Bradley US Cavalry Fighting Vehicle - RC 1/16 Build
- Capture6.JPG (261.69 KiB) Viewed 3935 times
Slowly getting there. Its not perfect of course, but close enough to the original design.
- M3A3 Bradley US Cavalry Fighting Vehicle - RC 1/16 Build
- Capture7.JPG (319.1 KiB) Viewed 3935 times
- M3A3 Bradley US Cavalry Fighting Vehicle - RC 1/16 Build
- Capture8.JPG (385.81 KiB) Viewed 3935 times
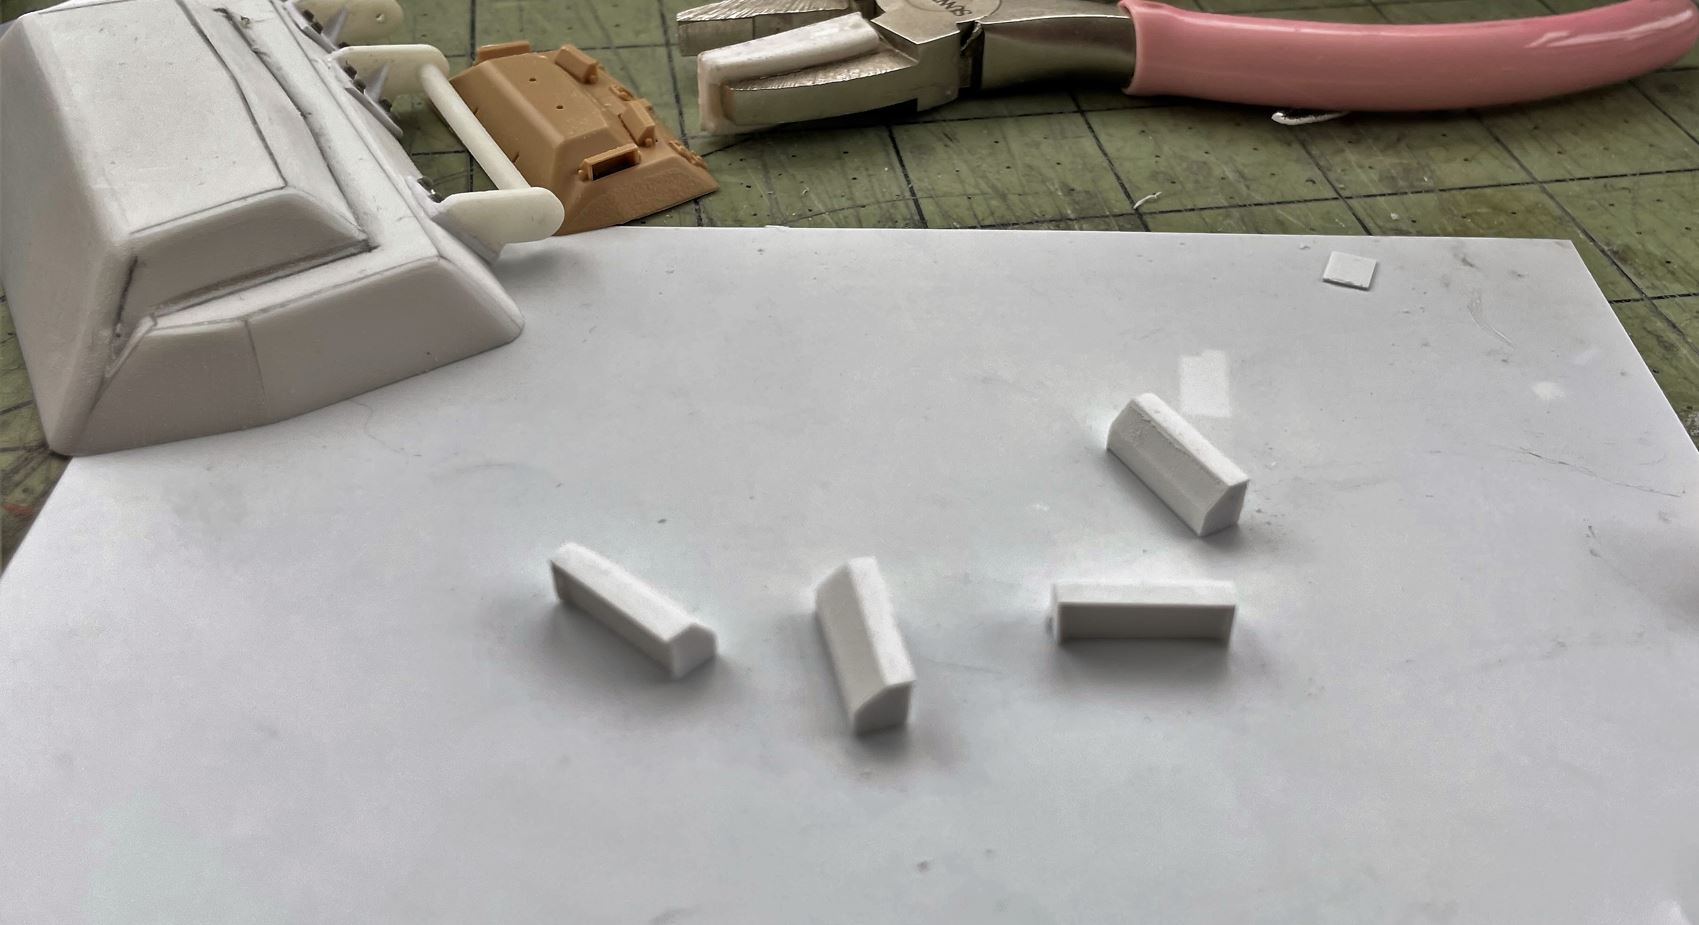
I used to be scared of creating periscope. What's available on the market, mainly WW2 periscopes, are never of the right dimensions. Periscopes core are easily created in 4mm thick plasticard, shaped with a nail file and augmented by a thin plasticard sheet for the guards.
- M3A3 Bradley US Cavalry Fighting Vehicle - RC 1/16 Build
- Capture9.JPG (137.66 KiB) Viewed 3935 times
Here, the hatch is getting close to completion. There are a few differences here and there with the Meng kit design, but this is the closest i could do with the time i wanted to spend on it, more or less 10 hours in total.
- M3A3 Bradley US Cavalry Fighting Vehicle - RC 1/16 Build
- Capture10.JPG (292.94 KiB) Viewed 3935 times
Continuing on following post


