I ended up slightly modifying the dozer blade design, and then re-printing the two halves. It took over 5 hours per half?? I did design it to be strong though, I tested one by placing it on the floor and then standing on it with one foot. It took my whole bodyweight and never broke.
Just need to print some infill sections and it will be good to primer, paint and assemble, I'll probably use plastic weld as that gives excellent strength on styrene, and reports on the web say that it works on PLA too.
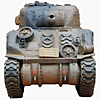
Kodiak AEV 3 Armoured Excavation Vehicle
-
wibblywobbly

- Major
- Posts: 6396
- Joined: Fri Oct 17, 2008 9:30 am
- Location: South Wales Valley
- Contact:
-
AlwynTurner

- 2nd Lieutenant
- Posts: 2656
- Joined: Thu Oct 23, 2014 10:47 am
- Location: Chapel-en-le-Frith, Derbyshire
Re: Kodiak AEV 3 Armoured Excavation Vehicle
Looks great Rob, well done. Seams ready for action? Alwyn
YOU'RE NEVER TOO OLD TO HAVE A HAPPY CHILDHOOD!
Saladin scratchbuild, Matilda scratchbuild, Churchill scratchbuild, Crusader scratchbuild, M10 Achiĺles scratchbuild, Universal Carrier scratchbuild
Saladin scratchbuild, Matilda scratchbuild, Churchill scratchbuild, Crusader scratchbuild, M10 Achiĺles scratchbuild, Universal Carrier scratchbuild
-
wibblywobbly
- Major
- Posts: 6396
- Joined: Fri Oct 17, 2008 9:30 am
- Location: South Wales Valley
- Contact:
Re: Kodiak AEV 3 Armoured Excavation Vehicle
Finally got the dozer blade all glued together and some filler in, need to sort out the operating mechanism at some point.
- Attachments
-
Tiger 1 Late
Panther G
King Tiger
M36 B1
Panther G
King Tiger
M36 B1
Re: Kodiak AEV 3 Armoured Excavation Vehicle
Looking good.
Plastic weld is great with PLA as it melts it so you get a very strong bond. In fact it'll be stronger then the layers of the thing you print.
Plastic weld is great with PLA as it melts it so you get a very strong bond. In fact it'll be stronger then the layers of the thing you print.
Last edited by Woz on Wed Apr 01, 2015 10:33 pm, edited 1 time in total.
-
billpe
- Warrant Officer 2nd Class
- Posts: 1144
- Joined: Tue Jan 29, 2013 1:59 pm
- Location: The bowels of Kent
Re: Kodiak AEV 3 Armoured Excavation Vehicle
Looking really quite good.
-
wibblywobbly
- Major
- Posts: 6396
- Joined: Fri Oct 17, 2008 9:30 am
- Location: South Wales Valley
- Contact:
Re: Kodiak AEV 3 Armoured Excavation Vehicle
I read that somewhere, what I tend to (and I do it on styrene builds too) is tack parts together with superglue, and then squirt plastic weld into the seams. Like you say, it makes any structure rock solid. Just need to be sure that the parts are where you want them when you squirt the stuff in, as it isn't coming apart afterwards without destroying everything.Woz wrote:Looking good.
Plastic weld is great with PLA as it melts it so you get a very strong bond. In fact it'll be stronger then the layers of the thing you print.
Superglue will hold PLA very well if it gets a good surface, but is useless on anything that is porous.
Tiger 1 Late
Panther G
King Tiger
M36 B1
Panther G
King Tiger
M36 B1
-
PainlessWolf

- Colonel
- Posts: 7883
- Joined: Sun Feb 26, 2012 9:09 pm
- Location: Southern Colorado Rocky Mountains
Re: Kodiak AEV 3 Armoured Excavation Vehicle
Good Afternoon,
You made everything work and this vehicle can stand beside anything out there and shine. Final paint, stowage and weathering should be a treat! Following along.
regards,
Painless
You made everything work and this vehicle can stand beside anything out there and shine. Final paint, stowage and weathering should be a treat! Following along.
regards,
Painless
...Money!? What's that!?...
-
AlwynTurner
- 2nd Lieutenant
- Posts: 2656
- Joined: Thu Oct 23, 2014 10:47 am
- Location: Chapel-en-le-Frith, Derbyshire
Re: Kodiak AEV 3 Armoured Excavation Vehicle
Looks superb Rob, well done. Alwyn 

YOU'RE NEVER TOO OLD TO HAVE A HAPPY CHILDHOOD!
Saladin scratchbuild, Matilda scratchbuild, Churchill scratchbuild, Crusader scratchbuild, M10 Achiĺles scratchbuild, Universal Carrier scratchbuild
Saladin scratchbuild, Matilda scratchbuild, Churchill scratchbuild, Crusader scratchbuild, M10 Achiĺles scratchbuild, Universal Carrier scratchbuild
-
HERMAN BIX

- Major-General
- Posts: 11905
- Joined: Sun Jan 12, 2014 12:15 am
- Location: Gold Coast,Australia
Re: Kodiak AEV 3 Armoured Excavation Vehicle
Thats a whole lot of good work Mr Wobbly.
I swear it could also look the part if it was painted 'New CAT Yellow' & badged accordingly !!
!!
Also impressed by the use of printed parts. Must give you guys with the right brains the ability to run amok with your imagination.
I swear it could also look the part if it was painted 'New CAT Yellow' & badged accordingly
Also impressed by the use of printed parts. Must give you guys with the right brains the ability to run amok with your imagination.
HL JAGDPANTHER,HL TIGER 1,HL PzIII MUNITIONSCHLEPPER, HL KT OCTOPUS,HL PANTHER ZU-FUSS,HL STuG III,HL T34/85 BEDSPRING,
HL PZIV MALTA,MATORRO JAGDTIGER,HL F05 TIGER,TAMIYA KT,HL PANTHERDOZER,HL EARLY PANTHER G,TAIGEN/RAMINATOR T34/76,
HL AN-BRI-RAM SU-85
HL PZIV MALTA,MATORRO JAGDTIGER,HL F05 TIGER,TAMIYA KT,HL PANTHERDOZER,HL EARLY PANTHER G,TAIGEN/RAMINATOR T34/76,
HL AN-BRI-RAM SU-85
-
wibblywobbly
- Major
- Posts: 6396
- Joined: Fri Oct 17, 2008 9:30 am
- Location: South Wales Valley
- Contact:
Re: Kodiak AEV 3 Armoured Excavation Vehicle
I had to mount the HL elevation unit right back by the battery box to clear the turntable motor. Due to the length of the arms inside of the hull this gave me about 5mm of lift at the dozer blade. The only solution was to print a new cam to go in the elevation unit that was 40mm high, I did this and araldited it in place.
I then printed a block that is screwed to the hull floor and used a very tight rubber band to pull the dozer arm onto the cam. I 'just' get enough movement at the blade to lift it clear of the ground, but it was touch and go.
The blade and assembly is very strong so hopefully it won't break anytime soon.
I now need to refine the electrics, get a decent signal to the three rx boards, and tidy up the spaghetti wiring inside the hull.
I toyed with the three way switch a while back, but wasn't getting a signal through it, this is something that I will have to work on. If it doesn't work out, I will just have to switch the crystals manually on the tx when I want to switch to using the excavator etc.
Tiger 1 Late
Panther G
King Tiger
M36 B1
Panther G
King Tiger
M36 B1
