Tamiya 1/35 1973 Vintage M41 Walker SCALE MODEL to RRC

Post all your Smaller Scale RC Tanks, Half Tracks and Vehicles, including build threads here. From below 1/18 to way down as far as you can go, H.O. 1/87th scale or less. Even your Smaller Scale figures are welcome here.
Post Reply
User avatar
modler
Sergeant
Posts: 503
Joined: Sat Feb 02, 2019 2:33 pm
Location: North Ridgeville Ohio USA

Tamiya 1/35 1973 Vintage M41 Walker SCALE MODEL to RRC

Post by modler »

This is the first SCALE MODEL to Radio Remote Control CONVERSION that I have featured here. I selected the M41 as it is a good one to start with if interested in this pursuit of "bringing the smalls to life" as I heard someone say here. Converting scale 1/35 military models like Tanks is very difficult. I have only managed to upgrade three 1/35 scale Tank models using non standard components (custom built gearbox or modified). It really takes too much time using that approach and the results usually are inferior as a tank drive has to be very robust or it breaks or slips.

The M41 has a factory upgrade option to SMM and I did that upgrade initially just because I had never done a Single Motor Motorized Switch On\Off control upgrade. Then that evolved into a DMM gearbox upgrade with low cost 2 channel radio setup keeping the On\Off switch from the first upgrade as a permanent hardware improvement but is not required for the next step to DSM2 upgrade.

Next step is DSM2 hobby grade radio setup with Transmitter mixing.
The battery supply voltage will also be changed to 2s 350mah lipo. It looks like this is a better way to go. 1s lipo as used in the Centurion MkIII and it works OK but involves modifications to the ESC wiring and connectors and I have determined it is not worth the extra work.

Left\Right tracking issues..
The major advantage of this Upgrade is Left\Right motor proportional trim control. When you add proportional throttle to a dual motor tank, a nonlinear issue of Left\Right tracking with respect to motor speed becomes apparent. The answer to this issue is digital proportional left\right trim on the left\right turn channel. The precise trim of a computer Transmitter is required to solve this issue. Nothing is more annoying than when a model Tank pulls to the left or right at different speeds. This issue is the reason I am upgrading all my Best Tanks to DSM2.

Note. The DSM2 Version 2 upgrade on the M41 will be different than the last DSM2 upgrade I did on the Centurion MkIII as that one used a external 2 channel mixer and a 1s lipo. This M41 DSM2 will use "Transmitter elevon mixing with a additional Throttle mix). This is a more advanced DSM2 upgrade but requires a DSM(X) computer Transmitter that has model memories. Also this upgrade Version 2 will use a 2s lipo.
I will be using an older Spektrum Dx6i that has been retired from aircraft duty.

Now onto the upgrade...
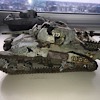
Experience in my modeling career helped me select this model for conversion. I have learned the hard way that converting the wrong tank model can lead to disappointment and failure and this is a problem for me as I always finish what I start. So without further ado, I present the Tamiya M41 Walker Bulldog as a prime candidate for conversion to RRC. Read on to find out why. 8|

This M41 SERIES NO.55 is a scale model non motorized kit however, it is available as a "motorized" kit and usually that means, it is a prime candidate for conversion to "motorized'" free running or if the proper gearbox is used, Radio Remote Control 2 channel :D

This kit has extra features with KEY PARTS which allow STANDARD CONVERSION TO MOTORIZED. That is a key element for conversion otherwise you have to engineer a interface between the drive axle and the drive sprocket(s). This is a key factor in the success of any model Tank motorized conversion. What does STANDARD CONVERSION mean? It means the drive sprockets use a standardized interface that works with both single motor motorized (SMM) and dual motor motorized (DMM) Tamiya gearboxes.

I got this tank including shipping for just shy of $20 (15.54 pound sterling). it was inventory of a former hobby shop and was in excellent condition including the box so this was a bargain in my eyes as I had everything in stock to do the conversion.

Below are pictures of motorized elements that are required for a successful motorized conversion of the M41.
Attachments
Hi\LOW axle mount SMM gearboxes. This is the major difference between the gearbox variants. 1G gearboxes (1962-68)  are other variants but are rare and rarely used. So the two types I show will fit most Tamiya Tanks and the drive sprockets of these The Hi mount GB (right) fits the M41.
Hi\LOW axle mount SMM gearboxes. This is the major difference between the gearbox variants. 1G gearboxes (1962-68) are other variants but are rare and rarely used. So the two types I show will fit most Tamiya Tanks and the drive sprockets of these The Hi mount GB (right) fits the M41.
IMG_4648.JPG (80.52 KiB) Viewed 1078 times
this pressed drive axle nut allows push on mount for drive sprocket. the nylon internal spacer (P2) that only comes with a motorized capable kit holds it on the axle with simple friction fit. It is a lovely design. This allows universal fit between drive axles and drive sprockets!
The standardized motorized drive sprocket will push mount of this sprocket mount and will be removable on this model but only if it has an motorized option otherwise the sprocket design is different and will not interface with standard Tamiya gearbox.
IMG_4644.JPG (67.68 KiB) Viewed 1080 times
If you see these openings on the chassis, it means this model has a SMM option and may also have a DMM option and may come with extra gearbox interface parts even as a non motorized model that will allow easy upgrade to motorized with the proper gearbox.
Standardized drive sprocket configuration which works and interfaces with ALL SMM, DMM Tamiya metal  HI\LOW mount drive axle gearbox.
Standardized drive sprocket configuration which works and interfaces with ALL SMM, DMM Tamiya metal HI\LOW mount drive axle gearbox.
IMG_4642.JPG (86.56 KiB) Viewed 1082 times
This motorized on\off switch control option is available with the M41, M42 Tamiya models. This one came to me by accident in a M113 APC purchase.
IMG_4632.JPG (66.18 KiB) Viewed 1082 times
outside view of that switch which would make this a motorized with on\off switch control.
IMG_4639.JPG (99.63 KiB) Viewed 1082 times
motorized bulkhead mount on\off switch that comes with the motorized option package.
Here are the additional parts required for conversion to motorized (SMM). Not shown in this picture is the on\off switch that comes with the motorized kit option package. Most of these SMM gearboxes use a Mabuchi RE-260 motor which is larger physically than the normal Mabuchi 140RH used in most DMM. Some DMM gearboxes use the more common 130 motors.
IMG_4631.JPG (92.25 KiB) Viewed 1082 times
The Tamiya M41 Series NO.55 is a prime candidate for conversion to motorized
Last edited by modler on Fri Feb 28, 2020 4:58 pm, edited 9 times in total.
User avatar
modler
Sergeant
Posts: 503
Joined: Sat Feb 02, 2019 2:33 pm
Location: North Ridgeville Ohio USA

Re: Tamiya 1/35 1973 Vintage M41 Walker SCALE MODEL to RRC

Post by modler »

Ok in this conversion, we will be using a dual motor motorized gearbox which will interface with the drive sprockets that are included in this NO.55 M41 kit.

I could use a SMM gearbox as well and that is what I did initially but I think there is probably more interest in the DMM conversion and that is what we are doing here so here we go.

Since I had a M41 SMM kit for this model, I used and wired the factory on\off switch so mine will use that with the DSM2 upgrade we are doing here but is not required. I just like to have the factory switch in my models and always use them if available.

My DMM gearbox has been wired with two female micro JST connectors so they can connect to the male ESC connectors. I showed how to wire the twin ESC's in the link below
viewtopic.php?f=33&t=29237.

NOTE: Male\female connectors go by the pin type not connector type so I will have to revise this connector info bellow..Sorry, my mistake..

One Esc will connect to the left motor and the other to the right motor. So 3 connectors total on the DSM2 package.
2 male micro JST ESC outputs, 1 output per motor.
1 female micro JST battery input (note: later in this thread, I convert the twin battery female JST inputs to one female JST input)
2 female micro JST motor inputs from ESC 1 and ESC two.

I have a standard for JST connectors.
Anything usinging a input including battery input voltage uses a female JST
Anything that produces and output voltage uses a male JST.
so in summation, outputs are male JST, inputs are female JST.

It is best to follow these standards to avoid damage to electronics when connecting things in building block configuration style that I use. I will only explain this here as I can not repeat it over and over as explaining this stuff takes up a lot of time.
So it would be a good idea to order the micro JST connectors (I order 100 at a time) as it makes everything interchangeable and standardized for mix and match of building blocks. I know it is a bit advanced methodology but after 43 years of doing this it is the only way I can work with this stuff and answer question and correct issues, it requires a standard method ;)

to be continued..
Attachments
this is the finished setup ready to be installed. It can use 4 to 6 ni-mh cells as well as 2s lipo.
Ok that's better and I will elaborate how that was done in the next installment. we will eliminate another connector (4to3) and use some tape to stack the ESC's and RX together plus I will explain my wire connections and how I terminate 3 wire connections and wire insulation techniques using heat and clear tape.
IMG_4678.JPG (94.26 KiB) Viewed 1066 times
This M41 radio bay is quite small so the DSM2 setup is going to be condensed even more so that it will fit the M-41 radio bay. One way to do that is to convert the ESC battery inputs to a single connector and stack the circuit boards and secure with clear tape. I will dedicate a section later in this thread explaining how that is done and also some wiring techniques I use that are quick and effective for use in RRC work.
IMG_4661.JPG (92.55 KiB) Viewed 1066 times
very small and very simple 3 connector radio setup. This setup uses serial motor wiring which works very well but has one drawback. no neutral steering function.
IMG_4660.JPG (80.88 KiB) Viewed 1066 times
Gearbox removed and old radio gear removed. Factory on\off with wiring will be reused in the next radio setup. Since it is all micro JST with I\O connection\wiring standard practices, it's basically plug and play.
IMG_4656.JPG (77.48 KiB) Viewed 1066 times
This setup actually works very well but we are taking it to the next level here you all.
This gearbox has been upgraded to 8 tooth brass pinion gears so it is all metal  gears in a metal gearbox. Has a very nice metallic sound.
This gearbox has been upgraded to 8 tooth brass pinion gears so it is all metal gears in a metal gearbox. Has a very nice metallic sound.
IMG_4652.JPG (92.1 KiB) Viewed 1066 times
this very simple radio system which is basically a on\off 2 channel will be replaced with a hobby grade DSM2 setup with programmable Tx with elevon mixing, fully proportional throttle with 5 channels, parallel wired motors each with a ESC. Able turn proportional with proportional speed  and neutral steering or spin in place.
this very simple radio system which is basically a on\off 2 channel will be replaced with a hobby grade DSM2 setup with programmable Tx with elevon mixing, fully proportional throttle with 5 channels, parallel wired motors each with a ESC. Able turn proportional with proportional speed and neutral steering or spin in place.
Last edited by modler on Sat Feb 29, 2020 3:25 pm, edited 2 times in total.
User avatar
modler
Sergeant
Posts: 503
Joined: Sat Feb 02, 2019 2:33 pm
Location: North Ridgeville Ohio USA

Re: Tamiya 1/35 1973 Vintage M41 Walker SCALE MODEL to RRC

Post by modler »

I have been running the M41 with the updates shown here and I have to say it is now my best 1/35 scale Tank. It is smooth and can cruise very slow or very fast thanks to its 2s lipo upgrade. I programmed limits of the voltage available to the 3v motors as there is now 7.2 v available (under load) which is more than twice the voltage requirement for the motors. I have it set to about 60% power and that just gets the motors warm after a good run but seems OK.
The digital trims allows tracking tweaks on the fly and is way more enjoyable being able to trim those problems away in just a few seconds :D
I am now thinking I will update the Version 1 DSM2 upgrade on the Centurion MkIII to Version 2. This includes upgrading from 1s to 2s.
Attachments
With the radio gear finalized, I will now finish the assembly of this model. I run a power on LED in all my RRC because if you leave it on accidently, it can kill the Lipo permanently.
IMG_4716.JPG (72.44 KiB) Viewed 1007 times
Oh, this is lipo I will be using in this Tank now, 500 mah 2s.
IMG_4721.JPG (83.49 KiB) Viewed 1007 times
I think I like this battery location better.
IMG_4715.JPG (69.8 KiB) Viewed 1007 times
2s 350mqh fits the bay quite nicely. This is lipo location option one. A nice benefit of using a lipo is they hold their charge for a long time when inactive.
Since this lipo has a JST, and adapter will be added to interface to my micro JST battery connector.
IMG_4707.JPG (74.71 KiB) Viewed 1031 times
Now that is tight but there is still room for a 350mah 2s lipo
The M41 has a smaller radio bay than the larger Centurion MkIII so radio gear had to be condensed  to the next level.
The M41 has a smaller radio bay than the larger Centurion MkIII so radio gear had to be condensed to the next level.
IMG_4713.JPG (77.79 KiB) Viewed 1031 times
User avatar
jimbo_wa
Corporal
Posts: 380
Joined: Fri Dec 21, 2018 3:55 pm
Location: Cambridge, UK

Re: Tamiya 1/35 1973 Vintage M41 Walker SCALE MODEL to RRC

Post by jimbo_wa »

Is there no end to your collection! You say you live in an apartment,but there has to be 16 rooms full of unbuilt and rare models as you keep pulling great things out of your hat!!

Keep them coming, and if you have a good reference source of the vintage motorised kits available, please will you post it up? The Tamiya site doesn’t have any of your kits listed and ScaleMates is a bit hit and miss on their search function...


Sent from my iPad using Tapatalk
User avatar
modler
Sergeant
Posts: 503
Joined: Sat Feb 02, 2019 2:33 pm
Location: North Ridgeville Ohio USA

Re: Tamiya 1/35 1973 Vintage M41 Walker SCALE MODEL to RRC

Post by modler »

jimbo_wa wrote:Is there no end to your collection! You say you live in an apartment,but there has to be 16 rooms full of unbuilt and rare models as you keep pulling great things out of your hat!!

Keep them coming, and if you have a good reference source of the vintage motorised kits available, please will you post it up? The Tamiya site doesn’t have any of your kits listed and ScaleMates is a bit hit and miss on their search function...


Sent from my iPad using Tapatalk
Hey jimbo, Yes I have amassed a large collection of motorized tanks over the years. I think the best place to find them is ebay. I have one for sale there now. The prices go and down depending what time of the year. best search words there are "Tamiya motorized remote control" That will bring up dozens most anytime. They are not cheap but it is supply and demand and sometimes the supply is greater than the demand and that is when I buy. I am modfly09 there.

I am still trying to figure out Scalemates. It is hard to figure out anything there but when I have the time I navigate and try to add a model to my "stash". So far I have managed to get one in the stash lol
Attachments
Prices are down on ebay at this time.
Post Reply

Return to “Smaller Scale Military.”