Puma Sd.Kfz. 234/2 Metal Origin 1:16 WIP

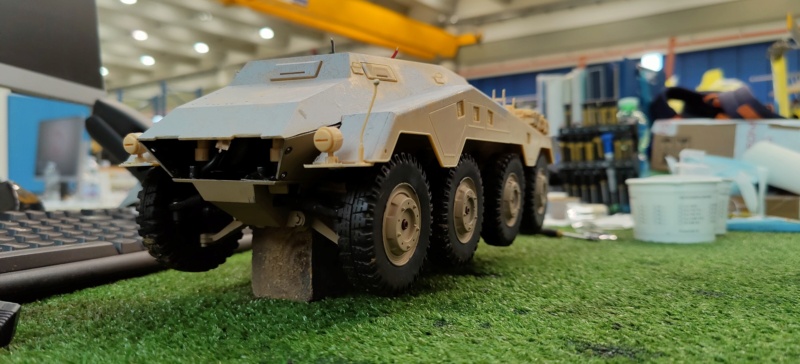
This section is for builds that are not strictly Tamiya or Heng Long. For instance, replacing the electronics from a WSN or Matorro, or even a scratch-build.
User avatar
jhamm
Staff Sergeant
Posts: 968
Joined: Fri May 19, 2017 7:21 am
Location: Germany
Contact:

Re: Puma Sd.Kfz. 234/2 Metal Origin 1:16 WIP

Post by jhamm »

Hi Fabio,
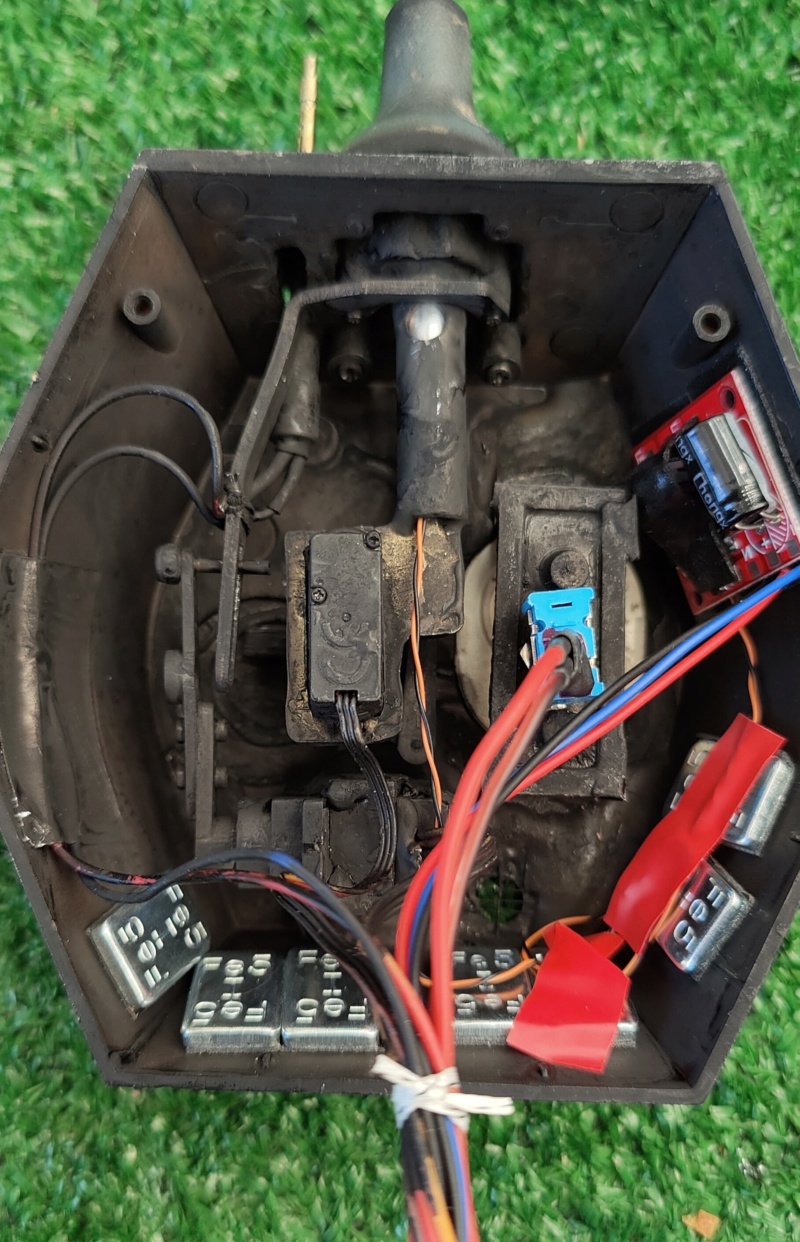
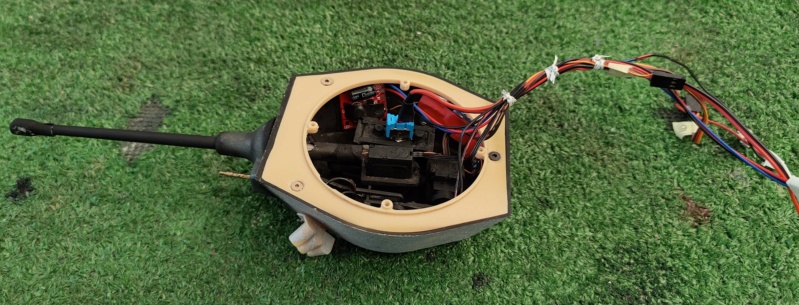
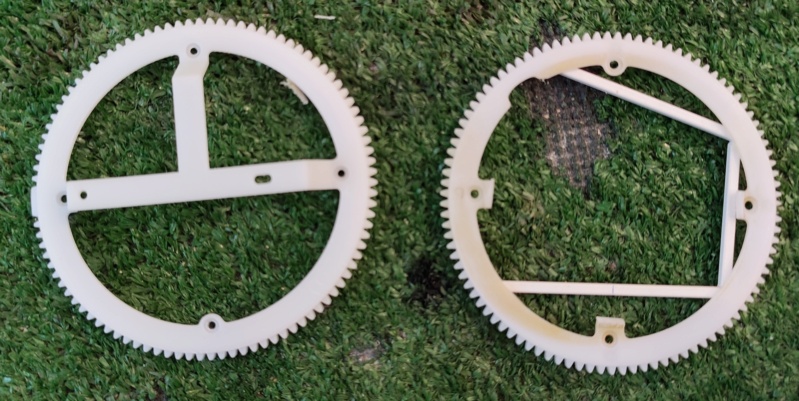
i replace the rotation Unit of my Puma because the motor is too weak or the gear reduction is too low...
use then a small gearmotor like this:
s-l500.jpg
s-l500.jpg (24.35 KiB) Viewed 2482 times
it works perfectly and use half of space
Met5
Corporal
Posts: 262
Joined: Fri Jan 13, 2017 5:08 am
Location: Rome, Italy

Re: Puma Sd.Kfz. 234/2 Metal Origin 1:16 WIP

Post by Met5 »

Image

Old version (black) & new version (white).

the new version works perfectly and fits into the hull without interfering with the transmission or engine:

Image
User avatar
EAO
Warrant Officer 2nd Class
Posts: 1162
Joined: Sun May 10, 2020 5:29 pm
Location: Central Missouri, U.S. of A.

Re: Puma Sd.Kfz. 234/2 Metal Origin 1:16 WIP

Post by EAO »

Met5,

Always loved the Puma. Man that's a lot of parts! Talk about complex, about as much as the real thing!

Beautifully painted figures too! That is going to be one awesome project when done! :clap: :thumbup:

Cheers,
Eric.
"You can always tell a German, you just can't tell him much." Anonymous.

German cars, German girls, German beer, German firearms, German Shepherds, German motorcycles... Not necessarily in that order though!

UP THE IRONS!
Met5
Corporal
Posts: 262
Joined: Fri Jan 13, 2017 5:08 am
Location: Rome, Italy

Re: Puma Sd.Kfz. 234/2 Metal Origin 1:16 WIP

Post by Met5 »

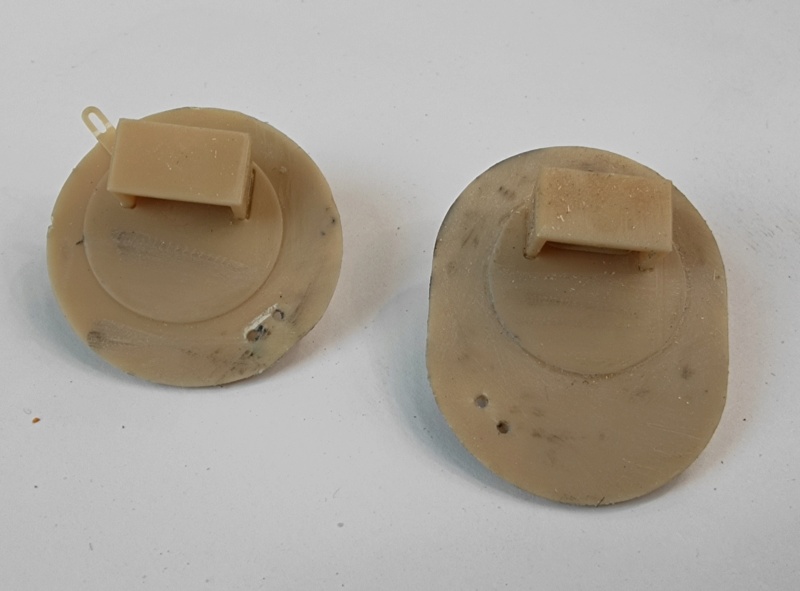
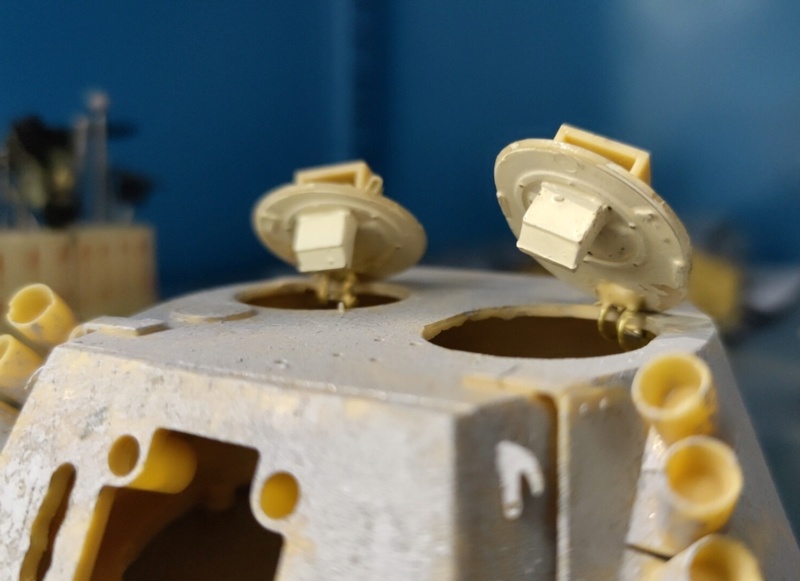
After the winter holidays we resume hostilities with the Puma. Let's start with the hinges. We restore the hatches by removing the external hinges and cleaning from traces of glue:

Image

We build the hinges:

Image

They are installed and:

Image

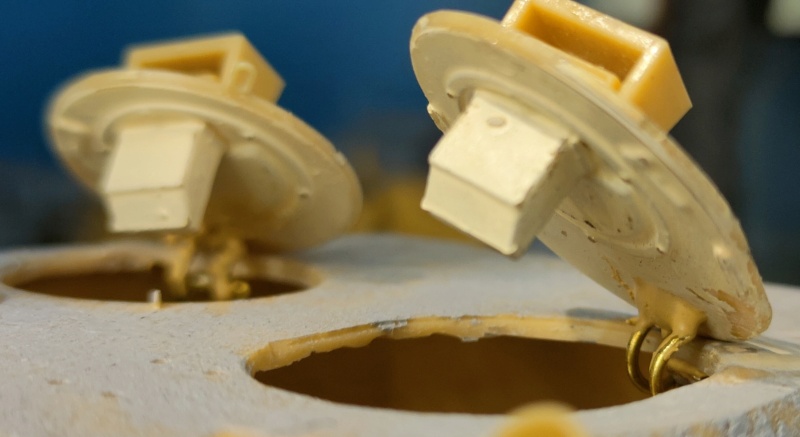
They do not open.....

Image

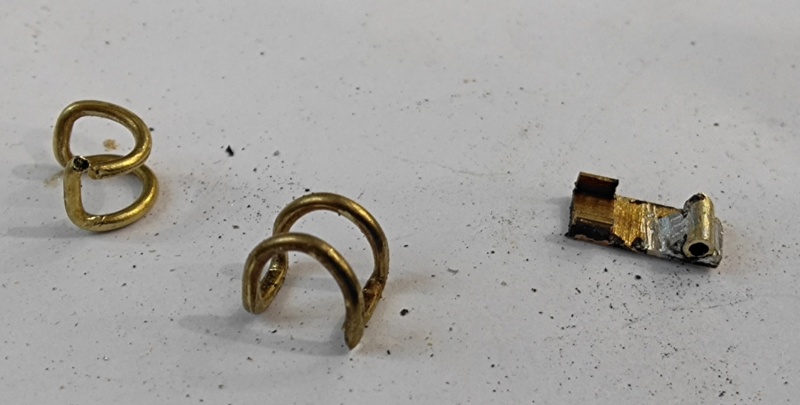
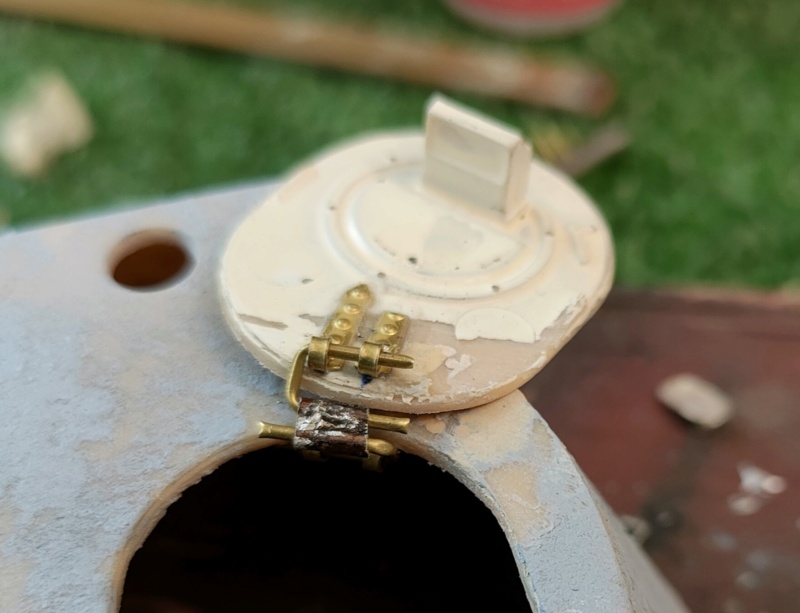
We switch to U-profile hinges (the first production had a C as an arch). But the situation is not improving. The shot is refined and we move on to an articulated hinge:

Image[/urlImage

A finishing touch: end-of-stroke bushings
Image

Now we are definitely there:


Then we move on to the construction of the recoil of the piece:

Image

Image

Self-supporting structure: the sleeve inside which the piece slides supports the frame that holds the servo:

Image

Image

Image

Do not forget the space for the flash wires

Image

Here it is in action:


The test boxes are very useful for these tests

Then he built the support for the ignition switch of the vehicle, which will also support the foreman:

Image

Image

That is all for the moment. We go slow it's true, but at zero tolerance this is the best we can do: lol !:
Met5
Corporal
Posts: 262
Joined: Fri Jan 13, 2017 5:08 am
Location: Rome, Italy

Re: Puma Sd.Kfz. 234/2 Metal Origin 1:16 WIP

Post by Met5 »

Aware of the fact that every three steps forward we take two steps back to Patrie Officine, we face the challenges head on with straight back, back shoulders and high forehead.

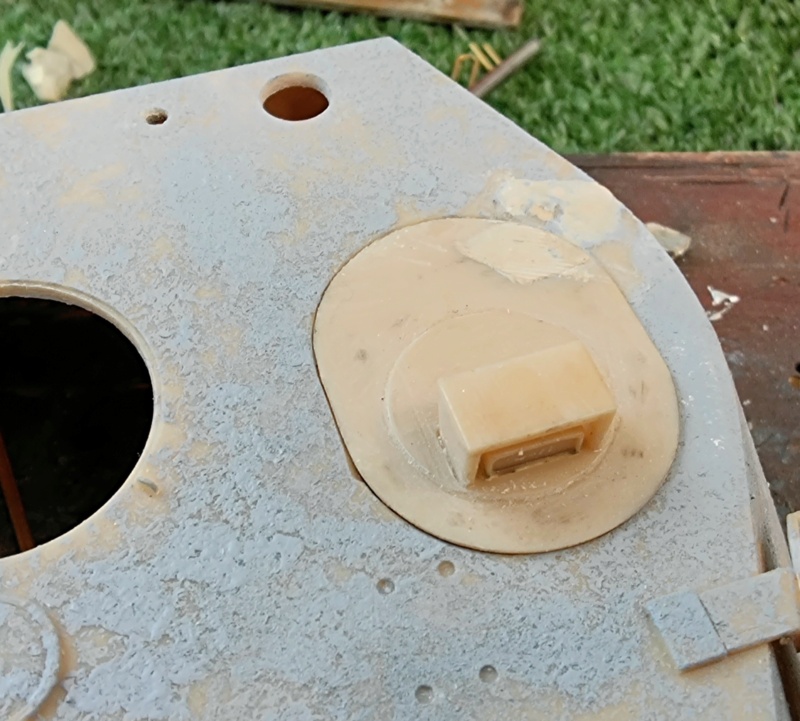
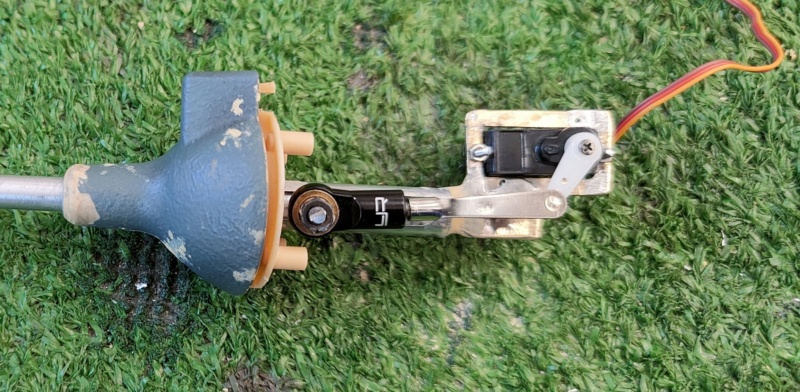
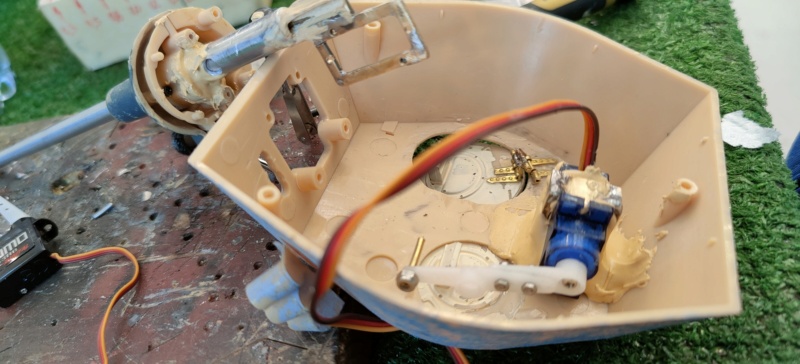
Let's see how the elevation system works. Franciscan, simplistic but the space available is limited and we must be satisfied:


Let's put it on the hull and see:


the servo drive is always given by the test box. The Elmod has servo speed adjustment, we should be able to have a realistic drive


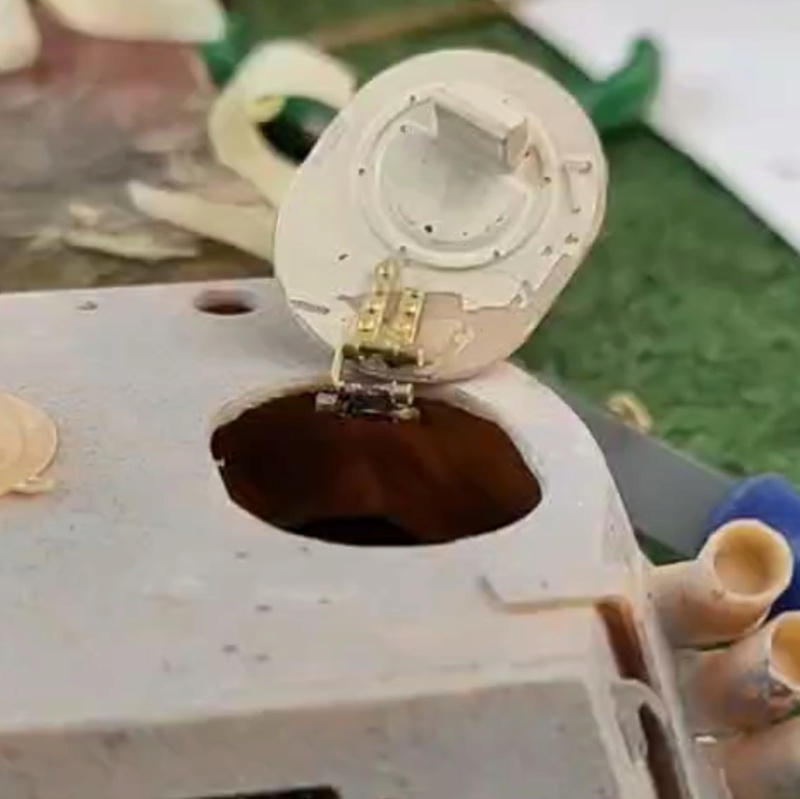
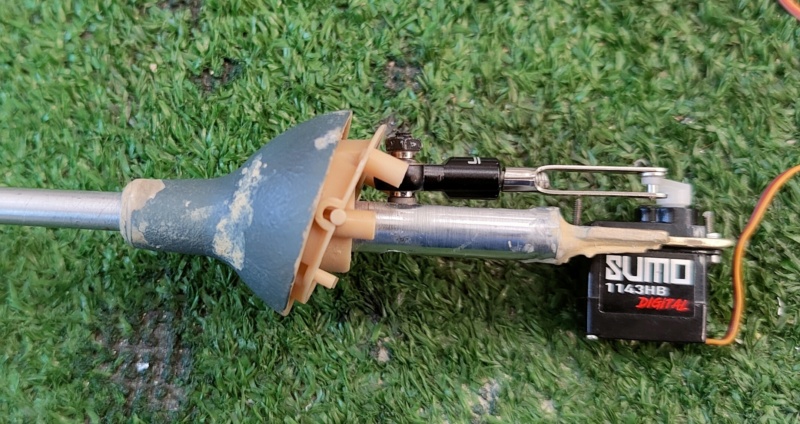
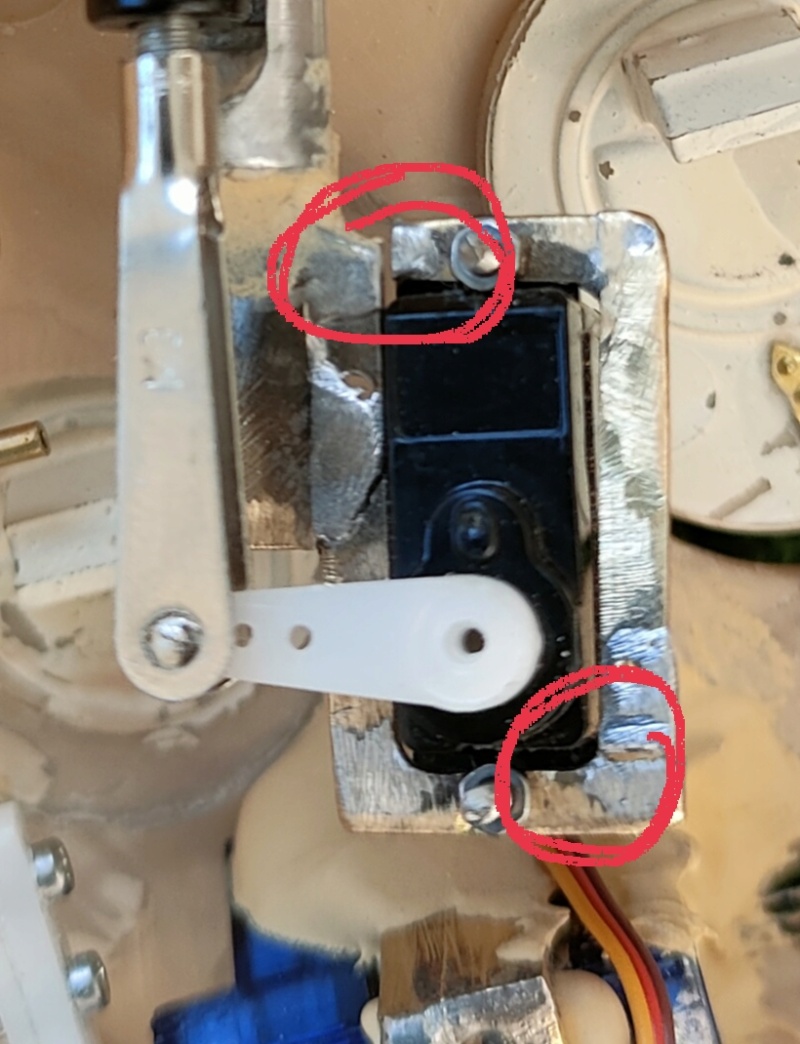
At the end stops there is a small oscillation of the barrel caused by a play in the rotation mechanism (a tilting plastic hinge). It would be enough to limit the travel of the servo and not let it reach us. But we prefer to take everything apart and investigate. At least let's try to improve:

We proceed to consolidate the installation of the sleeve inside which the piece slides and we try to improve the installation of the hinge:

Image

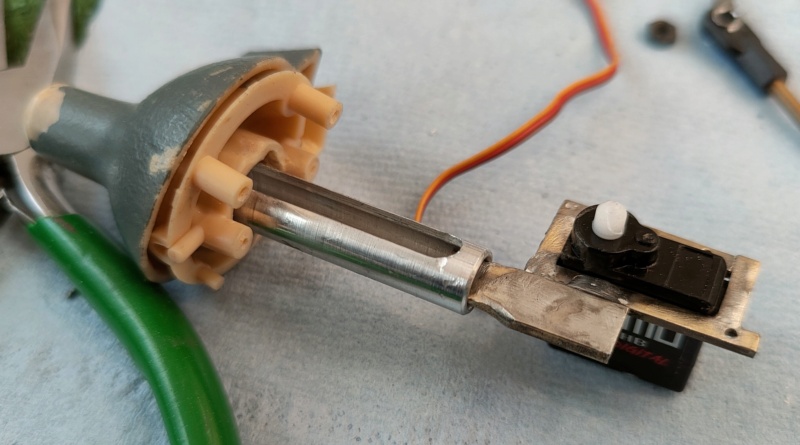
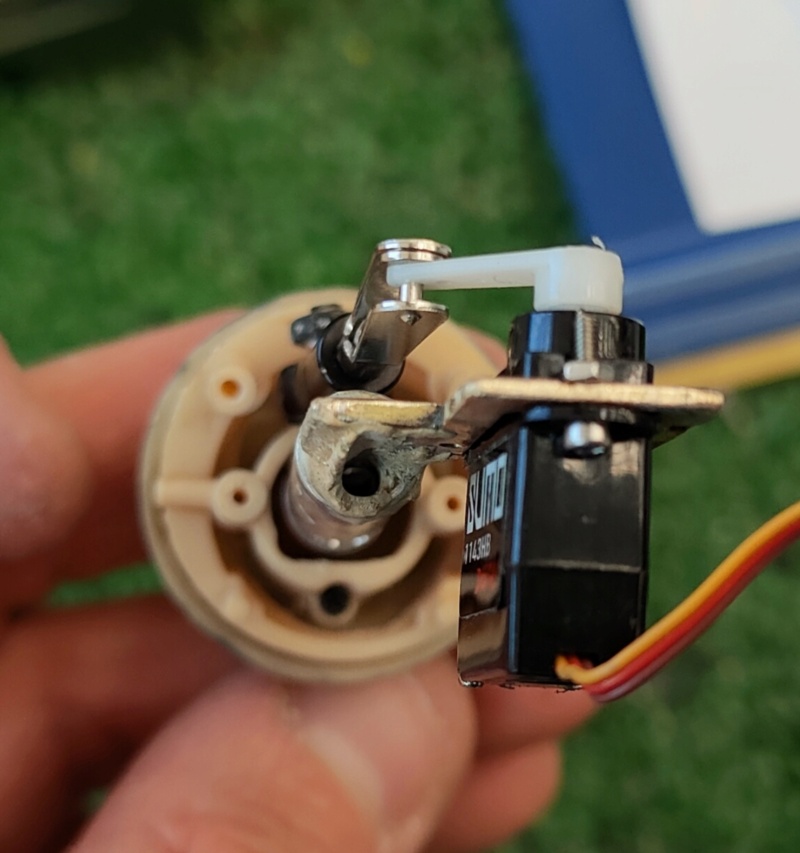
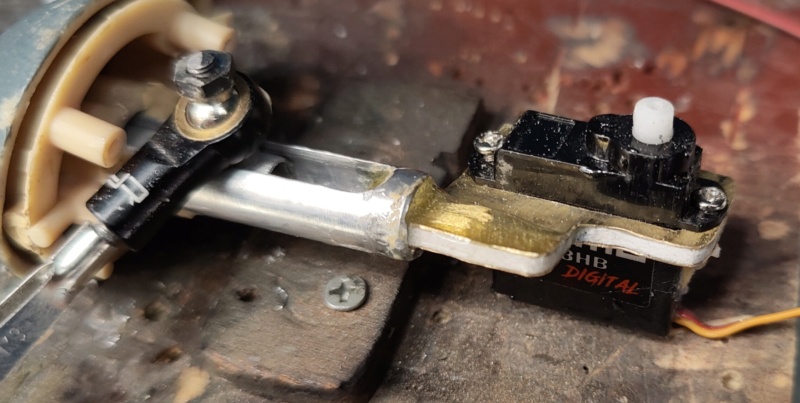
During reassembly, two tin welds of the recoil servo support fail:

Image

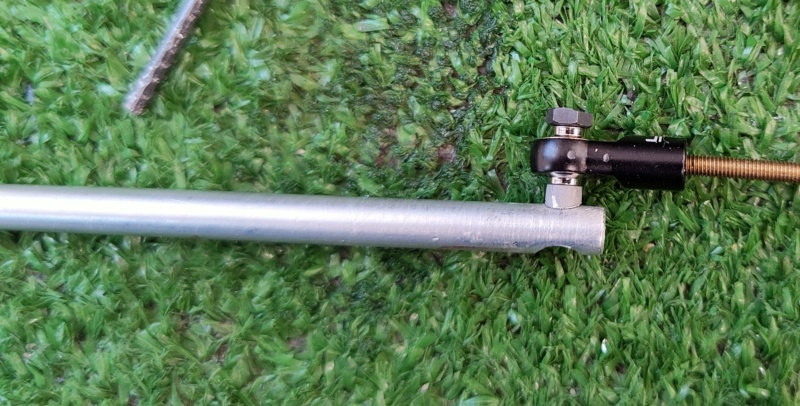
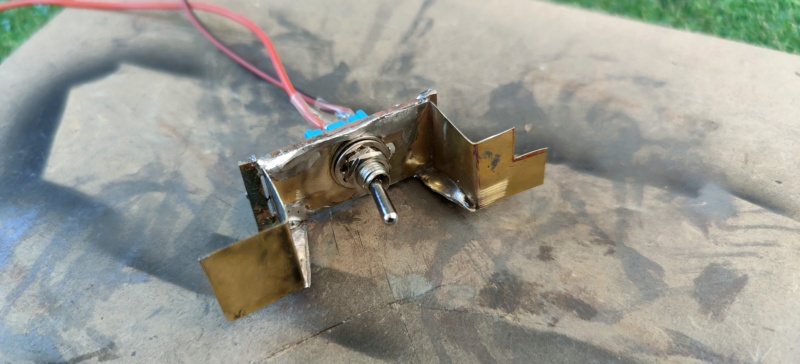
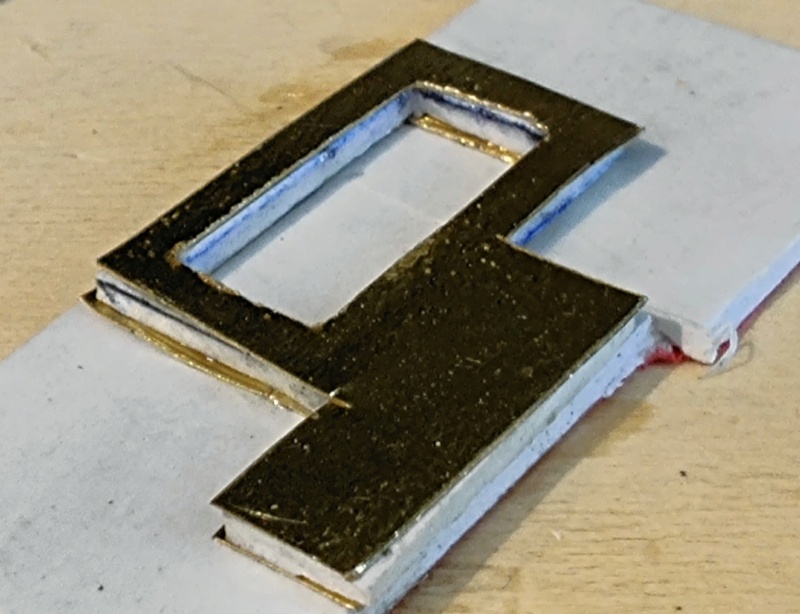
After the initial discomfort, a new support is made, a sandwich structure: brass, plastic, brass. All glued with two-component epoxy:

Image

Image

It may not be beautiful, but it is solid as a rock and cost nothing.

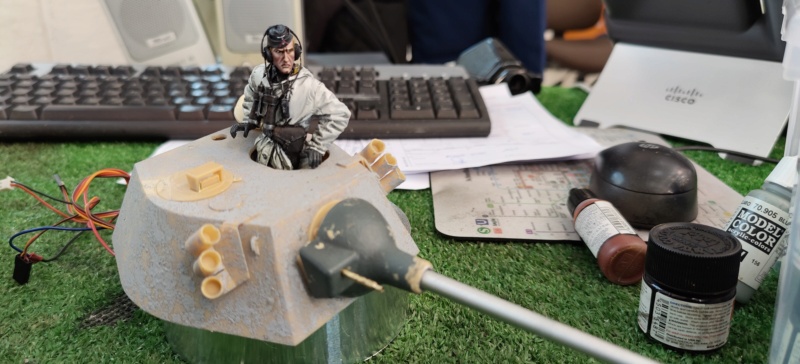
The support for the commander is installed, the coaxial machine gun is installed:

Image

The upper magnets

Image

It seems born to be there:

Image

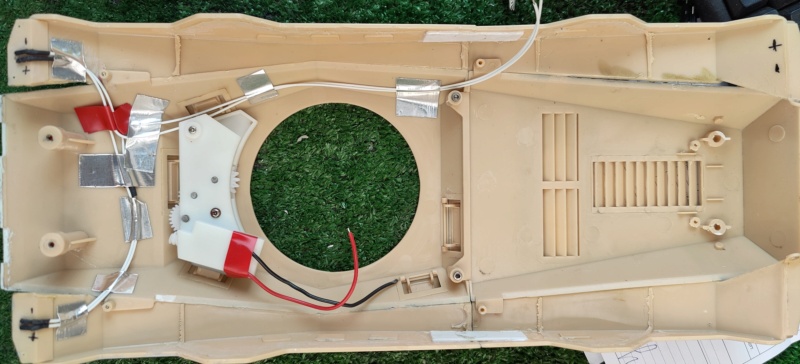
Now we proceed with the internal painting of the turret, then it is up to the internal LEDs of the turret and the power button

Have a nice weekend
User avatar
EAO
Warrant Officer 2nd Class
Posts: 1162
Joined: Sun May 10, 2020 5:29 pm
Location: Central Missouri, U.S. of A.

Re: Puma Sd.Kfz. 234/2 Metal Origin 1:16 WIP

Post by EAO »

That's coming along nicely! Fabulous engineering! :thumbup:

Cheers,
Eric.
"You can always tell a German, you just can't tell him much." Anonymous.

German cars, German girls, German beer, German firearms, German Shepherds, German motorcycles... Not necessarily in that order though!

UP THE IRONS!
Met5
Corporal
Posts: 262
Joined: Fri Jan 13, 2017 5:08 am
Location: Rome, Italy

Re: Puma Sd.Kfz. 234/2 Metal Origin 1:16 WIP

Post by Met5 »

Thanks Eric, a track for who will build it after me
Met5
Corporal
Posts: 262
Joined: Fri Jan 13, 2017 5:08 am
Location: Rome, Italy

Re: Puma Sd.Kfz. 234/2 Metal Origin 1:16 WIP

Post by Met5 »

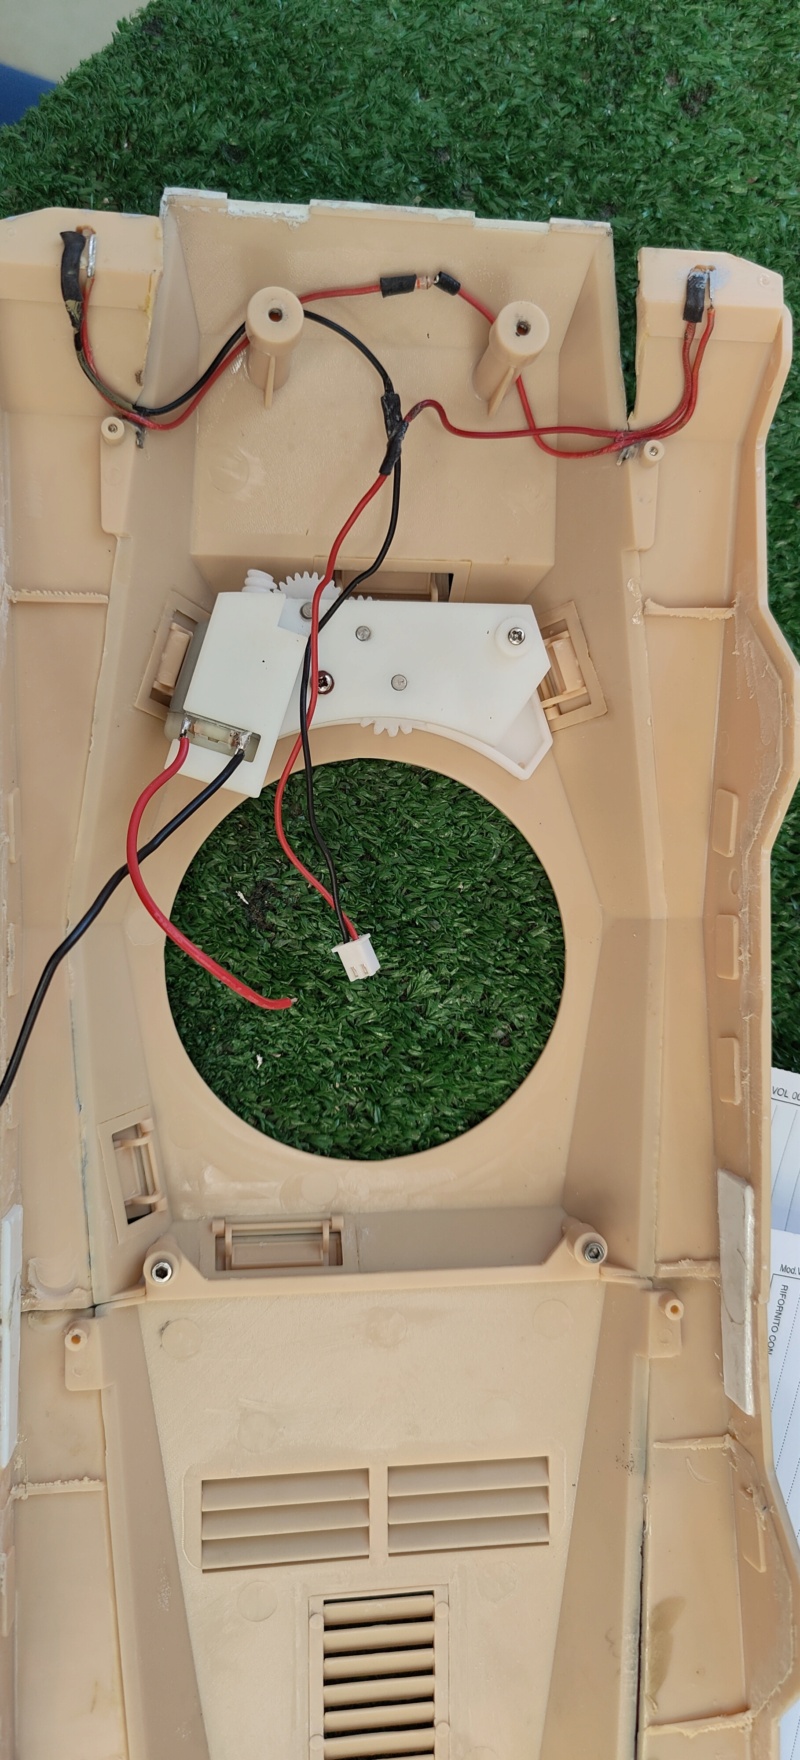
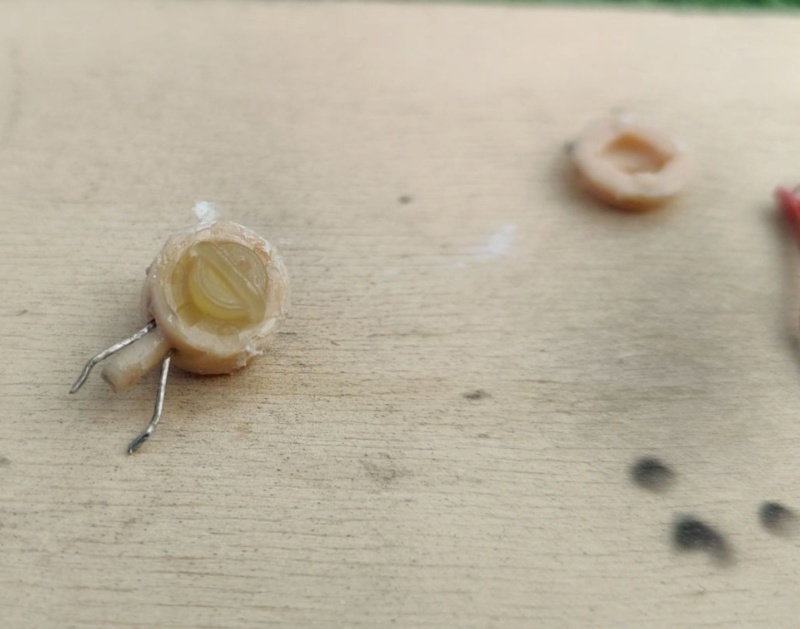
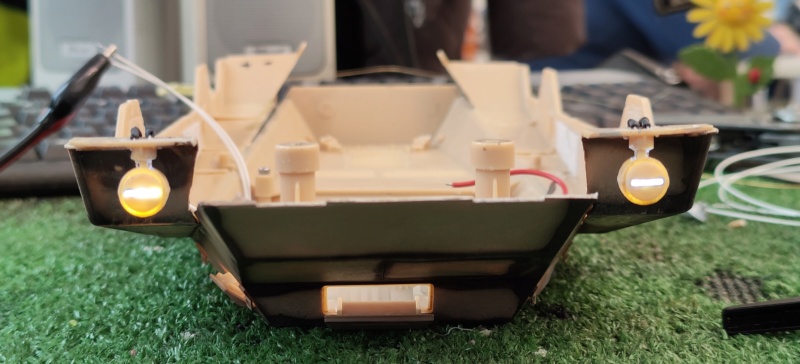
Let's start by studying the electrical system of the headlights. I see something that doesn't fit me.......

..... Not only are the LEDs put in series, there is also a resistance between the two. I try to feed them. They run on 2 volts, one burns out during the test. All that remains is to remove them and replace both LEDs.....

....Led so never seen. While we are reproducing the internal parables......

Image

Image

Image

Image

Image
Met5
Corporal
Posts: 262
Joined: Fri Jan 13, 2017 5:08 am
Location: Rome, Italy

Re: Puma Sd.Kfz. 234/2 Metal Origin 1:16 WIP

Post by Met5 »

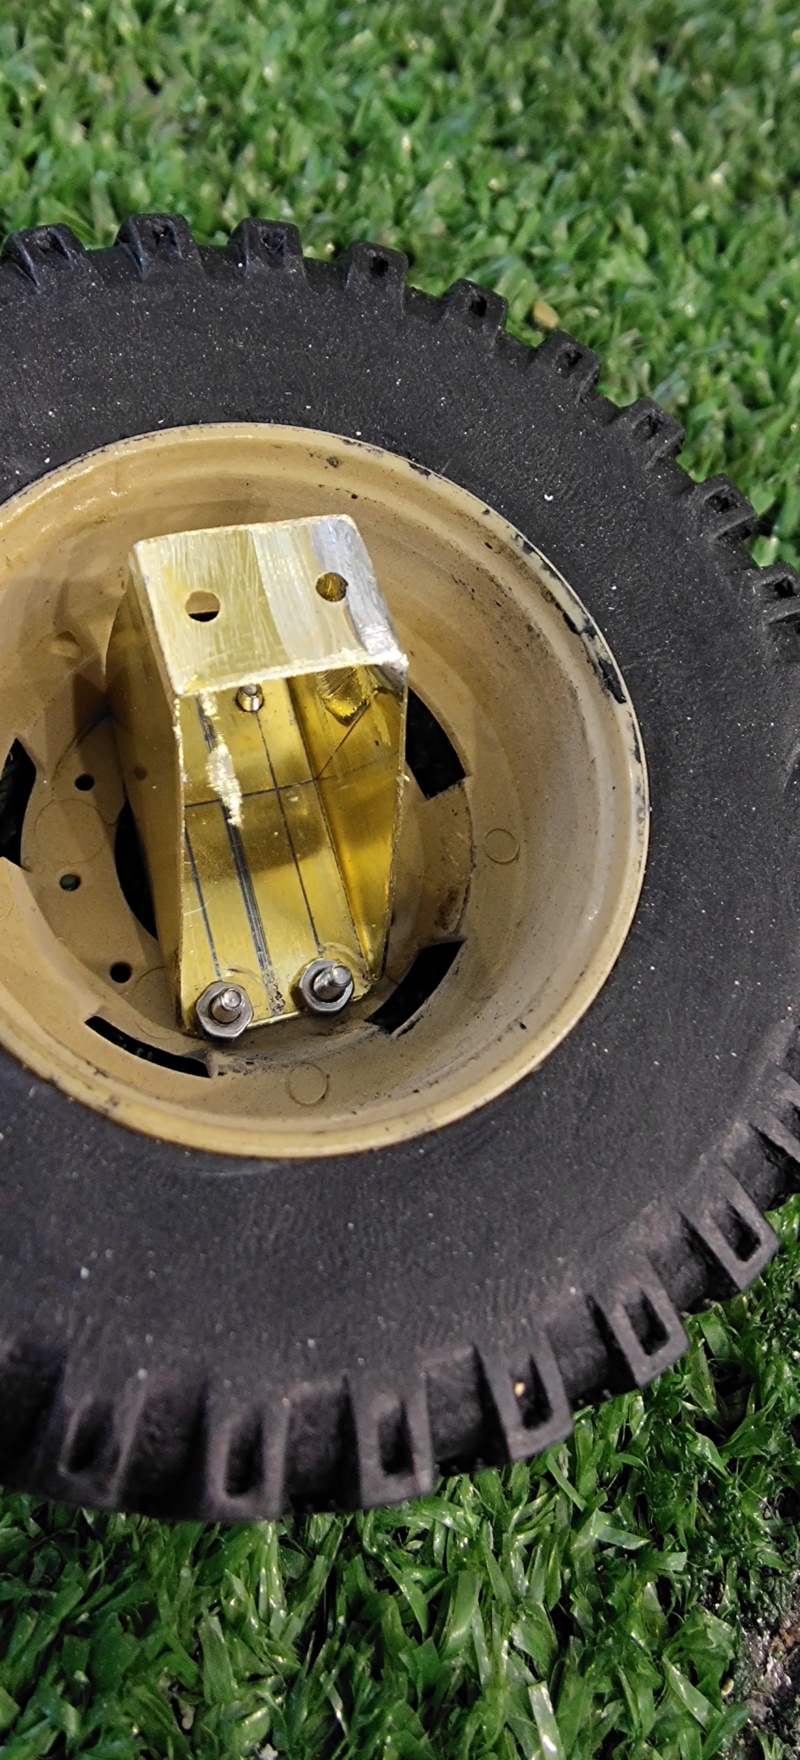
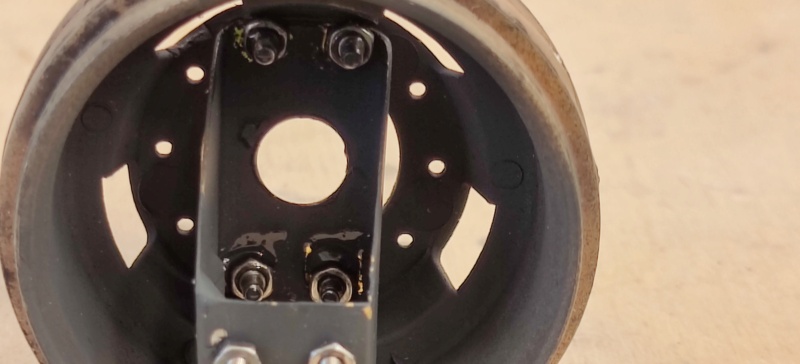
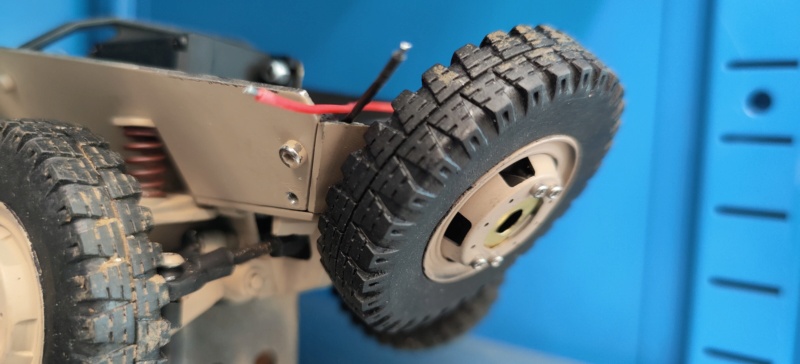
Spare wheel installation: The previously built support is installed with nuts and bolts:

....And with nuts and bolts it is installed on the frame. The brass support maintains a certain elasticity which should guarantee resistance to future impacts.....

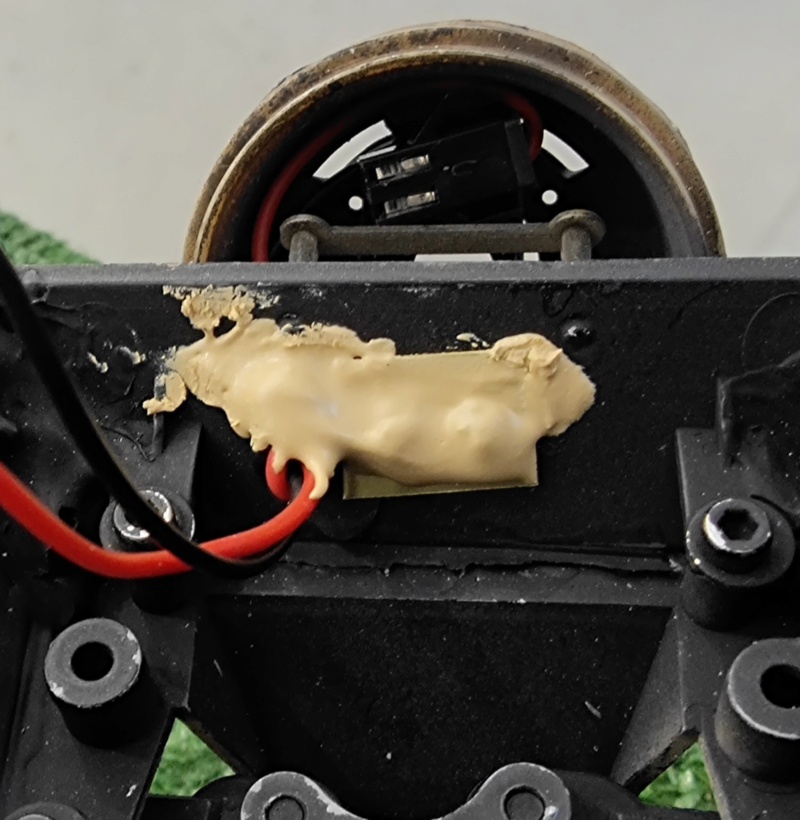
.....There is no space for a wall charging point, we will have a flying charging point.....

....when not necessary, the connector is worthily concealed in the spare wheel rim:

Image

Image

Image

Image

Image

Image
Met5
Corporal
Posts: 262
Joined: Fri Jan 13, 2017 5:08 am
Location: Rome, Italy

Re: Puma Sd.Kfz. 234/2 Metal Origin 1:16 WIP

Post by Met5 »

Let's move on to the turret:

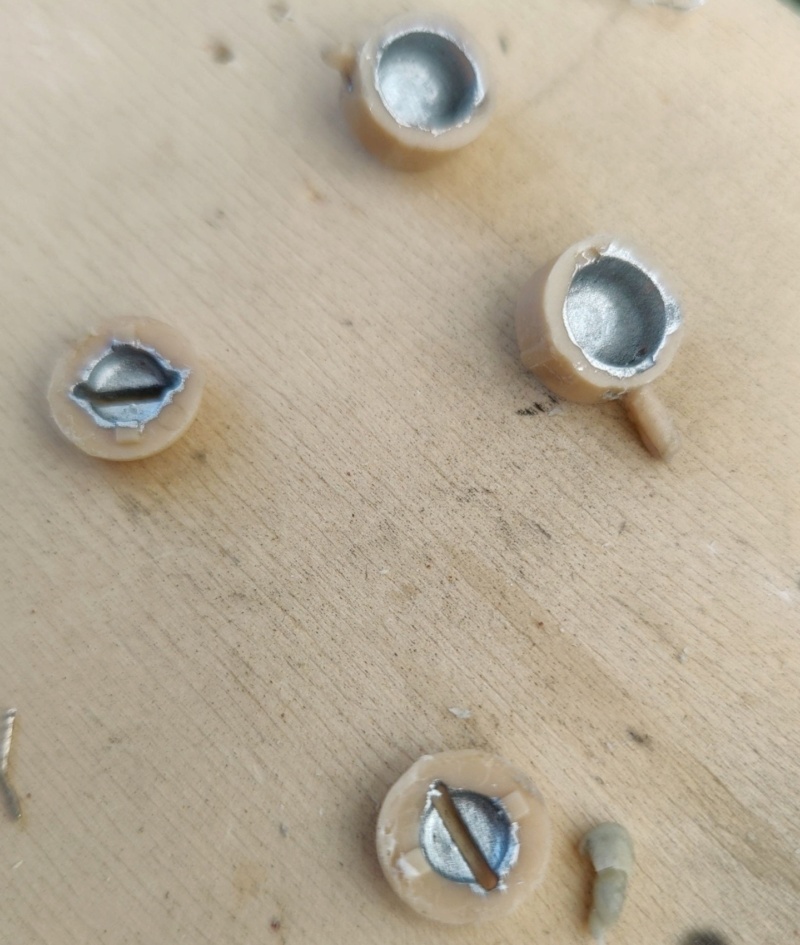
....installed the balancing weights, the flash unit for the LEDs in the muzzle brake, given a coat of black to amalgamate that confusion that reigns supreme.....

....the flash unit LEDs have been replaced by a single LED to enter the microscopic muzzle brake .....

....the rotation ring is modified to allow the gun to rise....

For installation it is essential to tighten that allows the turret to rotate.....

the satisfactions are not lacking....

Image

Image

Image

Image

Post Reply

Return to “Other Builds”