Good evening,
Extra Sweet detailing and modification work on the Sturm'! I have one of these to eventually build and will, like you, get a Taigen complete or just the lower to put the Imperial Modelbau kit on. Following with interest ( and loving those brass fenders )
regards,
Painless
TORRO Sturmtiger build
-
PainlessWolf

- Lieutenant-Colonel
- Posts: 7405
- Joined: Sun Feb 26, 2012 9:09 pm
- Location: Southern Colorado Rocky Mountains
Re: TORRO Sturmtiger build
...Here for the Dawn...
-
baldrick131
- Lance Corporal
- Posts: 140
- Joined: Fri Oct 04, 2019 8:46 pm
- Location: March cambridgeshire
- Contact:
Re: TORRO Sturmtiger build
I haven't done much on the sturmtiger today just fiddling about with odds and sod's fitting the jack and a bit of damage to the zimmerit
I also filled the two holes the smoke pipes were pushed through
As I have made some exhausts where the pipe goes into it and the smoke will exit out the top
But more on those another time.
There was a pleasant arrival today
I bet I'm not the only one who likes it when new shiny bits turn up.
I also filled the two holes the smoke pipes were pushed through
As I have made some exhausts where the pipe goes into it and the smoke will exit out the top
But more on those another time.
There was a pleasant arrival today
I bet I'm not the only one who likes it when new shiny bits turn up.
-
baldrick131
- Lance Corporal
- Posts: 140
- Joined: Fri Oct 04, 2019 8:46 pm
- Location: March cambridgeshire
- Contact:
Re: TORRO Sturmtiger build
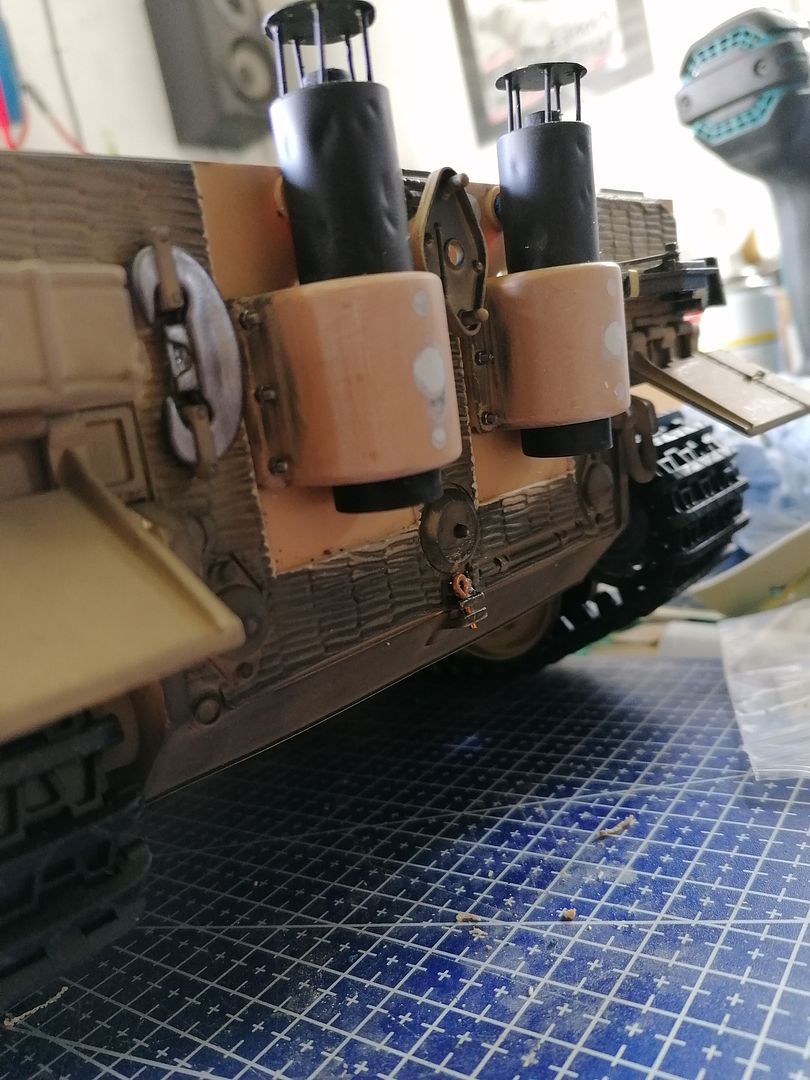
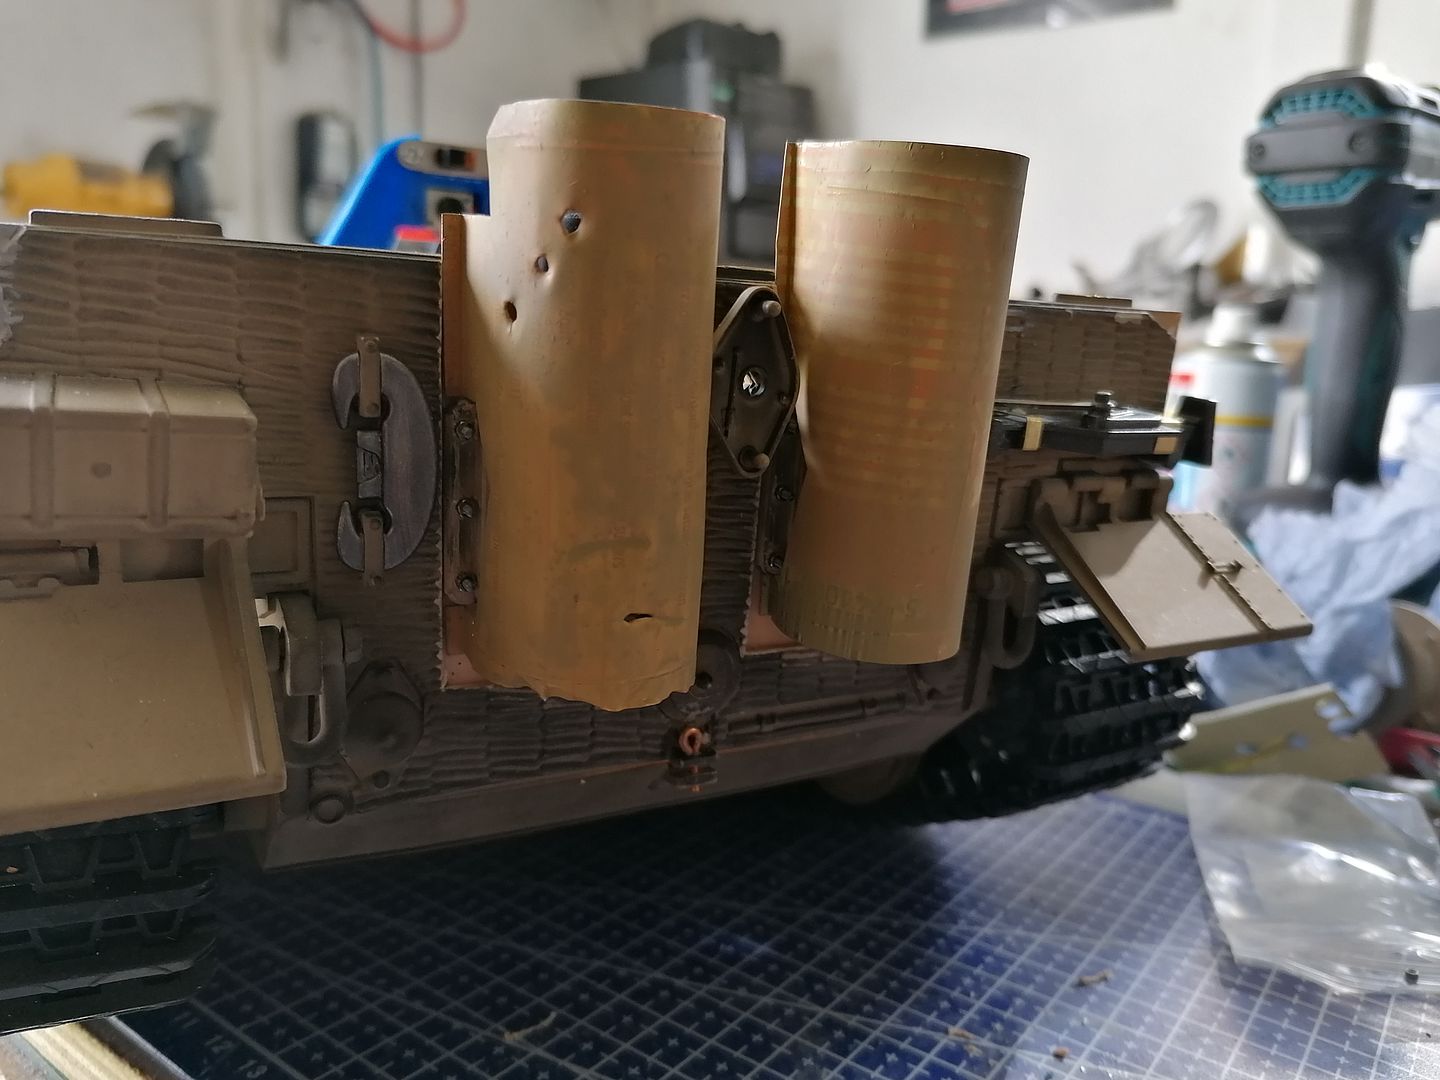
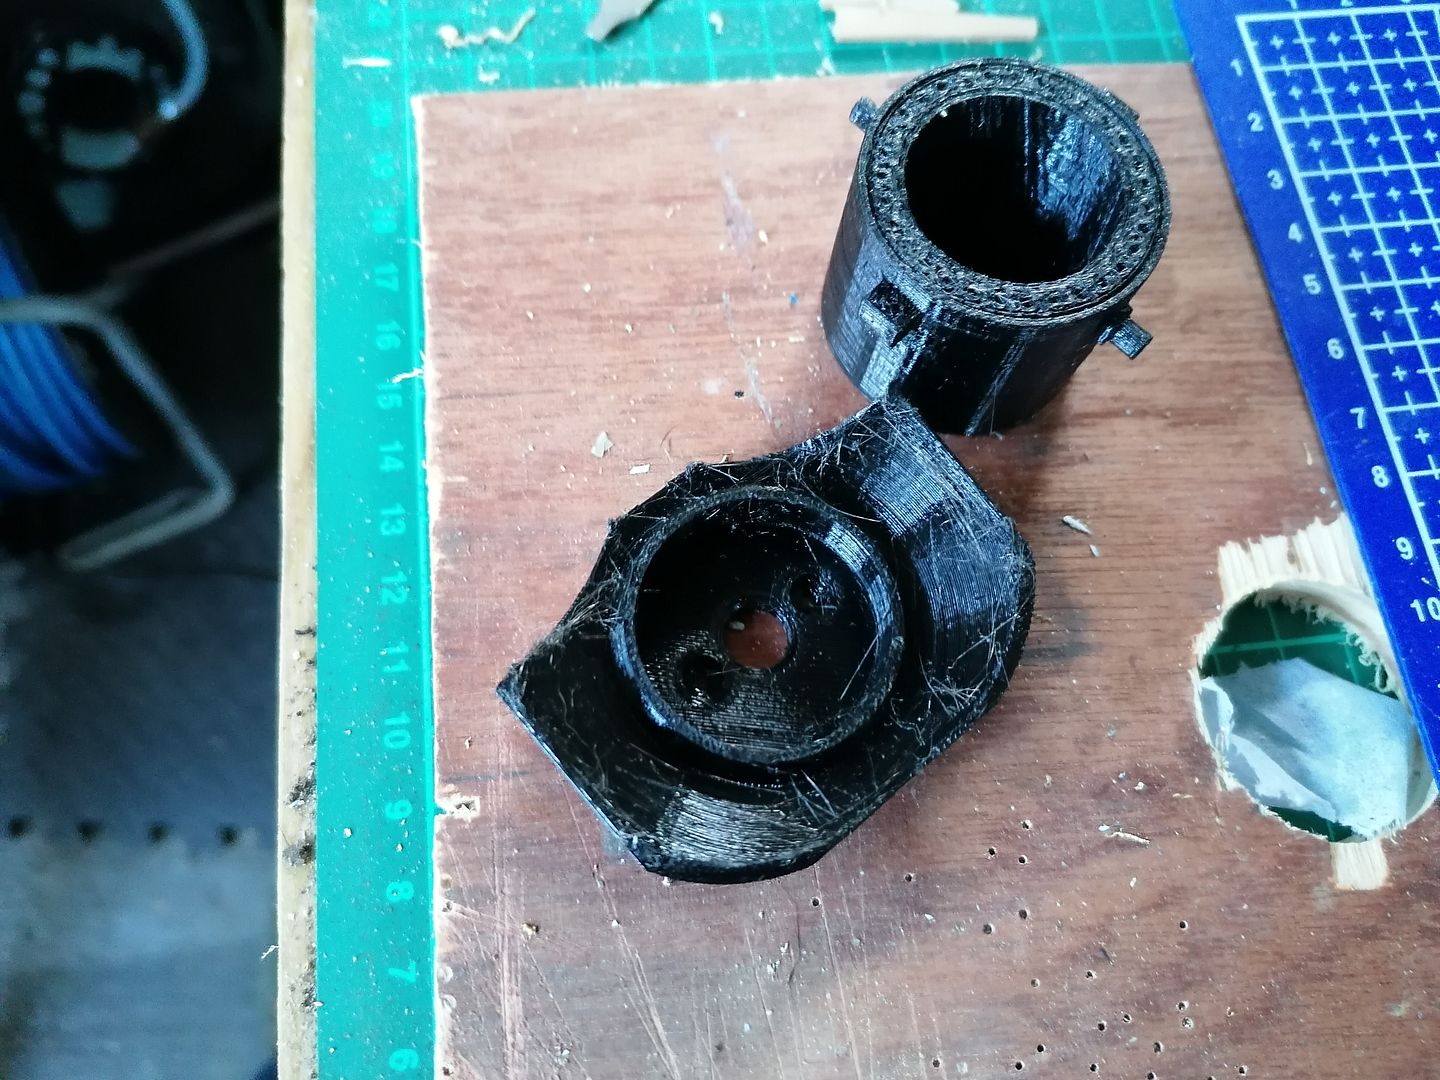
I haven't been able to get to my 3d printer for a few days so I have had a go at getting a bit further with the exhausts as I had already started with them and was bored so had a crack at fitting them.
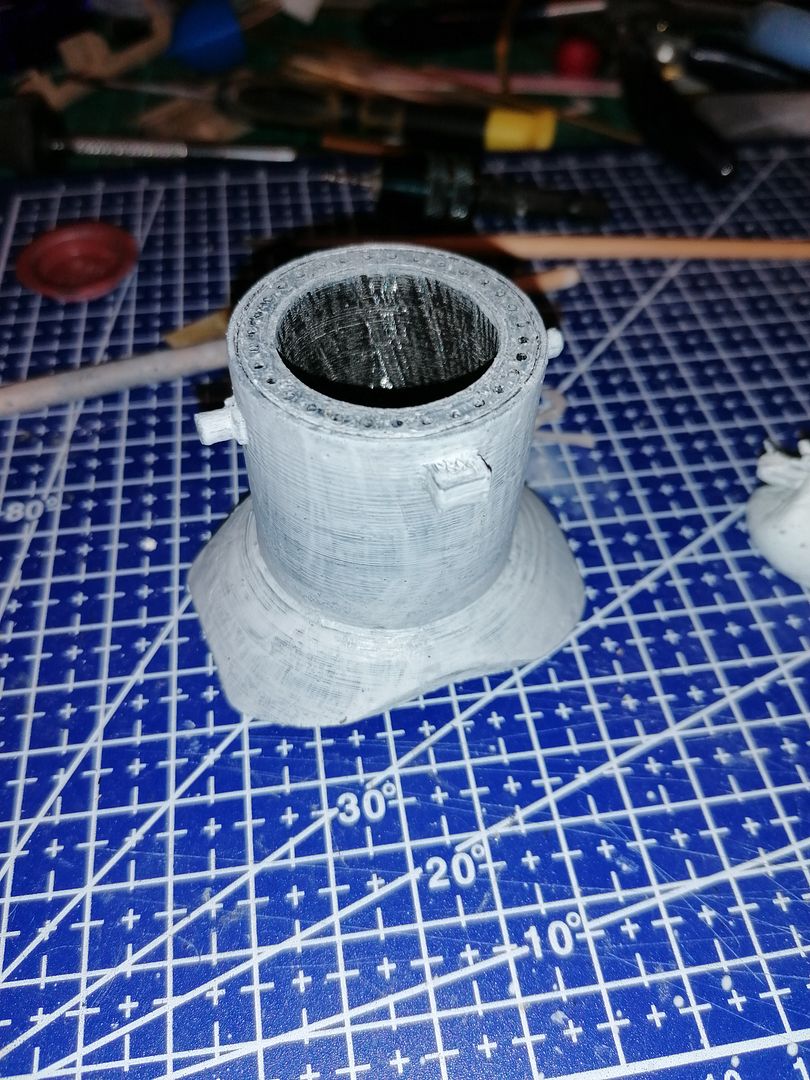
This is just after I had printed them and trial fitted before going any further with them.
The exhausts are made with a center section that is covered with a skin made from an old beer can that is glued in place.

I cut out some top covers out of brass I did 3d print some but they looked too bulky
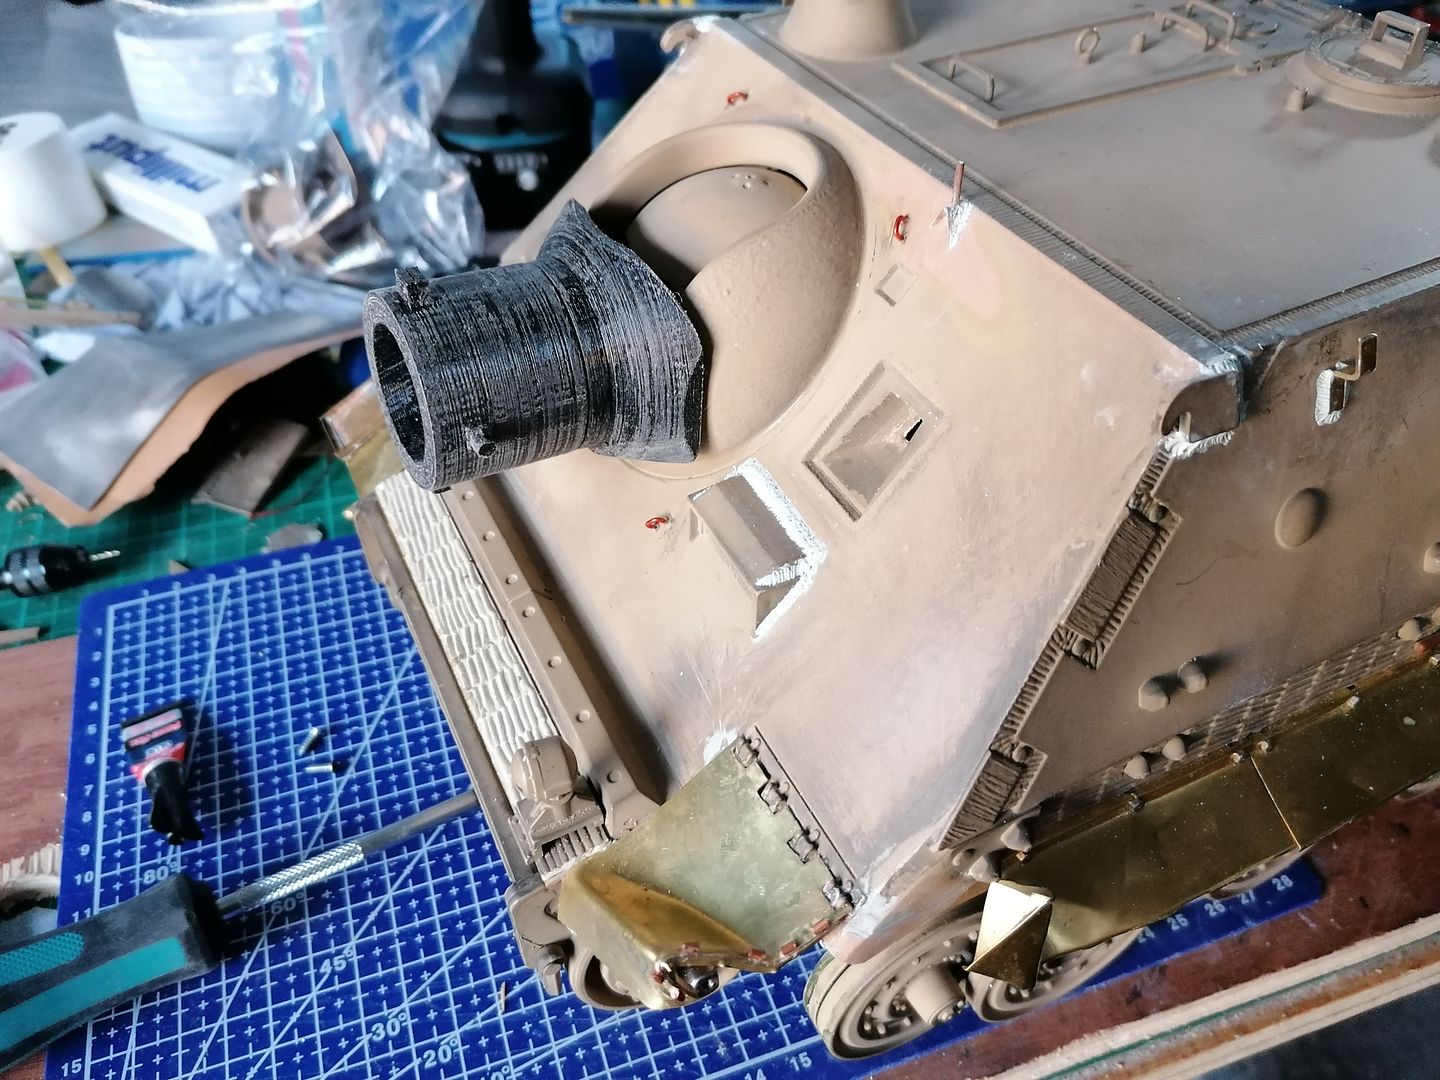
This is them all together with some dents and distortion for effect I now know they should have some flaps over the outlets but mine won't have but they will have smoke coming out as they are made with the pipe from the generator going into the exhausts and exiting out the top.
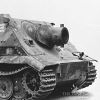
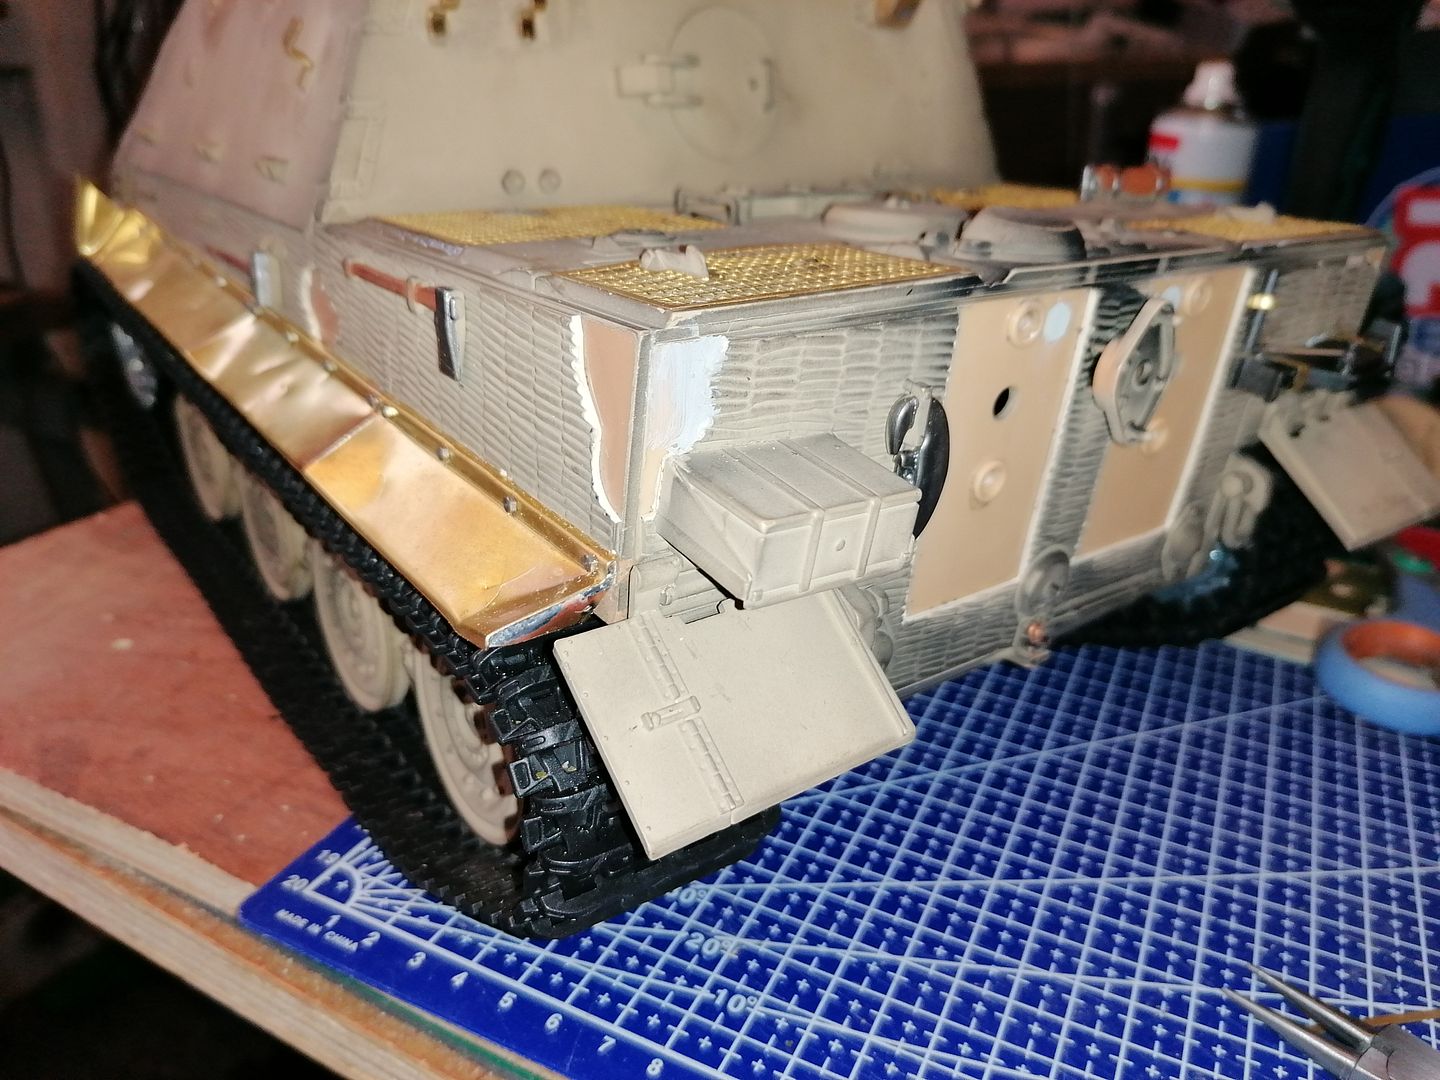
But after removing the zimmerit from around the exhausts area the exhausts clashed with the armoured covers so I modified them to sit closer to the rear panel.
Now to start the armoured covers first filled in the holes left from removing them followed by removing the moulded nuts and carefully drilling a hole in their place.
Now to position them on the rear section and drill more holes and make sure that the 12ba bolts fit.
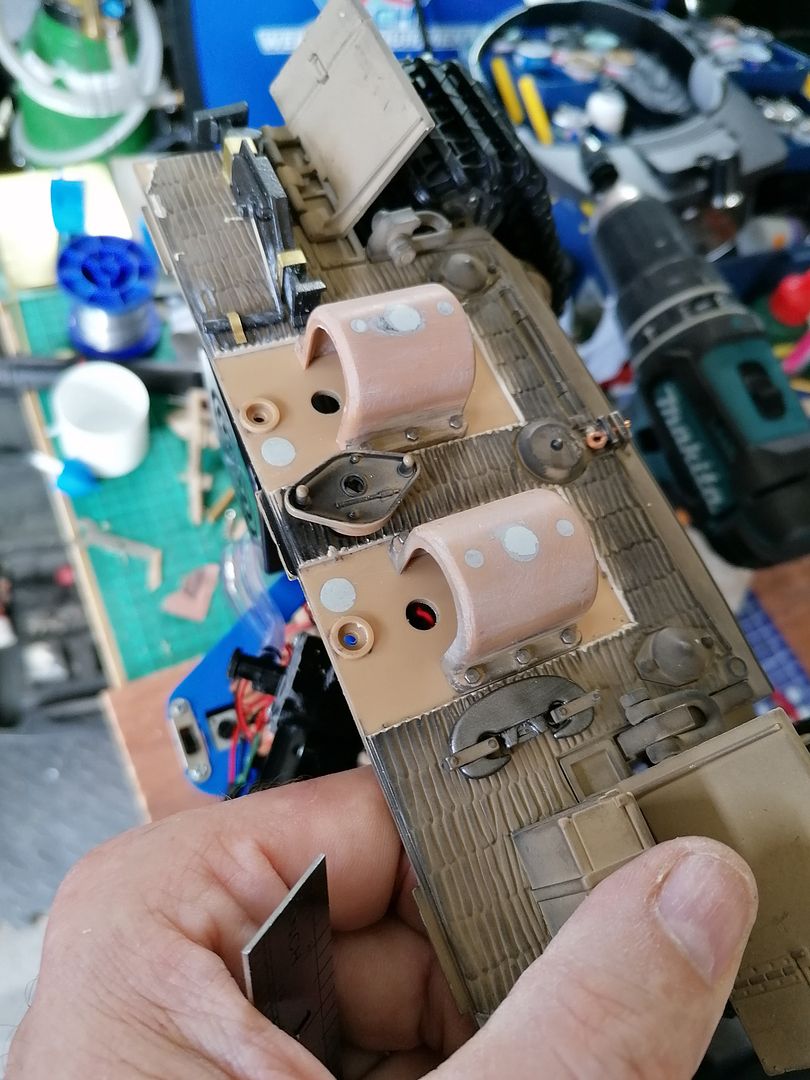
I had to make some spacers as the 12ba bolts were a bit long and I didn't want to cut them down.
I did offer up some covers I made from more beer cans but they are a bit flimsy so will be making them from thicker material.
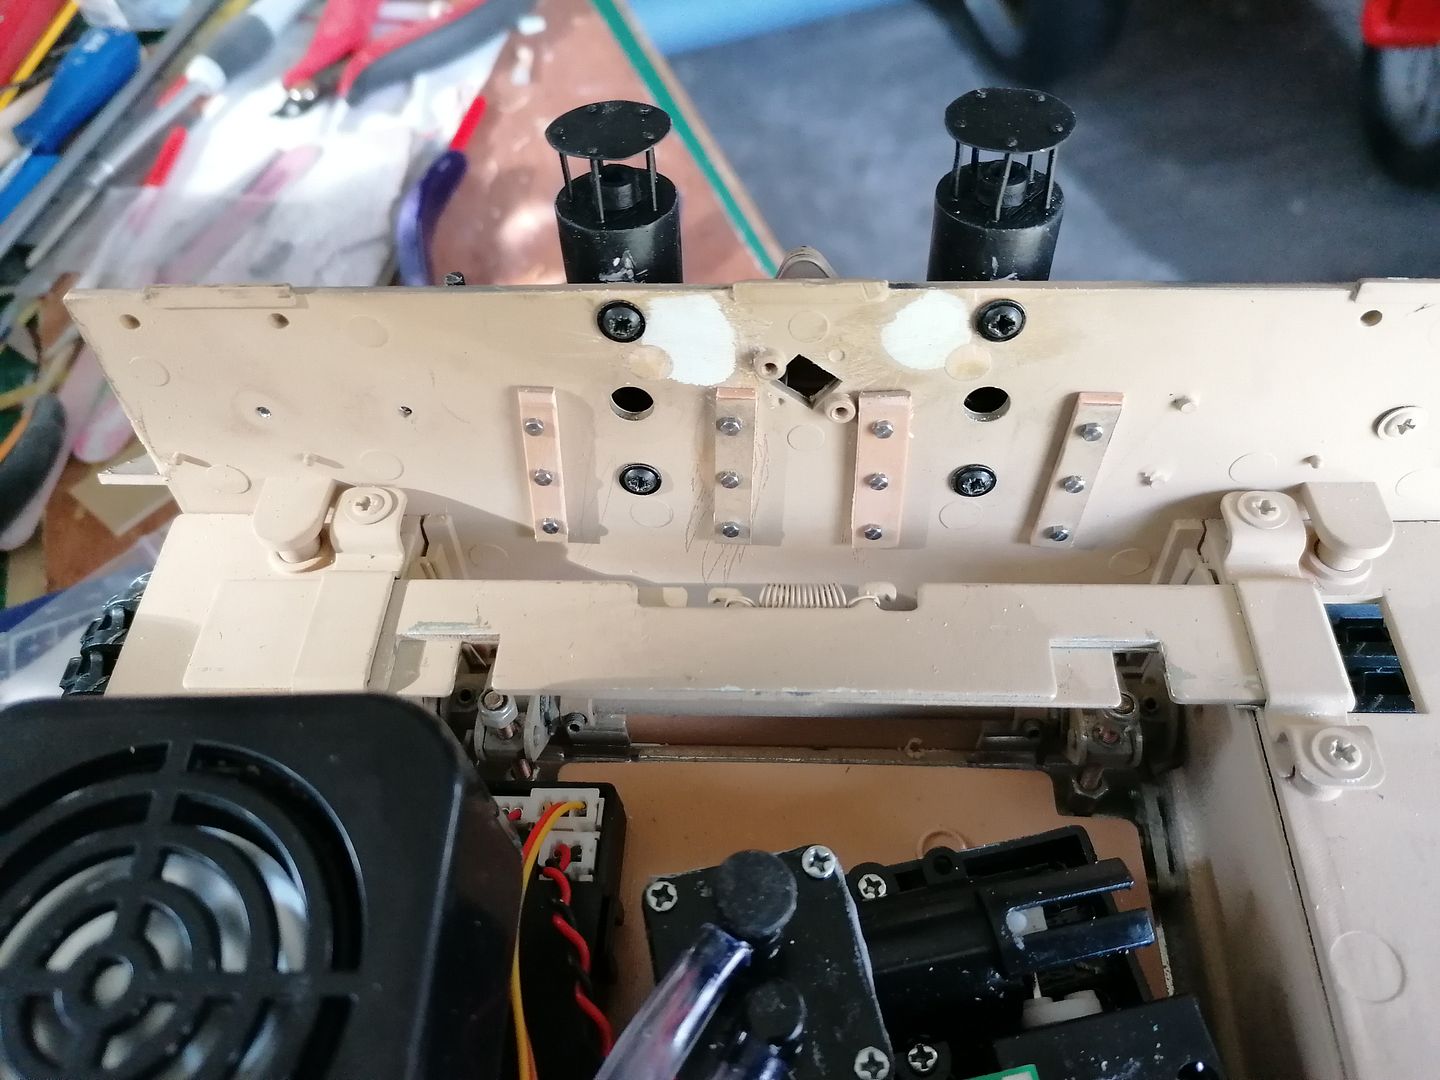
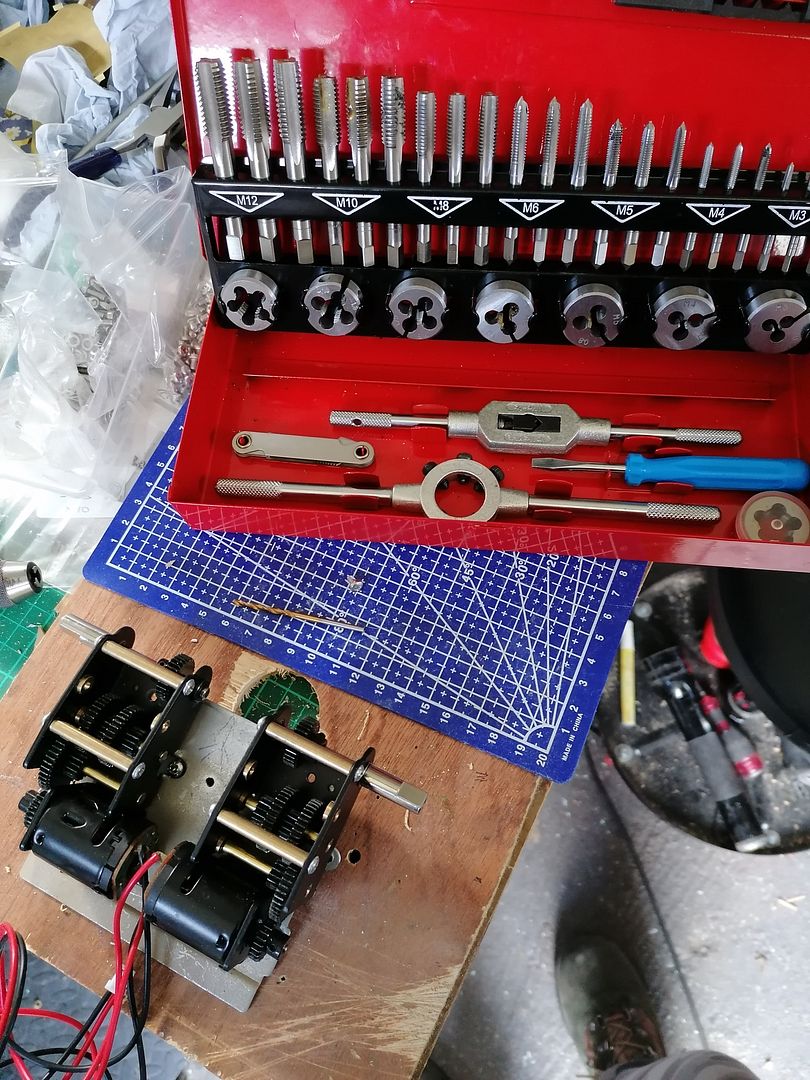
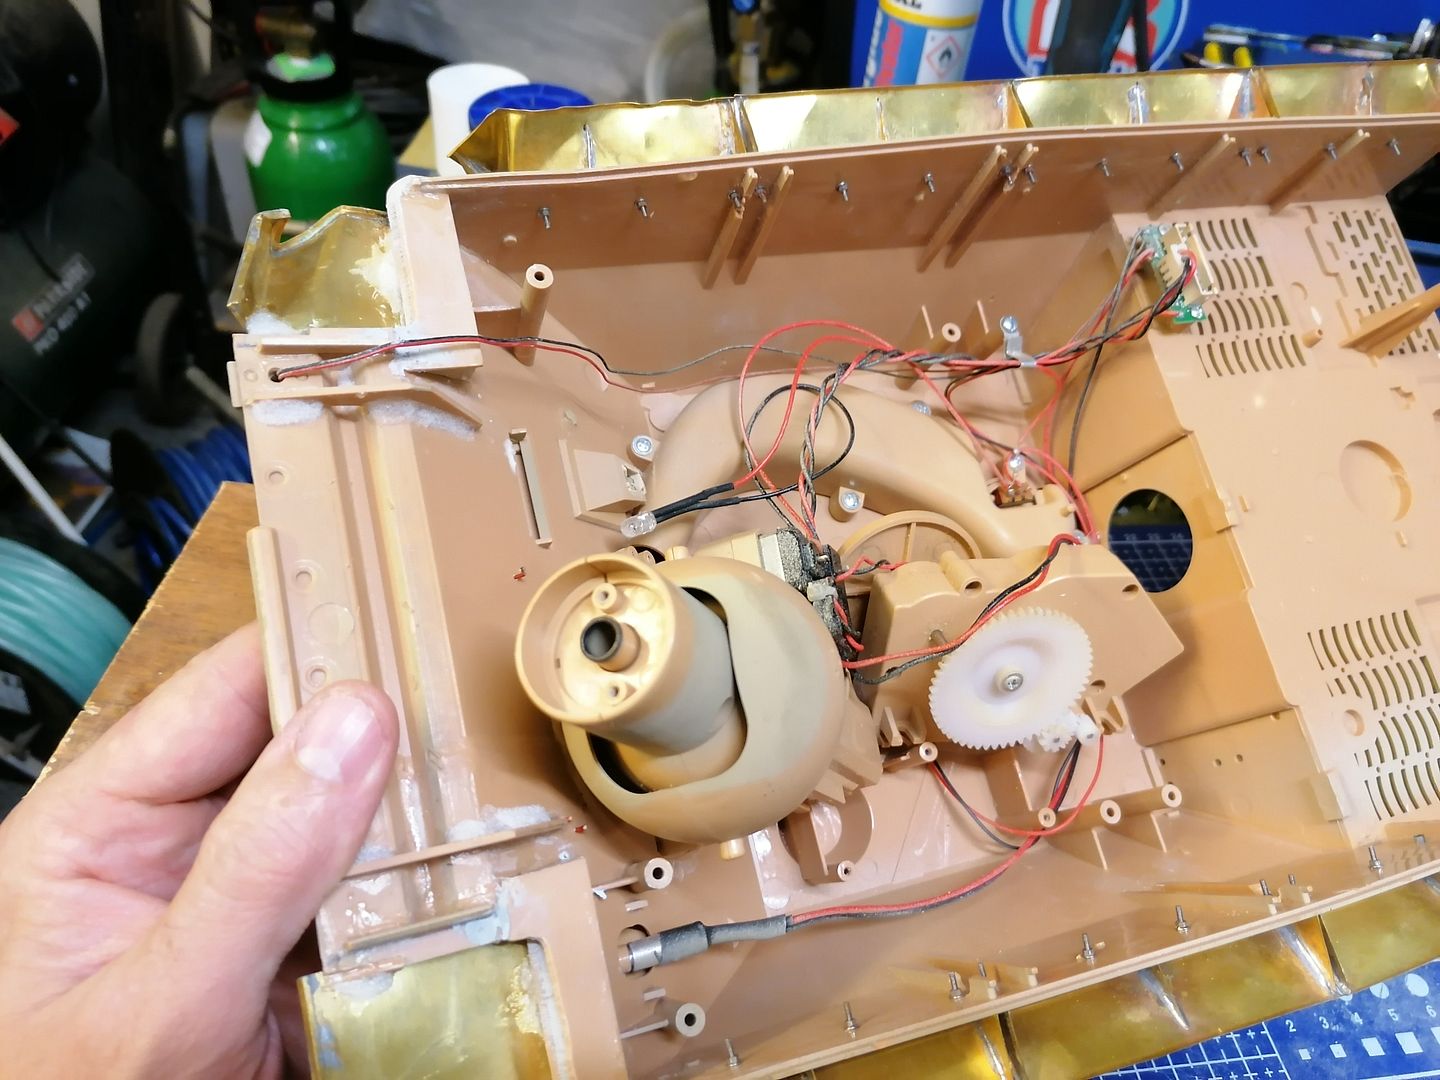
So unable to go much further with them I decided to address the new gearboxes I installed I am surprised they do not have better fixings on to the tank 1 M3 screw and 1 self tapper into plastic just won't cut it and they soon moved after running it for a very short time so time to get the drill and tap set out.
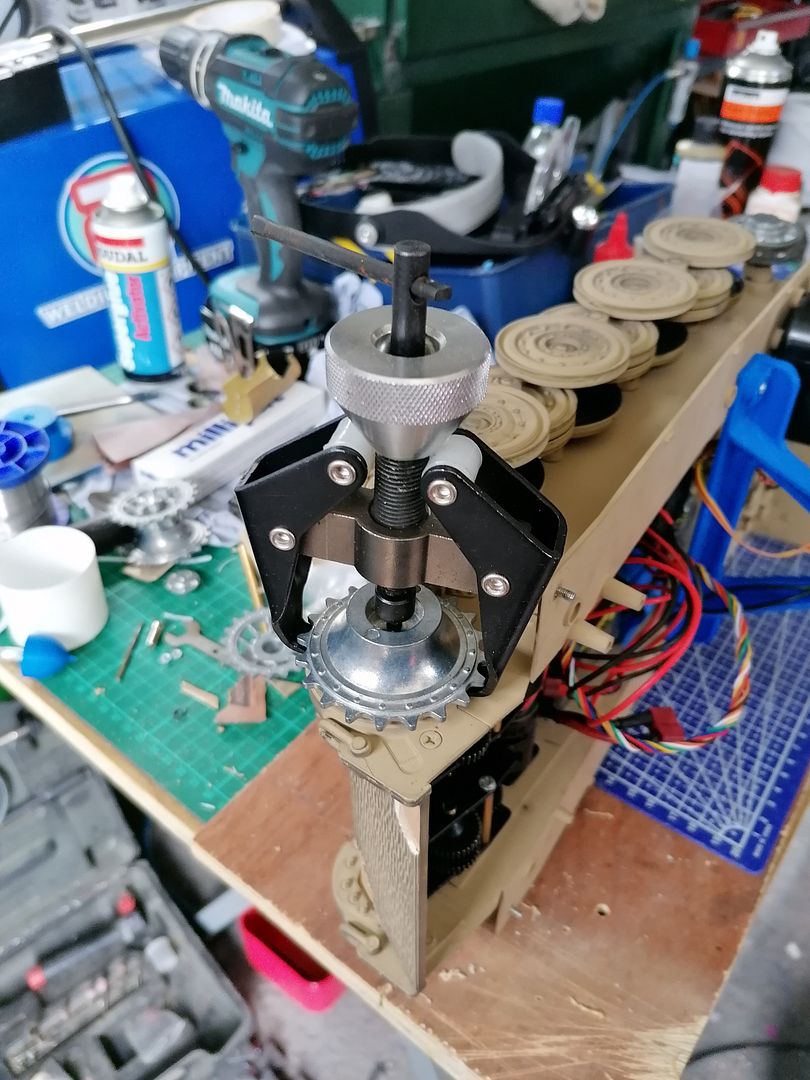
But first removing a stuck drive sprocket luckily a windscreen wiper arm removal tool I have fitted and did the trick just had to leave the screw in the drive shaft poking out so the tool could push against it.
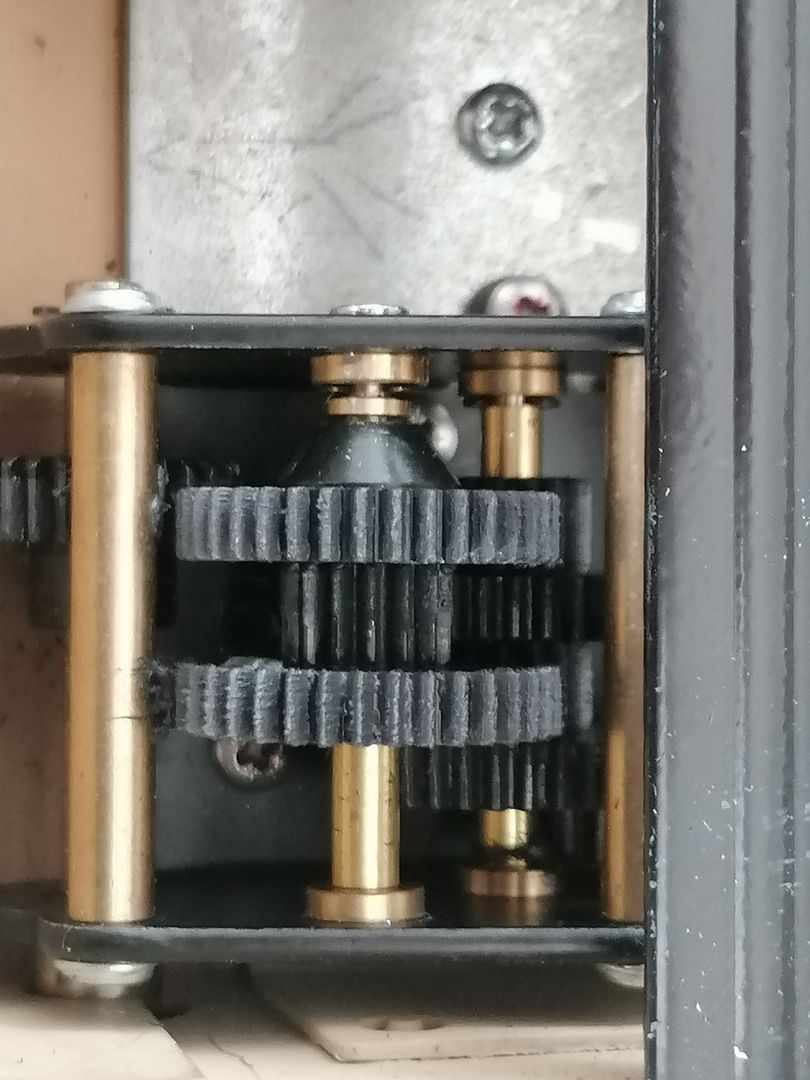
My plan is to add 2 more screws on each gearbox one in an existing hole and drill a new hole.

A bit of a fuzzy photo but here it is with the 2 new screws fitted now they should be pretty secure I omitted the self tapping screws as one was stripped and they seemed redundant after refitting the gearboxes.
This is just after I had printed them and trial fitted before going any further with them.
The exhausts are made with a center section that is covered with a skin made from an old beer can that is glued in place.
I cut out some top covers out of brass I did 3d print some but they looked too bulky
This is them all together with some dents and distortion for effect I now know they should have some flaps over the outlets but mine won't have but they will have smoke coming out as they are made with the pipe from the generator going into the exhausts and exiting out the top.
But after removing the zimmerit from around the exhausts area the exhausts clashed with the armoured covers so I modified them to sit closer to the rear panel.
Now to start the armoured covers first filled in the holes left from removing them followed by removing the moulded nuts and carefully drilling a hole in their place.
Now to position them on the rear section and drill more holes and make sure that the 12ba bolts fit.
I had to make some spacers as the 12ba bolts were a bit long and I didn't want to cut them down.
I did offer up some covers I made from more beer cans but they are a bit flimsy so will be making them from thicker material.
So unable to go much further with them I decided to address the new gearboxes I installed I am surprised they do not have better fixings on to the tank 1 M3 screw and 1 self tapper into plastic just won't cut it and they soon moved after running it for a very short time so time to get the drill and tap set out.
But first removing a stuck drive sprocket luckily a windscreen wiper arm removal tool I have fitted and did the trick just had to leave the screw in the drive shaft poking out so the tool could push against it.
My plan is to add 2 more screws on each gearbox one in an existing hole and drill a new hole.
A bit of a fuzzy photo but here it is with the 2 new screws fitted now they should be pretty secure I omitted the self tapping screws as one was stripped and they seemed redundant after refitting the gearboxes.
-
baldrick131
- Lance Corporal
- Posts: 140
- Joined: Fri Oct 04, 2019 8:46 pm
- Location: March cambridgeshire
- Contact:
Re: TORRO Sturmtiger build
Thing's have been a bit slow on the sturm tiger for a little while as I have had some other things to do but I have done some little jobs just to keep it ticking over.
The first thing I did was 3d print a newer version of the barrel that required the removal of some of the breech section to allow more depth to the barrel itself.
This is the new 2 part barrel it looks a bit stringy because its a new to me material Petg and it still needs more work on the printer but this one is good enough to use.
The breech section needed modifications to let the barrel fit properly.
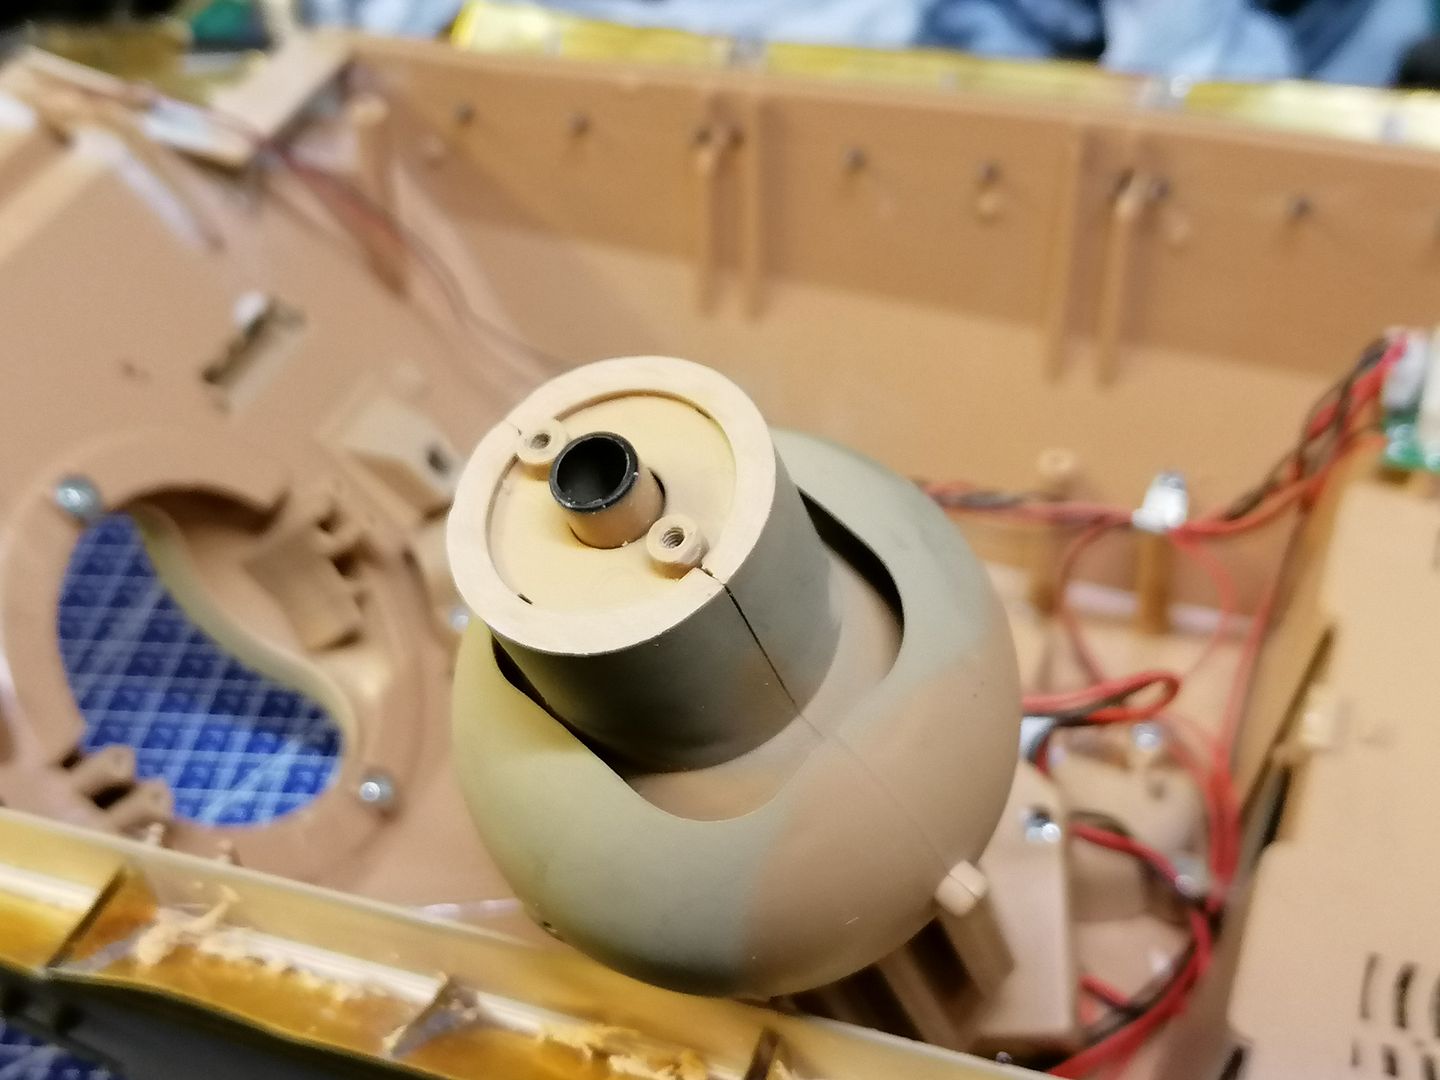
Back together with the barrel fitted plus a few extra bits fitted to give more detail.
With it fitted I took it off and started work on smoothing it off with thin layers of milliput (I haven't used it in years so another thing that I'm re learning)
I also had a go at adding weld beads around the brackets I made from brass and other places while I had the milliput out.
That was something I have never done before.
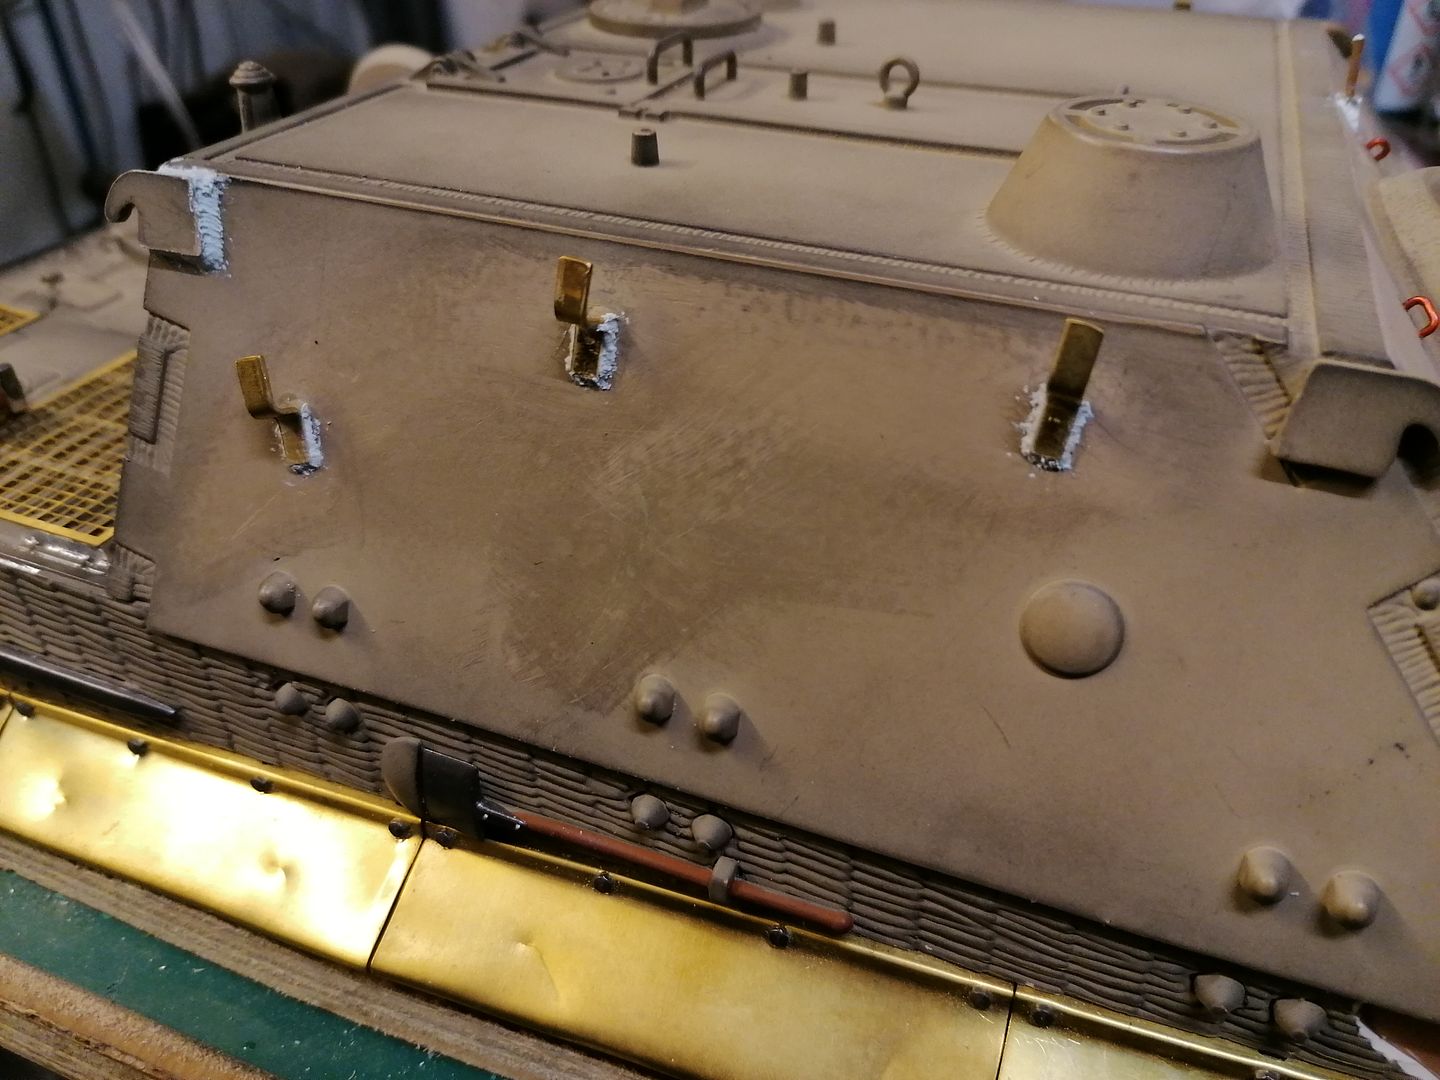
I took off the front 2 hooks on the superstructure because the hook parts were obstructed I moved them forward slightly and re attached them and added more milliput weld

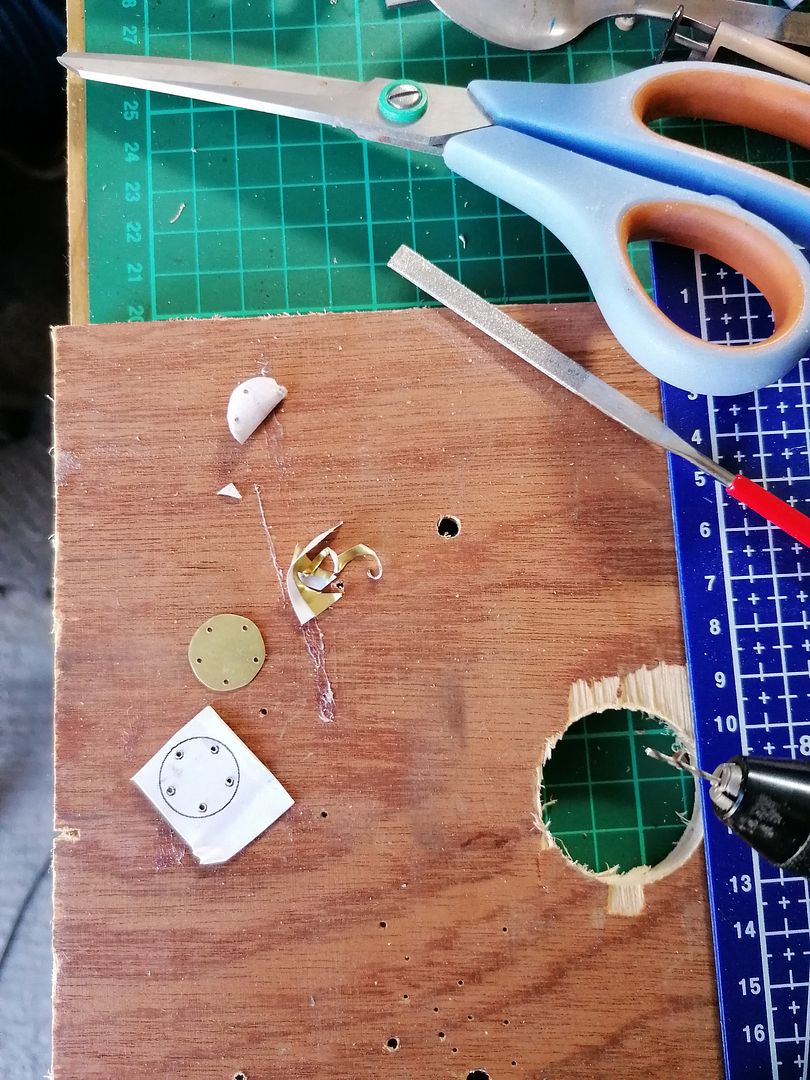
I got some thin brass sheet to make the exhaust covers as I didn't like the beer can material.
I first stuck the templates I made in cad.
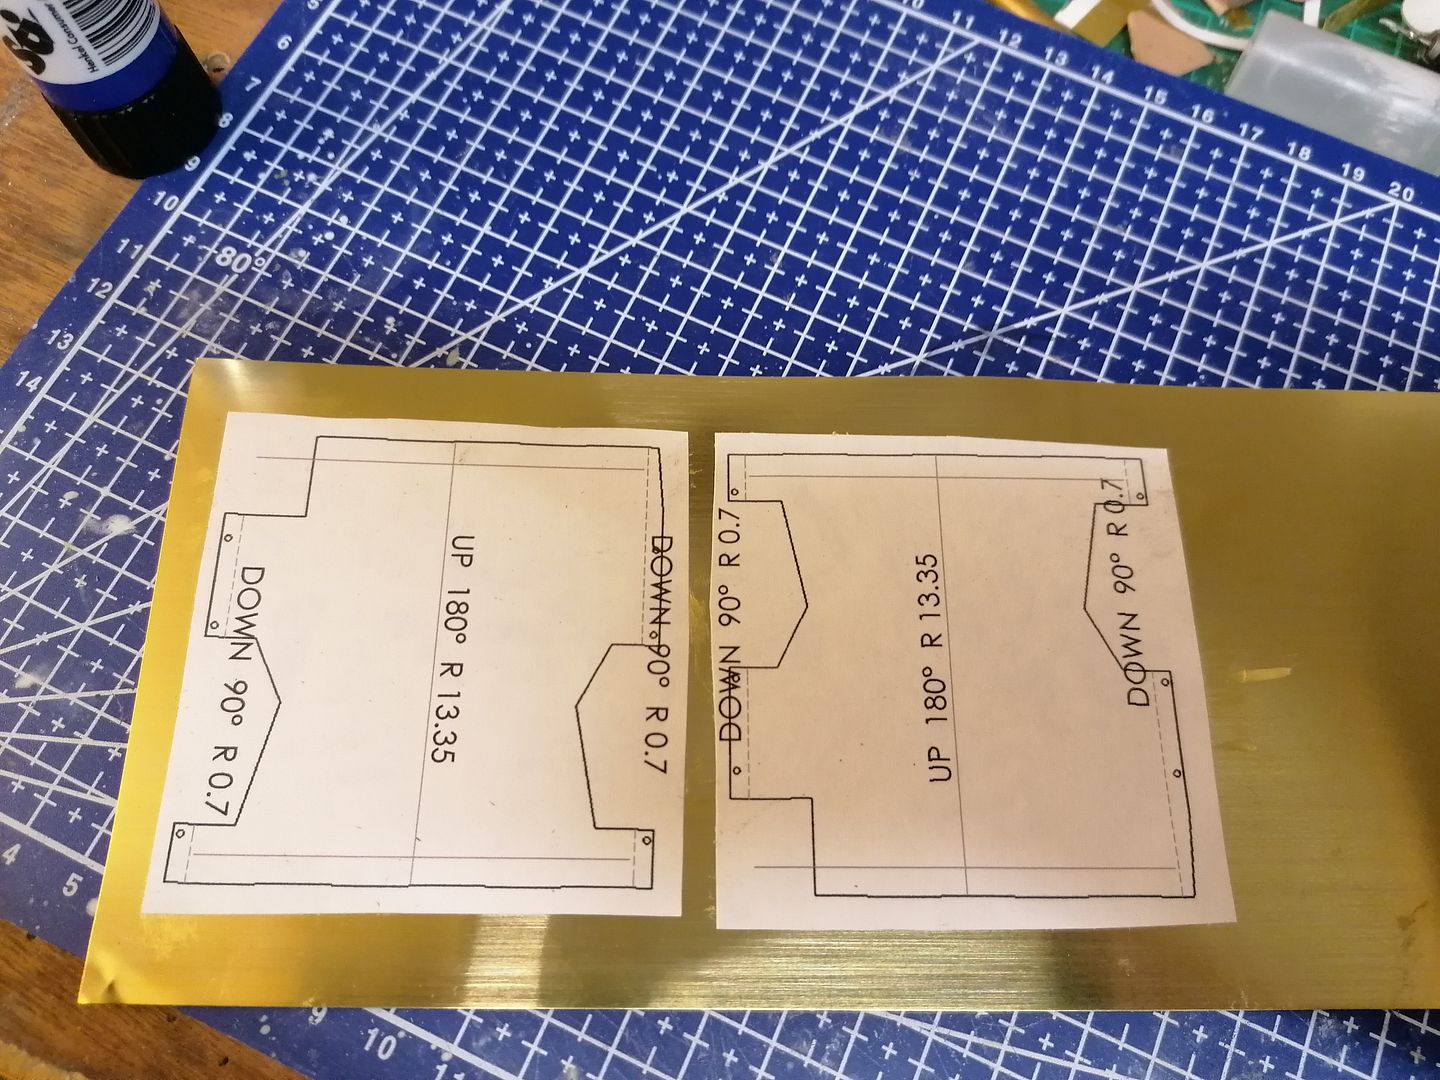
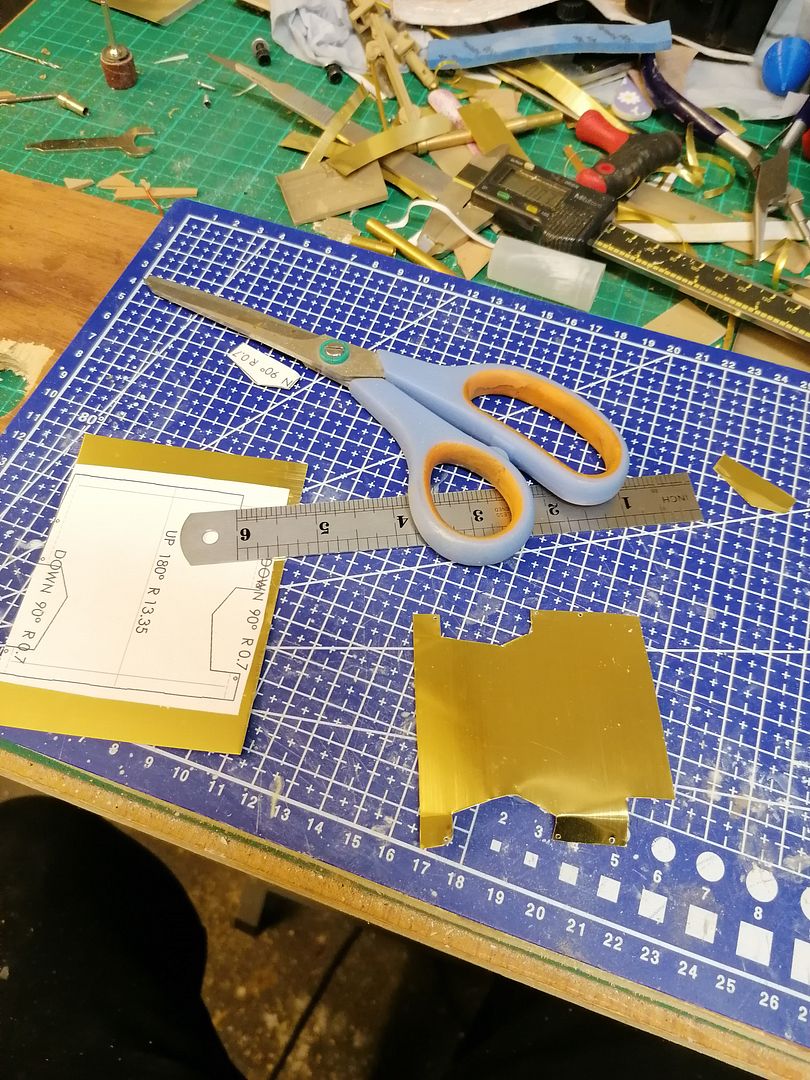
Then cut them out using the trusted kitchen scissors then drilled the 1mm holes.
They required a small amount of straightening but that isn't important as they will get a bit of damage before they are fitted properly.
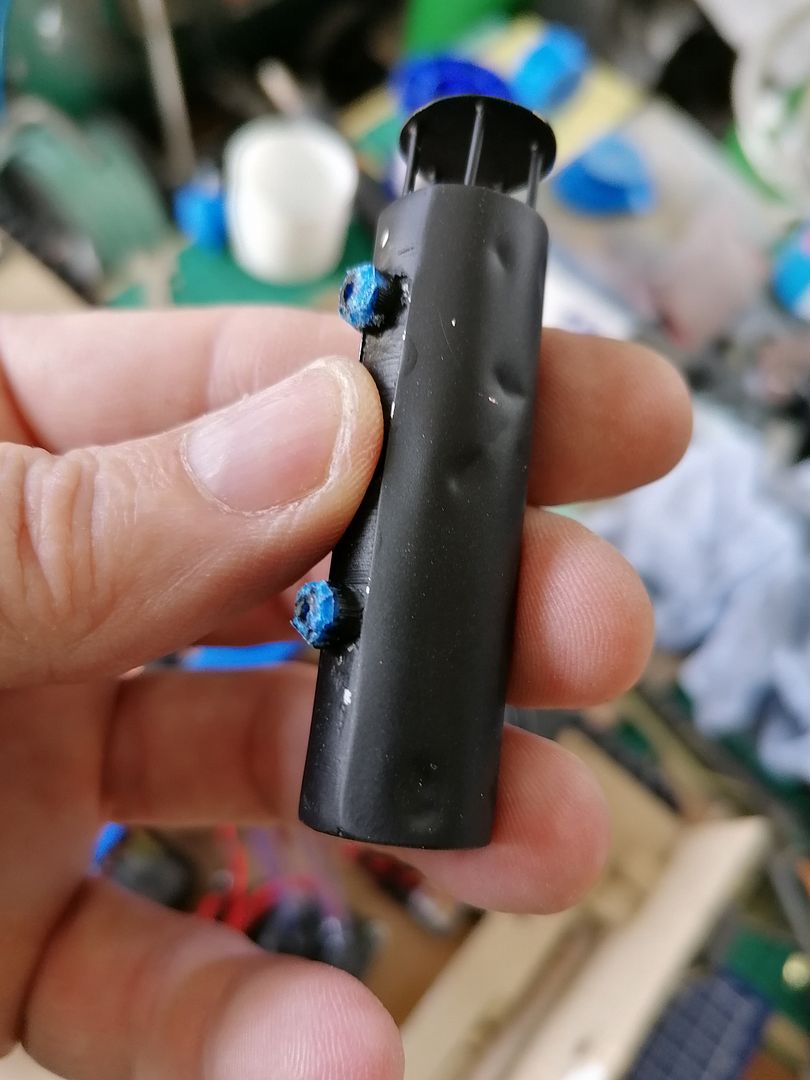
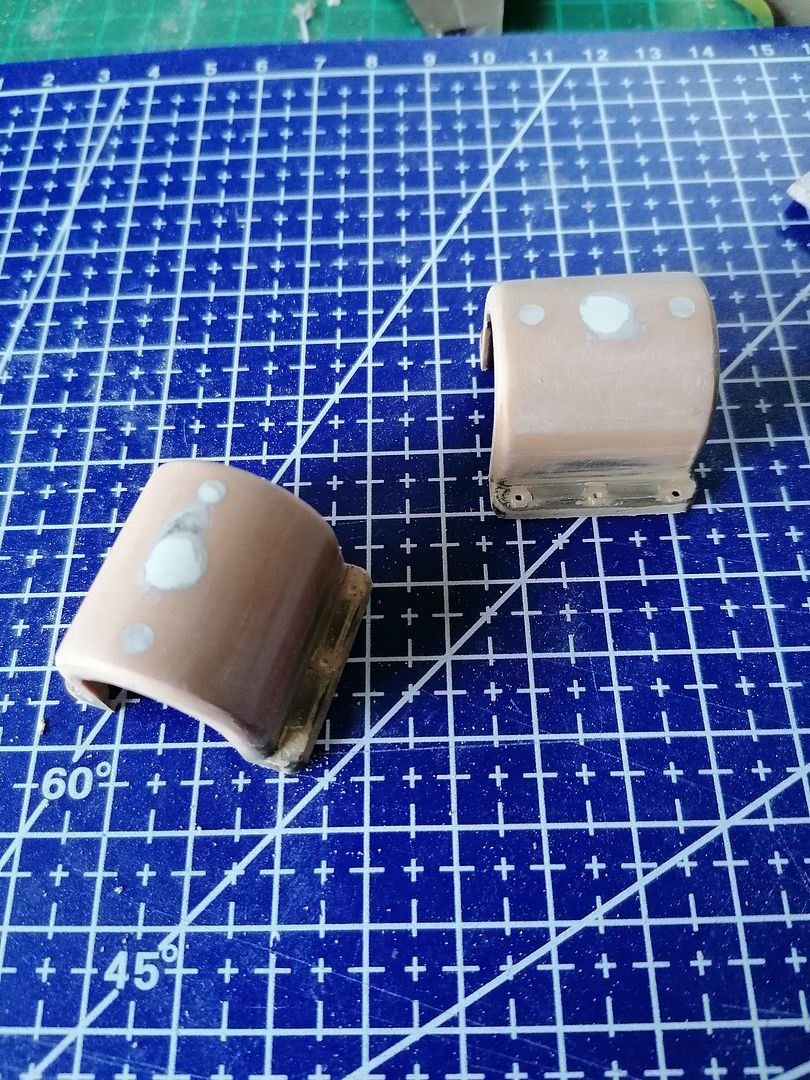
Here is one folded and rolled with a crease line at the top and bottom done with a straight edge and the tip of one of the wife's knitting needles.
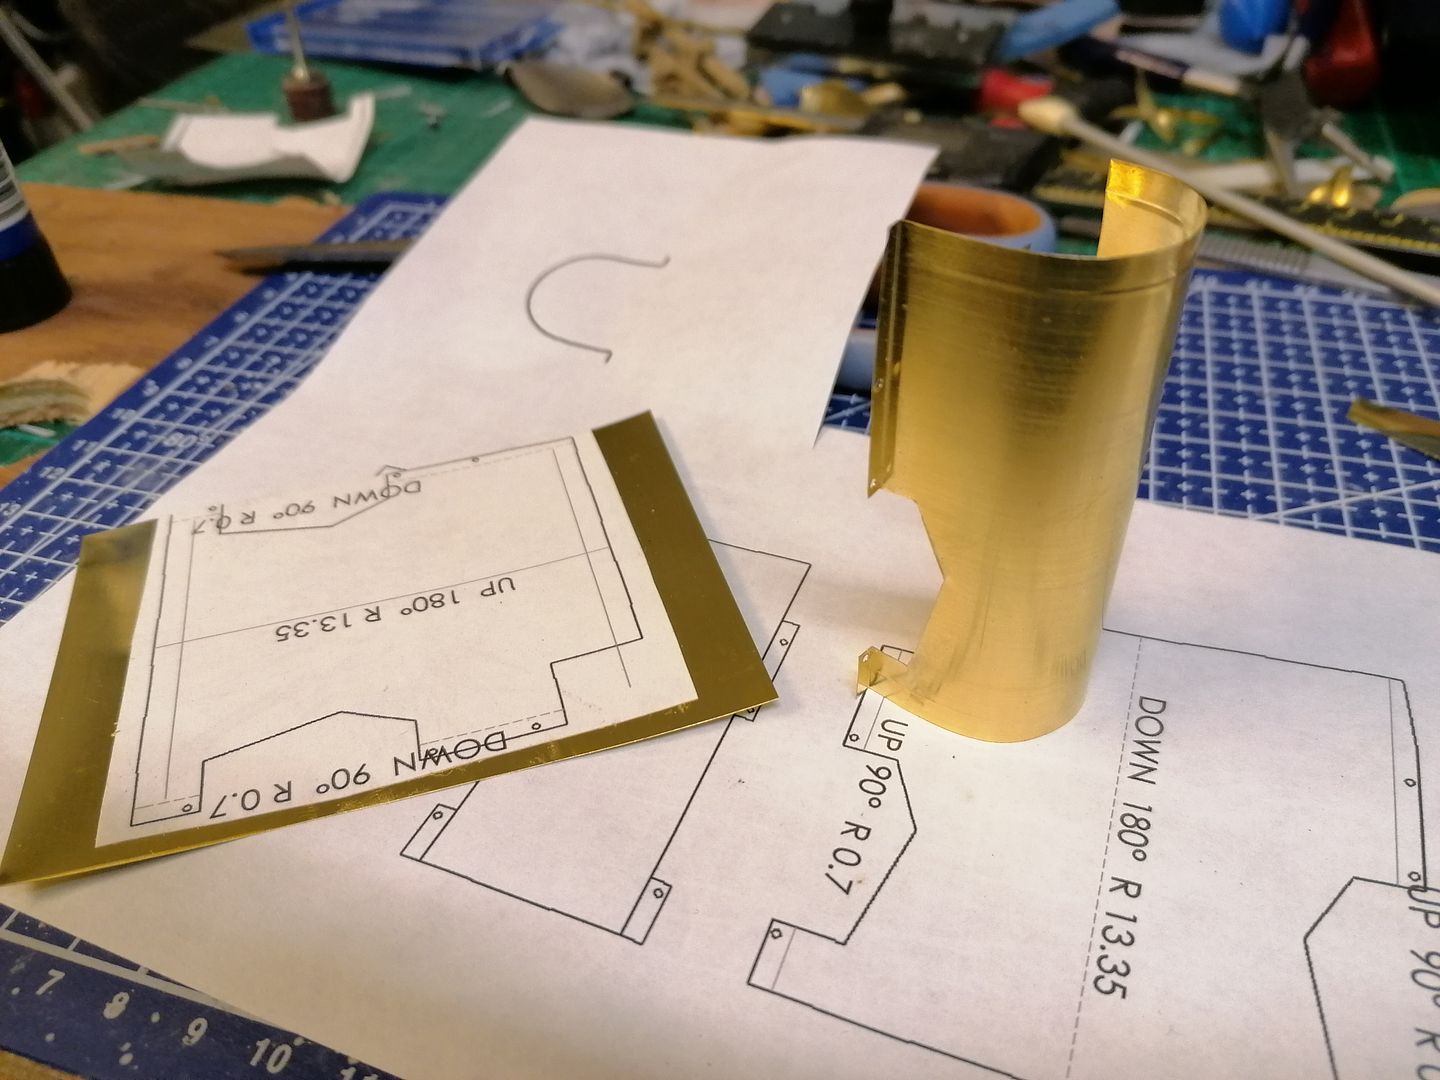
Both of them done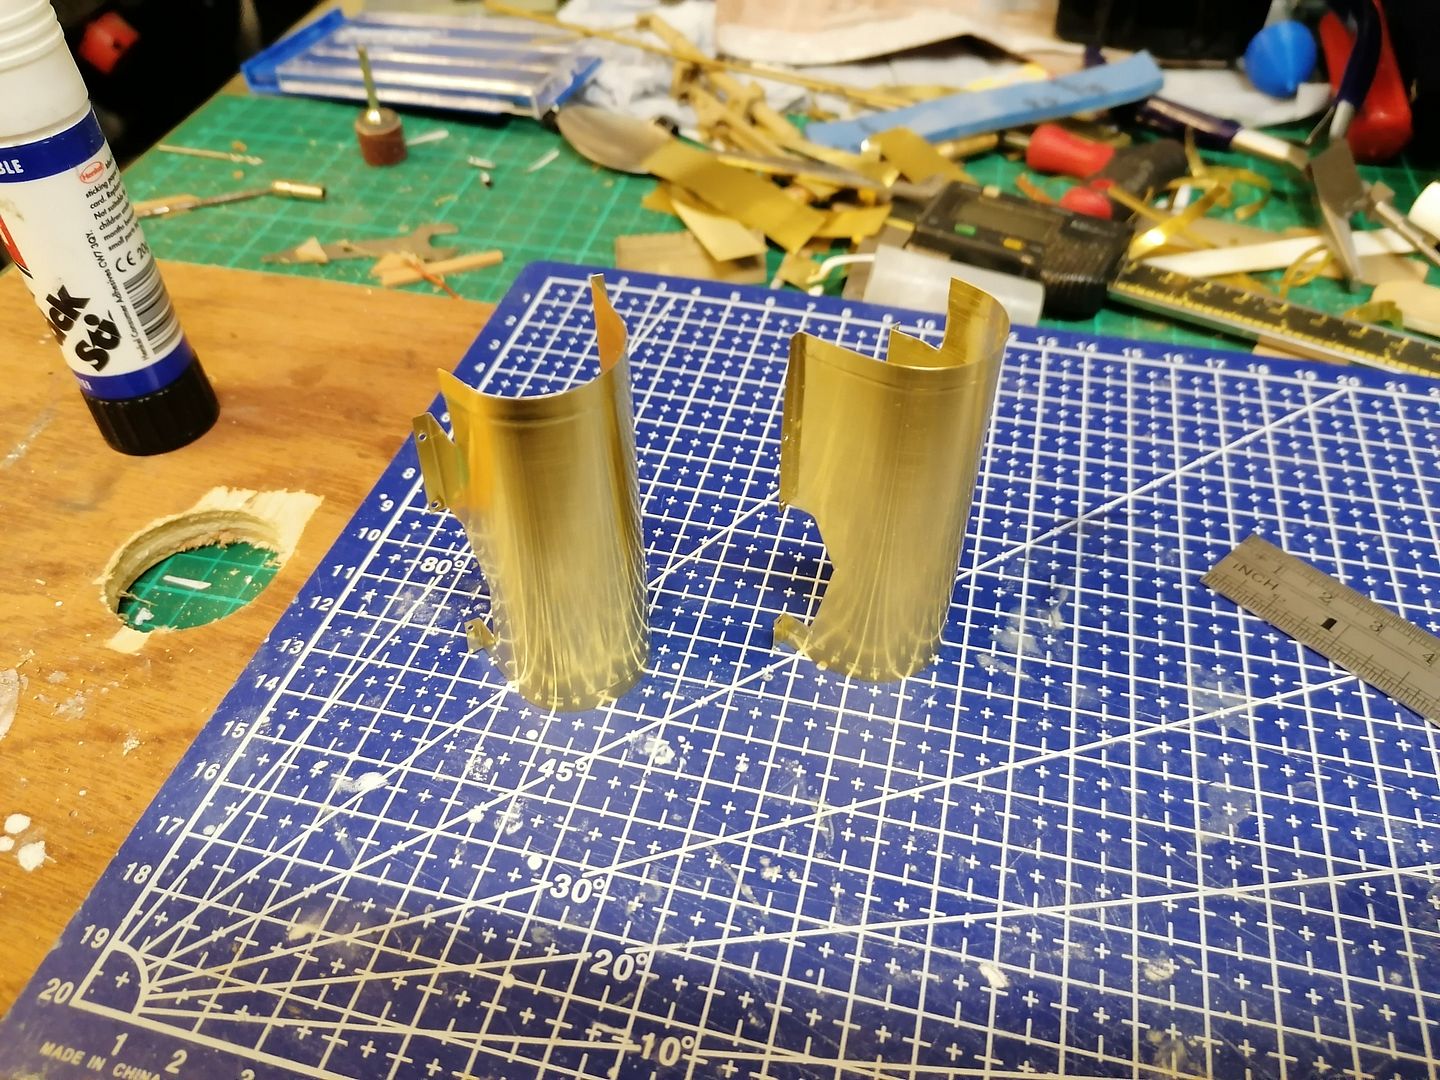
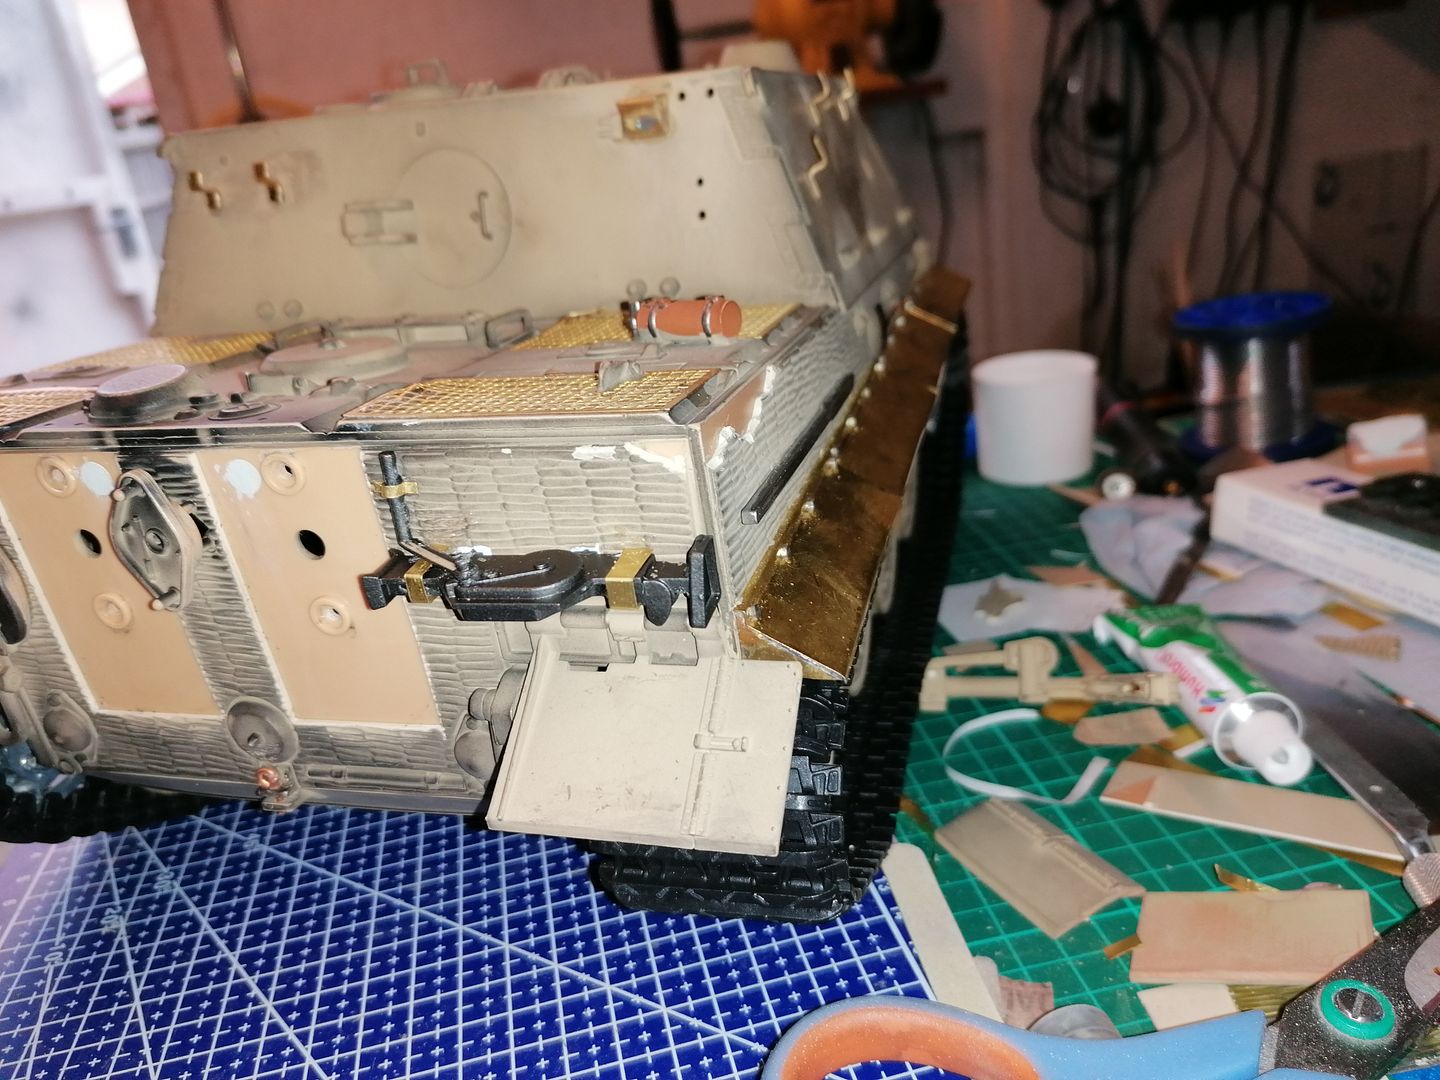
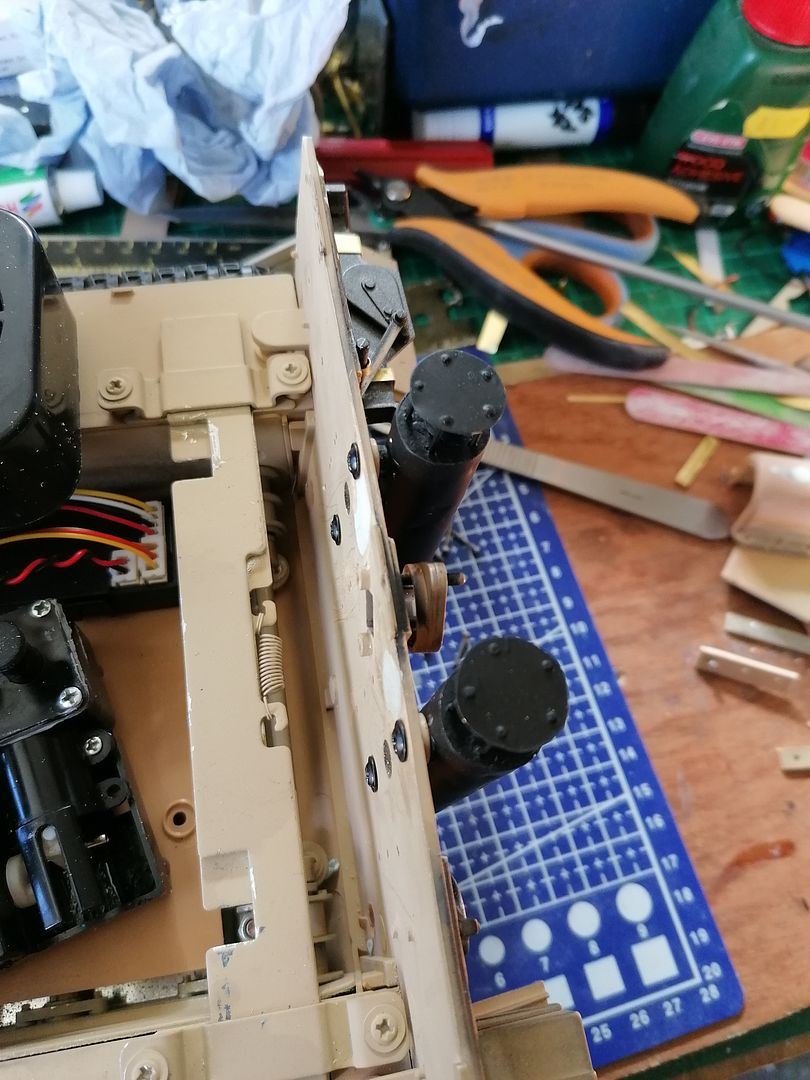
Now on the tank with holes drilled and fitted with 14ba bolts to make sure that everything fits.
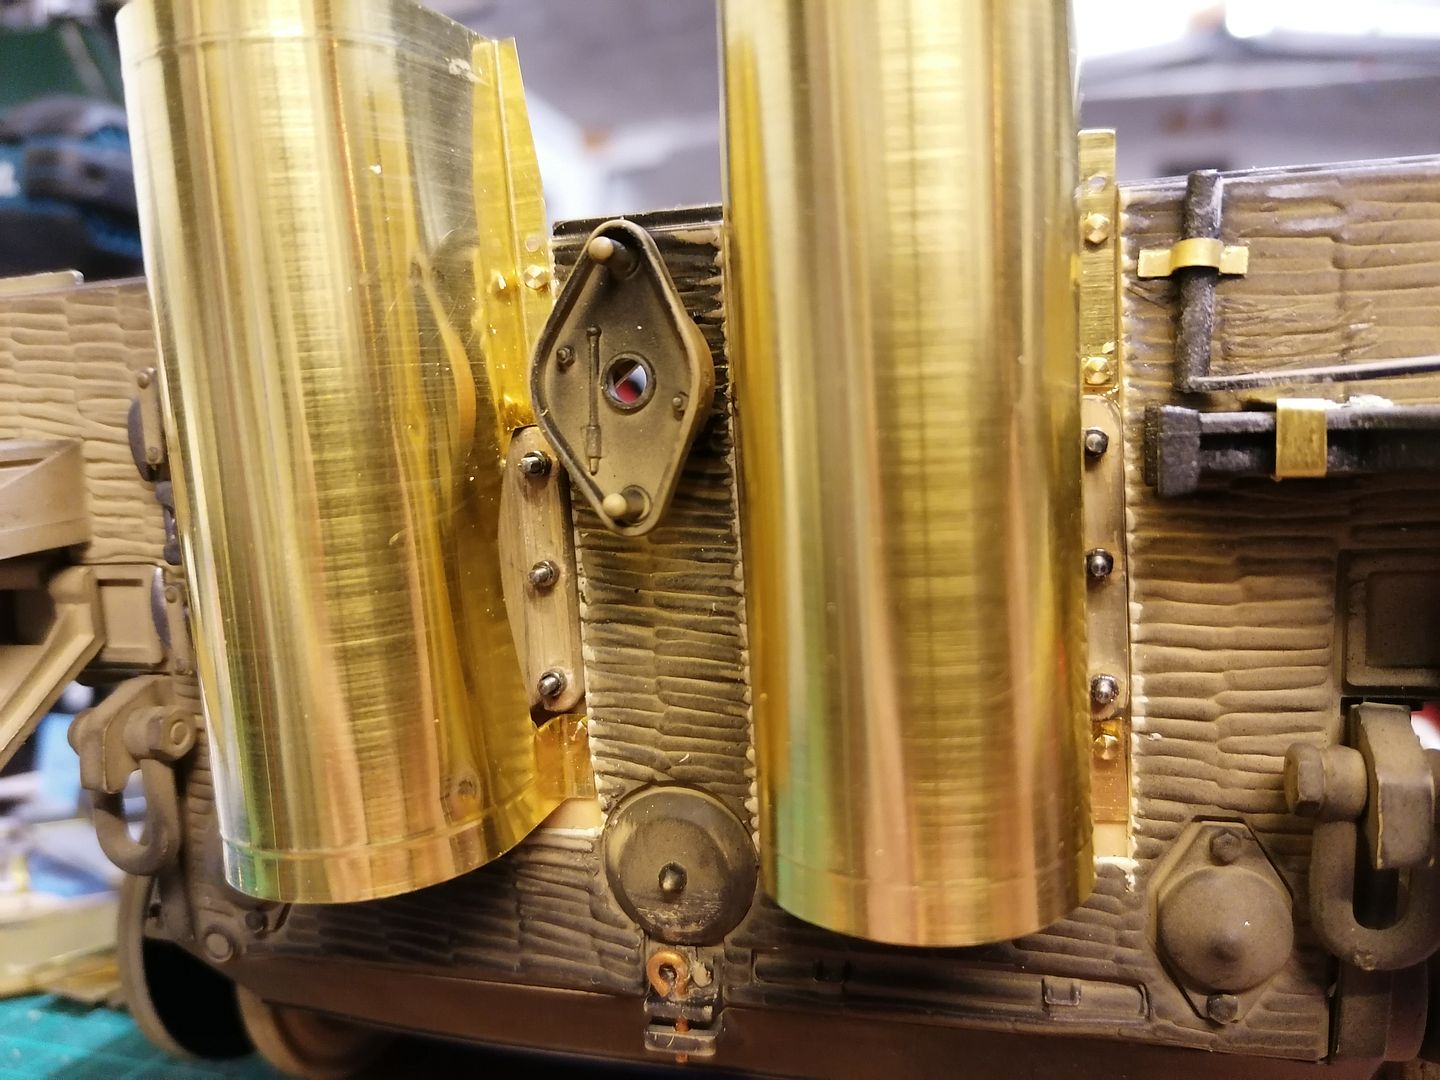
It's starting to look a lot better than it did straight out of the box here you can also see I have started to work on the crane but I will go more into that later as I just do smallbits on it between the big jobs.
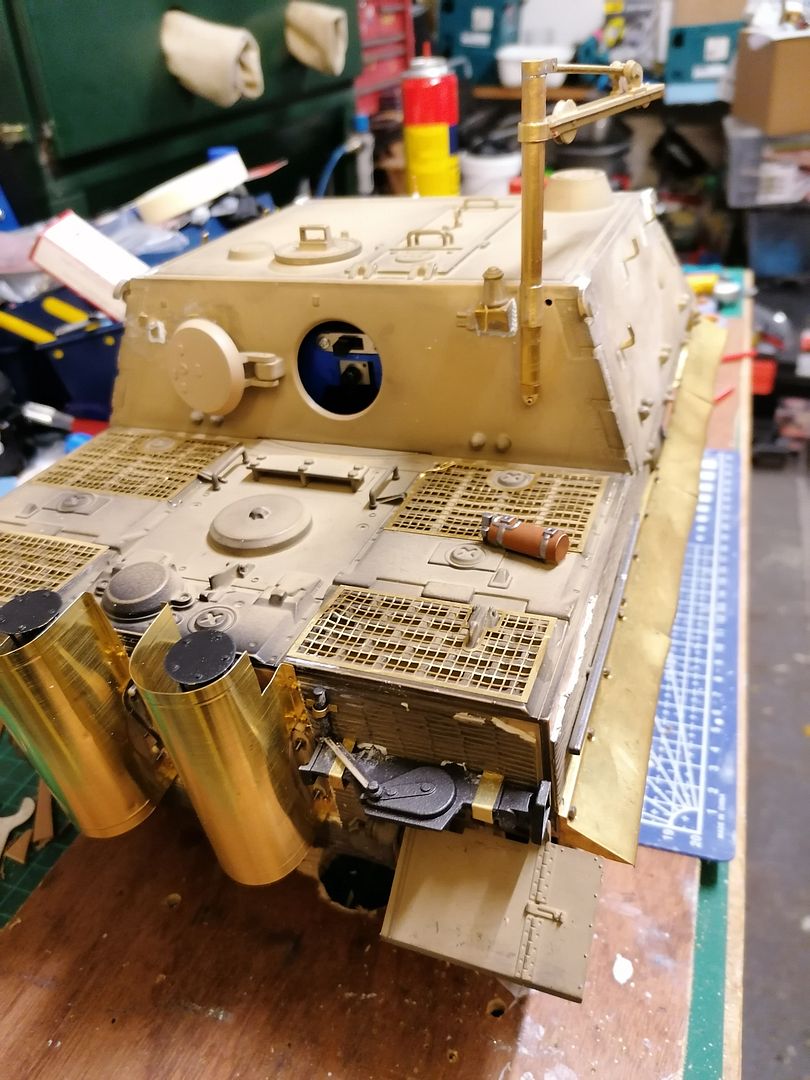
So that's about as far as I have got with it and hope to post more as and when I get chance to work on it.
The first thing I did was 3d print a newer version of the barrel that required the removal of some of the breech section to allow more depth to the barrel itself.
This is the new 2 part barrel it looks a bit stringy because its a new to me material Petg and it still needs more work on the printer but this one is good enough to use.
The breech section needed modifications to let the barrel fit properly.
Back together with the barrel fitted plus a few extra bits fitted to give more detail.
With it fitted I took it off and started work on smoothing it off with thin layers of milliput (I haven't used it in years so another thing that I'm re learning)
I also had a go at adding weld beads around the brackets I made from brass and other places while I had the milliput out.
That was something I have never done before.
I took off the front 2 hooks on the superstructure because the hook parts were obstructed I moved them forward slightly and re attached them and added more milliput weld
I got some thin brass sheet to make the exhaust covers as I didn't like the beer can material.
I first stuck the templates I made in cad.
Then cut them out using the trusted kitchen scissors then drilled the 1mm holes.
They required a small amount of straightening but that isn't important as they will get a bit of damage before they are fitted properly.
Here is one folded and rolled with a crease line at the top and bottom done with a straight edge and the tip of one of the wife's knitting needles.
Both of them done
Now on the tank with holes drilled and fitted with 14ba bolts to make sure that everything fits.
It's starting to look a lot better than it did straight out of the box here you can also see I have started to work on the crane but I will go more into that later as I just do smallbits on it between the big jobs.
So that's about as far as I have got with it and hope to post more as and when I get chance to work on it.
-
c.rainford73

- Major
- Posts: 6104
- Joined: Thu Aug 25, 2016 7:34 pm
- Location: Connecticut USA
-
Von Mooflesaaa
- Corporal
- Posts: 318
- Joined: Sat Aug 24, 2019 9:28 pm
- Location: Boise ID
Re: TORRO Sturmtiger build
mighty impressive work, where did you get the plans to scale to cut out your own brass sections, that looks crazy helpful for future builds I have in mind.
Taigen Metal Tiger
Taigen Metal Panzer IV
Taigen Metal Panzer IV
-
baldrick131
- Lance Corporal
- Posts: 140
- Joined: Fri Oct 04, 2019 8:46 pm
- Location: March cambridgeshire
- Contact:
Re: TORRO Sturmtiger build
The plans were created using solidworks as a small sheet metal part and drawn up by the program as a 1:1 plan so they could be stuck on and cut round.
-
baldrick131
- Lance Corporal
- Posts: 140
- Joined: Fri Oct 04, 2019 8:46 pm
- Location: March cambridgeshire
- Contact:
Re: TORRO Sturmtiger build
I have put the STL and PDF files for the exhaust and cover on Tingiverse for anyone who is interested in them the pdf's are 1;1 in scale but bare in mind it may not print to scale so i have put measurments on them so the scale can be checked wit a ruler before cutting anything up.
They can be found here
https://www.thingiverse.com/thing:3958354
They can be found here
https://www.thingiverse.com/thing:3958354
-
baldrick131
- Lance Corporal
- Posts: 140
- Joined: Fri Oct 04, 2019 8:46 pm
- Location: March cambridgeshire
- Contact:
Re: TORRO Sturmtiger build
Here is the link to my pdf files for the side mudguards i made.
https://www.thingiverse.com/thing:3958427
and here is the link to the barrel stl file
https://www.thingiverse.com/thing:3958390
https://www.thingiverse.com/thing:3958427
and here is the link to the barrel stl file
https://www.thingiverse.com/thing:3958390

Re: TORRO Sturmtiger build
You are certainly a modeler on a very high level! Your attention to detail and general results are spectacular and a joy to watch.
