
Hello fellow Tankers.
Some might remember the JPanther Thread that I intermixed various tanks into, when my JP mood was down. I also intermixed it with a Panther G build, that I plan to carry on during the months to come.
So for the better use of it and to properly archieve it, I thought to start it new and do an own thread. I know all the build threads I followed on in this forums helped me alot, so this might be usefull for noobs like me, who are still learning.
Panther Gs Detail upgrades
Panther Gs Detail upgrades
Last edited by Soeren on Tue Jun 19, 2018 1:59 pm, edited 1 time in total.
Re: Panther G late. Taigen +Details
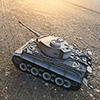
This is how it all started. A Panther bought at RCTANK.de. Taigen lower with 4:1 gears and the older Hewng Long uper painted in a somewhat more interesting scheme.
A bit dusty, after a run in the garden. That was more or less one year ago.
A bit dusty, after a run in the garden. That was more or less one year ago.
- Attachments
-
-
- IMG_5679.JPG (99.6 KiB) Viewed 6360 times
Re: Panther G late. Taigen +Details
I didnt like the initial paintjob too much, but wanted to go 1945, so olive base coat. Got me a beginners airbrush set. Sparmaxx Arizm kit with SP-35 airbrush and of he went. Inverse Spaghetti colours. Not too happy with either the paintjob, nor the level of detailing after watching this forum, I had to get to the next level.
- Attachments
-
- IMG_5695.JPG (92.78 KiB) Viewed 6359 times
-
-
Re: Panther G late. Taigen +Details
In the meantime, I built my first Dragon kit. The Panther G 6268. Amazed by the amount of detailing together with that paintjob, made me want to change the 1/16 tank even more. 
- Attachments
-
-
Re: Panther G late. Taigen +Details
A new upper had to be bought and the ABER basic Panther set.
Base coat and highlights and it looked like so.
Base coat and highlights and it looked like so.
- Attachments
-
-
-
Re: Panther G late. Taigen +Details
The next step was putting on the camo and repaint the wheels. Some Oil paints added some tone variation in addition to the highlight sprayed on and the pin washes.
- Attachments
-
-
-
-
-
Marco Peter
- Sergeant
- Posts: 719
- Joined: Mon Jun 05, 2017 10:18 pm
- Location: The Netherlands
Re: Panther G late. Taigen +Details
Off to a very nice start! You really took things seriously rebuilding it - good luck!
1:16 was my scale. Until 'Konan' came into my life... an Armortek 1:6 Tiger 1!
... Now followed by a Panther G, 'Gunther'!
I'm a happy man.
... Now followed by a Panther G, 'Gunther'!
I'm a happy man.
-
Estnische

- Warrant Officer 2nd Class
- Posts: 1065
- Joined: Tue Jun 07, 2016 11:52 pm
- Location: Wollongong, Australia
Re: Panther G late. Taigen +Details
Yep, liking Panther builds right now.
What are you using for Dunkelgelb? I tried Tamiya XF60, and it looks greenish.
What are you using for Dunkelgelb? I tried Tamiya XF60, and it looks greenish.
Re: Panther G late. Taigen +Details
Thanks guys,
that was fun so far for sure.
The base colours are all Vallejo Airbrush Acrylics. RAL 7028 Dunkelgelb and RAL6003 Olive. The higlights were 20% Dunkelgelb in Olive or 20% Aged white in the Dunkelgelb. Then brushed with some oils of Abteilung 502.
that was fun so far for sure.
The base colours are all Vallejo Airbrush Acrylics. RAL 7028 Dunkelgelb and RAL6003 Olive. The higlights were 20% Dunkelgelb in Olive or 20% Aged white in the Dunkelgelb. Then brushed with some oils of Abteilung 502.
Re: Panther G late. Taigen +Details
The next action were the laborious dusting up of the lower hull.
It is more or less plaster, some Vallejo dust washes, a bit of paint or pigments and a lot of rinsing stages.
Like this: Apply dirt roughly where you want it, then rinse an let dry...
Apply dirt, rinse, let dry... rinse... apply dirt... etc. Did that for about 3-4 sessions.
It is more or less plaster, some Vallejo dust washes, a bit of paint or pigments and a lot of rinsing stages.
Like this: Apply dirt roughly where you want it, then rinse an let dry...
Apply dirt, rinse, let dry... rinse... apply dirt... etc. Did that for about 3-4 sessions.
- Attachments
-
-
-
-
