Finishing the engine deck
In my quest to get the upper hull ready for priming my attention turned to the engine deck for the first time in a long time.
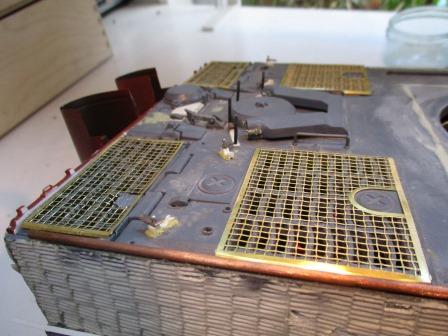
The most obvious additions are the debris screens. These were a common feature of German tanks but, for obvious reasons, usually missing from museum survivors. Because they were spot welded into place they were often lost in the field as well. But any operational Tiger is going to have most if not all in place and, once painted, they really do look the part.
Originally I had attempted to make my own using plastic mesh and brass frames, but to be honest I was never very happy with these. At that time there were several options, all from photo-etch, including Taigen, the ones that come with the Hobby Boss 1/16 scale Tiger and the Build Your Own Tiger magazine, but the only ones that really looked right were the Aber ones. Luckily Voyager have now made a set which are just as good and a lot cheaper.
Note that because the Heng Long Tiger has its rear deck hatch latches moulded on in a rear-facing position, some of the other sets have a cut-out to accommodate the latch as well as the hinge - but this is not right. On the real tank these latches could swing forwards or backwards and simply lay on top of the mesh.
The other reason why the Voyager (and Aber) grilles look better is because they have a strip at each side which bends to follow the contour of the engine deck - they don't just sit on top...
I stuck mine in place with my trusty Deluxe Materials glue and then used a wooden paint brush handle to score along the mesh to make it sag down a little between the grilles. In real life this mesh would have seen considerable wear and tear as the crew walked all over it.
Finally, it seems that some Tigers also had a finer grade of mesh beneath the top grilles - there are photos showing this. However, I took the view that by the time my Tiger was built this would have been simplified to just the one layer.

- Voyager engine deck screens dramatically alter the appearance.jpg (48.02 KiB) Viewed 5649 times
- The Voyager engine deck grilles are just as good as the Aber ones - and cheaper.jpg (42.99 KiB) Viewed 5649 times
Next I added the clamps to the end of the Feifel air cleaner trunking. When it was fitted, these were used to clamp the flexible pipes in place to crate an air-tight seal. These were actually Aber clamps which I made up a while back, supposedly for the rear of the turret stowage bin. They were just about the hardest thing I have ever had to make in model form and they looked far too fragile to go there - so I used them here instead where they should at least get some protection!
All I have to do now is reinstate the rear hatch latches themselves (from Tamiya) and the engine deck is finished.
Oh yes, and there is one thing which I
haven't corrected and which, from what I have read, is not quite 'accurate' for my model of Tiger. Why not? Because even I cannot be bothered. Can anyone spot it? I bet David Byrden can!

- Feifel air hose clamps from Aber.jpg (34.6 KiB) Viewed 5649 times
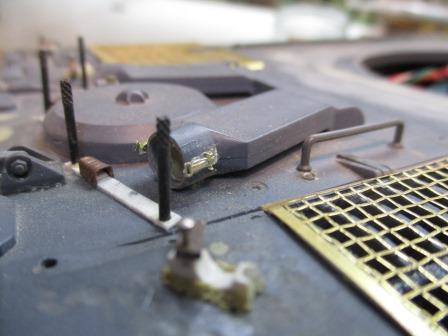
- Another view of the Feifel clamps - I also replaced my wire engine hatch handles with better looking Tamiya parts.jpg (35.13 KiB) Viewed 5649 times
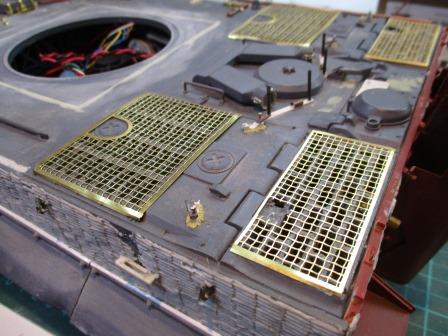
- All that remains to be done on the engine deck is to replace the rear hatch latches.jpg (48.02 KiB) Viewed 5649 times


