Operation Tamy T1 face lift

This section is for you to give a commentary / build log of your Tamiya tank. Remember - lots of pictures please!
Forum rules
This section is for posting a build log of your Tamiya tank.
Questions relating to issues you are having with your tank(s) should be posted in the General Questions forum here: viewforum.php?f=14
Post Reply
User avatar
Burger_Patrol1
Lance Corporal
Posts: 197
Joined: Sun Dec 25, 2016 7:21 pm
Location: Brea, CA. USA

Re: Operation Tamy T1 face lift

Post by Burger_Patrol1 »

HERMAN BIX wrote:Mr Burger...........thank you Sir for taking the time & inclination to post your progress in here.
Its a vital part of every hobbyists life to view the likes that "normal folk just cant do damnyou " !!!! :haha: :haha: :/

Fantastic work and plenty of visual advice for others to follow-no matter how distant !

Do you have a cam scheme in mind yet or is that a bit promiscuous to suggest !!
Thank you Mr. Bix,
I enjoy every minute...even when I screw up. I Only wish I had more time in the day to work on it, but I defiantly don't like to rush things. I believe in the old sayings...."Good things come to those who wait", " Patience is a virtue", "If at first you don't succeed, try, try, again."
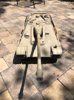
I hope my posts will help someone at some point in time, whether it be information or inspiration. I am leaning towards the desert camo scheme this time around.
Have a good one!!! :thumbup:
Tanks a lot,
Burger_Patrol1
Brea, CA. USA ;D
Tamy T1
Tamy Sand Scorcher
Tamy BlackFoot
Tamy Clodbuster
Static Dio's
User avatar
Burger_Patrol1
Lance Corporal
Posts: 197
Joined: Sun Dec 25, 2016 7:21 pm
Location: Brea, CA. USA

Re: Operation Tamy T1 face lift

Post by Burger_Patrol1 »

This post might be a bit boring, but I thought it would be good to show some weld seams being made. If you start to fall asleep just hit esc button and wait for the next post...LoL :haha: ;) :yawn:
Used Dremel tool to groove out where weld seam will go.
Horizontal weld
Horizontal weld
Aft port side vertical weld seam scarfed out.
Always get sweaty palms thinking of the dentist when using Dremel...loL
IMG_4179.JPG (91.36 KiB) Viewed 3480 times
Had this putty laying around...most any putty should work for welds.
2 parts...mix equally.
IMG_4182.JPG
Use CA glue to help anchor putty and keep from moving while you work the putty in the weld groove.
IMG_4183.JPG (80.25 KiB) Viewed 3480 times
IMG_4184.JPG
Once putty in kneaded together, roll it out to a this strip.
Tanks a lot,
Burger_Patrol1
Brea, CA. USA ;D
Tamy T1
Tamy Sand Scorcher
Tamy BlackFoot
Tamy Clodbuster
Static Dio's
User avatar
Burger_Patrol1
Lance Corporal
Posts: 197
Joined: Sun Dec 25, 2016 7:21 pm
Location: Brea, CA. USA

Re: Operation Tamy T1 face lift

Post by Burger_Patrol1 »

IMG_4186.JPG
IMG_4186.JPG (77.39 KiB) Viewed 3477 times
IMG_4187.JPG
IMG_4187.JPG (98.53 KiB) Viewed 3477 times
Once putty is pushed into weld seam. I use an old paint brush that I removed the bristols from to make welds beads.
IMG_4188.JPG (95.93 KiB) Viewed 3477 times
I cut the circle end in half and smoothed out with a small file.
IMG_4189.JPG (65.76 KiB) Viewed 3477 times
Then just slowly push end into the putty to get the desired affect. Remember this does not have to be perfect. Many times weld seams were not uniform.
IMG_4190.JPG (97.13 KiB) Viewed 3477 times
Ahhhhh...finished...simple
IMG_4191.JPG (87.94 KiB) Viewed 3477 times
Many times I will use a pointed tool to rough up left and right edge of weld so it is not so uniform.
IMG_4192.JPG (86.41 KiB) Viewed 3477 times
IMG_4193.JPG
IMG_4193.JPG (85.42 KiB) Viewed 3477 times
IMG_4194.JPG
IMG_4195.JPG
IMG_4195.JPG (92.92 KiB) Viewed 3477 times
Ok welds 101 class is over...you can wake up now ;)
Tanks a lot,
Burger_Patrol1
Brea, CA. USA ;D
Tamy T1
Tamy Sand Scorcher
Tamy BlackFoot
Tamy Clodbuster
Static Dio's
Reaper332
Corporal
Posts: 484
Joined: Wed Jan 11, 2012 8:54 pm

Re: Operation Tamy T1 face lift

Post by Reaper332 »

Nice job on the welds mate.... really nice job... :thumbup:
User avatar
Raminator
Warrant Officer 2nd Class
Posts: 1267
Joined: Tue Aug 11, 2015 9:57 am
Location: Newcastle, Australia

Re: Operation Tamy T1 face lift

Post by Raminator »

Picture-perfect work, as we've come to expect. Everything's coming together very nicely.
Burger_Patrol1 wrote:Ok welds 101 class is over...you can wake up now ;)
I was bright-eyed and bushy-tailed through the whole thing, very interesting to see how the professionals do it! I had a go at some milliput welds for the first time the other day, and it was a bit of a disaster. Scoring underneath the weld line and anchoring the putty with glue would have helped with some of the problems I came across, I'll have to try again. Thanks for sharing!
User avatar
Burger_Patrol1
Lance Corporal
Posts: 197
Joined: Sun Dec 25, 2016 7:21 pm
Location: Brea, CA. USA

Re: Operation Tamy T1 face lift

Post by Burger_Patrol1 »

Reaper332 wrote:Nice job on the welds mate.... really nice job... :thumbup:
Thanks Reaper...more to come soon. :thumbup:
Tanks a lot,
Burger_Patrol1
Brea, CA. USA ;D
Tamy T1
Tamy Sand Scorcher
Tamy BlackFoot
Tamy Clodbuster
Static Dio's
User avatar
Burger_Patrol1
Lance Corporal
Posts: 197
Joined: Sun Dec 25, 2016 7:21 pm
Location: Brea, CA. USA

Re: Operation Tamy T1 face lift

Post by Burger_Patrol1 »

Raminator wrote:Picture-perfect work, as we've come to expect. Everything's coming together very nicely.
Burger_Patrol1 wrote:Ok welds 101 class is over...you can wake up now ;)
I was bright-eyed and bushy-tailed through the whole thing, very interesting to see how the professionals do it! I had a go at some milliput welds for the first time the other day, and it was a bit of a disaster. Scoring underneath the weld line and anchoring the putty with glue would have helped with some of the problems I came across, I'll have to try again. Thanks for sharing!
Thanks Raminator,
I have tried Milput for a few different things and it can be a bit finicky. When is starts to dry, it gets sticky and if you wet it to much it gets messing. I did have good luck using it to scratch build some figures though. PROFESSIONAL? 8O Don't say that to loud, I'll get a big head...LoL :haha: I still have much to learn to get my skills where I'd like them to be, but thanks for the kind words :thumbup:
Tanks a lot,
Burger_Patrol1
Brea, CA. USA ;D
Tamy T1
Tamy Sand Scorcher
Tamy BlackFoot
Tamy Clodbuster
Static Dio's
User avatar
Markocaster
Staff Sergeant
Posts: 990
Joined: Mon Mar 31, 2014 11:16 pm
Location: Bay Area , California

Re: Operation Tamy T1 face lift

Post by Markocaster »

Nice tidy welds :thumbup:
HL /Mato tiger 1 early, Tamiya Tiger 1 early, Taigen tiger 1 mid
Taigen T34/85, HL SU-100
Jagdpanzer Lang
Taiga Jagdpanther
Heng Long Sherman DGS Firefly kit
Tamiya King Tiger (unbuilt)
Mato all metal Panzer III
1/10 Jagdpanther
User avatar
Burger_Patrol1
Lance Corporal
Posts: 197
Joined: Sun Dec 25, 2016 7:21 pm
Location: Brea, CA. USA

Re: Operation Tamy T1 face lift

Post by Burger_Patrol1 »

Markocaster wrote:Nice tidy welds :thumbup:
Thank you sir :wave:
Tanks a lot,
Burger_Patrol1
Brea, CA. USA ;D
Tamy T1
Tamy Sand Scorcher
Tamy BlackFoot
Tamy Clodbuster
Static Dio's
User avatar
Burger_Patrol1
Lance Corporal
Posts: 197
Joined: Sun Dec 25, 2016 7:21 pm
Location: Brea, CA. USA

Re: Operation Tamy T1 face lift

Post by Burger_Patrol1 »

Happy Superbowl Sunday ya'll!!
Moving on to the rear tow hitch. I didn't realize how many details are on the rear hull of the T1 until I had to remove and replace them all with more detailed parts. :crazy:
Nice Aero-Mate rear tow hitch
IMG_4196.JPG (94.04 KiB) Viewed 3376 times
Making pin for hitch
IMG_4197.JPG (93.33 KiB) Viewed 3376 times
IMG_4198.JPG
IMG_4198.JPG (93.73 KiB) Viewed 3376 times
IMG_4199.JPG
IMG_4199.JPG (90.77 KiB) Viewed 3376 times
IMG_4200.JPG
IMG_4201.JPG
IMG_4201.JPG (96.85 KiB) Viewed 3376 times
IMG_4202.JPG
IMG_4202.JPG (72.58 KiB) Viewed 3376 times
IMG_4203.JPG
IMG_4203.JPG (85.08 KiB) Viewed 3376 times
IMG_4204.JPG
IMG_4204.JPG (81.2 KiB) Viewed 3376 times
IMG_4205.JPG
IMG_4205.JPG (97.94 KiB) Viewed 3376 times
Tanks a lot,
Burger_Patrol1
Brea, CA. USA ;D
Tamy T1
Tamy Sand Scorcher
Tamy BlackFoot
Tamy Clodbuster
Static Dio's
Post Reply

Return to “Tamiya Builds”