s.I.G 33 Converion
-
baldrick131
- Lance Corporal
- Posts: 140
- Joined: Fri Oct 04, 2019 8:46 pm
- Location: March cambridgeshire
- Contact:
Re: s.I.G 33 Converion
Just using an old Tronxy x3 that I have had for ages and is probably 80 percent upgrade parts
-
baldrick131
- Lance Corporal
- Posts: 140
- Joined: Fri Oct 04, 2019 8:46 pm
- Location: March cambridgeshire
- Contact:
Re: s.I.G 33 Converion
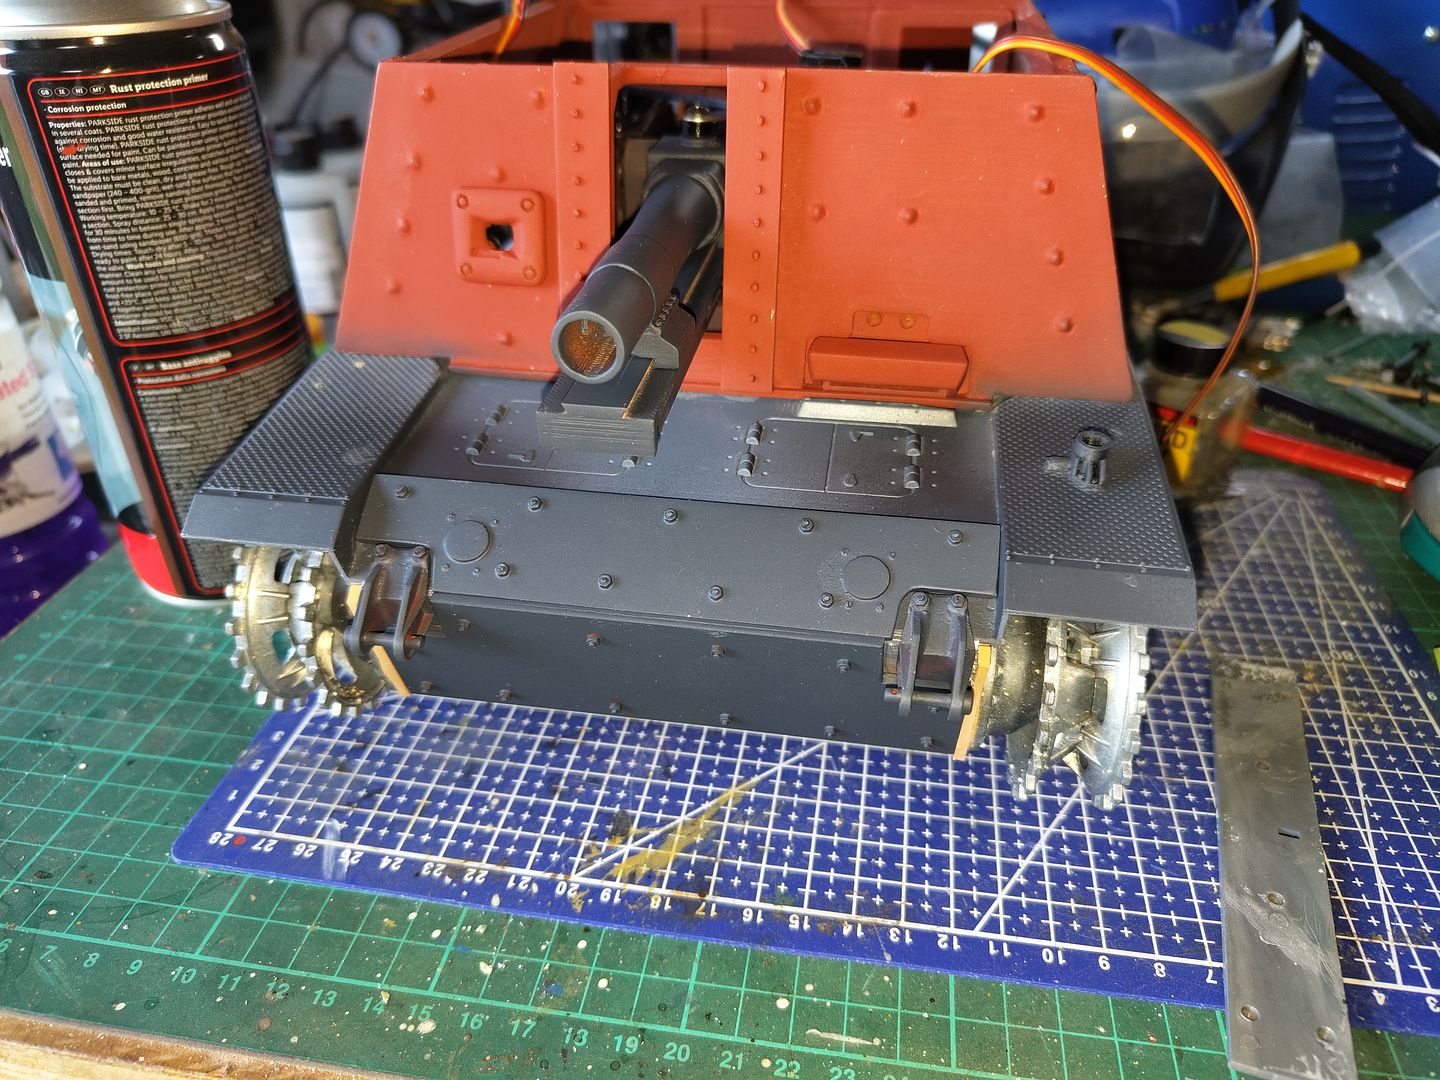
I redesigned the gun shield and made a lower section that pivots on a hinge not exactly to scale or even the right shape but it does the job.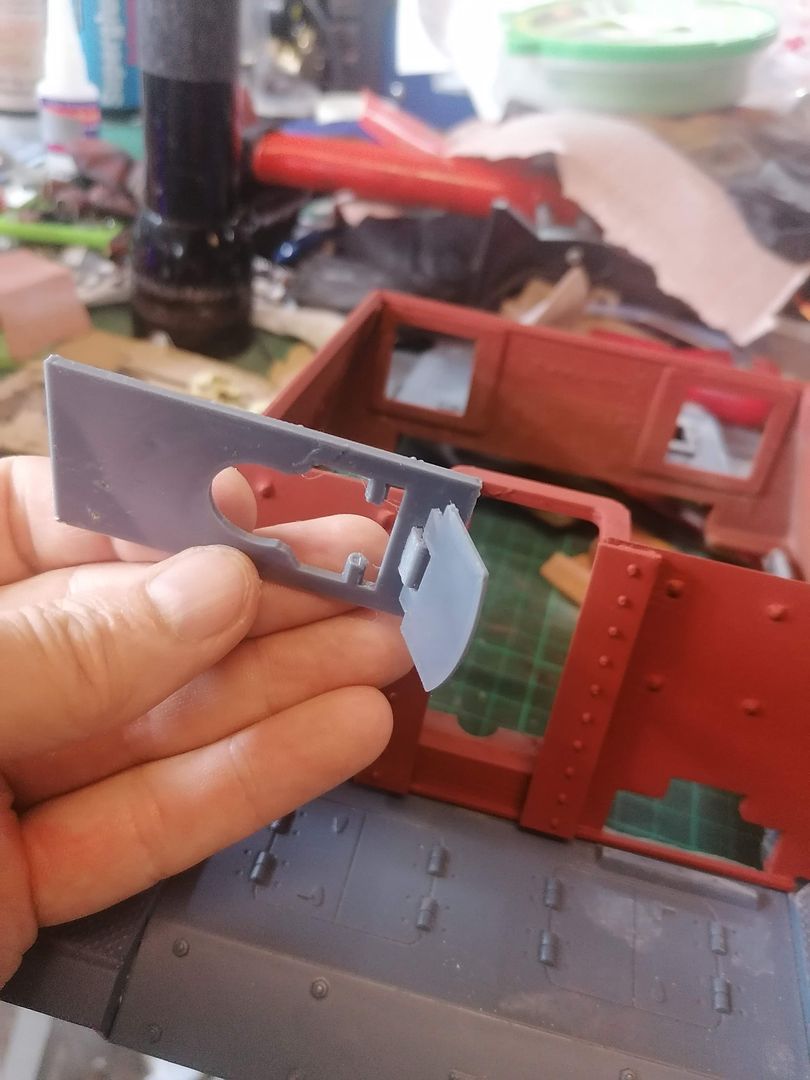
Imade a start on smoothing off the parts of the case mate and roof as it doesn't need to be changed any more so I can at least start the build properly now.
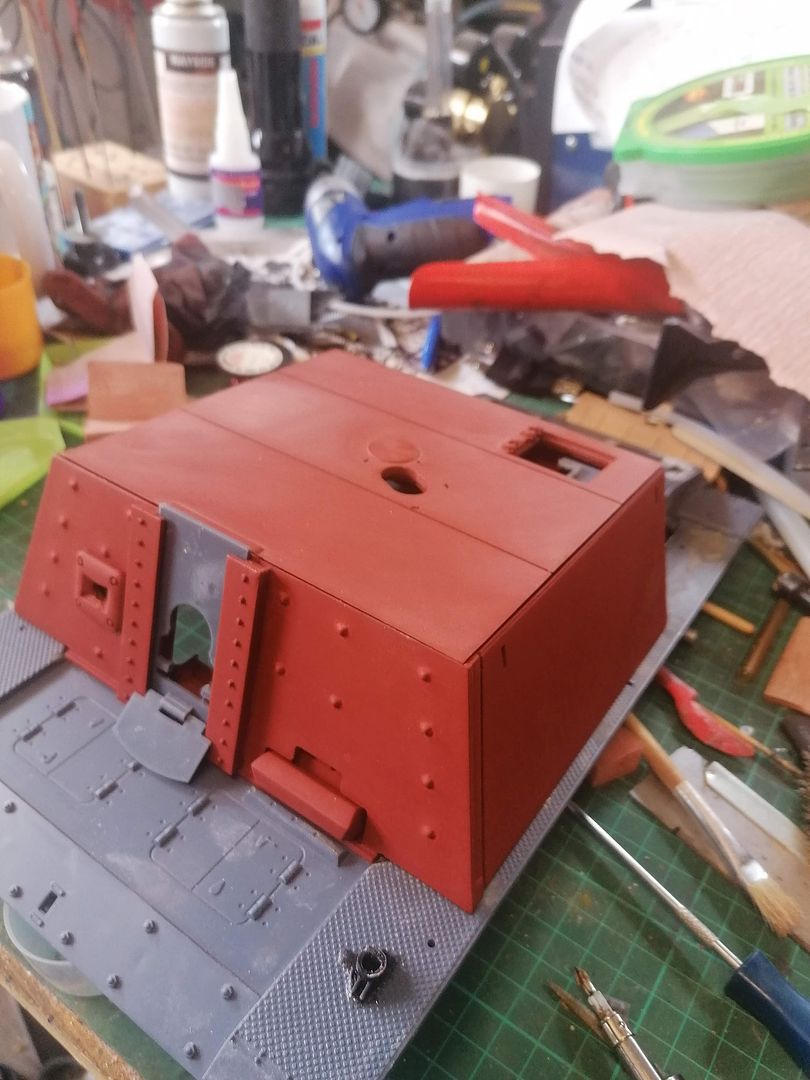
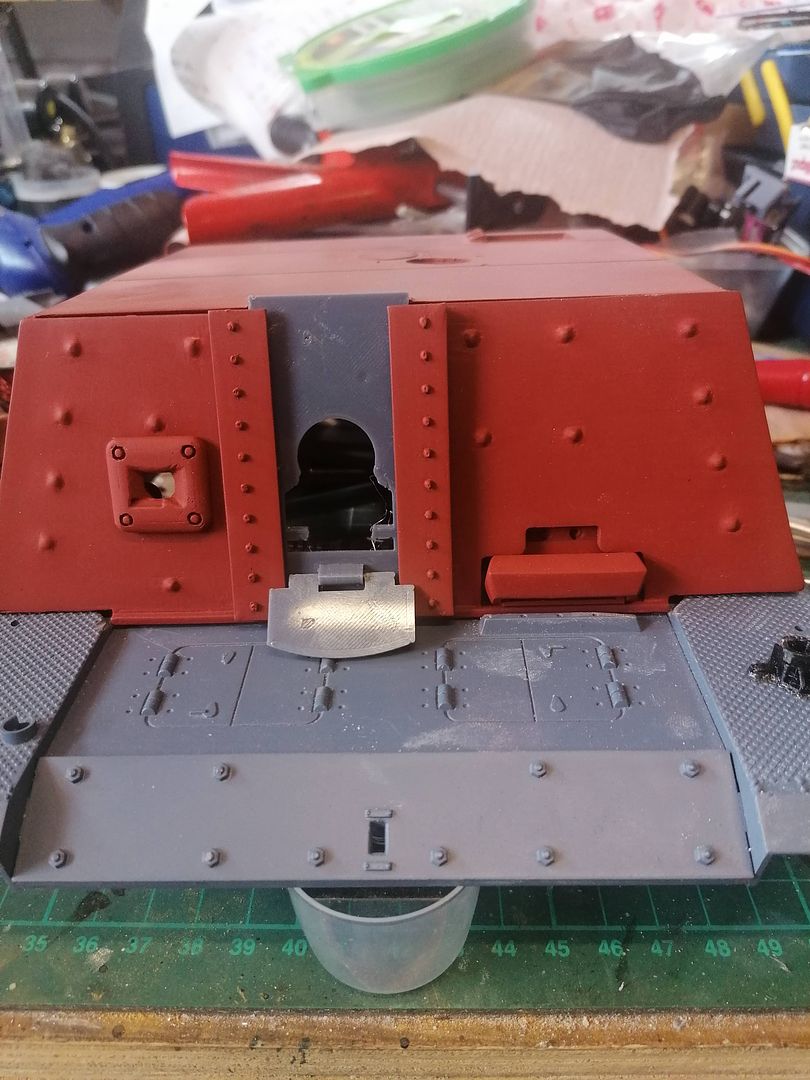
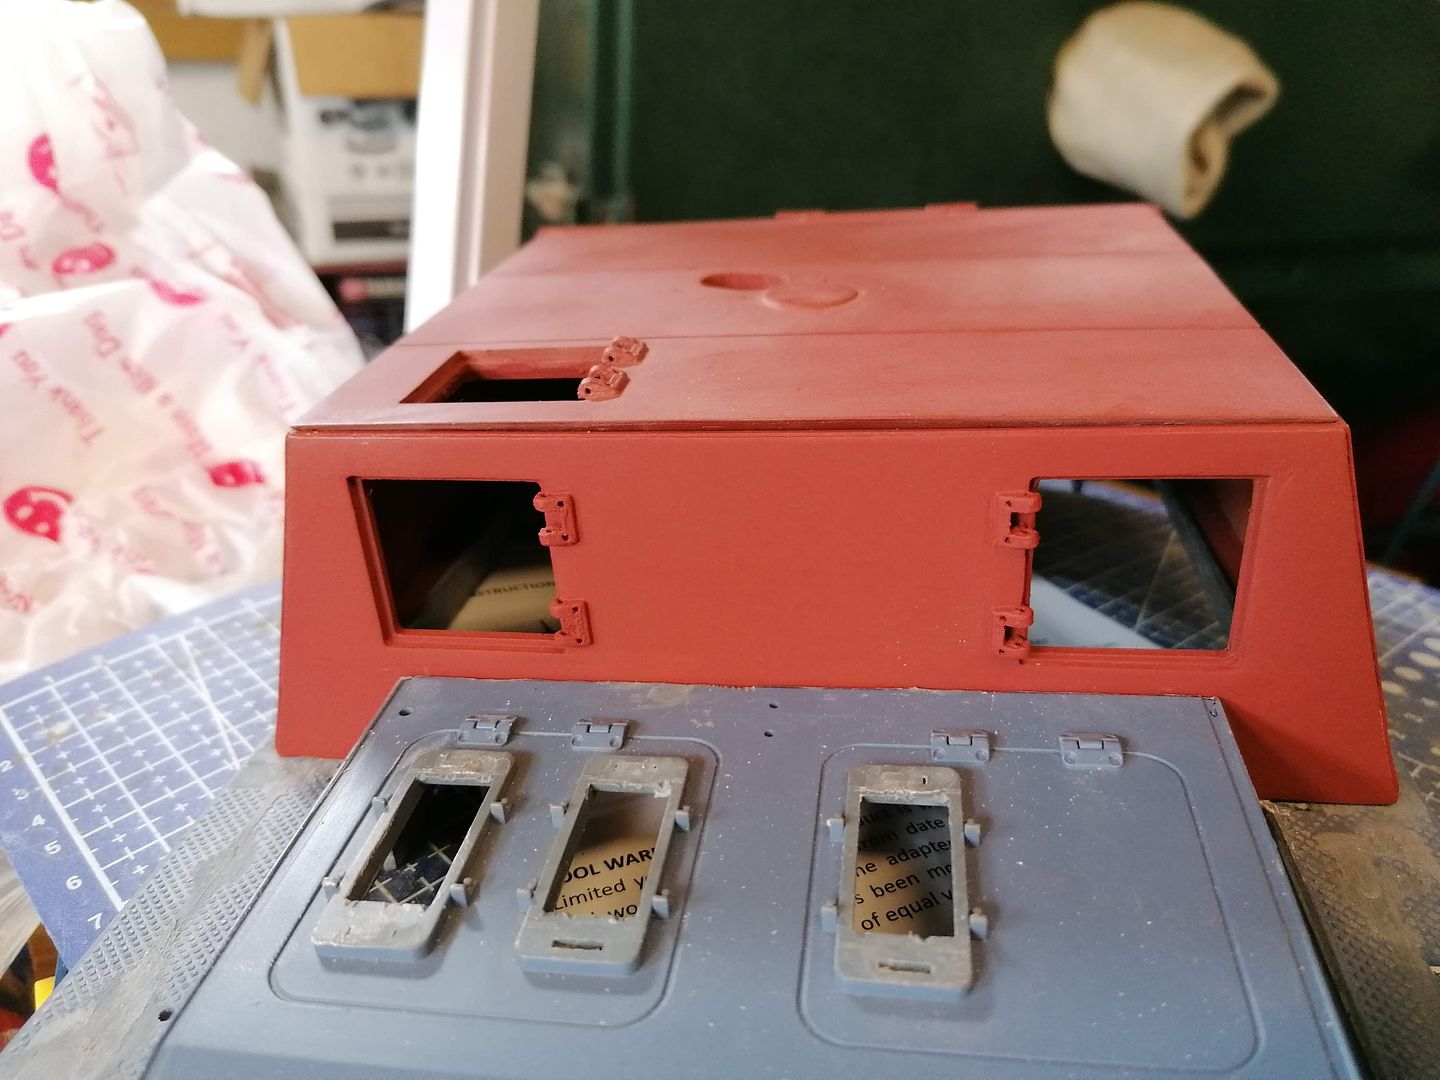
I think I am going to live with the slight bow in the roof as its not too much but as its a separate part it wouldn't be too much to change anyway.
The rear door frames were glued in place using my favorite plastic bumper repair epoxy as it hasn't let me down yet, then just filled any gaps with Milliput and a bit of halfords red oxide plastic primer and its nearly done.
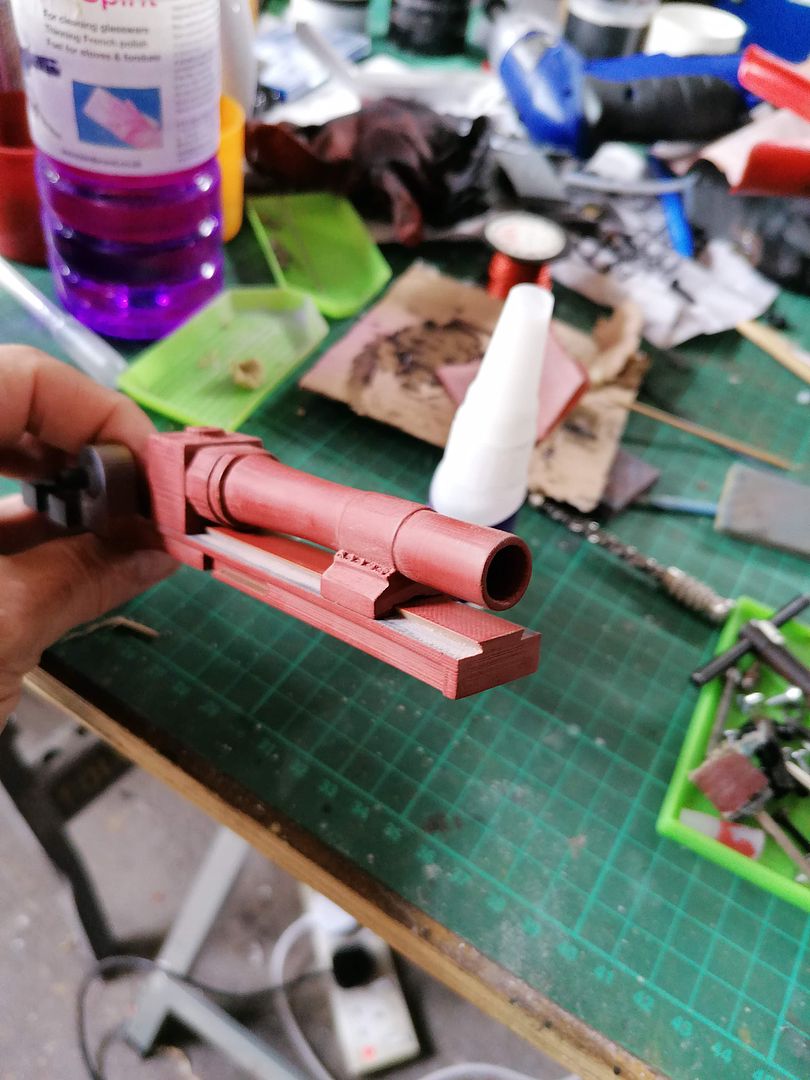
The barrel needed quit a bit of filling as I printed it top down and the supported area wasn't very smooth I have masked off the sections the barrel slides on so it diddnt cause a problem when it built up.
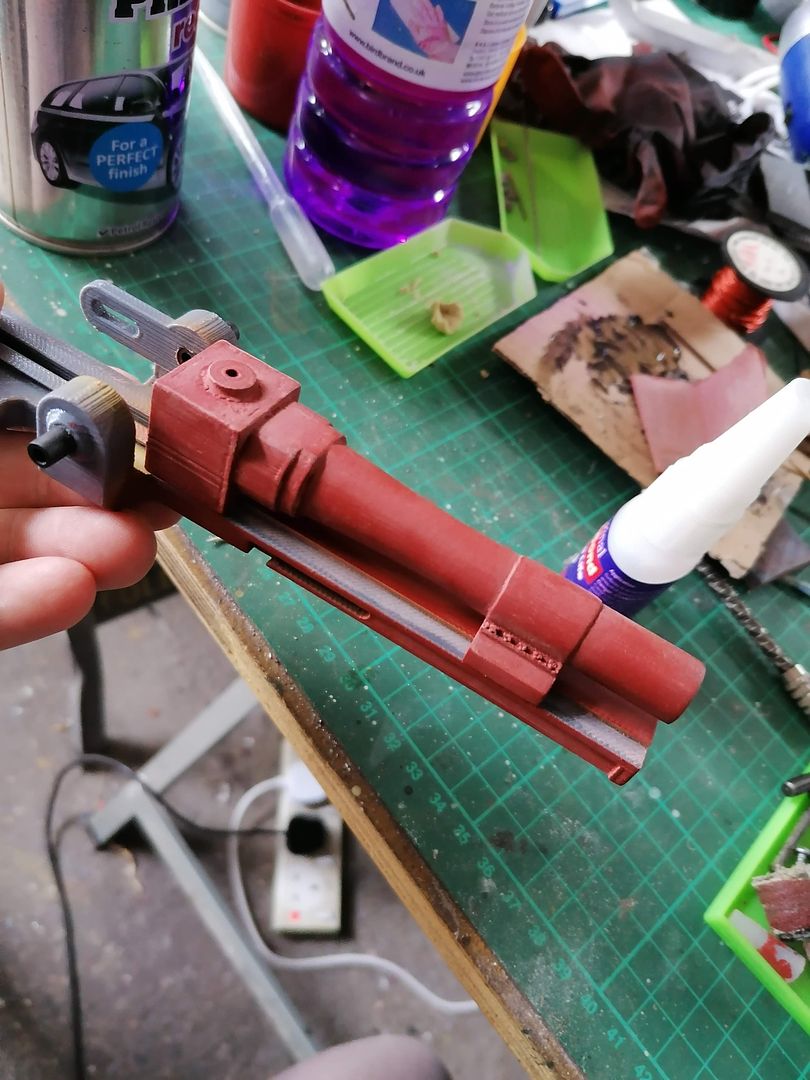
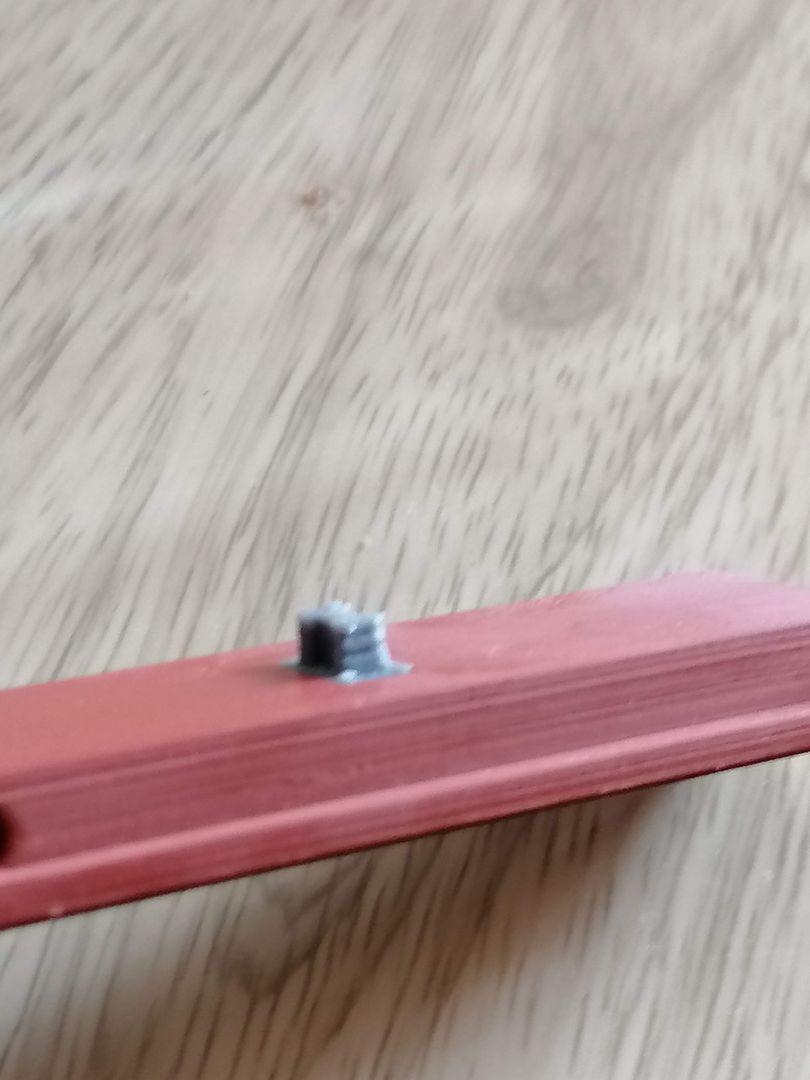
I printed a small plug that glues in to the bottom of the gun bed and replicates the block for the barrel clamp.
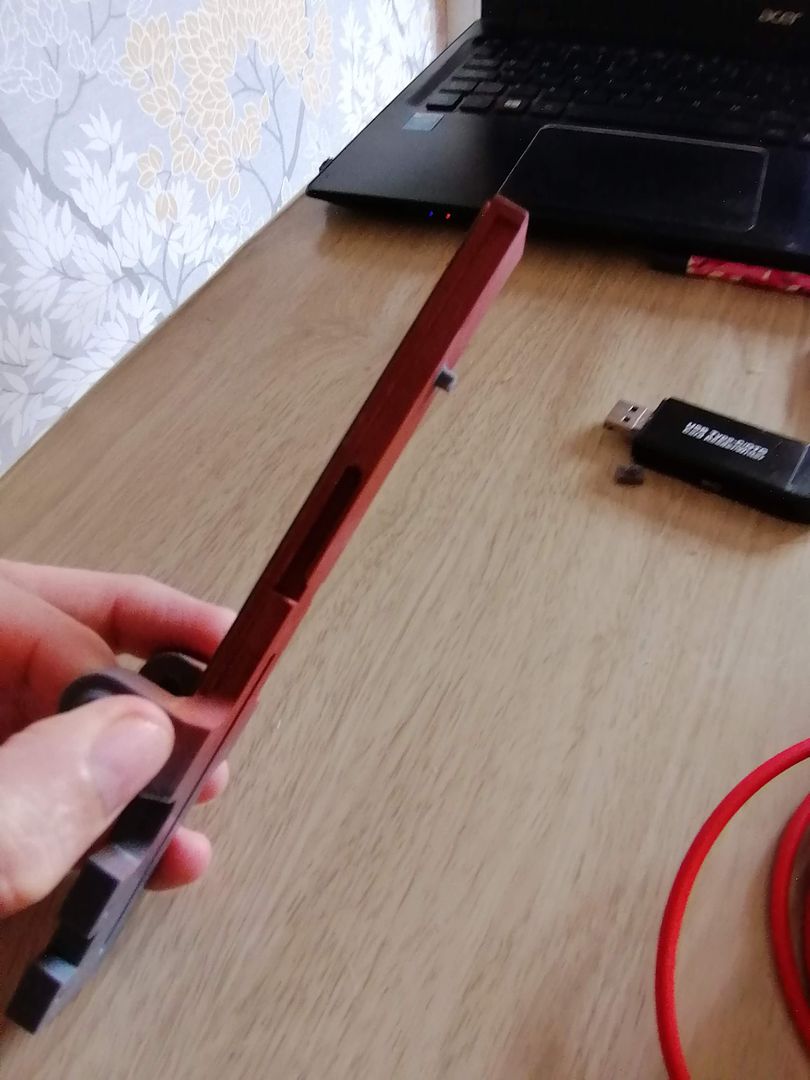
A bit of filling and some paint and I can put the gun back together and refit it in the case mate.
I have uploaded all the STL files for the case mate and gun to Thingiverse and I will Be adding any other parts I make when I get to working on other parts.
the files are here
https://www.thingiverse.com/thing:5445508/files
Imade a start on smoothing off the parts of the case mate and roof as it doesn't need to be changed any more so I can at least start the build properly now.
I think I am going to live with the slight bow in the roof as its not too much but as its a separate part it wouldn't be too much to change anyway.
The rear door frames were glued in place using my favorite plastic bumper repair epoxy as it hasn't let me down yet, then just filled any gaps with Milliput and a bit of halfords red oxide plastic primer and its nearly done.
The barrel needed quit a bit of filling as I printed it top down and the supported area wasn't very smooth I have masked off the sections the barrel slides on so it diddnt cause a problem when it built up.
I printed a small plug that glues in to the bottom of the gun bed and replicates the block for the barrel clamp.
A bit of filling and some paint and I can put the gun back together and refit it in the case mate.
I have uploaded all the STL files for the case mate and gun to Thingiverse and I will Be adding any other parts I make when I get to working on other parts.
the files are here
https://www.thingiverse.com/thing:5445508/files
Re: s.I.G 33 Converion
That is turning out really nice looking!
This is giving me a lot of inspiration to learn how to design parts to 3d print.
This is giving me a lot of inspiration to learn how to design parts to 3d print.
-
baldrick131
- Lance Corporal
- Posts: 140
- Joined: Fri Oct 04, 2019 8:46 pm
- Location: March cambridgeshire
- Contact:
Re: s.I.G 33 Converion
It can be an adventure down the rabbit hole learning cad but try the different free programs out there to get a feel for the one that suits you as I've found some are less intuitive to use than others.Nitewyn wrote:That is turning out really nice looking!
This is giving me a lot of inspiration to learn how to design parts to 3d print.
check this video as its very informative of the pros and cons of the most popular free ones.
-
baldrick131
- Lance Corporal
- Posts: 140
- Joined: Fri Oct 04, 2019 8:46 pm
- Location: March cambridgeshire
- Contact:
Re: s.I.G 33 Converion
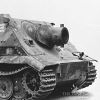
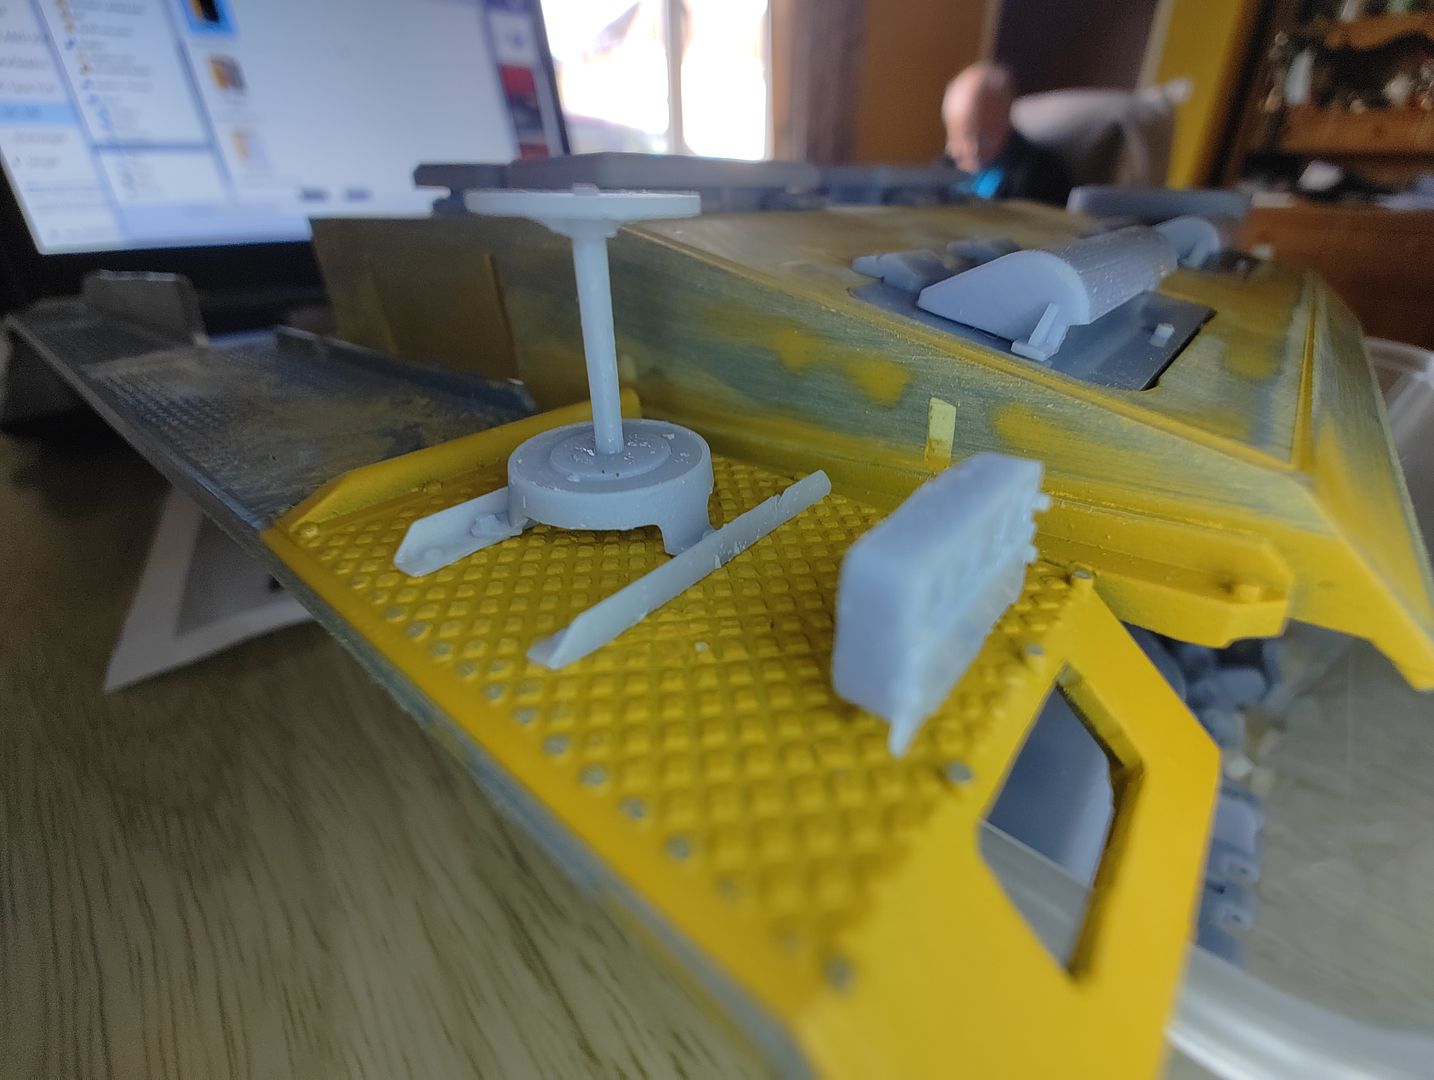
I finally got some time to work on the tank and decided to make the cover over the periscope.
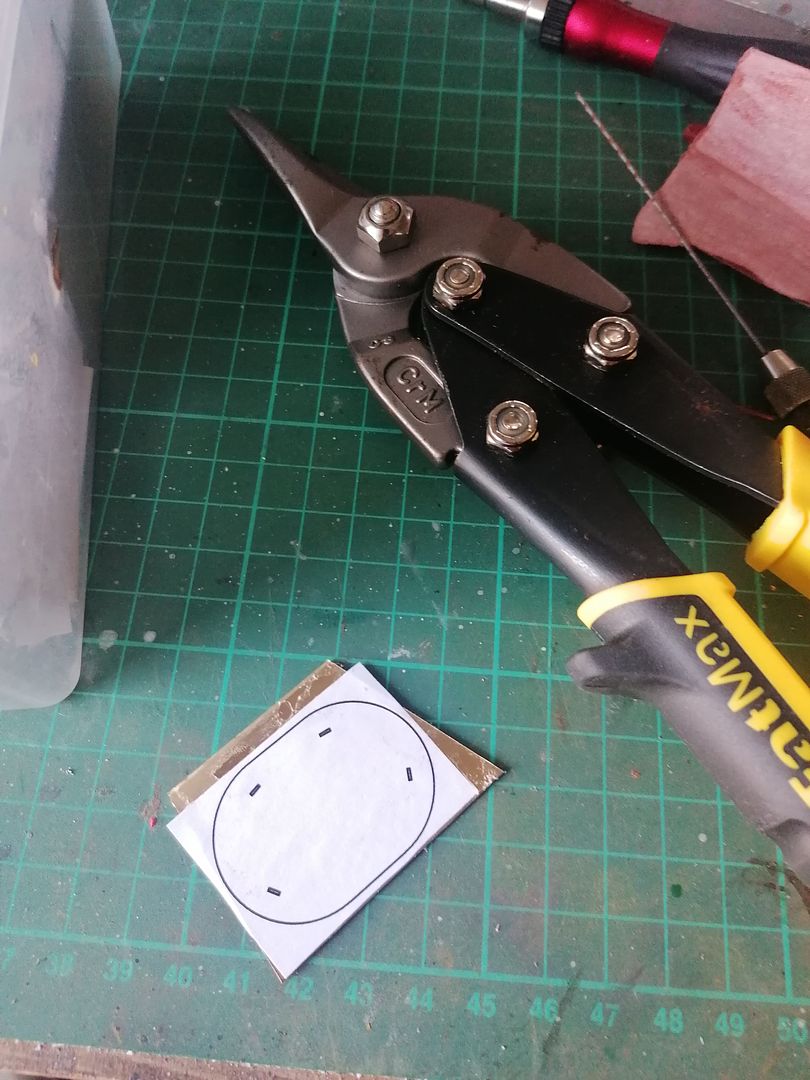
I printed the 1:1 plan and cut it out of brass sheet and scribe the marks for the mounting strips.
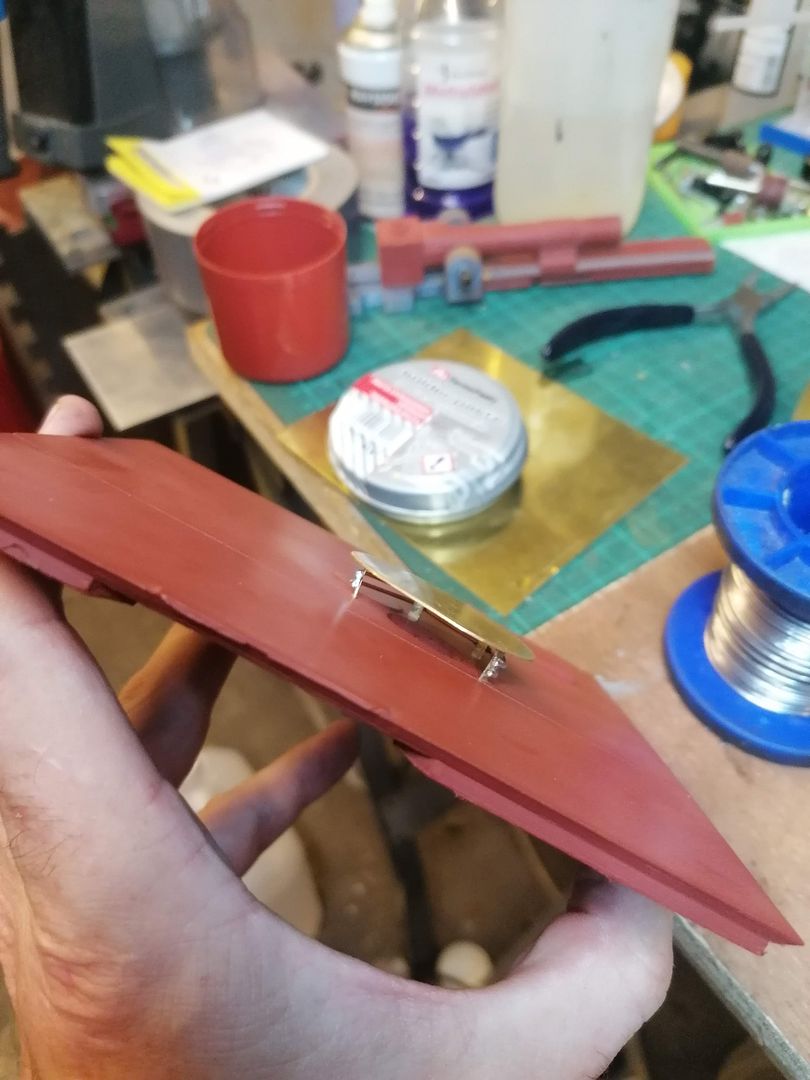
After the mounting strips and bars were soldered on I fitted it to the roof.
I also made a start on the hull modifications.
first modify the towing brackets to look more like the ones fitted to the Sig 33b with a few bits of plasticard and some 12ba nuts.
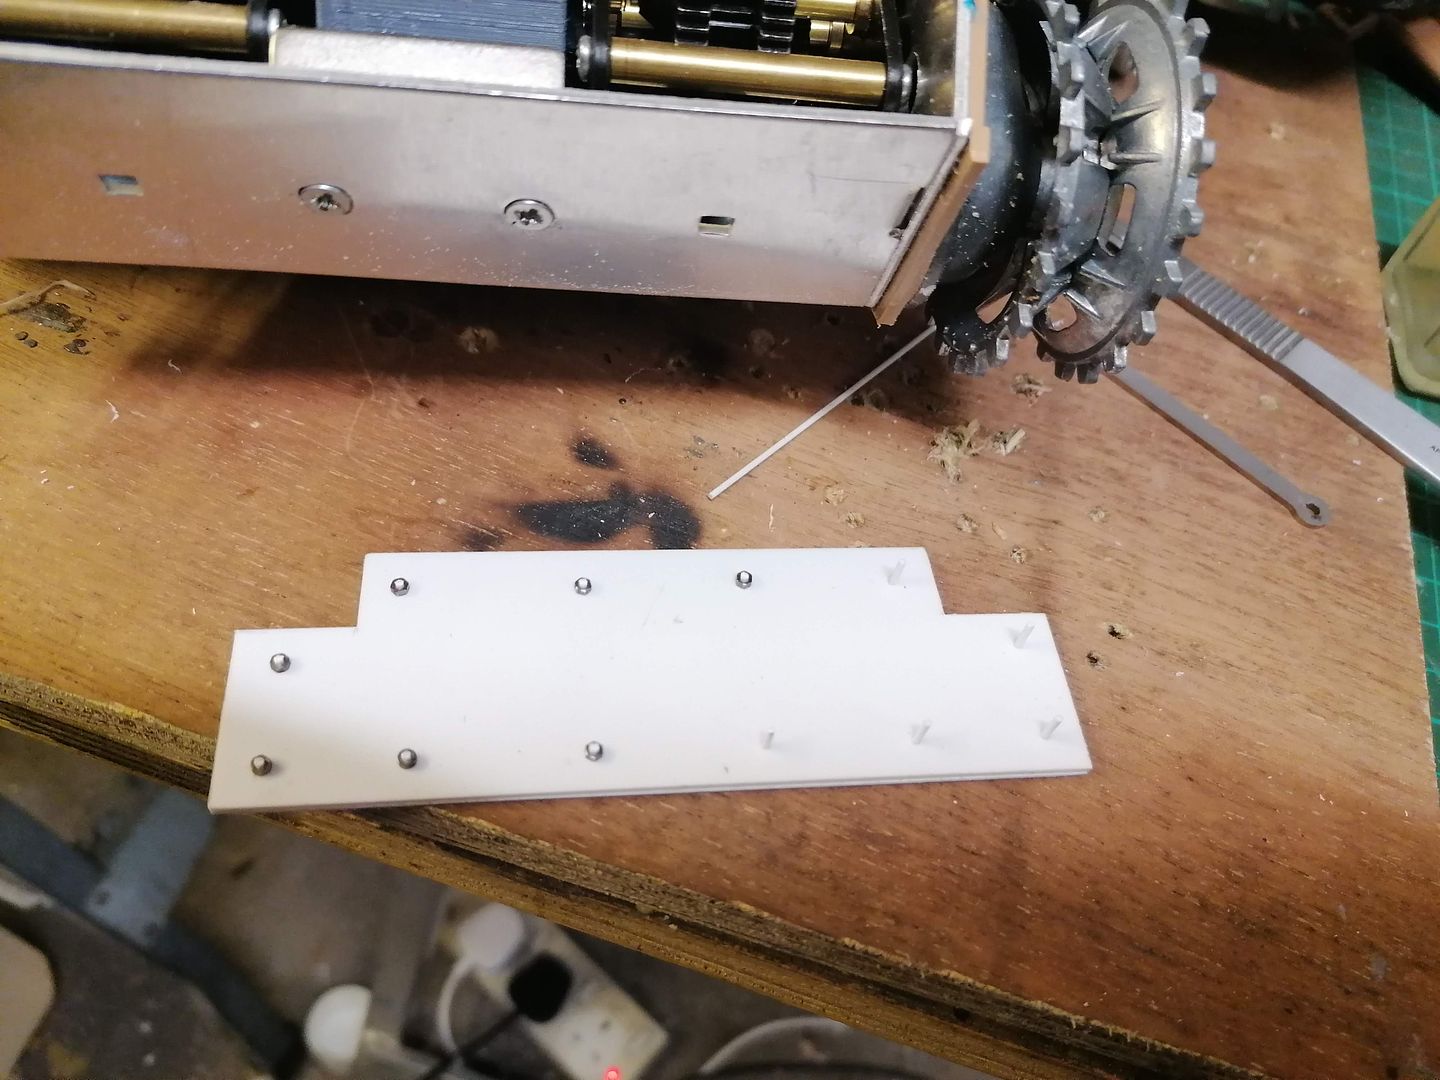
The front lower added armour was also done with plasticard and 12ba nuts.
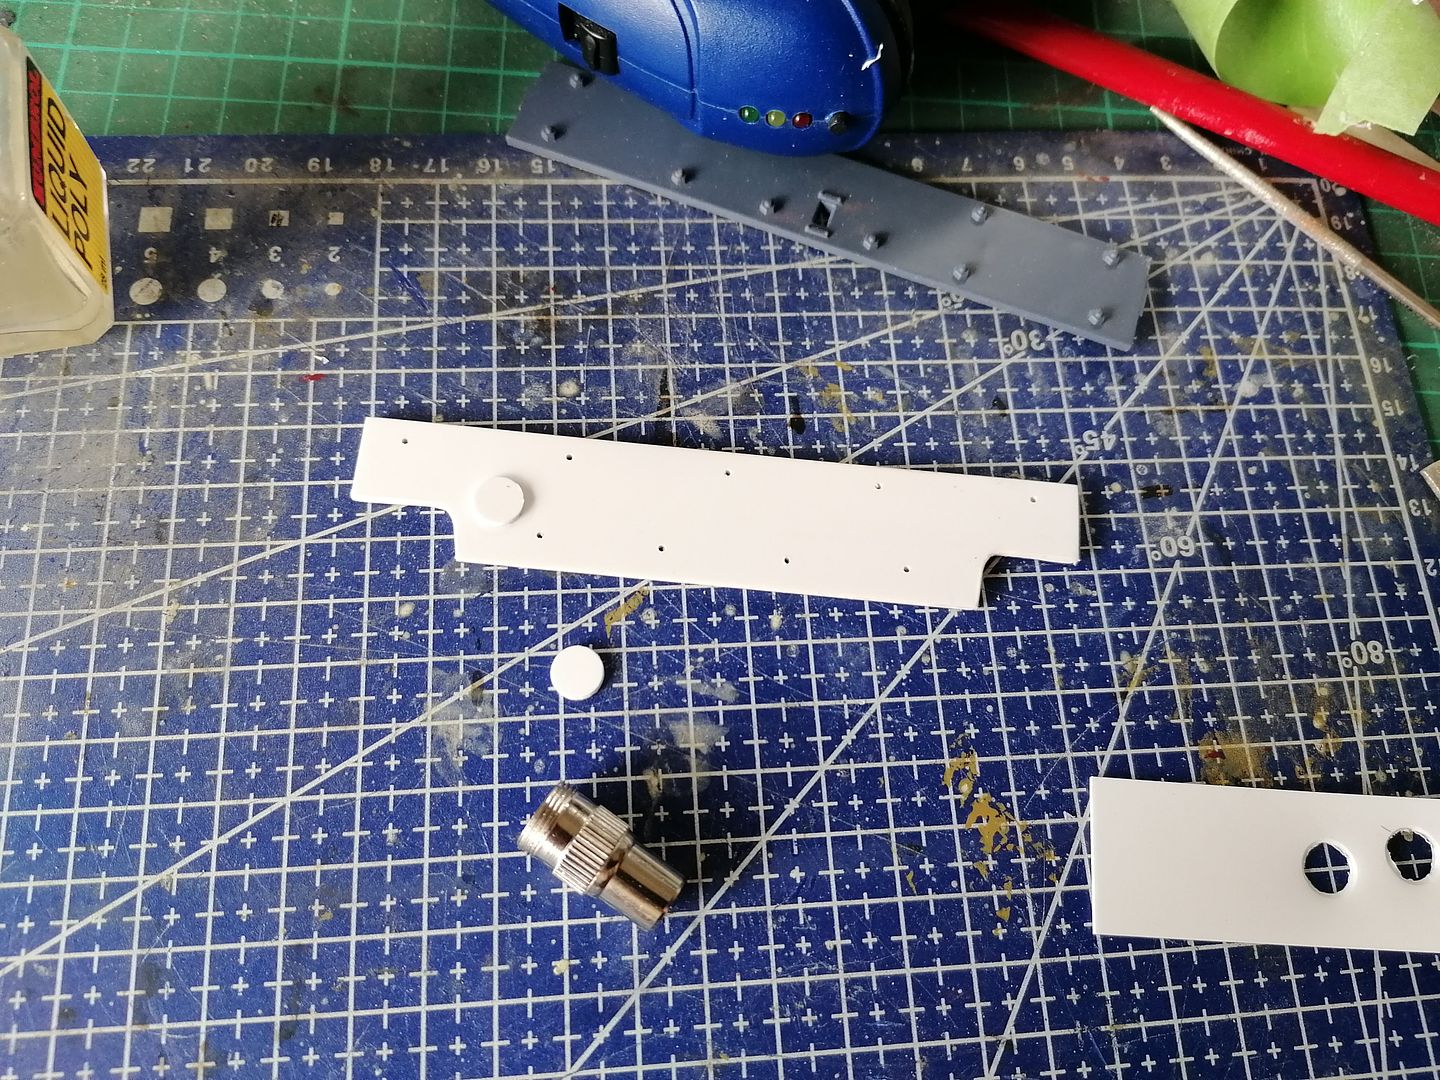
The upper added armour is also re done as the original part fitted as standard was different.
Luckily a outer part of a tv antenna cable plug made a perfect punch for the brake vent covers.
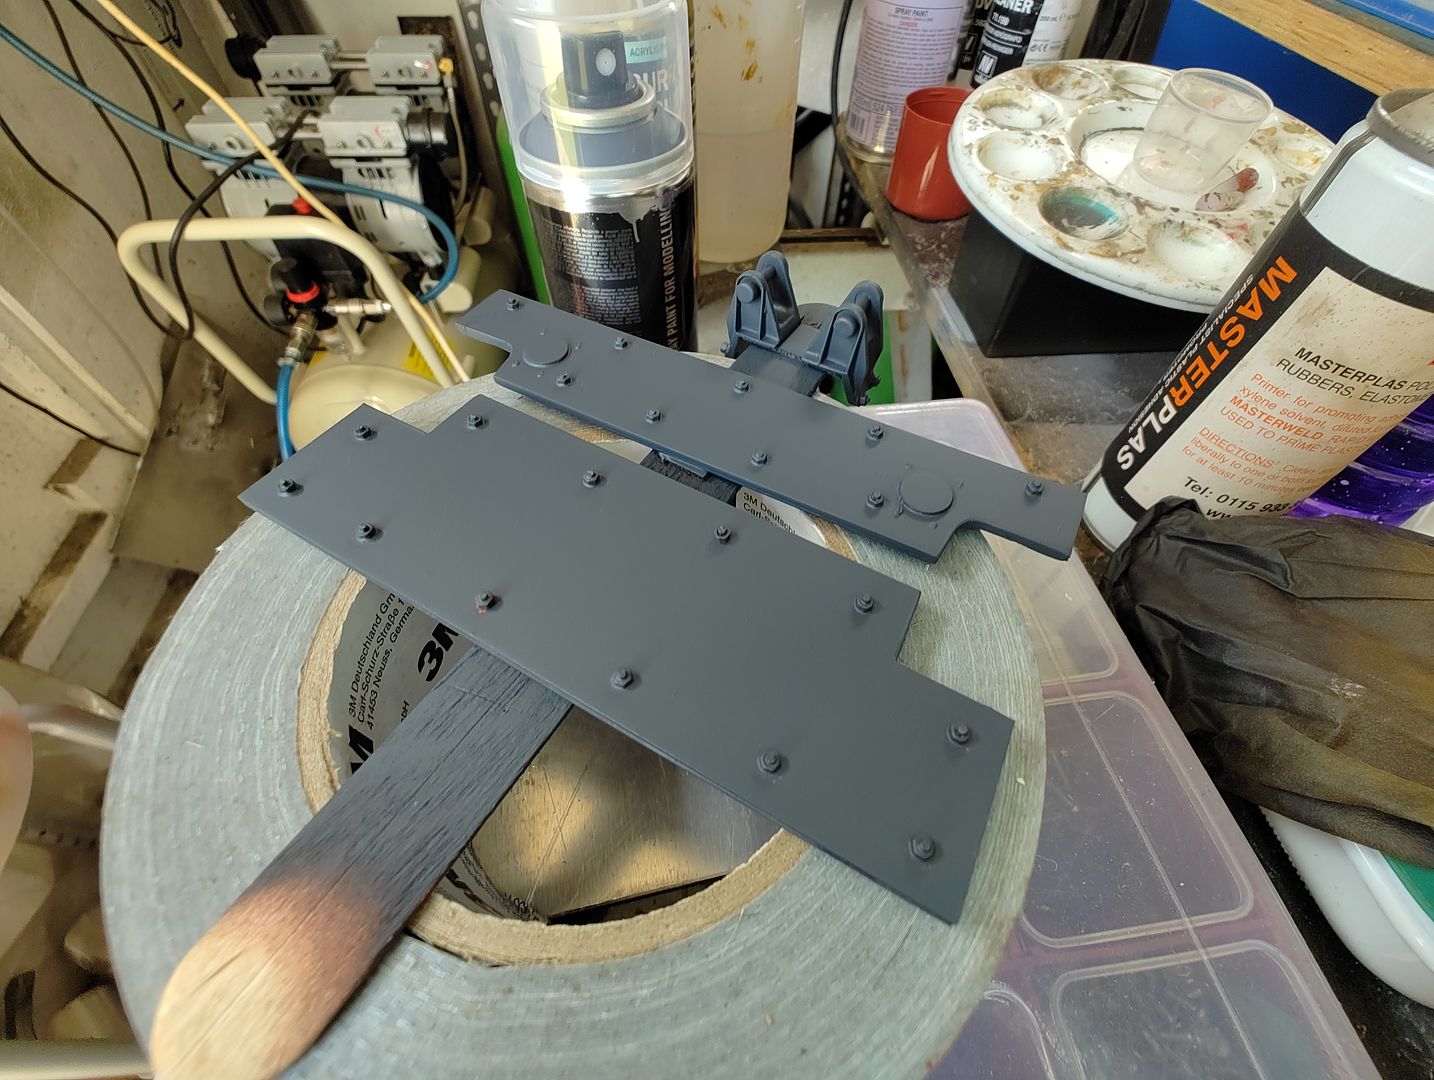
A bit of paint to finish.
The tow brackets are glued to the lower hull to allow the upper hull to be removed as normal.
My next job is to make a clamp for the barrel and a couple of fender brackets to finish of the front then I can start on modifying the rear deck hatches and vents.
I printed the 1:1 plan and cut it out of brass sheet and scribe the marks for the mounting strips.
After the mounting strips and bars were soldered on I fitted it to the roof.
I also made a start on the hull modifications.
first modify the towing brackets to look more like the ones fitted to the Sig 33b with a few bits of plasticard and some 12ba nuts.
The front lower added armour was also done with plasticard and 12ba nuts.
The upper added armour is also re done as the original part fitted as standard was different.
Luckily a outer part of a tv antenna cable plug made a perfect punch for the brake vent covers.
A bit of paint to finish.
The tow brackets are glued to the lower hull to allow the upper hull to be removed as normal.
My next job is to make a clamp for the barrel and a couple of fender brackets to finish of the front then I can start on modifying the rear deck hatches and vents.
-
baldrick131
- Lance Corporal
- Posts: 140
- Joined: Fri Oct 04, 2019 8:46 pm
- Location: March cambridgeshire
- Contact:
Re: s.I.G 33 Converion
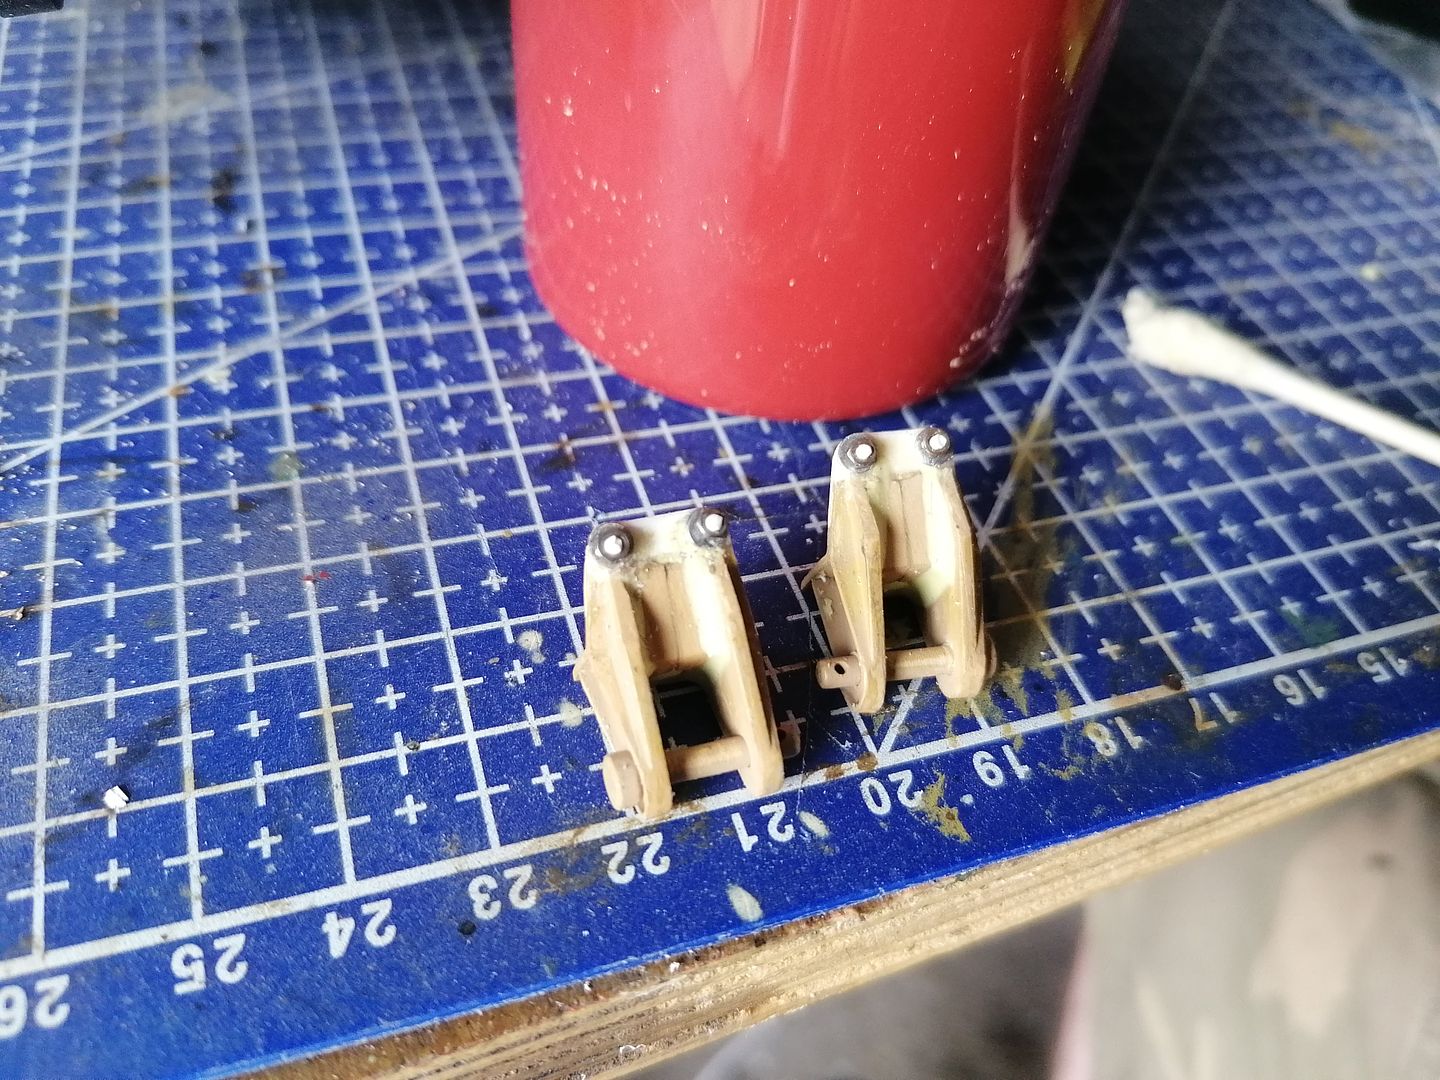
Today I decided to fire up my resin printer to make some parts for the tank first was a hinge to glue onto the rear deck when I get round to working on it
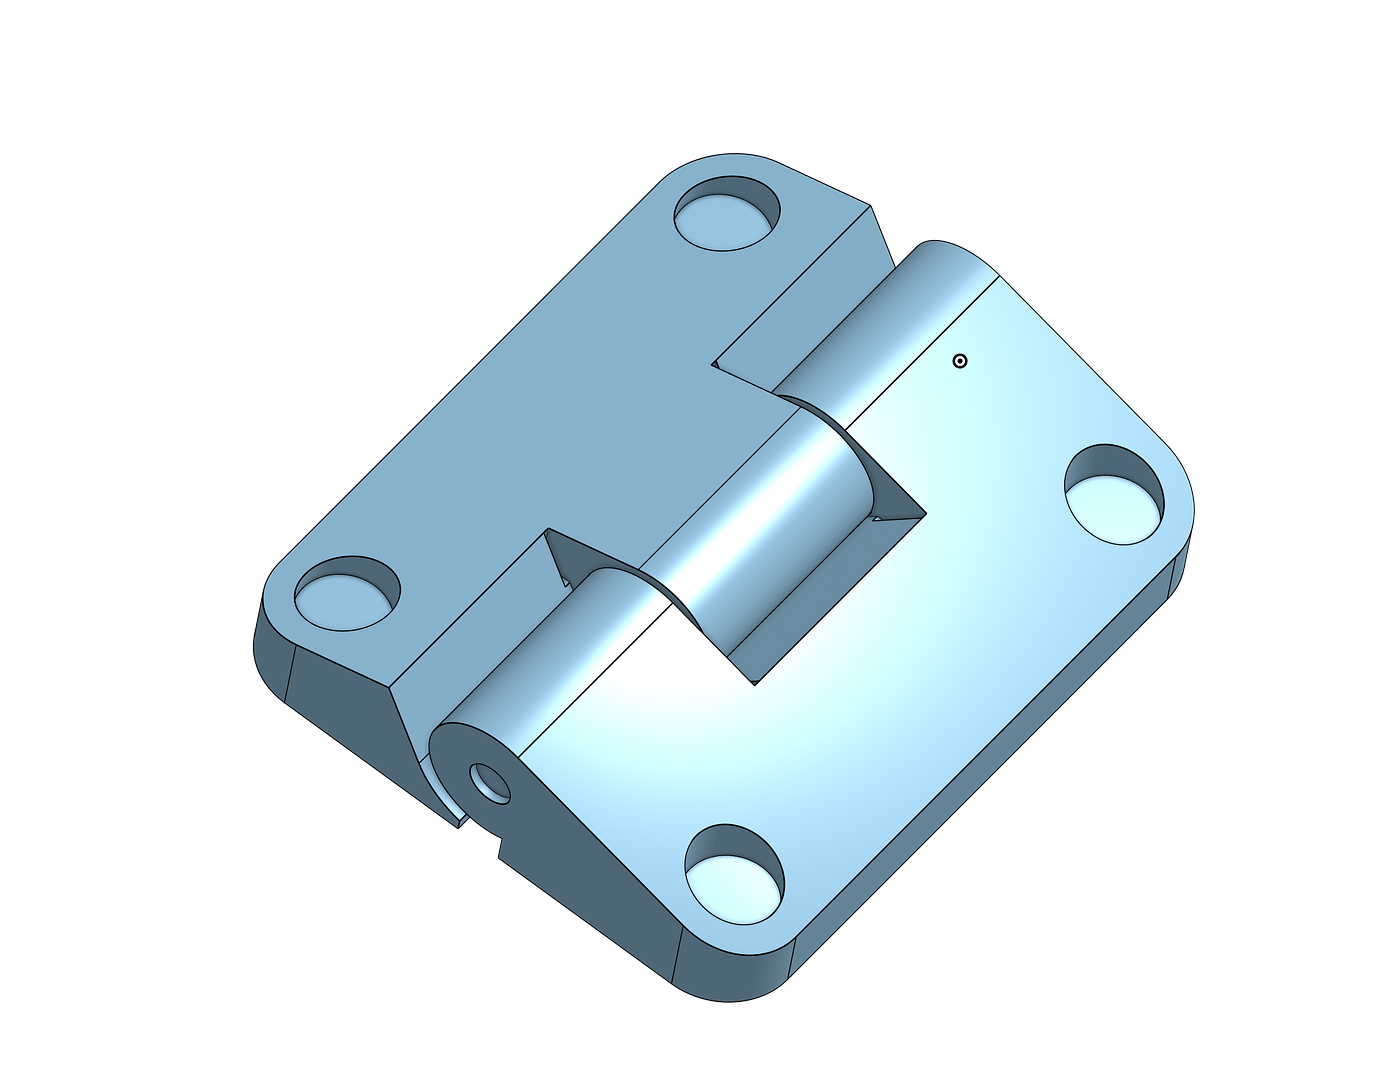
Seeing as I am working on the front and I need a couple of new mudguard brackets in front of the casemate it would be the perfect time to try a resin printed one.

After a few tries and a fair bit of messing about mostly with cleaning everything between prints i managed to make some parts
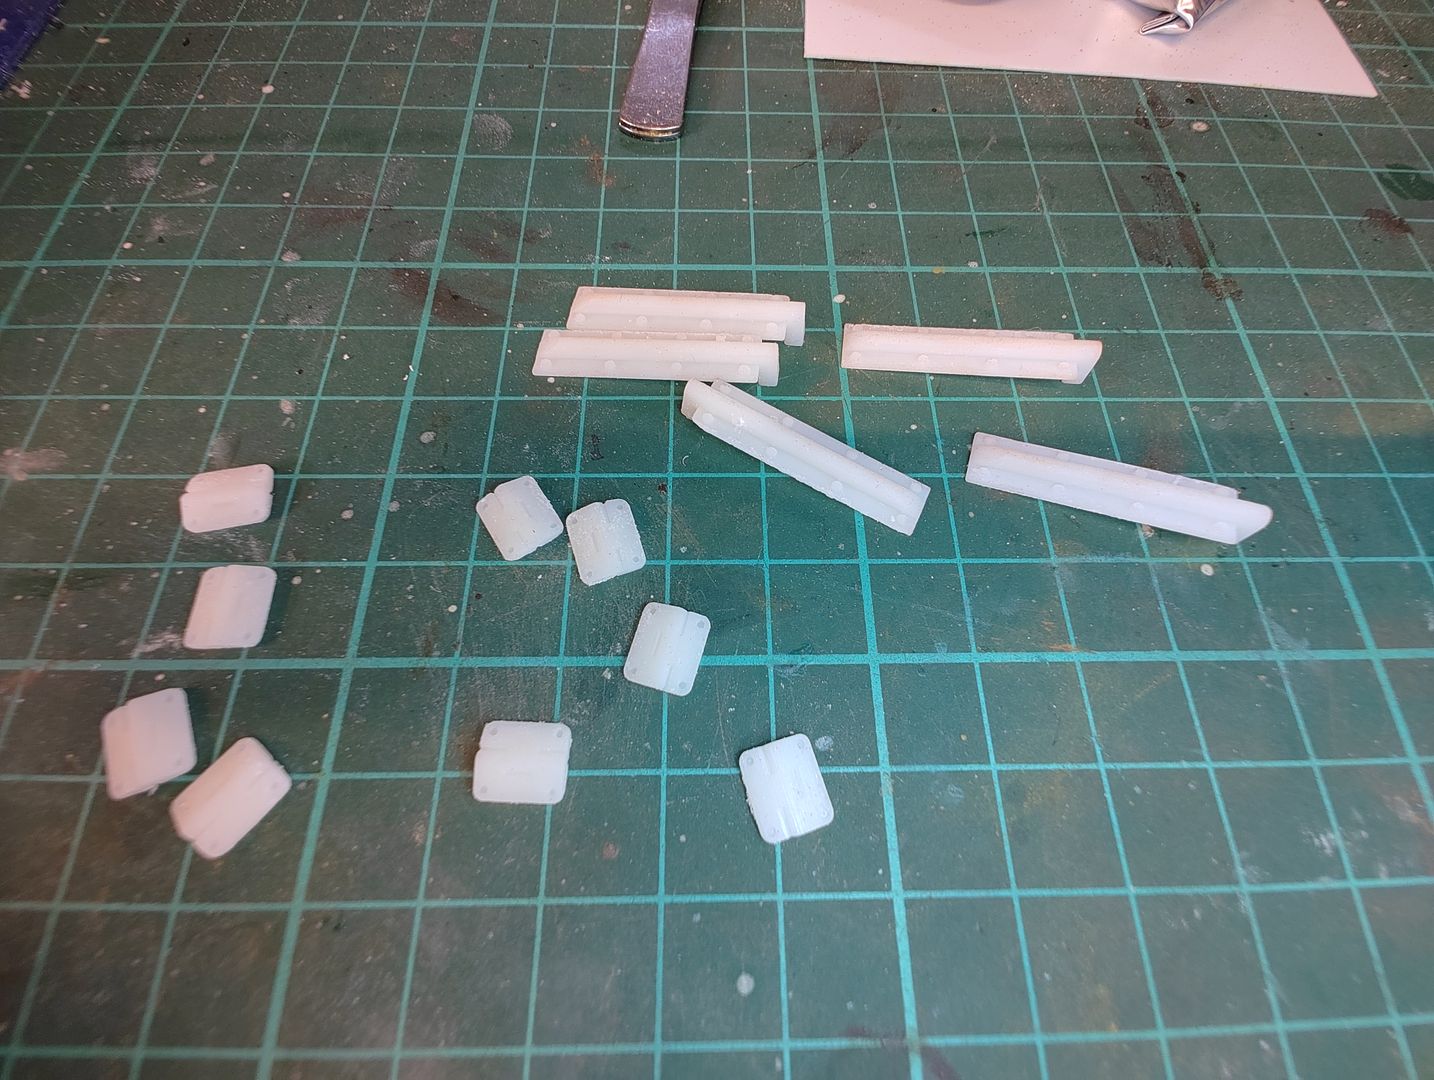
Sorry they are a bit hard to make out as they are in white but I am more than pleased with how they turned out.
Cant get much better than that a bit of paint and they will look perfect
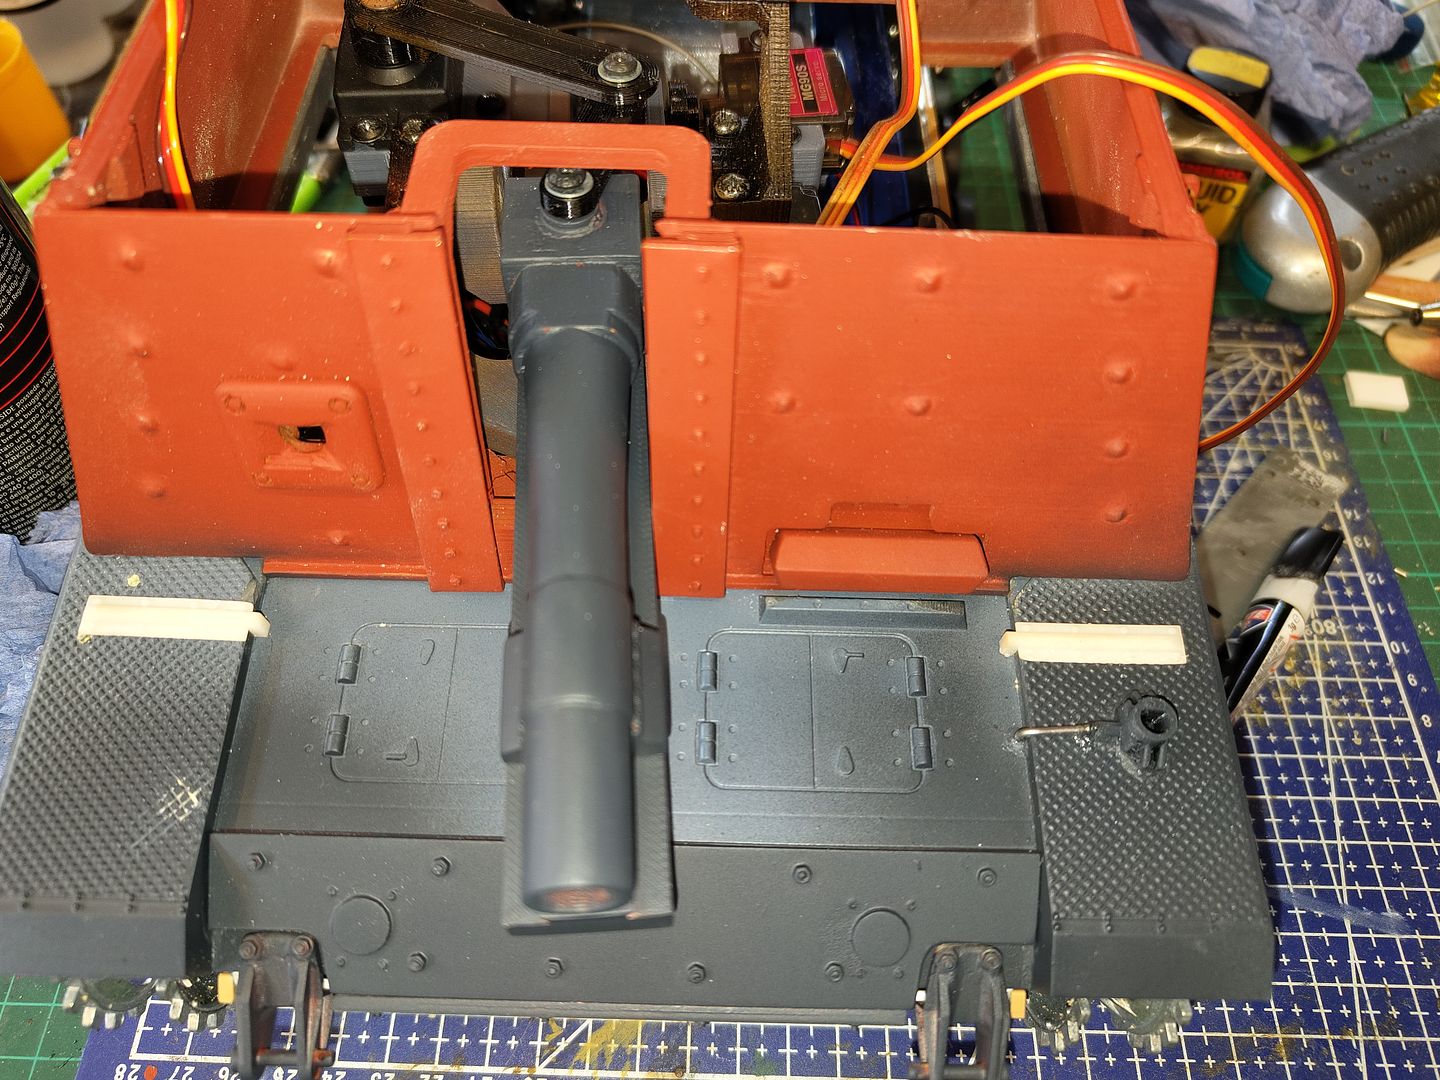
This is how it should look and after cutting away the old vents and filling the holes and scribing a horizontal gap in the doors the new hinges can be fitted in place.
Along with the new vents I have drawn up ready to print if only I hadn't run out of filters for pouring the resin back in the bottle.
This resin printing could get addictive it definitely gives scratch building a run for its money
I have put the STLs for the hinge and the mudguard bracket on my thigeverse page for the Sig 33b if any body wants to make them I will be adding the vents and any other parts I make to detail the rear deck as and when I get round to doing it.
https://www.thingiverse.com/thing:5445508
Seeing as I am working on the front and I need a couple of new mudguard brackets in front of the casemate it would be the perfect time to try a resin printed one.
After a few tries and a fair bit of messing about mostly with cleaning everything between prints i managed to make some parts
Sorry they are a bit hard to make out as they are in white but I am more than pleased with how they turned out.
Cant get much better than that a bit of paint and they will look perfect
This is how it should look and after cutting away the old vents and filling the holes and scribing a horizontal gap in the doors the new hinges can be fitted in place.
Along with the new vents I have drawn up ready to print if only I hadn't run out of filters for pouring the resin back in the bottle.
This resin printing could get addictive it definitely gives scratch building a run for its money
I have put the STLs for the hinge and the mudguard bracket on my thigeverse page for the Sig 33b if any body wants to make them I will be adding the vents and any other parts I make to detail the rear deck as and when I get round to doing it.
https://www.thingiverse.com/thing:5445508
-
baldrick131
- Lance Corporal
- Posts: 140
- Joined: Fri Oct 04, 2019 8:46 pm
- Location: March cambridgeshire
- Contact:
Re: s.I.G 33 Converion
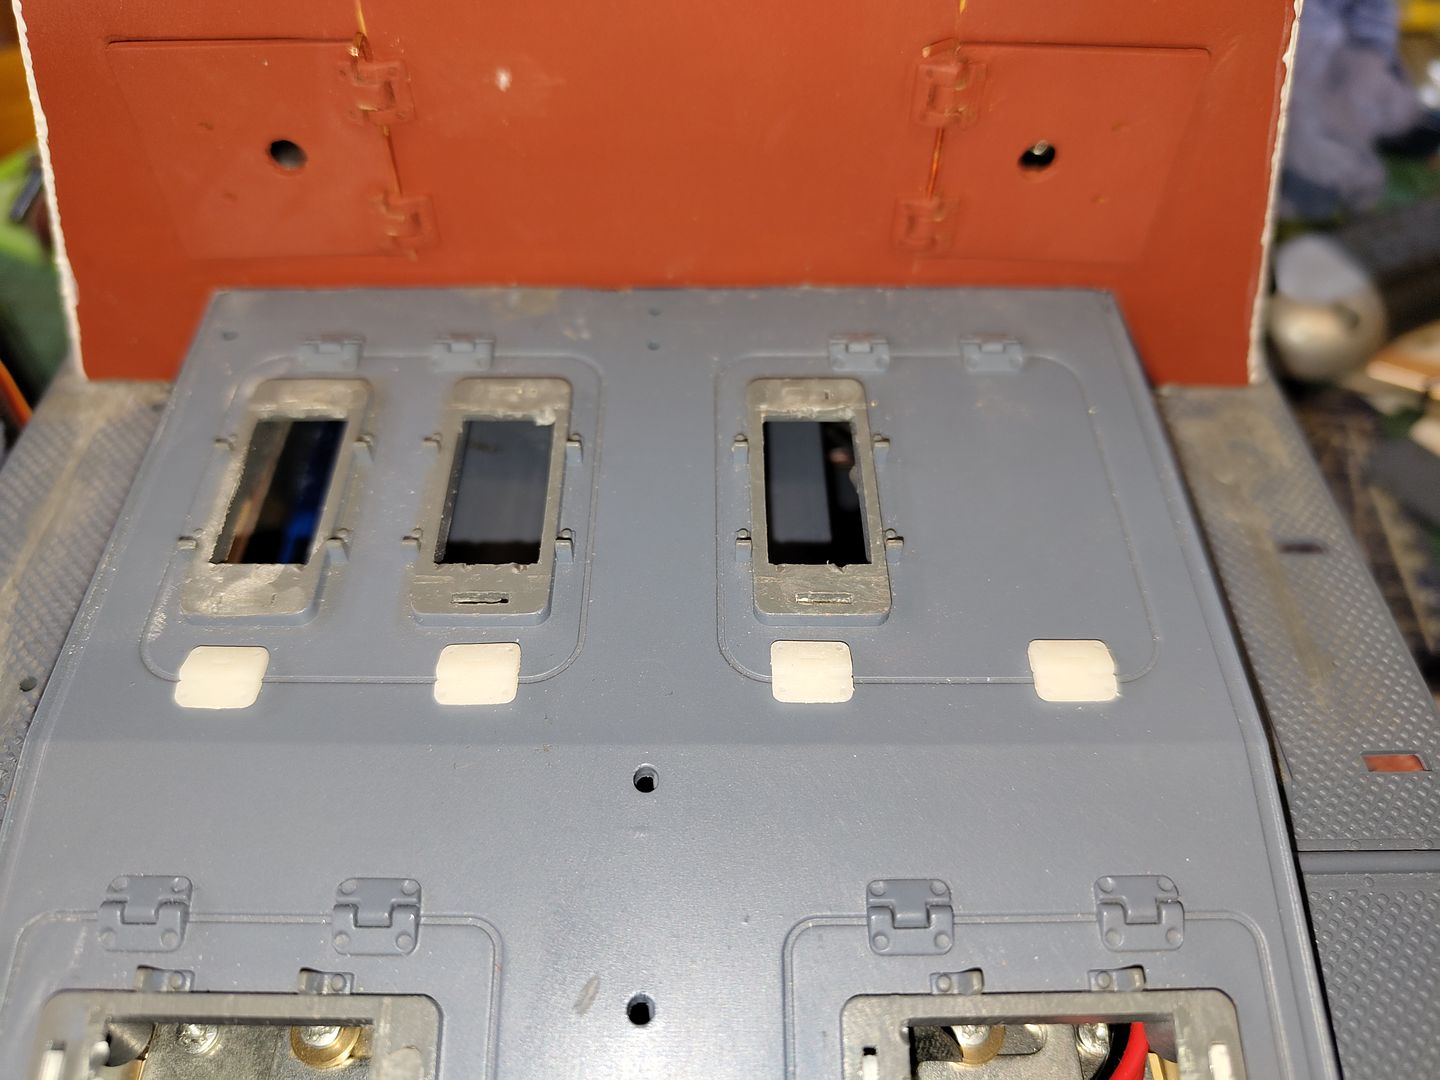
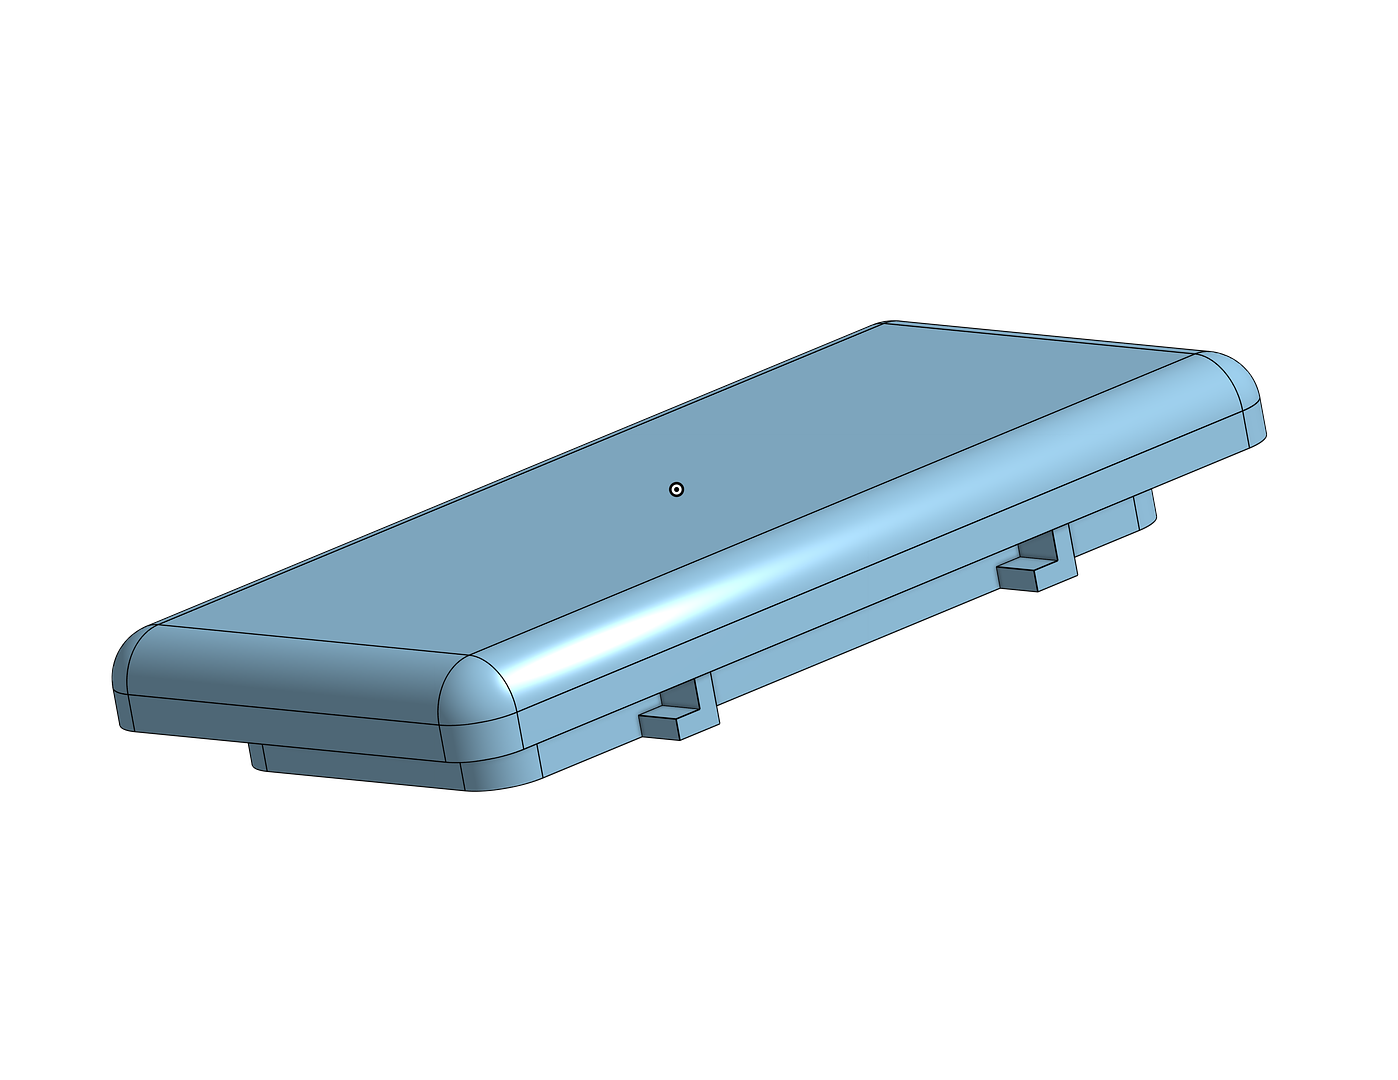
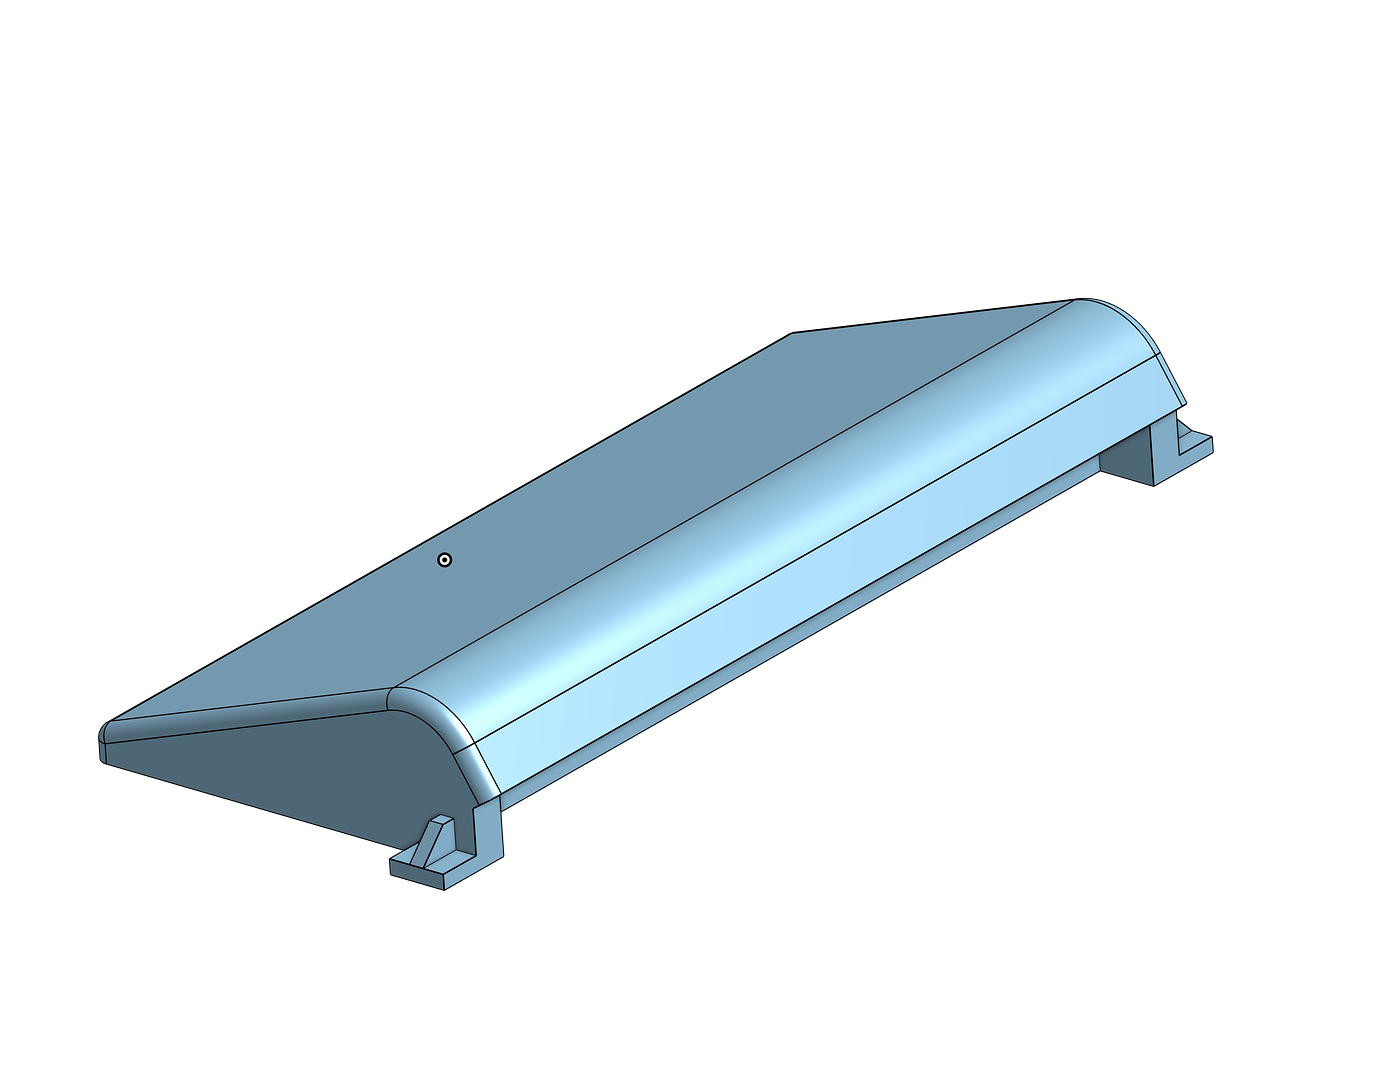
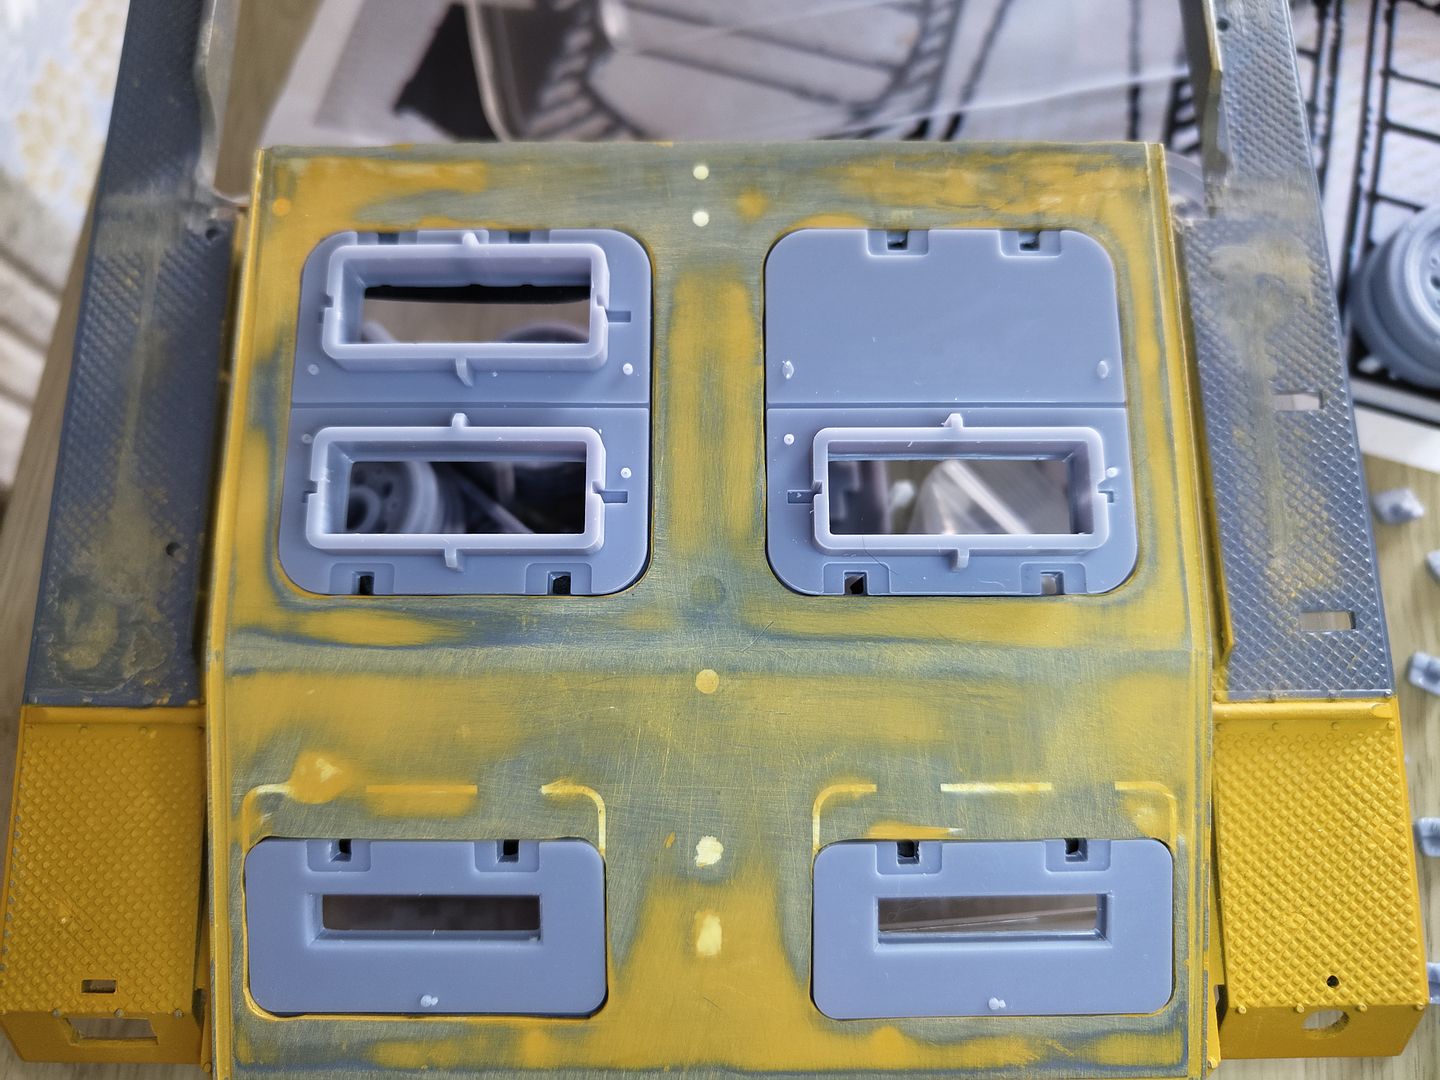
I finally got round to CADing up the rear vents and I had to make the very rear hatches smaller as when I tried to make the vent fit it looked all out of proportion compared to the photos I have but it looked like the hatch in the photos was smaller than the ones on the henglong stug and as I am no expert on these things I presume the early stug the Sig 33B was made from had smaller hatches.
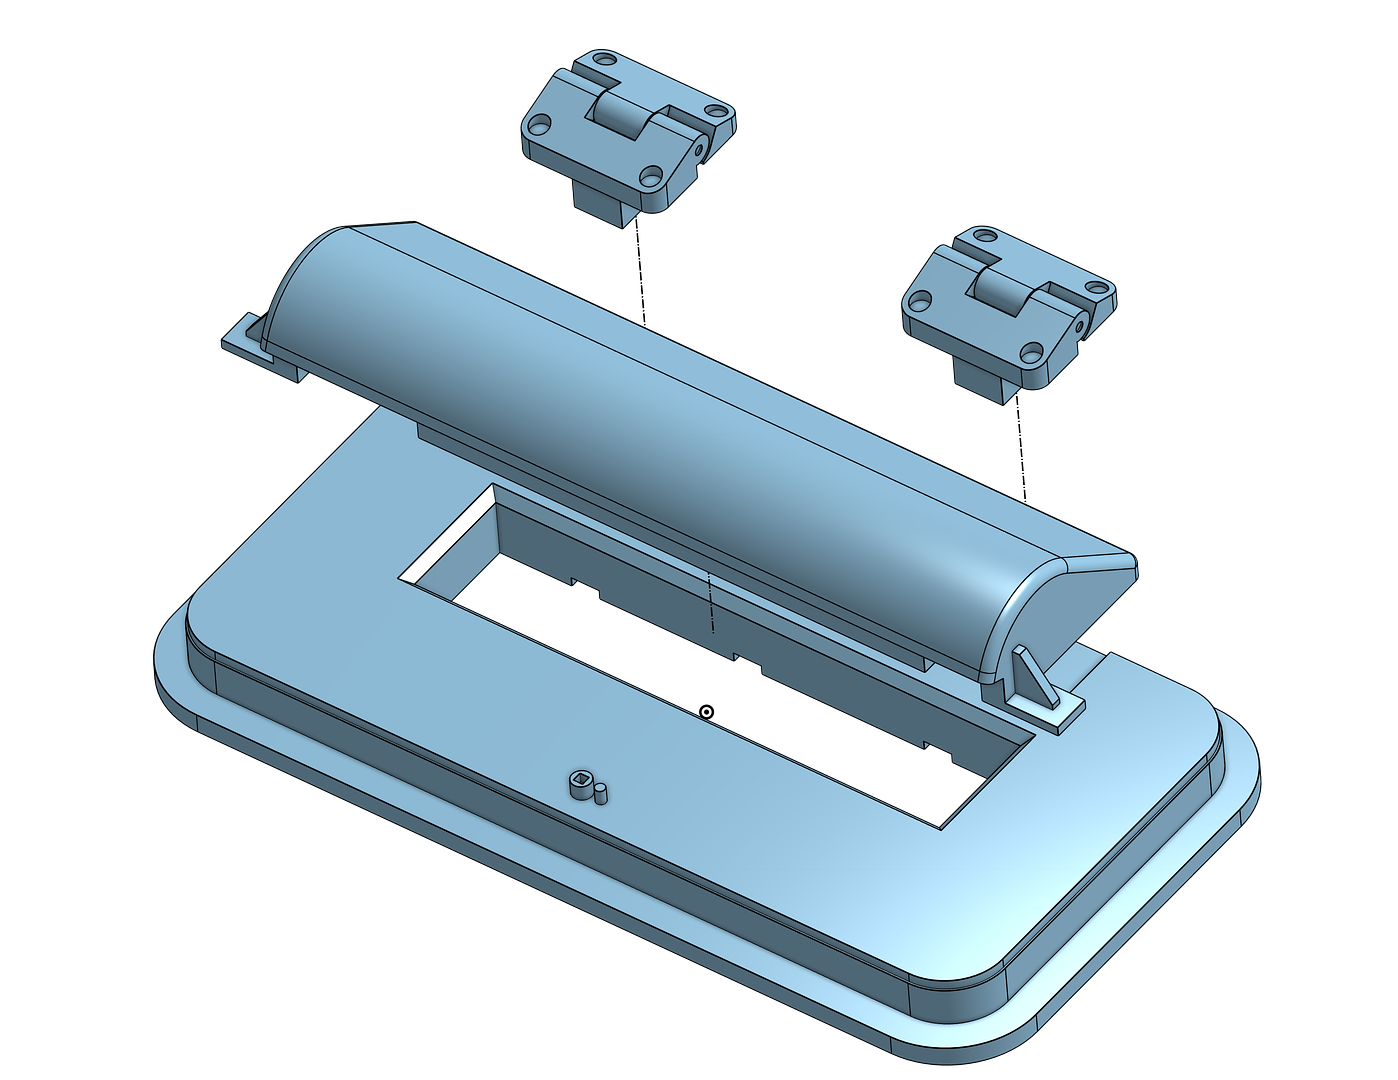
The two bigger hatches just needed to be turned 90deg
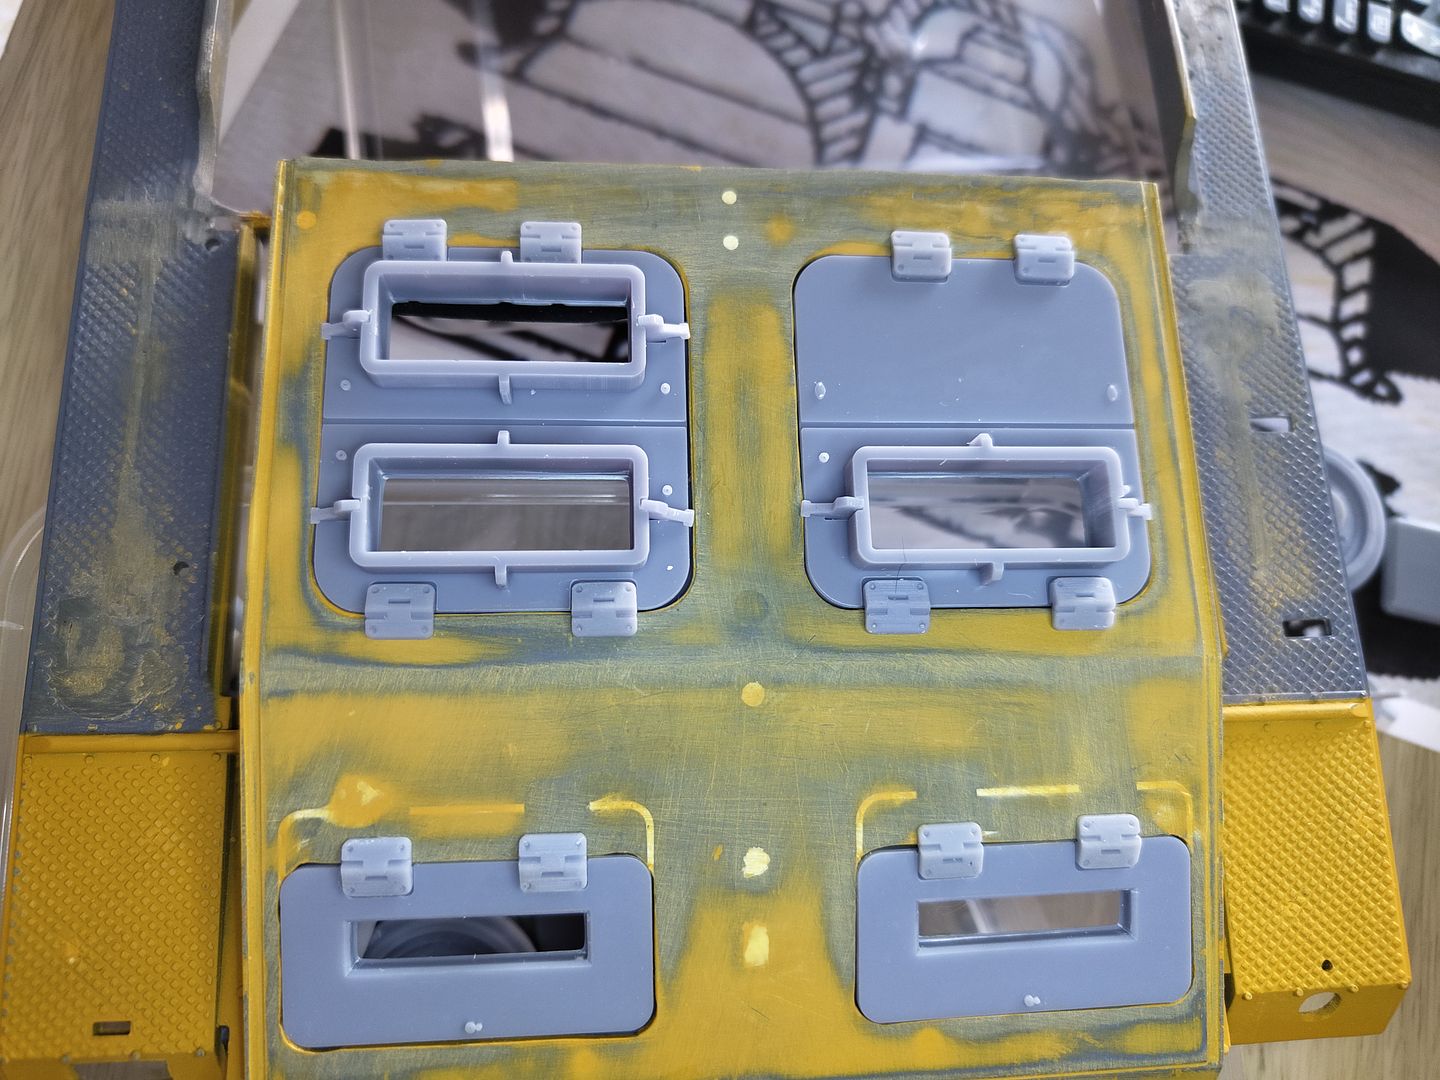
I made them up in separate parts so the main hatch can be glued on from underneath with the small brackets with the hatch stops glued in position followed by the vent covers and lastly the hinges are glued on.
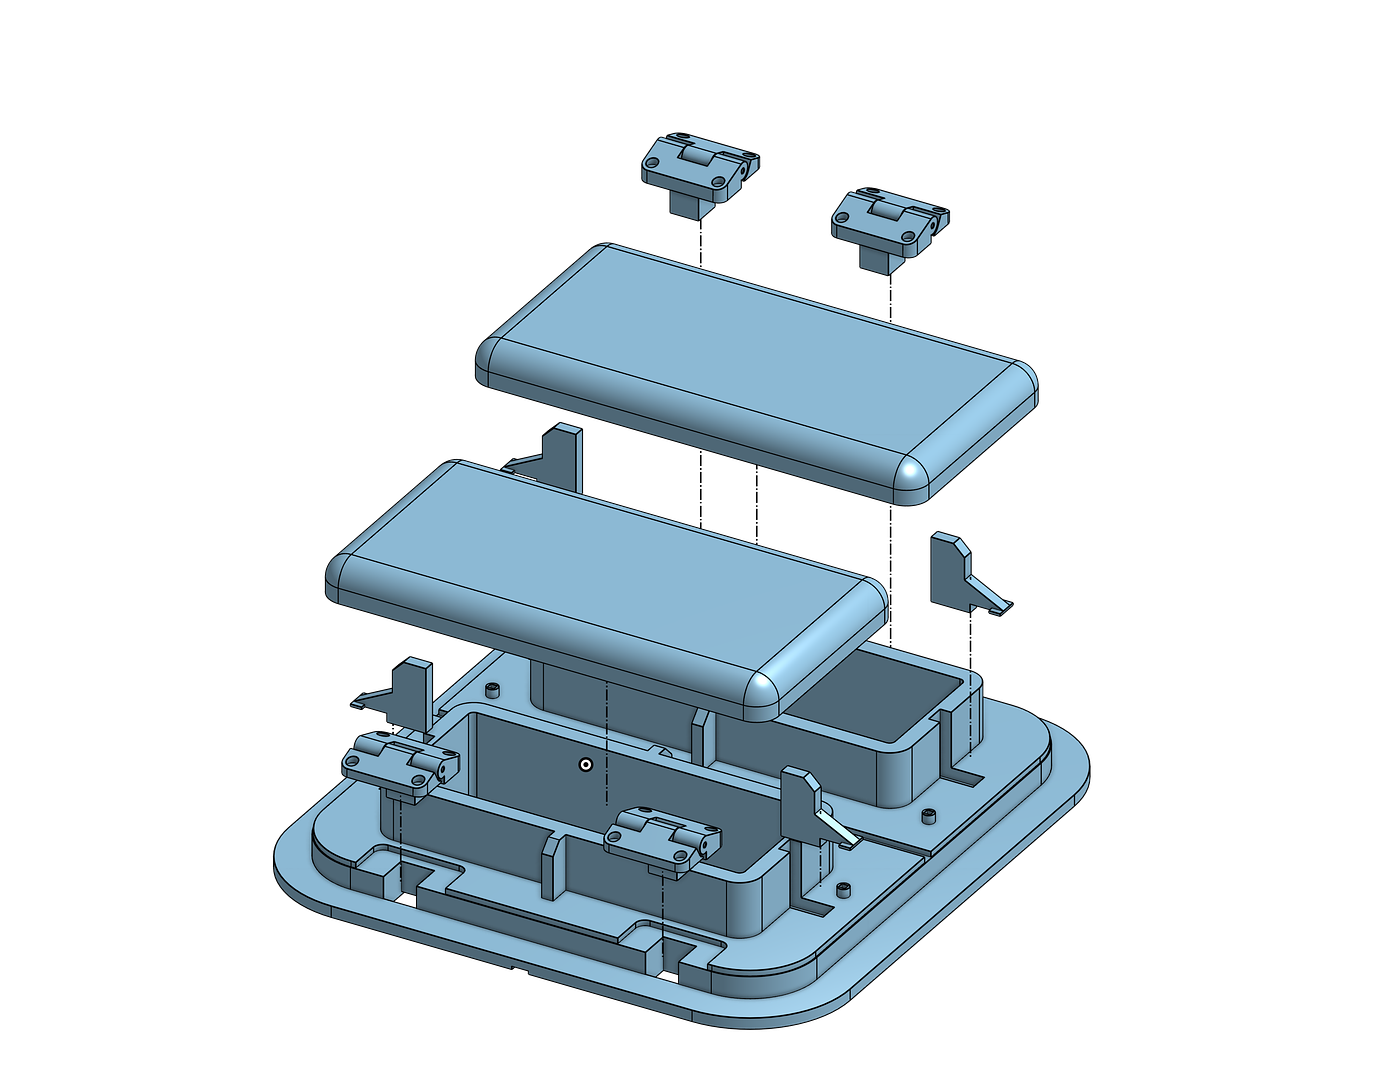
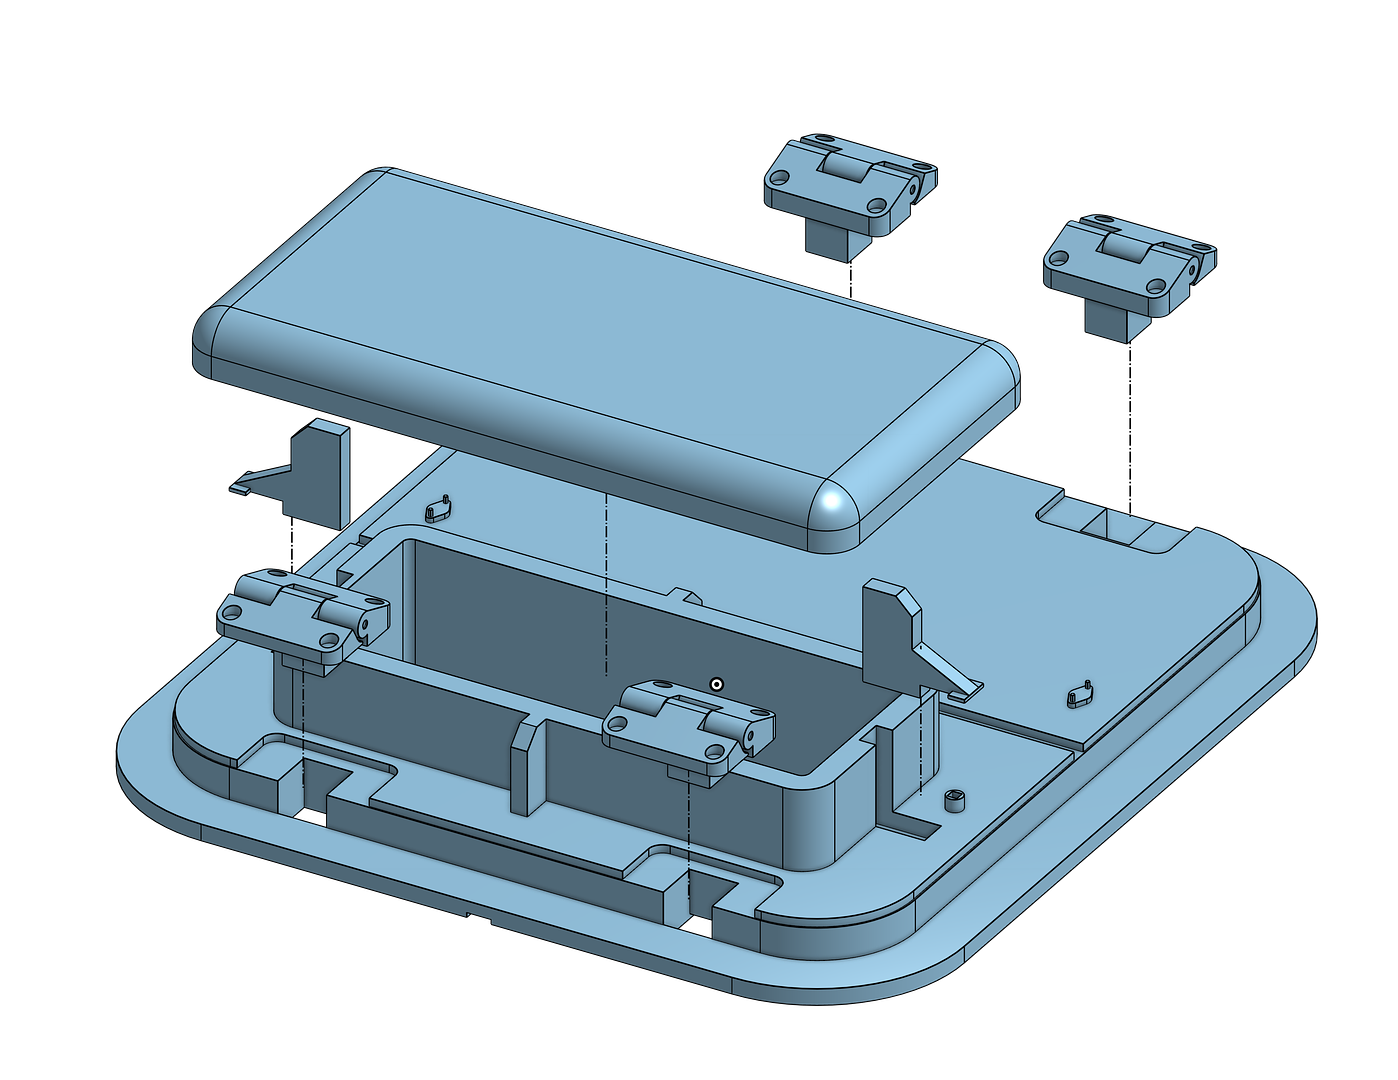
First job cut away the rear deck to allow the new hatches to be inserted from below.
Here I used the first set of hatches I printed as a guide.
After a bit of filling and sanding tine to see what it looks like I just held these in place with tape for now as I have some more work to do on the rear deck before I glue it all together.
Now the side pieces and hinges are fitted these will require a bit of sanding before the top parts are fitted.
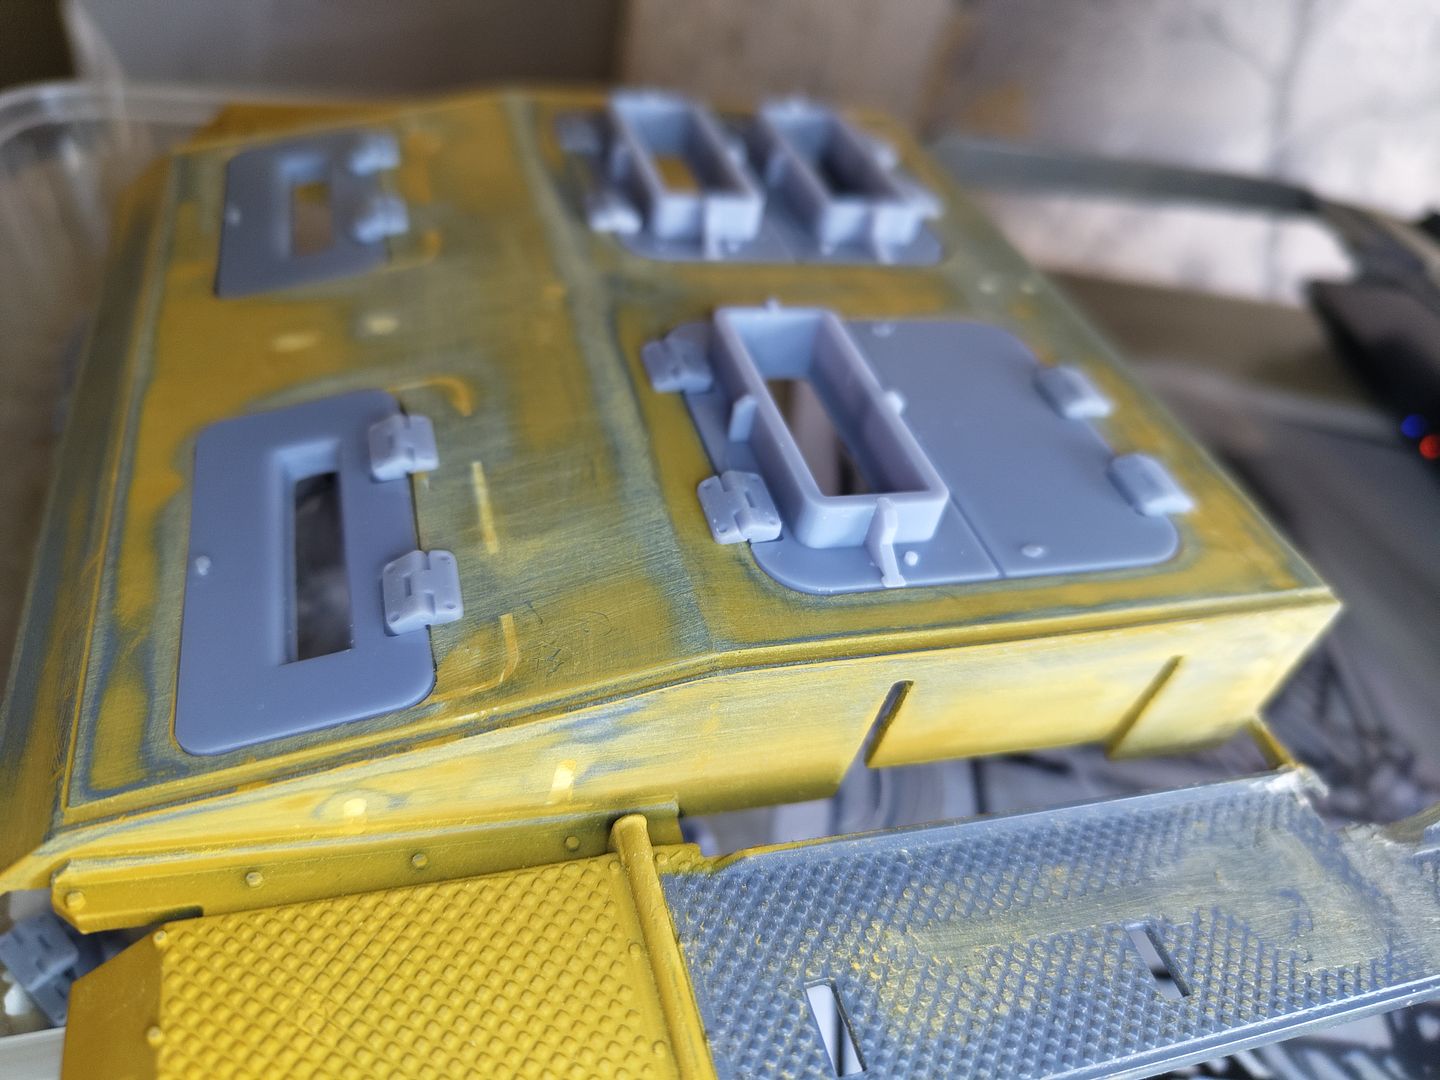
And this is what it looks like all together.
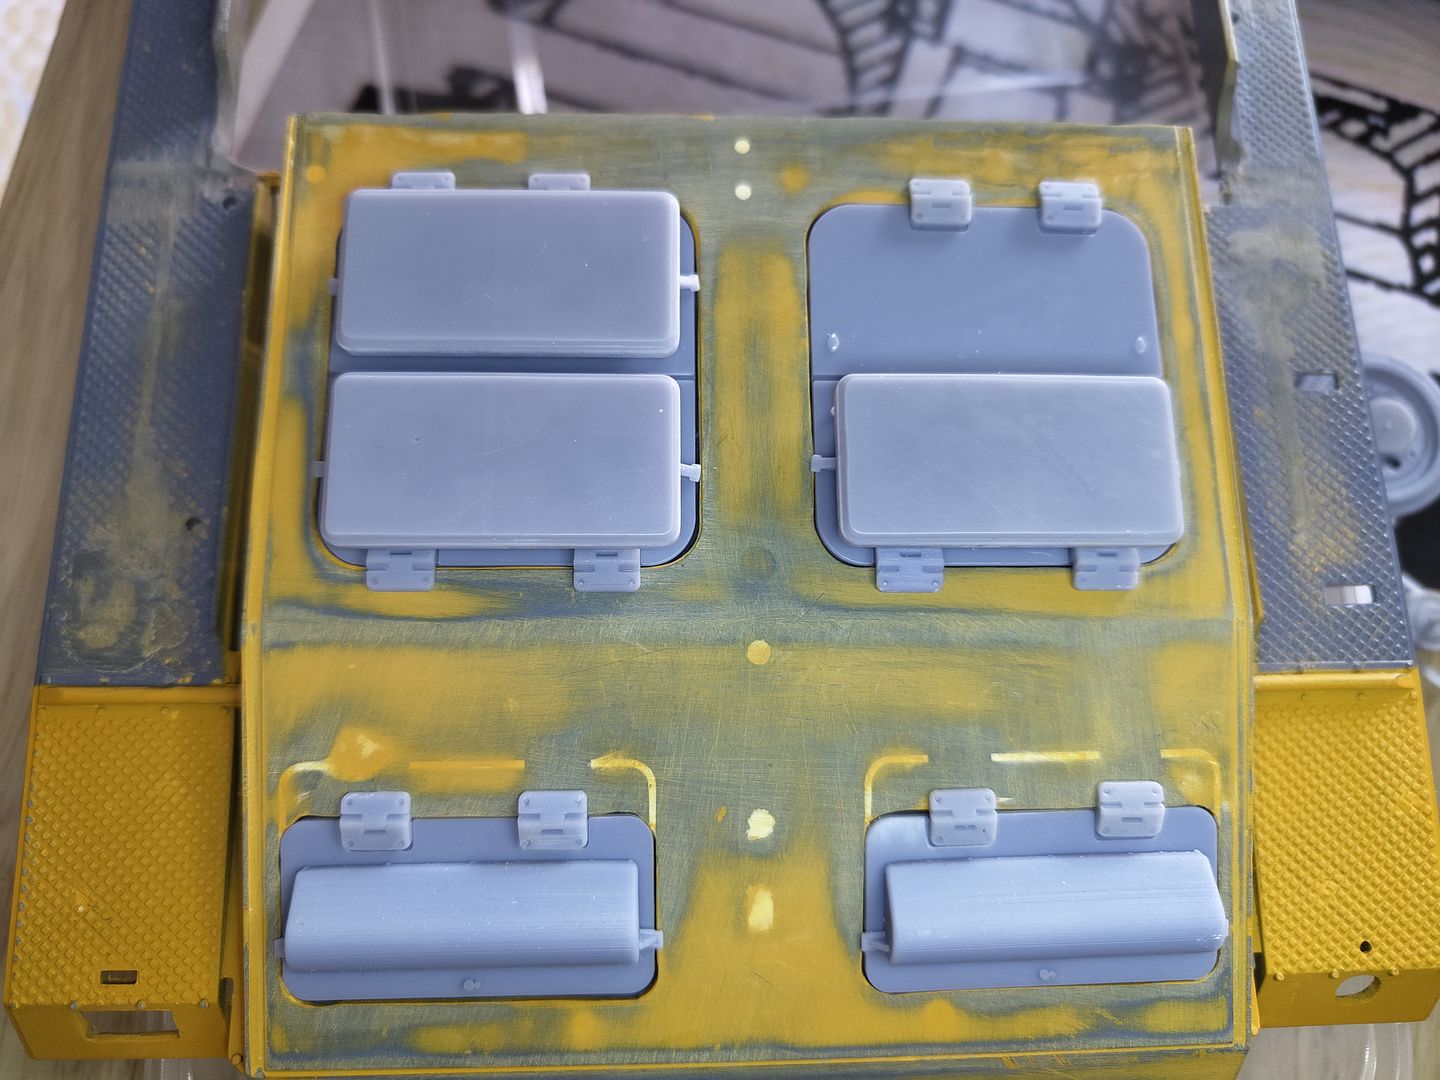
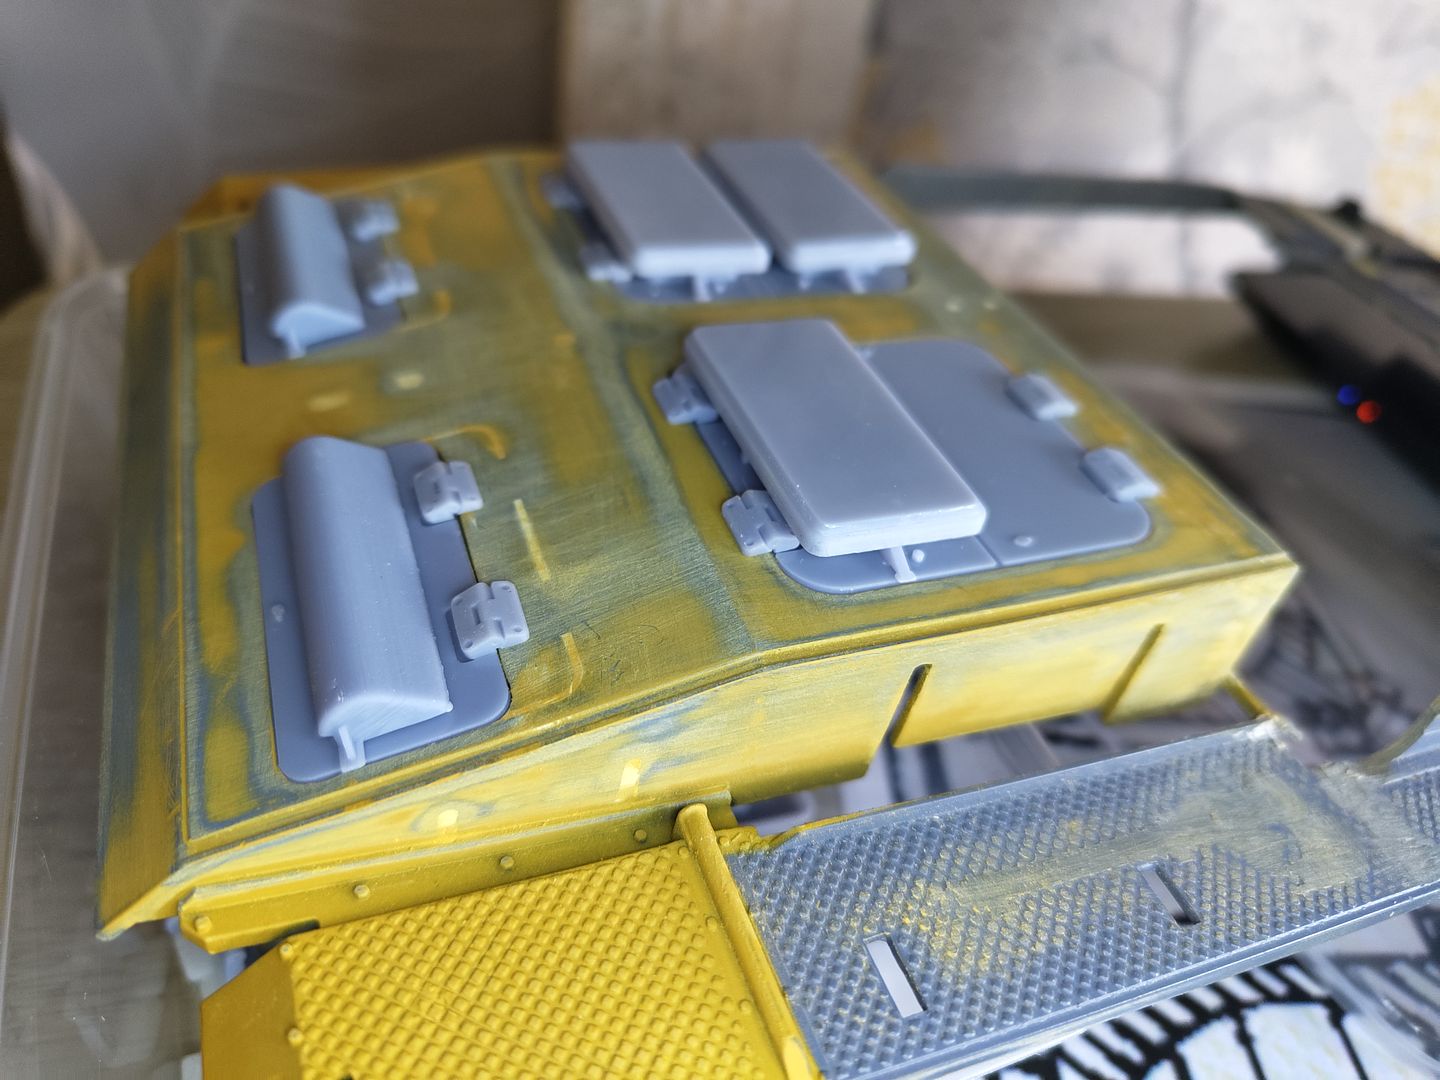
This is the rear end with rear lights and some spare wheel mounts that I also drew up with separate wheels that I will have a go at making with printed rubber tires.
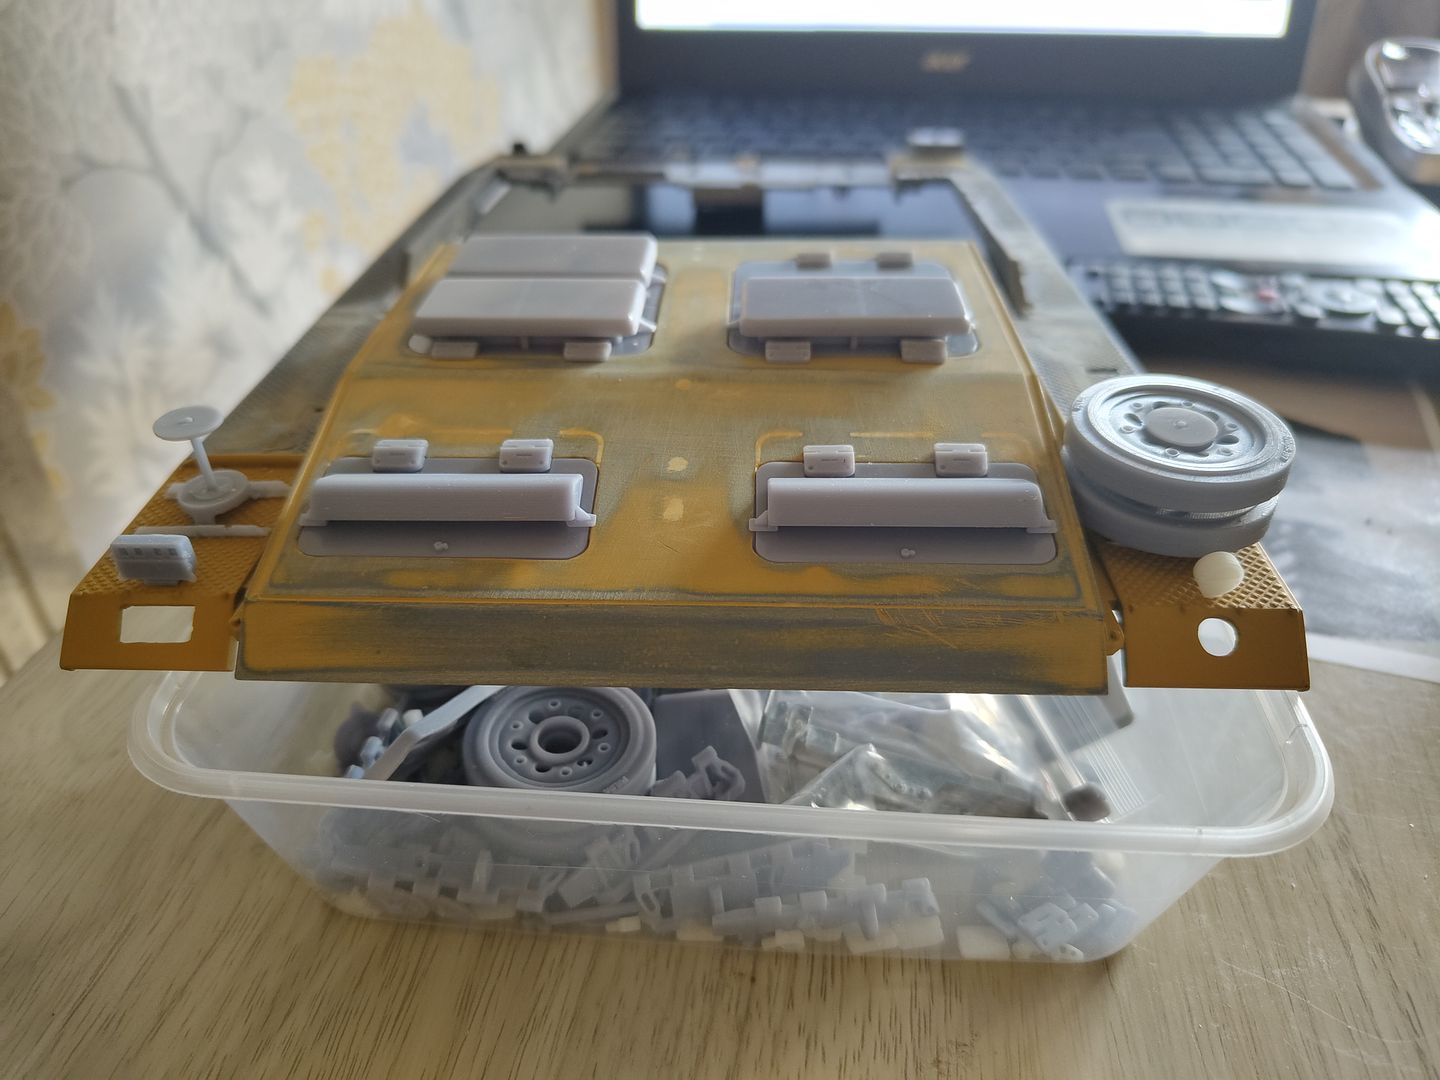
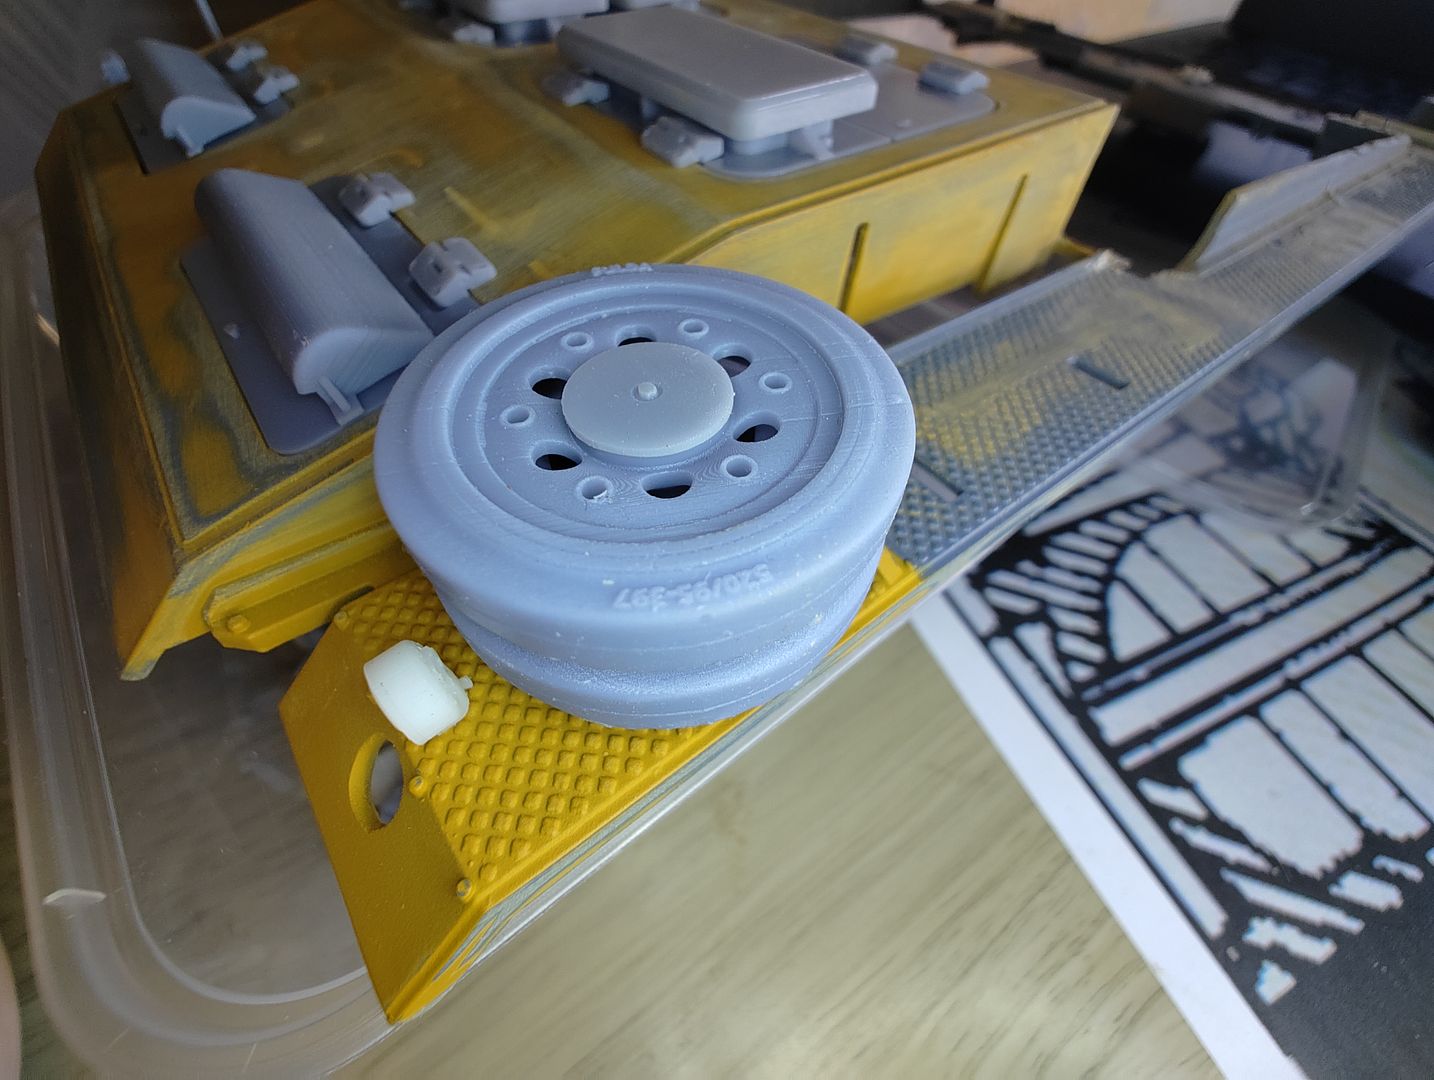
I used Anycubic Basic Grey resin to make the hatches and spare wheels everything else is made with Anycubic ABS Like Resin + and as I am a novice with a resin printer I was surprised that it was less hassle to use than the basic resin and it feels less likely to break when handling very small parts.
All of the parts I have added here are on Thingeverse Here,
https://www.thingiverse.com/thing:5556458
The two bigger hatches just needed to be turned 90deg
I made them up in separate parts so the main hatch can be glued on from underneath with the small brackets with the hatch stops glued in position followed by the vent covers and lastly the hinges are glued on.
First job cut away the rear deck to allow the new hatches to be inserted from below.
Here I used the first set of hatches I printed as a guide.
After a bit of filling and sanding tine to see what it looks like I just held these in place with tape for now as I have some more work to do on the rear deck before I glue it all together.
Now the side pieces and hinges are fitted these will require a bit of sanding before the top parts are fitted.
And this is what it looks like all together.
This is the rear end with rear lights and some spare wheel mounts that I also drew up with separate wheels that I will have a go at making with printed rubber tires.
I used Anycubic Basic Grey resin to make the hatches and spare wheels everything else is made with Anycubic ABS Like Resin + and as I am a novice with a resin printer I was surprised that it was less hassle to use than the basic resin and it feels less likely to break when handling very small parts.
All of the parts I have added here are on Thingeverse Here,
https://www.thingiverse.com/thing:5556458
-
c.rainford73

- Major
- Posts: 6104
- Joined: Thu Aug 25, 2016 7:34 pm
- Location: Connecticut USA
-
c.rainford73
- Major
- Posts: 6104
- Joined: Thu Aug 25, 2016 7:34 pm
- Location: Connecticut USA
Re: s.I.G 33 Converion
What resin printer have you been using? Great quality, the parts are really nice 
Tanks alot.... 
-
baldrick131
- Lance Corporal
- Posts: 140
- Joined: Fri Oct 04, 2019 8:46 pm
- Location: March cambridgeshire
- Contact:
Re: s.I.G 33 Converion
I'm using a anycubic photon mono X and lychee slicer as I've been only using it for a couple of weeks it's probably more good luck that I'm getting decent prints off it.c.rainford73 wrote: ↑Sun Oct 09, 2022 7:56 pm What resin printer have you been using? Great quality, the parts are really nice
