So I recently acquired one of the old LAV's that had the water squirt gun in the barrel. It has been present for the last several years to squirt many unsuspecting children that are too close at larger public RC tanking events (example: Aquino Tank Fest in Oshawa, ON, Canada).
I had repaired it once previously with the existing drivetrain, the main issue is that when full of water, the LAV is too heavy to move and striped the Drive Hubs from the axle shaft, and once fixed, the gearbox itself. Long story short, driveline toast, control board corroded to hell = dead.
It was literally dumped into my hands and was told, "Its yours if you want it." So of course I said yes.
I had looked at the concept of a complete rebuild after the first time I fixed the unit... When it became mine, I bought a WPL 6x6 for the starting point of the build.
Initial Driveline concept...
Basic frame concept
Showing Steering design
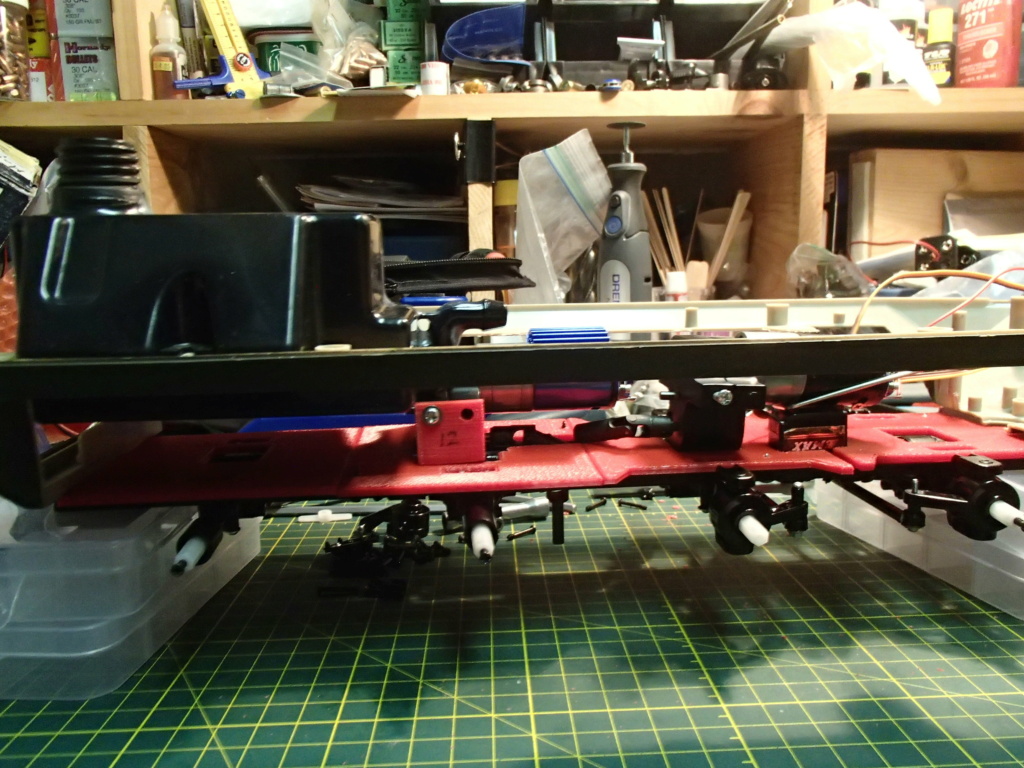
Wheels and underside removed
Frame in rough position
Re: LAV-25 - Watercannon rebuild
Posted: Wed Sep 23, 2020 2:06 pm
by Jarlath
Now to find more tires and steering axles...
The truck will be a 6x8 due to the required space for the motor gearbox... The question is if I get another 6x6 to make it a dual motor (Front 2 axles driven by one, rear two by the other.)
I still plan on this being a water squirtgun as well I'll spread out the water tank portion across the lower hull for better distribution of mass.
Re: LAV-25 - Watercannon rebuild
Posted: Wed Sep 23, 2020 8:24 pm
by midlife306
I’m sure Will could sort you out with a compact dual motor setup
Sent from my iPhone using Tapatalk
Re: LAV-25 - Watercannon rebuild
Posted: Thu Sep 24, 2020 2:31 am
by Herr Dr. Professor
You list yourself as an "hydraulic systems designer." No wonder you want it resurrected to squirt water. I would love to see that in action when kids are watching. What fun!
Re: LAV-25 - Watercannon rebuild
Posted: Thu Sep 24, 2020 12:56 pm
by Will01Capri
I heard dual motors lol
Re: LAV-25 - Watercannon rebuild
Posted: Thu Sep 24, 2020 4:00 pm
by Jarlath
Will01Capri wrote:I heard dual motors lol
LOL... I have heard that the stock plastic gearbox/motor combo is pretty weak and prone to breakage...
Are the twin N20 systems better? I have ordered a second donor WPL 6x6 kit for parts (I'm sure I'll break something). And for the possibility of running twin original gearboxes albeit using only a single output shaft each (one for rear 2 axles, another for front two axles).
Re: LAV-25 - Watercannon rebuild
Posted: Thu Sep 24, 2020 5:53 pm
by Will01Capri
Jarlath wrote:
Will01Capri wrote:I heard dual motors lol
LOL... I have heard that the stock plastic gearbox/motor combo is pretty weak and prone to breakage...
Are the twin N20 systems better? I have ordered a second donor WPL 6x6 kit for parts (I'm sure I'll break something). And for the possibility of running twin original gearboxes albeit using only a single output shaft each (one for rear 2 axles, another for front two axles).
I developed a twin 180 and a twin 370 motor setup. They are strong and powerful and can be spec'd for speed and torque.
If you want I can share videos of both, but axles and driveshafts must be metal as they destroy plastic gears and flimsy driveshafts in seconds.
Please do not use n20, these are very noisy and very weak
Re: LAV-25 - Watercannon rebuild
Posted: Thu Sep 24, 2020 10:48 pm
by Jarlath
Yes please.
Re: LAV-25 - Watercannon rebuild
Posted: Fri Sep 25, 2020 12:49 pm
by Jarlath
Tools of the trade for fabrication...
Cutting by hand is such a pita some days... I really should invest in a mini-table saw...
Maybe a Proxxon 37006 KS 115 Bench Circular Saw or similar...
Basic sizing, 2mm sheet, cutting 36mm side walls.
Just a old school Vernier caliper for measuring... No fancy digital here.
Read the graduations! READ THEM!
The side walls cut off.
Layout of floor
Basic straight lines are pretty simple, but when I start having to do coping or more intricate details.
Layout is key for me. Make a simple template, go scissors!
Trial layout on the remaining lower hull. More cutting to be done...
Layout material for prep and template. Note the trimmed 2mm styrene floor.
Thankfully I have an ample supply of cardstock for layouts.
And way more from my place of employment. (They literally throw these away!)
Re: LAV-25 - Watercannon rebuild
Posted: Fri Nov 06, 2020 12:24 pm
by Jarlath
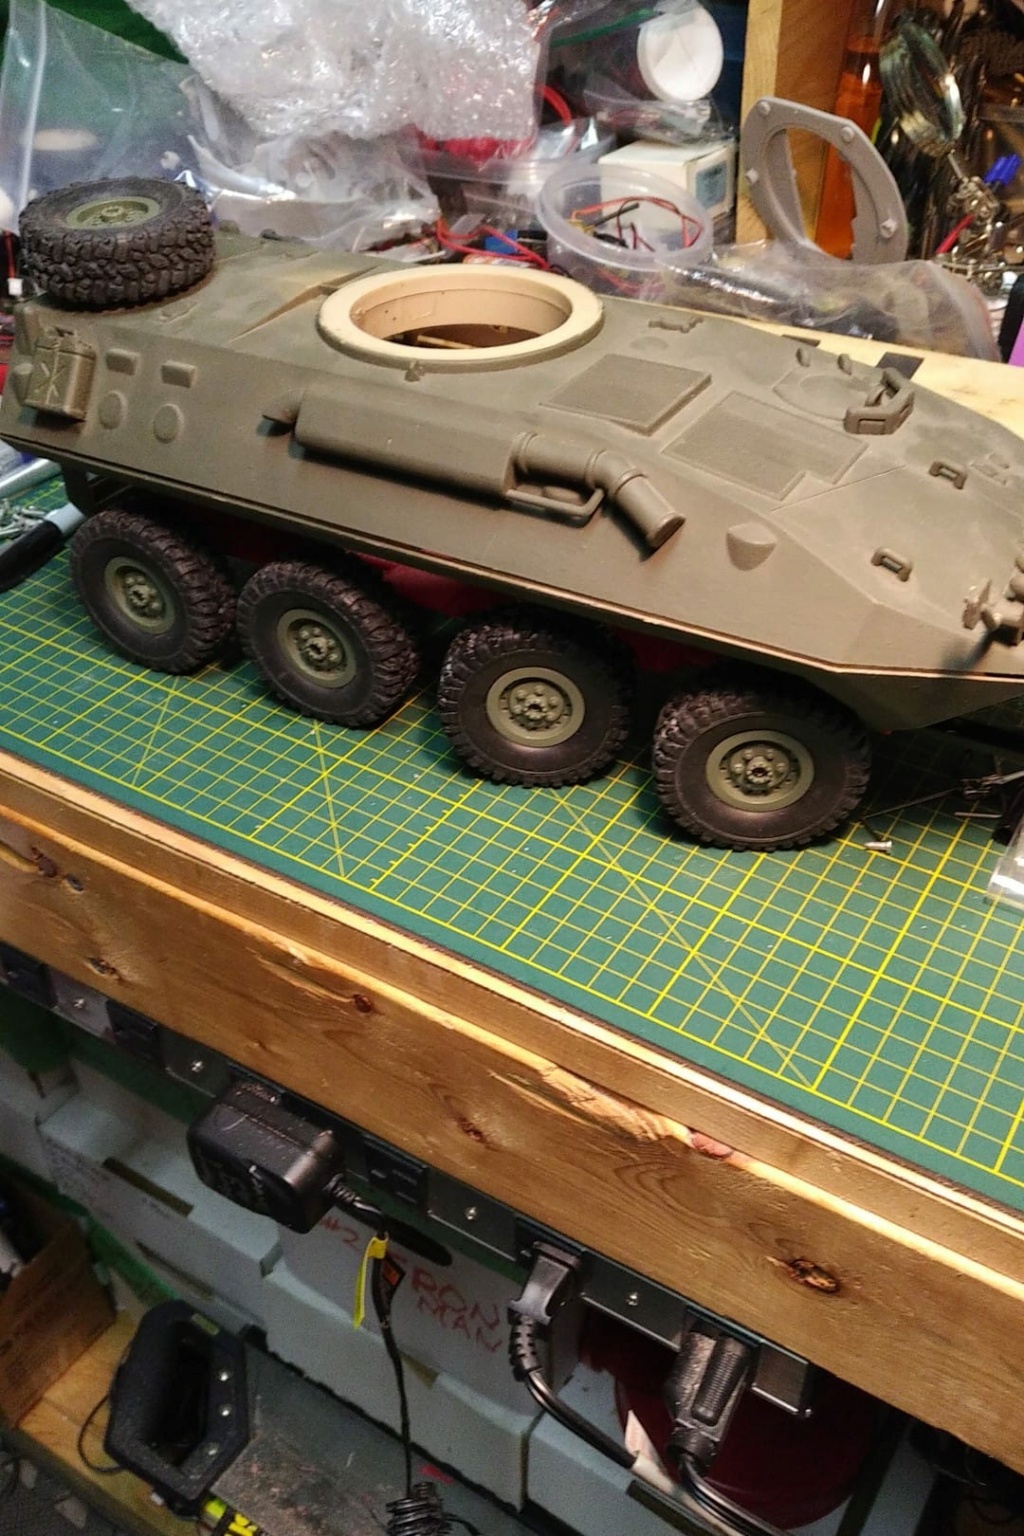
A small bit of advancement (My buddy Chris from NY sent me some spare axles and a whack of spare tires/rims from Dean = progress.)
Still unsure If I'll reused the old water tank. It fits. Barely! Trimmed down the existing water cap with the "tire" and fit it into a WPL hub completely. A Full sized spare!
Yes that is a "full size" spare tire now used as the water cap for the tank portion. I think it looks good. I'll likely have to limit turret travel now however.
How it looks with the upper hull loosely put into place. RAR! Upper hull will be the last pieces to be revised/rebuilt/tampered with...
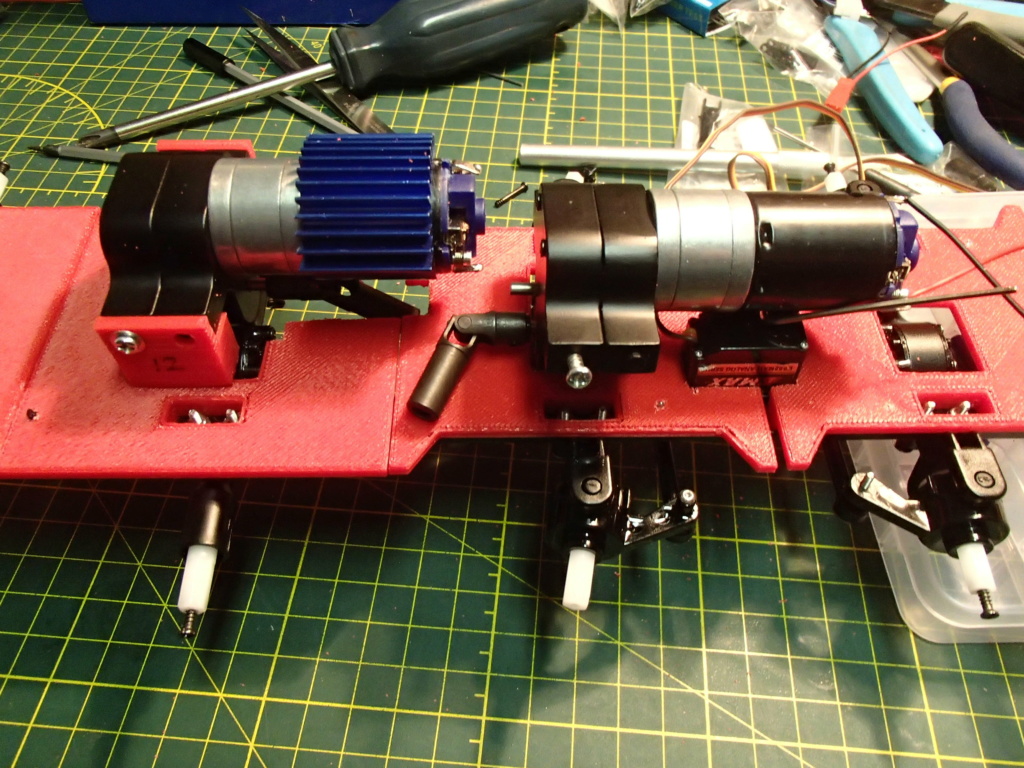
Adding in the 2nd servo for steering since all the other concepts for single servo/dual steering were lack lustre in final forms.
Rough concept placement for the 2nd drive motor (Mounted one with heat sink drives the front wheels)
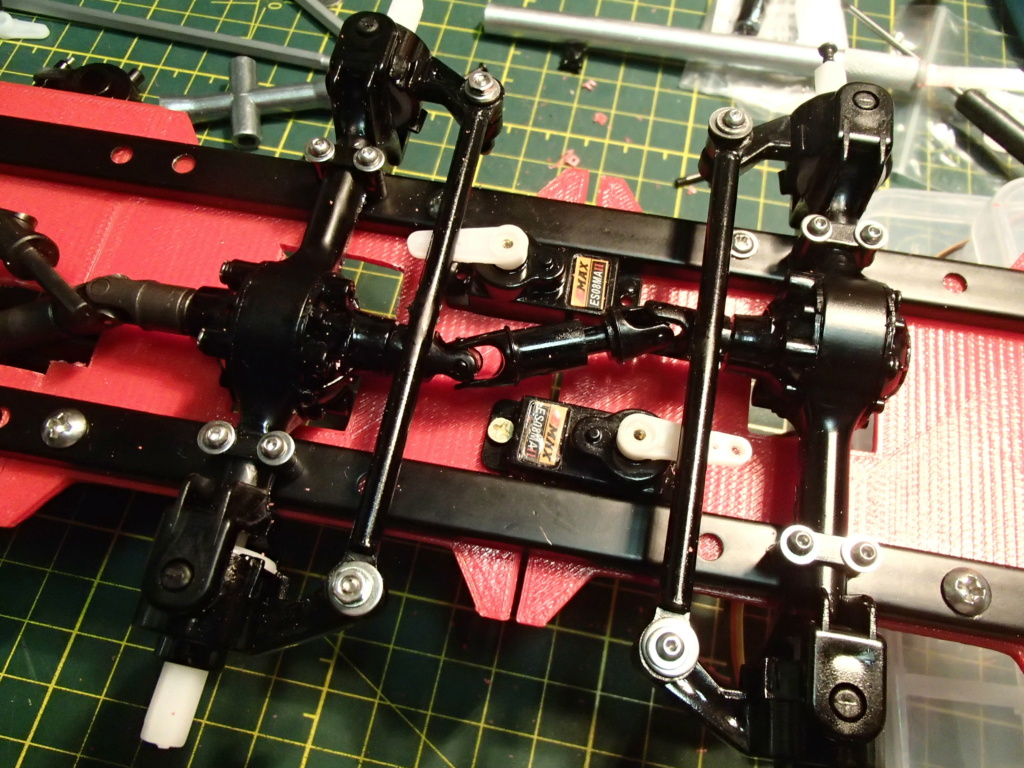
Steering linkage under the chassis in it's final configuration.
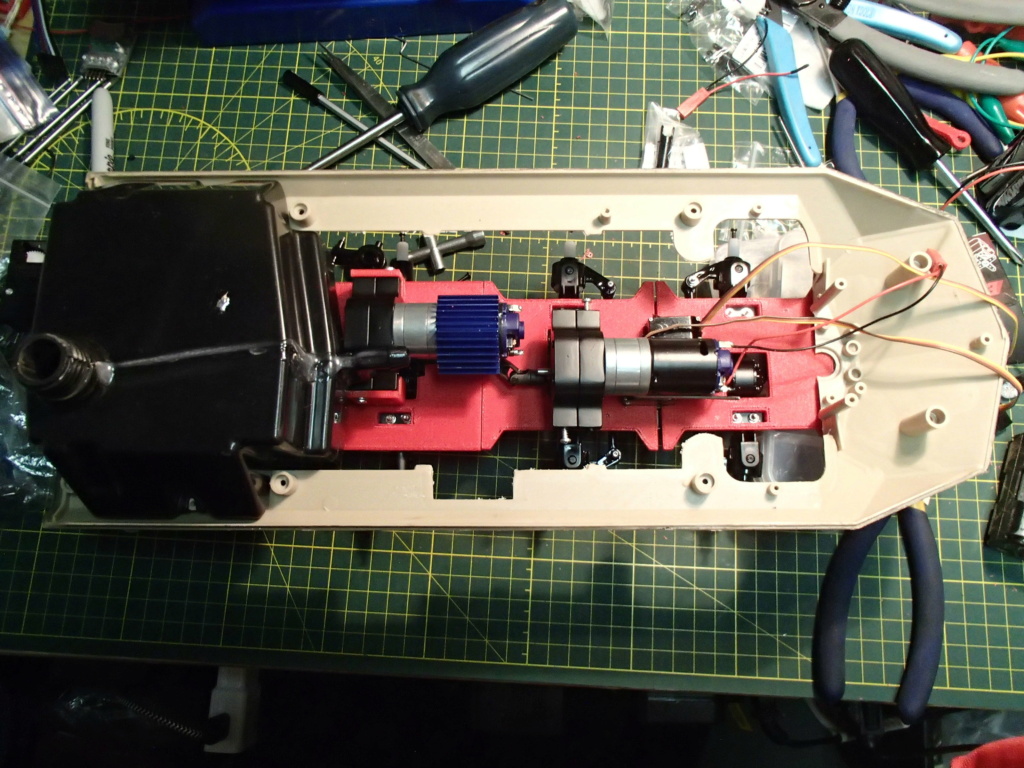
Again rough concept of the existing water tank space claiming. It is a VERY tight fit... May need to be modified.
Side shot showing the height. I may also need to use Heng Long rotation units due to possible interference fron the new drive motors.
Showing the conceptual test of steering with a "final linkage solution"
The driveline test! Both motors hooked up to a 6V battery pack (4xAA). You can see the tails of the Z-bends in the steering linkage video above. Forgot to trim them and they fit right into the universal joints of the driveline. (Whoops. Now trimmed down to avoid interference)