Challenger 2 - for me, not you!
-
tankme

- Warrant Officer 1st Class
- Posts: 1985
- Joined: Tue Oct 31, 2017 3:51 pm
- Location: Elgin, TX
- Contact:
Re: Challenger 2 - for me, not you!
On the SU-152 the resin printed pieces I got were a little soft IE: not fully cured. Dealing with those printed rivets is a bit of a PITA, but I guess it makes it easier to sand the flat parts. 
Derek
Too many project builds to list...
Too many project builds to list...

Re: Challenger 2 - for me, not you!
Wow, those look great Tom. 
I'm checking in with James on them now!
Barry
I'm checking in with James on them now!
Barry
"Details make perfection, and perfection is not a detail."
Leonardo Da Vinci
Leonardo Da Vinci

Re: Challenger 2 - for me, not you!
Hey, my experience with parts made out of this resin (from a few different sources) is thats just how it is. Thats definitely one advantage, I think they're worth the effort compared to the original version with them printed as one piece.tankme wrote:On the SU-152 the resin printed pieces I got were a little soft IE: not fully cured. Dealing with those printed rivets is a bit of a PITA, but I guess it makes it easier to sand the flat parts.
I must be a glutton for punishment as I've got arnoured models tusk 1 kit for my taimya abrams and that has even more rivets.
Sent from my SM-G973F using Tapatalk
Re: Challenger 2 - for me, not you!
Hey Tom,tomhugill wrote:Hey, my experience with parts made out of this resin (from a few different sources) is thats just how it is. Thats definitely one advantage, I think they're worth the effort compared to the original version with them printed as one piece.tankme wrote:On the SU-152 the resin printed pieces I got were a little soft IE: not fully cured. Dealing with those printed rivets is a bit of a PITA, but I guess it makes it easier to sand the flat parts.
I must be a glutton for punishment as I've got arnoured models tusk 1 kit for my taimya abrams and that has even more rivets.
Sent from my SM-G973F using Tapatalk
You'll have fun with the Abrams tiles. The Abrams Armored Tiles outer plate are held in place with 8 bolts and 6 rivets per tile and there are 32 tiles per side. Luckily only 31 have bolts and rivets.

Barry
"Details make perfection, and perfection is not a detail."
Leonardo Da Vinci
Leonardo Da Vinci
-
spongehoobtank82
- Sergeant
- Posts: 610
- Joined: Fri Aug 08, 2014 1:23 am
Re: Challenger 2 - for me, not you!
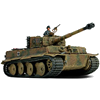
I dunno how you guys have the patience to do the ERA and slat armour  but kudos it looks awsome!
Sent from my SM-G955F using Tapatalk
but kudos it looks awsome! Sent from my SM-G955F using Tapatalk
Sponghoobtank82-panzerIII, panther V, tiger VI early and late and another early tiger,leopard 2a6, panzer IV F2,challenger 2
Re: Challenger 2 - for me, not you!
Hey folks, this build has been locked into the long grass for a while waiting for parts and inclination to crack on with it.
There were some detail part additions that I wanted to add, around the mounts for the turret armour and a couple of other details such as the cable drum holder.
However the main thrust of the work required is electrical. I initially did an instal with a regular tk60, however after I'd done a tk60g2 install on a tamiya abrams and I was that impressed that I decided to do the same thing needed to be done one my challenger.
Something that was raised was being mindful about cables being twisted. I needed a slip ring which could handle motor power but couldn't find anything like this.
Happily Stanley at rctanklegion has come good and has one in specifically for tamiya modern tanks. It has 4x10A channels and 12A channels. This allows for the motors, rotation, engine deck switch, speaker, head lights, indicators and 2 spare should the be needed later.
Wire hygiene isn't generally my strong point but on this build with all the electrics in the turret I pushed myself to be as neat as possible here.
Here's the wiring within the hull, on this tank there is a good deal of space within the hull, but due to the position of the recoil in the turret being off centre there needs to be some room left for the wiring to move around the turret centre.
I've also made up a speaker box in the front integrated into the hull, like I have done on my chieftain.


On the turret the tk60 was installed in the bustle with the Rx along side on one side and the gyro on the other side. There's also a volume control. Wires were all put into conduits depending on where there were going to on the board. I also added some side plates to keep wiring within the turret and make it easier to attach the turret top.


Some photos of the lighting. I need to add the beacon light to the turret as well as adding some tamiya red clear to most of the white LEDs


Sent from my SM-G973F using Tapatalk
Re: Challenger 2 - for me, not you!
Some videos of the tank in action
Something I'm still waiting on is the Clark rotation unit with the engine deck level sensor. Currently I'm using metal rotation unit, this is a little slow, especially on 2S. With the Clark unit this speed will be increased greatly which really helps which the stabilization. I still need to dial this in on the elevation servo too.
Something I'm still waiting on is the Clark rotation unit with the engine deck level sensor. Currently I'm using metal rotation unit, this is a little slow, especially on 2S. With the Clark unit this speed will be increased greatly which really helps which the stabilization. I still need to dial this in on the elevation servo too.
Re: Challenger 2 - for me, not you!
Yay! 
Tom,
You've got it working pretty well.
Looks way cool with azimuth locked and "dancing" around!
Thanks to your tip on the Slip Ring, I'm getting closer to having mine ready to power up in the Abrams.
Barry
Tom,
You've got it working pretty well.
Looks way cool with azimuth locked and "dancing" around!
Thanks to your tip on the Slip Ring, I'm getting closer to having mine ready to power up in the Abrams.
Barry
"Details make perfection, and perfection is not a detail."
Leonardo Da Vinci
Leonardo Da Vinci
