M4A1 75mm Sherman from BOB

This section is for builds that are not strictly Tamiya or Heng Long. For instance, replacing the electronics from a WSN or Matorro, or even a scratch-build.
User avatar
MarkofZollo
Corporal
Posts: 328
Joined: Mon Jul 05, 2010 6:16 pm
Location: Honiton, East Devon

Re: M4A1 75mm Sherman from BOB

Post by MarkofZollo »

Following on from last post, today I cut the aerial and mount thing off the bustle, filed down a fair bit and cut a large section out (forgot to take a pic of this lol) then made a styrene top and CAd on;

Image

Did some filling with......filler, about this angle for low bustle I reckon :D ;

Image

Cut out the engine bay door and moulded hinges;

Image

2mm plasticard doors and roughly replicated hinges using ali sheet and rod;

Image

Image

I plan to make a 'stand' with all switches and charging port behind this if the speaker permits :haha:
Rest of electronics may have to wait as soldering iron will barely melt butter now >:<
Last edited by MarkofZollo on Thu Jan 01, 2015 3:58 pm, edited 1 time in total.
There is always a fifth Sherman
User avatar
MarkofZollo
Corporal
Posts: 328
Joined: Mon Jul 05, 2010 6:16 pm
Location: Honiton, East Devon

Re: M4A1 75mm Sherman from BOB

Post by MarkofZollo »

Pistol port today, cut out from the surround and shaved a little;

Image

Made a hinge and attached, its a tad loose but will do;

Image

Cut a hole roughly where the port is;

Image

CAd on and filled the gaps;

Image

Attached the aerial by drilling hole through base, then stuck the base to the bustle, filled and sorted that and the mount thing. I hope to be painting tomorrow or friday but a lot of detail needs to be added........ :O :/
Last edited by MarkofZollo on Thu Jan 01, 2015 4:00 pm, edited 1 time in total.
There is always a fifth Sherman
User avatar
MarkofZollo
Corporal
Posts: 328
Joined: Mon Jul 05, 2010 6:16 pm
Location: Honiton, East Devon

Re: M4A1 75mm Sherman from BOB

Post by MarkofZollo »

So have been doing some detailing yesterday and today, first to show is the engine deck hatch.
I just cut it out and trimmed the moulded hinge;

Image

then made a new hatch from styrene as the origional became a bit smaller with the cutting :/ , made my rough hinges again from ali sheet and rod and re-attached the handles;

Image

Most time has probably been spent on periscopes and covers, all home made :D a bit rough but ok and the other bits on turret too (there are other bits on A sprue but not sure where they go?);

Image

stuck the clear plasticard in a couple of 'em before I remembered they have to be painted :{ so will have to remember to cover lol
Did hull front too, horn cover was a tad tricky as the Grizzly one is different, should all look ok once painted;

Image

Hope to do texture tomorrow morning, If im lucky it may be ready to prime in afternoon but then will have to be packed away for a couple days as Im moving into parents house next week for a few months between houses and whilst they are away :P , tankfest Sunday and then need to move stuff!!
Last edited by MarkofZollo on Thu Jan 01, 2015 4:01 pm, edited 1 time in total.
There is always a fifth Sherman
User avatar
MarkofZollo
Corporal
Posts: 328
Joined: Mon Jul 05, 2010 6:16 pm
Location: Honiton, East Devon

Re: M4A1 75mm Sherman from BOB

Post by MarkofZollo »

Right, sorry I have been off the build for a few weeks :crazy: , took a long time to move all the stuff me and my girlfriend had accumulated in the flat. Moving into an already cluttered house (parents) proved difficult and took a while too lol.
Anhywho been itching to get back the whole time, did a bit of research too at Bovington during the parachute display at tankfest :D , the pics follow;

Canadian Ram Kangaroo troop transport
Image

Canadian Ram 2
Image

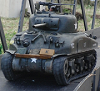
M4A4 (Sherman V) crab
Image

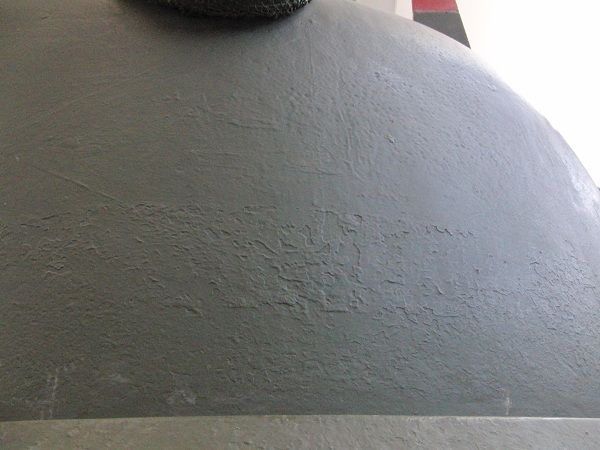
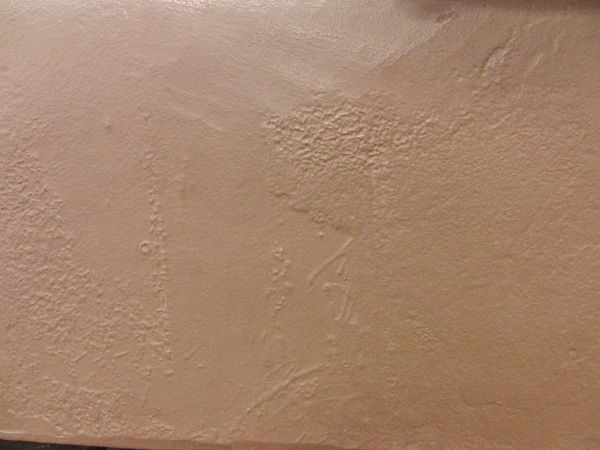
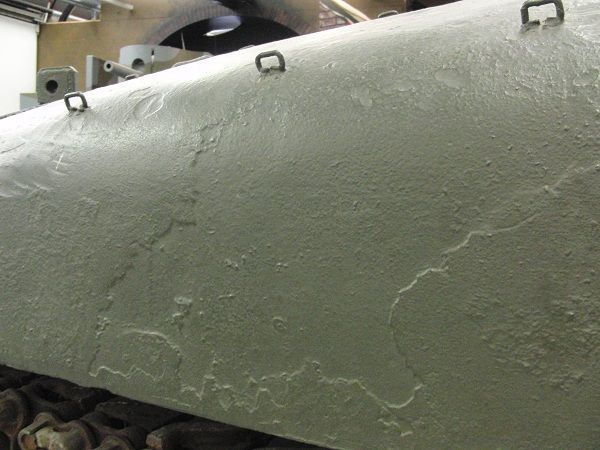
As you can see the cast effect shows some large and little ditches, some smooth bits and some very rough. The top two appear a bit rougher but are from the same factory and period of the war that the Grizzly was. My attempts to replicate are perhaps a little big ditch wise but I quite like it, although a final verdict will only appear once painted etc;

Image

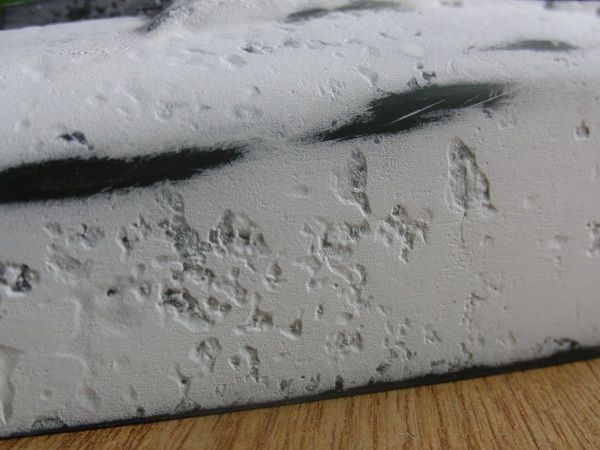
All the upper hull is covered at least to where I know it goes, though unsure about behind turret around the fuel cap things?

Other stuff I have done over last few days include electrical stuff finally now I have a soldering iron that works!! :O
First to show is a switch to turn the lights on and off;

Image

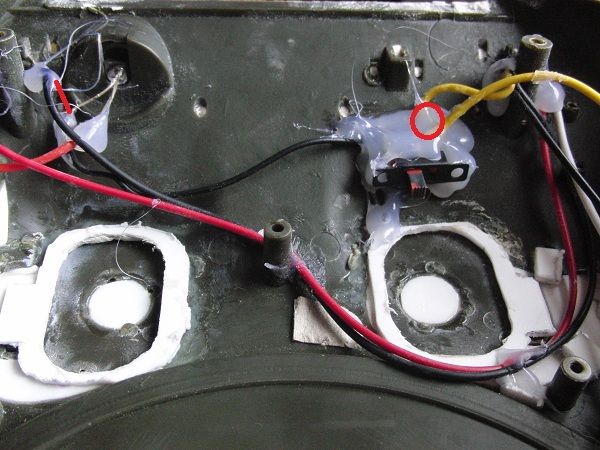
The red line on left is the connection that had to be severed, leaving a common negative with front and back lights but now a seperate one for the MG so it can still be used with the switch either way. The red circle is roughly where I cut the yellow wire (common neg for lights) to wire it to switch, Neg from MG is soldered to yellow that goes back to board. Switch had to be under drivers side 'cos its the only place (I could) due to wiring.

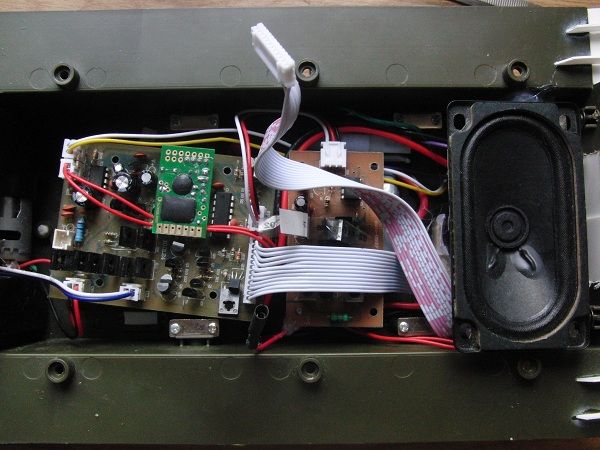
My current layout of elecs, not moved hugely but doesnt touch bottom of main gun now;

Image

And behind and under speaker is the rear engine door with access to volume potentiometre (circled), pull-outable charging jack and power switch;

Image

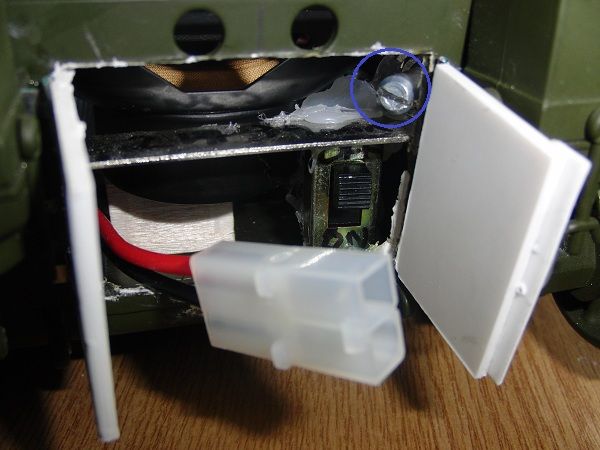
Now the power switch is odd 'cos when I did this on my Tiger I just added charge wire as extra leg on switch, but here I have had to put this switch on the batt leaving original switch tucked under main board and kept on. The off position of old switch I think acts as a drain to activate 'cold start' so I may have to rethink later, or just always be warm :D

Now a final point for the build update, fiddling with electrical stuff and power tools etc can be very dangerous, so make sure you wear appropriate attire;

Image

:haha: :haha:

Near where I live in Devon, there is a monument to Exercise Tiger and the lives lost in the practise for Overlord, Im sure if you guys have read the book 'The Forgotten Dead' by Ken Small you will know. The monument is an M4A1 'DD' tank, with my recent knowledge building on this build I thought back to that tank and was a tad confused, so I got a pick of it the other day;

Image

You may notice or know this has a 75mm turret (high bustle, M34A1 mantle and split hatch) but the late wide hatches and I guess wet stowage too then. I havnt seen evidence of another one of these so this is odd to me but shows they do exist, and it being a DD means they invested money in it so probably was intended to be used in the war and maybe others were. I have added this because I am a bit perfectionist with larger details sometimes, and (please dont take offence anyone) when I see unmodified Mato Shermans with Tamiya turrets on I think 'well thats not feasable' 8O but in fact it is. If all this is known fact I have missed or overlooked then comment, just new to me!!
Anyway should be working solid on this 'til end of month so more regular updates should appear 8|
Last edited by MarkofZollo on Thu Jan 01, 2015 4:02 pm, edited 1 time in total.
There is always a fifth Sherman
User avatar
MarkofZollo
Corporal
Posts: 328
Joined: Mon Jul 05, 2010 6:16 pm
Location: Honiton, East Devon

Re: M4A1 75mm Sherman from BOB

Post by MarkofZollo »

Was hoping to post yesterday but took longer than anticipated :/ ,
Thought I may aswell try to do things properly so after 971wright pointed me in the right direction I bought some 12BA nuts and bolts off Evilbay. I just melted the hole through raised sections with an angled bit of 1.2mm brass rod, first tried to use lighter but wasnt hot enough so just touched a soldering iron to the rod which worked great. Then wound the nuts and bolts on after cutting to correct length, this took ages!!! :| So I still had 5 left to do by time I went out last night........ finished this morn and hey presto;

Image

Also removed one tow hook holder from each side of back 'cos there are double the number on this hull than should be, then CAd to front, aswell as made the raised bit in front of bolts at top by laying 1mm wire and covering up to with filler. For a while I have been meaning to grind down the 'cheeks' of the hull to give smoother curve of earlier hulls;

Image

Typical I left it to after having textured the hull, oh well :/
Been working on other bits of hull, including exhaust pipes for the possibility of a smoke generator, just drilled out ones I lukily got in a load of 'spares' from Rocketman;

Image

Then cut out shape in paper (wanted to be thin) for the other side thats missing for this models pipe;

Image

Trying to mount this atm but run out of time for today.
Cheers
Last edited by MarkofZollo on Thu Jan 01, 2015 4:03 pm, edited 1 time in total.
There is always a fifth Sherman
User avatar
MarkofZollo
Corporal
Posts: 328
Joined: Mon Jul 05, 2010 6:16 pm
Location: Honiton, East Devon

Re: M4A1 75mm Sherman from BOB

Post by MarkofZollo »

Had a couple slow days, managed to get rear finished today though, this is how it looks;

Image

about what I wanted really :D . I like how it looks through engine deck hatch too;

Image

When I get the smoke generator if I do just gotta attach the pipes to brass tube either side and sorted :thumbup:
My week is planned out now 8| , so I know I have said it more than once but I really may be painting it this weekend!!!! :O
Cheers guys, Dave
Last edited by MarkofZollo on Thu Jan 01, 2015 4:05 pm, edited 1 time in total.
There is always a fifth Sherman
User avatar
MarkofZollo
Corporal
Posts: 328
Joined: Mon Jul 05, 2010 6:16 pm
Location: Honiton, East Devon

Re: M4A1 75mm Sherman from BOB

Post by MarkofZollo »

Back to the build 8| , spent yesterday and today making all the mounts and strap bars for tools, roughly outlined where they are on the BOB tanks though two things I have made up placement;

Image

Made all the tools how they should be, wooden bits and sharpened edges rather than moulded mounts, trying out some new wood stain on the shovel too;

Image

Also started work on the mudguards and possible side skirt;

Image

but unsure if it will work with my inability to cut a straight line of aluminium sheet :O
Cheers for looking :D
Last edited by MarkofZollo on Thu Jan 01, 2015 4:06 pm, edited 1 time in total.
There is always a fifth Sherman
User avatar
MarkofZollo
Corporal
Posts: 328
Joined: Mon Jul 05, 2010 6:16 pm
Location: Honiton, East Devon

Re: M4A1 75mm Sherman from BOB

Post by MarkofZollo »

Again things taking longer than anticipated :/ , painted and stained the tools yesterday;

Image

Need a bit more drybrushing on metal bits I think. Finished off the front mudguards and started on the skirts;

Image

The skirts stick out a little further than they should but will do, the curve down isnt sharp enough either but best I can do lol especially having to do it in sections rather than one bit :{

Image

Finished all above today, also started final turret work including co-ax MG;

Image

Annoying that pic turned out blurry but Il get another later on to show it 'cos I am quite chuffed with it, simple things eh. This MG bulb is wired up and ready, just have to finish other turret work before I just plug it in the socket in back of MG and done;

Image

I hope to have time to spend on tank tomorrow as I will be doing a lot of work on car >:< but then will be painting start of next week!
Cheers, Dave
Last edited by MarkofZollo on Thu Jan 01, 2015 4:07 pm, edited 1 time in total.
There is always a fifth Sherman
User avatar
MarkofZollo
Corporal
Posts: 328
Joined: Mon Jul 05, 2010 6:16 pm
Location: Honiton, East Devon

Re: M4A1 75mm Sherman from BOB

Post by MarkofZollo »

Right painting time is getting close, I can feel it!! Spent some of yesterday doing odd bits, lights were on the list;

Image

basicaly just cut the Tamiya rear light down and ground out the upper bit, with light on;

Image

I made and fitted this........thing which appears to be on all Grizzlys in BOB;

Image

and re-attached this......other thing as it was broken off a while ago lol :/ ;

Image

Man im good with detailed Shermanology :D
Today started with the front lights;

Image

just a 6mm circle of clear plasticard filed a little to get lenses dirty, lines scored across and a touch of yellow paint on the led;

Image

I still have to sort the gun travel hook and do a little sanding then maybe painting primer this eve or tomorrow morn :P
Last edited by MarkofZollo on Thu Jan 01, 2015 4:08 pm, edited 1 time in total.
There is always a fifth Sherman
User avatar
MarkofZollo
Corporal
Posts: 328
Joined: Mon Jul 05, 2010 6:16 pm
Location: Honiton, East Devon

Re: M4A1 75mm Sherman from BOB

Post by MarkofZollo »

Right Il try and keep this one short as Im looking after my nephews atm using a rubbish laptop.....
I asked a favour of the mould genious nickmow, to make the head of the gunner from the 21st c tank crew as I cant find it for under about £20! 8O
Anyway the head came this morn and I started the conversion, firstly using this guy I got with some spares from Rocketman (cheers!);

Image

I removed the head and neck, plus all the other stuff on his outfit (the moulded head is clear here) and put his neck on the new head;

Image

Hot glued on some spare arms;

Image

then cut arms and torso to about the right bit;

Image

Spent ages painting him, face is acrylics and rest is enamels, its no work of art like fynsdad could do :D but I tried my best;

Image

Also spent some time moddeling the mound bits around the hatches to a better shape (had been meaning to do for a while) and added a working Tamiya gun travel hook;

Image

though ran out of time making the upper bits work.

Anyway as usual stuff takes longer than norm so havnt started painting the tank yet.......... :/
will be starting tomorrow morn. Cheers guys :D
Last edited by MarkofZollo on Thu Jan 01, 2015 4:17 pm, edited 1 time in total.
There is always a fifth Sherman
Post Reply

Return to “Other Builds”