Jagtiger

User avatar
Hetzer
Recruit
Posts: 36
Joined: Sat Mar 10, 2012 8:37 pm

Jagtiger

Post by Hetzer »

Hello Guys. I've started working on a new project this week end and any thought and comments welcome.
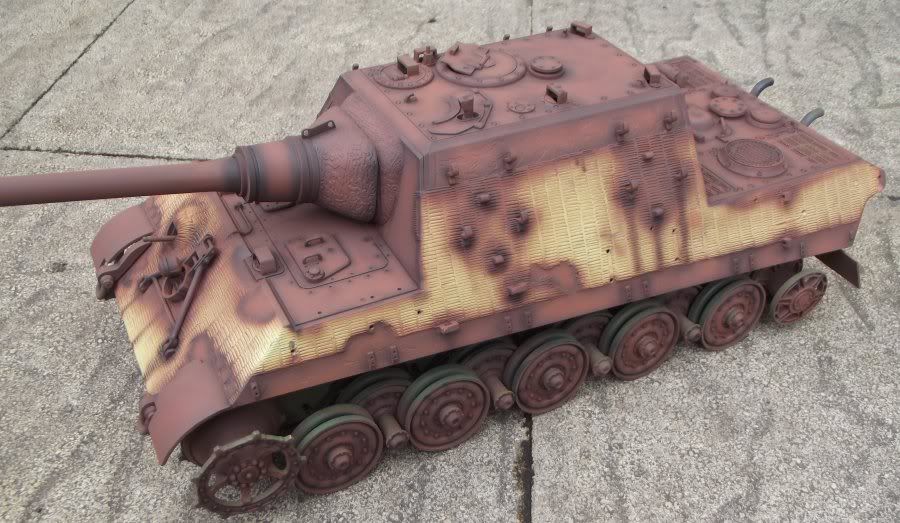
First off, the model is not strictly Heng long, but Heng Feng. Secondly, only Porsche manufactured JT's carried Zimmerit , but as this model has a borrowed Matorro chassis with Zim I have decided to finish off the top half also. I was going to replace the Gearbox and subsequently remove the silly bulge on the front, but after looking closley at the model and all its inconsistances decided that I couldn't be bothered.( I suppose i could have swapped it for the Heng Long KT chassis) But to be honest as the model is wrong on many levels,I will be using it at a painting excersise and to have some fun in the garden with it rarther than being a shelf queen like most of my other Tanks.
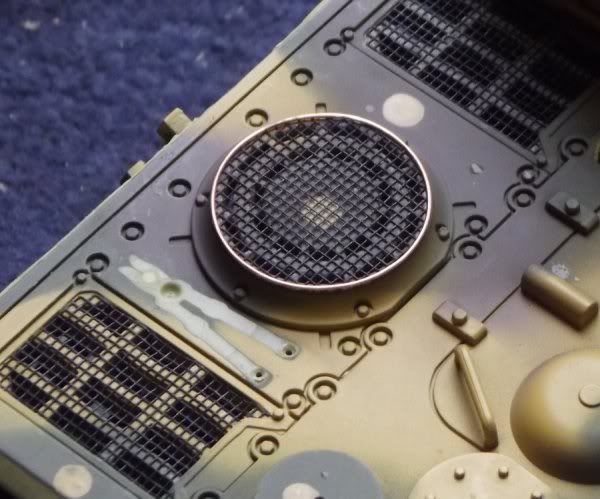
I started off with adding some engine screens from Verlinden mesh. The two circular rings were made from copper wire.
Image
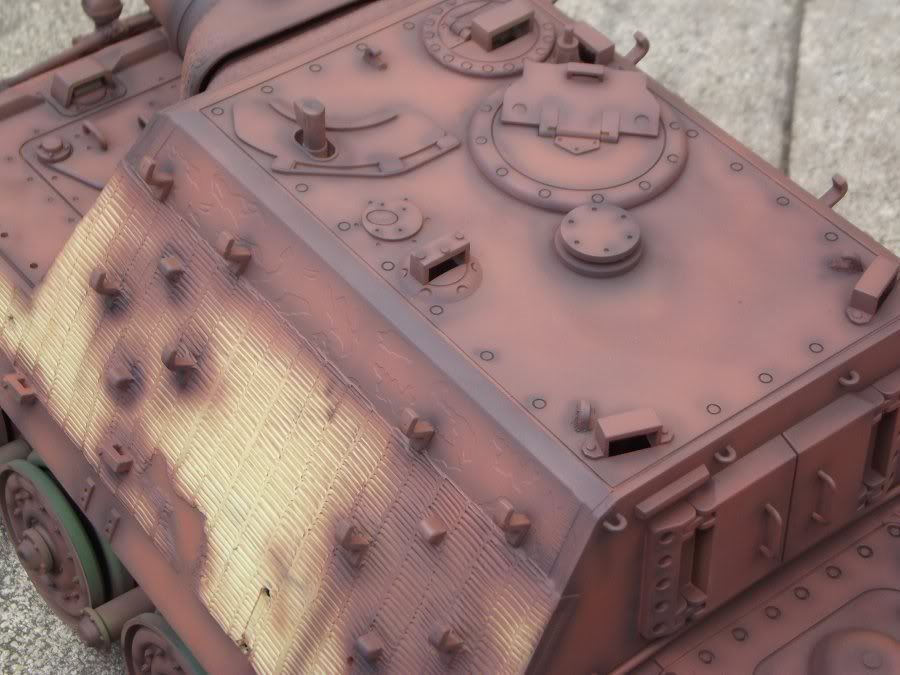
Then I added some weld seams around the lifting lugs, not realising untill later that the nice people at the Heng Feng factory have glued them in the wrong way. I suppose I should turn them around before finishing the model.
Image
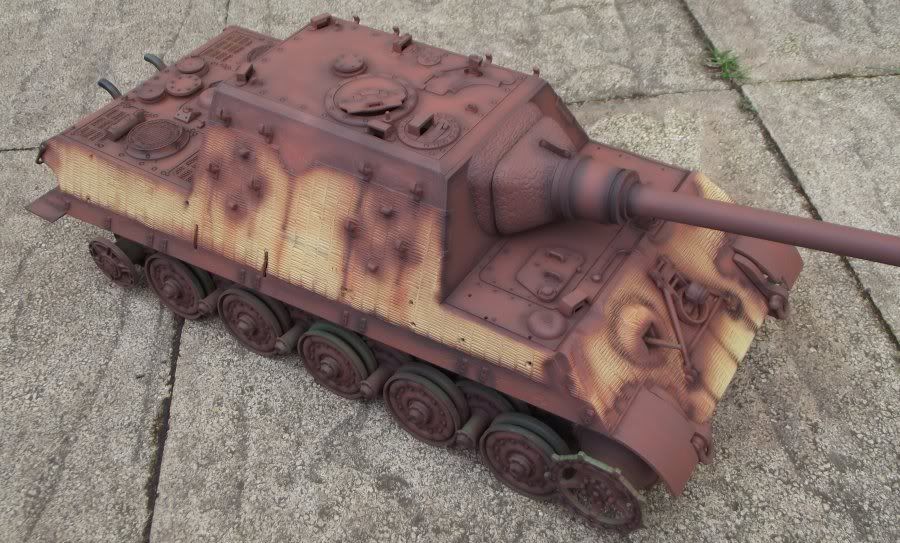
Next added Zimmerit with Milliput and added battle damage.
Image
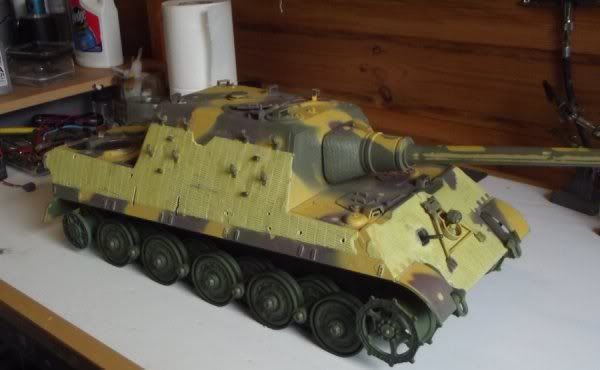
Today I have started the painting process. First with a light dusting of Primer red followed with some pre shading ready for the base coat of Dunkaleb.
Image
Image
Image
User avatar
maxmekker
Warrant Officer 1st Class
Posts: 1719
Joined: Tue Apr 27, 2010 8:47 am
Location: Norway

Re: Jagtiger

Post by maxmekker »

oh boy. Don't keep us waiting 4 more :-)
Drammen Rock City
magmer
Lance Corporal
Posts: 245
Joined: Tue Sep 29, 2009 10:03 am
Location: Southport. NW UK

Re: Jagtiger

Post by magmer »

Really like your painting technique there!
User avatar
Hetzer
Recruit
Posts: 36
Joined: Sat Mar 10, 2012 8:37 pm

Re: Jagtiger

Post by Hetzer »

I sprayed the dark yellow base coat on last night and added the cammo pattern. It all looks a bit stark at the moment but after painting in chipping and scratches, the subsequent washes and filters will blend it all together and tone it it down.
Image
Image
I havent decided yet but I think the yellow dots over the red would look better in green, so I might change that.

Started the chipping process today......
Image
I use a base chip of Buff drawn in with a o or oo sable and then fill in with different shades of rust..
Image
Image
User avatar
maxmekker
Warrant Officer 1st Class
Posts: 1719
Joined: Tue Apr 27, 2010 8:47 am
Location: Norway

Re: Jagtiger

Post by maxmekker »

bloody he... Were have you been hiding. Can we see some of you're other work pleez. Really great mister. How do you mask of the zimm damage when you go camo? just a steady hand ? And what brand of colour have you used on this build ?
Drammen Rock City
User avatar
Hetzer
Recruit
Posts: 36
Joined: Sat Mar 10, 2012 8:37 pm

Re: Jagtiger

Post by Hetzer »

Maxmekker, I used masking fluid to cover the damaged bits of zim and sprayed Tamyia acrillics thinned down about 50-50 with Normal proponoyl thinners.
Another tip for applying chips quickly is to first spray a base coat of primer red. Then take a scotch brite pad and tear off a small piece. Dip the teared off piece into masking fluid and lightly dapple around the usual areas of wear. Allow to dry for 10 mins and then spray the base color and cammo over the top. Leave for half hour or so and them simply gently rub with a finger over the model. The masking fluid will roll away leaving realistic chips. I find this works on any scale from 1/35 upwards, you just have to adjust the pressure when dappling on to suit the scale. The chips are flat and 2 dimential but depth can easily be created by filling in with darker shades with the odd bit of lighter outer.
The pic below was chipped using the masking fluid method, the control is not a fine as appling individual chips by hand and they tend to be larger, but still quite effectve.
Image
And after blending in with washes and filters the same model........
Image
It works well when weathering tools and acessories too, you just need to think about the base colors before hand.......
Image
Image
Reaper332
Corporal
Posts: 484
Joined: Wed Jan 11, 2012 8:54 pm

Re: Jagtiger

Post by Reaper332 »

Looks Fantastic :thumbup:
Love it , Ken
jeff1101
Corporal
Posts: 340
Joined: Tue Jan 03, 2012 9:08 am

Re: Jagtiger

Post by jeff1101 »

Nice work Hetzer. Can I ask what type of masking fluid you use? Do you use Hairspray or a specific masking product? (Like say Humbrol Maskol) Thanks.
User avatar
Hetzer
Recruit
Posts: 36
Joined: Sat Mar 10, 2012 8:37 pm

Re: Jagtiger

Post by Hetzer »

Hiya jeff1101, I normally use Humbrol masking fluid ( pink in colour). I find it dries in minutes and easily rubs off with the minimal amount of effort.
The hair spray method is also very good but I would use this only when applying white wash to AFV's or yellow over grey on German armour.
jeff1101
Corporal
Posts: 340
Joined: Tue Jan 03, 2012 9:08 am

Re: Jagtiger

Post by jeff1101 »

Thanks for the info. I am at awe of your work and want to at least replicate your results on my build.
I'm planning to do a hard edge camo for my panther and plan to use masking tape to produce the tri-color. So does masking fluid stay on when you tape over it when doing camo masking?
Post Reply

Return to “Jagdtiger”